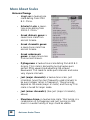
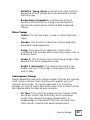
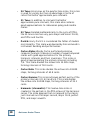
1
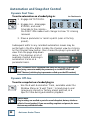
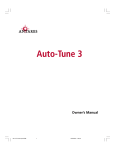
USER’S GUIDE
Auto-Tune
™
Antares Advanced Tuning Effects
Plug-in for Mackie Digital Mixers
®
™
Iconography
This icon identifies a description of how to
perform an action with the mouse.
This icon identifies a description of how to
perform an action from the console.
This icon will lead you to some further
explanations of features and practical tips.
This icon marks information which is very
important, so please make sure you have a read.
“Mackie” and the “Running Man” figure are trademarks or
registered trademarks of Mackie Designs Inc. All other brand
names mentioned are trademarks or registered trademarks of
their respective holders, and are hereby acknowledged.
Part No. 820-252-00 Rev. A 03/2001
© 2001 Mackie Designs Inc. All Rights Reserved.
2
Antares Auto-Tune
Contents
Introduction ----------------------------------------4
About Antares ---------------------------------------------------4
About the D8B UFX Card -------------------------------------- 5
About Auto-Tune------------------------------------------------ 5
Let’s Get Started ---------------------------------- 6
Requirements ----------------------------------------------------6
Authorizing the Plug-in ----------------------------------------6
Unlock Procedure ----------------------------------------------- 7
Configuring the Plug-in --------------------------------------- 8
Using the Auto-Tune Plug-in ------------------ 10
Front Panel Overview ---------------------------------------- 10
Global Controls ------------------------------------------------ 11
Auto-Tune Controls ------------------------------------------- 13
Vibrato Controls ---------------------------------------------- 18
Saving, Loading, and Resetting a Preset ----------------- 19
Automation and Snapshot Control ---------- 22
FX Routing ---------------------------------------- 23
More about Scales------------------------------- 28
Note: Any future revisions of this guide will be available for
viewing and downloading from our website: www.mackie.com.
User’s Guide
3
Introduction
Thank you for purchasing Auto-Tune from Antares. It is one of
the exciting new family of 24-bit plug-ins for the D8B,
specifically designed for the new Mackie Universal Effects (UFX)
card.
The Auto-Tune plug-in is a precision instrument for controlling
pitch, allowing you to apply nuances of intonation to virtually
any performance. This plug-in is an implementation of the
Antares Auto-Tune pitch correcting software for the Mac and
PC. It employs state-of-the-art digital signal processing
algorithms to continuously detect the pitch of a periodic input
signal (typically a solo voice or instrument) and instantly and
seamlessly change it to a desired pitch (defined by a number of
user-programmable scales).
About Antares
Antares Audio Technologies is renowned as a developer of
innovative, DSP-based audio software and hardware, including
the ATR-1 Intonation Processor, MDT (Multi-band Dynamics
Tool) and JVP (Antares Voice Processor) DSP plug-ins.
4
Antares Auto-Tune
About the D8B UFX Card
The UFX card provides robust processing power for computationheavy plug-ins. The UFX card is a 4-in/4-out architecture, which
means it can support four mono, two mono and one stereo, or
two stereo sends simultaneously. Up to four UFX cards can be
installed in the D8B, allowing up to sixteen simultaneous singlechannel effects, eight stereo plug-ins, or combinations thereof.
Note: Earlier D8Bs were fitted with 16 MB of memory. It is recommended that
you increase this to 32 MB (as fitted in newer D8Bs) if you install more than one
UFX card. Memory upgrade instructions are supplied with each UFX card.
About Auto-Tune
Auto-Tune is very easy to use. Simply identify a key and scale
and the affected signal will automatically conform to that scale
in real time, while preserving all of the expressive nuance of the
original. Auto-Tune can work while the track is being recorded
(instead of as a separate post-recording process). In other
words, the tracked vocal goes to tape (or disk) already in tune.
Of course, you can always process a track that has already been
recorded. Micro-adjustments can be automated using hands-on
D8B controls instead of a mouse, a huge advantage when
correcting melodies that have modulated to other keys or modes.
Up to 4 channels of Auto-Tune can be engaged per UFX card.
With 4 UFX cards installed, that’s up to 16 channels of pitch
correction!
User’s Guide
5
Let’s Get Started
Requirements
• One or more Mackie UFX cards
• Mackie Real Time OS 3.0 Software
• Plug-in Software
We will assume you have successfully installed a Mackie UFX
card and Mackie Real Time OS 3.0 software upgrade. If you have
encountered problems with the installation of hardware or
software please see their associated user guides or contact
Mackie support (www.mackie.com).
Authorizing the Plug-in
If you have D8B v 3.0 b186 or greater, the plug-in is already
installed on the D8B hard drive, however an authorized unlock
code must be entered to unlock the plug-in for normal operation.
An Unlocked
Plug-in
AUTHORIZE
1234-5167-89D1
LICENSING
D8B Electronic Serial Number (ESN)
6
Antares Auto-Tune
D8B SETUP screen’s
LICENSING window
Unlock Procedure
1. Locate your D8B’s Electronic Serial Number (ESN). This
is displayed at the bottom of the Licensing window,
which is accessed from the Setup screen. The 12 digit
ESN is made from numbers 0–9 and letters A–F. It is
unique to the D8B processor, and is not the serial
number label on the rear of the control surface or CPU
chassis.
2. You will also need your plug-in’s serial number which is
printed on the floppy disk label.
3. To obtain the unlock code, have the ESN and plug-in
serial number ready. Then you have two options:
• Log on to the Mackie plug-in authorization web page:
(http://www.mackie.com/d8bauthorize.htm)
or
• Telephone Mackie Tech Support at 800-258-6883.
4. When you have obtained an unlock code, open the D8B
Setup window, and click Licensing.
5. With your plug-in highlighted in the Licensing window,
click Authorize, and enter your unlock code in the
UNLOCK CODE box. Click Enter, and enjoy your newly
expanded console.
User’s Guide
7
Configuring the Plug-in
After booting the D8B you must assign the Auto-Tune plug-in to
a UFX card. See FX Routing on page 23 for more details.
Assign the Auto-Tune Plug-in to a UFX card
1. Click the Plugins menu and select
Plugins, (or Ctrl+P on the
keyboard).
2. In the Plugin
Configuration window,
locate the card slot
that contains the UFX
card you wish to assign
to.
3. In the Mode column,
click the Mono/Stereo
toggle button and set it
to Mono.
4. In the Plugin column,
select Antares
Autotune from the drop-down menu.
Note: A plug-in can also be loaded from the Setup section on the console.
8
Antares Auto-Tune
Assign an Input Source to the Plug-in
• Click the plug-in’s INPUT button to select an input
source. In the example below, we have chosen the
Aux 5 Bus as the input to the plug-in installed in slot 5.
When a plug-in is fed from
an aux bus, its output
appears on the FX Return
channels (faders in the
EFFECTS bank). The return
channel is determined by the
slot number and whether the
effect output is mono or
stereo. For example, a reverb
with a mono input and stereo
output that is installed in
Slot 5 has its outputs on FX
5 and FX 6. Note: The
default state for all FX
channels is MUTE. You won’t
hear the effect until you
unmute its FX return
channel(s).
A plug-in can also receive its input from a channel pre- or postDSP insert or the main stereo left and right bus. When a plug-in
is inserted “in line” in this manner, its output is routed directly
back into the channel. See FX Routing on page 23 for more
details.
Removing the Plug-in
1. In the Plugin column, select none from the
drop-down menu.
2. Click OK in the Alert dialog box.
Note: A plug-in can also be deleted
from the Setup section on the console.
User’s Guide
9
Using the Auto-Tune Plug-in
Front Panel Overview
You can think of Auto-Tune as being broken into three sections.
1. Global Controls
2. Auto-Tune Controls
3. Vibrato Controls
Global Controls
Auto-Tune Controls
10
Antares Auto-Tune
Vibrato Controls
Global Controls
Input Select Display &
Drop-down Menu
Preset Display/
Select
Hide Plug-In
Window Button
Meter Displays
(In/Out)
Preset Select
Memory A/B
Buttons
Menu Bypass
Button Button
Input Select
Assign Auto-Tune’s input from any of the DB8’s pre, post, or
auxiliary channels.
Input and Output Meters
The input meter represents the incoming signal from the D8B,
with a range from –50 dB to 0 dB. The output meter is located
just beneath the input meter.
Menu Button
The drop-down menu button will enable familiar functions such
as undo, redo, load, save, reset, cut, copy and paste. See page 19
for more details.
Hide Button
The small button located at the top right of the GUI will hide the
Auto-Tune window.
Preset Selection and Display
Toggle the up/down arrows to select from an array of factory
presets or your own saved user presets.
Note: The Input Source can be set from either the plug-in GUI or the plug-in
configuration Window.
User’s Guide
11
Memory A/B
Memory A and Memory B are two separate storage banks that
let you temporarily store setups. This is handy for quickly
referencing and comparing sounds while you are creating edits.
Bypass
This allows the input signal to pass through Auto-Tune without
being processed. Click the button again to resume processing.
Switching the Bypass state will not cause any audio artifacts, so
it can be used in real time for live performance, recording or
mixing applications.
12
Antares Auto-Tune
Auto-Tune Controls
This section is a reference for all of the Auto-Tune controls and
describes the function of each control.
Scale Display &
Drop-down Menu
Scale Editor
Button
Pitch Controller
Change Meter
Key Display
& Dropdown Menu
MIDI Input
Channel Display
Scale Detune
Display & Slider
Retune Display
& Slider
Tracking Display
& Slider
Scale Selection
Select the desired scale from the
drop-down scale list. The first
three scales are equal tempered.
These are the ubiquitous scales
typically found in Western tonal
music. The other scales are
historical, ethnic, and microtonal
scales.
An in-depth discussion of these scales and their history is
beyond the scope of this guide. The interested reader will find
more information in Tuning In – Microtonality In Electronic
Music by Scott R. Wilkinson, published by Hal Leonard Books.
For a brief synopsis of scales, see More About Scales on page 28
of this guide.
User’s Guide
13
Scale Editor
Click the Scale button to open the Scale Editor
window. Edits made using this dialog are associated
with each scale. That is, each scale retains its own
edits separate from the other scales. When finished
editing, click the Done button to close the window.
Scale Display
Key Display
Go to Previous
Page
Go to Next
Page
Set to Major
Scale
Set to Minor
Scale
Cancel Button
(to close without saving)
Done Button
(to close and
save)
Do Not Track
Column
Remove
Column
Note
Value
Column
Cent Value
Column
The Edit Scale window displays each note of the currently
selected scale in the currently selected key. If the selected scale
includes more than twelve notes, use the Page Up/Down buttons
to scroll through all of the available notes. Beside each note
name are two check boxes: Do Not Track and Remove. If neither
of these boxes are selected, Auto-Tune treats this note as a
normal scale note, i.e., when the input pitch is close to this note,
Auto-Tune will correct the pitch to this note at the rate set by
the Retune Speed control.
14
Antares Auto-Tune
If the Do Not Track box is
selected, when the input pitch
is close to this note the input
will be passed through with no
correction. If the Remove box is selected, then the note is simply
removed from the current scale. For example, selecting the
Chromatic scale and then setting C#, D#, F#, G#, A# to Remove
would cause a C Major scale to remain. In that case Auto-Tune
would always retune the input to the closest note of the C Major
scale.
Why Remove?
A pitch error greater than 49 cents could allow Auto-Tune
to choose notes in a given scale that otherwise would not
be played as the incorrect pitch moves through the scale.
The scale and key selected by the user might be
appropriate but if the pitch error is too great, an
undesirable note from the scale could be played. In this
instance select the Remove box associated with the culprit
note.
Key Selection
To select the desired key, click the Key button
and then click the desired note from the dropdown list. This determines the pitch of the first
tone of the scale according to the standard
A3 = 440 Hz.
User’s Guide
15
Pitch Controller
The Pitch Controller is used to force the
input to an exact pitch. Trigger the desired
note(s) by selecting keys on the keyboard
image or by using a MIDI input controller.
MIDI Chan 6
As long as a key is selected or held/triggered
from an external controller, the chosen note
will adjust the input pitch. Only when you release the note will
the input return to its original pitch. An external MIDI controller
can also be used to gain immediate access to multiple octaves.
Note: If you are using a MIDI tempo map or tracking with timecode you can
easily program (record) a note value into a MIDI sequencer at a precise location. In this way it is possible to correct a particular problem where the
performance might otherwise be fine - using as little processing as possible.
Scale Detune
The Detune parameter allows
you to change the pitch standard
of Auto-Tune from the default
A = 440Hz. The values are cents
(100 cents = 1 semitone or half
step). The range of adjustment
is from –10 to +10 (10 being
100 cents).
The Detune function can be used
to tune a vocal performance to
some irreparably out-of-tune
instrument (a piano or organ, for
example), or to allow correction
to other than the conventional
Scale
Change
440Hz standard. If you have a
Detune
Meter
tone that you want to use as the
pitch standard, select that tone and play it in a loop. Adjust
Scale Detune until the Change meter reads zero. (You may be
required to use the Edit Scale dialog to remove adjacent tones so
that Auto-Tune doesn’t tune to the wrong tone.)
16
Antares Auto-Tune
Retune Speed
Retune Speed controls how rapidly the
pitch correction is applied to the
incoming sound. The units are
milliseconds. A value of zero will cause
instantaneous changes from one tone to
another and will completely suppress a
vibrato (note that any related volume
changes will remain). Values from 10 to
50 are typical for vocals. Larger values
let through more vibrato and other
interpretative pitch gestures but also
Retune Tracking Change
Slider
Slider
Meter
slow down how rapidly pitch corrections
are made. Although the above
suggestions can be used as starting points, finding the correct
Speed setting for a particular performance is largely a matter of
trial-and-error and depends on such attributes as song tempo,
note duration and vocal style, among others.
Tracking
In order to accurately identify the pitch of the input, Auto-Tune
requires a periodically repeating waveform, characteristic of a
voice or solo instrument. The tracking control determines how
much variation is allowed in the incoming waveform for AutoTune to still consider it periodic. If you are working with a
well-isolated solo signal (e.g., tracking in a studio or off of a
multitrack tape) you can typically set the tracking control to 25
and forget it. If, on the other hand, your signal is noisy or not
well-isolated (as might be more common in a live performance
situation) or you are dealing with a breathy voice, it may be
necessary to allow more signal variation (higher tracking
numbers). However, under these circumstances tracking is not
guaranteed and a too “relaxed” setting may introduce distortion
and popping.
Change Meter
The Change meter shows you how much the pitch is being
changed, measured in cents (100 cents = 1 semitone or half
step). For example, if the meter is reading +66, it indicates that
the input pitch is 66 cents too flat and Auto-Tune is raising the
pitch by 66 cents to bring the input back to the desired pitch.
User’s Guide
17
Vibrato Controls
The Vibrato Section contains one drop-down menu and three
sliders. The Vibrato drop-down allows you to select the shape of
the vibrato’s pitch variation through time. The choices are: (no
vibrato), sine wave, square, and sawtooth. Depth varies from 0
to 100 cents, controlling the amount of pitch variation in the
vibrato. Rate varies from 0.1 to 10.0 Hz and controls the speed
of the vibrato. Delay varies from 0 to 300 milliseconds,
controlling the speed of onset of the vibrato.
Vibrato Type
Drop-down Menu
Depth Slider
Delay Slider
Rate Slider
The vibrato is restarted every time Auto-Tune matches the
incoming pitch to a different scale tone. Also, the vibrato is
applied after the effects of the Retune Speed control. Hence,
even with a slow retune value of 50, a square wave vibrato will
make instantaneous changes in pitch.
18
Antares Auto-Tune
Saving, Loading, and Resetting a Preset
Auto-Tune settings can be saved and recalled
from the hard drive. You can save and load files
using either Memory A or Memory B.
To Save a Preset:
1. Click and hold the Menu button.
2. Select Save User Preset to
overwrite the file currently
opened.
3. Select Save User Preset As to
save to a new file name. The Save
Preset File As dialog box
appears.
4. A default name for the preset is
automatically displayed, such as
Preset#1. If you want to rename
it, simply type in the name you
want, using up to 32 characters.
A new sub folder can
be easily created to
help organize custom
patches.
5. Select INTERNAL (default hard drive) or FLOPPY.
6. Click Save to complete the operation.
User’s Guide
19
To Load a Preset:
1. Click Mem A or Mem B to choose the
memory location from which to load the
file.
2. Click and hold the Menu button.
3. Select Load Antares Autotune to
open a file. The Load Preset File
dialog box appears.
4. Click INTERNAL if the file is on the internal drive, or
click FLOPPY if the file is on a floppy disk.
5. Select the preset you want to load.
6. Click Open to load the selected preset.
You can also load a preset
from the Preset Display.
20
Antares Auto-Tune
To Reset the Plug-in:
Reset will reload the previous patch.
1. Click and hold the Menu button.
2. Select Reset Antares Autotune.
To Cut Preset Settings:
1. Click and hold the Menu button.
2. Select Cut AntaresAT.
The current settings are temporarily
stored in the clipboard memory in case
you want to paste them to a new preset.
The plug-in also reverts to its default
state (it is reset).
To Copy Preset Settings:
1. Click and hold the Menu button.
2. Select Copy.
The current settings are temporarily stored in the clipboard
memory in case you want to paste them to a new preset.
To Paste Preset Settings:
1. Click and hold the Menu button.
2. Select Paste AntaresAT.
The current settings are replaced with the setting in the
clipboard memory.
User’s Guide
21
Automation and Snapshot Control
Dynamic Real Time
To write automation on a loaded plug-in:
On The Console
1. Engage AUTO TOUCH.
2. Engage ALL, disengage
BYPASS, and send
timecode to the console –
the POSITION readout will change to show TC is being
received.
3. Move a parameter or recall a patch (user or factory
preset).
Subsequent edits to any recorded automation moves may be
performed in the Mix Editor. Enable the channel view by clicking
on the Channel View button, then choose the plug-in you wish to
view from the page drop-down
menu. This displays a list of
available channel and plug-in
automation tracks on a
parameter basis.
Note: Parameters can be controlled from either the GUI plug-in graphic parameters (using a mouse to modify the parameters) or via the VFD V-Pots and
SELECT buttons (with the plug-in parameters called up on the VFD readout).
Dynamic Off-line
To write a snapshot on a loaded plug-in:
♦
Use the Event Automation Track, available under the
Window Menu as ‘Event Track’, to load plug-in user
(previously stored) or factory preset patches, at a
specific time during automation playback.
General Note:
Plug-in settings are recalled as part of a console Snapshot, but may also be recalled as Presets (patches). If you are recalling snapshots and presets, be aware
that one may override the other.
22
Antares Auto-Tune
FX Routing
The Plug-in Configuration Window
Input Source AsCard Slot Column signment Column
Plug-in
display toggle
Input Channel
Assignment Dropdown Menu Button
Card A
Plug-in Assignment Column
Close Window
Stereo/Mono
Mode Column
Stereo/Mono
Toggle Button
Card B
Card C
Card D (no
card installed)
User’s Guide
23
Inserting a Plug-in into a Channel
A pre- or post-DSP channel insert can also be used as the input
source for a plug-in. When a channel insert point is selected, the
plug-in output returns to the channel. The FX return path is
disconnected, although the plug-in output is still displayed on
the FX return channel meter.
A plug-in channel insert assignment can be made from the
Plugin Configuration window, or from a drop-down menu from
the mixer screen.
Plug-in Configuration Window
Post-DSP Drop-down
Pre-DSP Drop-down
This assignment can also be made from the control surface and
VFD by holding in the desired channel’s SELECT button for two
seconds, then paging over to Plug Pre or Plug Post, selecting
the input source, then selecting the desired plug-in slot from the
follow-on menu.
24
Antares Auto-Tune
Using an Aux Send with a Plug-in
♦
Click the associated INPUT menu button and select an
Aux input source. In the example below, we have chosen
the Aux 5 Bus.
Send the Input Signal to the Aux Bus
1. Send a signal to a D8B mixer input channel (MIC/LINE
or TAPE IN).
2. Assign the input channel V-Pot/GUI
Control Pot to an aux send. We have
chosen AUX 5 according to the example
above.
3. Use the AUX 5 control to
adjust the input level to the
plug-in.
Remember to select an aux send before using the V-pot or GUI
Control Pot on the mixer input channel (MIC/LINE or TAPE IN).
User’s Guide
GUI Control
Pot Assigned
to AUX 5
25
You will see the plug-in’s input meter become active as you raise
the mixer input channel’s aux send.
Set the plug-in input/output signal levels as you would with any
effect, so the meter reaches its upper-most range every so often
(always trust your ears first). This can be accomplished from the
console or GUI.
Pre-Fader and Post-Fader Auxiliary Sends
Normally, effect sends are post-fader, so the signal sent to the
effect follows the program level in the mix. Occasionally you
may wish to feed an effect from a pre-fader source so that the
signal level from the aux control is independent of the channel
fader position. Aux sends are selectable pre- or post-fader
globally (all Aux 1’s for instance) from the Mix Options screen in
the Setup window, or individually on a channel-by-channel basis
either from the channel strip or the Fat Channel.
In the channel strip, Alt-click the Aux Send level
indicator to toggle between pre-and post-fader operation.
Post-fader is indicated by a red bar, pre-fader is indicated
by a yellow bar.
In the Fat Channel,
clicking on the small
indicators below the
Aux knobs toggles
between pre- and postfader operation. Yellow
indicates pre-fader,
post-fader is indicated
by the background
color.
Channel Strip
Fat Channel
26
Antares Auto-Tune
The FX Return Channel
♦
Switch the D8B Bank Select to
EFFECTS (49-72) and bring up
faders one and two (channels 49 and
50). You will also see meter activity
associated with these channels.
FX Channels 1&2
(channels 49&50)
Stereo Plug-in
The Plug button
toggles between
Windows menu
buttons and FX
buttons (lower
left on the D8B
mixer screen).
Plugins button opens the Patch
Configuration window (or
Ctrl+P on the keyboard).
Here the Delay Factor plug-in is
selected for display.
User’s Guide
27
More About Scales
Historical Tunings
28
•
Ling Lun: a twelve-tone
scale dating from 2700
B.C. China.
•
Scholar’s Lute: a seventone scale dating from
300 B.C. China.
•
Greek diatonic genus: a
seven-tone scale from
ancient Greece.
•
Greek chromatic genus:
a seven-tone scale from
ancient Greece.
•
Greek enharmonic
genus: a seven-tone scale
from ancient Greece.
•
Pythagorean: a twelve-tone scale dating from 600 B.C.
Greece. This scale is derived by tuning twelve pure
perfect fifths upward and adjusting the octaves
downward. This leads to some pure intervals and some
very impure intervals.
•
Just (major chromatic): a twelve-tone scale. Just
intonation tunes the most frequently used intervals to
be pure (integer ratios in frequency). These tunings
depend on the mode (major or minor) and the key. This
scale is tuned for major mode.
•
Just (minor chromatic): (See Just (major chromatic),
above)
•
Meantone chrom.: a twelve-tone scale. This tuning is a
combination of Pythagorean and Just tunings so that
music in a wider variety of keys could be usable.
Antares Auto-Tune
•
Vallotti & Young chrom: a twelve-tone scale. Another
derivative of the Pythagorean scale designed to allow
arbitrary keys.
•
Barnes-Bach (chromatic): a twelve-tone scale. A
variation of the Vallotti & Young scale designed to
optimize the performance of Bach’s Well-Tempered
Clavier.
Ethnic Tunings
•
Indian: This 22-tone scale is used in India to perform
ragas.
•
Slendro: This five-tone Indonesian scale is played by
ensembles called gamelans.
•
Pelog: This seven-tone Indonesian scale is more
interesting than Slendro and is now the primary scale in
Balinese music.
•
Arabic 1: This 17-tone scale is the original Arabic scale
adopted from the Pythagorean scale.
•
Arabic 2 (chromatic): This twelve-tone scale is the
modern version of the Arabic scale popular in Arabic
music today.
Contemporary Tunings
Equal-tempered scales with a large number of tones are typically
used to play common tonal harmony with greater purity of
intervals and chords. The typical approach is to analyze a
passage (or less) of music and select tones from a scale that will
best approximate the desired pure intervals.
•
19 Tone: This scale has greater purity of minor thirds
and major thirds (and conversely, minor and major
sixths) than twelve-tone equal temperament. A
disadvantage is that perfect fifths are narrower than
those found in twelve-tone equal temperament.
User’s Guide
29
30
•
24 Tone: Also know as the quarter-tone scale, this scale
is used for variety but has no advantage in terms of
ratios that better approximate pure intervals.
•
31 Tone: In addition to intervals that better
approximate pure intervals, this scale also contains
good approximations to Indonesian pelog and slendro
scales.
•
53 Tone: Related mathematically to the cycle of fifths,
the 53-tone scale has very pure major and minor thirds,
and fifths and fourths.
•
Partch: Harry Partch is considered the father of modern
microtonality. This scale was devised by him and used in
instrument building and performances.
•
Carlos Alpha: Wendy Carlos performed extensive
computer analysis to devise a number of equal-tempered
scales with good approximations for the primary
harmonic intervals and their inversions. This scale is
good at approximating the primary intervals including
7/4. This scale divides the octave into 15.385 steps,
forming intervals of 78.0 cents.
•
Carlos Beta: This scale divides the octave into 18.809
steps, forming intervals of 63.8 cents.
•
Carlos Gamma: This scale achieves perfect purity of the
primary intervals 3/2, 4/3 and 5/4. This scale divides
the octave into 34.188 steps, forming intervals of 35.1
cents.
•
Harmonic (chromatic): This twelve-tone scale is
created in the partials in the fifth octave of the harmonic
series. The scale degrees that correspond to the classic
Just intervals are the major second, major third, perfect
fifth, and major seventh.
Antares Auto-Tune
Complimentary Doodle Page
User’s Guide
31
®
™
©2001 Mackie Designs Inc. and Antares Audio Technologies.
All Rights Reserved. Part No. 820-252-00 Rev. A 03/2001