1
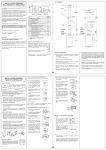
REU-VR1620WG / VR2626WG
WIRING DIAGRAM
DIMENSIONS
GAS PRESSURE SETTING
VR2626WG
DURING PRESSURE TESTING OF THE CONSUMER PIPING
ENSURE GAS COCK SITUATED BEFORE UNIT IS SHUT-OFF.
WARNING
FAILURE TO DO SO MAY RESULT IN SERIOUS
DAMAGE TO THE APPLIANCE AND POSSIBLE INJURY.
The regulator on the Infinity is electronically controlled and factory pre-set.
Under normal circumstances it does not require adjustment during
installation. Perform this procedure only if the unit is not operating correctly
1. Turn 'OFF' the gas supply.
2. Turn 'OFF' power supply.
VR1620WG
3. Remove the appliance cover .
4. Check gas type switches (fig. 1) are in
the correct position (No.1 swich of
Dip.SW2 'ON' = NG, 'OFF' = LPG).
fig.1
Dip.SW2
5. Attach pressure gauge to burner test
point, located on the gas control.
(fig. 2)
6. Turn 'ON' the gas supply.
7. Turn 'ON' power supply.
8. If remote controllers are fitted, turn the
unit 'ON' at the kitchen controller,
select
the
maximum
delivery
temperature and open a hot water
tap
fully.
(CAUTION:
Ensure
building occupants do not have access
to hot water outlets during this
procedure.)
fig.2
9. Set the Infinity to 'Forced Low'
combustion by setting No. 9 switch of
the Dip.SW1 set of dip switches to
'ON'. (fig. 3)
DIAGNOSTIC POINTS
(
(kPa)
)
10. Check the burner test point pressure.
11. Remove rubber access plug and
adjust the regulator screw on the
modulating valve (fig. 4) as required to
the pressure. (Table 1) Replace rubber
access plug.
fig.3
12. Set the Infinity to 'Forced High'
combustion by setting both No. 7 and
No. 8 switches of the bottom Dip.SW1
set to 'ON'. (fig. 5) Ensure maximum
water flow.
NG
LPG
VR1620WG
0.16
0.15
VR2626WG
0.12
0.16
Table.1 Pressure Setting Low
fig.4
Regulator adjustment
screw access plug
(
(kPa)
)
13. Check the burner test point pressure.
14. Adjust the high pressure Potentiometer
(POT) on the Printed Circuit Board
(PCB) as required to the pressure
shown Table 2. (fig.1)
fig.5
15. IMPORTANT: Set No.7 & 8 switches of
the bottom of Dip.SW1 set of switches
to 'OFF' to return the appliance to
'Normal' combustion. (fig. 6)
NG
LPG
VR1620WG
0.85
0.78
VR2626WG
0.73
0.92
Table.2 Pressure Setting Low
fig.6
16. Close hot water tap.
17. Turn OFF the gas supply and power supply.
18. Remove pressure gauge, and replace sealing screw.
19. Turn 'ON' the gas supply and power supply.
20. Operate unit and check for gas leaks at test point.
5
21. Replace the front cover of the appliance.
REU-VR2626WGP
WIRING DIAGRAM
DIMENSIONS
GAS PRESSURE SETTING
DURING PRESSURE TESTING OF THE CONSUMER PIPING
ENSURE GAS COCK SITUATED BEFORE UNIT IS SHUT-OFF.
WARNING
FAILURE TO DO SO MAY RESULT IN SERIOUS
DAMAGE TO THE APPLIANCE AND POSSIBLE INJURY.
The regulator on the Infinity is electronically controlled and factory pre-set.
Under normal circumstances it does not require adjustment during
installation. Perform this procedure only if the unit is not operating correctly
1. Turn 'OFF' the gas supply.
2. Turn 'OFF' power supply.
3. Remove the appliance cover .
4. Check gas type switches (fig. 1) are in
the correct position (No.1 swich of
Dip.SW2 'ON' = NG, 'OFF' = LPG).
fig.1
Dip.SW2
5. Attach pressure gauge to burner test
point, located on the gas control.
(fig. 2)
6. Turn 'ON' the gas supply.
7. Turn 'ON' power supply.
8. If remote controllers are fitted, turn the
unit 'ON' at the kitchen controller,
select
the
maximum
delivery
temperature and open a hot water
tap
fully.
(CAUTION:
Ensure
building occupants do not have access
to hot water outlets during this
procedure.)
fig.2
9. Set the Infinity to 'Forced Low'
combustion by setting No. 9 switch of
the Dip.SW1 set of dip switches to
'ON'. (fig. 3)
PRESSURE SETTING LOW
10. Check the burner test point pressure.
11. Remove rubber access plug and
adjust the regulator screw on the
modulating valve (fig. 4) as required to
the pressure. (Table 1) Replace rubber
access plug.
NG
0.12 kPa
LPG
0.16 kPa
Table 1
fig.3
DIAGNOSTIC POINTS
12. Set the Infinity to 'Forced High'
combustion by setting both No. 7 and
No. 8 switches of the bottom Dip.SW1
set to 'ON'. (fig. 5) Ensure maximum
water flow.
fig.4
Regulator adjustment
screw access plug
13. Check the burner test point pressure.
14. Adjust the high pressure Potentiometer
(POT) on the Printed Circuit Board
(PCB) as required to the pressure
shown Table 2. (fig.1)
PRESSURE SETTING HIGH
NG
0.72 kPa
LPG
0.83 kPa
Table 2
fig.5
15. IMPORTANT: Set No.7 & 8 switches of
the bottom of Dip.SW1 set of switches
to 'OFF' to return the appliance to
'Normal' combustion. (fig. 6)
fig.6
16. Close hot water tap.
080 00012 31535 4
17. Turn OFF the gas supply and power supply.
REU-VR1620WG-ASN
REU-VR2626WG-ASN
REU-VR2626WGP-ASN
18. Remove pressure gauge, and replace sealing screw.
19. Turn 'ON' the gas supply and power supply.
20. Operate unit and check for gas leaks at test point.
21. Replace the front cover of the appliance.
6
U304-912(00)