1
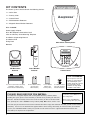
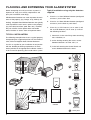
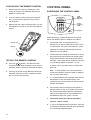
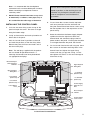
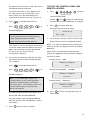
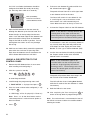
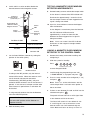
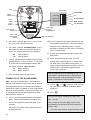
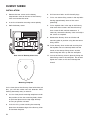
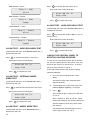
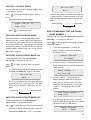
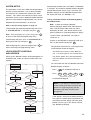
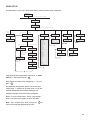
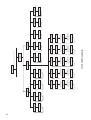
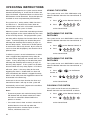
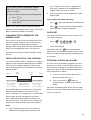
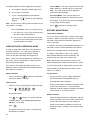
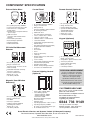
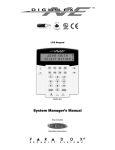
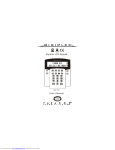
On initial installation the detector should be
configured into Walk Test ready for testing,
(i.e. Pressing down SW1 for 2 seconds).
6.
To learn a new detector ID code and link it to
the selected zone press 3 .
The panel will now listen for a valid signal from
a new detector to link to the zone.
SW1 (Test Mode)
SW1
Test Mode
SW3
SW2
The Panel will remain in Learn Mode for 30s.
If a valid signal is not received from a new
device within 30s it will automatically exit
Learn Mode and return to the top of level 2.0.
Press for 2 seconds to
activate Walk Test mode
Sensitivity
Hi
Low
7.
9.
Refit the PIR Detector to the rear cover by
offering the detector up to the rear cover and
locate the clips in the top edge into the rear
cover. Push the lower edge of the detector into
place and refit the fixing screw in the bottom
edge of the PIR to secure in position. Do not
over-tighten the screws as this may damage
the casing.
10. Walk into and move slowly around the protected
area within the 5 minutes of pressing SW1.
Each time the detector senses movement the
LED indicator behind the lens will flash.
Note: If the detector is already linked to the
control panel on any other zone then the
panel will produce a single long beep and the
received signal from the detector will be ignored.
If the detector is new and not already linked on
any security zone the panel will produce two
short beeps and the display will show ‘New
Device’ and the type of device detected (PIR).
8.
LINKING A PIR DETECTOR TO THE
CONTROL PANEL
1.
Remove the PIR Detector from its rear cover
after installing and configuring it.
2.
With the system in Standby
Press
,
?
?
?
? ,
ENTER
The panel will produce three short beeps and
the LCD will show ‘Device Confirmed’.
to enter Program Mode.
Scroll through the programming menu until
‘3. ZONE SETUP’ is displayed and press
ENTER
4.
Confirm the new device ID code by activating
the Tamper Switch on the same new PIR
detector within 15 seconds.
Note: If the confirmation signal is not
received within 15s the control panel will
produce a single long beep and exit the
learning process. The learning process will
need to be started again to learn the new
device into memory.
Installer Access Code
3.
Activate the Tamper Switch on the PIR detector.
The LCD will then show ‘Saving New Device’
while the ID code of the new detector is stored
into memory.
.
Enter the zone number to be configured (1 - 36)
and press
.
9.
‘3-1 ZX Empty’ will be displayed (X = Zone no.)
10. After completing the Zone Setup press
to
return to the top level of programming menu.
Refit the PIR to its rear cover.
ENTER
Note: Zones 33 - 36 the wired zones are the
same except there is no learn menu option as
these are wired.
5.
16
Press
ENTER
.
ESC
Note: Ensure that there is no movement in front of
the PIR for 3 minutes to allow it to stabilise before
entering test mode.