1
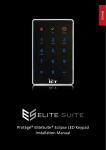
EliteSuite LCD Keypad User Manual PUBLICATION INFORMATION 5152 R First Publication 7075 R Update to User Programming & Options Selection EliteSuite™ User Manual CONTENTS INTRODUCTION ...................................................... 1 OPERATION ............................................................ 2 INDICATOR LIGHTS .................................................................... 2 VISUAL DISPLAY......................................................................... 3 AUDIBLE TONE ........................................................................... 3 ALARM MEMORY ......................................................................... 4 TROUBLE DISPLAY ...................................................................... 5 MASTER CODE ........................................................................... 7 DURESS CODE ........................................................................... 7 USER SETUP............................................................ 8 PROGRAMMING USER CODES ....................................................... 8 MODIFYING USER OPTIONS ......................................................... 10 User Card Numbers..................................................................... 14 ARMING/DISARMING ........................................... 17 EXIT DELAY ............................................................................... 17 DISARMING ............................................................................... 17 REGULAR ARMING ...................................................................... 18 STAY ARMING ............................................................................ 18 FORCE ARMING .......................................................................... 19 BYPASSING ZONES ..................................................................... 20 ONE KEY ARMING ....................................................................... 21 SPECIAL FEATURES............................................... 22 CHIME ZONES ............................................................................ 22 DISABLE AUDIBLE OUTPUT .......................................................... 22 MESSAGES ................................................................................ 23 PANIC ALARM............................................................................. 24 FIRE ALARM ............................................................................... 24 CONFIGURATION .................................................. 26 ZONE DESCRIPTION.................................................................... 26 FIRE ZONE................................................................................. 26 ONE KEY ARMING ....................................................................... 27 PANIC KEYS ............................................................................... 27 TIMERS ..................................................................................... 27 USERS ...................................................................................... 28 EliteSuite™ User Manual INTRODUCTION Your suite has been equipped with the EliteSuite™ Security System. The EliteSuite™ Security System will give you peace of mind by providing reliable security protection. The EliteSuite™ System is an advanced technology security system specifically designed to enhance the functionality of condominium and apartment security with flexible local monitoring and offsite communication. The elegant and user friendly EliteSuite™ Keypad maintains complete control of your residence providing easy to understand information. All the actions performed in your security system will be executed and displayed through the EliteSuite™ keypad. Therefore, before using your EliteSuite™ security system, we highly recommend you read this manual carefully and have your property manager explain basic system operation to you. Please consult the configuration section on page 26 to find out how your system is configured. Some features may not be available depending on your system configuration. EliteSuite™ User Manual 1 OPERATION The following section provides you with information on how to use the EliteSuite™ keypad. When the text [USER CODE] is shown this indicates that you are required to enter your user code. The default Master Code to gain access to your system is . This code MUST be changed, see section 0 on page 7 on how to program user codes. Many of the features and options must be enabled by the installation company or property manager. If the feature is not programmed or an option is not enabled the system will generate a rejection tone. Refer to the system configuration tables in section 0 on page 26. INDICATOR LIGHTS The EliteSuite™ LCD keypad features three status indicator lights showing the condition of the EliteSuite™ Security System. Power / Trouble Indicator Ready Indicator Armed / Alarm Indicator Figure 1 - Indicator Lights EliteSuite™ User Manual 2 Power / Trouble Indicator When FLASHING, indicates that there is a trouble condition present. When ON, the system is powered and operating normally. If there is a complete power failure this indicator will be OFF. Ready Indicator When ON, the system has all zones closed and is ready to be armed. When OFF, one or more zones in the system are open and the system cannot be regular armed. Armed / Alarm Indicator When FLASHING, the system is in alarm and you need to enter your user code. When ON, the system is armed and you may enter your user code to disarm. VISUAL DISPLAY The EliteSuite™ LCD keypad features a rich 32 Character LCD (Liquid Crystal Display) display showing customised messages. All messages are shown on the LCD screen. AUDIBLE TONE When you press a key on the EliteSuite™ LCD keypad a short audible tone is generated. Other tones are generated when certain functions are used, you should be familiar with the following audible tones. Confirmation Tone When an operation (arming/disarming) is successfully entered on the keypad or when the system switches to a EliteSuite™ User Manual 3 new status/mode, the keypad generates a series of four audible tones. Rejection Tone When the system times out or when an operation is incorrectly entered on the keypad, it will generate a continuous audible tone for three seconds. ALARM MEMORY All zones that generate an alarm will be stored in the memory of the EliteSuite™ Keypad. If an alarm has occurred on your system, the display will scroll between the default display and the following screen: Alarm Memory [MEMORY] To view Viewing Alarm Memory 1. Press and hold the memory key for 2 seconds or press memory and enter your [USER CODE]. 2. Use the up and down keys to scroll the alarm memory message. 3. To choose another menu option press menu or to exit press the clear key. The alarm memory can also be accessed from the main menu by pressing or scrolling to the Memory option and pressing the enter key. Clearing Alarm Memory The alarm memory is cleared automatically next time you arm your EliteSuite™ system. EliteSuite™ User Manual 4 TROUBLE DISPLAY The EliteSuite™ Security System continually monitors five system trouble conditions that can occur on your system. All trouble conditions are cleared automatically by the system when the fault is rectified. It is recommended that you inform your property manager or security company if a trouble condition occurs. When a trouble condition occurs the EliteSuite™ keypad can be programmed to generate an audible tone every 120 seconds. The trouble tone is cancelled when the trouble condition is viewed or the condition is returned to normal. To silence the keypad completely see section 0 on page 22. Viewing System Trouble Information 1. Press the menu key then enter your user code. 2. Use the up and down keys to scroll to the TROUBLE menu or press . 3. Use the up and down keys to view the troubles currently present in the system. 4. To choose another menu option press menu or to exit press the clear key. TROUBLE LIST The five troubles that can occur in your system are detailed in the following list. EliteSuite™ User Manual 5 Host Comms Communication with the host system is currently offline. This is possibly due to maintenance or a system fault. Contact the property manager or security installation company if the problem persists. Zone Fault A zone in the system is faulty or the wiring has been damaged. Contact the property manager or security installation company to arrange for your system to be serviced. Cover Tamper The cover of the EliteSuite™ system is open and may have been damaged. Contact the property manager or security installation company to arrange for your system to be serviced. Timer Loss A complete power failure of your system has occurred and the time has been lost. The time will automatically be updated. Fire Loop The fire detection wiring or a fire detector has become faulty. Contact the property manager or security installation company to arrange for your system to be serviced. Fire Zones and Fire Loop trouble detection MUST be enabled by your property manager or installation company. Please refer to the system configuration table on page 27. EliteSuite™ User Manual 6 USER CODES User Codes are personal identification numbers that allow you to enter certain programming modes, arm or disarm your EliteSuite™ system as well as activate or deactivate home automation functions. The EliteSuite™ system supports up to eight user codes. MASTER CODE By default User 01 is a master code for your system. A master code can perform the arm or disarm functions and modify and delete any user code, change user options and modify user card numbers. Other users can be given a master code by enabling User Option 2 for each new master user, please see section 0 for details. DURESS CODE If you are forced to arm or disarm your system, entering the user code assigned to User 08 will arm or disarm the system and immediately transmit a silent message (Duress Code) to the Property Management System or Security Company. EliteSuite™ User Manual 7 USER SETUP Entering the User Setup Menu 1. Press the menu key then enter your [USER CODE]. 2. Use the up and down keys to scroll to the User Setup menu and press enter, or press to access the menu directly. The display will show: Select user To modify [01] 3. You can now use the up and down keys to scroll the user(s) in the system. Press the enter key to program to enter the User Setup menu for the user number that is displayed. You can now choose from the Modify Code, Options or Add Card selections explained below. To choose another menu option press the menu key or to exit press the clear key. PROGRAMMING USER CODES Your EliteSuite™ system uses four digit user codes, where each digit can be any value from 0 to 9. Avoid programming simple or obvious user codes, such as part of your telephone number or address and codes such as 1234, 1111 or 1212. Programming User Codes EliteSuite™ User Manual 8 From the User Setup Menu (see section 0 to access), press or use the up and down keys to scroll to the Modify Code option and press the enter key. Select PIN [****] Using the keys, enter the new code for the user and then press the enter key. The EliteSuite™ keypad will then prompt for confirmation of the user code. Repeat the user code and press the enter key to confirm. Deleting User Codes To delete a user code, follow the same procedure to program the user code, and when the old user code is displayed, press the force key to clear the user code. Changing User Codes To change a user code, overwrite the current user code with the new value and then press the enter key. EliteSuite™ User Manual 9 MODIFYING USER OPTIONS The User Option menu contains options for arming, disarming and door latching for the optional Card Reader interface. If your EliteSuite™ system is not equipped with a Card Reader interface, changes to these options will have no effect. From the User Setup Menu (see section 0 to access), press or use the up and down keys to scroll to the Options menu and press the enter key. Modifying User Options Use the up and down keys to scroll through the available options. Press the key to turn the option ON, or the key to turn the option OFF while viewing that option. Once the options have been set press the enter key to return to the User Menu. The available options are described below. Code Can Arm System Only: N Option 1 – Arm Only Code 5 Enabled allows the user code to be used only for arming the EliteSuite™ system. EliteSuite™ User Manual 10 6 Disabled allows the user code to arm and disarm the EliteSuite™ system. User Can Modify Other Users: N Option 2 – Master User 5 Enabled allows the selected user to access the User Setup menu and modify codes, card numbers and options of all other users. 6 Disabled prevents access to the User Setup menu. Disarm On Single Badge Enabled: N Option 3 – Single Badge Disarming For Card Reader Interface Equipped Systems Only 5 Enabled allows the selected user to disarm the EliteSuite™ system by presenting the card programmed for that user at the Card Reader. 6 Disabled will allow only unlocking of the door where the card is presented, and the system will remain armed until disarmed by PIN entry on the keypad or a card being EliteSuite™ User Manual 11 presented by a Single Badge Disarm enabled user. Each user may have only 1 of the following Triple Badge options enabled at any time. Enabling one of the triple badge user options will automatically disable all other Triple Badge user options for you. Arm on 3 Badge Enabled: N Option 4 – Triple Badge Arming For Card Reader Interface Equipped Systems Only 5 Enabled allows the selected user to regular arm the EliteSuite™ system by presenting the card programmed for that user at the Card Reader three times in quick succession. 6 Disabled prevents triple card presenting from arming the system. 3 Badge Latch Door Toggle: N Option 5 – Triple Badge Door Latching For Card Reader Interface Equipped Systems Only 5 Enabled allows the selected user to toggle a door lock open or closed upon presenting EliteSuite™ User Manual 12 their card 3 times in quick succession. 6 Disabled prevents triple card presenting from toggling the door lock. 3 Badge Latch Door 2 Hours: N Option 6 – Triple Badge Latch 2 Hours For Card Reader Interface Equipped Systems Only 5 Enabled allows the selected user to hold a door open for 2 hours upon presenting their card 3 times in quick succession. 6 Disabled prevents triple card presenting from latch opening the door. 3 Badge Latch Door 4 Hours: N Option 7 – Triple Badge Latch 4 Hours For Card Reader Interface Equipped Systems Only 5 Enabled allows the selected user to hold a door open for 4 hours upon presenting their card 3 times in quick succession. 6 Disabled prevents triple card presenting from latching the door open. EliteSuite™ User Manual 13 3 Badge Latch Door 8 Hours: N Option 8 – Triple Badge Latch 8 Hours For Card Reader Interface Equipped Systems Only 5 Enabled allows the selected user to hold a door open for 8 hours upon presenting their card 3 times in quick succession. 6 Disabled prevents triple card presenting from latching the door open. Any user that has a Triple Badge Latch Option enabled may present their card three times while the door is latched open to cancel the latching and immediately lock the door. User Card Numbers This menu is only for Card Reader interface enabled readers. Modifying User Card Numbers without a card reader interface installed in your EliteSuite™ system will have no effect. The EliteSuite™ Alarm system is able to be interfaced with a EliteSuite™ Card Reader device to provide proximity card access to your condominium. If the Card Reader interface EliteSuite™ User Manual 14 has been installed, each user can be assigned a unique card number that is stored on a proximity card or tag device. If you wish to obtain these devices, please contact your property manager or security installation company. Programming User Card Numbers From the User Setup Menu (see section 0 to access), press or use the up and down keys to scroll to the Add Card option and press the enter key. The card details can now be entered manually via the keypad or automatically by presenting the card at a reader interface. Manually Programming a User Card Facility Number: 0000000000 Using the keys, enter the new Facility Number for the user and then press the enter key. The EliteSuite™ keypad will then prompt for the Card Number. Card Number: 0000000000 Automatically Programming a User Card Facility Number: 0000000000 When at the Facility Number entry screen, present the new user card at the installed Card Reader. The Facility and Card Numbers will be updated in your EliteSuite™ system and the new Facility Number will be displayed. Press the EliteSuite™ User Manual 15 enter key to confirm. The EliteSuite™ keypad will then show the updated Card Number, press the enter key again to confirm. Deleting a User Card To delete a user Card Number, follow the same procedure to program the Facility and Card Number, and when the old number is displayed, press the force key to clear the Facility or Card Number. Changing a User Card To change a user code, overwrite the current Facility and Card Number with the new value and then press the enter key. EliteSuite™ User Manual 16 ARMING/DISARMING To take full advantage of your EliteSuite™ System, you should familiarize yourself with the different arming methods. EXIT DELAY After entering a valid arming sequence the exit delay time will provide you with enough time to exit the protected area before the system arms. The keypad will generate a beepbeep tone repeatedly during the exit delay period. The tone will increase in frequency to indicate that only ten seconds remains. DISARMING To disarm an armed system or an alarm, enter your user code. An entry point, like the front door, will be programmed with an entry delay time. When an entry point is opened, the keypad will emit a continuous audible tone until you disarm the system. Your EliteSuite™ system will not generate an alarm until this timer elapses. All user codes can be used to disarm the system. Deactivating Alarm To deactivate an alarm enter your [USER CODE]. This will also disarm the system if it was armed. Disarming Your System 1. Enter through a designated entry point (Entry Door), the entry delay time will start and the keypad will emit a continuous audible tone. EliteSuite™ User Manual 17 2. Enter your [USER CODE]. REGULAR ARMING Regular arming arms your system. Arming Your System 1. Check that the system is ready to arm and all zones are closed (Ready Indicator is Green). 2. Enter your [USER CODE]. 3. The exit delay will start and you can now leave your premises. Quick arming can be used by pressing and holding the arm key. This option MUST be enabled by your property manager or installation company. See the configuration section on page 26. STAY ARMING This method allows you to remain in the protected area while partially arming the system. Stay zones are zones that are bypassed when the system is stay armed. For example, when you go to sleep at night, doors and windows can be armed without arming other zones like motion detectors. Stay Arming Your System 1. Check that all zones that are not stay zone(s) are closed and ready to arm. 2. Press the stay key then enter your [USER CODE]. 3. The exit delay will start. EliteSuite™ User Manual 18 Instant Arming Your System 1. During the EXIT DELAY press and hold the key for 2 seconds. The system will instant arm all zones, any zone will trigger the alarm immediately. Fast Stay Arming 1. To fast stay arm your system press and hold the stay key for two seconds. Switching From Stay To Regular/Force Armed 1. If you need to leave your premises and want to arm the system fully you can use the fast exit arming method. Press and hold the force key or arm key to switch to exit delay and arm in either force or regular arming. FORCE ARMING Force Arming allows you to rapidly arm the system without waiting for all zones in the system to close. During force arming, a forced zone is considered deactivated until it closes, then the system will arm that zone. Force arming is commonly used when a motion detector is protecting the area occupied by a keypad. For example, when arming and the motion detector is programmed as a force zone, the system will allow you to arm even if the zone is open. Force Arming Your System 1. Check that all zones that are not force zone(s) are closed and ready to arm. 2. Press the force key then enter your [USER CODE]. 3. The exit delay will start. EliteSuite™ User Manual 19 To fast force arm your system press and hold the force key for two seconds. This option MUST be enabled by your property manager or installation company. Refer to the system configuration table on page 26. BYPASSING ZONES Bypassing zones allows you to program the alarm system to ignore (deactivate) specified zones the next time the system is armed. For example, you may wish to bypass certain zones when workers are renovating part of your establishment. Once the system is disarmed, the bypass settings are erased. Bypassing Zones 1. Press the bypass key then enter your [USER CODE]. 2. Use the up and down keys to scroll to the zone(s) you want to bypass. 3. Press the bypass key to change the bypass status of the selected zone. 4. Press the enter key to store the bypass settings and exit. 5. Press the clear key to exit without making changes. To remove the bypass setting select the zone again and press the bypass key, to remove all bypassed zones press the force key. Bypass Zone Recall After disarming the system, the bypass entries are erased. The Bypass Recall Feature reinstates the previous bypass entries saved in memory. This eliminates the need to EliteSuite™ User Manual 20 manually re-program the bypass entries every time you arm the system if you are always bypassing the same zone(s). 1. Press the bypass key then enter your [USER CODE]. 2. Press and hold the bypass key for 2 seconds the last settings will be loaded. You may change these settings if required. 3. Press the enter key to store the bypass settings and exit. 4. Press the clear key to exit without making changes. ONE KEY ARMING One key arming can be used to arm the system in regular, force, stay and instant arming modes. You can use this feature to allow specific individuals like service personnel (i.e. cleaners) to arm without giving them access to any other alarm system operations. One key arming MUST be enabled by your property manager or installation company. Refer to the system configuration table on page 27. EliteSuite™ User Manual 21 SPECIAL FEATURES The EliteSuite™ System offers many unique features. CHIME ZONES A chime enabled zone will generate an audible tone every time that the zone opens. The chime feature is excellent for a front door. Chiming Zones 1. Press the menu key then enter your [USER CODE]. 2. Use the up and down keys to scroll to the chime menu or press . 3. You can now use the up and down keys to scroll the zone(s) in the system. Press the enter key to toggle the chime option for the selected zone. You can now select another Chime Zone to edit by following the instructions from step 2. To choose another menu option press the menu key or to exit press the clear key. To clear all chimed zones at step 3 press the force key. DISABLE AUDIBLE OUTPUT It may be desirable to disable the audible tone on your keypad. This will prevent the beeper from generating any notification of alarms, exit delay or entry delay. The keypad EliteSuite™ User Manual 22 will continue to generate a tone when a key is pressed and to provide audible confirmation. Disabling Audible Output 1. Press and hold the clear key. 2. Keypad will generate one long audible tone (rejection tone) to signify that the audible output is disabled. To enable the audible output repeat the above steps, the keypad will generate four audible tones to indicate that the audible output has been enabled. MESSAGES The EliteSuite™ system provides powerful message handling capabilities to allow communication with a property or facility manager. Up to four messages can be stored by the EliteSuite™ system. A new message that has been sent to your system is announced by an audible tone and the text "New Message [MENU] To View". Viewing Messages 1. Press the menu key then enter your [USER CODE]. 2. Use the up and down keys to scroll to the message menu or press . 3. Use the up and down keys to scroll the available messages(s). Pressing the enter key will acknowledge the message. To choose another menu option press the menu to exit press the clear key. EliteSuite™ User Manual key, or 23 Once all messages are acknowledged the new message indication display will not be shown. Any new messages will overwrite the oldest message that is present. Erasing Messages To completely remove a message from memory, press the force key while viewing the message. PANIC ALARM The EliteSuite™ system can provide three panic alarms that can immediately generate an alarm after simultaneously pressing and holding two specific buttons for three seconds. Based on your needs, these panic alarms can generate audible alarms (sirens or bells) or silent alarms and can communicate specific messages to your monitoring station or property manager. Press & hold keys Press & hold keys Press & hold keys and and and for the panic alarm. for a medical alarm. for a fire alarm. All Panic Alarm activations MUST be enabled by your property manager or installation company. Please refer to the system configuration table on page 27. FIRE ALARM When a fire alarm occurs, the EliteSuite™ will emit three audible tones at 2 second intervals until reset by entering a valid user code. If the zone is a delay fire zone, there is a delay of thirty seconds before the system contacts the security company or property manager. EliteSuite™ User Manual 24 A delayed fire zone will prevent unnecessary reporting of false alarms allowing you to reset the fire alarm before a report is sent. If there is no fire condition, contact your property manager or security company immediately to avoid an unnecessary response. A delayed fire zone will automatically cancel if the smoke detector is reset within 30 seconds. Pressing any key on the keypad during the first 30 seconds will silence the alarm for 90 seconds. Fire Alarm functions MUST be enabled by your property manager or installation company. Please refer to the system configuration table on page 26. EliteSuite™ User Manual 25 CONFIGURATION The EliteSuite™ system has many options that are enabled by your installer. The following lists the options and how your system is configured. Use this location to write your user names and any information about your system. ZONE DESCRIPTION The following lists the zones in your system and how each zone is configured. ZONE 01 02 03 04 ZONE NAME ZONE 1 ZONE 2 FORCE STAY BYPASS 5 5 5 5 5 5 FIRE ZONE The following lists the fire zone configuration for your system. Enabled Disabled Fire Zone Delayed Fire Zone Your fire zone is located on zone ____________ and operates with a delay of _____ seconds. EliteSuite™ User Manual 26 ONE KEY ARMING The following lists the one key arming method(s) that are enabled on your system. Enabled Disabled Regular Arming 5 Stay Arming 5 Force Arming 5 Instant Arming 5 PANIC KEYS The following lists the panic key configurations that are enabled on your system. Enabled Disabled [1] + [3] Panic Alarm 5 [4] + [6] Medical Alarm 5 [7] + [9] Fire Alarm 5 TIMERS Your entry time is programmed to be _030_ seconds. This is the time that you have before an alarm is generated if you enter through the zone __ZONE 1__. Your exit time is programmed to be _030_ seconds. This is the time that you have to exit before the system arms. If an alarm occurs the siren/beeper will activate for _005_ minutes unless disarmed. EliteSuite™ User Manual 27 USERS The following table should be used to keep a record of the users programmed in your EliteSuite™ system. Record the name of the user only. Do not write the user code. All users can arm and disarm the system. USER 01 02 03 04 05 06 07 08 USER NAME MASTER EliteSuite™ User Manual DURESS ARM ONLY 28 WARRANTY The Seller warrants its products to be free from defects in materials and workmanship under normal use for a period of one year. Except as specifically stated herein, all express or implied warranties whatsoever, statutory or otherwise, including without limitation, any implied warranty of merchantability and fitness for a particular purpose, are expressly excluded. The Seller does not install or connect the products and because the products may be used in conjunction with products not manufactured by Seller, Seller cannot guarantee the performance of the security system. Seller's obligation and liability under this warranty is expressly limited to repairing or replacing, at Seller's option, any product not meeting the specifications. In no event shall the Seller be liable to the buyer or any other person for any loss or damages whether direct or indirect or consequential or incidental, including without limitation, any damages for lost profits, stolen goods, or claims by any other party caused by defective goods or otherwise arising from the improper, incorrect or otherwise faulty installation or use of the merchandise sold. EliteSuite™ User Manual 29 NOTES _______________________________________________________ _______________________________________________________ _______________________________________________________ _______________________________________________________ _______________________________________________________ _______________________________________________________ _______________________________________________________ _______________________________________________________ _______________________________________________________ _______________________________________________________ _______________________________________________________ _______________________________________________________ _______________________________________________________ _______________________________________________________ _______________________________________________________ _______________________________________________________ _______________________________________________________ NOTES _______________________________________________________ _______________________________________________________ _______________________________________________________ _______________________________________________________ _______________________________________________________ _______________________________________________________ _______________________________________________________ _______________________________________________________ _______________________________________________________ _______________________________________________________ _______________________________________________________ _______________________________________________________ _______________________________________________________ _______________________________________________________ _______________________________________________________ _______________________________________________________ Unit C, 6 Ascension Place, Mairangi Bay, P.O. Box 302-340 North Harbour, Auckland, New Zealand. Phone: +64 (9) 476 7124 y Fax: +64 (9) 476 7128 www.integratedcontroltechnology.com