1
Quick Start — MVP 104GX, cont’d
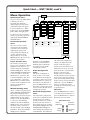
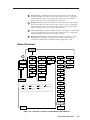
Menu Operation
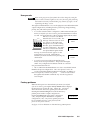
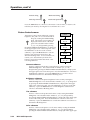
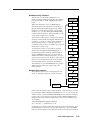
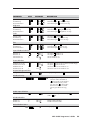
Default Cycle menu
On power up of the MVP 104GX,
a default cycle of two
informational submenus
displaying the product name
and product type will appear
in 2-second intervals. While
in this cycle, all selected Input
button LEDs will light green.
Exit
Menu
Power
On
Extron
MVP 104GX
Multi Video
Processor
Picture
Controls
Contrast
1–4
000 – 150
Brightness
Position/Size window
menu
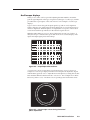
The active window can be
sized and positioned either
vertically or horizontally by
adjusting the appropriate
sizing and positioning knobs
(see the Adjustment knobs
diagram below). Press the
Menu button to advance to the
Picture Controls menu.
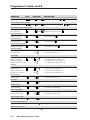
Picture Controls menu
The Picture Controls menu
allows you to adjust the contrast,
brightness, tint, and color of a
window image by rotating the
Vertical sizing knob. Press the
Active window selection button
to select a window. Press the
Next button to advance to the
Contrast, Brightness, Tint, and
Color submenus, or press the
Menu button to exit the Picture
Controls menu/submenus and
advance to the Window
Blanking menu.
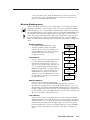
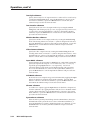
Window Blanking menu
Select a window by pressing the
Active window selection button.
The Window Blanking menu
adjusts the top, bottom, left, and
right blanking of each output
window. Press the Next button
to advance to the Blanking
submenu. Rotate the Vertical
sizing knob to select <manual>,
then press Next to advance to
the Top, Bottom, Left, and Right
submenus. Rotate the Vertical
sizing knob to adjust the
1–4
1–4
Top
Bottom
1–4
Background Color
Horizontal Phase
color
000 – 255
Window Priority
Left
1–4
1 – 16 characters
Text Style
solid
1–4
Right
Text Location
1–4
top left
000 – 016
Position/Size
Window #1 – 4
000 – 255
Windows Text 1 – 4
000 – 016
000 – 100
Subcarrier Phase
A<1> B3 C4 D2
000 – 016
000 – 032
Genlock
not detected
-15 – +09 dB
000 – 016
1–4
Tint
Color
To adjust any active window’s
sizing or positioning, press the
appropriate Active window
selection button.
1–4
Audio Level
Blanking
Auto <Manual>
000 – 050
Advanced
Configuration
Audio
Configuration
Window
Blanking
Window Borders
ON
2 -second default cycle
press Freeze and Next
buttons simultaneously
press Menu button
press the Active window
selection button
press Next button
<OFF>
Video Format
select <Manual> blanking
and press Next button
<NTSC> PAL
16-second time-out
#1
Input Mode
mode
#2
mode
VCR Mode 1 – 4
Off On Off Off
Chroma 1 – 4
Off Off Off On
System Reset
Freeze and Next
Confirm Reset
Freeze and Next
System Resetting
Please Wait
blanking. Press the Menu
button to exit the Window
Blanking menu/submenus
and advance to the Audio
Configuration menu.
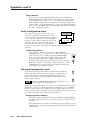
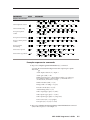
Audio Configuration
menu
The Audio Configuration
menu consists of an Audio
level submenu which adjusts
a window’s audio level. Press
the Next button to advance to
the Audio Level submenu, or
press the Menu button to exit
the Audio Configuration menu
and proceed to the Advanced
Configuration menu.
Advanced Configuration
menu
The Advanced Configuration
menu allows adjustment of the
background color, window
priority, window text, window
borders, and video format of
the window image by rotating
the Vertical sizing knob (rotate
the Horizontal sizing knob
when shifting through the text
in the Window Text submenu).
The advanced configuration
settings are displayed on the
bottom of the LCD panel.
System reset and confirm reset
submenus can also be accessed
from this menu. Press the Next
button to advance to the
Background Color, Window
Priority, Window Text, Text Style,
Text Location, Window Borders,
Video Format, Input Mode, VCR
Mode, Chroma, and System Reset
submenus, or press the Menu
button to exit the Advanced
Configuration menu and proceed
to the Exit menu.
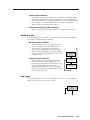
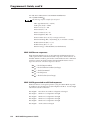
Exit menu
Press the Menu button to return
to the default cycle submenus, or
press the Next button to return to
the Picture Controls menu.
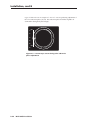
Adjustment knobs
vertical
positioning
horizontal
positioning
vertical
sizing
horizontal
sizing