1
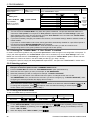
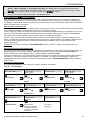
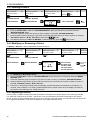
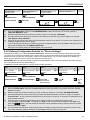
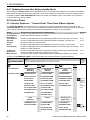
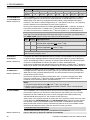
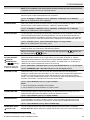
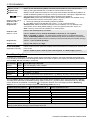
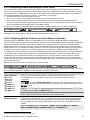
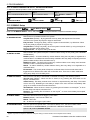
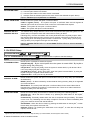
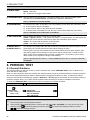
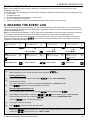
5. PROGRAMMING To Replace, a device proceed as follows: Step 1 Select "REPLACE DEVICES" Option [1] [2] [3] [4] Select the respective device Group [2] 02:ZONES/DEVICES REPLACE DEVICES [1] Step 2 Step 3 Select exact device you wish to replace [3] Step 4 Enroll the new device [4] Step 5 CONTACT SENSORS KEYFOBS K03:Keyfob ENROLL NOW or ID No. 300-0307 ENTR ID:300-XXXX See [4]. – Replacing a Device Enter the Installer Menu, select the "02:ZONES/DEVICES" option (see section 5.2) and then select the "REPLACE DEVICES" option. Select the respective group of the device you wish to replace. For example, "KEYFOBS". Scroll the Device Group, identify (by zone and/or ID number) the exact device you wish to replace, for example: "K03: Keyfob > ID No. 300-0307". From here on the process is the same as the enrollment process of a new device. To continue, refer to Section 5.4.2 "Adding a Wireless Device" Part A, Step 2. If you try enrolling a new device of a different type than the replaced device, the PowerMaster will reject the new device and the display will read "WRONG DEV.TYPE". When done, the display shows the device details of the new device. 5.4.6 Defining Configuration Defaults for "Device Settings" PowerMaster enables you to define the Default Parameters used during enrollment and to change them whenever you wish so that new devices enrolled into the system will be configured automatically with these default parameters without the need to modify the configuration of each new enrolled device. You can use a certain set of defaults for certain group of devices and then change the defaults for another group. IMPORTANT! Devices that were already enrolled in the PowerMaster system before the defaults have been changed will not be affected by the new default settings. To Define the Default parameters of a device Group proceed as follows: Step 5 Step 1 Step 2 Step 3 Step 4 Select "DEFINE DEFAULTS" Option [1] Select the respective device Group [2] Select the Default Parameter [3] Select the new Default Setting [4] 02:ZONES/DEVICES DEFINE DEFAULTS [1] [2] [3] [4] [5] CONTACT SENSORS MOTION SENSORS Alarm LED Event Counter Disarm Activity [5] Low High See [5] to Step 3 – Changing Defaults Enter the Installer Menu, select the "02.ZONES/DEVICES" option (see section 5.2) and then select the "DEFINE DEFAULTS" option. Select the respective Group of the device you wish to define its defaults. For example, "MOTION SENSORS". Scroll the parameter list of the Device Group and select the Default Parameter you wish to change, for example: "Event Counter". The list combines the parameters of all devices in the group, for example, the parameters of all types of Motion sensors. In the example, the existing default setting of the "Event Counter" for enrolled motion sensors was "Low Sensitivity" (marked with ) . To change it to "High", scroll the menu until the display shows "High" and press the button. The new default for the Event Counter parameter setting of Motion Sensors enrolled from now on will be "High". The new default does not affect motions sensors that were already enrolled before the change was made but only new motion sensors that will be enrolled in the PowerMaster after the change is performed. D-303222 PowerMaster-10/30 G2 Installer's Guide 35