1
COMMODORE |
TM
PERSONAL COMPUTER
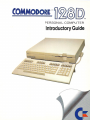
Introductory Guide
INTRODUCING
THE
COMMODORE 128D™
PERSONAL COMPUTER
Copyright © 1987 by Commodore Electronics Limited
All rights reserved
This manual contains copyrighted and proprietary information. No
part of this publication may be reproduced, stored in a retrieval sys
tem, or transmitted in any form or by any means, electronic,
mechanical, photocopying, recording or otherwise, without the prior
written permission of Commodore Electronics Limited.
Commodore BASIC 7.0
Copyright © 1985, 1987 Commodore Electronics Limited; all rights
reserved
Copyright © 1977 Microsoft Corporation; all rights reserved
CP/M® Plus Version 3.0
Copyright © 1983 Digital Research Inc. All rights reserved
Copyright © 1982 Digital Research Inc.
Commodore and Commodore 64 are registered trademarks of Commodore Electronics
Limited.
Commodore 128 is a trademark ol Commodore Electronics Limited.
CP/M is a registered trademark of Digital Research Inc.
Perfect Writer is a registered trademark of THORN EMI
Jane is a registered trademark of International Consumer Technologies.
Wordstar is a registered trademark of MicroPro Corporation
THE PRODUCT DOES NOT NECESSARILY RESEMBLE THE PICTURE INSIDE THE USERS MANUAL
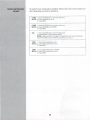
CONTENTS
THE COMMODORE 128D PERSONAL COMPUTER
1
THETHREEOPERATINGMODESOFTHECOMMODORE128D .2
C128 Mode
2
C64 Mode
2
CP/M Mode
3
UNPACKING
4
WHAT YOU SHOULD FIND IN THE BOX
4
A LOOK AT THE COMMODORE 128D
5
THE COMPUTER
'
5
THE KEYBOARD
'.
SETTING UP
CONNECTING THE KEYBOARD
CONNECTING YOUR COMMODORE 128D TO A MONITOR OR
TELEVISION SET
Connecting a Monitor
Connecting a Television Set
CONNECTING YOUR COMPUTER TO ELECTRICAL POWER
CONNECTING ACCESSORY EQUIPMENT (PERIPHERALS)
GETTING STARTED
TURNING ON THE COMPUTER FOR THE FIRST TIME
INITIAL SCREEN DISPLAY
8
8
9
12
11
16
16
16
SCREEN MESSAGES
TROUBLESHOOTING CHART
,
HOW TO SELECT AN OPERATING MODE
C128MODE
Entering C128 Mode—40 Columns—With the Computer Off
Entering C128 Mode—80 Columns—With the Computer Off
Switching Between 40 and 80 Columns in C128 Mode
Leaving C128 Mode
C64 MODE
Entering C64 Mode
Leaving C64 Mode
CP/M MODE
Entering CP/MMode—40 Columns—with the Computer Off
Entering CP/M Mode—80 Columns—with the Computer Off
Entering CP/M Mode from C128 Mode
Switching Between 40 and 80 Columns in CP/M Mode . Leaving CP/M Mode
USING THE RESET BUTTON
USING THE DRIVE RESET BUTTON
MODE SWITCHING CHART
16
18
20
20
20
21
21
21
22
22
22
23
23
24
24
. . .24
24
25
25
26
THECURSOR
"
LOADING AND RUNNING SOFTWARE
WHAT SOFTWARE IS
SOFTWARE FORMATS FOR EACH OPERATING MODE .
LOADING AND RUNNING PREPACKAGED SOFTWARE
Loading Prepackaged C128 Disk Soft ware
Loading Prepackaged C64 Disk Software
Saving Your Work to Disk in C128D/C64 Modes
LOADING AND RUNNING SOFTWARE IN CP/M MODE
Saving Your Work in CP/M Mode
LOADING CARTRIDGE SOFTWARE
USING PREPACKAGED CASSETTE TAPE SOFTWARE
6
8
8
16
27
■
LOADING AND RUNNING PROGRAMS YOU HAVE CREATED
27
. . .28
29
29
30
31
32
34
34
35
35
USERS MANUAL
STATEMENT
This equipment generates and uses radio frequency energy. If it is not prop
erly installed and used in strict accordance with the manufacturer's instruc
tions, this equipment may interfere with radio and television reception. This
machine has been tested and found to comply with the limits for a Class B
computing device in accordance with the specifications in Subpart J of
Part 15 of FCC rules, which are designed to provide reasonable protection
against such interference in a residential installation. If you suspect interfer
ence you can test this equipment by turning it off and on. If you determine
that there is interference with radio or television reception, try one or more
of the following measures to correct it.
• reorient receiving antenna
• move the computer away from the receiver
• change the relative positions of the computer equipment and the
receiver
• plug the computer into a different outlet so that the computer and
the receiver are on different branch circuits.
If necessary, consult your Commodore dealer or an experienced radio tele
vision technician for additional suggestions. You may also wish to consult
the following booklet, which was prepared by the Federal Communications
Commission:
"How to Identify and Resolve Radio-TV Interference Problems".
This booklet is available from the U.S. Government Printing Office, Washing
ton, D.C. 20402, Stock No. 004-000-00345-4.
Information To Users
WARNING: This system has been certified to comply with the limits for a
Class B computing device, pursuant to Subpart J of Part 15 of the FCC
Rules. The AC ground (the circular pin of the AC input plug) is required to
do so.
CAUTION: If the house AC wall receptacle is not the 3-pronged type contact
an electrician to install the correct 3-pronged receptacle.
If a multi-connector box is used to connect the C128D computer and periph
erals to AC, the ground must be common to all units.
Only peripherals with shield grounded cables (computer input/output
devices, terminals, printers, etc.) certified to comply with Class B limits may
be attached to this computer. Operation with non-certified peripherals is
likely to result in interference to radio and TV reception.
THE
—A Powerful New Multi-Mode Computer
COMMODORE
128D PERSONAL
COMPUTER
—A POWERFUL NEW MULTI-MODE COMPUTER
Your new Commodore 128D Personal Computer is packed with a
host of novel and exciting features that make it one of the best per
forming, most versatile microcomputers available at any price.
Among the many impressive features of the Commodore 128D are:
• 128K of user memory which is expandable up to 640K by
using optional RAM expansion modules
• 40 and/or 80 column full color display
• Professional typewriter keyboard with full numeric keypad
• Built-in advanced Basic 7.0 computing language
• Full CP/M Plus Version 3.0 operation
• Complete compatibility with Commodore 64® hardware and
software
• Access to over 6,000 of existing software programs
• Advanced sound capabilities
• Fast 1571 compatible disk drive that uses standard 51/*"
floppy disks
Not the least of the Commodore 128D's virtues is the fact that it is
produced by Commodore—the maker of more microcomputers than
any other company in the world. And as with all Commodore prod
ucts, the C128D gives you high performance without high price.
THETHREE
OPERATING
MODES OF THE
COMMODORE 128D
The Commodore 128D is actually three computers in one, offering
three primary operating modes:
• C128 Mode
• C64 Mode
• CP/M Mode
Here's a summary of what each mode gives you.
C128DMode
In C128™ Mode, the Commodore 128 Personal Computer provides
128K of RAM (Random Access Memory). This supplies all the mem
ory needed to run even sophisticated applications like word process
ing, spreadsheets, database programs, or integrated software pro
grams like JANE. And you can easily expand the RAM to 256K or
640K with optional RAM expansion modules.
C128 Mode also incorporates a powerful extended Commodore
BASIC language, known as BASIC 7.0. Offering over 140 commands,
statements and functions, BASIC 7.0 provides better, quicker and
easier ways to perform what otherwise would be complex and timeconsuming programming tasks, such as graphics, animation, sound
and music. C128 mode also offers both 40- and 80-column output,
and a 92-key keyboard. The keyboard features a numeric keypad as
well as Escape, Tab, ALPHA Lock, and Help keys.
The powerful capabilities available in C128 mode are complemented
by the family of new peripheral devices from Commodore (1571 fast
disk drive, 1902 40/80-column RGBI monitor, etc.). And you can still
use all standard Commodore peripherals as well.
lnC64 Mode, the Commodore 128 retains all the capabilities of the
commercially successful Commodore 64, thus allowing you to take
full advantage of the wide range of available Commodore 64 soft
ware. You also have full compatibility with standard Commodore 64
peripherals, including user port and serial devices, cassette
recorder, joysticks, composite video monitors, and TV output.
C64 Mode provides the BASIC 2.0 language, 40- column output and
access to 64K of RAM. The keyboard provides the same functions
available on a Commodore 64 computer. And all the Commodore 64
graphics, color and sound capabilities are retained, used exactly as
on a Commodore 64 computer.
CP/M Mode
In CP/M Mode, an onboard Z80 microprocessor allows you to run
Digital Research's CP/M® Version 3.0, plus a number of new capabili
ties added by Commodore. The Commodore 128D'sCP/M package,called CP/M Plus, provides 128K bytes of RAM, 40- and 80-column
output, access to the full keyboard including the numeric keypad and
special keys, and access to the new fast serial disk drive and the
standard peripherals. And with CP/M Plus, you can choose from
thousands of popular software programs like Perfect Writer, Perfect
Filer, and Wordstar^—already available, and already proven.
Before You Plug in Anything...
By now you're probably anxious to set up your equipment and start
computing. But before you do, take a few minutes to read the rest of
this booklet, which gives illustrated, step-by-step instructions on the
right way to set up your new Commodore 128D. The booklet also
shows how to connect the computer to the most commonly used
peripherals (i.e., accessory equipment), including a video monitor or
TV set, a disk drive, a printer, and a modem. Pay special attention to
the paragraphs preceded by a large check mark, like this
Y
These paragraphs contain information that will help you avoid possi
ble problems.
The last part of this booklet tells you what software is and shows you
how to use prepackaged (i.e., commercial) software programs. Fol
low the instructions in this booklet carefully and you will find yourself
computing almost before you know it.
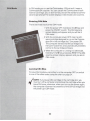
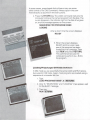
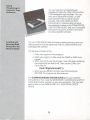
UNPACKING
The three disks packed in this carton are:
The CP/M® Systems and Utilities Disk
The Commodore 128 Tutorial Disk
The Commodore 128D Disk Drive Disk
To use these disks follow the instructions given under
LOADING AND RUNNING PREPACKAGED SOFTWARE
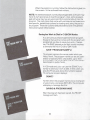
What You Should
Find in the Box
If any of the items shown above is missing or damaged, contact your
dealer immediately You may want to save the boxes to protect the
equipment if you need to move it or return it for service.
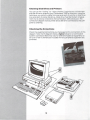
A LOOK AT THE
COMMODORE 128D
The Computer
Physically, the Commodore 128D is a light tan box with a detachable
keyboard. There are several switches, jacks and plug connections
located on the right side and back of the box. This section identifies
all these switches, jacks and connections (often called SLOTS or
PORTS), and introduces you to the keyboard. For detailed informa
tion on using the keyboard, see Section 3 of the Commodore 128D
System Guide (the other book packed in the carton with the
computer).
The Right Side
CASSETTE PORT—The Datassette
tape recorder plugs in here.
KEYBOARD PORT—Connect the
keyboard here.
CONTROL PORTS #1 & #2—Joysticks
and other peripherals plug into these
openings.
DISK DRIVE RESET SWITCH—
Resets disk drive without turning the
computer off.
RESET SWITCH—Resets computer
and diskdrive.
The Back
EXPANSION PORT—Software car
tridges plug inhere.
SERIAL SOCKET—Connect disk
drives and printers here.
VIDEO SOCKET—Plug composite
monitor cable in this socket.
CHANNEL SELECTOR SWITCH—
Set television channel for viewing com
puter display {L = channel 3;
H = channel 4)
RF SOCKET—Use this to attach cable
from Computer/TV switchbox.
RGBI SOCKET—Plug RGBI monitor
cable in this socket.
USER PORT—Accessories, such as
modems, plug in here.
POWER SOCKET—The POWER
CORD plugs in here.
ON/OFF SWITCH—Turns the power
on or off.
The Keyboard
One way you communicate with your computer is by using the key
board. The keys let you tell Ihe computer what you want it to do, and
let you answer any messages or questions the computer displays on
the screen. These messages or questions are cailed prompts.
You do not need to be an accomplished typist to use the Commodore
128 keyboard. You only need to know the general keyboard layout.
Work at the keyboard as much as you like. You won't hurt the com
puter by typing, and you will learn a good deal from the experience.
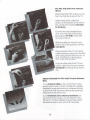
In addition to the standard typewriter
keys, the Commodore 128
keyboard has a number of
other keys. These include
special keys located
on the main keyboard,
a row of keys located
above the main key
board, and a sepa
rate numeric keypad.
On the C128 keyboard, some keys always function, regardless of
what mode you are in; other keys can only be used in certain modes.
The diagram below shows which keys can be used when. If you
press a key that does not function in a particu ar mode, the com
puter simply does not respond.
C-64 MODE
SETTING UP
The minimum system (or using Commodore 128D Personal Com
puter is the C128D itself, and a suitable monitor or TV set.
Setting up your equipment should be easy if you follow the instruc
tions and illustrations closely. Make sure that EVERYTHING is con
nected properly before you turn on the power.
Connecting the
The keyboard has a cable attached to the back of it. Plug the
end of this cable into the keyboard port on the right hand
side of the computer. If you wish the keyboard to be angled,
rather than flat, pull out the two feet located under the back
Keyboard
of the keyboard.
Connecting Your
You can connect either a standard television set (color, or black and
Commodore 128t
To a Monitor or
white) or a video monitor to display your computer information. A
video monitor resembles a TV set; however, the video monitor dis
Television Set
play has better resolution (sharpness) than a TV display.
Connecting a Monitor
Connecting a monitor is easy—just plug it into the VIDEO port or the
RGBI port on the back of the Commodore 128D. What port you use
depends on the type of monitor you are using—composite, RGBI, or
dual.
Connecting a Composite Monitor
A composite monitor like the Commodore 1702 provides a
40- column color display. You plug a composite monitor into
the 8-pin port labeled VIDEO on the back of the computer.
Connecting an RGBI Monitor
An RGBI monitor provides an 80-column color or monochrome dis
play. (The picture on most TV sets and composite monitors does not
have the extra sharpness or resolution required to handle an 80column display.) You plug an RGBI monitor into the 9-pin port labeled
RGBI on the back of the computer.
NOTE: You can connect a composite monitor and an RGBI monitor
to the Commodore 128D at the same time. You can switch between
the monitors by pressing and releasing the ESCAPE key and then
pressing the letter X.
Connecting a Dual Monitor
A dual monitor like the high-resolution Commodore 1902 cap provide
either a 40- or 80-column color display. The video switch on the moni
tor must be set to the operating mode (composite, RGBI) you want.
A dual monitor comes with both an 8-pin and a 9-pin cable. You plug
the cables into the VIDEO and RGBI ports on the back of the
computer.
The above instructions should apply to most monitors. If you have a
problem making the connection, check the user's manual that came
with your monitor.
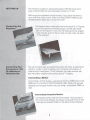
Connecting a Television Set
How you connect your Commodore 128D to a television set depends
on what type of antenna connection your TV has. There are two
types of antenna connections:
• Flat 300-ohm wire
• Round 75-ohm coaxial cable
9
For TVs with 300-ohm Antenna
Wires:
Disconnect the VHF antenna wires
from the VHF terminals of the TV.
Insert these wires under the
screws at the bottom of the switch
box, at the point marked Connect
to Antenna.
Connect the two-pronged short
wire, from the side of the switch
box marked TV VHF, to the VHF
terminal of the TV.
Slide the selector switchon the
switch box to the position marked
Computer.
Plug one end of the TV connector
cable (the black cable with the RCA
phono plug at each end) into the TV
jack on the back of the Commo
dore 128D (labelled RF).
Plug the other end of the TV con
nector cable into the jack marked
Computer at the top of the switch
box.
Adapters Needed For TVs with 75-ohm Antenna
Wires
If your antenna cable is the round 75-ohm type,
you will need to use a 75-ohm to 300-ohm adapter
(available in most electronics or hardware stores)
to attach the VHF antenna cable to the screws at
the bottom of the switch box.
If your television set's antenna terminals are
also round 75-ohm types, you will need to use a
300-ohm to 75-ohm adapter to attach the switch
box antenna wire to your set's VHF terminals.
10
Connecting Your
Computer to
Electrical Power
To connect your computer to electrical power, plug the end of the
POWER CORD into the computer POWER SOCKET (on the right
hand side of the back of the computer). Make sure the computer
power switch (located on the back of the computer, next to the
power socket) is set to OFF.
Next, plug the 3-pronged end of the power supply
cable into a 3-pronged electrical outlet.
/
CAUTION—If the house AC wall receptacle is not the
3-pronged type, contact an electrician to install the
correct 3-pronged receptacle. If a multi-connector
box is used to connect the C128 computer and
peripherals to the AC line, the AC ground must be
common to all units. Contact an electrician if you are
not sure if your system is grounded properly.
11
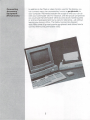
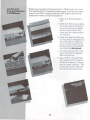
Connecting
In addition to the TV set or video monitor used for the display, you
Accessory
can connect many other accessories, known as peripherals, to
Equipment
(Peripherals)
your computer. Peripherals broaden the scope of what you can do
with your Commodore 128. For instance, with the proper peripherals
you could use the Commodore 128 to access stock market quotes
or airline schedules and print out a copy for reference—all without
leaving your home or office. The foldout connection diagram
describes some of the most popular peripherals and shows how to
connect them to the Commodore 128D.
12
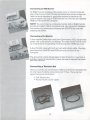
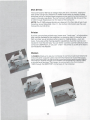
Disk Drives
The Commodore 128D has an integral fast disk drive. However, additional
disk drives can give you the ability to make taster back-up copies of disks
and allow you to run certain targe programs more quickly by eliminating the
need to manually swap disks. You can connect additional disk drives to the
C128D through the serial port on the back of the computer.
NOTE: The C128D's integral disk drive is device 8. Further disk drives must,
therefore, be set to device 9,10 or 11. For further information see the user
manual for your disk drive.
Printer
A printer can provide a printed copy, known as a "hard copy", of information
that is either contained in the computer, or stored on disk or cassette tape.
With a printer you can produce letters,reports, mailing labels—even pic
tures, if you use a printer having graphic capabilities. A printer can be con
nected in more than one way. You can either connect a printer directly to the
computer's SERIAL port, or you can "chain" the printer to a disk drive that is
connected to the computer.
Modem
A modem allows you to use your computer to communicate over telephone
lines with other computer users and with information services like Compu
Serve and Dow-Jones, as well as with computerized bulletin boards (BBs's).
Information received through your modem can be saved on a disk or tape,
or printed as a hard copy. The modem is connected to the Commodore
128D through the USER PORT on the back of the computer.
13
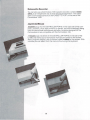
Datassette Recorder
You can also use a Commodore 1530 cassette recorder, called a Datas
sette, as an inexpensive way to store and recall information. The Datas
sette cord connects directly to the CASSETTE PORT on the side of the
Commodore 128D.
Joysticks/Mouse
Joysticks plug into the CONTROLLER PORTS on the right side of the com
puter. Joysticks, once used primarily for games, are now increasingly being
used for educational and business software. Joysticks designed for the
Commodore 64 are compatible with the Commodore 128.
A mouse plugs into either of the CONTROLLER PORTS on the side of the
C128D and allows you to move easily from place to place on the screen.
Many programs display a list of choices {called a menu) on the screen. With
a mouse you can select from the menu without using the keyboard.
14
Chaining Disk Drives and Printers
You can use the "chaining" (or "daisy chaining") technique to connect sev
eral disk drives or printers to your Commodore 128D at one time. Using this
technique, you connect a cable from one serial port of a printer or disk drive
to a serial port of another disk drive. A disk drive must be the item of equip
ment that is directly connected to the Commodore 128's serial port. The
connection diagram shows a printer and a disk drive connected to the com
puter by chaining.
Checking the Connections
Check the equipment connections you make against the connections in this
diagram. Note that this diagram shows a typical setup for a Commodore
system. Connection details may vary for different models of equipment, so
be sure to refer to the manuals included with any peripheral equipment you
purchase.
15
GETTING
STARTED
Turning on the
Plug in and turn on the television set or monitor that you have con
Computer for the
First Time
nected to the computer. If you are using a television set, make sure it
is tuned to either channel 3 or channel 4—whichever is not used in
your area—and make sure the channel selector switch on the back
of the computer is set to the same channel (L = channel 3; H = chan
nel 4). If you are using a monitor you don't need to set this switch.
Then set the computer power switch (located on the right side of the
computer) to ON. The small red light on the left side of the keyboard
should come on.
Initial Screen
Display
Shortly after you turn on or "power up" your computer, you should
see a display on the screen of your television set or monitor. The
Commodore 128 is capable of providing various types of screen
displays. These displays can either be 40 or 80 columns wide.
COLUMNS are the spaces ACROSS the screen (horizontal), as
opposed to the vertical ROWS. Both displays feature 25 rows on the
screen.
The exact display depends on what operating mode you have
selected (C128, C64, CP/M), and in some cases on what type of mon
itor you are using. See HOW TO SELECT AN OPERATING MODE on
page 18 for a description of the initial screen displays for the various
operating modes.
The Cursor
When your display appears you will often see a small flashing rectan
gle somewhere on the screen. This rectangle is called the cursor.
The cursor marks your position on the screen. When you type in
something or when the computer responds to something you have
typed in, the cursor usually moves accordingly.
16
Screen Messages
If you press the RETURN key without having entered an appropriate
command you may see any one of several messages on the screen
e.g., SYNTAX ERROR). These messages are the computer's way of
telling you that it doesn't have enough information to act on. In most
cases the messages are self-explanatory, but in some cases you
may need a more detailed explanation of the message. Appendices
A and B of the Commodore 128D SYSTEM GUIDE list the error mes
sages for the Commodore 128.
If You Have A Problem..
If the screen display is not clear, try adjusting the controls on your
television set or monitor. You may not get a picture at all if your con
trol settings or connections are not correct. In such a case you
should check all your settings and connections. Often the TV may
simply be tuned to the wrong channel, or you may have the bright
ness turned off.
Make sure that the keys on the keyboard are in the proper position.
Normally, the SHIFT LOCK, CAPS LOCK and 40/80 keys should not
be depressed. If they are depressed you may get no picture at all, or
the symbols on the screen may look strange.
The Troubleshooting Chart shown on the following pages lists some
of the more common problems and tells how to correct them.
If you check the connections and you still can't get the com
puter to work, call CUSTOMER SUPPORT:
(215)436-4200
Commodore CUSTOMER SERVICE personnel at this number will
help you find and correct the problem. If the problem cannot be cor
rected over the phone, you will be given the number of the Commo
dore service facility nearest you. Commodore has over 750 indepen
dent companies, including the RCA Service Company, ready to
provide nationwide service and maintenance for your Commodore
equipment.
Most set-up and start-up problems are simple and can be diagnosed
over the phone. By calling CUSTOMER SUPPORT, you can probably
avoid an unnecessary trip to the service facility. More important, you
can continue to use your equipment.
Remember—Call the CUSTOMER SUPPORT number before you
take any equipment in for warranty service.
TROUBLE
SHOOTING
CHART
Symptom
Cause
Remedy
Indicator light not 'ON'
Computer not turned ON
Make sure power switch is in
ON position
Computer not plugged into
Check power socket for loose
wall outlet
or disconnected power cable.
Check connection with wall
outlet
No picture (Monitor)
Monitor not connected
Check monitor connections
40/80 column setting incorrect
Check 40/80 column switch on
computer and/or monitor
No picture (TV)
Incorrect hookup
Check computer hookup to
VHF antenna terminal; see
page 10 for details.
Cable to TV not plugged in
Check output cable
connection to TV
Computer and/or TV set for
Set computer to same channel
wrong channel
as TV (3 or 4)
40/80 key setting incorrect
Turn off computer. Set 40/80
key to UP position for TV
Random pattern on
Cartridge not properly
screen with cartridge in
inserted
Turn power OFF and reinsert
cartridge
Poorly tuned color controls
Adjust color controls on TV or
place
Picture with poor or no
color
Sound with excess
monitor
Volume too high
Adjust volume
Volume too low
Adjust volume
AUX input on external amplifier
Connect sound jack to AUX
input on amplifier and select
background noise
Picture OK, but no
sound
not property connected
AUX input
18
Sound OK, but no
picture
See "No picture" listings
See "No picture" listings
above
above
Computer stuck:
Cursor not flashing
Computer inadvertently
While depressing the RUN/
received instructions to
disable keyboard; or the
printer, cassette or disk drive
STOP key press RESTORE key
is in listening mode
the computer off and on
Computer displays
garbled symbols on the
twice; or reset the peripherals
by turning off and on; or turn
Incorrect operating mode
Press ESCAPE key; release,
setting for monitor
press X
CAPS LOCK key depressed
Release CAPS LOCK key
Overheating
Pull plug on power supply and
allow to cool down (make sure
screen
air flow around power supply
is not restricted)
.19
How to Select an
Operating Mode
Each of the three operating modes of the Commodore 128—C128,
C64 and CP/M—takes advantage of particular hardware and soft
ware features. Two modes—C128 and CP/M—allow you to use both
40- and 80-column screen displays. In effect, then, the Commodore
128 lets you.select any of the following five operating options:
• C128—40 Columns
• C128—80 Columns
• C64—40 Columns
• CP/M—80 Columns
• CP/M—40 Columns
If you are using a composite monitor or a TV set for your display, you
can access only the 40- column options. If you are using an RGBI
monitor you can access only the 80-column options.
If you are using a dual monitor like the Commodore 1902, you can
access all five options. You can also use iwo separate monitors (one
composite, and one RGBI) to access all five options. With a dual
monitor or with separate composite and RGBI monitors, you can
switch from option to option as desired. This section briefly
describes each mode and shows you how to switch from one mode
to another.
NOTE: When you change modes, the information you are work
T
C128 Mode
ing
inc with in a given mode is not transferred to the mode you
change to. If you want to keep that information you should SAVE
it before changing modes. See page 29 for instructions on
SAVEing information.
C128 mode is the default mode for your computer at power-up. This
means that if you don't specifically select C64 or CP/M mode, and if
all disk drive equipment is OFF, you wiil be in C128 mode when you
turn on the computer.
Entering C128 Mode—40 Columns—with the Computer
OFF
1. Make sure computer 40/80 key is not depressed.
2. Check that CP/M disk is not in the disk drive.
3. If you are using a 1902 dual monitor, make sure it is set to
separated chroma/luma.
4. Press computer ON/OFF switch.
20
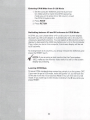
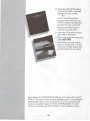
When you turn on your
computer in C128 mode,
using a 40-column display
the screen display should
look like this:
■
Entering C128 Mode—80 Columns—with the Computer
OFF
1. Make sure you are using a properly con
nected RGBI monitor (color or monochrome).
If you are using a 1902 dual monitor make
sure the monitor screen display is set for
RGBI (on the video switch) and POS DIGITAL
(on the RGBI switch on the back.)
2. Check that CP/M disk is not in the disk drive.
3. Depress computer 40/80 key.
4. Press computer ON/OFF switch.
Here is a sample 80-column display:
Switching between 40 and 80 Columns in
C128Mode
With a dual monitor like the Commodore 1902,
or with two separate 40- and 80-column moni
tors you can switch back and forth between 80
and 40 columns, even while the computer is
running. To make the change, you press and
release the ESC (ESCape) key; then press the X
key.
Leaving C128 Mode
You can leave C128 mode either by turning off the computer, or by
entering C64 or CP/M mode. See "Entering C64 Mode" and "Enter
ing CP/M" for instructions.
Remember—you must SAVE what you're working on in C128 mode
before you switch to another mode. If you don't your C128 mode
work will be lost when you switch modes.
21
C64 Mode
In C64 mode you can use the Commodore 128 just as if it were a
Commodore 64 computer. You can use all the Commodore 64 soft
ware (in cartridge, tape, or disk format), and all the standard Commo
dore 64 peripherals. The screen display in C64 mode is 40 columns.
Entering C64 Mode
There are three ways to enter C64 mode:
1. With the power OFF, hold down the C* key and
press the ON/OFF switch. The C64 opening
screen display will appear and you wil! be in
C64 mode.
With the computer power OFF, insert a soft
ware cartridge designed to run on the Commo
dore 64 in the cartridge slot. Turn power ON.
The computer senses that the cartridge is for
the Commodore 64, and automatically.transfers
control to the'cartridge software.
3. When the computer is running in C128 mode,
hold down the O key and press RESET. The C64
opening screen display appears and you are in
C64 mode.
Leaving C64 Mode
To leave C64 mode you can either turn the computer OFF or switch
to one of the other modes using the chart on page 24.
NOTE: If you have a C64 cartridge in the cartridge slot, you
must turn off the computer and remove the cartridge when you
leave C64 mode; otherwise, when you turn on the power again,
the computer will sense the presence of the C64 cartridge and
will power up in C64 mode.
22
CP/M Mode
CP/M is a popular operating system (OS) for microcomputers devel
oped by Digital Research Incorporated (DRI). Like all operating sys
tems, CP/M is a set of instructions that tells a computer how to man
age all the hardware and software elements of the system.
CP/M mode on the Commodore 128 provides you with the capa
bilities of DRI's CP/M Pius Version 3.0, including 128K of random
access memory (RAM), a 40- or 80-column display, programmable
function keys, and access to a fast disk drive, tn CP/M Mode you
can run any of thousands of commercial software programs
available for CP/M 3.0 and other, earlier versions of CP/M (CP/M 2.0,
CP/M 2.2, etc.)
Entering CP/M Mode—40 Columns—with the
Computer OFF
1. Make sure you are using a properly connected
composite monitor (color or monochrome). If
you are using a 1902 dual monitor make sure the
monitor screen display is set for a separated
chroma/luma (40 columns).
2. Make sure computer 40/80 key is not
depressed.
3. Insert the CP/M 3.0 system disk.
4. Turn the computer on. CP/M 3.0 is booted (that
is, loaded) automatically.
Entering CP/M Mode—80 Columns—with the
Computer OFF
1. Make sure you are using a properly connected
RGBI monitor (color or monochrome). If you are
using a 1902 dual monitor make sure the moni
tor screen display is set for RGBI (80 columns).
2. Depress computer 40/80 key.
3. Insert the CP/M 3.0 system disk.
4. Turn the computer on. CP/M 3.0 is booted (that
is, loaded) automatically.
23
Entering CP/M Mode from C128 Mode
1. Set the computer 40/80 key and the dual moni
tor video switch to match the CP/M operating
mode you want to enter (40 or 80 column). Insert
the CP/M 3.0 system disk.
2. Press RESET
3 Press RETURN
Switching between 40 and 80 columns in CP/M Mode
In CP/M, you can choose either a 40- or 80-column screen display.
At power-up, the screen display is automatically set to 40 columns
unless you specify 80 columns. You can select an 80-column screen
display by depressing the 40/80 key before you turn on the computer.
Then, when you turn on the computer, the screen display will be set
to 80 columns.
To change back to 40 columns, you simply release the 40/80 key and
press the RESET switch.
NOTE: If you are using a dual monitor like the Commodore
1902, make sure the monitor video switch is set for the screen
display you are using.
Leaving CP/M Mode
To leave CP/M mode and stop computing, simply turn the power OFF
If you want to go to C128 mode, leave the power on, but remove the
CP/M disk from the drive and press RESET. You will then be in C128
mode. If you want to go to C64 mode, hold down the CE key while you
press RESET.
24
Using the Reset
Button
WARNING: Pressing the reset switch destroys any information in
the computer's memory unless that data is first saved.
Under certain conditions the computer may "lock up"—that is, it will
not accept input from the keyboard. You can use the RESET button
(located on the right side of the computer) to free the keyboard.
RESET— C128/64 Modes
When you press RESET in these modes, the screen clears
and the initial screen display for whatever mode you are in
reappears.
RESET—CP/M Mode
When you press RESET in this mode, CP/M 3.0 reboots, bring
ing you back to the opening screen display.
Note that the CP/M system disk must be in the drive when you
press RESET.
Pressing RESET resets both the computer and the disk drive.
Using the Drive
Reset Button
Under certain conditions you may want to reset the disk drive with
out resetting the computer. In this case you can use the DRIVE
RESET button (located on the right side of the computer).
25
MODE SWITCHING
CHART
To switch from one mode to another, follow the instructions below for
the mode that you want to switch to.
C128D
l. Check that CP/M disk is no! in the diskdrive.
40 COL 2 Check that 40/80 key is UP
3. Press RESET
C128D 1. Check that CP/M disk is not in the disk drive.
80 COL 2. Check that 40/80 key is DOWN.
3. Press RESET.
C64
1 Check that CP/M disk is not in the disk drive.
2. Hold & key down while pressing RESET.
NOTE: Installing any C64 cartridge in the expansion port will automatically
cause the C128D to assume C64 mode when you turn it on.
CP/M
1. Check that the 40/80 key is UP.
40 COL 2. insert CP/M system disk in drive.
3. Press RESET
CP/M
1. Check that the 40/80 key is DOWN
80 COL 2. Insert CP/M system disk in drive.
3. Press RESET.
26
LOADING AND
RUNNING
SOFTWARE
What Software Is
SOFTWARE is a set of instructions (also called a PROGRAM) that
tells your computer what to do. You can create your own software
and you can buy prepackaged (i.e., commercial) programs. You don't
need to know all about computing or programming to use prepack
aged software programs. There is a wide range of software pro
grams available for your Commodore 128 computer, since the
Commodore 128 runs all Commodore 64 software and thousands of
CP/M programs as well.
Prepackaged software is available in three different forms: DISK,
CARTRIDGE and CASSETTE TAPE.
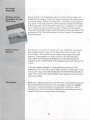
Disk
Disks for the C128D (also known as diskettes, floppy disks or "flop
pies") are about 5 inches in diameter, and resemble a 45-rpm record.
Disks provide fast, easy to use storage and retrieval for your com
puter programs and files. The disk itself is enclosed in a protective
plastic sleeve—do not try to remove the disk from this sleeve!
Before you can store a program on a new disk, you must first FOR
MAT that disk so it can be used. Section 3 of the SYSTEM
GUIDE tells how to format a disk for use with
your own programs. Section 3 of the SYS
TEM GUIDE also describes and defines
other commands that you will want to know
how to use if you plan to create, save and
run your own programs.
27
Cartridge
Cartridge software comes in pack
ages about the size of a deck of
cards. Software cartridges are
easy to use: with the computer
OFF, you simply plug them directly
into the cartridge slot on the back
of the computer.
Cassette Tape
This lype of software comes on
standard size cassette tapes, and
can be used with a special Com
modore cassette recorder called
the 1530 DATASSETTE1".
Software Formats
for Each
Operating Mode
Different types of software are available for the three different oper
ating modes of the Commodore 128. The following chart shows what
formats can be used in each of the three operating modes.
OPERATING MODE
SOFTWARE
TYPE
C128
C64
CP/M
X
DISK
CARTRIDGE
CASSETTE
28
Loading and
Running
Prepackaged
Software
Using prepackaged software is a two-step process:
1. The program must be entered into your computer's memory.
This is called LOADING the program.
2. Then the computer must carry out, or RUN, the program.
If you have additional disk drives make sure that the cable connect
ing the disk drive to the C128 is plugged into the six-pin SERIAL port
located on the back of your computer. Don't confuse the SERIAL
port with the VIDEO port, which is also located on the back of the
Commodore 128.
Loading Prepackaged C128 Disk Software
Follow these steps to load prepackaged disk software:
1. Insert the software disk into the disk drive. Make sure the
label on the disk is facing up. Put the disk in so that the
labeled end goes in last. Be sure the disk is all the way in, but
don't force it.
2. Pull down the lever on the front of the disk drive.
3. Type the LOAD command as specified in the software
instructions. In most cases the command will be:
LOAD "PROGRAM NAME",8
Note that you must enclose the name of the program in
quote marks.
29
In some cases, prepackaged disk software may use some
other format of the LOAD command. Always type in the com
mand exactly as specified in the instructions.
4. Press the RETURN key. The LOAD command instructs the
computer to retrieve the named program from the disk. The
cursor disappears, the indicator light on the disk drive goes
on, and this message appears on the screen:
SEARCHING FOR PROGRAM NAME
LOADING
After a short time the screen displays:
READY
When the screen displays
READY and the cursor reap
pears, the program has been
loaded into the computer. Then
type RUN and press RETURN.
This command instructs the
computer to perform (i.e., RUN)
the program.
Loading Prepackaged C64 Disk Software
In C64 mode you use essentially the same LOAD and RUN proce
dure used in C128 mode. Again, most programs are loaded using a
sequence of commands like this:
1. Type:
LOAD "PROGRAM NAME",8HB1K
2. After the "SEARCHING" and "LOADING" lines appear, wait
for the READY message.
3. Then type:
RUN
When the program is running, follow the instructions given on
the screen or in the software instructions.
NOTE: As mentioned above, some prepackaged disk software may
have its own special way to load the program. Also, some prepackged software may have an automatic RUN command built into the
program. The instructions that come with commercial software con
tain specific, detailed instructions for loading and using the particu
lar program. These instructions take precedence over the general
instructions given in this booklet.
Saving Your Work to Disk in C128/C64 Modes
If you are using a prepackaged software program,
the user's manual that comes with the program will
probably tell you how to save your work, if neces
sary. The SAVE procedure for disk usually involves
a command like this in C128 or C64 mode:
SAVE "PROGRAM NAME",8
The program name is the name under which you
file your work. The program name can be any com
bination of alphanumeric characters, up to 16 in
all. Note again that the program name must always
be enclosed in quote marks.
In C128 mode only, you can use the DSAVE func
tion key to save your work to disk. In this case, you
press the F5 key just above the numeric keypad.
The computer screen displays:
DSAVE"
You then enter the program name and a closing set
of quote marks, and press RETURN. The computer
will display a message like this:
SAVING 0: PROGRAM NAME
When the program has been saved, the READY
message will flash.
31
Loading and
Running Software
in CP/M Mode
Before you can load a software program in CP/M mode, you must
first load the CP/M 3.0 operating system itself. To do this you load a
copy of the CP/M 3.0 system from the CP/M System disk into the
computer's memory, using this procedure:
1. Make sure the computer is
OFF.
2. Make sure that you are using
the proper type of monitor. If
you are using a dual monitor
like the Commodore 1902.
make sure the video mode is
set properly.
3. Make sure that the 40/80 key
on the computer keyboard is
set to the column width you
want. In most cases this will
be 80 columns, so the 40/80
key should be depressed.
4. Turn the computer ON. Then
insert the CP/M 3.0 System
disk into.the drive.
5. Type "BOOT" this automati
cally loads CP/M 3.0 into the
computer's memory. This pro
cess is called "booting/1 This
is what the screen looks like
during the booting process.
32
6. After the initial CP/M display,
this two-character message
appears on your screen:
A>
This is the CP/M system
prompt, which tells you that
CP/M is ready to accept com
mands from your keyboard.
Remove the CP/M System
disk from the disk drive.
8. Insert the CP/M software pro
gram disk in the drive.
9. Type in the program name and
press RETURN.
10. Then follow the instructions
given on the screen, or in the
manual for the particular soft
ware program you are using.
See Chapter IV of the SYSTEM GUIDE for an introduction to what
CP/M 3.0 software can do, and how to begin using it. To purchase a
detailed description of how to use CP/M, 3.0, fill out and mail the
coupon included in Chapter IV of the SYSTEM GUIDE. You will
receive a complete copy of the CP/M 3.0 User's Guide in return.
33
Saving Your Work in CP/M Mode
To save your work in CP/M mode, follow the instructions given in the
manual that accompanies the CP/M program you are using.
Loading
Follow these steps to bad cartridge software in C128 and C64
Cartridge
Software
MODES:
1. Make sure your computer is OFF before trying to LOAD a
cartridge. The POWER SWITCH is located on the back
of the computer. Check that the POWER LIGHT is not lit.
REMEMBER TO TURN OFF
YOUR COMPUTER BEFORE YOU
INSERT OR REMOVE CARTRIDGES.
IF YOU DON'T YOU MAY
DAMAGE THE CARTRIDGE AND THE
COMPUTER.
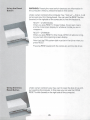
2. Insert the cartridge into the slot
located on the back of-your computer.
The cartridge can only be
plugged in with the title facing
up. Insert the cartridge firmly,
but do not force it.
3. Turn ON your Commodore 128.
That's all there is to it. The pro
gram loads automatically
when you turn the computer
I
on. You don't have to use a
LOAD command, and
usually you don't need to use
the RUN command either.
Just follow the directions
given on the screen, or in
any printed instructions that
come with the cartridge.
34
Using
Prepackaged
Cassette Tape
Software
Loading and
Running Disk
Programs You
You can load and run prepackaged
cassette software by using a Commodore
1530 Datassette tape recorder. You can
also use a Datassette to load, run and
save software that you have created
yourself. The LOAD, SAVE and RUN
instructions for cassette tape software
are explained in detail in the COMMODORE
128D SYSTEM GUIDE. See your Datassette
instruction manual for further information
on using cassette software.
You can LOAD and RUN disk software programs that you have cre
ated yourself in much the same way that you LOAD and RUN pre
packaged disk software.
Have Created
The general procedure is this:
1. Enter your program in the computer.
2. SAVE your program on disk using the DSAVE or SAVE com
mands.
3. When you want to use the program, insert the disk containing
the program into the disk drive. Then use the LOAD com
mand, like this:
LOAD "PROGRAM NAME",8
4. When you get a READY prompt, type RUN and press
RETURN. Your program will then execute.
The COMMODORE 128D SYSTEM GUIDE gives you complete
instructions on how to use the SAVE/DSAVE, LOAD/DLOAD and RUN
commands to save, load and run your own programs. You may also
want to refer to the COMMODORE 1571 DISK DRIVE USER'S
GUIDE.
35
By following the procedures described in this booklet, you can
quickly make use of any of thousands of prepackaged software pro
grams in a variety of categories—including business, home, recrea
tional, educational, scientific—and more.
Because of the wide capabilities available in these prepackaged
programs, you may never want or need to write your own software
programs. But if you do, the SYSTEM GUIDE provided with your
Commodore 128 has been designed to provide you with all the infor
mation you will need to create and run your own programs.
36
COMMODORECommodore Business Machines, Inc.
1200 Wilson Drive • West Chester, PA 19380
P/N: 319929-01
Commodore Business Machines, Limited
3470 Pharmacy Avenue • Agincourt. Ontario Ml W 3G3
41A084-001
PRINTED IN TAIWAN