1
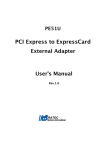
Limitation of Liability
- Information presented by RATOC in this manual is believed to be accurate and reliable. RATOC assumes
no responsibility for its use. No license is granted by implication or otherwise to any rights of RATOC.
- In no event shall the liability of RATOC (or their officers, directors, employees or agents) for any
damages (whether direct or indirect, special, punitive, incidental, consequential, or otherwise), loss of
profits, loss of business, or any pecuniary loss, arising out of or related to the use of the product exceed
the actual price paid for the product. Some states do not allow the exclusion or limitation of incidental or
consequential damages. If such laws apply, the limitations or exclusions contained in this statement may
not apply to you.
Trademark References
Trademarks and registered trademarks are proprietary to their respective manufactures.
Advisories
Three types of advisories are used throughout this manual to provide helpful information, or to alert you
to the potential for hardware damage or personal injury. They are Note, Caution and Warning. The
followings is an example of each type of advisory.
NOTE
Used to amplify or explain a comment related to procedural steps or text.
WARNING
Used to indicate and prevent the following step from causing injury.
CAUTION
Used to indicate and prevent the following procedure or step from causing damage to the equipment.
1
1
Introduction
Thank you for purchasing the RATOC PCI Express to ExpressCard Adapter. This device allows to use
ExpressCard on a desktop computer. Normally ExpressCard is need to inserted into the ExpressCard slot
before system boot and never allow to exchange ExpreassCard after system boot both Windows PC and
MAC pro. This product provide ExpressCard Hot-plug capable driver for Windows PC and MAC Pro. To
install ExpressCard Hot-plug driver you can exchange ExpressCard at any time.
1-1.Feature
To assure PCI Express signal quality signal repeater is located on the PCI Express board.
To enable ExpressCard Hot-Plug capability Hot-Plug driver is provided for Windows PC and MAC Pro.
Recommended as a SxS Pro compliant product on the web site below.
https://www.oss-formats.org/en/sxs/outline/index.html
1-2.Pre-Installation Information
Before using ExpressCard adapter you should perform the following steps:
1. Inventory the shipping carton contents for all of the required parts
2. Read this manual
1-3.Package Contents
ExpressCard Adapter
PCI Express add-in card
Low Profile bracket
PCI Express extension Cable
NOTE
If any of these items are missing, contact the
CD-ROM
Manual
supplier immediately.
1-4.System Requirements
Supported Operating System
Windows 7 / Windows Vista / Windows XP( x32/x64, Latest Service Pack should be installed)
Mac OSX 10.4.11 or later / 10.5.6 or later / 10.6 or later
Supported Computer
Windows PC PCI Express slot equipped.
Intel Mac Pro
2
1-5.Supported ExpressCard
ExpressCard/34 ( ExpressCard/54 is not supported. )
Sony SxS Card
SxS Pro SBP-8/SBP-16, SxS-1 SBS-32G1
Sony MemoryStick DUO Adapter MSAC-EX1
NOTE
For the latest information, go to our web site.
http://www.ratocsystems.com/english
1-6.Layout
ExpressCard Adapter
Connector for
PCI Express expansion cable
ExpressCard Slot
Eject lever
PCI Express add-in card
Connector for
PCI Express expansion cable
3
2
Setup
2-1.Installing the PCI Express add-in card and ExpressCard adapter
Shut down all power connected to the host
computer
CAUTION
As an added step to ensure safe
installation, unplug the power supply from
the computer.
After the host computer is off and all power
PCI Express add-in card
cords disconnected, remove the cover and
insert the card into a vacant PCI Express
Windows PC
slot by gently pushing the card until it is
firmly seated. Be sure to secure the card
with a retaining screw.
Mac Pro
CAUTION
Electrostatic Discharge (ESD) is the enemy of semiconductor devices. You should always take precautions
to eliminate any electrostatic charge from your body and clothing before touching any semiconductor
device or card by using an electrostatic wrist strap and/or conductive mat.
4
Connect PCI Express add-in card and
ExpressCard Adapter by the PCI Express
extension cable
PCI Express extension cable
NOTE
.
Standard bracket
If PCI Express slot of your
computer is low profile, you
need to change the bracket of
PCI Express add-in card to low
profile bracket
turn a screw
5
Low profile bracket
2-2.Windows Software Installation Steps
NOTE
At the first system boot you will see the balloon message below. You do not
need to do anything, go ahead to the installation steps below.
Installation Steps
Following steps are example under Windows 7.
Insert provided CD into your disc drive.
You will see the AutoPlay dialog box, click “Run
RATOC-PE51HotPlugTool-Setup.exe”.
Under Windows 7 or Windows Vista you will see “User
Account Control” dialog box.
Click “Yes” button.
Installation will start, click “Next >” button.
6
Confirm the destination location and click
“Next >” button.
Click “Install” button.
Security warning message will be shown
up.
Click “Install” button.
7
Installation complete.
Select “Yes, I want to restart my computer
now” and click “Finish” button.
After system restart PE51EX HotPlug Tool icon will stay on
TaskBar.
NOTE
Under Windows 7 HotPlug Tool icon is hide. You should
change the setting to view hide icon at any time from the
“Customize…” menu.
Change the setting from “Only
show notification” to “Show icon
and notifications”.
8
NOTE
You can confirm installation complete successfully or not by Device Manager as follows.
Open start menu and enter
“devmgmt.msc” at the “Search
programs and files” edit box.
devmgmt.msc
You will see Device Manager.
Select “devices by connection”
from view menu.
Insert SxS Card.
If you can find “SxS Memory Card”
under the “PCI Express standard
Upstream Switch Port”, installation
complete successfully.
9
Uninstallation Steps
Following steps are example under Windows 7.
Open “Program” folder under control
panel from start menu.
Click “Programs and Features” icon.
Click “RATOC PE51EX HotPlug Tool”.
Uninstallation will be start. Click “Yes”
button.
Uninstallation complete.
Select “Yes, I want to restart my
computer now” and click “Finish” button.
10
2-3.MAC Software Installation Steps
Insert the provided CD into your disc drive. You will see following file and double click.
- Mac OS 10.4
: PE51_Device_Driver104x.dmg
- Mac OS 10.5 or 10.6
: PE51_Device_Driver.dmg
Installation Steps
Followings are installation steps under Mac OS 10.6.
Double click the “PE51_Driver_Installer” icon
and installation will be start.
Click “Continue” button.
Click “Install” button.
11
Enter your name and password.
Click “OK” button.
Confirm system restart message and
click “Continue Installation” button.
Installation complete message will be
displayed, click “Restart” button.
12
NOTE
You can confirm installation complete successfully or not by the system profiler as follows.
1. Run the system profiler under utility folder of application.
2. Open “PCI Cards” on the Hardware as show below.
3. If five kinds of driver is installed, installation complete successfully.
13
Uninstallation Steps
Followings are uninstallation steps under Mac OS 10.6.
Insert provided CD into your disc drive. You will see following file and double click.
- Mac OS 10.4
PE51_Device_Driver104x.dmg
- Mac OS 10.5 or 10.6
PE51_Device_Driver.dmg
Double click “PE51_Driver_Uninstaller” icon
and uninstallation will be start.
Enter your name and password.
Click “OK” button.
Uninstallation
complete
message
will
be
displayed and click “OK” button.
14
3
SxS Card (EpressCard) HotPlug Operation
3-1.Install SxS Card driver (3rd Party ExpressCard driver)
You need to install SxS Card driver (or 3rd party card driver) before insert SxS Card to
PE51EX
ExpressCard Slot. Please follow the steps of SxS Card install manual.
Example (Windows PC)
Insert SxS Card to the slot and start
balloon message will be displayed.
3-2. Windows PC
SxS Card Remove operation
Step.1
You must stop SxS Card from
HotPlug Tool icon menu first before
remove SxS Card from the slot.
SxS Card stopped balloon message
will be displayed. Now you can
remove SxS Card from the slot
safely.
Step.2
Push out the eject lever( ), push the eject lever( )
again and pull out the SxS Card( ).
CAUTION
If you remove SxS Card without above step.1 operation, Windows system will be freeze. Don’t remove
SxS Card suddenly.
15
3-3. Mac Pro ExpressCard Remove operation
Sony SxS Card
Step.1
Drop mounted drive icon to trash
box.
Step.2
Push out the eject lever( ), push the eject lever( ) again
and pull out the ExpressCard( ).
CAUTION
If you remove ExpressCard without above step.1 operation,
system will be freeze. Don’t remove ExpressCard suddenly.
Other ExpessCard
Step.1
Select “Power off Card” from the PC Card icon of menu bar.
Step.2
Push out the eject lever( ), push the eject lever( ) again
and pull out the ExpressCard( ).
CAUTION
If you remove ExpressCard without above step.1 operation,
system will be freeze. Don’t remove ExpressCard suddenly.
16
4
Troubleshooting
You can visit the RATOC Technical Support FAQ pages on the Internet at :
www.ratocsystems.com/english/support/faq/pe51u.html
Below is a listing of commonly asked questions and basic troubleshooting steps.
Q1 : SxS Card not recognized
Answer
Please confirm SxS Card is recognized on Device Manager as follows.
1. Open Device Manager and select
“devices by connection” from view
menu.
Please refer page.9.
2. Select “devices by connection”
from view menu of Device Manager.
NOTE
“?” mark is displayed at “REX-PE51
System Device”, but this is not a
problem.
3. If “SxS Memory Card” is not
recognized, please check
followings.
a) Make sure PCI Express extension
cable is connected to add-in card
and SxS Card slot as explained at
page.5?
b) Change PCI Express slot where
add-in card is inserted as a trial.
c) Make sure SxS Card driver is
installed?
17
Q2 : Yellow “!” mark is displayed at Device Manager.
Answer
Step.1
1. Open Device Manager and select
“devices by connection” from the
view menu.
Please refer page.9.
2. If yellow “!” mark is displayed on
the PCI Express Root Port, memory
resource
required
by
PE51EX
conflicts with another device.
NOTE
PCI Express Root Port
number
“2660” will be different depend on
your environment.
Step.2
To solve memory resource conflict
issue follow the steps below.
1.Select “devices by connection”
from the view menu.
2.You will find
“80000000-FFFFFFFF” is assigned
for the PCI bus.
And “80000000-D76FFFFF” is free
area
3.This means that you can assign
memory range
“80000000-D76FFFFF” to PE51EX.
18
Step.3
1.Right click HotPlug Tool icon on TaskBar and select
“Settings”.
2. Dialog to edit memory resource range will be shown
up.
From here you can assign memory range
“80000000-D76FFFFF” to PE51EX.
Enter “800” in the start address, “D76” to the end adress
and “002” to the memory size.
Click “OK” button.
3. Finally restart dialog will be shown up. Click “Yes”
button.
19
Step.4
1. Confirm device manager after
reboot your system.
If
memory
resource
issue
is
worked out, yellow “!” mark which
was on “PCI Express Root Port 2660” is not displayed any more.
2. Insert SxS Card and confirm
“SxS Memory Card” is displayed
on device manager.
20
5
Appendix
Technical Specification
Model Number
PE51EX
Product name
PCI Express to ExpressCard External Adapter
PCI Express BUS Interface
PCI Express Specification Revision 1.1
PCI Express x1 Lane, 2.5Gbps
ExpressCard BUS Interface
ExpressCard Standard Release 1.0
PCI Express(2.5Gbps), USB2.0(480Mbps)
ExpressCard slot
1 slot ExpressCard/34
Max power supply capability
Max.1300mA/3.3V
(to ExpreassCard)
Max.275mA/3.3Vaux
Max.650mA/1.5V
Dimension
ExpressCard Adapter
120(L) X 103.6(W) X 27.4(H)
PCI Express add-in card
65.3(L) X 69.8(W) X 1.6(T)
Weight
Total 760g
Operating Environment
0ºC to 40ºC Operating Temperature
-20ºC to 60ºC Storage Temperature
Operational Humidity
20 to 85% Relative Humidity, Non-condensing
Support OS
Windows 7 / Windows Vista / XP (x32/x64)
(Latest Service Pack should be installed)
Mac OSX 10.4.11 or later / 10.5.6 or later / 10.6 or later
Supported Computer
Windows PC PCI Express slot equipped.
Intel Mac Pro
Regulatory Compliance
RoHS
FCC Class B Verified
Warranty
1 Year
21
Compliance
- FCC
This equipment has been tested and found to comply with the limits for a Class B digital device,
pursuant to Part 15 of the FCC Rules. These limits are designed to provide reasonable protection
against harmful interference in a residential installation. This equipment generates, uses and can
radiate radio frequency energy and, if not installed and used in accordance with the instructions,
may cause harmful interference to radio communications. However, there is no guarantee that
interference will not occur in a particular installation. If this equipment does cause harmful
interference to radio or television reception, which can be determined by turning the equipment
off and on, the user is encouraged to try to correct the interference by one or more of the
followingmeasures:
(1) Reorient or relocate the receiving antenna.
(2) Increase the separation between the equipment and receiver.
(3) Connect the equipment into an outlet on a circuit different from that to which the receiver is
connected.
(4) Consult the dealer or an experienced radio/TV technician for help.
Changes or modifications not expressly approved by the party responsible for compliance may
result in this unit not complying with FCC Rules Part 15.
- CE
The product(s) described in this manual complies with all applicable European Union (CE) directives
(EN55022 Class B/EN55024). RATOC will not retest or recertify systems or components that have been
reconfigured by customers.
- CE
The product(s) described in this manual complies with all applicable European Union (CE) directives.
RATOC will not retest or recertify systems or components that have been reconfigured by customers.
22
RATOC Systems, Inc. All rights reserved.
23