1
 a) In Standby mode, press the MENU button to access the Video Time
Menu
b)P
ress the UP or DOWN button to select the duration of time blocks Off
/ 1min / 3min / 5min / 10min
c) To save Loop Recorded time blocks, see “File Protection”.
7.Motion Detection:
a) In Standby mode, press the MENU button to access the Motion
Detection Menu
b) Press the UP or DOWN button to select On
c) While powered on, when the camera detects motion it will begin video
recording
d) When motion is no longer detected, the camera will record for a further
10 seconds then stops recording
8. Photo:
a) When in stand-by mode, press the MODE button to change to Photo
mode.
b) Press the OK button to take pictures – a chime will indicate photos
have been captured.
Note: In Video mode, press the ON / OFF button to turn on the IR light.
9. Playback:
a) In stand-by mode, press the MODE button to enter Playback mode
b) Press the UP or DOWN button to select the file to preview
c) Press the OK button to play or stop
10. Delete:
a) In Playback mode, press the MENU button to access the Delete menu
b) Press the UP or DOWN button to select “delete current” or “delete all”
and press the OK button to confirm your selection and return to the
Delete menu.
c) Press the MENU button to exit the Delete menu and return to playback
mode.
11. File protection:
a) In Playback mode, to protect a file from being overwritten by Loop
Recording, press the MENU button to access the Lock menu, select
the file and lock it.
b) In order to delete protected files, select the file and unlock it, then the
files can be deleted.
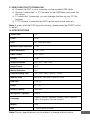
E. OPTIONS & SYSTEM SETTINGS
a) In standby mode, press the MENU button to enter the set-up menu.
b) Press the UP or DOWN button to select the setting.
c) Press the OK button to confirm your selection.
d) After confirmation, press the MENU button to exit.
5