1
Installation
Important: This thermostat must be installed according to all
relevant national and local electrical codes. The installation must
be performed by qualified personnel.
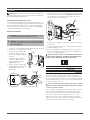
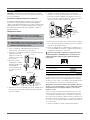
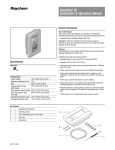
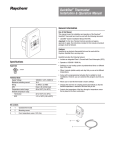
5. Insert the floor sensor cable through one of the two openings
on the power base and connect to terminals 1 and 2 (no polarity). Position the sensor cable such that it does not come in
contact with the floor heating wires.
Locating the floor temperature sensor
The floor temperature sensor is installed under the floor surface.
See Section 6 of the appropriate system installation manual for more
details. Perform the Sensor Resistance Test prior to terminating
the floor sensor to the thermostat. See Section 7 of the appropriate
system installation manual for more details.
Supply
ground
Floor
heating
cold lead
ground
Wiring the thermostat
WARNING: Shock Hazard. Turn off the power to the circuit
at the main power panel to avoid electric shock.
WARNING: Shock Hazard. To prevent shock, the QuickNet
floor heating mat and CeraPro floor heating cable must be
connected to ground.
1. Remove the control module from the power base by loosening
the captive screw underneath the base.
2. Connect the floor heating cold
Air
vents
leads to the load wires (two
inner wires) using the supplied
Control
module
wire nuts.
3. Connect the power supply
leads to the power base wires
(two outer wires) using the
supplied wire nuts.
Air
4. Connect the floor heating cold
vents
lead braid (ground) to the supPower
ply ground in the electrical
base
junction box.
Floor temperature sensor
6. Push the excess length of the wires back inside the electrical
junction box
7. Secure the power base to the electrical junction box using the
provided mounting screws
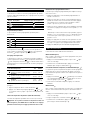
8. Verify the settings of the configuration switches on the back
of the control module. Default settings for the configuration
switches are highlighted below.
Important: If your system is installed underneath laminate
or engineered wood flooring, you MUST use AF mode with the
default settings. Note the factory default is AF mode.
No.
1
2
3
Power
supply
Configuration
Display format
Early Start1
Temperature control mode 2
Up
°F/12 hr
Enable
F
Down
°C/24 hr
Disable
AF
1
Supply
ground
Floor
heating
cold lead
ground
Load / Floor heating mat
Early Start can be used in Automatic mode only. When this
function is enabled, the thermostat calculates the optimal time
to start heating in order to obtain the desired temperature by the
set time. The thermostat re-assesses the start time daily based
on the previous day’s results.
Note: If you wish to use only 2 periods, set periods “1 and 4”
or periods “2 and 3”. Early Start will not work if you set periods
“1 and 2” or periods “3 and 4”.
2
To select floor sensing mode, place the switch to the F position.
To select floor sensing and ambient sensing mode, place the
switch to the AF position and ensure that the remote temperature sensor is connected to the thermostat. To select the A
mode, place the switch in the AF position and ensure that the
remote temperature sensor is NOT connected to the thermostat.
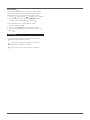
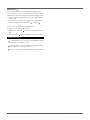
9.Install the control module onto the power base.
THERMAL BUILDING SOLUTIONS
EN-RaychemQuickStatTCthermostat-IM-H58517 10/14
2/6