1
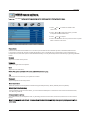
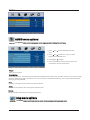
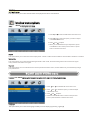
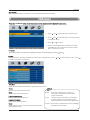
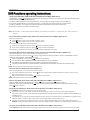
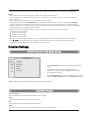
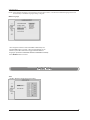
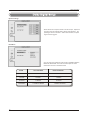
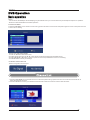
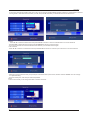
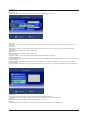
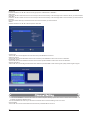
User's Manual
TFD-2617DVBT
Operation
VIDEO menu options
Press the LCD MENU button on the front panel or on the remote control to display the main menu.
1. Press
and
main menu.
to select PICTURE in the
2. Press
and
to select the option you want
to adjust in the PICTURE menu.
3. Press
and
to adjust.
4. Press LCD MENU to return to previous menu or press
EXIT to exit the main menu.
Picture Mode
Select Picture Mode in PICTURE menu. The above picture effects are available: Dynamic, Standard, Mild and User.
If you want to change the value of Contrast, Brightness, Color, Tint (NTSC only), Sharpness or Color temperature on
the picture menu, the User option is selected automatically. You may select the picture mode directly by pressing PMODE
button .
Contrast
Adjust the contrast of the picture.
Brightness
Adjust the brightness of the picture.
Color
Adjust the color saturation.
NOTE: This option is invalid in PC mode, and it will be shown in gray.
Tint
Adjust the tone of color when your system is in NTSC.
Sharpness
Adjust sharpness level of the picture.
Color temperature
Select an optimum color temperature mode among Normal (balance), Warm (reddish) and Cool (bluish).
DNR (Digital Noise Reduction)
If the broadcast signal received is weak, you can select the DNR option to reduce the video noise level between Auto,
Low, Mid, High and off.
Advanced picture settings
This option allows you to adjust the fresh, by selecting the level of Fresh tone, Green tone, Blue tone or Film mode as
below.
Note: If cinema mode is set to Auto, cinema mode will be detected automatically when you are playing a movie with cinema mode.
2
Operation
0
AUDIO menu options
Press the LCD MENU button on the front panel or on the remote control to display the main menu.
1. Press
menu.
and
to select SOUND inthe main
2. Press
and to select the option you want
to adjust in the SOUND menu.
3. Press
and
to adjust.
4. Press LCD MENU to return to the previous menu
or press EXIT to exit the main menu.
Volume
Adjust the sound level.
Sound System
Select SOUND menu. The following sound effects are available: Music, News, User, Standard, Cinema. If you want to change
the value of Bass and Treble on the Sound menu, the User option is selected automatically. You may select the sound mode
directly by pressing SMODE.
Bass
Increase or decrease the level of the lower-pitched sounds.
Treble
Increase or decrease the level of the higher-pitched sounds.
Balance
Adjust the audio output between left and right speakers.
Setup menu options
Press the LCD MENU button on the front panel or on the remote control to display the main menu.
3
Operation
1. Press
and
to select SETUP in the main menu.
2. Press
and
to select SETUP menu.
3. Press
and
to adjust.
4. Press LCD MENU to return to the previous menu
or press EXIT to exit the main menu.
Language
This option allows you to select the language of OSD (on screen display) by pressing
and
.
Country
Press / button and then use / to select one of country as following: AUSRIA/BELGIUMC/CROATIA/CZECH/DENMARK/
FINLAND/FRANCE/GERMANY/GREECE/HUNGARY/IRELAND/ITALY/LUXEMBOCERG/NETHERLAND and others.
NOTE:
- Your country is not included in the above list, please refer to page 30 (worldwide TV system)
The selection of the country will effect the Auto Scan and Teletext functions. So please select the correct country
where the user in .
Auto tuning
This option allows you to tune the channels that can be received automatically.
Note: Before you perform Auto Tuning, you must choose the country where you are by selecting COUNTRY option in the
FUNCTION menu.
1. Press
and
to select Auto Tuning in SET UP menu.
2. Press
and
to perform your selection.
3. Press ENTER to start Auto Tuning as below:
4. During searching, you can press EXIT to stop tuning
at any moment, and return to the previous menu.
4
Operation
Manual Tuning
This option allows you to perform Manual Tuning.
Note: Before you perform Manual Tuning, you must choose the country where you are by selecting Country option in the
FUNCTION menu.
1. Press
and
to select Manual tuning in SETUP menu.
2. Press
and
to perform your selection, the menu of Manual tuning will display on the screen.
Auto
Program
The current program number. Press
upper or lower program.
and
to select the
Sound System
Press and to select a corresponding sound system, such
as BG/I/DK/L.
Color System
Press and to select a corresponding color system, such as
PAL/SECAM.
Skip
Skip option allows you to skip the current channel. When set
ON, the program number will be skipped when you select the
skipped channel with CH+/CH- . You can also select the skipped
channel by pressing the numeric buttons directly.
AFT (Auto Fine Tune)
Due to weak signals or a wrong antenna configuration, some of
the channels may not be turned to the best reception condition.
AFT function allows you to fine tune channel selected.
Manual Search
Manual search option allows you to preset channels one by one.
Please press ENTER key to save the current channel if you want.
Program Label
This option allows you to name a channel, you can also rename the program which you have named.
1. Select a channel to be named.
2. Press and to select Program Label in SETUP menu.
3. Press and to perform your selection. The menu of program label will display as below:
4. Press the numeric buttons to input the numbers directly or press and
5. Press and to move the cursor.
6. Press LCD MENU to return to previous menu or press EXIT to exit.
5
to select the letters.
Operation
Program Edit
This function allows you to sort the TV programs according to your preferences, as following:
000
001
002
003
004
005
1. Press and to select Program Edit in SETUP menu.
2. Press and to enter into the sub menu, a channel list will display.
3. Press and to select the channel in the list which you would like to sort.
4. Press to perform your selection.
5. Press and to select the location you would like to place the channel.
6. Press to perform you selection.
7 . After completed, press LCD MENU to return to the previous menu or press EXIT to exit.
Timer menu options
Press LCD MENU button to display the main menu.
1. Press
to
select TIMER in the main menu.
2. Press
to select your option what you want to
adjust in the TIMER menu.
3. Press
and
to adjust.
4. Press the LCD MENU to return to the previous menu
or press the EXIT to exit the main menu.
Sleep Timer
Select the sleep time to put automatically the TV in standby mode. Timer can be set up from 15 minutes to 120 minutes.
You may select the sleep time by pressing SLEEP repeatedly.
Off Timer
This LCD TV can be set to turn OFF after a certain time.
On Timer
This LCD TV can be set to turn ON after a certain time.
6
Operation
On Timer Program
This option allows you to set a channel number to be played when the TV turn ON itself.
Function menu options
Press LCD MENU to display the main menu.
1. Press
and
to select FUNCTION in the main menu.
2. Press and to select the option you want to adjust
in the FUNCTION menu.
3. Press
and
to adjust.
4. When you are satisfied with your adjustment, press
LCD MENU to return to the previous menu or press
EXIT to exit the main menu.
Aspect
This option allows you to select the screen display mode. 3 kinds of video size are available: 16:9 /16:9Sub /16:9Zoom /14:9/Auto.
Blue screen
This option allows you to select the blue background ON or OFF. If ON, the screen background will turn blue when signal
is very weak or when there is no signal.
Key Lock
This option allows you to lock the buttons on the front panel and remote control, so that children may not accidentally change
your preferences.
SCART and S-VIDEO menu
Press the LCD MENU button on the front panel or on the remote control to display the main menu.
1. Press
and
to select SETUP in the main menu.
2. Press
and
to select the option you want to adjust
in the SETUP menu.
3. Press
and
to adjust.
4. Press the LCD MENU button to return to the previous
menu or press the EXIT to exit the main menu.
Language
This option allows you to select the language of OSD (on screen display) by pressing
7
and
.
Operation
Color system
Select a corresponding color system, such as PAL/SECAM/PAL60/AUTO/NTSC.
VGA menu
Press the LCD MENU button on the front panel or on the remote control to display the main menu.
1. Press
and
to select SETUP in the main menu.
2. Press
and
to select the option you want to adjust
in the SETUP menu.
3. Press
and
to adjust.
4. When you are satisfied with your adjustment, press
LCD MENU to return to the previous menu or press
EXIT to exit the main menu.
Language
This option allows you to select the language of OSD (on screen display) by pressing
Position
This option allows you to adjust the position in PC mode. In SETUP menu. Press
to enter into the sub menu as below:
and
and
.
to select Position, then press
Auto Sync
Clock
Reset
Auto Sync
Adjust screen settings automatically to optimize picture position.
Phase
Remove any horizontal interference.
Clock
Remove any vertical interference.
H (Horizontal) Position
Adjust screen horizontal position.
V (Vertical) Position
Adjust screen vertical position.
Reset
Replace Phase, Clock, V Position and H Position with the
factory default values.
-Phase
This function allows you to remove any
horizontal noise and clear or sharpen the
image of characters
-Clock
This function is to minimize any vertical bars
or stripes visible on the screen background.
And the horizontal screen size also will change.
-Position This function is to adjust the picture to Left/Right
and Up/Down as you prefer..
8
.
Operation
DVD/DVB-T/YPbPr/HDMI menu
Press LCD MENU to display the main menu.
1. Press
and
to select SETUP in the main menu.
2. Press
and
to select the option you want to adjust
3. Press
and
to adjust.
4. When you are satisfied with your adjustment, press
LCD MENU to return to the previous menu or press
EXIT to exit.
Language
This option allows you to select the language of OSD (on screen display) by pressing
and
.
Position
This option allows you to adjust the position in DVD/DVB-T/YPbPr/HDMI mode. In SETUP menu. Press
press
to enter into the sub menu as below.
and , to select position, then
H (Horizontal) position
Adjust the screen horizontal position.
V (Vertical) position
Adjust screen vertical position.
Reset
Replace H position, V Position, H size and V size with the factory
default values.
9
DVD Operation
DVD Operation
Basic operation
1. Turn ON and OFF the DVD function
- Turn on the LCD TV and then press INPUT repeatedly to select DVD mode.
2. Insert Disc to DVD
- Insert the Disc to the Disc slot (printed side of the disc has to face towards front of the unit), the player will load the disc
automatically. There will have an on screen indication “CLOSE” then “READ”. After loading the disc content, it will switch
to play mode automatically. If the disc is already placed inside, the disc will be read automatically.
NOTE: - For some discs, after loading the content of the disc, need to press or select from the disc menu to start.
- Please make sure when inserting the Disc, the printed side of the disc should be facing you When inserting
the Disc incorrectly, you may damage the DVD mechanism.
3. Play the DVD
- According to the disc content, the disc menu will display for your selection. When playing the disc, you may use
button
to toggle between Play and Pause mode. This product also supports Menu, Title, Sequential and Program playback.
4. Menu playback (for DVD/ super VCD and VCD 2.0 discs)
- Press MENU button
For DVD discs, the screen will display the DVD Disc Menu (Root Menu)
For Super VCD & VCD2.0 discs, the screen will display the Super VCD, VCD2.0 Disc Menu (PBC: [OFF]) (Press the
D.MENU button to display the PBC status).
Playback the Super VCD & VCD2.0 discs, the default PBC status is ON.
- For DVD discs, use the navigation buttons to select and Play the highlighted contents; For Super VCD &
VCD2.0 discs, use the numeric buttons to play your favorite content directly.
NOTE: PBC should be OFF.
- Press ENTER or
button to start from the highlighted content.
- Return to the Root Menu when playing the disc
For DVD discs, press D.MENU to display the Disc Menu.
For Super VCD & VCD2.0 discs, when PBC is ON, press D.MENU to display the Disc Menu.
- STOP
Press
button once to stop. Press
button to resume from where you stopped.
Press button Twice to stop. Press
button to start from beginning.
In order to protect the disc, press button then press EJECT button to take the disc out. When the disc is ejected, hold
the disc edge slightly and take it from the eject direction to prevent scratches.
When not using the DVD function (in stand-by mode or using others modes for a long time), please take out the disc to
protect the DVD loader and the disc.
5. Title playback (for DVD disc only)
- Press TITLE button, there will have an on screen indication “TITLE”.
- Press the direction or numeric buttons to select your favorite title.
- Then will play from the first chapter of the selected title.
6. PBC (for Super VCD/ VCD discs)
- For Super VCD & VCD discs, if PBC is “ON” status, press button will enter the disc menu. Press D.MENU button to turn
PBC OFF. Press button to start in sequent. For others, while it stopped, press
button to start in sequent.
7. Program playback (for DVD/ Super VCD/ VCD/ CD/ CD-G/HD-CD and Mp3/ JPEG discs)
- Using Program playback, you can select max. 16 tracks from the disc to playback in programmed order.
- OSD for program playback as below.
10
DVD Operation
DVD and MP3/JPEG discs
PROG
T C
1 :
Super VCD/ VCD/ CD /CD-G/ HD-CD discs
PROG
T
C
T
C
5
:
9
:
T
C
13 :
1
5
9
12
2
:
6
:
10
:
14
:
2
6
10
14
3
:
7
:
11
:
15
:
3
7
11
15
4
:
8
:
12
:
16
:
4
8
13
16
PLAY
CLEAR
PLAY
CLEAR
- If it is in PBC ON status, using program playback will turn to PBC OFF automatically.
- According to the highlight area input the title and chapter number by numeric buttons, press
to the <PLAY> by navigation buttons, press ENTER button to start.
button to start; or move
- While playing the program, you may press PROGRAM button to display the program menu for edit. To clear the program
by moving to <CLEAR> and press ENTER button. Or press
button to end the program. When press
button again,
the disc will play by sequent.
- While playing the program, there will have an on screen indication “PRG PLAY” and the current title and chapter number.
Supporting DVD format
This products can play the following format of DVD disc.
Disc Type
Disc Size (Diameter)
Recorded Time
Recorded Content
Single side:120mins. Approx
DVD
12cm
Double side:240mins. Approx
Remarks
DVD format:
Compressed digital
audio and video
45mins. Approx
MPEG2
Compressed digital
audio and video
Include SVCD
Include:
VCD2.0/ VCD1.1
VCD1.0/ DVCD
Super VCD
12cm
VCD
12cm
74mins. Approx
MPEG1
Compressed digital
audio and video
CD
12cm
74mins. Approx
CD-DA: Digital audio
HD-CD
12cm
74mins. Approx
HD-DA: Digital audio
MP3/JPEG
12cm
600mins. Approx
Digital audio
NOTE: Also support DVD-R, CD-R, CD-RW playback.
WARNING! DO NOT INSERT OR PLAY 8CM DISC, THEY WILL GET STUCK.
Region Code 2
As it is usual for DVD movies to be released at different times in different regions of the world, all players have region codes
and discs can have an optional region code. If you load a disc of a different region code into your player you will see the
region code notice on the screen. The disc will not playback and should be unloaded. The region code for this player is 2
(refer to the symbols below).
ALL
11
2
1
2
1
3
2
4
DVD Operation
DVD Functions operating instructions
1. Play (for DVD/ Super VCD/ VCD/ CD/ CD-G/HD-CD and Mp3/ JPEG discs)
- For DVD disc, press
button from root or title menu; while playing the DVD, you may play your favorite title directly with
title selection by pressing the TITLE button.
- For Super VCD & VCD discs, while playing the disc, you may play your favorite tracks by numeric buttons.
- For CD, CD-G & HD-CD discs, while playing the disc, you may play your favorite tracks by numeric buttons.
- For MP3 / JPEG disc, you may play your favorite tracks by numeric buttons from the content menu.
- If input track number is not valid, it will not function.
NOTE: From track 1-10, use numeric buttons directly; For tracks over 10, press - / -- button first. (E.g. Track 15, press - / -then 5)
2. Previous/Next (for DVD/ Super VCD/ VCD/ CD/ CD-G/HD-CD and Mp3/ JPEG discs)
- While playing the disc;
Press
button to play to the last Title / Chapter / track.
Press
button to play to the next Title / Chapter / track
- For super VCD & VCD discs, in PBC OFF status;
If the current track is the first one, press
If the current track is the last one, press
button will stop the playback.
button will stop the playback.
- For DVD discs, the above functions may vary due to different DVD disc's structure.
3. Forward/ Backward (for DVD/ Super VCD/ VCD/ CD/ CD-G/HD-CD and Mp3/ JPEG discs)
- While playing the disc, you may use forward or backward function.
- There are 4 speeds for forward. Press
button to toggle between different speeds in sequent. (FORWARDx2 / FORWARDx4 / FORWARDx8 / FORWARDx20 / Play).
While in backward, you may press
to resume normal speed.
For CD, HD-CD, MP3, backward also has audio output(just only for forwardx2).
For DVD discs, if backward to first title / chapter, it will start from the beginning.
For Super VCD & VCD discs, in PBC ON status, if backward to the first track, it will start from the beginning.
NOTE: During Forward or Backward, the sound will be off.
4. Slow motion(for DVD/ Super VCD/ VCDdiscs)
- While playing the disc, you may use slow motion function.
There are 6 speeds for slow motion. Press
button to toggle between different speeds in sequent. (SF1/2, SF1/3,
SF1/4, SF1/5, SF1/6, SF1/7, Play).
While in slow motion, you may press
to resume normal speed.
NOTE: During Slow motion, the sound will be off.
5. Pause (for DVD/ Super VCD/ VCD/ CD/ CD-G/HD-CD and Mp3/ JPEG discs)
- FOR CD, CD-G, HD-CD & MP3/JPEG discs, press
button to pause; press
button to resume.
- FOR DVD, Super VCD, VCD discs, press
button to pause; press SLOW/STEP button to playback frame by frame;
press button to resume.
6. Repeat (for DVD/ Super VCD/ VCD/ CD/ CD-G/HD-CD and Mp3/ JPEG discs)
- Press REPEAT button once to display the current repeat mode.
For Super VCD, VCD, CD, CD-G, HD-CD, discs, while playing in sequent, you may use the repeat playback.
There are 2 repeat modes, press REPEAT to toggle between different modes in sequent. (REPEAT (OFF)/ REPEAT (1)
/REPEAT (ALL)).
For DVD discs, you may setup the repeat playback mode. There are 2 repeat modes, press REPEAT to toggle between
different modes in sequent. (REP: (OFF) / REP: (CHAPTER) / REP: (TITLE) / REP: (ALL)).
For MP3 / JPEG discs, while playing the disc, you may use the repeat playback. There are 3 repeat modes, press
REPEAT to toggle between different modes in sequent. (REPEAT (OFF) / REPEAT (1) / REPEAT (DIR) / REPEAT (ALL)).
7. Display (for DVD/ Super VCD/ VCD/ CD/ CD-G/HD-CD and Mp3/ JPEG discs)
- Press DISPLAY button to activate the on screen roll-down menu for the current Title, Chapter, time and other information
12
DVD Operation
For DVD discs, (2 pages) Press D.DISP button once to display first page as shown below:
Disc Type
DVD
Chapter
TT 0 / 3
Tiltle
-/-(Current/Full)
CH
Elapsed disc time
1 / 2
00:05:45
-/- (Current/ Full)
Press D.DISP button again to display second pages shown below:
Audio
Language
Audio Type
Angle ON/OFF
1 / 2 ENG
-/- (Current/ Full) or OFF
1CH
1/1
ENG
OFF
Subtitle -/-(Current/Full)or OFF
Press DISPLAY button again to turn off the on screen display.
For Super VCD discs, (2 pages),Press DISPLAY button once to display first page: Disc type, Track -/- (Current / Full),
Mute status, PBC status, Repeat mode status, Current track time. Press DISPLAY button again to display second page:
Audio-/--(Current/Full) or OFF, Audio type, Language, Subtitle-/-(Current/Full) or OFF. Press DISPLAY button again to
turn off the on screen display.
For CD, CD-G, HD-CD, MP3 / JPEG discs, Press DISPLAY button once to display first page: Disc type, Track -/- (Current
/ Full), Mute status, Repeat mode status, Current track time.
- Press D.DISP button again to turn off the on screen display.
8. Goto (for DVD/ Super VCD/ VCD/ CD/ CD-G/HD-CD and Mp3/ JPEG discs)
- This function allows you to play your favorite Title / Chapter / track. Press GOTO button to activate the on screen scrolldown menu for edit. According to the highlighted area, input your favorite Title / chapter / Track number by numeric buttons
or input the playback time. After editing, press ENTER to start. If the input is invalid, it will not function.
NOTE: While editing, the GOTO button is not function.
- If it is in PBC ON status, this function will switch it to OFF.
9. INTRO (for Super VCD/ VCD/ CD/ CD-G/HD-CD discs)
- For Super VCD & VCD discs, while the disc had stopped, press INTRO button.
The screen will split to 9 small displays to play each track by 3 sec. according to the tracks order.
If it is in PCB ON status, this function will switch it to OFF.
Press
/
button to navigate the 9 small screens.
Press
button to playback the current selection.
Press 1 - 9 button to activate corresponding small screen directly.
- For CD, CD-G, HD-CD discs, while the disc had stopped, press INTRO button. It will start to play each track
by 15 sec. according to the tracks order.
Press numeric buttons directly to select the tracks for preview
Press
button to playback the current track
While playing the discs, you may also press INTRO button to activate this function.
NOTE: - If started the disc menu, preview will not function.
- if the current track started over 15 sec. this function will start from next track.
10. AUDIO (for VCD/ CD/ CD-G/HD-CD and Mp3/ JPEG discs)
- Press AUDIO button once to display current audio mode.
- Press again to toggle between different audio modes in sequent.
For Super VCD & VCD discs: (Stereo - L - R - Auto L - Auto R)
For CD, CD-G, HD-CD, MP3 discs: (Stereo - L - R)
Note: Switching to Auto L / R audio channel may be varied due to different discs contents. Bilingual VCD discs can use
AUDIO button to switch between different languages.
11. Language (for DVD and Super VCD discs)
- Press AUDIO button once to display current language.
- Press again to toggle between different languages mode in sequent.
13
DVD Operation
NOTE: For Multi-languages DVD & Super VCD discs, press AUDIO button to select your favorite language.
12. Subtitle (for DVD and Super VCD discs)
- Press SUBTITLE button once to display current sub-title.
- Press again to toggle between different subtitle modes in sequent.
NOTE: For Multi-languages subtitle DVD & Super VCD discs, press SUBTITLE button to select your favorite subtitle
language.
13. Angle (for DVD disc)
- Press ANGLE button once to display current playback angle.
- Press again to toggle between different playback angle codes in sequent. (E.g. Angle -/- (Current/Full) or OFF)
NOTE: Only for DVD with multi-angle, press ANGLE button to select your favorite playback angle. Selectable playback
angle depends on the availability of the DVD contents.
14. Mute (for DVD/ Super VCD/ VCD/ CD/ CD-G/HD-CD and Mp3/ JPEG discs)
- Press MUTE button to mute the audio output. There will have an on screen symbol indicate “MUTE”.
- Press again to cancel, or Press VOL+/VOL - to cancel and adjust the volume.
- In case there is no audio output, try to press MUTE button to cancel mute.
15. ZOOM (for DVD/ Super VCD/ VCD and Mp3 / JPEG discs)
- Press ZOOM button to zoom in the picture.
- There are 6 zoom modes, press ZOOM button to toggle between different zoom modes in sequent. (Zoom2 - Zoom3 Zoom4 - Zoom1/2 - Zoom1/3 - Zoom1/4 - Zoom OFF)
- In Zoom2-4, you may use the navigation buttons to pan the picture for your favorite portion.
16. Repeat A- B (for DVD/ Super VCD/ VCD/ CD/ CD-G/HD-CD and Mp3/ JPEG discs)
- In normal Playback, fast forward or fast reverse, press A-B button at where you want to start the repeat portion. There wil
l have an on screen indication “REPEAT A “.
- In normal Playback, fast forward or fast reverse, press A-B button again at where you want to stop the repeat portion.
There will have an on screen indication “REPEAT A B“.
- The repeat function started to playback the portion from A to B automatically.
- Press A-B button again to cancel. There will have an on screen indication “A B CANCEL”.
For Super VCD, VCD & CD discs, repeat A-B is only function within the same track. When playing the others, repeat
A-B will cancel automatically.
For Super DVD discs, repeat A-B is only function within the same Title /Chapter. When playing the others, repeat
A-B will cancel automatically.
17. Volume (for DVD/ Super VCD/ VCD/ CD/ CD-G/HD-CD and Mp3/ JPEG discs)
- Press VOL+ / VOL - buttons to adjust the output volume.
NOTE: Playback DVD discs in original code, is not adjustable
MP3/JPEG Playback
After loading the MP3 / JPEG disc, it wil start to scan for the stored MP3 /JPEG folders. Then will firstly display the MP3
contents automatically and start to play the first file (highlighted file). Screen as follow:
Display current
MP3 playback
function
Highlight file for
current playback.
Display current
MP3 playback
function
Scroll bar to view
next page.
Buttons for switching
between MP3 and JPEG
playback function.
14
DVD Operation
- Using the navigation buttons to check you favorite folder and playback the first file or move to the your favorite file.
NOTE:
- Press ◄ ► buttons to move the highlight to folders, documents or mode selection.
- Press numeric buttons to select the contents directly. For number over 10, press -/-- button first. (e.g. File number 15,
press -/-- then 5.)
- When playback MP3 files, there is no picture display, only audio output.
- Playing the JPEG discs, press PROGRAM button to select slide effects. There are 17 slide modes, press PROGRAM
button to toggle between different modes in sequent. (Start from top Start from bottom Start from left Start from right
Start from upper left corner Start from upper right corner Merge from left / right Horizontal blades Vertical blades Merge
form 4 corners Random Playback Slide effect OFF).
- When play or pause with picture playback, you may use navigation butoons to flip / rotate the picture.
▲ button to flip horizontally.
▼ button to flip vertically.
◄ button to rotate left 90˚.
► button to rotate right 90˚.
- When play or pause with picture playback, you may use D.MENU button to enter preview mode to dislay 12 pictures.
Press
/
button to select next / previous page or press numeric buttons to view the corresponding pictures.
- The maximum JPEG image size that can be displayed is 1280 x 1024.
Function Settings
DVD Function General setup
- Press DVD SETUP button to activate the DVD player OSD
menu;
- Press ◄ / ► button to move and highlight between
different sub-menu. Press ▲ / ▼ ENTER button to enter
the highlighted sub-menu.
- Press DVD SETUP button to exit the OSD menu, or move the
highlight to EXIT DVD SETUP then press ENTER button to exit.
NOTE: In Setup mode, the disc playback functions will be cancel or pause.
System Setup
TV color system
This menu enables you to set the picture format for your TV/DVD.
NTSC
This format is used by some other countries, e.g. USA
PAL
This is the format used in the UK and the default setting.
AUTO
This format can be used if your TV/DVD is capable of both PAL and NTSC formats.
15
DVD Operation
NOTE: PAL format is generally used for TVs in the UK.
Check your TV user guide for supported formats.
If NTSC is selected with a non-compatible television
you may experience interference or picture scrolling.
TV Type
DVDs are produced in a variety of screen aspect ratios. This menu enables you to select one of the three aspect ratios:
4:3 PS (Normal)
4:3 LB (Normal)
16:9 (Wide)
- Select the most appropriate aspect ratio for the DVD being
viewed.
4:3PS (Normal)
Normal Pan and Scan is used for most normal television broadcasts and
it is the default setting. It has an aspect ration of 4:3. If you select this setting
when viewing a DVD the picture will fill the screen but, you will not see the
left and right edges of the picture.
4:3LB (Normal)
Normal Letter Box will show the DVD in its original aspect ratio so depending
on the size of your television screen, you may see black borders above and
below the picture.
16:9 (Wide)
Choose this setting if you have a widescreen television.
NOTE:
- Playback screen size may vary according to the discs contents.
- For discs with 4:3 contents, using any mode would only display a 4:3 screen
- Screen ratio selection should be according to the connected TV / Display
aspect ratio.
PassWord
- The default setting is locked. No Rating selection or change password could be done. To edit the Rating setting, please
enter default password “0000” by numeric buttons, then press ENTER button to confirm.
- To change password, input any 4 digit number when the lock is unlocked. Once the 4 digit number is entered, that will be
your new password.
Rating
- Playback for some discs with rating, you can select the rating setting according to your preference. Rating restriction
divided in eight different category from KID SAFE to ADULT.
16
DVD Operation
NOTE: Only editable when password is unlocked. And only
can function when password is locked. It does not,
however, reset either the Password or the Rating
setting.
Default Setting
- Press ENTER button to restore factory default.
Language Setup
Press SETUP button to enter the DVD OSD menu.
GERMAN
SPANISH
SWEDISH
DANISH
- OSD Language
Use navigation buttons to select the OSD LANGAUGE setup
icon, press ENTER button to confirm. There are 2 languages
for your selection, press ▲ & ▼ buttons to toggle between
different languages ENGLISH / GERMAN / SPANISH/
SWEDISH/ SWEDISH/ DANISH. Press ENTER button to
confirm.
NOTE: If the selected language is not included in you DVD disc
content, it will select the default language of the disc
automatically. The default language setting is English.
- Audio Language
Use navigation buttons to select the AUDIO LANG setup icon, press ENTER button to confirm. There are 8 languages for
you selection, press ▲ & ▼ buttons to toggle between different languages. (ENGLISH / GERMAN / SPANISH/ SWEDISH
/ DANISH). Press ENTER button to confirm.
NOTE: If the selected language is not included in you DVD disc content, it will select the default language of the disc
automatically. The default language setting is English.
- Subtitle Language
Use navigation buttons to select the SUBTITLE LANG setup icon, press ENTER button to confirm. There are 7 languages
for you selection, press ▲ & ▼ buttons to toggle between different languages. (ENGLISH / GERMAN / SPANISH/ SWEDISH/
/ DANISH/OFF) Press ENTER button to confirm.
17
DVD Operation
NOTE: If the selected language is not included in you DVD disc content, it will select the default language of the disc
automatically. The default language setting is English.
MENU Language
GERMAN
SPANISH
SWEDISH
DANISH
- Use navigation buttons to select the MENU LANG setup icon,
press ENTER button to confirm. There are 8 languages for you
selection, press ▲ & ▼ buttons to toggle between different
languages. (ENGLISH / GERMAN/ SPANISH/ SWEDISH/ DANISH)
Press ENTER button to confirm.
Audio Setup
Tone
- Use ▲ & ▼ buttons to adjust the Tone setting.
18
DVD Operation
Dolby Digital Setup
Dynamic Range
- When switch the compress mode to “Audio output”, adjust the
compress ratio for different effect. When selected FULL, the
peak signal value is smallest. When selected OFF, the peak
signal value is biggest.
Dual Mono
- You can select four different audio output, STEREO, MONO L,
MONO R, MIX MONO. The audio out description of these
Selections is shown in the table below.
MODE
19
LEFT SPEAKER
RIGHT SPEAKER
STEREO
STEREO-L
STEREO-R
L-MONO
L-MONO
L-MONO
R-MONO
R-MONO
R-MONO
MIX-MONO
L-MONO+R-MONO
L-MONO+R-MONO
Operation
DVB Operation
Basic operation
NOTE:
-In this manual, the OSD (On Screen Display) may be different from your TV's because it is just example to help the TV operation.
-Be sure to select the DVB source before operation.
ENTER MAIN MENU
Press the DVB MENU on the remote control to bring up the main menu on the screen and press it again to return to the previous menu
or return to TV viewing.
ADJUST THE OSD ON SCREEN
1.Press ▲ / ▼ button select each menu.
2.Press ► button and then use ▲ / ▼ / ◄ / ► button to select and adjust the available menus.
3.Press DVB MENU or ◄ button to return to previous menu and press EXIT to return to TV viewing.
4.Press ENTER to confirm your settings
NO SIGNAL OR NO SERVICE
There is no signal or service input
Channel List
1. Press the DVB MENU on the remote control or on the front panel to bring up the main menu on the screen and use ▲ / ▼ to
select the Channel List menu.
2. Press the ENTER to confirm your selection and there will a Channel List menu on the screen as below:
20
Operation
3. There is a channel list of DVB in this menu, also you can refer to the Band Width/ Quality/ Frequency and Strength of channel.
4. Using the ▲ / ▼ to select channel which you like, and press ► that allow you to delete/ move/ Lock & Unlock it.
Delete
- Press ▲ / ▼ to select the delete item and press ENTER to confirm it. There is a delete menu on screen as below:
-Press ENTER to delete the channel and press DVB MENU to return to previous menu.
-If you want to restore the channel that have been deleted, you should to search again.
Lock & Unlock
-Press ▲ / ▼ to select Lock & Unlock item and press ENTER to confirm it. There is a pin code menu on screen as below:
-Press the number buttons directly to input the pin code that made up six number, and the initial is: 888888. You can change
it in System Setting .
-If Lock is already set, enter the pin code as requested.
Move
This function allows you to change the order of channel in the list.
21
Operation
Favorite List
1. Press the DVB MENU on the remote control to bring up the main menu on the screen and use ▲ / ▼ to select the Favorite
List menu.
2. Press the ENTER to confirm your selection and there have a Favorite List menu on screen as below:
3. Press ► that you can continue add or delete the favorite channel.
4.Use the ▲ / ▼ to select add item and then press ENTER to confirm it, there have a Channel list menu display on the right,
you can use ▲ / ▼ and ENTER to select one of them to your favorite list.
5.Press DVB MENU to return to previous menu, then press ENTER to TV viewing.
System Settings
1. Press the DVB MENU on the remote control or on the front panel to bring up the main menu on the screen and use ▲ / ▼
to select the System Settings menu.
2. Press the ENTER to confirm your selection and there have a System Settings menu on screen as below:
Time Settings
- Use the ▲ / ▼ to select Time Setting item and then press ENTER to confirm it
Time Zone
Press ▲ / ▼ to select Time Zone, then press ENTER to confirm it, you can select the option of GMT+0 --- 8.
Banner Time Setting
This function allows you to set the time of banner display, you can Press ▲ / ▼ to select banner time options: 1secs/ 3 secs / 5
secs/ 7 secs/ 9 secs.
22
Operation
Language Settings
- Use the ▲ / ▼ to select Language Setting item and then press ENTER to confirm it
Menu language
This function allows you to set the language of OSD display, you can Press ▲ / ▼ to select the options: English/ Deutsch/
Danish/ Swedish/ Espa ñ ol .
Audio language
This function allows you to set the language of audio, you can Press ▲ / ▼ to select the options: English/ Deutsch/
Danish/ Swedish/ Espa ñ ol .
Parental Control
-Use the ▲ / ▼ to select Parental Setting item and then press ENTER to confirm it
-If the lock is already set, enter the pin code as requested.
Chang Password
This function allows you to change the pin code, you should to input a new pin code twice and press ENTER to confirm it.
Level
You can Press ▲ / ▼ to select an age bracket options: Off / 6/ 10/ 14/ 18.
23
Operation
Video Settings
-Use the ▲ / ▼ to select Video Settings item and then press ENTER to confirm it
TV Shape
This function allows you to select the proper picture proportion to match the source's image, you can select one of 4 : 3
and 16: 9.
Conversion
This function allows you to select the wide screen mode options: Full / Vert. Cut/ Pillarbox / LetterBox / Pan&Scan.
Brightness
Press the ◄ / ► to adjust the value of brightness.
Saturation
Press the ◄ / ► to adjust the value of saturation.
Factory Default
Use the ▲ / ▼ to select Factory Default item and then press ENTER to confirm it
Restore to Defaults
Press ENTER to enter the restore to defaults menu and use ENTER to do it else use DVB Menu to return to previous menu.
Clear Channels
Press ENTER to enter the clear channels and use ENTER to do it else use DVB Menu to return to previous menu.
Country Select
Press ENTER to enter the country select menu and use ▲ / ▼ to select country that one of Default / France / Australia.
Timer List
-Use the ▲ / ▼ to select Timer List item and then press ENTER to confirm it
This function allows you booking the TV program, press ENTER to enter the setting menu:
Event Id
Press ► and then use ▲ / ▼ to select event id options: 1/ 2/ 3/ 4/ 5.
Channel
Press ENTER and then use ▲ / ▼ to select channel which you want to book from channel list.
24
Operation
Event type
Press ► and then use ▲ / ▼ to select event type options: ONCE/ DAILY/ WEEKLY.
Start Time
Press the ◄ / ► to select the move cursor and input the number directly to set the begin time of channel which you have booked.
Start date
Press the ◄ / ► to select the move cursor and input the number directly to set the begin date of channel which you have booked.
Duration
Input the number directly to set the last time of the channel which you have booked.
Status
Press ► and then use ▲ / ▼ to select options: ON/ OFF.
System Info
-Use the ▲ / ▼ to select System Info item and then press ENTER to confirm it
Software Version
-Use the ▲ / ▼ to select Software Version item and then press ENTER to refer to the version of software.
Hardware Version
-Use the ▲ / ▼ to select Hardware Version item and then press ENTER to refer to the version of hardware.
Signal Information
-Use the ▲ / ▼ to select Signal Information item and then press ENTER to refer to the signal quality and strength of signal.
Channel Setting
1. Press the DVB MENU on the remote control or on the front panel to bring up the main menu on the screen and use ▲ / ▼
to select the Channel Setting menu.
2. Press the ENTER to confirm your selection and there have a Channel Setting menu on screen.
Channel Scan
-Use the ▲ / ▼ to select Channel Scan item and then press ENTER to confirm it
25
Operation
Scan Type
Press ► and then use ▲ / ▼ to select one of the search type options: Auto Scan/ Manual Scan/ Scan By NIT.
Channel
Input the number directly to select the channel number, but the range of channel is 1 --- 69.
Frequency KHz
This function let you know the frequency accordance the channel.
Bandwidth
Press ► and then use ▲ / ▼ to select one of the band width options: 7M/ 8M.
Encrypted Progr.
Press ► and then use ▲ / ▼ to select one of the encrypted service options: Save/ Not Save.
Scan Mode
Press ► and then use ▲ / ▼ to select one of the update mode options: Append/ Replace.
Start Scan
Press ENTER to start scan.
Sort Channels
-Use the ▲ / ▼ to select Sort Channel item and then press ENTER to confirm it
Name Upward
Press ENTER to rise to the channel list by name.
Name Downward
Press ENTER to drop the channel list by name.
Encrypt
Press ENTER to sort the channel list by encrypting.
EPG
1. Press the DVB MENU on the remote control or on the front panel to bring up the main menu on the screen and use ▲ / ▼
to select the EPG menu.
2. Press the ENTER to confirm your selection and there have a EPG menu on screen as below.
26
Operation
3. This function let you know the detailed information of the channel, that can predict the time of the program playing.
4. You can book channel by pressing ENTER, and the operation of it is the same as Book setting.
TELETEXT Operation
TE XT
Press thi s but ton to ent er Tel et ext si gna l. Press it aga in the backg roun d of tel et ext will beco me transp ar ent and pr ess it once
mor e to exi t tel et ext mode and ret ur n to norm al TV vi ew ing.
RED/ GREEN/ YELLO W/ BLU E
Press these but tons to access di rect ly to the cor respo ndi ng col or pag es di spl ayed at the low er part s of the tel et ext scr een .
PAGE SELE CTION
Press UP and Dow n but tons to sel ect the pr eced ing or fol low ing pag e.
You al so can ent er pag e num ber (thr ee di gi tal ) di rect ly usi ng the num ber but tons to sel ect the pag e, and if you pr ess a wrong
num ber duri ng inpu t, you must com pl et e the thr ee di gi tal num ber and re- ent er the cor rect pag e num ber .
Press Right and Lef t but tons to sel ect the sub pag e of one pag e.
In DVB-T Mode
The BLUE button/AB and the SUBTITLE button have the same function;
The GREEN/INTRO button and the NICAM button have the same function;
27
Supported Operating Modes
Supported operating modes
Component video(YPbPr) input
MODE
RESOLUTION
HORIZONTAL FREQUENCY(KHz)
VERTICAL FREQUENCY(Hz)
480i
720X480
15.73
59.94/60.00
480p
720X480
31.47
59.94/60.00
576i
720X576
15.63
50.00
576p
720X576
31.26
50.00
720p
1280X720
44.96
59.94/60.00
1080i
1920X1080
28.13
50.00/60.00
PC-RGB input
MODE
RESOLUTION
HORIZONTAL FREQUENCY(KHz)
31.50
VERTICAL FREQUENCY(Hz)
DOS
720X400
70.00
VGA
640X 480
31.50/37.90/37.50
60.00/72.00/75.00
SVGA
800X 600
37.90/47.20/46.90
60.00/72.00/75.00
XGA
1024X 768
48.40/56.50/60.00
60.00/70.00/75.00
SXGA
1280X 1024
64.00
60.00
HDMI input
MODE
RESOLUTION
HORIZONTAL FREQUENCY(KHz)
VERTICAL FREQUENCY(Hz)
480i
720X480
15.73
59.94/60.00
480p
720X480
31.47
59.94/60.00
576i
720X576
15.63
50.00
576p
720X576
31.26
50.00
720p
1280X720
44.96
59.94/60.00
1080i
1920X1080
28.13
50.00/60.00
28
Supported Operating Modes
SCART input and output
Input
Output
Connector
Y / C RGB AUDIOCVBS TV
SCART1
SCART2
29
AUDIO(L/R)
ENGLISH
Instructions on environment protection
DENVER ELECTRONICS
Do not dispose of this product in the usual household garbage at the end of
its lifecycle; hand it over at a collection point for the recycling of electrical
and electronic appliances. The symbol on the product, the instructions for
use or the packing will inform about the methods for disposal.
The materials are recyclable as mentioned in this marking. By recycling,
material recycling or other forms of re-utilization of old appliances, you are
making an important contribution to protect our environment.
Please inquire at the community administration for the authorized disposal
location.