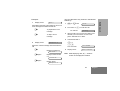
1
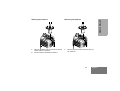
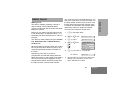
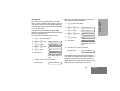
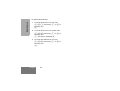
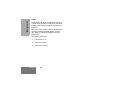
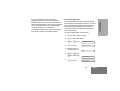
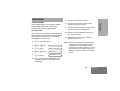
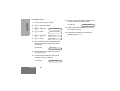
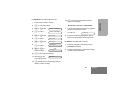
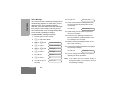
Professional Radio
GP680
User Guide
68P64110B29A
Issue: June 2000
6
5
4
3
2
1
8
7
12
11
10
9
13
14
CONTENTS
Operation and Control Functions . . . . . . . . 3
Radio Controls . . . . . . . . . . . . . . . . . . . 3
Programmable Buttons . . . . . . . . . . . . . 4
Menu Keys . . . . . . . . . . . . . . . . . . . . . . 6
Menu Navigation Chart . . . . . . . . . . . . . 7
Keypad Keys . . . . . . . . . . . . . . . . . . . . . 8
Keypad / Character Table . . . . . . . . . . . 9
LCD Display and Icons . . . . . . . . . . . . 10
Audio Signal Tones . . . . . . . . . . . . . . . 11
Getting Started . . . . . . . . . . . . . . . . . . . . 13
Battery Information. . . . . . . . . . . . . . . . . .
Battery Care and Tips . . . . . . . . . . . . .
Recycling or Disposal of Batteries . . .
Charging the Battery . . . . . . . . . . . . . .
13
13
14
14
Accessory Information . . . . . . . . . . . . . 16
Attaching the Battery . . . . . . . . . . . . . . . .
Removing the Battery. . . . . . . . . . . . . . . .
Attaching the Antenna . . . . . . . . . . . . . . .
Removing the Antenna . . . . . . . . . . . . . .
Attaching the Belt Clip . . . . . . . . . . . . . . .
Removing the Belt Clip. . . . . . . . . . . . . . .
16
16
17
17
18
18
Attaching the Side Connector . . . . . . . . . .19
Radio Operation. . . . . . . . . . . . . . . . . . . .20
Turning the Radio On-Off . . . . . . . . . . . . .20
Adjusting the Radio’s Volume . . . . . . . . . .20
Radio Registration . . . . . . . . . . . . . . . . . . .20
Radio Calls . . . . . . . . . . . . . . . . . . . . . . . .21
Making a Call. . . . . . . . . . . . . . . . . . . . . . .21
Contact List . . . . . . . . . . . . . . . . . . . . . . . .21
User Absent. . . . . . . . . . . . . . . . . . . . . . . .25
Dedicated Calls . . . . . . . . . . . . . . . . . . . . .26
Manual Dialling . . . . . . . . . . . . . . . . . . . . .26
Last number Redial . . . . . . . . . . . . . . . . . .27
Keypad Edit . . . . . . . . . . . . . . . . . . . . . . . .27
Ending a Call . . . . . . . . . . . . . . . . . . . . . . .28
Cancelling a Call . . . . . . . . . . . . . . . . . . . .28
Receiving a Call. . . . . . . . . . . . . . . . . . . . .29
Receiving a Call on a OACSU System . . 29
Receiving a Call on a FOACSU System. 29
Missed Calls . . . . . . . . . . . . . . . . . . . . . . .30
Call Diversion . . . . . . . . . . . . . . . . . . . . . .33
1
English
CONTENTS
Radio Overview . . . . . . . . . . . . . . . . . . . . 3
CONTENTS
Special Calls . . . . . . . . . . . . . . . . . . . . . . 35
Short data Messages (SDM) . . . . . . . . . .
Receiving an SDM . . . . . . . . . . . . . . .
Making an SDM. . . . . . . . . . . . . . . . . .
Status Calls . . . . . . . . . . . . . . . . . . . . . . .
Making a Status Call . . . . . . . . . . . . . .
Receiving a Status Call . . . . . . . . . . . .
Emergency Calls . . . . . . . . . . . . . . . . . . .
Priority Calls . . . . . . . . . . . . . . . . . . . . . . .
Broadcast Calls . . . . . . . . . . . . . . . . . . . .
DTMF . . . . . . . . . . . . . . . . . . . . . . . . . . . .
35
35
38
40
40
41
42
43
43
44
Personality . . . . . . . . . . . . . . . . . . . . . . . 45
MPT . . . . . . . . . . . . . . . . . . . . . . . . . . . . .
Talkgroup . . . . . . . . . . . . . . . . . . . . . . . .
Fixed and Dynamic Groups. . . . . . . . .
Conventional Mode . . . . . . . . . . . . . . . . .
Personality Selection . . . . . . . . . . . . . . . .
45
45
45
46
47
Call Progress - Ending . . . . . . . . . . . . .56
Safety Information . . . . . . . . . . . . . . . . . .57
Safe and Efficient Operation . . . . . . . . . . .57
Exposure to Radio Frequency Energy. . . .57
Radio Operation and EME Exposure . . . .58
Electromagnetic Interference/
Compatibility . . . . . . . . . . . . . . . . . . . . . . .58
Operational Warnings . . . . . . . . . . . . . . . .58
Vehicles with an Air Bag. . . . . . . . . . . .58
Potentially Explosive Atmospheres . . .58
Batteries . . . . . . . . . . . . . . . . . . . . . . . .58
Blasting Caps and Areas . . . . . . . . . . .59
Operational Cautions. . . . . . . . . . . . . . . . .59
Damaged Antennas . . . . . . . . . . . . . . .59
Batteries . . . . . . . . . . . . . . . . . . . . . . . .59
General Radio Care. . . . . . . . . . . . . . . . . .59
Computer Software Copyright
Features . . . . . . . . . . . . . . . . . . . . . . . . . 49
Voice Storage. . . . . . . . . . . . . . . . . . . . . .
Voice Recorder . . . . . . . . . . . . . . . . . .
Voice Message . . . . . . . . . . . . . . . . . .
Call Progress . . . . . . . . . . . . . . . . . . . . . .
Call Progress - Sending . . . . . . . . . . .
Call Progress - Receiving . . . . . . . . . .
Call Progress - Cancelling. . . . . . . . . .
English
2
49
49
52
54
54
55
56
The products described in this manual may include copyrighted computer
programmes stored in semiconductor memories or other media. Laws in the
United States of America and other countries preserve for Motorola Europe
and Motorola Inc. certain exclusive rights for copyrighted computer
programmes, including the right to copy or reproduce in any form the
copyrighted computer programme. Accordingly, any copyrighted computer
programmes contained in the products described in this manual may not be
copied or reproduced in any manner without the express written permission of
the holders of the rights. Furthermore, the purchase of these products shall not
be deemed to grant either directly or by implication, estoppel, or otherwise, any
licence under the copyrights, patents, or patent applications of the holders of
the rights, except for the normal non-exclusive royalty free licence to use that
arises by operation of the law in the sale of the product.
RADIO OVERVIEW
Top Button (programmable)
Recommended as Emergency button.
8.
LED Indicator
Green: Flashes to indicate NO SERVICE.
Red: On when radio is transmitting.
Red Flashing: When transmitting - battery low.
Red Flashing: When receiving - channel busy
(Conventional Mode).
9.
Microphone
Please read pages 57 to 59 before using this radio
OPERATION AND CONTROL FUNCTIONS
Radio Controls
The numbers below refer to the illustrations on
the inside front cover.
1.
Rotary Knob
Used as a multi-function scroll key and as a
channel selector in Conventional mode.
2.
On-Off / Volume Knob
Used to turn the radio on or off, and to adjust
the radio’s volume.
3.
Clear Button (Side Button 1)
Used to cancel a call, clear down at the end of
a call or Carrier Monitor (Conventional mode).
4.
Push to Talk Button (PTT)
Press and hold down this button to talk, release
it to listen.
5.
Side Button 2
Personality button, otherwise programmable.
6.
Side Button 3 (programmable)
10. LCD Display (1 Line)
11. Menu Keys
12. Keypad
13. Antenna
14. Accessory Connector
Connects headsets, remote speaker/microphones and other accessories. Replace
attached dust cap when not in use.
3
English
RADIO OVERVIEW
This user guide covers the operation of the
GP680 Portable Radio.
7.
RADIO OVERVIEW
Programmable Buttons
Several of your radio buttons can be
programmed (by Customer Programming
Software CPS) to activate the radio features.
English
The following table shows the features that can
be assigned to the Top button and the Side
Buttons 2 and 3.
Feature
Description
Dedicated Call/
Emergency
To make a call to a pre-determined number. This can
be an emergency number, effectively activating an
Emergency Call.
Personality
Short cut to the personality menu option to select
one of four radio personalities,
(e.g. MPT trunking system or conventional system).
This will normally be Side Button 2.
Missed Calls
Short cut to the Missed Call menu option.
This is a list of calls received and stored by the radio
when you were unable to take the call.
User Absent
To switch the User Absent feature On and Off.
This feature is used to indicate to he caller that you
are away from your radio and unable to take calls.
4
Description
Record/Play-back
(Voice Recorder)*
To record/play-back incoming calls or memo using
voice recorder feature.
Record/Play-back
(Voice Message)*
To record/play a greetings message using the voice
message feature.
RADIO OVERVIEW
Feature
*Voice Storage option board needs to be installed and enabled to activate voice
storage features.
5
English
RADIO OVERVIEW
Menu Keys
Exit
Up
Menu/
Select
x
d
+
e
c
f
Left
Down
Right
Menu/Select Key c
Used to enter the Menu Mode. When you are in the
Menu Mode, this key is also used to make menu
selections.
Note: When the radio is in the IDLE STATE, pressing any of the six menu keys causes the
radio to enter the Menu mode.
Exit Key x
Used to move up to the next higher Menu level.
When the top level menu is selected this key is
used to exit the Menu Mode. Also used to cancel/
end calls.
Up Key +
Used for scrolling when in Menu Mode.
Down Key e
Used for scrolling when in Menu Mode.
Right Key f
Used as More key to provide additional information.
Left Key d
Used as a destructive backspace key when editing.
Refer to the menu navigation chart for menu
selectable features
English
6
Menu Navigation Chart
Missed
Calls
Contact
List
select/ ID status/
voice/
voice playback
select/
enter ID
Status
select/
enter ID
c
+e
Data Calls
User
Absent
select/
enter ID
+e
Add
Contact
Delete
Contact
Personality
Voice
Storage
select/
1,2....etc
+e
+e
search/
edit entry
on/off
Voice
Recorder
Voice
Message
select/
record/
play/
delete
select/
record
ref:
Missed
Calls for
playback
Menu Navigation
c to enter Menu Mode.
+ to e to scroll through the list.
c to select Menu item.
+ to e to scroll through sub-list.
x to return to previous menu level.
c to select sub-menu item.
7
English
RADIO OVERVIEW
(Refer to Menu Navigation guidelines lower, left-hand corner of this page)
RADIO OVERVIEW
Keypad Keys
1
4
7
*
2
5
8
0
3
6
9
#
These keys are used when dialling a phone
number, making a radio call or entering
information for programming the radio’s lists.
Each key can generate several different
characters. For example, to enter the character
“C”, press the 2 key three times.
Pressing # will toggle between the upper
and lower case of the selected character.
If the next character required is on the same
key, press f to move the cursor forward one
character.
If an error is made, press d to delete the
current character and move cursor back one
character.
For full character set, refer to the following
table.
English
8
Entering Characters using the Keypad
Key
1
2
3
4
5
6
7
8
9
10
0 +
-
0
x
*
/
=
>
<
#
1 .
1
?
¿
!
,
@
-
&
2 A
B
C
2
Ä
Å
¥
Á
À
3 D
E
F
3
É
È
Ê
Ê
Ë
4 G
H
I
4
Ì
Í
5 J
K
L
5
³
6 M
N
O
6
Ñ
Ñ
Ö
Ò
Ó
7 P
Q
R
S
7
Œ
8 T
U
V
8
Ü
Ù
9 W
X
Y
Z
9
*
#
11
12
13
14
15
16
17
:
“
(
)
‘
%
£
$
Æ
ß
Ç
Æ
Ú
Space
Use this key to toggle between UPPER CASE and lower case of the selected character
9
English
RADIO OVERVIEW
Number of Times Key is Pressed
RADIO OVERVIEW
LCD Display and Icons
Symbol
L
Displays channel, menu, and radio status
information. The top two screen rows show radio
status indicator symbols, explained in the table
below:
Name and Description
Registered Indicator
Indicates that a system has been acquired,
and monitor in conventional mode.
M
Signal Quality Indicator
Shows the radio signal quality. Five bars
indicates the best signal.
N
Option Board Indicator
Indicates that an option board is activated.
Symbol
Name and Description
D
Contact List Edit Indicator
Indicates user is editing the contact list.
A
XPAND™ Indicator
Indicates that your radio has the companding
feature activated.
K
Data Calls List Indicator
On, indicates a data call in the list
Flashing, indicates new unread calls.
B
Power Level Indicator
“L” lights when your radio is configured to
transmit in Low Power. “H” lights when your
radio is configured to transmit in High Power.
C
Loudspeaker Indicator
Indicates that you have the loudspeaker
active.
F
Voice Recorder Indicator
Indicates that there are stored messages or
memos in the voice recorder.
H
Scan Indicator
Indicates that you are scanning for a system.
English
10
P
Battery Level Indicator
Shows the remaining charge in your battery,
based on how many bars are displayed.
Flashing, indicates flat battery.
Missed Calls Indicator
Q
!
On, indicates there are missed calls in the
missed call list.
Flashing, indicates new unread calls.
Timer
Shows the call time.
Audio Signal Tones (Normal)
Tone
Self test
Signal
Tone
Signal
Description
Low pitched tone
Description
Key click
Confidence tone when
any key pressed or
Speech limitation alert.
Fail tone
Hardware error or
Call timed out
(conventional mode).
Power up.
Tone A
Call clear indication.
Tone B
Traffic channel
allocated or PTT/ Mic/
Loudspeaker enabled.
Tone I
Low battery warning.
Tone K1
Voice Storage recording.
Tone C1
System busy.
Tone K2
Voice Storage warning.
Tone C2
Unavailable.
Tone K3
Voice Storage full.
Tone C3
Called party busy.
Tone M1
Talkgroup Confirmation.
Tone C4
Invalid number.
Tone M2
Talkgroup unavailable.
Call set up in progress,
wait for further
indications.
Tone N1
Out of range alert.
Tone D
Tone F
Transaction
confirmed, called unit
will call back.
Tone G
Look at display for
call set up or
System information.
Tone H
Invalid entry.
Ring
tones
Standard/
English/French/
General
Incoming call, press
PTT, then wait for
further indications.
11
English
RADIO OVERVIEW
High pitched tone
RADIO OVERVIEW
Audio Signal Tones (Alternate)
Tone
Signal
Description
High to Low pitched tones
Tone
Signal
Tone H
Invalid entry.
Key click
Confidence tone when
any key pressed or
Speech limitation alert.
Fail tone
Hardware error or
Call timed out
(conventional mode).
Tone I
Low battery warning.
System busy.
Tone K1
Voice Storage recording.
Unavailable.
Tone K2
Voice Storage warning.
Tone K3
Voice Storage full.
Tone M1
Talkgroup Confirmation.
Tone M2
Talkgroup unavailable.
Tone N1
Out of range alert.
Description
Self test
Power up.
Tone A
Call clear indication.
Traffic channel
allocated or PTT/ Mic/
Loudspeaker enabled.
Tone B
Tone C1
Tone C2
Tone C3
Called party busy.
Tone C4
Invalid number.
Tone D
Call set up in progress,
wait for further
indications.
Tone F
Transaction
confirmed, called unit
will call back.
Tone G
Look at display for
call set up or
System information.
English
12
Ring
tones
Standard/
English/French/
General
Incoming call, press
PTT, then wait for
further indications.
•
BATTERY INFORMATION
Battery Care and Tips
This product is powered by a nickel-cadmium
(Ni-Cd), nickel-metal-hydride (NiMH), or
lithium-ion rechargeable battery.
•
•
The following battery tips will help you obtain the
highest performance and longest cycle life from
your Motorola rechargeable battery.
•
•
•
•
•
•
Charge your new battery overnight (14-16 hrs)
before using it to obtain maximum battery capacity and performance.
Charging in non-Motorola equipment may lead
to battery damage and void the battery warranty.
When charging a battery that is attached to the
radio, turn the radio off to ensure a full charge.
The battery should be at about 25°C (room temperature) whenever possible. Charging a cold
battery (below 10°C) may result in leakage of
electrolyte and ultimately, in failure of the battery.
•
Charging a hot battery (above 35°C) results in
reduced discharge capacity, affecting the performance of the radio. Motorola rapid-rate battery
chargers contain a temperature-sensing circuit
to ensure that the battery is charged within these
temperature limits.
New batteries can be stored up to two years
without significant cycle loss. Store new/unused
batteries in a cool dry area.
Batteries which have been in storage should be
charged overnight.
Do not return fully charged batteries to the
charger for an “extra boost”. This action will
significantly reduce cycle life.
Do not leave your radio and battery in the
charger when not charging. Continuous charging
will shorten battery life. (Do not use your charger
as a radio stand.)
For optimum battery life and operation use only
Motorola brand chargers. They were designed to
operate as an integrated energy system.
13
English
GETTING STARTED
GETTING STARTED
GETTING STARTED
Recycling or Disposal of Batteries
Charger LED
NiCd
At the end of its useful life, the NiCd battery can
be recycled. However, recycling facilities may not
be available in all areas.
Motorola endorses and encourages the recycling
of all re-chargeable batteries. Contact your local
Motorola dealer for further information.
Status
Red
Battery is charging
Green
Battery is fully charged
Flashing Red *
Battery is unchargeable
Flashing Yellow
Charger is getting ready to charge
Flashing Green
Battery is 90% charged
*
Battery is damaged. Please contact your dealer.
Charging the Battery
If a battery is new, or its charge level is very low,
indicated by battery level indicator showing one
or no segments, you will need to charge the
battery before you can use it in your radio.
Note: Batteries are shipped uncharged from the
factory. New batteries could prematurely
indicate full charge, charge a new battery for
14-16 hrs before initial use.
English
14
1.
Place the radio with the battery attached, or the
battery alone, in the charger.
2.
The charger’s LED indicates the charging
progress.
Part No.
HNN9008
HNN9009
HNN9010
HNN9011
HNN9012
HNN9013
GETTING STARTED
Battery chargers will charge only the Motorola
authorized batteries listed below; other batteries
will not charge.
Description
High-Capacity NiMH
Ultra-High-Capacity NiMH
Ultra-High-Capacity FM NiMH
High-Capacity FM NiCd
High-Capacity NiCd
Lithium-Ion
FM - Factory Mutual
15
English
GETTING STARTED
ACCESSORY INFORMATION
Attaching the Battery
Removing the Battery
Battery
Latches
2
2
3
1
Slots
1.
Fit the extensions at the bottom of the battery
into the slots at the bottom of the radio’s body.
2.
Press the top part of the battery towards the
radio until you hear a click.
English
16
1.
Turn off the radio, if it is turned on.
2.
Slide the battery latches, on both sides of the
battery, downwards.
3.
Pull the top part of the battery away from the
radio’s body, and remove the battery.
Removing the Antenna
1.
Align the threaded end of the antenna with the
radio’s antenna connector.
1.
2.
Turn the antenna clockwise to fasten it.
GETTING STARTED
Attaching the Antenna
Turn the antenna counterclockwise until you
can remove it.
17
English
Removing the Belt Clip
GETTING STARTED
Attaching the Belt Clip
Belt Clip Tab
1
2
1.
Align the grooves of the belt clip with those of
the battery.
1.
Use a key to press the belt clip tab away from
the battery.
2.
Press the belt clip downwards until a click is
heard.
2.
Slide the belt clip upwards to remove it.
English
18
Attaching the Side Connector Cover
Place the loop (attached to the side connector
cover) over the antenna; then slide it downward until it touches the top of the radio.
2
Insert the tab on top of the cover into the slot
above the connector.
3
Position the cover over the connector and
align the thumbscrew with the threaded hole
in the radio.
4
Tighten the thumbscrew to hold the cover in
place. Do not overtighten the thumbscrew.
Loop
Slot
Thumbscrew
19
English
GETTING STARTED
Antenna
1
GETTING STARTED
RADIO OPERATION
Radio Registration
Turning The Radio On or Off
When turned on, the radio enters a self test routine
during which time the display is activated, the self
test tone will sound and the LED will light green.
If the radio fails the self test a continuous low tone
will sound and the display will show a failure
message. e.g.
Synth Lock
until the radio is turned off .
ON
•
•
OFF
To turn the radio on, turn the On-Off/Volume
Control knob clockwise.
To turn the radio off, turn the On-Off/Volume
Control knob counterclockwise until you hear a
click.
Adjusting the Radio’s Volume
•
Turn the On-Off/Volume Control knob to adjust
the volume level.
Note: If the radio fails the self test routine, consult
your dealer.
When the self test is complete the radio will display:
Freetext
This display is for the personality last used. To check
the radio personality or select a new personality
refer to PERSONALITY - Personality Selection.
After this text has been displayed, the radio will scan
for system access with the LED on the top of the
radio flashing GREEN and the scanning icon H lit.
When a system is acquired, the green LED will go
off, the scanning iconHwill be replaced by the
registered icon L and the display will show:
Idle Freetext
English
20
RADIO CALLS
The radio is capable of making a variety of
calls, including calls to individual radios,
groups of radios and calls to private and public
telephone systems.
Before you can make a call the radio must be
in the IDLE STATE, as displayed above, i.e. a
personality has been selected and no call is in
progress.
The radio can make calls by using the Contact
List, Dedicated Calls or Manual Dialling.
Contact List
When the radio is in the IDLE state, the contact
list may be used which allows access to up to
100 preprogrammed numbers accessed via
the menu.
Depending on the way your radio is
programmed, the radio will display either the
alpha alias (name) or the number to be dialled.
One of four tones may be tagged to the preprogrammed numbers, which will sound when
the radio receives a call from that number.
To access the contact list via the menu:
1
c to enter Menu Mode.
2
+ or e until:
Contact List
3
c to select:
Contact List
4
+ or e until:
Alpha Alias
Number
Ring Tone
f
f
f
5
Alpha Alias
c or PTT button or # to make call.
You will see:
6
Calling
After the call is set-up, press PTT button and
talk with your mouth 2.5-5 cm from microphone. Release PTT to listen.
21
English
RADIO CALLS
Making a Call
The contact list can be entered directly by one
click of the rotary knob (1) when the radio is in
the IDLE STATE. Use the rotary knob to scroll
through the list and select the required name
or number as indicated in step 4 below. Make
and end the calls as in steps 5 to 8 below.
RADIO CALLS
7
When finished with call.
8
CLEAR BUTTON or
x or
To Add an Entry
1
c to enter Menu Mode.
2
+ or e until:
Add Contact
3
c to select:
Add Contact
*#
Tone A sounds
Call Ended
If a contact list number is selected but no call
request is sent, the display is held until tone H
sounds and then reverts to the IDLE STATE.
When the number is displayed it may be edited
as described in the Keypad Edit section.
Modifying the Contact List
You can modify the Contact List in three ways:
1.
Add an entry
2.
Delete an entry
3.
Edit an existing entry
Note: The radio cannot receive any calls while you
are modifying the contact list.
English
22
You will see:
Name?
4
Use the keypad to enter the name (see pages
8 and 9). A maximum of 14 characters is
allowed.
5
c to store the name.
You will see:
Number?
6
Use the keypad to enter the number (see
pages 8 and 9). A maximum of 20 digits is
allowed.
7
c to store the number.
You will see:
8
Add Contact
If you make an error, use the d key to
delete the last character/digit and the f
key to create a space.
To Delete an Entry
To Edit an Entry
c to enter Menu Mode.
1
c to enter Menu Mode.
2
+ or e until:
Delete Contact
2
+ or e until:
Contact List
3
c to select:
Delete Contact
3
c to select:
Contact List
4
+ or e until you see the entry you want
You will see current
entry e.g.:
4
Alias 1
to edit
+ or e (or rotary knob) until you see
the entry you want to delete.
You will see e.g.:
5
You will see e.g.:
5
c to select the entry
You will see:
6
Alias 2
d for 2 seconds to enter Edit Alias Mode
when display icon D flashes.
You will see selected
entry e.g.:
Alias 3
Delete?
6
Use the keypad to edit the alias (see pages 8
and 9) or delete and enter a new alias.
Use the d key to delete the last character
or the CLEAR key to delete entire entry.
7
c to store edited/new alias.
c to delete the selected entry.
Display returns to:
Alias 3
Delete Contact
You will see
associated number
e.g :
01256488116
23
English
RADIO CALLS
1
RADIO CALLS
8
9
Use the keypad to edit the number (see pages
8 and 9) or delete and enter a new number.
Use the d key to delete the last digit or the
CLEAR key to delete entire entry.
c to store the edited/new entry.
Display returns to:
To Search for an Entry
When in Contact List or Delete Contact menu, you
may search for an alias (name) by entering
characters from the keypad.
1
Enter up to 3 characters
from the keypad e.g.:
Pol
Alias 3
2
c to start search of list:
Display shows search
result e.g.:
3
Police
* to repeat search using same search
criteria
4
x to cancel search at any time,
or
If search unsuccessful display returns to
contact list menu prior to search.
Note: The search process is not case sensitive.
English
24
User Absent
1
c to enter Menu Mode.
2
+ or e until:
User Absent
3
c to select:
User Absent
4
+ or e until:
On
5
c to select:
On
6
Followed by:
Selected
CLEAR button to exit Menu Mode.
Display shows:
c to enter Menu Mode.
2
+ or e until:
User Absent
3
c to select:
User Absent
4
+ or e until:
Off
5
c to select:
Off
6
Followed by:
7
CLEAR button to exit Menu Mode.
Display shows:
(held for 10 seconds,
then display returns to
idle)
7
1
Idle Freetext
RADIO CALLS
User Absent can be selected on your radio
when you are unable to take calls. Any calls to
your radio wil be put into the Missed Calls list
automatically and the message ‘Will Call Back’
is sent to the caller.
User Absent may be switched on and off
directly by pressing the dedicated User Absent
button (if programmed).
To switch on User Absent via the menu:
When you are able to take calls, ensure that
User Absent is switched off by:
Off
(held for 10 seconds,
then display returns to
idle)
Idle freetext
User Absent may be permanently enabled in
your radio via programming. With this feature
enabled, entry into the user absent mode is
automatic and any calls received when you are
away from your radio will be put into the
25
English
RADIO CALLS
Missed Calls list automatically and the
message “Will call back” sent to the caller.
When you return to your radio, check whether
tone G sounds every 10 seconds which
indicates that your radio is in user absent
mode. Press any button to exit user absent
mode and return the radio to the idle state for
normal operation.
Manual Dialling
To make a call from the keypad (12):
1
Enter
2
PTT button or # to make radio call.
Dedicated Calls
Dedicated calls can be made from either a
preprogrammed dedicated call button or using
the speed-dial feature from the keypad.
Press the Dedicated Call button to make a call
to the most commonly used pre- programmed
number. The display will show “Calling”.
To use the speed-dial feature, hold down one
of the keypad keys (0 to 9) for a preset period
to make a call to one of ten (1 of 10)
preprogrammed numbers which are the first
ten entries (1 to 9, 0= 10) in the contact list.
The selected number and then the alias will be
displayed and the conversation can go ahead.
English
26
You will see:
Telephone Number
(PSTN calls always
start with 0)
(PABX calls start with
6,7 or 8)
or
Radio ID
or
Group ID
Calling
Keypad Edit
The last number dialled by the radio is stored
in the memory of the radio.
Partially entered numbers are also stored.
With the radio in the IDLE STATE:
If the radio is displaying a Contact List number,
a Keypad Dialled number, Status number or
Missed Call number, the last digit may be
deleted by:
For Contact List numbers
1
PTT button
2
PTT button or # to make radio call.
You will see:
Number
Calling
The number may also be edited, see Keypad
Edit .
Last number redial does not function when
Talkgroup personality is selected, see
PERSONALITY - Personality Selection.
1
d Once
(to select number)
1234567
2
d Again
(to delete last digit)
123456
For all other numbers
3
d Once
(to delete last digit)
123456
4
Enter new numbers
12345699
5
PTT button or # to make radio call.
You will see:
Calling
Note: The edited number is not saved at the end of
the call in the contact list, but is saved in the
last number redial.
27
English
RADIO CALLS
Last Number Redial
RADIO CALLS
Ending a Call
Cancelling a Call
Always end a call by:
At any time while setting up a call it may be
cancelled by:
1
CLEAR BUTTON or
x or
1
*#
Tone A sounds
Call Ended
See "Call Progress - Ending a Call".
English
28
CLEAR BUTTON or
x or
*#
Cancelling
See "Call Progress - Cancelling a Call".
Receiving a call on an FOACSU system
There are two types of systems on which the
radio may be used, Off Air Call Set Up (OACSU)
and Full Off Air Call Set Up (FOACSU).
When the radio is called:
If you are in doubt about which system you are
operating on, please consult your dealer.
1
Ring tone sounds
2
PTT button or # to accept call.
(Unless in talkgroup personality, when the
radio unmutes automatically for dynamic and
fixed group calls)
3
Tone D sounds
Caller ID
4
Tone B sounds
(when conversation
is permitted)
Call Type
Receiving a call on an OACSU system
When the radio is called:
1
Tone D sounds
CallerID
2
Tone B sounds
Call Type
For display Call Type see "Call Progress Receiving"
Caller ID
For display Call Type see " Call Progress Receiving"
Note: The system may have a limited call time,
indicated on the display, and the call may be
terminated automatically if this call time is
exceeded.
e.g.
Display shows:
01:22
29
English
RADIO CALLS
Receiving A Call
RADIO CALLS
Missed Calls
If a call remains unanswered, the call will be
stored by the radio, provided that missed calls
have been programmed into your radio.
Up to ten calls can be stored. If the same radio
calls more than once the call is only stored
once. When ten calls have been stored by the
radio, the eleventh call received may overwrite
the first.
When a call has been stored by the radio, tone
G will sound every ten seconds, the Missed
Call icon Q will flash and the display will
show:
Missed Calls
With the display showing ‘Missed Calls’ ,
pressing any of the menu buttons provides a
quick access into the Missed Calls List.
The Missed Call List can also be entered
directly by pressing the Missed Call button (if
programmed) when the radio is in the IDLE
STATE or via the menu.
If using the Missed Call button, follow the
procedures from step 4 below.
English
30
To view the calls in the list via the menu:
1
c to enter Menu Mode.
2
+ or e until:
Missed Calls
3
c to select:
Missed Calls
4
First call in list
Alpha Alias
5
+ or e to
scroll list:
Alpha Alias
Note: In the Missed Calls list some alpha alias/
numbers may contain a suffix S or V.
S indicates a status message associated
with the call, and V indicates a voice
message associated with the call.
Examples:
Display shows
Bob V
where Bob is the alias of the calling unit and V is a
voice message associated with the call
2
f
To playback the voice
message.
f
To skip to end of
message.
Display shows
RADIO CALLS
1
You can call back to any number in the Missed
Call list by:
1
+ or e until:
2
PTT button or # to make the call.
You will see:
After the call is set-up, press PTT button and
talk with your mouth 2.5-5 cm from microphone. Release PTT to listen.
4
CLEAR BUTTON or
x or
*#
where S is a status message associated with the
call
Displays message e.g.
On Break
f again
Displays status number
e.g.
Status 04
f again
Display shows
Reception S
Calling
3
Reception S
f
Alias
5
Tone A sounds
Call Ended
Display shows
Idle freetext
Note: Whilst displaying alias, d will allow
number to be displayed and edited.
31
English
RADIO CALLS
On a successful call set- up, the entry is
automatically deleted from the list together with
an associated voice message.
Unanswered calls may be deleted from the
Missed Call list at any time by pressing:
1
1
x button
or MISSED CALL button to exit Menu mode.
Display shows:
Idle freetext
CLEAR button
Display shows:
2
To exit the Missed Call List:
Delete?
c (or *# or CLEAR button)
to delete missed call from the list.
3
x to retain missed call in list.
4
*# deletes the currently selected
missed call with no display prompt.
On deletion of the last message in the Missed
Calls list, the radio will exit the menu and return
to the IDLE STATE.
English
32
Note: The calls in the stack are not deleted when
the radio is turned off. It is not possible to
call back status calls.
Call Diversion
Examples:
1
*41
From your radio
2
*44
From another radio
1
Will divert all calls from your radio to the radio
with ID “234”
2
When the radio is in the IDLE STATE, call
diversion can be initiated by:
1
2
*41*
or
*44*
To divert all calls
*411* To divert speech
calls only
or
*441*
3
*412* To divert status/
data calls only
or
*442*
4
Enter ID of radio to which you are diverting
5
#
*41*234#
*44*234*
432#
Will redirect all calls from the radio with ID “234”
to the radio with ID“432”
If a call is made to a radio whose calls are
currently being diverted:
1
Tone D sounds
Diverting
A call is automatically set up to the radio which is
receiving the diverted calls
To complete call
diversion
33
English
RADIO CALLS
Incoming speech calls or status calls can be
diverted by:
RADIO CALLS
To cancel Call Diversion:
1
To cancel call diversion from your radio
#41 followed by 1 or 2 if
necessary and
#
2
To cancel call diversion from another radio
#44 followed by 1 or 2 if
necessary and
* “ID” (234 in example)#
3
To cancel calls redirected to your radio
#45 followed by 1 or 2 if
necessary and
#
English
34
SPECIAL CALLS
Storing SDMs
Short data messages may be set up, sent and
received using the radio keypad and controls.
Outgoing data messages from the keypad are
limited to alphanumeric data in any
combination of up to 20 characters (which
include address information and data selection
characters).
Receiving Short Data Messages
On receiving a Short Data Message:
1
Tone G sounds
Data Received
The data message icon K is lit whenever
SDMs are in the data message calls list. Note
that the data message icon flashes when data
messages in the calls list are unread. The icon
is lit permanently when a message is read and
retained in the calls list.
Incoming SDMs are stored on receipt in the
Short Data Message Calls List. Up to ten
SDMs can be stored by the radio. The data
message icon K is lit whenever SDMs are in
the calls list.
SDMs are not stored when the radio is
switched OFF, except for one SDM only which
can be saved.
Interrogating the SDM Calls List
When an SDM call has been stored by the
radio, the display will show:
Data Received
With the display showing ‘Data Received’ ,
pressing any of the menu buttons provides a
quick access into the Data Calls List.
35
English
SPECIAL CALLS
Short Data Messages (SDM)
SPECIAL CALLS
To view the calls in the list via the menu:
1
c to enter Menu Mode.
2
+ or e until:
Data Calls
3
c to select:
Data Calls
4
First call in list
Alpha Alias
To save an SDM to be retained after the radio
is switched off.
1
Read the data message in the Data Calls List.
2
c
You will see:
or
Save?
3
c to save selected message.
4
x will not save selected message, display
Number
5
+ or e to
scroll list:
Alpha Alias
Number
6
c or f to
read
selected message:
7
At end of message:
e.g.
Call 8116
f or x to return
to data calls list.
8
x to retain message in list and exit from
data messages
9
x again to exit from Menu Mode
English
36
will return to Data Calls List.
or
When the radio is switched off and on again the
saved SDM will appear in the Data Calls List.
Note: You must exit the data message calls list
interrogate mode to put the radio in the idle
state in order to make other calls.
Deleting Messages from the Data Calls List
To delete data messages from the data calls
list or while viewing data messages.
2
CLEAR button
Display shows:
3
Delete?
c (or *# or CLEAR button)
Where an SDM contains a calling party
number, the radio can respond with a status
message or voice call.
To respond with a status message, from the
data call list interrogate mode or data message
scrolling mode, press the Status button. The
radio will exit the data mode and enter the
dialling state for example:
to delete data message from the calls list.
Display shows:
4
x to retain data message in the calls list.
5
*# deletes the currently selected
data message with no display prompt.
6
Radio returns to the data calls list interrogate
mode after each deletion until the last message is deleted when the display returns to
the idle state and the data message icon K
is extinguished.
213S
The status digits can then be specified as in
normal status mode.
To respond with a voice message, use the d
button, to remove the status symbol S and
press the PTT or # button to initiate the call.
Display shows:
213
You can move directly from the Data Calls List
to the Missed Calls List by pressing the Missed
Calls button. Once in the Missed Calls List the
functionality is as detailed in RADIO CALLS Missed Calls.
37
English
SPECIAL CALLS
1
Status/Voice Call replies to an SDM
SPECIAL CALLS
Making an SDM Call
SDM Calls may be initiated in three different
ways:
1.
Via the keypad using a Call modifier
2.
Via the Contact List
Note: The maximum data message size is limited
to 20 characters which includes address
information and data selection characters.
Data entered via the call modifier method
may be alphanumeric characters entered
from the keypad.
In the contact list method data may consists
alphanumeric characters which are pre-programmed into your radio by your dealer.
To initiate a data call via the keypad:
1
*2*
2
Enter message from keypad in alphanumeric
characters (ref pages 8 & 9)
3
*
Final part of modifier
4
Enter
Called radio address
5
Display shows:
+ or e to
scroll message:
6
Part of modifier
*2*Call Bryan
ASAP*NNNNN
(where NNNNN is called
radio address.)
Press PTT button or # to make a call to the
dialled numbers
Tone D sounds
Display shows:
Sending Data
Number
7
English
38
Press CLEAR button or *# at any time
to delete dialled numbers and return radio to
IDLE STATE when tone H sounds
To initiate a Data call via the contact list
2
+ or e until:
Contact List
3
c to select:
Contact List
4
+ or euntil:
f
f
f
Alpha Alias
Number
Ring Tone
Alpha Alias
5
c or PTT button to make radio call.
Display shows:
SPECIAL CALLS
In this method data may consist of alphanumeric
characters which are pre-programmed into your
radio by your dealer.
1 c to enter Menu Mode.
Sending Data
Alias/Number
6
7
When finished with call.
CLEAR BUTTON or
x or
*#
Tone A sounds
Call Ended
Note: The maximum data message size is limited
to 20 characters which includes address
information and data selection characters.
39
English
SPECIAL CALLS
Status Calls
Make the call by:
A status is a code for transmitting prearranged
messages, e.g. status “05” may indicate
“Return to Base”.
1
PTT button or # to make radio call.
You will see:
Sending Status
Making a Status Call
Status Calls may be initiated in two different
ways:
1.
Via the keypad using a Call modifier,
2.
Via the Menu
To initiate a status call via the keypad:
1
*0
Part of modifier
2
05
Example of status
digits in range 1-31
3
*
Final part of modifier
4
Enter
Called radio address
5
Display shows:
*005*NNNNN
To initiate a status call via the menu:
1
c to enter Menu Mode.
2
+ or e until:
Status
3
c to select:
Status
4
+ or e until:
Status Message e.g.
On break
Status Number e.g.
Status 04
f
5
c to select:
Status 04
6
Display shows for 10
seconds:
Select Contact
7
c or turn rotary
knob to display:
Where NNNNN is called radio address.
English
40
Current entry in
contact list
8
Alternatively, a valid
number can be
dialled from the keypad:
Alpha Alias
(required name or
number)
Your radio receives a Status Call when:
1
Tone G sounds
2
Display alternates
every 2 second
between:
e.g.
*004*207
10 c or PTT button or # to make call.
You will see:
Receiving a Status Call
SPECIAL CALLS
9
+ or e until:
Status 04
or
On Break
and
Alias/Number
Sending Status
Note: The c key only functions when you are in
the contact list menu option.
Where Status message “04” / “On Break” is
example status message. Note that only status
number (04) only will be displayed if associated
message is not programmed into your radio.
Alias/Number is the name or number of the
calling radio.
41
English
SPECIAL CALLS
Emergency Calls
An emergency call allows you the highest form
of priority calling and normally takes
precedence over all other calls.
Your radio can be programmed to give you a
one-button quick access to call a particular
radio or centre (predefined by your dealer) in
emergency situations.
Conversely you can dial the number, prefixing
it with*9*.
To initiate an emergency call:
1
Press the Emergency button
or
2
*9* followed by the radio number
and PTT or #.
Tone D will sound and
Display shows:
English
42
Emergency
Emergency can be stopped by one of the
following:
1
Switching the radio Off and On again.
2
Pressing the CLEAR button.
3
The emergency time duration is reached.
Note: The emergency time duration is
programmed into your radio by your dealer.
Your radio may receive an emergency call
when:
Tone D or Ring tone
will sound and Display
shows:
Emergency
Broadcast Calls
A priority call allows you to gain priority over
other users of the system when requesting a
call.
To initiate a priority call:
A broadcast call allows you to make calls to
groups of radios. Note that on a broadcast call
only the calling radio can talk and there is no
indication that any radios in the group have
received the call.
To initiate a broadcast call:
1
*8* followed by the number and
PTT or #.
1
Tone D will sound and
Display shows:
*11* followed by the group
number and PTT or #.
Priority
See " Call Progress - Sending".
Tone D will sound and
Display shows e.g.:
*11*90
43
English
SPECIAL CALLS
Priority Calls
SPECIAL CALLS
DTMF
DTMF means Dual Tone Multi Frequency and
is used when the radio is required to operate in
a radio system with an interface to telephone
systems.
An access code, which is system dependent, is
normally needed for DTMF, please contact
your dealer or network manager for further
information.
To initiate a DTMF call:
1
Enter Access code
2
Press and hold PTT
3
Enter desired number
English
44
PERSONALITY
MPT
This personality permits the radio to operate in
a trunked mode. Incoming and outgoing calls
are set up using a defined set of rules or
protocol between your radio and a controller in
a similar manner to your home telephone. Your
radio ‘registers’ onto an MPT trunked system
as described in GETTING STARTED - Radio
Registration.
Talkgroup is an MPT personality following the
same rules or protocol, but is primarily for
talkgroup calls. In talkgroup personality,
talkgroups are contained in a Talkgroup list,
similar to the Contact list, which is scrolled and
selected using the Rotary Knob (1).
On selection of a talkgroup, you may send and
receive calls as described below.
Fixed and Dynamic Groups
These groups form part of the Talkgroup
Personality, such that when this personality is
selected your talkgroup list shows only these
groups.
A fixed group is a group of users, the address
(number / alias) of which is preprogrammed
into your radio by your dealer.
A dynamic group is a group of users, the
address (number) of which is sent to your radio
‘over air’ at any time via the system controller.
Therefore at any time you may become a
member of a dynamic group, able to receive
calls and (depending on how your radio is
programmed) send calls to that group.
45
English
PERSONALITY
The personalities described below are
programmed into your radio by your dealer and
are accessible either via the personality button
or via the menu.
A radio personality contains data such as
frequencies, display text, alert tones, permitted
calls etc. which determines the mode of
operation of your radio. Your radio may be
programmed with up to 4 different
personalities, selected from MPT, Talkgroup
and Conventional.
Talkgroup
PERSONALITY
Incoming calls to fixed and dynamic group
numbers are detailed in Receiving a Call and
displayed under Call Progress - Receiving.
To make an outgoing call to a selected
talkgroup, press the PTT and speak after the
confidence tone.
Calls are cleared in the normal manner.
If the system is busy an engaged tone will be
heard, release the PTT and wait for the
confidence tone. You may then proceed with
the call by pressing the PTT.
When in Talkgroup personality, you can still
make an individual or status call using the
keypad or entering the Contact List via the
menu as detailed in RADIO CALLS - Contact
List.
English
46
Conventional Mode
In the conventional mode your radio operates
as a standard two-way radio.
Select the personality “Conventional” as
described in Personality Selection, the
display shows:
Channel xx
where xx is the channel number. Use the rotary
knob (1) to display and select the desired
channel.
Prior to transmission always make sure that
the channel is free (red LED not flashing).
Press the PTT (4) to transmit, release to listen.
The red LED lights while the radio transmits
and flashes if the channel is busy.
Some channels may be monitored for activity
by pressing the clear button (3). The L icon
will be displayed until the channel is changed
or the clear button is pressed again.
Personality Selection
Personality selection may be entered directly
by pressing the Personality button (5). You may
then scroll using the rotary knob and select a
personality as described in step 7 below, or
scroll and select a personality as described
from step 6 below.
To select a personality via the menu:
1
Ensure radio is in IDLE STATE.
2
c to enter Menu Mode.
3
+ or e until:
Personality
4
c to select:
Personality
5
Display shows current personality e.g.:
MPT
+ or e until
desired personality
e.g.:
Conv Pers
c to select:
Conv Pers
6
7
47
English
PERSONALITY
In the conventional mode, the radio is
equipped with a time out timer. A speech
limitation alert tone will sound a few seconds
before the transmitter in your radio is switched
off. The call timed out tone will sound and
continue until the PTT is released.
To generate DTMF tones, press and hold the
PTT while entering the desired number.
PERSONALITY
8
The display will be held for 2 seconds while
your radio retunes to the new personality.
Your radio will return
to the idle state:
English
48
Freetext
FEATURES
Voice storage allows you to perform various
voice related tasks which include voice
recorder and voice message facilities.
Voice Recorder
You can record and playback incoming calls or
make a memo using the voice recorder feature,
which allows up to 2 minutes of recording.
To record an incoming call:
1
c to enter Menu Mode.
2
+ or e until:
Voice Storage
3
c to select:
Voice Storage
4
+ or e until:
Recorder
5
c to select:
Recorder
6
Press and hold the Record/Playback button,
the Voice Storage Recording alert sounds
momentarily.
Record the call or part of the call.
8
The Voice Storage Warning alert sounds
when the memory is nearly full.
9
The Voice Storage Full alert sounds when the
memory is full and recording ceases.
10 Release the Record/Playback button at any
time to stop recording.
11 Subsequent messages can be stored by
repeating steps 6 to 10.
Note: All recorded messages are retained when
changing between personalities, with the
exception of conventional personalities
where the voice storage feature is not available. However all recorded messages are
deleted on selection of the voice message
feature.
49
English
FEATURES
VOICE STORAGE
7
FEATURES
To record a memo:
1
Ensure radio is in IDLE STATE.
2
c to enter Menu Mode.
3
+ or e until:
Voice Storage
4
c to select:
Voice Storage
5
+ or e until:
Recorder
6
c to select:
Recorder
7
Press and hold the Record/Playback button,
the Voice Storage Recording alert sounds
momentarily.
You will see:
Recording
8
Speak clearly into the radio microphone to
record your memo.
9
The Voice Storage Warning alert sounds
when the memory is nearly full.
You will see:
English
50
Storage Low
10 The Voice Storage Full alert sounds when the
memory is full and recording ceases.
You will see:
Storage Full
11 Release the Record/Playback button at any
time to stop recording.
12 Subsequent messages can be stored by
repeating steps 7 to 11.
To playback a recorded call or memo:
13 c Current message deleted. Display
shows next message.
Ensure radio is in IDLE STATE.
2
c to enter Menu Mode.
3
+ or e until:
Voice Storage
4
c to select:
Voice Storage
5
+ or e until:
Recorder
6
c to select:
Recorder
7
+ or e until:
Messages
8
c to select:
Messages
1
Playback message as described in above
alternative procedure.
9
+ or e to
select message:
e.g.
Message 2
2
Press the Clear button to delete the message
currently being played back.
Alernatively, with radio in IDLE STATE
1
Press the Record/Playback button to playback
the first recorded call or memo.
You will see:
2
Playing
Press the Record/Playback button again to
skip to the next message to be played back.
To delete a recorded call or memo:
10 c to play selected message
11 After playing message display shows:
Delete?
12 x Display shows next message without
deleting current message.
51
English
FEATURES
1
FEATURES
Voice Message
10 You will see:
You can pre-record a greetings message to be
automatically played to a caller when you are
absent and the voice message facility is
selected. Your radio will auto-record messages
from callers in your absence as long as you
have selected the voice message facility and
pre-recorded a greetings message.
To pre-record a greetings message:
1
Ensure radio is in IDLE STATE.
2
c to enter Menu Mode.
3
+ or e until:
Voice Storage
4
c to select:
Voice Storage
5
+ or e until:
Message
6
c to select:
Message
7
You will see:
On/Off
8
c to select:
On
9
You will see (for 10
seconds):
Selected
English
52
Record Msg
11 Press and hold the Record/Playback button,
the Voice Storage Recording alert sounds
momentarily.
You will see:
Recording
12 Speak clearly into the radio microphone to
record your message.
13 Ensure that your greetings message is as
short as possible to enable maximum incoming messages to be recorded.
14 Release the Record/Playback button at any
time to stop recording.
15 Press the Record/Playback button to playback
the greetings message.
You will see:
Playing
16 You can change the message at any time by
repeating the above procedure.
Note: If you select the voice recorder facility or
change personality, you will have to record a
new greetings message.
To playback a message from callers:
Enter the Missed Calls list as detailed in
RADIO CALLS - Missed Calls.
2
Any calls having a V suffix have an associated
voice message e.g. Bob V.
3
+ or e until:
4
f to playback the message.
5
f to skip to end of the message.
6
The voice message is automatically deleted
when the associated missed call is answered
or deleted.
FEATURES
1
Bob V
53
English
FEATURES
Call Progress
When in operation, your radio monitors each
step in setting up a call whether sending or
receiving. These steps are displayed to provide
you with call progress and indicate call types.
Call Progress - Sending
Tone
Display
Comment
D
Calling
Trying to connect call
D
Priority
Priority call sent,
modifier *8* used
D
Emergency
Emergency call sent,
modifier *9* used
D
Sending Status
Status call sent,
modifier *0xx* used (xx is
status message number)
G/D Queued
Call queued on system
D
Diverting
Calls to called unit have
been diverted
C2
Unobtainable
Call unobtainable
C2
Unavailable
Unit unavailable
English
54
C4
Invalid Number
Unit number invalid
C1
System Busy
System busy, try again
D
Alerting
Alerting called unit
C3
Engaged
Called unit is busy
F
Will Call Back
User absent, called unit
will call back
C2
Call Failed
Call failed, try again
C2
Timeout
Call request timed out.
Check service is available
H
Scanning
System access lost, try
again
Call Progress - Receiving
Talkgroup NN
Talkgroup call received
(NN is list number)
A call is being received
on OACSU
B
Dynamic NN
Dynamic group call
received (may be alias or
number - NN)
Ring Caller ID
Tone
A call is being received
on FOACSU. Press PTT
or ‘#’ to accept the call
B
Group NN
Fixed group call received
(may be alias or number NN)
D/
Emergency
Ring
Tone
Emergency call being
received
B
System Wide
Call to all radios in use on
the system
B
Alias/Number
Call from radio in your
fleet
B
Broadcast
broadcast call received,
user reply not permitted
B
Interfleet
Call from radio in another
fleet
G
Status XX
Receiving status
message (xx is status
message number)
B
Telephone
Calls from public
telephone system
B
PABX
Calls from private
telephone system
B
Unknown Party
Call identity unknown to
the system
D
Display
Caller ID
Comment
55
English
FEATURES
B
Tone
FEATURES
Call Progress - Cancelling a call
Call Progress - Ending a call
Tone
Tone
Display
D/G Cancelling
English
56
Comment
Call successfully cancelled by user
A
Display
Call Ended
Comment
Call ended, another call
can now be made
SAFETY INFORMATION
This section provides information and instructions for
the safe and efficient operation of Motorola Portable
and Mobile Two-Way Radios.
•
•
National Council on Radiation Protection and
Measurements (NCRP - 1986)
International Commission on Non-Ionizing
Radiation Protection (ICNRP - 1986)
European Committee for Electrotechnical
Standardisation (CENELEC):
• ENV. 50166-1
1995 E
For information regarding radio use in hazardous
areas, please refer to the Factory Mutual (FM)
approval manual supplement or Instruction Card
which is included with radio models that offer this
capability.
Human Exposure to Electromagnetic Fields Low Frequency (0Hz to 10kHz)
• ENV. 50166-2
1995 E
Human Exposure to Electromagnetic Fields High Frequency (10kHz to 300GHz)
Exposure To Radio Frequency Energy
• Proceedings of
SC211/8 1996
Safety Considerations for
Human Exposure to E.M.F.s
from Mobile Telecommunications Equipment (M.T.E.) in
the Frequency Range
30MHz - 6 GHz (E.M.F. Electromagnetic Fields)
National and International Standards and
Guidelines
Your Motorola Two-Way Radio, which generates and
radiates radio frequency (RF) electromagnetic energy
(EME) is designed to comply with the following National
and International Standards and Guidelines regarding
exposure of human beings to radio frequency
electromagnetic energy:
•
•
Federal Communications Commission Report
and Order No. FCC 96-326 (August 1996)
American National Standards Institute
(C95.1 - 1992)
To assure optimal radio performance and that
human exposure to radio frequency electromagnetic
energy is within the guidelines set forth in the above
standards, always adhere to the following
procedures:
57
English
SAFETY
Safe and Efficient Operation of Motorola
Two-Way Radios
•
SAFETY
Portable Radio Operation and
EME Exposure
Operational Warnings
!
When transmitting with a portable
radio, hold the radio in a vertical
position with its microphone 2.5 to 5
centimeters (1 to 2 inches) away from your mouth.
Keep antenna at least 2.5 centimeters (1 inch) from
your head and body.
If you wear a portable two-way radio on your body,
ensure that the antenna is at least 2.5 centimeters
(1 inch) from your body when transmitting.
MAN WITH RA
Electromagnetic Interference/Compatibility
Note: Nearly every electronic device is susceptible
to electromagnetic interference (EMI) if
inadequately shielded, designed or otherwise configured for electromagnetic compatibility.
To avoid electromagnetic interference and/or
compatibility conflicts, turn off your radio in any
facility where posted notices instruct you to do so.
Hospitals or health care facilities may be using
equipment that is sensitive to external RF energy.
When instructed to do so, turn off your radio when
on board an aircraft. Any use of a radio must be in
accordance with airline regulations or crew
instructions.
English
58
Vehicles With an Air Bag
WARNING
Do not place a portable radio in the area over an air
bag or in the air bag deployment area. Air bags
inflate with great force. If a portable radio is placed
in the air bag deployment area and the air bag
inflates, the radio may be propelled with great force
and cause serious injury to occupants of the vehicle.
Potentially Explosive Atmospheres
Turn off your two-way radio when you are in any
area with a potentially explosive
atmosphere, unless it is a radio type especially
qualified for use in such areas (for example, Factory
Mutual or CENELEC Approved). Sparks in a
potentially explosive atmosphere can cause an
explosion or fire resulting in bodily injury or even
death.
Batteries
Do not replace or recharge batteries in a potentially
explosive atmosphere. Contact sparking may occur
while installing or removing batteries and cause an
explosion.
Batteries
To avoid possible interference with blasting
operations, turn off your radio when you are near
electrical blasting caps, in a blasting area, or in
areas posted: “Turn off two-way radio.” Obey all
signs and instructions.
All batteries can cause property damage and/or
bodily injury such as burns if a conductive material
such as jewellery, keys, or beaded chains touch
exposed terminals. The conductive material may
complete an electrical circuit (short circuit) and
become quite hot. Exercise care in handling any
charged battery, particularly when placing it inside a
pocket, purse, or other container with metal objects.
Note:
The areas with potentially explosive atmospheres
referred to above include fueling areas such as:
below decks on boats; fuel or chemical transfer or
storage facilities; areas where the air contains
chemicals or particles, such as grain, dust or metal
powders; and any other area where you would
normally be advised to turn off your vehicle engine.
Areas with potentially explosive atmospheres are
often but not always posted.
General Radio Care
•
Damaged Antennas
Caution
Do not use any portable two-way radio that has a
damaged antenna. If a damaged antenna comes
into contact with your skin, a minor burn can result.
!
Caution
•
Avoid physical abuse of the radio such as carrying
it by the antenna.
•
The accessory connector (if fitted) has a protective cap which should be left in place when the
connector is not in use.
•
Clean the radio exterior using a cloth moistened
with clean water and a mild dishwashing liquid.
•
The use of non-approved radio accessories may
damage the radio and invalidate warranty.
Operational Cautions
!
The use of chemicals such as
detergents, alcohol, aerosol
sprays, and/or petroleum
products may be harmful to
and damage the radio housing.
59
English
SAFETY
Blasting Caps and Areas
NOTES
NOTES
English
60