1
This document is a PDF version of the AMSTRAD DDI-1 USER
INSTRUCTIONS manual.
This version has been scanned and OCRed from the original and as a result may
contain spelling mistakes and errors which were not part of the original
document.
This manual is © Copyright Amstrad plc. All rights reserved.
Amstrad plc have given their permission for this document to be distributed on
the Unofficial Amstrad WWW Resource.
Amstrad plc website:
http://www.amstrad.com/
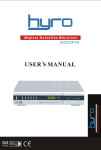
AMSTRAD
DISC DRIVE & INTERFACE
DDI-1
Congratulations on becoming the proud owner of the Amstrad
DDI-1. You will soon discover the wisdom of your choice, and what
a worthwhile investment your unit is.
Its speed will allow you to load and save files in seconds which would take several
minutes using cassette. Furthermore, each disc allows you to store up to 180k Bytes of
program on a single disc surface (360k on both sides). In other words, all your utilities
on a disc, 10 or so games on a disc, all your standard letter files on a disc, the database
from your indexing system on a disc - and so on.
Moreover, you can access files at random - which means that you don't have to pass
laboriously through unwanted program files to get to the one that you want to use.
Disc operation comes into its own when you want to write any sort of program. When
developing any software, it's very reassuring to take a copy every now and again in
case you happen to attempt to run it, and then discover that you've left an 'ON BREAK
GOSUB' lurking to prevent you from ever escaping back to direct mode; and if you
can do this in 5 seconds rather than 5 minutes, you will obviously get a lot more done!
When developing assembler programs, the convenience of being able to assemble
from disc and then test within seconds rather than minutes will be a boon to both the
seasoned programmer, and the novice feeling his way through machine code for the
first time.
The inclusion of CP/M opens a vast wealth of programming experience to the user.
The 80 column mode ensures that programs will require minimal modification to run
on the CPC464 - and the number of books written on the subject of CP/M and its use
runs well into three figures.
In short, you have made exactly the right decision to upgrade to disc based operation.
It will help and speed up your understanding and appreciation of computing in a way
that is simply not comparable with cassette-only systems.
Furthermore, the 3 inch compact floppy disc format, in its tough plastic casing (with a
protective shutter covering the head area) prevents accidental damage and provides a
positive and rigid location in the drive mechanism.
Two operating systems are supplied:
AMSDOS is an extension of the cassette filing system in CPC464 BASIC, and allows
access to the BASIC interpreter.
CP/M 2.2 is the standard 'random access' Z80 disc operating system for over 5000
commercial programs - ranging from business and accounts software to second
languages and scientific and engineering analysis. Thanks to the thoughtful
implementation of CP/M on the CPC464, CP/M files may be freely mixed on the disc
with AMSDOS files, which are automatically labelled with the appropriate filetype.
Digital Research's famous Dr LOGO has emerged as the most universal educational
and teaching medium - combining the unique user-friendliness of 'turtle graphics' with
sophisticated processing power. Dr LOGO is acclaimed as the most comprehensive
implementation of LOGO available and is supplied free as part of your Amstrad DDI-1
package.
AMSOFT
A division of
AMSTRAD
CONSUMER ELECTRONICS PLC
© Copyright 1984 AMSOFT, AMSTRAD Consumer Electronics plc
Neither the whole or any part of the information contained herein, or the product described in this manual may be
adapted or reproduced in any material form except with the prior written approval of AMSTRAD Consumer Electronics plc ('AMSTRAD’).
The product described in this manual and products for use with it are subject to continuous development and improvement. All information of a technical nature and particulars of the product and its use (including the information and
particulars in this manual are given by AMSTRAD in good faith. However, it is acknowledged that there may be errors
or omissions in this manual. A list of details of any amendments or revisions to this manual can be obtained by sending
a stamped, self addressed envelope to AMSOFT Technical Enquiries. We ask that all users take care to submit their
reply paid user registration and guarantee cards.
AMSOFT welcome comments and suggestions relating to the product or this manual.
All correspondance should be addressed to:
AMSOFT
169 Kings Road
Brentwood
Essex CM14 4EF
All maintenance and service on the product must be carried out by AMSOFT authorised dealers. Neither AMSOFT nor
AMSTRAD can accept any liability whatsoever for any loss or damage caused by service or maintenance by unauthorised personnel. This guide is intended only to assist the reader in the use of the product, and therefore AMSOFT and
AMSTRAD shall not be liable for any loss or damage whatsoever arising from the use of any information or particulars
in, or any error or omission in, this guide or any incorrect use of the product.
Dr LOGO and CP/M are trade marks of Digital Research Inc.
Z80 is the trademark of Zilog Inc.
AMSDOS and CPC464 are trademarks of AMSTRAD.
First Published 1984
Compiled by Roland Perry and Ivor Spital with acknowledgements to Locomotive Software Ltd.
Published by AMSTRAD
Typeset by AMSOFT Computer Graphics
AMSTRAD is a registered trademark of AMSTRAD Consumer Electronics plc. Unauthorised use of the trademark or
word AMSTRAD is strictly forbidden.
Contents
Foundation Course
F1 Setting Up
F2 About Discs
F3 Loading Software/Games
F4 Introducing AMSDOS and CP/M
Chapter 1 Making Working Discs
Backup master disc
A working SYSTEM/UTILITY disc
A BASIC only disc
Turnkey AMSTRAD BASIC discs
Turnkey CP1M discs and packages
Configuring discs
Starting and autostarting a Turnkey CP/M package
Chapter 2 AMSDOS Primer
Disc directory
AMSDOS filenames and filetypes
Filename construction, headers and wild cards.
Examples of using AMSDOS commands in a program
Saving variables and performing a screen dump
Reference guide to AMSDOS commands
Copying files
Reference guide to AMSDOS error messages
Chapter 3 CP/M Primer
Operating with CP/M
CP/M system tracks
Configuration sector
Console control codes
Logging in a disc
Direct console commands
Transient commands
File and disc copying
System management
Disc generation
AMSTRAD Disc Drive & Interface DDI-1 Manual
Contents
Chapter 4 Introduction to LOGO
What is LOGO
Dr LOGO procedures
Editing programs and procedures
Operating hints
Summary of Dr. LOGO primitives
Word and list processing
Arithmetic operations
Logical operations
Variables
Procedures
Editing
Text screen
Graphic screen
Turtle graphics
Keyboard, joystick
Sound
System primitives
System variables
System properties
Chapter 4 Technical information for the user – Firmware
Headers
Store requirements
Error messages
AMSDOS messages
BIOS messages
Disc organisation
Jump block interception – by AMSDOS
Jump block re-interception – by the user
Return parameters
Intercepted firmware calls
Appendices
Appendix 1 Glossary of terms
Appendix 2 End User Program Licence Agreement
Appendix 3 Index
Contents
AMSTRAD Disc Drive & Interface DDI-1 Manual
AMSTRAD DDI-1
FOUNDATION COURSE
Foundations 1: Setting Up
Connecting the Mains Lead
The Amstrad disc drive operates from a 220-240V ~50Hz Mains Supply.
The Mains Lead is fitted at the rear of the unit. Fit a proper Mains Plug to the Mains
Lead. If a 13 Amp (BS1363) Plug is used, a 3 Amp fuse must be fitted. The 13 Amp
Fuse supplied in a new Plug must NOT be used. If any other type of Plug is used, a 5
Amp Fuse must be fitted either in the Plug or Adaptor or at the Distribution Board.
IMPORTANT
The wires in this Mains Lead are coloured in accordance with the following code:
Blue : Neutral
Brown: Live
As the colours of the wires in the Mains Lead of this apparatus may not correspond
with the coloured markings identifying the terminals in your Plug, proceed as follows:
The wire which is coloured Blue must be connected to the terminal which is marked
with the letter 'N' or coloured Black.
The wire which is coloured Brown must be connected to the terminal which is marked
with the letter 'L' or coloured Red.
Disconnect the Mains Plug from the Supply Socket when not in use.
Never attempt to remove any screws, or open the case of the disc drive. Always obey
the warning on the Rating Label which is located underneath the case of the disc drive:
WARNING LIVE PARTS INSIDE. DO NOT REMOVE ANY SCREWS
The POWER ON/OFF switch for the disc drive(s) is located on the rear panel of the
unit.
Always ensure that any discs are removed from the drive(s) before switching the
POWER switch ON or OFF.
Always switch the disc drives' POWER switch ON before switching the computer's
POWER switch ON.
Foundation 1.1
AMSTRAD Disc Drive & Interface DDI-1 Manual
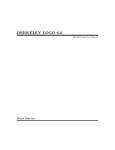
Connecting the DDI-1 to the Computer
1. Check that the computer and disc drive(s) are switched off.
2. Plug the Interface Unit firmly into the edge-connector marked FLOPPY DISC at
the rear of the computer (See Figure 1)
Rear of Computer
Interface Unit
Figure 1
3. At the end of the ribbon cable from the Interface Unit, you will find a plug which is
to be used for connecting to the main disc drive (Drive A), see Figure 2.
The plug which you will find slightly further back in the cable (see Figure 2) is to
be used only for connecting to a second disc drive (Drive B); i.e. if you have
purchased an additional Amstrad FD-1.
Connector Plug to
Main Disc Drive
(Drive A)
Ribbon
Cable
Interface
Unit
Connector Plug to
Second Disc Drive
(Drive B)
Figure 2
AMSTRAD Disc Drive & Interface DDI-1 Manual
Foundation 1.2
4. If you are operating with one disc drive only, connect the computer and disc drive
as shown in Figure 3.
Computer
Interface
Unit
Main Disc Drive
(Drive A)
Figure 3
5. If you are operating with 2 disc drives, connect the computer and disc drives as
shown in Figure 4.
Computer
Interface
Unit
Main Disc Drive
(Drive A)
Second Disc Drive
(Drive B)
Figure 4
Switch on the disc drive(s) then the computer. Your system is now ready for disc
operation.
Foundation 1.3
AMSTRAD Disc Drive & Interface DDI-1 Manual
IMPORTANT
1) For maximum data reliability, do not position your disc drive(s) closer than 20cm
(8 inches) to the monitor, see Figure 5. It is recommended that you locate your disc
drive(s) to the right of the computer (or MP-1 modulator/power supply if used).
DO NOT POSITION YOUR DISC
DRIVE(S) WITHIN THIS AREA
(RECOMMENDED
POSITION)
MP-1
(if used)
Computer
Disc
Drive(s)
Figure 5
Always ensure that your disc drive(s) is not located close to any sources of
electrical interference/noise which could give rise to data corruption.
2) Always ensure that your disc drive(s) and discs are not placed near strong magnetic
fields such as those produced by televisions, hi-fi loudspeakers etc.
3) The ribbon cable from the interface unit to your disc drive(s) should not be placed
parallel to the Mains Leads of the disc drive or monitor, nor close to the monitor.
4) Never block or cover the ventilation slots on the top, bottom, or sides of the disc
drive(s).
5) Do not use or store the disc drive(s) in direct sunlight, or in excessively hot, cold,
damp or dusty areas, or places subject to any heavy vibration.
AMSTRAD Disc Drive & Interface DDI-1 Manual
Foundation 1.4
Foundations 2: About Discs
The Amstrad disc drive uses 3 inch compact floppy discs. We strongly recommend
that for reliable data-to-disc transfer, you use only Amsoft CF-2 compact floppy discs.
Discs made by leading manufacturers however, may also be used.
Each side of a disc may be used separately. A disc should be inserted with its label
facing outward from the drive, and with the side that you wish to use face up (See
Figure 6).
Figure 6
Write Protection
In the left hand corner of each side of a blank disc, you will see an arrow pointing to a
small shuttered hole. This is called the Write Protect hole, and facilitates protection
against erasure or 'overwriting'. See Figure 7.
Write Protect Hole
Figure 7
Foundation 2.1
AMSTRAD Disc Drive & Interface DDI-1 Manual
When the hole is closed, data can be 'written' onto the disc by the computer. When the
hole is open however, the disc will not allow data to be written onto it, thus enabling
you to avoid accidental erasure of valuable programs.
Various compact floppy disc manufacturers employ different mechanisms for opening
and closing the Write Protect hole. The operation may be carried out on the Amsoft
CF-2 compact floppy disc as follows:
To open the Write Protect hole, slide the small shutter located at the left hand corner
of the disc, and the hole will be opened, See Figure 8(a).
Write Protect hole (OPEN)
Shutter
CLOSED
Shutter
OPEN
Write Protection ON
Write Protection OFF
Figure 8(a)
Figure 8(b)
To close the Write protect hole, simply slide the shutter to it’s closed position, see
Figure 8(b).
Some other compact floppy discs employ a small plastic lever located in a slot at the
left hand corner, see Figure 9.
Lever
Write Protect
hole
(CLOSED)
Figure 9
AMSTRAD Disc Drive & Interface DDI-1 Manual
Foundation 2.2
To open the Write Protect hole on this type of disc, slide the lever towards the middle
of the disc, using the tip of a ball-point pen or similar object, see Figure 10.
Slide Lever
towards middle of
disc
Write protect
hole
(OPEN)
Figure 10
Note that regardless of the method employed to open and close the Write Protect hole,
opening the hole in all cases facilitates protection against overwriting.
IMPORTANT
Always ensure that the Write Protect holes on your master CP/M disc are open
When Your Disc Is In
On the front of the unit, you will see a red indicator lamp, and a push button for Eject,
see Figure 11.
Eject
Button
Indicator
Lamp
POWER ON indicator
Figure 11
Foundation 2.3
AMSTRAD Disc Drive & Interface DDI-1 Manual
Indicator Lamp
The red indicator lamp has two functions:
If only one disc drive is connected (Drive A), the lamp indicates that data is being read
from, or written to the disc.
If two disc drives are connected, the red indicator on Drive B will illuminate
constantly, giving you a quick indication of which unit is Drive B.
When reading or writing to disc takes place however, the indicator reverts to its
primary function of indicating that reading/writing is being performed.
Eject Button
Pressing in the Eject button allows you to remove your disc from the drive.
IMPORTANT
1. ALWAYS REMOVE YOUR DISC FROM THE DRIVE
BEFORE SWITCHING THE SYSTEM ON OR OFF.
2. DO NOT PRESS THE EJECT BUTTON WHILE THE DISC IS
BEING READ FROM OR WRITTEN TO. EJECTING THE
DISC AT THIS TIME WILL RESULT IN READ/WRITE
ERRORS.
3. THE MAGNETIC FLOPPY DISC IS PROTECTED BY ITS
PLASTIC OUTER CASING. NEVER ATTEMPT TO GAIN
ACCESS TO OR TOUCH, THE DISC ITSELF.
It is assumed from here onwards in this manual, that you are familiar with the CPC464 computer, and with its BASIC, and that you have carefully read and understood
the CPC-464's User Instruction book.
AMSTRAD Disc Drive & Interface DDI-1 Manual
Foundation 2.4
Foundations 3:
Loading Software/Games
Software/Games available on disc for the Amstrad system are loaded many times more
quickly than their cassette counterparts.
It is necessary however, to remember a few important rules concerning the names of
programs to be loaded or run.
A command such as RUN" normally used when loading cassette software, is invalid
during disc operation as the naming of the program to be run is obligatory on disc.
Program names (or filenames) on disc are comprised of 2 parts (or fields) separated by
a dot .
The first field may contain up to 8 characters, and is usually the title of the game or
program. The second field is optionally specifiable and usually relates to the type of
program, e.g. BAS or BIN (BASIC or binary).
Note that filenames should not contain spaces or punctuation marks in the first or
second field.
Note that the use of either UPPER or lower case letters is permitted when typing in
AMSDOS or CP/M commands and filenames.
Further information on the naming of disc files will be found later in this manual
under the sections concerning AMSDOS and CP/M.
For now, to run a program on disc such as 'Roland in the Caves' type in:
run "rolcave"
If you have inserted the software disc correctly the program will load in a few seconds,
and will be ready for you to use.
If not, study any error message on the screen to see where you went wrong:
Drive A: disc missing
Retry, Ignore or Cancel?
means that you have either not inserted your disc correctly, or that you have inserted it
into Drive B.
ROLCAVE. not found
means that you have either inserted the wrong disc, or have not carefully typed in the
exact name of the program.
(Always follow the loading instructions accompanying each software package).
Foundation 3.1
AMSTRAD Disc Drive & Interface DDI-1 Manual
Bad command
means that you have incorrectly named the program, either by exceeding the number
of permitted characters in a field, or by introducing an unwanted space or punctuation
mark.
Type mismatch
means that you have omitted the quotation marks
Syntax error
means that you mistyped the word run
Drive A: read fail
Retry, Ignore or Cancel?
means that the computer has failed to read data from your disc. Check that you have
inserted the correct disc and press R to Retry. If the above message continues to
appear when you attempt to run that particular disc, it is likely that the disc has been
corrupted, or has not been correctly formatted using Amstrad CP/M.
Finally, if the message:
Press PLAY then any key:
appears on the screen, the disc drive(s) or the interface unit has not been correctly
connected to the computer, or the disc drive is not plugged into the Mains Supply and
switched on.
Note that if you wish to run a disc program after previously operating the Cassette
Datacorder, it will be necessary to issue the |disc command, described in the next
section.
MEMORY USAGE WARNING
The DDI-1 disc interface reduces the amount of memory available in the CPC464 by
1280 bytes. This may result in some cassette-based software failing to operate
correctly if run whilst the disc system is connected to the computer.
The 'Home Runner' demonstration on the CPC464 Welcome cassette is an example
of this aspect of operation.
If you encounter any such problems with cassette-based software, first eject any disc
present in the drive(s), then switch off the computer and disc drive(s).
Unplug the interface unit from the rear of the computer, and then switch on the
computer again. You will now be able to run the cassette in the normal manner.
AMSTRAD Disc Drive & Interface DDI-1 Manual
Foundation 3.2
Foundations 4:
Introducing AMSDOS and CP/M
When you switch your system on, the computer automatically runs internal checks to
see which peripherals are connected to the rear sockets. If the computer senses that a
disc drive(s) is connected, it will take any commands that would have been sent to the
cassette datacorder, and direct them to the disc drive. Hence, typing in any of the
commands:
load filename"
run "filename"
save "fitename"
chain "filename"
merge "filename"
chain merge "filename"
openin "filename"
openout "filename"
closein
closeout
cat
eof
input #9
line input #9
write #9
list #9
will act upon the disc instead of the cassette.
The speed write command however, always pertains to cassette operation, as
there is no such facility as 'disc speed write'.
Having sensed therefore, that a disc drive is connected, the computer reverts to
operation under the AMSDOS system. AMSDOS is an abbreviation of AMStrad Disc
Operating System, and enables you to program in normal Amstrad BASIC, with the
addition of extra commands for disc management.
These commands are called external commands, and are not available in the standard
computer without the disc drive connected. The software governing these commands is
contained in ROM (Read Only Memory) within the Disc Drive and Interface Unit.
External commands are preceeded with a bar symbol |. (You will find the | symbol by
holding down [SHIFT] and pressing the @ key.)
Some of the more common external commands that you will use are:
|a
|b
|tape (which can be sub-divided into |tape.in and |tape.out)
|disc (which can be sub-divided into |disc.in and |disc.out)
Foundation 4.1
AMSTRAD Disc Drive & Interface DDI-1 Manual
The commands |a and |b tell the computer which drive to direct any subsequent
disc command.
Typing in for example:
|a
load "filename"
will tell the computer to load the specified program from a disc placed in drive A.
If neither |a nor |b is initially entered or the computer is reset, the system will
default to drive A.
If you are using only one disc drive, this can be regarded as drive A, and |a or |b
commands need not be issued. Entering |b when only one disc drive is connected, will
result in the message on the screen:
Drive B: disc missing
Retry, Ignore or Cancel
to which you should respond C (to cancel).
The command |tape tells the computer to perform all loading and saving etc.
commands onto tape instead of disc. Unless |tape is entered, the computer will
always default to disc operation when switched on or reset.
To return to disc operation after |tape has been specified, type in:
|disc
Alternatively, you may for example wish to load in from cassette and save out to disc.
You may then use the command:
|tape.in
this command tells the computer to read data in from cassette, but continue to write
data out onto disc (default).
Similarly, to read data in from disc and save out onto cassette, you will first need to
type in: |disc.in to countermand the previously issued |tape.in (above), then: |
tape.out to tell the computer to write data out onto cassette.
It can be seen therefore that |tape.in and |tape.out countermand |disc.in
and |disc.out respectively, and vice versa.
Further information on directing data to and from discs and cassette will be found later
in this manual under the sections concerning AMSDOS and CP/M.
AMSTRAD Disc Drive & Interface DDI-1 Manual
Foundation 4.2
Storing Data Onto Disc
Before writing any data onto a new blank disc, the disc itself must first be formatted.
Formatting can be likened to building a series of shelves and dividers onto a disc prior
to the storage of information on those shelves; in other words, laying down an
organised framework around which data can be put in or taken out.
Formatting divides one side of the disc into 360 distinctly separate areas, see figure 12.
Track 39
Outer Case
Sector
Track 0
Figure 12
There are 40 tracks from the outside of the disc (Track 0), to the inside (Track 39), and
the circumference of the disc is divided into 9 sectors.
Each track in a sector can store up to 512 bytes of data; hence the total available space
on each side of a disc is 180kbytes.
First Steps Using The CP/M Disc
To prepare a new blank disc for reading and writing your own programs onto, you will
need to format using the CP/M disc.
Switch the system on, and insert the CP/M disc supplied, into the drive.
(If you are operating 2 disc drives always insert the CP/M disc into Drive A.)
Type in:
|cpm
This command hands over control of the operating system from AMSDOS to CP/M,
(CP/M stands for Control Program for Microcomputers).
Foundation 4.3
AMSTRAD Disc Drive & Interface DDI-1 Manual
After a few seconds you will see the following message on the screen:
CP/M 2.2 - Amstrad Consumer Electronics plc.
A>
This is a 'Sign on' message indicating that the operating system is under the control of
CP/M.
The displayed A> on the screen is a prompt, (similar to Ready during normal BASIC
operation) indicating that the computer is awaiting your instructions.
CP/M uses several prompts, all of which will be explained later in this manual under
the section concerning CP/M.
Once you are operating CP/M, you cannot enter BASIC commands into the computer,
as these will not be understood.
If for example, you type in the BASIC command:
cls
The Computer will return your entry, together with a question mark:
CLS?
indicating that it does not understand your command.
To briefly look at some of the CP/M commands, type in:
dir
On the screen you will see a directory of CP/M and utility COMmands one of which is
format. Type in:
format
On the screen you will see:
Please insert disc to be formatted into drive A
then press any key
Remove the CP/M disc and insert your new blank disc, then press any black or blue
key. Formatting will start, commencing at Track 0 and ending at track 39, after which
you will be asked on the screen:
Do you want to format another disc (Y/N):
If you wish to format the other side of your blank disc, or format another disc, type Y
(for Yes) and you will receive the initial message once again.
The formatting process can be repeated any number of times until you answer the
repeat question N (for No), whereupon the system will ask you to:
AMSTRAD Disc Drive & Interface DDI-1 Manual
Foundation 4.4
Please insert a CP/M system disc into drive A
then press any key:
After doing so, the computer will return you to direct mode CP/M (console mode), and
will await your next command. Other CP/M commands will be dealt with later in this
manual but for now, having learnt to format with CP/M, we will return to AMSDOS
by typing in:
amsdos
Always keep a master copy of your CP/M disc in a safe place, as it is literally the key
to your system. Later on in this manual, you will be shown how to make a 'working
copy' of your CP/M disc, so that you can keep your master copy safely locked away!
BEWARE
FORMATTING A PREVIOUSLY RECORDED DISC WILL ERASE ITS
CONTENTS.
You will not be able to format a disc which has its Write Protect hole open.
Attempting to do so will result in the message on the screen:
Drive A: disc is write protected
Retry, Ignore or Cancel?
Press C to cancel, then follow the instructions on the screen.
The format mode will then be abandoned.
... Back to AMSDOS
Now that we have a formatted blank disc (or two), we can start to manipulate BASIC
programs to and from disc (and cassette) using AMSDOS.
Saving a Program in Memory onto Disc
Having typed a program into the computer's memory, save it onto disc by typing in:
save "filename"
Once again note that the naming of the program is obligatory, and that it should
contain no more than 8 characters in the first field, and up to 3 characters in the second
field. If you do not specify a second field, AMSDOS will place a token such as BAS
(short for BASIC) there.
Note also that filenames should not contain spaces or punctuation marks in the first or
second field. A dot . is used to separate fields.
Further information on the naming of disc files will be found later in this manual
Foundation 4.5
AMSTRAD Disc Drive & Interface DDI-1 Manual
under the sections concerning AMSDOS and CP/M.
As an example of saving to disc, write a short program into the memory, insert a
formatted disc, then type in:
save "example"
After a few seconds, the prompt Ready will appear on the screen, and the program
will have been saved onto disc. (If not, check any error message on the screen to
establish whether you either forgot to insert your disc into the correct drive, forgot to
close the write protect hole, mistyped the command or even forgot to plug in the disc
drive(s) and switch on!).
Binary, protected and ASCII text files may be saved onto disc using the normal ,b ,p
and ,a suffixes as with cassette saving.
Disc filenames do not require the use of a preceeding exclamation mark ! to suppress
reading/writing prompts and software messages on the screen. Any preceeding ! will
be removed from the filename and ignored by AMSDOS.
Catalog
Like cassettes, discs can be catalogued, but at much greater speed. After saving the
above program, type in:
cat
On the screen you will see:
Drive A: user 0
EXAMPLE.BAS
1K
The filename will be displayed, including any specified or token second field. together
with the file length (to the nearest higher kbyte).
Loading From Disc
Programs may be loaded from disc then run, using the commands:
load "filename"
run
or they may be run directly using the command:
run "filename"
Note that protected programs may be run directly only.
If you are operating 2 disc drives, you may specify which Drive (A or B), that you
require a function to be performed on, by issuing the command |a or |b before the
save, cat, load or run instructions.
AMSTRAD Disc Drive & Interface DDI-1 Manual
Foundation 4.6
Copying Programs From Disc to Disc
Using the commands already learnt in this section, it can be seen that disc to disc
program copying is performed simply by loading the program into the memory from
the source disc, removing the source disc, and saving the program onto the destination
disc.
To save a program from disc to disc using 2 disc drives, you may prefer to insert your
source disc into, for example, Drive B, and your destination disc into Drive A. To
copy a program in this way, type in:
|b
load "filename"
|a
save "filename"
To copy the entire contents of one disc to another, it will be found much easier and
faster to use the DISCCOPY and COPYDISC facilities on the CP/M disc, than to
repeatedly load and save each program individually.
A brief description of how to use DISCCOPY and COPYDISC will be found later in
this section, and a more detailed account will be given under the section concerning
CP/M.
The DISCCOPY and COPYDISC facilities can be used to produce a 'working copy' of
the CP/M system disc itself.
Copying Programs From Cassette to Disc
Insert the program cassette into the datacorder, then type in:
|tape.in
load "program name" or load""
The computer will respond with:
Press PLAY then any key:
After the program has loaded and the cassette has stopped, type in:
save "filename"
Note that protected programs and software/games will not be able to be copied onto
disc or cassette.
Copying Programs From Disc to Cassette
Insert the program disc into the drive. If you have been previously loading in programs
from cassette, type in:
|disc.in
Foundation 4.7
AMSTRAD Disc Drive & Interface DDI-1 Manual
then type in:
load "filename"
After the program has loaded and the Ready prompt appears, save the program onto
cassette by typing in:
|tape.out
save "program name" or save""
The computer will respond with:
Press REC and PLAY then any key:
After the cassette has stopped, the program from disc will have been saved onto
cassette.
Note that the command |tape directs both input and output data to tape (equivalent to
issuing |tape.in and |tape.out commands). Similarly |disc directs both input
and output data to disc.
Copying Using the CP/M System Disc
The entire contents of a disc can be copied from one to another using the CP/M system
disc. If you have connected only one disc drive to the computer, use the DISCCOPY
facility.
If you are operating 2 disc drives you will find it easier and faster to use the
COPYDISC facility.
Copying Using DISCCOPY
Insert the CP/M system disc and type in:
|cpm
After the prompt A> appears on the screen, type in:
disccopy
The computer will ask you to:
Please insert source disc into drive A
then press any key
Remove the CP/M system disc from the drive, and insert the disc that you wish to
copy. If you wish to copy the CP/M disc itself, simply leave the CP/M disc inserted in
the drive.
AMSTRAD Disc Drive & Interface DDI-1 Manual
Foundation 4.8
When the source disc is inserted and you have pressed a key, the computer will display
the message:
Copying started
Reading track 0 to 7
After which, you will be asked to:
Please insert destination disc into drive A
then press any key
Whereupon you should remove your source disc and insert a disc for copying onto.
Bear in mind that any previous data on your destination disc will be overwritten during
copying.
If you insert a wrongly formatted or new unformatted disc into the drive, it will be
correctly formatted automatically during copying.
After you have inserted your destination disc and pressed a key, the computer will
display the message:
Writing track 0 to 7
and will then invite you to insert the source disc once again for reading tracks 8 to 15.
The reading/writing process will continue, 8 tracks at a time, until the last track (39) is
completed.
You will then be asked:
Do you want to copy another disc (Y/N):
If you have finished copying, answer N, then follow the instructions on the screen to
exit from the DISCCOPY mode.
Copying Using COPYDISC
COPYDISC can only be used if you are operating 2 disc drives. The facility enables
you to copy the entire contents of one disc to another, in a similar manner to
DISCCOPY previously described. The advantage of COPYDISC however, is that you
do not have to repeatedly insert and remove the source and destination discs.
Having read and understood the principles of DISCCOPY, COPYDISC may then be
performed as follows:
Insert the CP/M system disc and type in:
|cpm
After the prompt A> type in:
copydisc
Foundation 4.9
AMSTRAD Disc Drive & Interface DDI-1 Manual
Follow the instructions on the screen, and the contents of your source disc will be
copied onto your destination disc 8 tracks at a time, until the last track (39) is
completed. Like DISCCOPY, COPYDISC incorporates automatic formatting if
required. COPYDISC can be used to produce a 'working copy' of the CP/M system
disc itself.
Checking Discs
The CP/M system disc provides facilities for comparing one disc against another to
check for error free data copying.
If you have connected only one disc drive to the computer, select CP/M then type in:
discchk
Follow the instructions on the screen, and the destination disc will be checked against
the source disc. If the computer detects a difference between the discs, it will display
the message:
Failed to verify destination disc correctly:
track x sector y
Otherwise, the computer will continue to check through the discs, 8 tracks at a time,
until checking is completed. If an error was detected, a final WARNING: will be
displayed on the screen, before asking whether you wish to check another disc.
If you are operating 2 disc drives, disc checking may be carried out with more speed
and ease, using the CHKDISC facility. This operates in a similar manner to DISCCHK
previously described. The advantage of CHKDISC however, is that you do not have to
repeatedly insert and remove the source and destination discs. To use CHKDISC,
select CP/M then type in:
chkdisc
and follow the instructions on the screen.
Aborting
Note that functions performed using the CP/M system disc can be aborted by holding
down [CTRL] and pressing the C key. Doing so will return you to CP/M console
mode.
As an example, select CP/M and type in:
disccopy
When the computer invites you to insert a disc, press [CTRL]C. The function will
then be aborted.
Further information on DISCCOPY, COPYDISC, DISCCHK and CHKDISC together
with FORMAT and other CP/M commands will be found later in this manual under the
section concerning CP/M.
AMSTRAD Disc Drive & Interface DDI-1 Manual
Foundation 4.10
To conclude this 4-part Foundation course, here is a brief summary
of the Important points covered so far:
INSTALLATION
1. Always connect the Mains Lead to a 3 pin plug following the instructions
contained in the first section entitled, 'Setting Up'.
2. Never connect the disc drive(s) to any Mains Supply other than 220-240V ~ 50Hz.
3. There are no user serviceable parts inside the unit(s). Do not attempt to gain access
into the equipment. Refer all servicing to qualified service personnel.
4. Do not position your disc drives closer than 20cm (8 inches) to your monitor, nor
close to any source of electrical interference.
5. Keep disc drives and discs away from magnetic fields.
6. Keep the ribbon cable away from Mains Leads.
7. Do not block or cover any ventilation holes.
8. Do not use or store the equipment in excessively hot, cold, damp, or dusty areas.
OPERATION
1. Always remove any disc from the drive(s) before switching the system on or off.
2. Always switch the disc drives' POWER switch ON before switching the computer's
POWER switch ON.
3. Do not press the Eject button while reading or writing is being performed on a disc.
4. Ensure that you do not lose or accidentally overwrite your CP/M system disc. You
are advised to make a 'working copy' of the disc, and to ensure that its Write Protect
holes are open.
5. Never touch the floppy disc itself, inside its protective casing.
6. If you are using cassette based software while the DDI-1 system is connected to the
computer, observe the Memory Usage Warning on page F3.2 of this Foundation
Course.
Foundation 4.11
AMSTRAD Disc Drive & Interface DDI-1 Manual
AMSTRAD Disc Drive & Interface DDI-1 Manual
Foundation 4.12
CHAPTER 1
Making Working Discs.
This chapter discusses how to make discs to use from day to day,
and introduces some facilities of CP/M and its Utility programs.
Subjects covered are:
• Making a backup Master System/Utilites disc
• Constructing a Working Systems/Utility disc.
• Operating with a BASIC only disc.
• Installing a Turnkey AMSTRAD BASIC application.
• Installing a Turnkey CP/M application.
The foundation course has described how to format a blank system disc, which you
can use for BASIC and games as well as CP/M, and how to make exact copies of discs
with the DISCCOPY (one drive) or COPYDISC (two drive) programs. This chapter
considers how to make discs with the programs that you want on them.
1.1 Backup Master Disc
It is most important to make a copy of the Master System/Utility disc provided with
your DDI-1 and keep the original safe - it will be very costly to replace if damaged!
Remember that the disc supplied has two sides, the System/Utilities side and the Dr
LOGO side. Every disc, in fact, has two sides and you are free to use either side for
any purposes.
Remember that if you are using a fresh disc to copy onto, the DISCCOPY and
COPYDISC programs will format for you as well as doing the copying.
Chapter 1.1
AMSTRAD Disc Drive & Interface DDI-1 Manual
1.2 A working SYSTEM/UTILITY disc.
You will find that, as well as making a day-to-day copy of your Master System/Utility
disc and Dr LOGO disc, it is most convenient if you make a 'working utility disc'
containing a few of the programs from the Master System/Utility disc that you use the
most. This will still leave plenty of room for your programs. Should you require to run
any other utility programs then you can always obtain them from your copy of the
Master System/Utility disc. All the more commonly used programs will, however, be
at your fingertips.
First use CP/M and the FORMAT program to create a new blank disc. Then use the
CP/M program FILECOPY to copy each program that you want, onto the new disc.
Experience will tell you which programs you'll want to have handy. In this example we
have chosen AMSDOS.COM, FILECOPY.COM and DISCCOPY.COM.
Using your copy of the Master System/Utilities disc as the CP/M system disc, select
CP/M, and at the A> prompt type FILECOPY FILECOPY.COM and follow the
displayed instructions. (The SOURCE disc is the one initially in the drive and the
DESTINATION disc is the new disc you are creating). When it has finished, copy the
other two programs by the commands FILECOPY AMSDOS.COM and FILECOPY
DISCCOPY.COM
Once you have made one working system/utilities disc with your selection upon it, you
can prepare the second side of that disc or both sides of other discs simply by using the
DISCCOPY or COPYDISC programs. Take note however of the copying restrictions
laid down in the End User Licence Agreement, in Appendix 2 of this manual.
1.3 A BASIC only disc.
Tracks 0 and 1 of a system disc are reserved by CP/M and cannot be used by you. If
you want to use all the space on a disc for games, programs or data in BASIC, and
NEVER intend to use CP/M or ANY of the CP/M utilities on that disc, it can be
formatted without the CP/M system tracks. It is then called a data disc.
The disc must be formatted using an option of the format program: type FORMAT D
instead of FORMAT. To copy programs onto this disc you must use FILECOPY
(loaded from a system disc) or LOAD and SAVE them from BASIC. In a two drive
system it is possible to use the CP/M utility PIP. The programs COPYDISC and
DISCCOPY will format the destination disc to the same as the source.
1.4 Turnkey AMSTRAD BASIC discs
If you buy an application program written in AMSTRAD BASIC for the CPC464 it
should be ready to operate when you switch on. (The expression "Turnkey" comes
from the days when all small computers had a key-operated power switch). All you
have to do is install it on a suitable working disc
AMSTRAD Disc Drive & Interface DDI-1 Manual
Chapter 1.2
1.4.1 Turnkey BASIC using disc supplied.
Simply copy the master disc, with COPYDISC or DISCCOPY, preserve the master disc
and use the copy. Follow the instructions provided to run the program. If you require
any additional programs from your Master System/Utility disc, use FILECOPY to
transfer them.
1.4.2 Turnkey BASIC onto your Working disc.
In this case, copy the supplied programs onto your existing disc. Type FILECOPY and
follow the instructions. In particular answer N to the question:
Ambiguous file name: Confirm individual files (Y/N)?
The FILECOPY program will inform you of the filenames as they are copied. You can
then run the new application program from your upgraded working disc.
1.5 Turnkey CP/M Discs
The CP/M operating system allows you to load and run an immense library of software
which has already been written for personal computers that support CP/M. The
fundamental 'logic' of these programs has already been devised; all that is required to
use them on your CPC464 is to establish them on a suitable diskette and maybe to
inform them of the particular method that the CPC464 uses to operate the screen.
A set of programs on one disc designed to fulfil a specific application is called a
'package'. These packages are normally designed to work on a large range of different
computers, each of which has its own size of screen and way of moving the cursor
around. Sometimes the package you buy will have already been 'installed' for the
CPC464 or cater for it in a menu of alternative installations. In these cases, simply
follow the instructions provided with the software. If the package does not have a
CPC464 variant built in then section 1.5.2 ahead indicates the commands that can be
sent to the CPC464 screen to produce the sorts of effects that packages require.
Normally the installation, or customisation procedure will involve typing in the
relevant codes when requested to. Again, follow the instructions provided with the
package.
The software you have purchased must be on a disc suitable for use in the CPC464.
Almost every different computer uses a different form of disc. Although many have
the same size of disc this does not necessarily mean that there is any compatability
between one and another in the information contained on them. Ask your supplier for a
3”' AMSTRAD CPC464 version.
1.5.1 Creating a Turnkey CP/M System disc.
It is wise to preserve the original master disc containing the new software package and
transport the programs to another disc.
Chapter 1.3
AMSTRAD Disc Drive & Interface DDI-1 Manual
Although the instructions below are for a single drive disc system, it is in general,
simplest to follow them also if you have a twin disc system (by ignoring the second
drive).
Firstly format a new system disc. Then copy all the programs from your master
package disc using FILECOPY from your System/Utility disc.
Type FILECOPY *.* and follow the instructions on the screen. In particular answer
N to the question:
Ambiguous filename: Confirm individual files (Y/N) ?
The FILECOPY program will inform you of the filenames as they are copied.
When the FILECOPY program has finished you will have a working copy of the
turnkey disc. If you require any utilities, copy them from your System/Utilities disc
using FILECOPY.
1.5.2 Configuring a CP/M Program
The CPC464 supports a wide range of control codes suitable for customising a
software package to run with CP/M. Most data-processing any many other packages
require to be able to print messages at any part of the screen, accept input from any
part of the screen and generally understand cursor controls.
If your package has already been customised for the CPC464 then you need not
concern yourself further.
1.5.2.1 Configuring the Output from the package.
The installation procedure for a package will normally consist of running a special
program (often called INSTAL) which will ask a number of questions about the
parameters of the CPC464 screen. The answers should be derived from the table
below, which is an extract from the Amstrad BASIC reference Manual SOFT157:
Value Hex
Value Decimal
Operation
&07
&08
&09
&10
&0B
&0C
&0D
&10
&11
7
8
9
10
11
12
13
16
Sound Bleeper
Move cursor back one position.
Move cursor forward one position.
Move cursor down one line.
Move cursor up one line.
Home cursor and clear screen.
Move cursor to left edge of window on current line.
Delete character at cursor position.
Clear from left edge of window to and including the
cursor position.
Clear from and including the current cursor position to
right edge of window.
Clear from start of window to and including the
current cursor position.
17
&12
18
&13
19
AMSTRAD Disc Drive & Interface DDI-1 Manual
Chapter 1.4
Value Hex
Value Decimal Operation
&14
&18
&1E
&lF <c> <r>
20
24
30
31 <c> <r>
Clear from and including the current cursor position to
end of window.
Toggle into/out of Inverse video.
Home cursor.
Move cursor to given position in current window.<c>
is column, normally 1..80, <r> is row, normally 1-25.
1.5.2.2 Configuring the Input to the package.
The programs in the package will expect to be able to interrogate the keyboard. Most
of the keys on the CPC464 keyboard return standard values except for the cursor keys.
It is possible to use the SETUP utility (see CP/M primer) to re-define the codes
produced by the keyboard, although, where possible, it is preferable for each different
package to be configured to accept the standard default values.
The column marked 'WP Value' in the table below indicates typical values which
might be set into the keyboard via the SETUP utility in a word processing environment
if, for example, cursor codes are required from both the cursor key cluster and a
portion of the keyboard, and the Word Processing package is only capable of
recognising one unique code for each operation.
The installation procedure for a package will normally consist of asking a number of
questions about the parameters of the CPC464 keyboard. The answers should be
derived from the table below, which is an extract from the Amstrad BASIC reference
Manual SOFT157:
Key Name
Cursor up
Cursor right
Cursor down
Cursor left
C1r
Return
Space
Escape
Tab
Del
Value Hex
&F0
&F3
&Fl
&F2
&10
&0D
&20
&FC
&09
&7F
Value
Decimal
[Key number if required
to use SETUP utility]
WP Value
240
243
241
242
16
13
32
252
9
127
0
1
2
8
16
18
47
66
68
79
5
4
24
19
7
13
32
27
9
127
(Decimal)
1.5.3 Starting a Turnkey CP/M Package.
Normally all that is required is to type the package's main program name at the A>
prompt. For example, to run a wages program called PAYROLL.COM simply type
PAYROLL
Chapter 1.5
AMSTRAD Disc Drive & Interface DDI-1 Manual
1.5.4 Autostarting a Turnkey CP/M Package.
It is possible to arrange for the CP/M operating system to automatically run a
particular program every time CP/M is entered using a particular diskette. This is
performed by one of the options in the SETUP program. (See CP/M primer for
details).
AMSTRAD Disc Drive & Interface DDI-1 Manual
Chapter 1.6
CHAPTER 2
AMSDOS Primer
This chapter describes AMSDOS, covering all the available
commands and their uses. It details the format of filenames and
provides a reference guide to the commands. Each step is
illustrated by the use of examples.
Subjects covered in this chapter:
•
•
•
•
•
•
•
•
•
Introduction to AMSDOS
Disc Directory
The format of file names
AMSDOS file headers
Wild cards
An example program using AMSDOS Commands
Reference Guide to AMSDOS Commands
Manipulating files
Reference guide to Error Messages
2.1 Introduction.
AMSDOS extends the AMSTRAD BASIC supplied with your CPC464 by the addition
of a number of external commands and by re-defining some of the existing BASIC
commands. The additional external commands are identified by the | (bar) symbol and
are automatically available from ROM when the DDI-1 disc interface is plugged onto
the CPC464.
NOTE that where a string expression is required by an external command it must be
passed a string variable address. See ERA as an example. Note also that it is not
permitted to include the | (bar) symbol in a REM statement.
AMSDOS allows the user to change discs freely, as long as no files are in use -in
which case an error message will be displayed and there could be a loss of data if the
open file was being written to.
Chapter 2.1
AMSTRAD Disc Drive & Interface DDI-1 Manual
2.2 Disc Directory
Every disc has two sections, the directory and the data area. The directory contains a
list of all the filenames and a 'map' of whereabouts on the disc each file is to be found.
AMSDOS or CP/M can calculate the size of a particular file by inspecting its directory
entry. Calculation of the amount of space left on a disc is made by adding up all the
files in the directory and seeing how much remains unused.
Whenever a file is read its directory entry is examined, giving the disc location. When
a new file is created free space is allocated to it and when a file is erased the space is
relinquished. The directory works in units of 1K and can have up to 64 different
entries. Large files will have one entry for every 16K although normally this fact is
hidden from the user.
2.3 AMSDOS filenames and filetypes.
When using the CPC464 datacorder, filenames are permitted up to 16 characters and
do not normally contain any information about the type of file (eg BASIC, Binary
etc. ) This information is contained in a small record at the beginning of the file, called
the header, and can be displayed by using the CAT command. When using disc
systems it is standard practice to name disc files in such a way that there is an
indication of which type they are. This naming convention DOES NOT 'force' the
computer to use the file in any particular way, but some programs will only accept a
file when it has the correct type of name. BASIC will accept any type of name, but
will search in preference for certain file types if not otherwise specified. (See section
2.3.2)
2.3.1 Construction of Filenames
The filename is constructed from two parts with a . separating them. The first part can
be up to 8 characters long, and the second up to 3 characters long. Thus, for example,
"SCREEN.BIN", "WELCOMED. BAS" and "FORMAT.COM” are all legal
filenames. The second part of the filename is called the filetype. Filenames and
filetypes and can be composed of a mixture of letters and numbers, but cannot have
embedded spaces. Some common conventional filetypes are:
.<space>
Unspecified type. May be a data file created by an OPENOUT
"RESULTS" or BASIC program saved by AMSDOS using SAVE "
PROGRAM",A style.
.BAS
BASIC program saved by AMSDOS using SAVE "PROGRAM" or
SAVE "PROGRAM",P or SAVE "PROGRAM.BAS",A styles.
.BIN
Program or area of memory saved by AMSDOS using SAVE
"MEMORY",B,<binary parameters>, style.
.BAK
Old version of a file, where AMSDOS or a utility program has saved
a newer version of a file using an existing name. This allows the user
to back-track to the previous version if required.
.COM
Command file. CP/M utility programs are all of this filetype.
AMSTRAD Disc Drive & Interface DDI-1 Manual
Chapter 2. 2
2.3.2 AMSDOS headers
AMSDOS automatically SAVEs files with a suitable type identifier so it is not
normally necessary to specify one, unless you wish to override the defaults described
previously. AMSDOS BASIC program files, protected BASIC program files and
binary files are saved to the disc with a header record (similar to that recorded to
cassette) so that the AMSDOS LOAD command can recognise them and take the
appropriate action. (As on Tape, the LOAD command does not need to be told by the
programmer whether the file to be LOADed is BASIC, Protected BASIC, Binary or an
ASCII program - it works this out from the header). If the AMSDOS LOADer cannot
find a header it assumes that the file is a program in ASCII, ie plain text.
Notwithstanding the contents of the header, when the AMSDOS loader is asked to
LOAD a file where no filetype is specified, it first looks for a file of type .<space>,
then if that does not exist on the disc, one of type .BAS then one of type .BIN.
This allows the user to abbreviate the filename, ie not needing to specify the file type,
in most instances.
A disc data file started with the command OPENOUT and subsequently written to will
have no header and the contents will be in ASCII, ie plain text, from the BASIC
WRITE, PRINT or LIST commands. The disc command OPENIN will search for files
in the same order as LOAD if no file type is specified.
2.3.3 Filenames on two drives
On a two drive system, files can exist on either drive. The computer will not
automatically look for a file on both drives so the user must specify which drive to use.
You can either employ the |A or |B or |DRIVE commands (full description section
2.5.2) to select one or other drive, and then use a normal file name, or alternatively
you can override the default drive assignment by specifying the drive as a A: or B:
prefix to the filename. Thus, for example
|B
SAVE "PROG.BAS"
|A
and
|A
SAVE "B:PROG .BAS”
both save the program on the second drive, Drive B
Chapter 2.3
AMSTRAD Disc Drive & Interface DDI-1 Manual
2.3.3 Wild cards
It is often required to perform some disc operation (Cataloguing, copying, erasing etc)
on a number of disc files. When a filename is specified for a particular operation, the
software scans the disc directory looking for a name which exactly matches. It is
possible, where the command allows, to perform the operation on a set of files where
some of the characters can be 'don't care'. This is shown by using the character ? in the
don't care position. If the whole block of the filename or type specifier is 'don't care'
then the block of ?'s can be abbreviated to the symbol * . Thus, for example, FRED.*
is shorthand for FRED.??? and F*.BAS is shorthand for F???????.BAS . Finally the
expression *.* means 'all files'.
example:
DIRECTORY
BERT.BAS
FRED1.BAS
FRED2.BAS
FRED3.BAK
FRED3.BAS
FINISH.BAS
Match *.BAS
BERT.BAS
FRED1.BAS
FRED2.BAS
FRED3.BAS
FINISH.BAS
Match FRED?.BAS
FRED1.BAS
FRED2.BAS
FRED3.BAS
Match F*.BA?
FRED1.BAS
FRED2.BAS
FRED3.BAK
FRED3.BAS
FINISH.BAS
2.4 Examples of Using AMSDOS Commands in a
program.
To give you a good understanding of the AMSDOS commands, we recommend that
you work through the examples, referring to the relevant sections in the rest of this
chapter as you go. DO NOT operate these programs with your original Master
System/Utility disc installed - the program writes to the disc and you should NEVER
risk writing to the master disc. Use a working disc or copy instead.
2.4.1 Saving variables and performing a Screen Dump
NOTE: the use of .DAT and .SRN filetypes. These filetypes are used to remind us of
what is in the file, rather than because they have any inherent significance. The file
PARAM.DAT will be an ASCII data file without a header, whilst FLAGDUMP.SRN
is an AMSDOS Binary file with a header. The programs have been provided on your
Master System/Utility disc in unprotected ASCII form.
The first example (EX1.BAS) draws a Union Jack flag and then saves the whole
screen to disc. To run it type RUN"EX1". As we discussed, AMSDOS will search
automatically adding the .BAS filetype for you. The particulars of the screen dump,
namely the screen mode, palette colours and name of file containing the actual
information are saved into a parameter file. This illustrates the use of a data file to
WRITE program variables (dumpfile$) and constants (1), saving them for use by
another program.
AMSTRAD Disc Drive & Interface DDI-1 Manual
Chapter 2. 4
10 DIM colour(2)
20 MODE 1:ORIGIN 0,0,0,640,0,400 : REM reset screen
30 dumpfile$="flagdump.srn"
40 FOR i=0 TO 2
50 READ colour(i): REM Get colours from DATA statement
60 INK i,colour(i)
70 NEAT
80 OPENOUT "Param.dat"
90 WRITE #9,dumpfile$,1: REM save filename and mode
100 FOR i=0 TO 2
110 WRITE #9,colour(i): REM save colours
120 NEXT i
130 CLOSEOUT
140 BORDER 0
150 FOR x=-65 TO 60 STEP 2
160 MOVE x,400:DRAWR 24,-150,1
170 MOVE x,O:DRAWR 240,150
180 NEXT x
190 FOR x=575 TO 700 STEP 2
200 MOVE x,400:DRAWR -240,-150
210 MOVE x,O:DRAWR -240,150
220 NEXT x
230 FOR x=-40 TO 0 STEP 2
240 MOVE x,400:DRAWR 240,-150,2
250 NEXT x
260 FOR x=0 TO 40 STEP 2
270 MOVE x,O:DRAWR 240,150
280 NEXT x
290 FOR x=640 TO 680 STEP 2
300 MOVE x,O:DRAWR -240,150
310 NEXT x
320 FOR x=600 TO 640 STEP 2
330 MOVE x,400:DRAWR -240,-150
340 NEXT x
350 ORIGIN 0,0,260,372,0,400:CLG 1
360 ORIGIN 0,0,0,640,150,250:CLG 1
370 ORIGIN 0,0,284,348,0,400:CLG 2
380 ORIGIN 0,0,0,640,169,231:CLG 2
390 SAVE dumpfile$,b,&C000,&4000
400 DATA 2,26,6
Chapter 2.5
AMSTRAD Disc Drive & Interface DDI-1 Manual
The second example (EX2.BAS) is a general purpose screen dump displaying
program, using a parameter file to control its action. Note how variables are INPUT
from the data file, with the EOF function allowing automatic variation in the size of
the file. It is important that the screen dump displayed by this program was saved with
the screen in a known position in memory, otherwise the result will be 'skewed'. This
is ensured by the saving program executing a MODE command and thereafter being
careful not to cause the screen to scroll.
10 DIM colour(15) : REM Provision for 16 colours
20 OPENIN “param.dat”
30 INPUT #9,filename$,screenmode
40 i=0
50 WHILE NOT EOF
60 INPUT #9, colour(i)
70 INK i, colour(i)
80 i=i+1
90 WEND
100 CLOSEIN
110 MODE screenmode:BORDER 0
120 LOAD filename$
2.4.2 Pre-empting a Garbage Collection.
If the program performing data file transactions has a number of string variables,
particularly string arrays, it will speed the OPENing of files if the computer is
persuaded not to perform a garbage collection at that time. Garbage collection is the
process by which the BASIC clears away and tidies up the memory space used for
strings in order to dynamically allocate a buffer for the file transfer.
If a program does indeed operate a number of string variables and arrays, incorporate
the lines below into the program, and a file buffer will be permanently allocated,
which will prevent garbage collection when subsequent files are opened. Note that the
lines below should be incorporated after any SYMBOL AFTER commands in the
program.
OPENOUT "DUMMY"
MEMORY HIMEM-1
CLOSEOUT
2.5 Reference guide to AMSDOS commands.
Refer to Chapter 8 in your CPC464 User Instruction manual if you are in any doubt
about the notation used, or the effect of particular commands when used with cassette.
AMSTRAD Disc Drive & Interface DDI-1 Manual
Chapter 2. 6
2.5.1 Summary of BASIC commands
The following AMSTRAD BASIC commands are intercepted to operate on the disc
system rather than the datacorder. Apart from the CAT command, whose action is
substantially different, the effect of these commands is very similar to the cassette
versions as described in the CPC464 User Instruction Manual
File reading commands:
LOAD, RUN, CHAIN, MERGE, CHAIN MERGE,
OPENIN, EOF, INPUT #9, LINE INPUT #9, CLOSEIN
File writing commands:
SAVE
OPENOUT, PRINT #9, WRITE #9, LIST #9, CLOSEOUT
Cataloguing command:
CAT
The disc directory is sorted into alpha-numeric order and displayed in columns along
with each individual file size. The amount of free space is also shown.
2.5.2 Summary of AMSDOS external commands.
The following commands are contained in a ROM within the disc drive interface.
They are available as soon as the DDI- 1 is installed and powered up.
|A
|A
COMMAND: Set default drive to drive A. Equivalent to |DRIVE with parameter A.
|B
|B
COMMAND: Set default drive to drive B. Equivalent to |DRIVE with parameter B .
Chapter 2.7
AMSTRAD Disc Drive & Interface DDI-1 Manual
|CPM
|CPM
COMMAND: Switch to alternative disc environment by loading operating system
from a system disc. The operating system supplied with the DDI-1 is CP/M 2.2 This
will fail if drive A does not contain a system disc with CP/M
|DIR
|DIR [,<string expression>]
f$="*.BAS"
|DIR,@f$
COMMAND: Display the disc directory (In CP/M style) and free space. If the <string
expression> is omitted, the wild-card is assumed.
|DISC
|DISC
COMMAND: Equivalent to the two commands |DISC.IN and |DISC.OUT.
|DISC.IN
|DISC.IN
COMMAND: Use disc as file input medium.
|DISC.OUT
|DISC.OUT
COMMAND: Use disc as file output medium.
|DRIVE
|DRIVE,<string expression>
a$=”A”
|DRIVE,@a$
COMMAND: Set the default drive. This will fail if AMSDOS is unable to read the
disc in the requested drive.
AMSTRAD Disc Drive & Interface DDI-1 Manual
Chapter 2. 8
|ERA
|ERA,<string expression>
a$="FRED.BAK"
|ERA,@a$
COMMAND: All files which match the filename and are not read-only are erased.
Wild cards are permitted.
|REN
|REN,<string expression>,<string expression>
O$="OLDNAME.BAS"
N$="NEWNAME.BAS"
|REN,@N$,@O$
COMMAND: Give a file a new name. A file with the new name must not already
exist.
|TAPE
|TAPE
COMMAND: Equivalent to the two commands |TAPE.IN and |TAPE.OUT.
|TAPE.IN
|TAPE.IN
COMMAND: Use cassette as file input medium.
|TAPE.OUT
|TAPE.OUT
COMMAND: Use cassette as file output medium.
|USER
|USER,<integer expression>
|USER,3
COMMAND: For specialist use only. Consult CP/M reference manual.
Chapter 2.9
AMSTRAD Disc Drive & Interface DDI-1 Manual
2.6 Copying Files
We have already described the use of the CP/M program FILECOPY to make working
utility discs and package discs. This section describes how to copy all types of file,
from disc to disc, and between disc and tape.
2.6.1 AMSDOS files with headers
It is possible to copy these files in the CP/M environment using PIP or FILECOPY
(See CP/M primer). Any file created by AMSDOS which has a header record (see
2.3.2) will be copyable as a whole, from disc to disc, disc to tape, tape to disc, but in
general the contents of the file will not be understandable by any CP/M programs.
2.6.2 ASCII files
Files created by AMSDOS without headers are generally in ASCII and are both
copyable and understandable by CP/M programs. In particular it should be possible to
exchange ASCII program files, ASCII data files and ASCII text files freely between
AMSDOS and CP/M programs.
2.6.3 Read only files
It is possible, using CP/M, to set any file to be read-only and/or invisible to directory
cataloguing operations. Such attributes can only be set or reset in the CP/M
environment, but are honoured by AMSDOS. For further details see CP/M primer,
STAT utility.
2.6.4 File Copying procedures
The tables ahead cover copying files of all sorts between tape and disc. They assume a
single drive disc system. It is not possible to copy a protected BASIC program at all,
nor to copy a binary file (such as a machine code video game) unless the load
addresses are known. Further details of the programs FILECOPY, CLOAD and CSAVE
are given in the CP/M primer.
AMSTRAD Disc Drive & Interface DDI-1 Manual
Chapter 2. 10
Copying files from one disc to another in a two drive system is normally easier with
the CP/M utility PIP, see CP/M primer.
COPY FROM:
COPY TO:
AMSTRAD BASIC
on tape *
ASCII data
on tape *
Binary
on tape *
AMSTRAD BASIC on |TAPE
LOAD”FILE”
tape *
<change tapes>
SAVE “FILE”
|DISC
H = HIMEM
|TAPE
MEMORY <s>-1
LOAD”FILE”
<change tapes>
SAVE“FILE”
,B,<s>,<l>[,<r>]
|DISC
MEMORY H
<note 2>
Binary on tape *
ASCII
on tape *
|TAPE
LOAD”FILE”
<change tapes>
SAVE “FILE”,A
|DISC
|CPM
CLOAD“FILE”,
TEMP
<change tapes>
CSAVE TEMP
,”FILE”
ERA TEMP
AMSDOS
<note 1>
AMSTRAD BASIC on |TAPE
LOAD”FILE”
disc *
|DISC
SAVE”FILE”
ASCII on disc
Binary on disc *
|TAPE
LOAD”FILE”
|DISC
LOAD”FILE”,A
|CPM
CLOAD”FILE”
AMSDOS
H = HIMEM
|TAPE
MEMORY <s>-1
LOAD”FILE”
|DISC
SAVE “FILE”
,B,<s>,<l>[,<r>]
MEMORY H
<note 2>
* File has a header
<note 1> Requires free disc space for temporary file “TEMP”
<note 2> <s> is start address of file, <l> is length, <r> is optional run address.
Chapter 2.11
AMSTRAD Disc Drive & Interface DDI-1 Manual
COPY FROM:
COPY TO:
AMSTRAD BASIC
on disc *
AMSTRAD
BASIC on
tape *
LOAD”FILE”
|TAPE
SAVE “FILE”
|DISC
ASCII data
on disc *
on tape *
All other disc
H = HIMEM
MEMORY <s>-1
LOAD”FILE”
|TAPE
SAVE“FILE”
,B,<s>,<l>[,<r>]
|DISC
MEMORY H
<note 2>
Binary on
tape *
ASCII
AMSOS Binary
on disc *
LOAD”FILE”
|TAPE
SAVE “FILE”,A
|DISC
|CPM
CSAVE FILE
AMSDOS
AMSTRAD
BASIC on
disc *
LOAD”FILE”
<change discs>
SAVE”FILE”
- or |CPM
FILECOPY FILE
<follow instructions>
AMSDOS
ASCII on
disc
LOAD”FILE”
LOAD”FILE”,A
AMSDOS
Binary on
disc *
|CPM
CSAVE
FILE
AMSDOS
|CPM
CSAVE FILE
AMSDOS
<note 3>
|CPM
FILECOPY
FILE
<follow
instructions>
AMSDOS
|CPM
FILECOPY FILE
<follow instructions>
AMSDOS
All other disc
|CPM
FILECOPY FILE
<follow instructions>
AMSDOS
* File has a header
<note 2> <s> is start address of file, <l> is length, <r> is optional run address.
<note 3 > Destination file cannot be used directly by BASIC. However this option is
useful as a low cost transportation or backup medium. The file can be copied back to a
disc by CLOAD "FILE".
AMSTRAD Disc Drive & Interface DDI-1 Manual
Chapter 2. 12
2.7 Reference guide to AMSDOS Error Messages.
When AMSDOS cannot carry out a command for some reason, it will display an error
message. If there is a problem with the hardware, an error message is followed by the
question Retry, Ignore or Cancel?
R causes the operation be be repeated, possibly after the user has taken some
preventive action.
I causes the computer to continue as if the problem had not occurred, which will often
lead to unexpected and possibly inconvenient results.
C causes the operation to be cancelled, which will often lead to a further error
message. For further information see Chapter 5.
Unknown command
The command is not spelt correctly, or the disc interface is either not installed
correctly or not powered up.
Bad command
The command cannot be carried out for some reason. Syntax error or hardware failure.
<FILENAME> already exists
User is trying to rename a file with a name already in use.
<FILENAME> not found
File does not exist.
Drive <DRIVE>: directory full
No more room in the disc directory for a new entry.
Drive DRIVE>: disc full
No more room on the disc for new data.
Drive <DRIVE>: disc changed, closing <FILENAME>
disc has been changed with files still open on it.
<FILENAME> is read only
File cannot be operated on because it is read only. Files can only be set read-only or
read-write in the CP/M environment.
Chapter 2.13
AMSTRAD Disc Drive & Interface DDI-1 Manual
Drive <DRIVE>: disc missing
No disc in drive, or disc is not seated and spinning properly. Recommended action is
to eject and re-insert the disc and type R
Drive <DRIVE>: disc is write protected
Attempt has been made to write on a disc with the Write Protect hole open. To use the
disc, eject, close the Write Protect hole, re-insert the disc and type R
Drive <DRIVE>: read fail
Hardware error reading disc. Recommended action is to eject and re-insert the disc and
type R
Drive <DRIVE>: write fail
Hardware error writing disc. Recommended action is to eject and re-insert the disc and
type R
Failed to load CP/M
Read error loading CP/M during |CPM command, or you are not using a valid system
disc containing CP/M.
AMSTRAD Disc Drive & Interface DDI-1 Manual
Chapter 2. 14
Chapter 3 CP/M Primer
Operating with CP/M
Subjects covered in this chapter:
• Booting CP/M
• Configuration sector
• Direct console mode
• Transient programs
• Managing peripherals
CP/M is a disc operating system. It is a special program which gives you access to the
full power of your CPC464 disc system. Because CP/M is available for so many
different computers it means that there are thousands of applications packages
available for you to choose from and a whole wealth of knowledge and experience for
you to draw upon.
Full details of CP/M including information on how to write your own programs and
the information for the CPC464 implementation are contained in SOFT159 A Guide to
CP/M.
3.1 Introduction.
The CP/M operating system provides a user interface for disc hardware - a way for
you to communicate with the computer and manipulate files and peripherals.
The fundamental interface that is available is called the Direct Console Mode and is
identified by the A> or B> prompt. Certain built-in commands are available but the
majority of the functionality is obtained by loading and running 'Transient Programs'.
They are called 'transient' because they are only in the computer (rather than on the
disc) whilst you are using them, as opposed to being built-in.
As well as standard CP/M error messages the AMSTRAD disc system also generates a
number of specialised hardware error messages. Refer to section 2.7 of the AMSDOS
primer.
3.2 CP/M system tracks
The major part of CP/M resides on the outermost two tracks of the disc. The DDI-1
disc interface loads CP/M from these tracks into the CPC464 memory using a two
stage process.
Chapter 3.1
AMSTRAD Disc Drive & Interface DDI-1 Manual
Firstly the AMSDOS command |CPM loads the first sector of track 0 into the CPC464.
On a system disc this sector has been arranged to be a program which then loads the
rest of the system tracks into memory. Various checks are performed to determine that
the system tracks contain valid CP/M software and to calculate where in memory to
load them.
Part of CP/M is permanently in ROM inside the DDI-1 disc interface, the rest is
loaded into RAM. In the standard configuration 39.75k of RAM is left for transient
programs, with 2k of that used by the Console Command Processor which is loaded
from the system tracks whenever the Direct Console Mode is re-entered.
3.3 Configuration Sector.
During the loading process, when CP/M is first activated, various system parameters
are loaded from a special sector within the system tracks. These parameters include the
Sign-On (wake-up) message, special keyboard codes required etc. The SETUP utility
is provided to customise the configuration sector to your requirements.
3.4 Console control codes.
In the CP/M environment a variety of special key operations are used to control
program flow. These keystrokes replace the action of the [ESC]ape key used in
AMSTRAD BASIC, although some applications packages may re-instate the [ESC]
ape key with some of its former power.
[CTRL]S
[CTRL]C
[CTRL]P
[CTRL]Z
halts the screen output from CP/M. Type any character to resume.
typed at the start of a line returns control to the Direct Console Mode.
Many utilities and applications programs will also recognise this as a
request to abandon the program.
hardcopy toggle. Turn on/off log of all screen output to printer.
end of text.
3.5 Logging in a disc
Unless special action is taken by the CP/M program (as FILECOPY does for example)
then CP/M will not allow you to write to a disc unless it has been 'logged in'.
Furthermore the type of disc format (SYSTEM, DATA OR IBM) is only redetermined when a disc is logged in. For drive A this takes place whenever CP/M
returns to the Direct Console Mode, or when [CTRL]C is typed at the A> or B>
prompt. For Drive B this takes place the first time that the disc in drive B is accessed
after drive A has been logged in.
Should you try writing to a disc that has not been logged in, the error message Bdos
Err on <DRIVE> : R/O will be displayed. Press any key to continue. If the
changed disc was also of a different format then A read or write error will occur. Type
C to continue.
AMSTRAD Disc Drive & Interface DDI-1 Manual
Chapter 3.2
3.6 Direct Console Commands
There are five direct console commands which can be typed at the A> or B> prompt.
The first of these; SAVE, is for specialist use only.
CP/M Error messages tend to be economical and normally consist of repeating the
offending command or filename followed by a ?. Repeat the command with the
mistake corrected.
3.6.1 Filenames
Many of the commands take filenames as parameters, and where specified the
filename may contain wild-cards. (See sections 2.3.1 and 2.3.3 of the AMSDOS
primer). All filenames will be forced to upper case.
Direct Console Commands and most utility programs do not require that filenames are
contained in double quotes "". The CLOAD and CSAVE utilities (see section 3.7.2.3)
do however require that double quotes be placed around the cassette filename only.
Remember that filenames can have an A: or B: prefix to force CP/M to use the
appropriate drive if you have a two drive system.
3.6.2 Switching default drives
If you have two disc drives then it is possible to switch the default drive selection
between drive A and drive B by typing A: or B: at the B> or A> prompt. That prompt,
of course, tells you the current default drive. Adding the A: and B: prefix to filenames
overrides, but does not reset, the default drive setting.
3.6.3 DIR command
DIR lists the DIRectory of the disc. The filenames are not sorted into any particular
order, but the position of the filename in the DIR display indicates the position of that
file's entry in the disc directory. Wild cards are permitted.
DIR
DIR
DIR
DIR
DIR
B:
*.BAS
B:*.BAS
PIP.COM
will list all files
will list all files on Drive B
will list all files of type .BAS
will list all files of type .BAS on drive B
will list only the file PIP.COM , if it exists.
3.6.4 ERA command
ERA is used to ERAse files from the directory. Only the Directory Entry is erased so
the data is still in the data section of the disc until the space is re-used by another file,
but the information is nevertheless not recoverable. Wild card filenames are permitted.
If the filename *.* is specified then ERA will ask for confirmation that all files should
be erased. ERA does not list the filenames that are deleted. If any file about to be
erased is found to be read-only (see STAT) then the command will abort.
Chapter 3.3
AMSTRAD Disc Drive & Interface DDI-1 Manual
ERA PIP.COM
will erase the file PIP.COM
ERA B:PIP.COM will erase the file PIP.COM on drive B
ERA *.BAS
will erase all .BAS files
3.6.5 REN command
REN allows you to REName an existing file. The new filename is specified first
followed by = then the existing filename. If the new filename already exists, an error
message will be displayed. Wild cards are not permitted in the filenames.
REN HELLO.BAS=HALLO.BAS
REN B:HELLO.BAS=HALLO.BAS
Change the name of a file from
HALLO.BAS to HELLO. BAS
3.6.6 TYPE command
TYPE asks for the specified file to be TYPEd onto the screen. If the file is not an
ASCII text file, unpredictable and possibly undesirable side-effects may occur.
TYPE EX1.BAS
Display the program file EX1.BAS
3.7 Transient commands.
To perform more sophisticated file management than permitted by the Direct Console
Mode you must employ one of the various utility programs provided. These are
invoked merely by typing the program name; possibly followed by some parameters.
You will probably already have used FORMAT and DISCCOPY.
The commands fall into a number of categories as indicated below. Full
documentation of these programs is extensive and is contained in A Guide to CP/M
(SOFT 159).
The SYSGEN, BOOTGEN, FILECOPY, COPYDISC, DISCCOPY, CHKDISC,
DISCCHK, FORMAT, SETUP, CSAVE, CLOAD and AMSDOS commands are designed
by AMSTRAD and work exclusively on the CPC464. They have no function on any
other CP/M system, although other manufacturers may supply similar utilities (often
with the same name) customised for their hardware.
3.7.1 Peripheral Management
The PIP utility, (Peripheral Interchange Program), allows you to transfer information
between the computer and its peripherals. In general the form of the command is PIP
<destination> = <source> .
The <source> and <destination> can be either a filename, with wild-cards allowed in
the source, or a device token. The following device tokens may be used:
As Source
As Destination
CON: keyboard
RDR: serial interface
CON: screen
PUN: serial interface
LST: printer
AMSTRAD Disc Drive & Interface DDI-1 Manual
Chapter 3.4
examples:
PIP B:=A:*.COM
PIP SAV.BAS=EX1.BAS
PIP CON:=EX1.BAS
PIP LST:=EX1.BAS
PIP TYPEIN.TXT=CON:
copy all .COM files from drive A: to drive B:
make a copy of EX1.BAS, calling it SAV.BAS
send file EX1.BAS to screen. (Similar effect to TYPE
EX1.BAS)
send file EX1.BAS to printer
accept keyboard input and put into a file called
TYPEIN.TXT. Note that this operation is terminated
by the [CTRL]Z control code, and that in order to get
a newline you must type [CTRL]J after [ENTER]
every time. [CTRL]J is the ASCII for linefeed.
Note that PIP cannot be used to copy files from one disc to another on a single drive
system. Use FILECOPY instead.
3.7.2 File and disc copying
3.7.2.1 Single file copying
The utility FILECOPY allows you to copy files from one disc to another on a single
drive system. It copes with the disc changing and gives full instructions on the screen.
If a wild-card filename is specified then FILECOPY asks you to confirm that you
indeed wish to copy each file on an individual basis. The program informs you of each
filename as each file is copied.
FILECOPY *.BAS
Copy all the files of type .BAS
FILECOPY EX1.BAS Copy the file EX1.BAS
3.7.2.2 Whole disc copiers and checkers
DISCCOPY (for single drive systems) and COPYDISC (for two drive systems) allow
you to make a backup copy of the entire disc. They give full instructions on the screen.
If the Destination disc is not formatted, or not of the same format as the source disc
then these utilities will automatically format the disc correctly as they copy. The
companion utilities DISCCHK and CHKDISC allow you to compare two discs and
verify that they have exactly the same contents.
3.7.2.3 Cassette files.
Two utilities are available which transfer files between tape and disc. Except for
specialist use, it is unlikely that anything other than ASCII, ie plain text, files can
usefully be transferred.
Chapter 3.5
AMSTRAD Disc Drive & Interface DDI-1 Manual
CLOAD can take two parameters, the first is the source (Cassette) filename, enclosed in
double quotes, and the second the destination (disc) filename. If the destination
filename is omitted, the disc file will have the same name as the cassette file. If the
source filename is omitted then CLOAD reads the first file encountered on the tape. If
the first character of the cassette filename is ! then the normal cassette messages will
be suppressed. Example command:
CLOAD "MYLETTER" MYLETTER.TXT
CSAVE can take three parameters. The first is the source (disc) filename and the
second the destination (cassette) filename, enclosed in double quotes. If the destination
filename is omitted, the cassette file will have the same name as the disc file. If the
first character of the cassette filename is ! then the normal cassette messages will be
suppressed. If both filenames are specified then a third parameter may be used to
specify the tape write speed; 0 for nominal 1000 baud, 1 for nominal 2000 baud.
Example commands:
CSAVE OUTPUT.TXT "OUTPUT TEXT" 1
CSAVE DATAFILE
3.7.3 System Management
3.7.3.1 STAT
STAT provides more sophisticated directory (and peripheral) management. All the
normal rules apply to the filenames, including the use of wild-cards. Facilities are
provided to:
Display disc status and free space:
STAT
STAT A:
STAT B:
Display extended directory information about a particular file:
STAT *.COM
STAT EX1.BAS
Set a file to Read-only status , so that it cannot be accidentally erased or overwritten:
STAT *.COM $R/O
STAT EX1.BAS $R/O
Set a file to Read-write status, reversing the Read-only assignment:
STAT *.COM $R/W
STAT EX1.BAS $R/W
Set a file to 'System' status so that it is invisible to directory listings and file copying
programs. The file will still be available for all other purposes:
STAT *.COM $SYS
STAT SECRET.BAS $SYS
AMSTRAD Disc Drive & Interface DDI-1 Manual
Chapter 3.6
Set a file to 'Directory' status, reversing the 'System' assignment:
STAT *.COM $DIR
STAT SECRET.BAS $DIR
3.7.3.2 SETUP
This utility allows you to re-define the characteristics of the CPC464 keyboard, disc
drive and serial interface, and to invoke various actions when CP/M is first loaded.
When finished it updates the configuration sector. The program is menu driven and
when a particular screen is correct, or requires no modification, move on to the next by
answering Y to the question
Is this correct (Y/N):
The program can be aborted by [CTRL]C keys. When all the changes have been
made it will prompt
Do you want to update your system disc (Y/N):
giving you the opportunity to retain the existing configuration sector (by typing N),
and;
Do you want to restart CP/M (Y/N):
allowing you to load and try the new configuration by typing Y.
To copy a configuration sector from one disc to another, either use BOOTGEN (see
ahead) or load SETUP from the source disc, answer Y to every question, inserting the
destination disc at some time before answering the penultimate question.
Characters with an ASCII value less than decimal 32 can be typed into strings by
typing a ^ followed by a suitable character from the set @, A-Z, [, \, ], _
The following options are those more commonly requiring attention:
** Initial command buffer Any characters entered here will appear as if
they had been typed into the direct console mode when CP/M is first loaded. This has
the effect of auto-running a particular program at that time. Remember to include the
equivalent of the [ENTER] key which is represented by the two characters ^M. For
example to auto-run STAT, the initial command buffer should be STAT^M.
Sign-on String This is the message displayed at the top of the screen when
CP/M is first loaded. Note the use of ^J^M to give a carriage return - line feed effect.
The early part of the standard message sets suitable screen and border colours for
working in 80 column mode (See CPC464 User Instructions Chapter 9) and should be
copied exactly if they are to be preserved.
Keyboard translations This allows new ASCII values to be set into keys,
effectively simulating the AMSTRAD BASIC 'KEYDEF' command. The parameters
required are the key number and ASCII values to set into them. Refer to the CPC464
User instructions for a map of key numbers.
Keyboard expansions Effectively simulates the BASIC 'KEY' command.
Chapter 3.7
AMSTRAD Disc Drive & Interface DDI-1 Manual
3.7.3.3 AMSDOS
This program relinquishes control from CP/M and returns to the built-in AMSTRAD
BASIC, from which the AMSDOS disc commands will be available.
3.7.4 Disc Generation
3.7.4.1 FORMAT
The AMSTRAD DDI-1 disc system supports three disc formats, one of which has two
variants.
The usual format is System format, obtained by using the standard FORMAT command.
The system tracks are read from the disc containing the FORMAT.COM program and
are automatically written to the destination disc.
The other formats are obtained by adding a single letter as a parameter to the
command, separated by a single space:
For Data Format type:
For IBM Format type:
For Vendor Format type:
FORMAT D
FORMAT I
FORMAT V
** WARNING ** The licence agreement for your CP/M disc, (which is
electronically serial number encoded) permits its use on a single computer system
only. In particular this means that you are prohibited from giving any other person a
disc with YOUR serial-numbered copy of CP/M on it. Because every system disc
you make has your CP/M on it you must be careful, therefore, not to sell, exchange
or in any other way part with, any system format disc. Instead you must format a disk
in Vendor format, which is identical to System format except that the system tracks
are blank, and then copy the relevant software onto that disc using FILECOPY or
PIP. Be careful that the software you copy in this way is not itself copyright or
subject to a licence agreement.
If you receive software on a disc in Vendor format, in order to use it conveniently
you may either copy it to a system disc by using FILECOPY or PIP or alternatively
convert the disc to a System disc by adding your CP/M to it. This is acheived with
the BOOTGEN and SYSGEN commands.
CAREFULLY READ THE END USER LICENCE AGREEMENT IN APPENDIX 2
OF THIS MANUAL
AMSTRAD Disc Drive & Interface DDI-1 Manual
Chapter 3.8
3.7.4.2 MOVCPM
Sometimes it is required to construct a version of CP/M which does not load into
memory in the standard position. This may be because you wish to reserve some
memory for other purposes, so CP/M itself must be moved to a lower portion of
memory. It is possible to locate CP/M at any position in memory on a 256-byte
boundary. The position is specified by a size parameter in the range 64 to 179. This
parameter indicates the number of 256-byte areas available for CP/M and transient
programs.
The resulting relocated CP/M can either be written to the system disc using SYSGEN
or saved using a command prompted by the MOVCPM program.
The syntax of the command is MOVCPM <size> *
eg MOVCPM 178 * will make a CP/M 256 bytes lower in memory than the standard
version (which is created with the maximum possible size of 179).
3.7.4.3 SYSGEN
SYSGEN writes the result of a MOVCPM command onto the system tracks of a system
or vendor disc. There are three options:
SYSGEN * will write the CP/M generated by an immediately preceding MOVCPM
command.
SYSGEN <filename> will read in the specified file, which will probably have been
saved after a MOVCPM command, and write that to the system tracks. eg. SYSGEN
CPM44.COM
SYSGEN with no parameters will prompt for a Source and Destination disc and
therefore copy the system tracks from one disc to another. This is the option to use if
upgrading a Vendor disc to a System disc.
3.7.4.4 BOOTGEN
As discussed in section 3.2 and 3.3 there is more to the system tracks than just CP/M.
BOOTGEN, which will prompt for source and destination discs, copies the Sector 1,
track 0 (the loader) and the configuration sector from one disc onto another. Use
BOOTGEN as part of the process of upgrading a Vendor disc to a system disc, or when
you want to distribute a newly designed configuration sector around a number of discs.
3.7.5 Advanced programming
The following programs are for specialist use and it is recommended that the user
consults SOFT 159-A Guide to CP/M or other reference works.
ASM
DDT
DUMP
ED
SUBMIT
XSUB
Chapter 3.9
8080 Assembler.
8080 Assembly code debugging aid.
Hexadecimal file dump utility.
A simple context editor.
Console command mode Batch processing
Transient program batch processing.
AMSTRAD Disc Drive & Interface DDI-1 Manual
AMSTRAD Disc Drive & Interface DDI-1 Manual
Chapter 3.10
CHAPTER 4
Introduction to LOGO
This Section is intended to introduce the subject of LOGO, with
examples, and provide a guide to the commands available. It is not
intended to be an exhaustive tutorial or reference guide. That will
be provided by A GUIDE to LOGO (SOFT 160)
Subjects covered are:
• Concept of LOGO
• Loading and Running Dr LOGO
• Turtle Graphics
• Writing your own procedures
• Editing your own procedures
4.1 What is LOGO
Logo can help you grow as a programmer, whether or not you have ever programmed
before.
Logo is a powerful programming language that is rapidly gaining popularity because it
is so easy to learn and use.
You use procedures as building blocks to create Logo programs. Dr. Logo itself is a
collection of procedures, called primitives, that you use to build your own programs.
During the 1970's, a team of computer scientists and educators under the direction of
Seymour Papert, developed Logo with turtle graphics to allow very young children to
program and use a computer.
They developed the turtle so that young learners could have, as Papert says, "an object
to think with", a tool to help them learn in new ways.
In the form of an arrow head, the turtle can be directed across the screen by the use of
simple commands.
Chapter 4.
AMSTRAD Disc Drive & Interface DDI-1 Manual
4.2 Dr. LOGO
Dr LOGO is a thoughtful implementation of Logo which has been specially
customised for the AMSTRAD CPC464, to make it even easier to program.
Extensions have been included to make available the powerful sound facilities of the
CPC464 and program editing is made easy by the inclusion of the cursor key cluster.
4.3 Getting Started
To operate Dr. Logo, insert a copy of SIDE 2 of your master disc into the disc drive.
(The Foundation Course contains instructions on how to copy the master disc.)
Press the [CTRL], [SHIFT] and [ESC] keys simultaneously to reset the computer.
Type in |CPM [ENTER] and LOGO will load automatically.
The following Dr. Logo wake-up message will be displayed on your monitor:
Welcome to
Amstrad LOGO V1.1
Copyright (c) 198314, Digital Research
Pacific Grove, California
Dr.Logo is a trademark of Digital Research
Please Wait
This greeting will soon disappear and a question mark prompt ? will appear on your
screen.
The question mark tells you that Dr.Logo is waiting for you to type something at your
keyboard.
4.4 FIRST STEPS
Try typing in (using lower case letters): fd 60[ENTER]
and you will see a turtle appear which then moves forward 60 units leaving a line
behind it from where it started to where it finished. The screen will clear giving a large
graphics area and a smaller text area with the ? prompt near the bottom of the screen.
Dr. Logo will often decide to re-arrange the screen so as to give either a large text area
or large graphics area, for your convenience.
Type in rt 90[ENTER] and the turtle will move 90 degrees to the right. (From now
on we will assume that you press the [ENTER] key after every line of command.)
Now type in fd 60 and another line will be drawn the same length and at right angles
to the first line.
Experiment with the simple instructions fd , bk (short for back), rt and lt (short for
left) to see what happens on the screen.
AMSTRAD Disc Drive & Interface DDI-1 Manual
Chapter 4.2
4.5 DR. LOGO PROCEDURES
A procedure is a list of instructions that tells Dr. Logo how to do a task.
You will probably write your first procedures by adding to those already built into Dr.
Logo, these are called 'primitives'.
fd, bk, rt and lt are all built-in primitives which you may use at any time as
building blocks to write your own procedures.
Another very useful built-in primitive is cs which clears the screen and sends the turtle
to its starting position.
4.5.1 WRITING A SIMPLE PROCEDURE
It is easy to visualise that if the movements fd 60 rt 90 were to be repeated 4
times each, a square with sides of 60 units would be drawn.
The same effect can be achieved by writing a simple formula:
repeat 4 [fd 60 rt 90]
Clear the screen and then try typing this in to check what happens.
To make this formula into a new procedure called, 'square', type:
to square
repeat 4 [fd 60 rt 90]
end
Dr. Logo will now understand 'square' and each time it encounters the word 'square' it
will draw a square on the screen. We could have given this procedure any name, but
we chose 'square' to remind us what it does.
Dr. Logo allows us to type in a whole set of commands together so the instructions
square rt 45 square, will draw two squares, the second at a 45 degrees angle
to the first.
4.6 Procedures with parameters.
It is possible. to make a procedure to which we can say 'how much' in the same way
that we can say 'how much' to a built-in procedure.
To make a procedure that will draw squares of different sized sides, the definition of
'square' can be altered to:
to squareanysize :side
repeat 4 [fd :side rt 90]
end
This new procedure introduces the idea of a 'variable', which in this case is called :
side
You will notice that the variable :side, is preceeded by a colon, this indicates to Dr.
Logo that :side is a variable rather than a command.
Chapter 4.3
AMSTRAD Disc Drive & Interface DDI-1 Manual
When we use procedure squareanysize :side must have a value. Hence an
instruction squareanysize 150 would produce a square with sides of 150 units.
Try adding two procedures together and see what happens. For example, from an
instruction.
cs squareanysize 100 rt 45 squareanysize 150
the turtle will draw two squares of differing size sides and one will be at a 45 degrees
angle to the other.
Notice how Dr. Logo reminds you that a line of commands has split across more than
one line of screen.
4.7 Using Variables to remember values.
Dr. Logo will also allow us to use variables to remember values as well as for passing
values to a procedure. First define a new procedure called triangle:
to triangle
repeat 3 [fd :edge rt 120]
end
We can test this by typing:
make "edge 100
triangle
If we want to know the value remembered by edge we can just type edge after the ?
prompt and Dr. Logo will print the value.
Finally we can use our variable :edge in a new procedure to draw a pattern. Notice
how the value of :edge is increased by adding to its previous value so that each time
we draw the pattern it gets bigger.
to pattern
triangle lt 60 triangle rt 60
make "edge :edge+ 4
pattern
end
make "edge 10
cs pattern
When you have seen enough, press [ESC] to stop the program.
4.8 Editing programs and procedures
Dr. Logo allows us to correct typing mistakes and to alter procedures that we have
defined. The editing keys to use are:
The cursor Keys [↑][↓][←][→] which move the cursor by one character or line at a
time.
The cursor Keys [↑][↓][←][→] pressed at the same time as holding down [CTRL]
will move the cursor up and down a page and to the left and right of a line.
AMSTRAD Disc Drive & Interface DDI-1 Manual
Chapter 4.4
[CLR] deletes the character under the cursor, [DEL] deletes the character to the left
of the cursor.
[ENTER] tells Dr.Logo that you have finished editing a line of commands or makes
a new line if you are editing a procedure.
[ESC] means abandon and [COPY] tells Dr.Logo that you have finished editing a
procedure.
When typing in commands or new procedures simply edit the text in front of you on
the screen. Any characters other than those mentioned above will be inserted into the
text at the cursor position.
To edit an existing procedure use the command ed . Dr Logo will display the old
version of the procedure on the screen for you, and you can use all the commands
above to move the cursor around, and change what it says.
Try editing the procedure patterns by typing ed "patterns
Experiment with the editing keys. If when you have finished, you press [ESC], Dr.
Logo will abandon what is on the screen and give you back the original unedited
version.
Type ed "patterns again, and after changing the number 4 to 8, press [COPY] to
exit, then re-run the procedure and see how the screen output has changed. Remember
to set the initial value into :edge
4.9 Operating hints.
The workspace used by Dr. LOGO is divided into nodes. You can see how many are
left by typing nodes. Occasionally, when nearly all the nodes are used up, Dr. LOGO
will tidy up the workspace and you may see the turtle pause while this happens. You
can ask Dr. LOGO to tidy the workspace by typing using the command recycle.
This will often allow you to continue after Dr. LOGO has complained of not having
any more nodes left.
Make sure that there is plenty of disc space left before starting Dr. LOGO in case you
decide to save your procedures on disc. You can use the CAT command in AMSDOS
(see AMSDOS primer).
Glance through the final section below and try some of the examples - you won't
understand everything the first time ! As you learn about Dr. LOGO you will be able
to use more and more of the commands.
When you have finished with Dr. LOGO type bye.
4.10 Summary of Dr. Logo primitives.
This section groups together alphabetical lists of Dr. Logo primitives showing the
inputs to use, often with an example.
Primitive names can be entered in either upper or lower-case.
Chapter 4.5
AMSTRAD Disc Drive & Interface DDI-1 Manual
4.10.1 WORD AND LIST PROCESSING:
(Note that prompts ? and > are shown in the following examples)
ascii
Outputs the ASCII value of the first character in the input word.
?ascii "G
71
?ascii "g
103
bf
(but first) Outputs all but the first element in the input object.
?bf "smiles
miles
?bf [l 2 3]
[2 3]
bl
(but last) Outputs all but the last element in the input object.
?bl "smiles
smile
?bl [l 2 3 4]
[l 2 3]
char
Outputs the character whose ASCII value is the input number.
?char 83
S
count
Outputs the number of elements in the input object.
?count "six
3
?count [0 1 2 3]
4
AMSTRAD Disc Drive & Interface DDI-1 Manual
Chapter 4.6
emptyp
Outputs TRUE if the input object is an empty word or an empty list; otherwise outputs
FALSE.
?emptyp "
TRUE
?emptyp []
TRUE
?emptyp [x]
FALSE
?make "x []
?emptyp :x
TRUE
first
Outputs the first element of the input object.
?first "zebra
z
?first [1 2 3]
1
fput
(firstput) Outputs a new object formed by making the first input object the first
element in the second object.
?fput "s "milessmiles
smilessmiles
?fput 1 [2 3]
[1 2 3]
item
Outputs the specified element of the input object.
?item 4 "dwarf
r
list
Outputs a list made up of the input objects, retains lists' outer brackets (compare with s
e).
?(list 1 2 3 4)
[l 2 3 4]
?List "big [feet]
[big [feet]]
?(list)
[]
Chapter 4.7
AMSTRAD Disc Drive & Interface DDI-1 Manual
se
(sentence) Outputs a list made up of the input objects, removes list's outer brackets
(compare with list).
?make "instr_list rl
repeat 4 [fd 50 rt 90]
?run (se "cs : instr_list “ht
Note that the underline character between instr and list is obtained by pressing
[SHIFT]0
word
Outputs a word made up of the input words.
?word "sun "shine
sunshine
wordp
Outputs TRUE if the input object is a word or a number.
?wordp "hello
TRUE
?wordp []
FALSE
4.10.2 ARITHMETIC OPERATIONS
cos
Outputs the cosine of the input number of degrees.
?cos 60
0.5
int
Outputs the integer portion of the input number.
?int 4/3
1
random
Outputs a random non-negative integer less than the input number.
?random 20
sin
Outputs the sine of the input number of degrees.
?sin 30
0.5
AMSTRAD Disc Drive & Interface DDI-1 Manual
Chapter 4.8
+
Outputs the sum of the input numbers.
?+ 2 2
4
?2+2
4
Outputs the difference of the two input numbers.
?- 10 5
5
?10-5
5
*
Outputs the product of input numbers.
?* 4 6
24
?4*6
24
/
Outputs the decimal quotient of the two input numbers.
?/ 25 5
5
? 25/5
5
4.10.3 LOGICAL OPERATIONS:
and
Outputs TRUE if the result of all input expressions are true.
?and(3<4)(7>4)
TRUE
Chapter 4.9
AMSTRAD Disc Drive & Interface DDI-1 Manual
not
Outputs TRUE if the input expression is FALSE; FALSE if the input expression is
TRUE.
?not (3=4)
TRUE
?not (3=3)
FALSE
or
Outputs FALSE if all input expressions are FALSE.
?or "TRUE "FALSE
TRUE
?or (3=4)(1=1)
TRUE
=
Outputs TRUE if the two input objects are equal; otherwise outputs FALSE.
?= "LOGO "LOGO
TRUE
?1=2
FALSE
>
Outputs TRUE if the first input word is greater than the second; otherwise outputs
FALSE.
?> 19 20
FALSE
?20>19
TRUE
<
Outputs TRUE if the first word is less than the second; otherwise outputs FALSE.
?< 27 13
FALSE
?13<27
TRUE
AMSTRAD Disc Drive & Interface DDI-1 Manual
Chapter 4.10
4.10.4 VARIABLES:
local
Makes the input-named variable(s) accessible only to the current procedure and the
procedures it calls.
>(local "x "y "z)
make
Makes the input-named variable the value of the input object.
?make "side 50
?:side
50
4.10.5 PROCEDURES:
end
Indicates the end of a procedure definition; must stand alone at the beginning of the
last line.
?to square
>repeat 4[fd 50 rt 90]
>end
square defined
?square
po
(print out) Displays the definition(s) of the specified procedure(s) or variable(s).
?po "square
to square
repeat 4[fd 50 rt 90]
end
?po "X
x is 3
pots
(print out titles) Displays the names and titles of all procedures in the workspace.
?pots
Chapter 4.11
AMSTRAD Disc Drive & Interface DDI-1 Manual
to
Indicates the beginning of a procedure definition.
?to square
>repeat 4[fd 50 rt 90]
>end
square defined
4.10.6 EDITING:
ed
(edit) Loads the specified procedure(s) and/or variable(s) into the screen editor's
buffer.
?ed "square
4.10.7 TEXT SCREEN:
ct
(clear text) Erases all text in the window that currently contains the cursor then
positions the cursor in the upper-left corner of the window.
?ct
pr
(print) Displays the input object(s) on the text screen, removes list's outer brackets,
follows last input with a carriage return (compare with show and type).
?pr [a b c]
a b c
setsplit
Sets the number of lines in the split screen.
?ss 10
show
Displays the input object on the text screen, retains list's outer brackets, follows input
with a carriage return. (compare with pr and type).
?show [a b c]
[a b c]
AMSTRAD Disc Drive & Interface DDI-1 Manual
Chapter 4.12
ts
(text screen) Selects a full text screen.
?ts
type
Displays the input object(s) on the text screen, removes list's outer brackets, does not
follow last input with a carriage return (compare with pr and show).
?type [a b c]
a b c
4.10.8 GRAPHIC SCREEN:
Note that the screen is in Mode 1, giving four colours, and that the same co-ordinate
system is used as in AMSTRAD BASIC. In other words all screen positions will be
rounded to the nearest even-numbered screen dot. Red, green, and blue colours can
have amounts of 0,1,or 2.
clean
Erases the graphic screen without affecting the turtle.
?fd 50
?clean
cs
(clear screen) Erases the graphic screen and puts the turtle at [0,0] heading 0 (north)
with the pen down.
?rt 90 fd 50
?cs
dot
Plots a dot at the position specified by the input coordinate list in the current pen
colour.
?dot [50 10]
fence
Establishes a boundary that limits the turtle to the visible graphics screen. window
removes the boundary.
?fence
?fd 300
Turtle out of bounds
Chapter 4.13
AMSTRAD Disc Drive & Interface DDI-1 Manual
fs
(full screen) Selects a full graphic screen.
?fs
pal
(palette) Outputs numbers representing the amount of red, green, and blue colour
assigned to a pen.
?pal 2
[0 2 2]
setpal
(set palette) Sets the pen colour palette. Assign an amount of red, green, and blue to a
pen.
?setpal 3 [1 1 2]
?pal 3
[1 1 2]
sf
(screen facts) Outputs information about the graphic screen. The <format> is
[<bgcolour> <screen-state> <split-size> <window-state> <scrunch>] where
<bgcolour> is the background pen number, always 0. <screen-state> indicates ss
(Split screen), fs (Full screen) or ts (Text screen). <split-size> is the number of text
lines displayed on the split screen's text window and <window-state> indicates
window, wrap or fence mode. <scrunch> is permanently set to 1
?sf
[0 SS 5 FENCE 1]
ss
(split screen) Displays a window of text on the graphic screen.
9ss
window
Allows the turtle to plot outside the visible graphic screen after a wrap or fence
expression.
?fence fd 300
Turtle out of bounds
?window
?fd 300
AMSTRAD Disc Drive & Interface DDI-1 Manual
Chapter 4.14
wrap
Makes the turtle reappear on the opposite side of the graphic screen when it exceeds
the boundary.
?cs
?rt
?cs
?rt
wrap
5 fd 1000
window
5 fd 1000
4.10.9 TURTLE GRAPHICS:
bk
(back) Moves the turtle the input number of steps in the opposite direction of its
heading.
?cs fd 150
?bk 50
fd
(forward) Moves the turtle the input number of steps in the direction of its current
heading.
?fd 80
ht
(hide turtle) Makes the turtle invisible; speeds and clarifies drawing.
?ht
?cs fd 50
?st
lt
(left) Rotates the turtle the input number of degrees to the left.
?lt 90
pd
(pen down) Puts the turtle's pen down; the turtle resumes drawing.
?fd 20 pu fd 20
?pd
?fd 20
Chapter 4.15
AMSTRAD Disc Drive & Interface DDI-1 Manual
pe
(pen erase) Changes the turtle's pen colour to 0, the background colour; the turtle
erases drawn lines.
?fd
?pe
?bk
?fd
?pd
50
25
50
fd 25
pu
(pen up) Picks the turtle's pen up; the turtle stops drawing.
?fd 30
?pu
?fd 30
?pd fd 30
px
(pen reverse) Makes the turtle change the colour of any previously coloured pixel in its
trail to the reverse or logical colour compliment.
?fd
?pd
?px
?bk
?fd
?pd
20 pu fd 20
setpc 3 fd 20
80
80
bk 100
rt
Rotates the turtle the input number of degrees to the right.
?rt 90
seth
(set heading) Turns the turtle to the absolute heading specified by the input number of
degrees; positive numbers turn the turtle clockwise; negative numbers turn the turtle
counter-clockwise.
?seth 90
setpc
(set pen colour) Sets the turtle's pen to that specified by the input number. 0 is the
background colour.
? setpc 1
AMSTRAD Disc Drive & Interface DDI-1 Manual
Chapter 4.16
setpos
(set position) Moves the turtle to the position specified in the input coordinate list.
?setpos [30 20]
st
(show turtle) Makes the turtle visible if hidden.
?ht
?fd 50
?st
tf
(turtle facts) Outputs information about the turtle. The format is: [<xcor> <ycor>
<heading> <penstate> <pencolour#n> <shownp>] where <xcor> is the turtle's x
coordinate. <ycor> is the turtle's y coordinate. <heading> indicates the compass
direction the turtle is facing. <shownp> is TRUE if the turtle is visible. <penstate>
indicates PD (pen down), PE (pen erase), PX (pen reverse), or PU (pen up).
<pencolour#n> identifies the pen's number.
?setpos[15 30]
?rt 60
?setpc 3
?pe
?ht
?tf
[15 30 60 PE 3 FALSE]
4.10.10 WORKSPACE MANAGEMENT:
er
(erase) Erases the specified procedure(s) from the workspace.
?er "square
ern
(erase name) Erases the specified variable(s) from the workspace.
?make "side[100]
?make "angle[45]
?:side :angle
[100]
[45]
?ern[side angle]
?:side
side has no value
nodes
Outputs the number of free nodes in the workspace.
?nodes
Chapter 4.17
AMSTRAD Disc Drive & Interface DDI-1 Manual
recycle
Frees as many nodes as possible and reorganizes the workspace.
?recycle
?nodes
4.9.11 PROPERTY LISTS:
glist
(get list) Outputs a list of all the objects in the workspace that have the input property
name in their property lists.
?glist ".DEF
gprop
(get property) Outputs the property value of the input property name of the inputnamed object.
?make "height "72"
?gprop "height ".APV
72"
plist
(property list) Outputs the property list of the input-named object.
?plist "height
[.APV 72"]
pprop
(put property) Puts the input property pair into the input-named object's property list.
?pprop "master ".APV "Scott
?:master
Scott
remprop
(remove property) Removes the specified property from the input-named object's
property list.
?remprop "master ".APV
AMSTRAD Disc Drive & Interface DDI-1 Manual
Chapter 4.18
4.10.12 DISC FILES:
dir
(directory) Outputs a list of Dr. Logo file names on the default or specified disc;
accepts wild-cards.
?dir
[STARTUP STARS PATTERNS]
?dir "b:
[AVERAGE TOOLS ADDRESSES]
?dir "??AR????
[STARTUP STARS]
load
Reads the input-named file from the disc into the workspace.
?Load "myfile
?Load "b:shapes
save
Writes the contents of the workspace to the input-named disc file.
?save "shapes
4.10.13 KEYBOARD, JOYSTICK:
buttonp
(button pressed) Outputs TRUE if the button on the specified joystick is down;
numbers 0 or 1 identify the two possible paddles.
?to fire
>Label "loop
>if (buttonp 0)[pr[fire 0!]]
>if (buttonp 1)[pr[fire 1!]]
>go "Loop
>end
The position of the joystick is tested by paddle.
keyp
Outputs TRUE if a character has been typed at the keyboard and is waiting to be read.
?to inkey
>if keyp [op rc][op "]
>end
Chapter 4.19
AMSTRAD Disc Drive & Interface DDI-1 Manual
paddle
Returns the state of either joystick 0 or 1. The positions of the joystick are indicated as
follows:
Value returned
255
0
1
2
3
4
5
6
7
Meaning
Nothing pressed
Up
Up and right
Right
Down and right
Down
Down and left
Left
Up and left
?paddle 0
255
The fire buttons are tested by buttonp.
rc
(read character) Outputs the first character typed at the keyboard.
?make "key rc
(then press X key)
?:key
X
rl
(read list) Outputs a list that contains a line typed at the keyboard; input must be
followed by a carriage return.
?make "instr_list rl
repeat 4[fd 50 rt 90]
?:instr_list
[repeat 4[fd 50 rt 90]]
rq
(read quote) Outputs a word that contains a line typed at the keyboard; input must be
followed by a carriage return.
?make "command rq
repeat 3[fd 60 rt 120]
?:command
repeat 3[fd 60 rt 120]
AMSTRAD Disc Drive & Interface DDI-1 Manual
Chapter 4.20
4.10.14 SOUND:
The sound commands are unique to the AMSTRAD implementation of Dr. LOGO and
are similar to their AMSTRAD BASIC counterparts.
Refer to Chapter 6 of the CPC464 User Instructions for further information.
sound puts a sound into the sound queue. The format is : [<channel-status> <toneperiod> <duration> <volume> <volume-envelope> <tone-envelope> <noise-period>]
The parameters after duration are optional.
?sound [1 20 50]
env
Set up a volume envelope. The format is: [<envelope-number> envelope-section(s)>]
?env[l 100 2 20]
?sound[l 200 300 5 1]
ent
Set up a tone envelope. The format is: [<envelope-number> <envelope-section(s)>]
?ent [l 100 2 20]
?sound [1 200 300 5 1 1]
Release
Releases sound channels that have been set to a hold state in a sound command. The
channels to release are indicated as follows:
Input value
0
1
2
3
4
5
6
7
Channels released.
None
A
B
B and A
C
C and A
C and B
C and B and A
?release 1
4.10.15 FLOW OF CONTROL:
bye
Exits the current session of Dr. Logo.
?bye
co
Ends a pause caused by pause,a [CTRL]Z or ERRACT
?co
Chapter 4.21
AMSTRAD Disc Drive & Interface DDI-1 Manual
go
Executes the line within the current procedure following a label expression with the
same input word.
>go "Loop
if
Executes one of two instruction lists depending on the value of the input expression;
input instructions must be literal lists enclosed in brackets.
>if (a>b)[pr [a is bigger]]
>[pr [b is bigger]]
label
Identifies the line to be executed after a go expression with the input word.
>label "Loop
op
(output) Makes the input object the output of the procedure and exits the procedure at
that point.
repeat
Executes the input instruction list the input number of times.
?repeat 4[fd 50 rt 90]
run
Executes the input instruction list.
?make "instr_list[fd 40 rt 90]
?run :instr_list
stop
Stops the execution of the current procedure and returns to TOPLEVEL (the ? prompt)
or the calling procedure.
?stop
wait
Stops procedure execution for the amount of time specified by the input number. The
amount of time = input number * 0.22 seconds.
?wait 20
AMSTRAD Disc Drive & Interface DDI-1 Manual
Chapter 4.22
4.10.16 EXCEPTION HANDLING:
catch
Traps errors and special conditions that occur during the execution of the input
instruction list.
>catch "error[+[][]]
>pr [I am here]
I am here
error
Outputs a list whose elements describe the most recent error.
>catch "error[do.until.error]
>show error
pause
Suspends the execution of the current procedure to allow interaction with the
interpreter or editor.
>if :size>5 [pause]
throw
Executes the line identified by the input name in a previous catch expression.
?throw "TOPLEVEL
4.10.17 SYSTEM PRIMITIVES
.contents
Displays the contents of Dr. LOGO symbol space
.deposit
Puts second input number into the absolute memory location
specified by the first input number
.examine
Displays the contents of the absolute memory location specified.
4.10.18 SYSTEM VARIABLES
ERRACT
When TRUE causes a pause when an error occurs, then returns to TOPLEVEL.
FALSE
System value
REDEFP
When TRUE allows redefinition of primitives.
Chapter 4.23
AMSTRAD Disc Drive & Interface DDI-1 Manual
TOPLEVEL
throw "TOPLEVEL will exit all pending procedures.
TRUE
System value
4.10.19 SYSTEM PROPERTIES
.APV
Associated property value; the value of a global variable.
.DEF
Definition of a procedure.
.PRM
Identifies a primitive.
AMSTRAD Disc Drive & Interface DDI-1 Manual
Chapter 4.24
CHAPTER 5
Technical information for the user –
Firmware
This chapter assumes prior knowledge of the CPC464 firmware.
Some knowledge of the fundamentals of CP/M is also assumed. This chapter does not
however attempt to discuss the facilities available in the CP/M environment. Complete
information concerning CP/M, the CPC464 CP/M environment and the technical
specification of the BIOS is contained in SOFT159 A Guide to CP/M. The Complete
Firmware Specification of the Amstrad DDI-1 is contained in SOFT 158A, available
as an Appendix to the Concise Firmware Specification SOFT158.
5.0 Introduction
AMSDOS is a disc operating system for the AMSTRAD CPC464 fitted with the DDI1 floppy disc interface. AMSDOS enables BASIC programs to access disc files in a
similar manner to cassette files, indeed existing programs which currently use the
cassette should be able to use disc files with little, or no, modification. The main
source of incompatability will be file names in that, for AMSDOS, files names must
conform to CP/M standards whereas cassette file names are far less restricted.
AMSDOS has been designed to complement CP/M, not to compete with it. They share
the same file structure and can read and write each other's files. AMSDOS resides in
the same ROM as the CP/M BIOS.
AMSDOS switches the cassette input and output streams (#9) to and from disc. Thus
all the facilities available on cassette become available on disc. In addition displaying
the disc directory, erasing disc files, renaming disc files, and selecting the default
drive and user are also facilitated.
These facilities are implemented either by intercepting the cassette firmware calls or
by external commands.
5.1 Headers
Cassette files are subdivided into 2k blocks, each of which is preceded by a header.
CP/M files do not have headers. AMSDOS files may, or may not, have a header
depending on the contents of the file. This will not cause problems for programs
written in BASIC but is an important difference between cassette and disc files. This
could perhaps be exploited for a protection scheme.
Chapter 5.
AMSTRAD Disc Drive & Interface DDI-1 Manual
Unprotected ASCII files do not have headers. All other AMSDOS files have a single
header in the first 128 bytes of the file, the header record. These headers are detected
by checksumming the first 67 bytes of the record. If the checksum is as expected then
a header is present, if not, there is no header. Thus it is unlikely, but possible, that a
file without a header could be mistaken for one with a header.
5.2 Changing Discs
Under AMSDOS a disc may be changed, or removed, whenever the drive is not being
accessed and neither the input nor output files are open on that drive. Unlike CP/M
there is no need to 'log in' a disc.
Changing a disc while it is still being written to may corrupt the data on the disc. If a
disc is changed while there are still files open on it then, as soon as AMSDOS detects
this, all the open files on the drive will be abandoned and an error message produced.
Any data yet to be written will be lost and the latest directory entry will not be written
to disc. However, AMSDOS can only detect this change when it reads the directory,
which it does every 16k of the file and whenever a file is opened or closed. Thus,
potentially, 16k of data could be corrupted by changing a disc while there are still files
open on it.
5.3 Store requirements
When initialised, AMSDOS reserves #500 bytes of memory from the memory pool.
No change in this value is envisaged.
When loading a machine code program from disc into store using AMSDOS's CAS IN
DIRECT routine it is important that AMSDOS's variables are not overwritten. This
presents a problem since in general it is not possible to discover where these variables
are! This is because variables for external ROMs are allocated dynamically. Note that
this problem does not arise when loading from the cassette since the cassette manager's
variables are in the firmware variable area.
AMSDOS reserves store from the top of the memory pool so the simplest solution is to
always load machine code programs into the bottom of store. The program can then
relocate itself to a higher address if required.
Alternatively the machine code program could be loaded in two stages: first load and
run a small loader in the bottom of store. The action of MC BOOT PROGRAM will
have shut down all RSXs and extension ROMS. The loader program should now
initialise AMSDOS using KL INIT BACK thus forcing the AMSDOS variables to be
wherever you so wish. The loader can now load the machine code program using the
AMSDOS routines CAS OPEN IN, CAS IN DIRECT and CAS IN CLOSE together
with MC START PROGRAM.
In order to initialise AMSDOS using KL INIT BACK, AMSDOS's ROM number is
required. To determine AMSDOS's ROM number look at any of the intercepted
cassette jumpblock entries with the DISC routines selected. Each entry is a far call, the
address part of which points at a three byte far address, the third byte of the far address
is the ROM number. This must obviously be done before AMSDOS is shut down.
AMSTRAD Disc Drive & Interface DDI-1 Manual
Chapter 5.2
5.4 Error Messages
AMSDOS uses the CP/M BIOS in order to access the disc. Thus BIOS messages will
be displayed in the event of a disc hardware error.
In the following <DRIVE> means A or B. <FILENAME> means an AMSDOS
filename.
5.4.1 AMSDOS messages.
Bad command
The command has failed in some way. There is a syntax error in a command or
filename, or a BIOS error has been exited with a C cancel option.
<FILENAME> already exists
The user is trying to rename a file with a name that is already in use.
<FILENAME> not found
The user is trying to open for input, erase or rename a file that does not exist.
Drive <DRIVE>: directory full
There are no more free directory entries (there are 64 directory entries per disc).
Drive <DRIVE>: disc full
There are no more free disc blocks.
Drive <DRIVE>: disc changed, closing <FILENAME>
The user has changed the disc while files were still open on it.
<FILENAME> is read only
The user is trying to erase or rename a file which is marked R/O. May also be caused
by closing a file when the existing version of the file is R/O.
5.4.2 BIOS messages.
BIOS messages are followed by the question Retry, Ignore or Cancel?. The
system then discards any outstanding characters, turns on the cursor and waits for the
user to type R, I or C. Anything else typed in will cause a bleep.
Chapter 5. 3
AMSTRAD Disc Drive & Interface DDI-1 Manual
Typing R for retry causes the BIOS to repeat the operation.
Typing I for ignore causes the BIOS to continue as if the problem had not occured.
Typing C for cancel causes the BIOS to abandon the operation. This will often result
in a BDOS error message.
After the user has typed R, I or C the cursor is turned off.
The AMSTRAD BIOS messages are as follows:
Drive <DRIVE>: disc missing
This message is produced when the BIOS attempts to access a drive that does not, or
does not appear to, have a disc inserted.
Failed to load boot sector
This message is produced during a cold boot (invoked by 1 C PM) when the boot
sector is not read correctly or if all the bytes in the boot sector have the same value.
Failed to load CP/M
This message is produced during a warm boot when a sector of the CCP or BDOS is
not read correctly or if all the bytes in the first CCP sector have the same value.
Drive <DRIVE>: disc is write protected
This message is produced when the BIOS attempts to write to a disc that is writeprotected. If the user wishes to write on this disc then the user should remove the disc,
write enable it, re-insert it into the drive and then type R for retry.
Drive <DRIVE>: read fail
This message is produced when a hardware error has been reported whilst reading
from the disc. It may also be caused by trying to read from a disc with the wrong
format, for example: trying to boot from a DATA ONLY format disc.
Drive <DRIVE>: write fail
This message is produced when a hardware error has been reported whilst writing to
the disc.
In the event of a read or write fail the user is recommended to remove and re-insert the
disc then type R This may help in case the disc was badly positioned or may shift any
fluff or what-not adhering to the head. The importance of back-ups cannot be
overstressed.
AMSTRAD Disc Drive & Interface DDI-1 Manual
Chapter 5.4
5.5 Disc Organisation
The BIOS supports three different disc formats: SYSTEM format, DATA ONLY
format and IBM format. Under AMSDOS the format of a disc is automatically
detected each time a disc with no open files is accessed. To permit this automatic
detection each format has unique sector numbers.
3 inch discs are double sided, but only one side may be accessed at a time depending
on which way round the user inserts the disc. There may be different formats on the
two sides.
COMMON TO ALL FORMATS
Single sided (the two sides of a 3 inch disc are treated separately).
512 byte physical sector size.
40 tracks numbered 0 to 39.
1024 byte CP/M block size.
64 directory entries.
SYSTEM FORMAT
9 sectors per track numbered #41 to #49.
2 reserved tracks.
The system format is the main format supported, since CP/M can only be loaded (cold
and warm boot) from a system format disc. The reserved tracks are used as follows:
Track 0 sector #41: boot sector.
Track 0 sector #42: configuration sector.
Track 0 sectors #43.. #47 unused.
Track 0 sectors #48.. #49 and track 1 sectors #41.. #49: CCP and BDOS.
Note: 'VENDOR' format is a special version of system format which does not contain
any software on the two reserved tracks. It is intended for use in software distribution.
DATA ONLY FORMAT
9 sectors per track numbered #Cl.. # C9.
0 reserved tracks.
This format is intended for future enhancement, it is not recommended for use with
CP/M since it is not possible to 'warm boot' from it. However, if only AMSDOS is to
be used then there is a little more disc space available.
IBM FORMAT
8 sectors per track numbered 1..8.
1 reserved track.
This format is logically the same as the single-sided format used by CP/M on the IBM
PC. It is intended for specialist use and is not otherwise recommended.
Chapter 5. 5
AMSTRAD Disc Drive & Interface DDI-1 Manual
5.6 Jump Block Interception - by AMSDOS
When AMSDOS is initialised it copies the relevant cassette jumpblock entries into its
own data area. When DISC is selected the cassette jumpblock entries are overwritten
by AMSDOS entries, when TAPE is selected the original cassette entries are restored.
Initially the disc routines are selected.
5.7 Jump Block Re-Interception - by the User
In order to intercept the jumpblock entries the following procedure should be
observed: copy the three bytes from the required jumpblock entry into your own data
area - do not make any assumption as to what these three bytes are. Replace the
jumpblock entry with your own JMP, RST or whatever. When you receive control
restore the jumpblock entry, and CALL it. When you receive control once again save
the jumpblock entry and replace it with your own. This procedure will work no matter
what the jumpblock entry contains.
Note: when intercepting AMSDOS routines the above procedure must be followed.
Merely executing a copy of the jumpblock entry will not work; it must be restored toits
original place in the jumpblock
5.8 Return Parameters
So far as it is possible the AMSDOS routines all have the same interface as their
cassette counterparts, although in some cases tile interpretation of tile return
parameters is different. Errors which are detected by both the cassette and disc
routines are returned carry false, zero false. Errors which are only detected by the disc
routines are returned carry false, zero true. This latter case corresponds to the cassette
routine BREAK condition. In both cases register A contains an error number.
When a routine fails (carry false) it returns a six bit error number in the A register. Bit
7 is set it the error has already been reported to the user. The error numbers are as
follows:
#0E
#0F
the file is not open as expected.
hard end of file.
#1A
soft end of file.
#20
#21
#22
#23
#24
#25
#26
bad command, usually caused by an incorrect filename.
file already exists.
file doesn't exist.
directory is full
disc is full.
disc has been changed with files open on it.
file is read-only.
AMSTRAD Disc Drive & Interface DDI-1 Manual
Chapter 5.6
Errors detected by the floppy disc controller are reported as a bit significant value
between #40..#7F, i.e. bit 6 is always set. The other bits are returned as follows:
bit 5
bit 4
bit 3
bit 2
bit 1
bit 0
data error - CRC error on data or ID field.
overrun error.
drive not ready - there is no disc in the drive.
no data - can't find the sector.
not writable - disc is write protected.
address mark missing.
5.9 Intercepted Firmware Calls
The intercepted firmware calls are:
Reading Files
125
126
127
128
129
130
131
#BC77
#BC7A
#BC7D
#BC80
#BC83
#BC86
#BC89
CAS IN OPEN
CAS IN CLOSE
CAS IN ABANDON
CAS IN CHAR
CAS IN DIRECT
CAS RETURN
CAS TEST EOF
Open a file for input
Close the input file properly
Close the input file immediately.
Read a character from the input file.
Read the input file into store.
Put the last character read back.
Have we reached the end of the
input file yet?
CAS OUT OPEN
CAS OUT CLOSE
CAS OUT ABANDON
CAS OUT CHAR
CAS OUT DIRECT
Open a file for output.
Close the output file properly.
Close the output file immediately
Write a character to the output file.
Write the output file directly from
disc.
CAS CATALOG
Generate a catalogue from disc
Writing Files
132
133
134
135
136
#BC8C
#BC8F
#BC92
#BC95
#BC98
Cataloguing
137
#BC9B
Chapter 5. 7
AMSTRAD Disc Drive & Interface DDI-1 Manual
APPENDIX 1
GLOSSARY OF TERMS
Ambiguous File Name:
A file name containing one or more wildcard characters. Ambiguous filenames
refer to more than one specific file name and are used to refer to one or more files
at a time.
AMSDOS:
AMStrad Disc Operating System. The program that allows Locomotive BASIC to
access disc files.
Backup:
A duplicate copy of information used as a safeguard in case the original is lost or
accidentally damaged. Making a backup refers to the process of duplicating a disc
or disc file.
BDOS:
Basic Disc Operating System. This is the part of the CP/M operating system which
provides an interface for a user program to use the functions of CP/M.
BIOS:
Basic Input/Output System. This is the hardware dependent part of CP/M that is
written specifically for one type of computer. All the input and output to the screen,
keyboard, disc and so on is performed through the BIOS.
Boot:
The process of loading an operating system into memory. When CP/M is started
from BASIC a small boot program is loaded automatically from the disc, which
then loads the rest of the operating system into memory.
Buffer:
An area of memory reserved for temporarily storing, or buffering, information
during an information transfer.
Built-in commands:
Commands that are part of an operating system. They are always quicker than
transient commands because they are not accessed from disc.
CCP:
Console Command Processor. This is a module of CP/M that interprets and
executes user input from the keyboard. Usually commands are input which the CCP
loads and executes.
Appendix 1.
AMSTRAD Disc Drive & Interface DDI-1 Manual
Cold start:
The process of booting and initialising an operating system. A cold start of CP/M is
performed when the |CPM command is used.
Console mode:
CP/M direct mode; the A> appears on the screen, and the system awaits input of a
CP/M or utility command.
Corruption:
The destruction or alteration of the contents of a disc file or memory, in an
undesirable and potentially unrecoverable manner.
CP/M:
Control Program for Microcomputers. A disc based operating system by Digital
Research that provides a standard systems interface to software written for a wide
range of microprocessor based computer systems.
Default:
The value assumed in the absence of any user input. For example, when CP/M is
started drive A: is assumed to be the default drive.
Directory:
A section of a disc containing entries for each file on the disc. A list of the contents
of a disc.
Disc (or disk):
A flat, thin circular piece of plastic, coated on one or both sides with a magnetic
oxide surface and used as a medium for storing data. The disc is housed in a
protective envelope, with access for the reading head provided by a window. On a
3” disc the window is covered by a metallic shutter, which automatically slides
across when the disc is out of the disc drive.
Disc drive:
The mechanics used to spin and access the data on the surface of a disc.
Disc Interface:
The electronic hardware necessary to allow a disc drive to communicate with both
the software and internal operation of the attached computer.
Double sided:
A disc that can store information on both sides. A double sided disc drive can
access both sides of a disc without the need to change the disc over.
AMSTRAD Disc Drive & Interface DDI-1 Manual
Appendix 1.2
Dr.Logo:
Digital Research's version of Logo, a programming language with a graphics turtle.
Edit:
To correct or make changes to data, a program or text.
Expression:
In Dr. Logo an expression consists of a procedure name followed by any necessary
inputs to the procedure.
File:
A collection of data, generally stored on cassette or disc.
Filename:
The name of a file. In Dr. Logo a file name can consist of up to 8 alphabetic or
numeric characters. In CP/M an additional three character file type, preceeded by a
dot . is allowed.
Hexfile:
An ASCII representation of a command or machine code file.
Integer:
A whole number with no decimal point.
Interface:
An object that allows two independent systems, such as a CPC464 and a disc drive,
to communicate with each other.
Logical device:
The representation of a device that may be different to its physical form. For
example the CP/M logical device LIST may be assigned to the Centronics port or
perhaps the VDU.
Logo:
The name of a programming language derived from the Greek word logos, which
means word. Logo is designed to teach the fundamentals of computer
programming.
Node:
A unit of storage in the Logo workspace. Typically one node consumes 4 bytes of
memory space.
Appendix 1. 3
AMSTRAD Disc Drive & Interface DDI-1 Manual
Page zero:
This refers to the region of memory in a CP/M environment between 0000Hex and
0100Hex that is used to hold vital system parameters.
Physical device:
An actual device, consisting of hardware, that exists. Physical devices may be
represented by logical devices.
Primitives:
Procedures, operations or commands that make up Dr. Logo; the built-in
procedures.
Procedure:
A series of expressions or program statements that dictate how to perform a
particular task.
Prompt:
A short message or character sequence reminding the user that some type of input
is expected. For example, the CP/M prompt is the > and the Dr. Logo prompt is
the ? character.
Random access:
The ability to read and write information in memory or on a disc in any desired
order.
Read only R/O:
An attribute assigned to a disc, a disc file or a disc drive that prevents writing or
changing of data.
Read write R/W:
An attribute assigned to a disc, a disc file or a disc drive that allows both reading
and writing of data.
Record:
A group of bytes in a file. CP/M uses 128 byte records.
Sector:
A block of data on a disc. The AMSTRAD disc system uses a sector size of 512
bytes.
Single sided:
Refers to a disc which has only one side available for data storage.
AMSTRAD Disc Drive & Interface DDI-1 Manual
Appendix 1.4
System tracks:
Tracks reserved on the disc for the CP/M system.
TPA:
Transient Program Area. An area in memory commencing at 0100Hex where CP/M
user programs run and store data.
Track:
Tracks are concentric rings on a disc. Each track holds a fixed number of sectors.
The tracks and sectors are written to a specific area of a disc during formatting.
Transient program:
A CP/M utility program such as FILECOPY which can be loaded into the TPA and
run by typing its name at the keyboard.
Turnkey:
A word used to describe a program which executes automatically when the system
is booted. The Dr. Logo disc is an example of a turnkey program.
Turtle:
A graphic symbol, in the shape of an arrow head, that functions as a graphic cursor
on the Dr. Logo graphic screen.
Turtle graphics:
The graphics image left on the screen by the movement of a turtle. As the turtle
moves it leaves a trace of its path on the screen.
Turtle step:
The smallest distance a turtle can move. Normally one pixel.
Utility program:
A program on disc that enables the user to perform certain operations. See transient
program.
Warm start:
This is performed when [CTRL]C is pressed during CP/M. A warm start
reinitialises the disc subsystem and returns control to CP/M ready for commands to
be entered.
Wildcard character:
Either of the characters * or ?. Dr. Logo only supports the ? character. The *
wildcard simply means any number of ?s. When referencing files wildcard
characters are used to make up an ambiguous file name. Any ? s in the file name
refer to any numeric or alphabetic character.
Write Protection:
A safeguard used to prevent re-writing of a disc or disc file. A write protected disc
or file is Read Only.
Appendix 1. 5
AMSTRAD Disc Drive & Interface DDI-1 Manual
AMSTRAD Disc Drive & Interface DDI-1 Manual
Appendix 1.6
APPENDIX 2
DIGITAL RESEARCH & AMSTRAD END USER
PROGRAM LICENCE AGREEMENT
NOTICE TO USER - PLEASE READ THIS NOTICE CAREFULLY.
DO NOT OPEN THE DISKETTE PACKAGE UNTIL YOU HAVE
READ THIS LICENCE AGREEMENT.
OPENING THE DISKETTE PACKAGE INDICATES YOUR
AGREEMENT TO BE BOUND BY THESE TERMS AND
CONDITIONS.
1. DEFINITIONS
- In this Licence Agreement, the terms:
1. DRI means DIGITAL RESEARCH (CALIFORNIA) INC., P.O. Box 579, Pacific
Grove, California 93950, owner of the copyright in, or authorised licensor of, the
program.
2. Machine means the single microcomputer on which you use the program. Multiple
CPU systems require additional licences.
3. Program means the set of programs, documentation and related materials in this
package, together with all ancillary updates and enhancements supplied by DRI to
you regardless of the form in which you may subsequently use it, and regardless of
any modification which you make to it.
4. AMSTRAD means AMSTRAD CONSUMER ELECTRONICS PLC., Brentwood
House, 169 Kings Road, Brentwood, Essex CM14 4EF.
You assume responsibility for the selection of the program to achieve your intended
results, and for the installation, use and results obtained from the program.
2. LICENCE
You may:
1. Use the program on a single machine.
2. Copy the program into any machine readable or printed form for backup or
modification purposes in support of your use of the program on a single machine.
You may make up to three (3) copies of the program for such purposes. (Certain
programs, however, may include mechanisms to limit or inhibit copying. They are
marked 'copy protected'). Copying of documentation and other printed materials is
prohibited. Disassembly of code is prohibited.
3. Modify the program and/or merge it into another program for your use on the single
machine. (Any portion of this program merged into another program will continue
to be subject to the terms and conditions of this Agreement); and,
Appendix 2.
AMSTRAD Disc Drive & Interface DDI-1 Manual
4. Transfer the program and licence to another party if you notify DRI of name and
address of the other party and the other party agrees to a) accept the terms and
conditions of this Agreement, b) sign and forward to DRI a copy of the registration
card and c) pay the then current transfer fee. If you transfer the program, you must
at the same time either transfer all copies, including the original, whether in printed
or machine readable form to the same party or destroy any copies not transferred;
this includes all modifications and portions of the program contained or merged
into other programs.
You must reproduce and include the copyright notice on any copy, modification or
portion merged into another program.
EACH DISKETTE IS SERIALISED, AND YOU MAY NOT USE, COPY, MODIFY,
TRANSFER, OR OTHERWISE MAKE AVAILABLE TO ANY THIRD PARTY, THE
PROGRAM, OR ANY COPY, MODIFICATION OR MERGED PORTION, IN WHOLE
OR IN PART, EXCEPT AS EXPRESSLY PROVIDED FOR IN THIS LICENCE
AGREEMENT.
IF YOU TRANSFER POSSESSION OF ANY COPY, MODIFICATION OR MERGED
PORTION OF THE PROGRAM TO ANOTHER PARTY, YOUR LICENCE IS
AUTOMATICALLY TERMINATED.
3. TERM
The licence is effective until terminated. You may terminate it at any other time by
destroying the program together with all copies, modifications and merged portions in
any form. It will also terminate upon conditions set forth elsewhere in this Agreement
or if you fail to comply with any term or condition of this Agreement. You agree upon
such termination to destroy the program together with all copies, modifications and
merged portions in any form.
4. LIMITED WARRANTY
THE PROGRAM IS PROVIDED "AS IS". NEITHER DRI NOR AMSTRAD MAKE
ANY WARRANTY OF ANY KIND, EITHER EXPRESSED OR IMPLIED,
INCLUDING, BUT NOT LIMITED TO THE IMPLIED WARRANTIES OF
MERCHANTABILITY AND FITNESS FOR A PARTICULAR PURPOSE. THE
ENTIRE RISK AS TO THE QUALITY AND PERFORMANCE OF THE PROGRAM
IS WITH YOU. SHOULD THE PROGRAM PROVE DEFECTIVE, YOU (AND DRI
OR AMSTRAD) ASSUME THE ENTIRE COST OF ALL NECESSARY SERVICING,
REPAIR OR CORRECTION.
Neither DRI nor AMSTRAD warrant that the functions contained in the program will
meet your requirements or that the operation of the program will be uninterrupted or
error free.
However, AMSTRAD warrants the diskette on which the program is furnished, to be
free from defects in materials and workmanship under normal use for a period of
ninety (90) days from the date of delivery to you as evidenced by a copy of your
receipt.
AMSTRAD Disc Drive & Interface DDI-1 Manual
Appendix 2.2
5. LIMITATIONS OF REMEDIES
AMSTRAD's entire liability and your exclusive remedy shall be the replacement of
any diskette not meeting this "Limited Warranty" and which is returned to AMSOFT
with a copy of your receipt.
IN NO EVENT SHALL DRI OR AMSTRAD BE LIABLE FOR ANY DAMAGES,
INCLUDING ANY LOST PROFITS, LOST SAVINGS, OR OTHER SPECIAL
INDIRECT OR CONSEQUENTIAL DAMAGES, EVEN IF DRI OR AMSTRAD HAS
BEEN ADVISED OF THE POSSIBILITY OF SUCH DAMAGES, OR FOR ANY
CLAIM BY ANY OTHER PARTY.
6. REGISTRATION CARD
DRI may from time to time update its programs. Updates will be provided to you only
if a properly signed registration card is on file at DRI's main office or an authorised
registration card recipient. DRI is not obligated to make any program updates, or to
supply any such updates to you.
7. GENERAL
You may not sublicence, assign or transfer the licence or the program except as
expressly provided in this Agreement. Any attempt otherwise to sublicence, assign or
transfer any of the rights, duties or obligations hereunder is void.
This agreement shall be governed by and construed in accordance with the laws of
England.
Should you have any Questions concerning this Agreement. you may contact DRI by
writing to Digital Research Inc., P.O. Box 579, Pacific Grove, California 93950.
THIS AGREEMENT CANNOT AND SHALL NOT BE MODIFIED BY PURCHASE
ORDERS, ADVERTISING OR OTHER REPRESENTATIONS BY ANYONE, AND
MAY ONLY BE MODIFIED BY A WRITTEN AMENDMENT EXECUTED BY YOU
AND AN AUTHORISED OFFICER OF DRI AND AMSTRAD.
YOU ACKNOWLEDGE THAT YOU HAVE READ THIS AGREEMENT,
UNDERSTAND IT AND AGREE TO BE BOUND BY ITS TERMS AND
CONDITIONS. YOU FURTHER AGREE THAT IT IS THE COMPLETE AND
EXCLUSIVE STATEMENT OF THE AGREEMENT BETWEEN YOU AND DRI AND
AMSTRAD WHICH SUPERSEDES ANY PROPOSAL OR PRIOR AGREEMENT,
ORAL OR WRITTEN, AND ANY COMMUNICATIONS BETWEEN YOU AND DRI
OR AMSTRAD RELATING TO THE SUBJECT MATTER OF THIS AGREEMENT.
THIS AGREEMENT DOES NOT AFFECT YOUR STATUTORY RIGHTS.
Appendix 2. 3
AMSTRAD Disc Drive & Interface DDI-1 Manual
AMSTRAD Disc Drive & Interface DDI-1 Manual
Appendix 2.4
APPENDIX 3
INDEX
|A
Aborting CP/M functions
AMSDOS
AMSDOS command summary
AMSDOS error messages
AMSDOS filenames
AMSDOS headers
AMSDOS wildcards
AND
.APV
Arithmetic operations
Arithmetic operators (+ - * /)
ASCII
ASM
|B
BASIC disc
BF
BIOS messages
BK
BL
BOOTGEN
BUTTONP
BYE
CAT
CATCH
Changing discs
CHAR
CLEAN
CLOAD
CO
Configuration sector
Configuring a CP/M program
Connections
.CONTENTS
Control codes
COPYDISC
Copying discs
INDEX
F4.1 Ch2.7
F4.10
F4.1 Ch2.1
Ch2.6
Ch2.13 Ch5.3
Ch2.2
Ch2.3 Ch5.1
Ch2.4
Ch4.9
Ch4.24
Ch4.8
Ch4.9
Ch2.10 Ch4.6
Ch3.9
F4.1 Ch2.7
Chl.2
Ch4.6 1
Ch5.3
Ch4.15
Ch4.6
Ch3.9
Ch4.19
Ch4.21
F4.6
Ch4.23
Ch5.2
Ch4.6
Ch4.13
Ch3.6
Ch4.21
Ch3.2
Chl.4
F1.2
Ch4.23
Ch3.2
F4.9 Chl.2
Ch3.5
Copying files
COS
COUNT
CP/M
|CPM
CP/M filenames
CP/M System Tracks
CS
CSAVE
CT
Data only format
DDT
.DEF
.DEPOSIT
DIR (CP/M)
DIR (LOGO)
|DIR
Direct console
commands
Discs
|DISC
DISCCHK
DISCCOPY
Disc directory
Disc file commands
(LOGO)
|DISC.IN
Disc organisation
|DISC.OUT
DOT
|DRIVE
DUMP
ED
Editing
Eject button
EMPTYP
END
ENV
ENT
F4.7 Ch2.10 Ch3.5
Ch4.8
Ch4.6
Ch3.1
F4.3 Ch2.8
Ch3.3
Ch3.1
Ch4.13
Ch3.6
Ch4.12
Ch5.5
Ch3.9
Ch4.24
Ch4.23
Ch3.3
Ch4.19
Ch2.8
Ch3.3
F2.1 Ch5.2
F4.1 Ch2.8
F4.10
F4.8 Ch3.5
Ch2.2
Ch4.19
F4.2 Ch2.8
Ch5.5
F4.2 Ch2.8
Ch4.13
Ch2.8
Ch3.9
Ch3.9
Ch4.4 Ch4.12
F2.4
Ch4.7
Ch4.11
Ch4.21
Ch4.21
AMSTRAD Disc Drive & Interface DDI-1 Manual
ER
ERA
|ERA
ERN
ERRACT
ERROR
Error messages (AMSDOS)
Error messages (CP/M BIOS)
.EXAMINE
Exception handling
FALSE
FD
FENCE
FILECOPY
Filenames
Filetypes
Flow of control
Firmware
FIRST
FORMAT
FPUT
FS
Games
GLIST
Glossary of terms
GO
Graphic screen commands
GPROP
Headers
HT
IBM format
IF
Indicator Lamp
INT
Intercepted firmware calls
ITEM
Joystick commands (LOGO)
Jumpblock
interception and re-interception
Keyboard commands (LOGO)
KEYP
LABEL
Licence Agreement
LIST
List processing commands
LOAD (AMSDOS)
LOAD (LOGO)
Loading software
LOCAL
Logging in a disc
Ch4.17
Ch3.3
Ch2.9
Ch4.17
Ch4.23
Ch4.23
Ch2.13 Ch5.3
Ch5.3
Ch4.23
Ch4.23
Ch4.23
Ch4.15
Ch4.13
Ch1.2 Ch3.5
Ch2.2 Ch2.3
Ch2.2
Ch4.21
Ch5.1
Ch4.7
F4.4 Ch3.8
Ch4.7
Ch4.14
F3.1
Ch4.10
App1.1
Ch4.22
Ch4.13
Ch4.10
Ch2.3 Ch5.1
Ch4.15
Ch5.5
Ch4.22
F2.4
Ch4.8
Ch5.7
Ch4.7
Ch4.19
Ch5.6
Ch4.19
Ch4.19
Ch4.22
App2.1
Ch4.7
Ch4.6
F4.6
Ch4.19
F3.1
Ch4.11
Ch3.2
Logical operations
Logical operators (= > <)
LOGO
LT
MAKE
MOVCPM
NODES
NOT
OP
OR
PADDLE
PAL
PAUSE
PD
PE
Peripheral management
PIP
PLIST
PO
POTS
PPROP
PR
Primitives
.PRM
Procedures
Property list commands
PU
PX
RANDOM
RC
Read Only Files
RECYCLE
REDEFP
RELEASE
REMPROP
REN
|REN
REPEAT
RL
RO
RT
RUN (AMSDOS)
RUN (LOGO)
SAVE (AMSDOS)
SAVE (LOGO)
Screen Dump
SE
SETH
SETPAL
SETPC
AMSTRAD Disc Drive & Interface DDI-1 Manual
Ch4.9
Ch4.10
Ch4.1
Ch4.15
Ch4.11
Ch3.9
Ch4.17
Ch4.10
Ch4.22
Ch4.10
Ch4.20
Ch4.14
Ch4.23
Ch4.15
Ch4.16
Ch3.4
Ch3.4
Ch4.18
Ch4.11
Ch4.11
Ch4.18
Ch4.12
Ch4.5 Ch4.23
Ch4.24
Ch4.3 Ch4.11
Ch4.18
Ch4.16
Ch4.16
Ch4.8
Ch4.20
Ch2.10
Ch4.18
Ch4.23
Ch4.21
Ch4.18
Ch3.4
Ch 2.9
Ch4.22
Ch4.20
Ch4.20
Ch4.16
F4.6
Ch4.22
. F4.5
Ch4.19
Ch2.4
Ch4.8
Ch4.16
Ch4.14
Ch4.16
Page 2
SETPOS
SETSPLIT
Setting Up
SETUP
SF
SHOW
SIN
Software F3.1
SOUND
Sound commands (LOGO)
SS
ST
STAT
STOP
Store requirements
SYSGEN
SUBMIT
System disc
System format
System management
System primitives (LOGO)
System properties (LOGO)
System variables (LOGO)
|TAPE
|TAPE.IN
|TAPE.OUT
Text screen commands
TF
THROW
TO
TOPLEVEL
Transient commands
TRUE
TS
Turnkey BASIC disc
Turnkey CP/M disc
Turtle graphic commands
TYPE (CP/M)
TYPE (LOGO)
USER
Utility disc
Variables
Variables (saving)
WAIT
Wildcards
WINDOW
WORD
WORDP
INDEX
Ch4.17
Ch4.12
171.1
Ch3.7
Ch4.14
Ch4.12
Ch4.8
Workspace management commands
WRAP
Write protection
XSUB
Ch4.17
Ch4.15
F2.1
Ch3.9
Ch4.21
Ch4.21
Ch4.14
Ch4.17
Ch3.6
Ch4.22
Ch5.2
Ch3.9
Ch3.9
Ch1.2
Ch5.5
Ch3.6
Ch4.23
Ch4.24
Ch4.23
F4.1 Ch2.9
F4.2 Ch2.9
F4.2 Ch2.9
Ch4.12
Ch4.17
Ch4.23
Ch4.12
Ch4.24
Ch3.4
Ch4.24
Ch4.13
Ch1.2
Ch1.3
Ch4.15
Ch3.4
Ch4.13 I
Ch2.9
Ch1.2
Ch4.4 Ch4.11
Ch4.23
Ch2.4
Ch4.22
Ch2.4
Ch4.14
Ch4.8
Ch4.8
AMSTRAD Disc Drive & Interface DDI-1 Manual