1
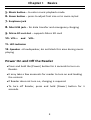
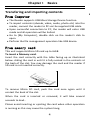
DENVER EBO
Instruction Manual
EBO‐701 FCC Information and Copyright This equipment has been tested and found to comply with limits for a Class B digital device, pursuant to Part 15 of the FCC rules. These limits are designed to provide reasonable protection against harmful interference in residential installations. This equipment generates, uses, and can radiate radio frequency energy, and if not installed and used in accordance with the instructions, may cause harmful interference to radio communications. However, there is no guarantee that interference will not occur in a particular installation. The vendor makes no representations or warranties with respect to the contents here and specially disclaims any implied warranties of merchantability or fitness for any purpose.Further the vendor reserves the right to revise this publication and to make changes to the contents here without obligation to notify any party beforehand.Duplication of this publication, in part or in whole, is not allowed without first obtaining the vendor’s approval in writing. The content of this instruction manual is subject to be changed without notice and we will not be responsible for any mistakes found in this manual. All the brand and product names are trademarks of their respective. All rights reserved Copyright @ DENVER ELECTRONICS A/S WWW.DENVER‐ELECTRONICS.COM
i
EBO‐701 Safety Precautions On Battery •
Charge the battery only in temperature that ranges from 0 to 35 degree Celsius. •
Do not charge reader if the battery is found damaged or leaking. On Operation • Never subject reader to extremes of light, temperature, moisture or vibration. • Do not use or store reader in a location subject: A.Extreme high temperature, such as in a sun‐heated car B. Direct sunlight C.High humidity or places with corrosive substances D.Sub‐zero condition, especially during winter . On SD card • After inserted a SD card, if the reader has no response, please take out and insert again. •
Do not remove SD card or turn off reader during data writing or reading to prevent damage to data and to the reader. •
Make sure the SD card is unlocked before writing or •
Backup your files and data before formatting the SD card. deleting data in the SD card. Please format the SD card in FAT. The symbol means that the unit complies with European safety and electrical interference directives. ii
EBO‐701 Contents FCC INFORMATION AND COPYRIGHT..................I
SAFETY PRECAUTIONS............................................ II
CONTENTS ..................................................................III
CHPATER 1 BASICS..................................................... 1
PARTS AND CONTROL.................................................1
POWER ON AND OFF THE READER ................................2
CHARGING THE READER ..............................................3
TRANSFERING AND IMPORTING CONTENTS .....................4
IMPORTING DRM CONTENTS ......................................5
HOME SCREEN ..........................................................9
OPTION MENU .......................................................10
CHPATER 2 GETTING STARTED........................... 12
READING BOOKS .....................................................12
PLAYING MUSIC ......................................................19
WATCHING VIDEOS .................................................21
VIEWING PHOTOS....................................................23
FILE MANAGER .......................................................25
iii
EBO‐701 CHPATER 3 SETTINGS ............................................ 26
TIME & DATE .........................................................26
DEVICE STANDBY ....................................................26
FORMAT MEMORY ..................................................26
ABOUT PRODUCT ....................................................26
POWER MANAGEMENT ............................................27
RESTORE FACTORY DEFAULTS ....................................27
LANGUAGE ............................................................27
USER’S MANUAL ....................................................27
CHPATER 4 TROUBLESHOOTING ....................... 28
CHPATER 5 APPENDIX ............................................ 29
MAINTENANCE .......................................................29
PRODUCT SPECIFICATIONS ........................................29
DISPOSAL AND RECYCLING INFORMATION .........31
iv
Chapter 1 Basics It is an ebook reader with full color display screen. It supports ebooks encrypted with Adobe DRM. Parts and Control 1. Power button – press and hold for 3 seconds to turn on/off, press and hold 6 seconds to reset. 2. Return button – press once to return to previous menu, press and hold to return to Home menu 3. Menu button – press to display Options Menu 4. Brake track ball ‐OK / Enter Button‐ Press to confirm or cancel. Previous pg button – roll left to turn to previous page ‐Next pg button – roll right to turn to next page ‐Directional buttons –roll the Brake track ball up/ down/ left/ right to move cursor 1
Chapter 1 Basics 5. Music button – to enter music playback mode. 6. Zoom button – press to adjust font size or to zoom in/out 7. Earphone jack 8. Mini USB jack – for data transfer and emergency charging 9. Micro SD cart slot – supports Micro SD card 10. VOL + and VOL‐ 11. LED indicator 12. Speaker –A loudspeaker, do not block this area during music playing Power On and Off the Reader • Press and hold the [Power] button for 2 seconds to turn on Reader. • It may take a few moments for reader to turn on and loading the content. • If Reader does not turn on, charging is required. • To turn off Reader, press and hold [Power] button for 2 seconds. 2
Chapter 1 Basics Charging the Reader • You need to charge the Reader prior to using it for the first time or when battery power is low. • Charge the reader using AC adapter with output 5V, 1.2A. • Charging through PC may not be able to fully charge the reader due to the low output charging current from PC USB port. • Please turn the Reader to standby mode to shorten the charging process. • It will take about 6 hours to fully charger the reader in standby mode (LCD off) • When DC /USB power cable is connected to the reader for charging, the reader will enter into standby mode after remains idle for 60 s. Press the [Power] button to wake up the reader. • The battery status is displayed at the bottom left corner. 3
Chapter 1 Basics Transfering and importing contents From Computer
• The Reader supports USB Mass Storage Device function. • To import contents (ebooks, video, audio, photo etc) into the reader, connect the reader to PC via the supplied USB cable. • Upon successful connection to PC, the reader will enter USB mode and all operation will be halted. • Go to [My Computer], double click on the reader’s disk to open. • Perform the file management operation like USB device. From memory card
This unit supports Micro SD card up to 16GB To insert a Memory card: Insert the card correctly with the lable facing up as illustrated below. sliding the card in until it is fully seated in the contacts at the back of the slot, You may damage the card and the reader if SD card is not inserted correctly. To remove Micro SD card, push the card once again until it contact the back of the slot. When the card is inserted or removed, it will take several seconds to load。 Please avoid inserting or ejecting the card when other operation is running as this may cause the system hang. 4
6
Chapter 1 Basics Do not remove the card if the content inside the card is being played. This will halt the operation of the reader and cause the reader to restart. If the system is not responding, press and hold the <Power> button for 6 seconds to reset and turn it off. Importing DRM Contents The Reader supports Adobe DRM contents. Adobe Digital Editions (ADE) is required. Installing Adobe Digital Editions (ADE) • The ADE installer is preloaded into the Reader. • Connect the Reader to PC via the supplied USB cable and open the reader as removable disk. Go to [My Computer], double click on the reader’s disk to open. • Make sure your computer is connected to internet • Double click on the [digitaleditions_172] file to open the installer. • Alternatively, you can download the installer from http://www.adobe.com/products/digitaleditions/#fp. • For first time user, you will need to get a free adobe ID from adobe website. click on the [get an Adobe ID online] link as illustrated: 5
Chapter 1 Basics • Enter your email address and complete the online form as per instructed. Authorizing PC and Reader • Upon registration, return to the ADE window. Enter the username and password to activate your Adobe account. • After activation, connect the Reader to PC. ADE will detect the Reader and you are prompted to authorize device. • After authorization, you will be able to find the Reader recognized in ADE as below. Contents inside the Reader will be displayed on the right hand windows. 6
Chapter 1 Basics • You can now start downloading or buying ebooks from online Ebook stores supporting Adobe DRM. • Purchased or downloaded ebooks will be stored in [My Digital Editions] in [My Documents]. Transferring DRM ebooks to Reader • From ADE menu, click on [All Items] on the left hand column • Items in [My Digital Editions] will be listed down in right window. • Select the desired item(s) to be transferred, <Shift> + <Left click> to select multiple files. • Drag and drop the selected item(s) into the Reader’s Drive located on the last row of the left side column as illustrated below. Notes For using ADE Each ADE ID supports only 6 devices, this includes the master device (the reader) and the slave device (SD card). When the reader is restored to default settings, ALL DRM activation record and data (including DRM books purchased) will be erased from the reader. You are required to authorize the device with your ADE ID again. 7
8
Chapter 1 Basics When the number of authorized device has exceeded the allowable amount, you will come across the following error message: To request for extension and reset of your ADE ID, go to http://www.adobe.com/support/digitaleditions/ Æ [Submit a web case]. You are required to key in your ADE ID info. 8
Chapter 1 Basics Home screen When the reader is turned on, it will enter the Home screen. Press the Return button antytime to return to the Home screen, which contains your EBO‐701 e‐books. click any icon to get started. 1.Continue Reading
-display the page of last
read book.Press OK to
open the last read page.
2. Library
-display the list of books
available. Move the cursor
to desired book and press
track ball to open it.
3. Battery Indicator
-displays battery status
during operation
4. Page Number
-displays current page
Number and total available
pages.
5. Time & Date
-display current time and
date,you can set this from
the
[Settings]
6. File Directory
- Indicates the location where the file is stored.
MICRO SD –MICRO SD memory card,INT – internal memory
9
Chapter 1 Basics Option Menu Shows all function icons, Press Menu button to display the option menu. Press the Brake track ball to move cursor to desired
item,Selected item will be highlighted in dark. Then press
Brake track ball to enter.
To exit from Option menu, move cursor to<Return> button
and press Brake track ball to confirm. Or press the
<Return> button on the panel to exit.
10
Chapter 1 Basics To sort books by different categories:Title, Author,
Category,Date, Format
Jump to a specific page
Read from previously added bookmarks
Adjust brightness of the display screen
Enter into Video Player
Enter into Music Player
Enter into Photo Viewer
Enter into File Explorer for advanced file
management
guide
Enter into System settings and to read user
guide
Open your favorite book list.
11
Chapter 2 Getting Started Reading books
1、On the Home Screen,You are free to point to open an e‐book. 2、You can also use the Track Ball to move the cursor up and down to scroll the ebook list. NOTICE: Supported format:TXT、PDF、EPUB、FB2 and RTF。 Page tuning On reading page, Roll the Brake track ball right/left to turn to
next /previous page
Adjusting Font Size • In reading page, press <Zoom> button on the unit to
enter the font size setting.
12
Chapter 2 Getting Started • There a 5 font sizes available: Small, Medium, Large,
XLarge, XXLarge.
• Move the cursor to the desired font size , then press the
Brake track ball to confirm.
• It will take several seconds for the fonts to be resized.
Zooming In/Out • You will need to use zooming function to enlarge images
available in the ebook (epud & pdf file)
• From the size menu, select [Elarge]
• Zoom menu will appear.
• Move the cursor to the desired zoom level and press the
Brake track ball.
• In zoom mode, Roll the Brake track ball right/left to pan
across the zoomed page.
• Page turning is disabled in zoom mode.
• Press <Return> to exit zoom mode and return to original
size and resume normal book reading functions.
13
Chapter 2 Getting Started Using Option Menu in Reading In Reading page, press <Menu> button to enter Option
Menu. Options available: 1.Add / Delete Bookmark
2. Bookmarks
3. Go to Page
4. Music
5. Auto flip
6. Book Information
7. Rotate
8. Display Settings
9. Add to Favorite
10. Decode Settings
Adding Bookmark When reading, turn to the desired page to be added
bookmark. Press <Menu> button, move the cursor to [Add
Bookmark] and then <OK>.
14
Chapter 2 Getting Started Deleting Bookmark • Turn to the bookmarked page that needs to be deleted.
Press <Menu> and move the cursor to <Delete
Bookmark>. Press the Brake track ball to confirm.
• Alternatively, you can delete bookmark from the
Bookmark List.
• In the Bookmark list, press <Menu> and select [Delete] to
delete selected bookmark.
Read from Bookmarks in Home Menu • From Home Menu, press <Menu> and select [Bookmarks]
to enter Bookmark List.
• In the Bookmark List, move the cursor to the desired
bookmark, press <OK> to open.
• To delete bookmark from the Bookmark List, press
<Menu> to display [Option Menu] and select [Delete] to
confirm.
Upper
window displays
a quick preview of the
selected
book.
Lower
window displays the
of books with bookmarks.
list
Press <OK> on the desired
book
to view the available
bookmark
list.
15
Chapter 2 Getting Started Read from Bookmarks in Current Book • In reading page, press <Menu> and select [Bookmarks] to
enter into Bookmark List.
• In Bookmark List, move the cursor to the desired page
and press <OK> to open.
• To delete bookmark from the Bookmark List, Press
<Menu> to display the Option Menu and select [Delete] to
confirm.
Go to Page • You can jump to pages using the [Go to Page]
• option.In the Option Menu, select [Go to Page].
• In Go to Page menu, move the cursor by the Brake track
ball. Input page number by the Brake track ball.Move the
cursor to [Apply] then press the Brake track ball to apply
settings.
Auto Flip You can set the Reader to [Auto Flip] mode. The auto flip
duration available are: 5s,10s, 20s, 30s, 40s, 50s, 1 min.
Displaying the book Information • You can check the information of the current book from the
[Book Information] option. This will show: Title, Author,
Publisher, File Type, Date added, File size, Publisher and
Expiration.
• Depends on the source of ebook that you download
/purchase, some of the information may not be available.
Rotate 16
Chapter 2 Getting Started [Rotate] option allows you to rotate the display orientation
o
90 in clockwise direction to landscape orientation.
• To return to original orientation, press <Menu> and enter
<Rotate> once again.
• To return to original orientation, press <Menu> and enter
<Rotate> once again.
• In landscape view, the Option Menu is divided into 2
pages. To access options in the second page, move the
cursor to [More>] icon at the top right corner of the Option
Menu and then enter
• To return to previous page, move the cursor to [< Back]
and then enter the menu
Display Settings • To adjust font color, background color, brightness during
reading.
• Change of font color and background color are only
applicable to txt and epub documents.
17
Chapter 2 Getting Started Add to Favorite • You can add books to your Favorite List. In Option menu,
move the cursor to [Add to Favorite] to add current book
into Favorite List.
• To view books in Favorite List, from Home Menu, press
<Menu> button and select [Favorite].
• To remove book from Favorite:
1.
Enter Favorite List from Home menu. Move the
cursor to the desired book title. Press <Menu>
button and select [Delete] from the dropdown list.
2.
From reading page, press <Menu> button and
select [Remove from Favorite] from the Option
Menu.
Decode settings This item allows you to choose bookdecode available
according to reference and region.The default setting is
auto.
18
Chapter 2 Getting Started Playing Music ● From Home Menu, press <Menu> to display Option
Menu.
● Move the cursor to [Music] and press the brake track
ball to confirm.
● In the Music player, press the brake track ball to
play/pause music playing
● Roll the brake track ball rigth to play next song.
● Roll the brake track ball left to play previous song.
● Roll the brake track ball down to Fast Forward ● Roll the brake track ball up to Fast Rewind
● Press< Vol+>Key to increase volume
● Press< Vol->Key to Decrease Volume
19
Chapter 2 Getting Started Using Option Menu in Music Player EQ
settings
move the cursor to
[EQ Settings] , roll
Left or roll Right
Brake track ball to
select desired EQ
mode.
2
Play
Mode
move the cursor to
[Play Mode] , roll Lef
t or roll Right Brake
track ball to select
desired Play mode
3
All
4
Artist
5
Album
1
6
7
To view all
audio files
To sort audio
artist
To sort audio
album
To sort audio
genre
Go
back
player.
Genre
Return
20
stored
files by
files by
files by
music
Chapter 2 Getting Started Watching Videos • From Main menu, Select “Video”,and enter into the video
library.
• In video library move the cursor to your desired video file
and press <OK> to start playing.
• During video playback, the button definition is a below:
1
Increase Volume
5 Roll left: Next Video
2
Decrease Volume
3
Full Screen / Fit to
screen
Roll up: Fast
Forward
Roll down: Fast
Forward
4
Press: Play / Pause
6
5
Roll right: Previous
video
7 Return
21
Option menu
Chapter 2 Getting Started Using Option Menu during Video Playback During video playback, press <Menu> button to display
Option Menu.
1. Play mode:choose play mode: loop
mode, repeat one.
2. Display format: adjust display
format: full screen or fit to screen.
3. Screen brightness: adjust the screen brightness.
4.Return: close the menu and return to playback screen.
• The reader supports subtitle of sub, ssa, srt, lrc format.
• The file name of the subtitle must be identical to that of
the video file. The subtitle will be loaded automatically
during video playback.
22
Chapter 2 Getting Started Viewing photos Gentle Reminder: Please organize the pictures into a
specific folder for the ease of navigation.
• From Home Menu, press <Menu> to display Option Menu.
• Move the cursor to [Photo] and press the Brake track ball
to confirm.
Upper
window displays
preview of the selected
photo
Lower
window displays
the file list in the reader.
• Use the brake track ball to navigate through the
files/folders.
• Press the brake track ball on the selected photo to view a
full screen display.
• In full screen mode, Roll the brake track ball Left/Right to
view previous and next picture.
23
Chapter 2 Getting Started Zoom in/out Picture • There are 3 zoom levels available. To zoom in picture, in
full screen mode, press <Zoom> button to change
different zoom level.
• To return to original size, press <Return> button and
resume normal operation.
Rotate the picture You can rotate the picture according to your view.
• In full screen mode, press <Menu> ÆRotate.
• each time you press the Rotate button, the picture will be
rotated by 90 degrees counterclockwise.
Slideshow • In full screen mode, press <Menu> Æ [Slideshow] to
start.
• To stop slideshow, press <Menu> button once.
• From the drop down menu, select [Slide Time] to adjust
slideshow duration.
Thumbnail view • In full screen mode, press <Menu> Æ [Thumbnail] to
view pictures in thumbnail mode.
• To exit thumbnail view, press <Menu> once to return to
full screen mode.
• From Home menu, press <Menu> Æ [Explorer]
• Roll the brake track ball Left/Right to select Internal /
MICRO SD card memory and press the brake track ball
to enter.
• Press <Return> to exit from current directory and the
cursor will move to the top for memory selection.
24
Chapter 2 Getting Started File Manager Copy / Paste file • You can copy files/folders from MICRO SD card to
internal memory and wise versa.
• From the file list, move the cursor to the desired file to
copy. Click <Menu> and select [Copy].
• From explorer, go to the desired directory to store the
copied file. Click <Menu> and select [Paste] to start
copying file into the new directory/folder.
Note: it may take longer time to paste files/folder with big file
size.
Deleting File From explorer, move the cursor to desired file to delete.
Press [Menu] and select [Delete] to start deleting file.
Note: it may take longer time to delete files/folder with big file
size and quantity.
25
Chapter 3 Settings These setting items allow you to customize EBO‐701, set the date, time and enter other preferences for the unit. Time & Date To set the clock and date, time zone, daylight saving time
• Roll the brake track ball Left/Right to move the cursor to
your desired item.
• Roll the brake track ball Up/Down to adjust the desired
value.
• Press Apply button to confirm, press Cancel button to
cancel the setting.
Note: Time zone setting is needed to calculate the expiry
duration for book borrowing / returning.
Device Standby • To enable / disable auto standby mode, also set the time
for the auto standby mode
• Press <Power> button to manually set the reader to
standby mode
• Press <Power> button once to wake up the reader from
standby mode.
Format Memory To format internal memory or memory card.
All data will be lost. Please backup your data before
performing this.
About Product Displays product information about the reader.
26
Chapter 3 Settings Power Management Displays real time battery status of the Reader.
Restore Factory Defaults To restore the Reader’s settings to defaults.
All settings will be restored. All DRM contents and activation
will be deleted. You are required to authorize the reader
again through ADE after system restored.
Language To set system language for the reader.
User’s Manual If the reader does not function as it is expected, please try
the following steps.
27
Chapter 4 Troubleshooting The Reader is not responding or can’t be turned on.
•
•
Reset the reader by press and hold the power button
for 6 seconds. The reader will be forced shutdown if it is
on and you are required to restart the reader again.
Battery has been fully depleted. Please charge the
reader via USB or USB AC Adapter.
Battery Life seems short o
•
The operating temperature is below 5 C. this is due to
the characteristics of battery and not a malfunction
•
The battery is not used for prolonged period. Please
recharge the battery of the reader again
•
The battery is not fully charged. Please charge the
reader for 4 hours.
•
The battery needs to be replaced. Please consult the
authorized dealer for service.
A Book cannot be read •
Copyright protected books cannot be read on any
device other than the authorized one.
•
Check if the book has expired.
•
Check if the book format is supported by the reader.
The reader cannot be operated during USB connection •
The reader cannot be operated while it is connected to
PC.
•
Eject the reader from computer to resume operation.
•
To use the reader while charging, click on the [Safely
Remove Hardware] icon located on the left lower
corner to disconnect data connection with computer.
After the reader is safely removed, computer will only
charge the reader and you can now resume normal
operation.
28
Chapter 5 Appendix Maintenance •
•
•
If reader does get wet, turn off reader immediately. Wait for reader to dry completely before turning on again. Clean the screen with a soft cloth; be careful not to wipe it with anything abrasive. When carrying your reader in bag, keep reader in the protecting case supplied to avoid scratches If reader needs service, please consult the authorized dealer through the contact information provided in the warranty card. Faulty service may void the warranty. Product Specifications Display 7 inch MICRO SDT-LCD Display, 800x480 pixels
Brightness: 200cd/m¬¬2
Storage memory Built in memory: 4GB (FAT format)
Supports MICRO SD up to 16GB (FAT/NMICRO SDS
format)
Media File Format supported Ebook: epub, pdf, txt, fb2
Audio: mp3, wma, wav, ogg, aac
Photo: jpg, bmp, gif, png
Video: wmv, flv, rm/rmvb, mov, avi, mpeg 1, mpeg 2, mpeg
4, xvid, divx, h.263, h.264, up to HD 1080p resolution
Connectivity Data transfer: USB 2.0 High Speed
Audio: 3.5mm audio jack
Power: DC jack, USB jack
29
Chapter 5 Appendix Miscellaneous Built in stereo speaker
Clock / Date
Real time battery indication
Battery life Reading – up to 8 hours
Music – up to 30 hours (with backlight off)
Charging Power: DC 5.0V, 1.2A
Duration: 6 hours (approx)
Minimum system requirement (USB Mass Storage) Windows 2K, ME, XP, Vista, Win 7, Mac OS 10x
Physical properties Dimension: 206.4 x 133 x 12.9 mm (approx)
Weight: 347g (approx)
30
Chapter 5 Appendix Disposal and Recycling Information Your Reader must be disposed of properly according to local laws and regulations. Because this product contains a battery, the product must be disposed of separately from household waste. When your iPod reaches its end of life, contact your local authorities to learn about recycling options. Battery Replacement: The rechargeable battery in it should be replaced only byan authorized service provider. This symbol on the product or in the instruction means that your electrical or electric equipment should be disposed at the end of its life separately from your household waste. There are separate collection systems for recycling in the EU,For more information, please contact the local authority or your retailer where you purchased the product. 31