1
Before you start
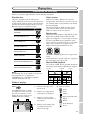
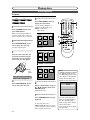
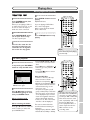
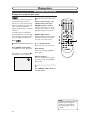
Functional overview
3* 4 5
2
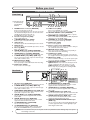
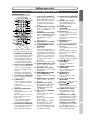
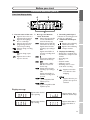
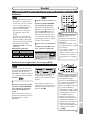
Front Panel
6
OPEN/CLOSE
(*) The unit can also
be turned on by
pressing these
buttons.
POWER
STOP/EJECT
REW
F.FWD
PLAY
VCR
STOP
DVD
PLAY
S-INPUT
VIDEO L(MONO) - AUDIO - R
REC/OTR
REC/OTR
CHANNEL
(TRACKING)
1
20
21 19 18 17 16
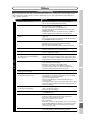
1.
POWER button / indicator (DVD/VCR)
Press to turn the unit on and off.
If timer programmings have been set, press to set the
unit in timer-standby mode. Press to cancel the timer
standby mode, then turn the unit on.
Red LED lights up when power is on.
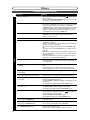
2. Cassette compartment (VCR)
Insert a videotape here.
3. A OPEN/CLOSE button (DVD)*
Press to open or close the disc tray.
4. VCR indicator
This indicator appears when the VCR output mode is selected.
5. DVD indicator
This indicator appears when the DVD output mode is selected.
6. Disc tray (DVD)
Place a disc when open.
7. AUDIO INPUT jacks (LINE2) (DVD/VCR)
Use to connect external equipment with standard audio cables.
8. VIDEO INPUT jack (LINE2) (DVD/VCR)
Use to connect external equipment with a standard video cable.
9. S-VIDEO INPUT jack (LINE2) (DVD only)
Use to connect the S-Video output of external equipment with an S-Video cable.
10. REC/OTR button (DVD)
Press once to start recording.
Press repeatedly to start a One-Touch timer Recording.
11. PLAY button (DVD)*
Press to start or resume play.
DUBBING
OUTPUT SELECT
15 14 13 12* 11* 10 9 8 7
12. STOP button (DVD)*
Press to stop playback or recording.
Press to stop the proceeding timer recording in DVD.
13. OUTPUT SELECT button (DVD/VCR)
Press to select the component you wish to operate.
14. DUBBING button (DVD/VCR)
Press to start VCR to DVD (DVD to VCR) duplication
which you set in the SETUP menu.
15. CHANNEL L / K button (DVD/VCR)
Press to change the channel up and down.
16. PLAY button (VCR)
Press to start playback.
17. Remote control sensor (DVD/VCR)
Receive signals from your remote control so that you
can control the unit from a distance.
18. REC/OTR button (VCR)
Press once to start a recording. Press repeatedly to
start a One-Touch timer Recording.
19. F.FWD button (VCR)
Press to rapidly advance the videotape, or view the picture rapidly in forward during playback. (Forward Search)
20. REW button (VCR)
Press to rewind the videotape, or to view the picture rapidly in reverse during the playback mode. (Rewind Search)
21. STOP/EJECT button (VCR)
EJECTbutton-Press to remove the videotape from the
cassette compartment when the power is on or off.
STOP button-Press to stop videotape playback.
Press to stop the proceeding timer recording in VCR.
1
2 3
4 5
6
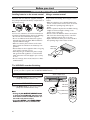
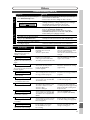
Rear Panel
DIGITAL
AUDIO
AUDIO OUT OUT
DVD
S-VIDEO
COMPONENT
VIDEO OUT
Y
L
COAXIAL
PB/CB
IN
R
DVD/VCR
AUDIO IN AUDIO OUT ANTENNA
IN
L
L
R
R
VIDEO IN VIDEO OUT
OUT
PR/CR
• These jacks are
OUT
useful only in
DVD mode.
8. VIDEO OUTPUT jack (DVD/VCR)
Use to connect a TV monitor, AV receiver or other
equipment with a standard video cable.
9. VIDEO INPUT jack (LINE1) (DVD/VCR)
Use to connect external equipment with a standard
video cable.
10. S-VIDEO OUTPUT jack (DVD only)
Use to connect the S-Video input of a TV monitor, AV
receiver or other equipment with an S-Video cable.
11. AUDIO OUTPUT jacks (DVD only)
Use to connect a TV monitor, AV receiver or other
equipment with standard audio cables.
12. COAXIAL DIGITAL AUDIO OUTPUT jack
(DVD only)
Use to connect an AV receiver, Dolby Digital decoder
or other equipment with a coaxial digital input jack
with a digital coaxial cable.
12 11 10
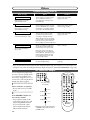
1.
2.
3.
4.
5.
6.
7.
AC Power Cord (DVD/VCR)
Connect to a standard AC outlet to supply power to this unit.
S-VIDEO INPUT jack (LINE1) (DVD only)
Use to connect the S-Video output of external equipment with an S-Video cable.
COMPONENT VIDEO OUTPUT jacks (DVD only)
Use to connect a TV monitor with component video
inputs with component video cables.
AUDIO INPUT jacks (LINE1) (DVD/VCR)
Use to connect external equipment with standard
audio cables.
AUDIO OUTPUT jacks (DVD/VCR)
Use to connect a TV monitor, AV receiver or other
equipment with standard audio cables.
TV ANTENNA IN jack (DVD/VCR)
Use to connect an antenna.
TV ANTENNA OUT jack (DVD/VCR)
Use to connect an antenna cable to pass the signal
from the TV ANTENNA IN to your TV monitor.
9 8
7
Note: Do not touch the inner pins of the jacks on the rear panel. Electrostatic discharge may cause perma8
nent damage to the unit.