1
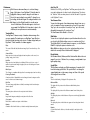
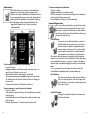
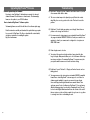
Digi-Frame™ Controls and Connectors
Menu Wheel
Rotate this control to navigate menus and lists. Push
(“click”) the control to select or act upon menu or list
items.
4 Forward
Use this button to advance to the next slide in a slideshow.
; Play/Pause
Use this button to pause or resume the slideshow at any
time. Press to exit menu system.
Use this button to display the previous slide in a
3 Back
slideshow.
Contrast Wheel Rotate this control to adjust the picture contrast.
CompactFlash™ slot Insert CompactFlash™ storage cards here.
IMPORTANT: Always use the Eject button to remove
cards from the memory card slots.
WARNING: Always turn off Digi-Frame™ before
inserting or removing cards.
SmartMedia™ slot Insert SmartMedia™ (SSFDC) storage cards here.
IMPORTANT: Always use the Eject button to remove
cards from the memory card slots.
WARNING: Always turn off Digi-Frame™ before
inserting or removing cards.
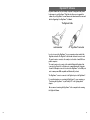
Digi-Link™ port
Connect the Digi-Frame™ to your PC or Macintosh® by
attaching the serial link cable between this socket and the
computer’s serial (COM) port.
Power Supply Jack Connects to Digi-Frame™ Power Adapter that plugs into
the wall.
Power Switch
Turns the Digi-Frame™ on and off. Always turn off the
Digi-Frame™ before inserting or removing memory cards.
Rotating Stand
Supports the Digi-Frame™ for tabletop use, it can rotate to
support either a vertical or a horizontal viewing position. It
adjusts to change the angle of the Digi-Frame™.
Screen
Displays your pictures in vivid color. Your Digi-Frame™’s
screen is made of glass and should be treated with care.
Use soft cloth and a recommended screen cleaning solution to remove fingerprints.
Rotating Logo
The “D” logo on the front of your Digi-Frame™ can be
rotated to match the current orientation of your DigiFrame™.
Decorative Frame Lets you customize the Digi-Frame™ to fit your lifestyle.
The DF-560 comes with 3 decorative frames; more are
available, see your retailer or our web site for more information.
6
7