1
DISPLAY
()_,ner s Instructions
SPP4231
mportant
Regarding
,rml .,n .
' 'm FormatViewing
Wide screen format PDP Displays (16:9,the aspect ratio of the screen width to height) are primarily
designed to view wide screen format full-motion video. The images displayed on them should primarily be
in the wide screen 16:9 ratio format, or expanded to fill the screen if your model offers this feature and the
images are constantly moving. Displaying stationary graphics and images on screen, such as the dark
side-bars on nonexpanded standard format television video and programming, should be limited to no
more than 5% of the total television viewing per week.
Additionally, viewing other stationary images and text such as stock market reports, video game
displays,station Iogos,web sites or computer graphics and patterns,should be limited as described above
for all televisions. Displaying stationary
images that exceed the above guidelines can
cause uneven aging of PDP Displays that leave subtle, but permanent
burned-in
ghost images in the PDPpicture.
To avoid this, vary the programming
and images,
and primarily
display full screen moving images,not stationary
patterns or dark bars.
On PDP models that offer picture sizing features,use these controls to view different formats as a full screen
picture.
Be careful in the selection and duration of television formats used for viewing. Uneven PDPaging as a
result of format selection and use,as well as burned-in images, are not covered by your Samsung limited
warranty.
UserInstructions
O Screen Image retention
Do not display a still image (such as on a video game or when hooking up a PC to this PDP) on the plasma
display panel for more than several minutes as it can cause screen image retention. This image retention is
also known as "screen burn". To avoid such image retention, refer to page 40 of this manual to reduce the
degree of brightness and contrast of this screen when displaying a still image.
@ Cell Defect
The plasma display panel consists of fine cells. Although the panels are produced with more than 99.9
percent active cells, there may be some cells that do not produce light or remain lit.
@ Altitude
The PDPwill not operate normally at altitudes above 6500 ft.
@ Warranty
Warranty does not cover any damage caused by image retention.
Burn-inis not covered by the warranty.
2
GeneralInformation
Channel
Control
Your New PlasmaDisplay Panel...................... 6
FineTuningChannels .................................. 64
RemoteControl Buttons.................................. 8
Wall Installation Instructions.......................... 10
Connecting
a PCandOperation
How to assemblethe Stand-Base ....................
Connection a PC ........................................
Connecting Speakers ..................................
15
66
Adjusting the PC Screen .............................. 70
Changing the Position of the Image................ 71
Connections
PictureQuality Adjustment .......................... 72
Connecting VHF and UHFAntennas .............. 18
Information ................................................
Connecting Cable TV ..................................
19
Connecting a VCR ......................................
21
75
TimeSetting
Connecting a Camcorder ............................ 22
Settingthe Clock ........................................
78
Connecting a DVD Player ............................ 23
Settingthe Sleep Timer ................................ 79
Connecting a DTVReceiver.......................... 24
Settingthe Timers........................................
Operation
Function
Description
Turningthe PDPOn and Off ........................ 26
Selectinga Menu Language ........................ 84
Plug & PlayFeature......................................
28
Digital Noise Reduction .............................. 85
Memorizing the Channels ............................ 31
Selectingthe Film Mode .............................. 86
Viewing an External Signal Source .............. 36
Settingthe Melody Sound ............................ 87
80
Settingthe Blue Screen ................................ 88
Picture
Control
Viewing Closed Captions ............................ 89
Customizing the Picture .............................. 40
Using the V-Chip..........................................
90
Using Automatic PictureSettings .................. 41
Selecting the Color Tone .............................. 42
Appendix
DNle (Digital Natural Image engine) ............ 43
Troubleshooting ..........................................
Changing the ScreenSize .......................... 44
Care and Maintenance ................................ 99
Freezing the Picture ................................... 46
Specifications............................................
98
1O0
Viewing the Picture-in-Picture....................... 47
Selecting
a SignalSource
(Antenna
or Cable)forPtP..... 52
SoundControl
Customizing the Sound ................................ 56
Using Automatic Sound Settings ................... 57
Choosing
a Multi-Channel
Sound(MTS)Soundtrack
...... 58
Using the Auto Volume ................................ 59
Setting the TruSurroundXT............................ 60
Selecting the Internal Mute ............................ 61
3
GeneralInformation
Your New PlasmaDisplay Panel ......................................................
RemoteControl Buttons ..................................................................
Wall Installation Instructions..........................................................
How to assemblethe Stand-Base....................................................
6
8
10
14
YourNew
SOURCE/ENTER
button
Pressto display all of the available video sources
ie., TV,AV,S-Video,Component, PC,DVI).
Press to confirm a se ection,
MENUbutton
Displays the main on-screen menu and exit.
VOL(+,-) button
Press to increase or decrease the volume. Also used
to select or adjust items on the on-screen menu.
CH(^,v)
PowerIndicator
- Power Off: Red
- Power On: Off
- TimerOn : Green
RemoteControlSignalReceiver
Aim the remotecontrol towards this spot
on the PDP.
button
Press CHA or CHv
to change Channels.
Also used to move up or down in the On-screen menu.
I/O
Press to turn the PDPon an_ off.
Once you have unpacked your PDP,check to make surethat you have all the pQrtsshown here.
If any piece is missingor broken, call your dealer.
Sold Separately
Owner'sInstructions
Remote
C0ntr0t
(BN59-00376B)/
Ferrite
Core2EA
(BN68-00631A)
6
AAABatteries
(4301-000103) (3301-001110)
Power
Cord
Antenna
Cable
Speaker
Cables
(3909-000144)
(BN39-O0333A)
(BN39-00530A)
S-VIDEO
Cable
DVICable
PCCable
Component
Cables(RCA}
PC Audio Cable
O DVI INPUT
Connect to the video output jack for
device with DVI output.
0 MONITOR OUT (VIDEO / L-AUDIO-R)
Outputs for external devices
IDPC INPUT(RGBIN / AUDIO)
Connect to the video and audio output
jack on your PC.
OFOR SERVICEONLY
Connector
for service only.
0 S-VIDEO
Video and audio inputs for external
devices with an S-Video output, such as
a camcorder or VCR.
OAV (VIDEO / L-AUDIO-R )
Video and audio inputs for external
devices, such as a camcorder or VCR.
0 COMPONENT
Video (Y/Pb/Pr) and audio (L-AUDIO-R)
inputs for Component.
0 ANTIN VHF/UHF(75_)
75L_ Coaxial connector for
Antenna/Cable Network.
O EXTSPEAKER
(8_)
Connectorsfor external speakers.
@ POWERIN
Connect the supplied power cord.
7
Remote
Buttons
®
@
@
0
@
@
8
®
@
O POWERbutton
Turnsthe PDPon and off.
0 S. MODEbutton
SelectSound effect.
0 Numberbuttons
_) PRE-CN
button
Tunes to the previous channel.
ID + 100button
_]) TV/VIDEObutton
Press to select channels over 100. For
example to select channel 121, press
"+100", then press "2" and "1 ."
O MUTEbutton
Press to display all of the available video
sources ie. Video, S-Video, Component,
PC, DV .
CH(Channel)
buttons
Use it to switch channels.
Press to mute the PDP sound.
0 VOL (Volume)buttons
Use it to adjust volume.
O SLEEPbutton
Pressto selecta preset time interval for
automatic shutofL
0 EXITbutton
Pressto exit the menu.
0 MENUbutton
_) Up/DownLeft/Rightbuttons
screen.
Control the cursor m the menu.
Displays the main on-screen menu.
O ENTER
button
1_) P. SIZE button
Setect Picture size.
Confirms a selection.
O ADD/DELbutton
Pressto add or delete channels in the TV's
memory.
@AUTO PROG.button
TheTV automatically cycles through all of
the available channelsand storesthem in
memory.
• P.MODEbutton
Adjust the PDPpicture by selecting one of
the preset factory settinqs (or selectyour
personal, customized pt_cturesettings.)
Slide the back cover
to open the battery
compartment of the
remote control.
INFO button
Press to display information on the PDP
_) STILL button
Press to pause the current
screen.
I_) CAPTION
button
Controls the caption decoder.
_) MTS button
Press to choose stereo, mono or Separate
Audio Program (SAP broadcast).
Install two AAA size batteries. Make sure to match the
"+" and "-" ends of the batteries with the diagram
inside the compartment.
Slide the cover back into
place.
RemoteControlOperationRange.
You can useyour remotecontrol within a distance of 23 feet and an angle of 30 degrees
from the left and right sidesof the PDP'sremote control receiver.
9
in
Installation
Notes
1
2
Do not install the PDPon any location other than a vertical wall.
To protect the performance of the PDP and prevent problems, avoid the following locations:
• Do not install next to smoke and fire detectors.
• Do not install in an area subjected to vibration or high voltage.
• Do not instal[near or around any heating apparatus.
3
Use only recommended parts and components.
Parts
(Wall
attachment
panel
issold
separately.
Check
with
your
dealer)
WallMountBracket
Insulation Holder ; 4 FA
10
Screws ; 4 EA
Fixing
thePDP
panel
tothe
wall
attachment
panel
bracket
Remove the screws from the back of the PDP.
2
Connect insulation holders to screws (see the illustration below).
• If you are uncertain about installation, hire a specialist to install the wall mount bracket.
• Be sure to check that the insulationholders are completely secured on both the left
and right side after hanging the PDPon the wall mount bracket.
• Be careful to avoid getting your fingers caught during installation.
• Make sure the wall attahcment panels are tightened. Otherwise the PDP may
fall
t¸---4
Tighten the screws of the insulation holders to the back of the PDP.
T
@
11
Put
4 insulation
holders
the PDP
thewall
grooves
of bracket
the wall 101.
mount bracket and
pull the
down
on the PDP
(0/to onsecure
it tointhe
mount
Tighten the screws as shown (0) so that the PDP cannot be separated from wall
mount bracket.
PDPpanel
Wall
Wall attachmentpanel bracket
Connecting
External
Devices
tothePDP
To connect external devices such as a DVD or a Home Theater System to the PDP,
please refer to following instructions:
Be sure to remove the safety pins underneath the PDP.
• If the safety pins are not removed, the angle cannot be adjusted.
Any attempt to do so may cause damage to the PDP.
Pull
outdirection
the bottom
of the PDP
(which
has(refer
beentoattached
to the Wall
in the
indicated
by the
arrows
the illustration)
until Mount
it clicks.Bracket)
• Using the PDP After Connecting External Devices.
Be sure to secure the PDP by inserting the 2 locking pins after readjusting the
angle of the PDP to 0 °.
• For safety, be sure to secure the PDP using the locking pins,
If the safety pins are not used, the PDP may fall, causing serious injury.
20.0°:E2.0
12
°
How
toAdjust
Mounting
Angle
Factorydefault
The wall mount bracket is delivered separately. Please tighten the captive screw in the
direction of the arrow after assembling the bracket.
Changing
theangle
I
Securethe
PDPto the wall
bracket. (Pleaserefer
to themount
following
instructions.)
Setthe
angle by pulllng
the upper
end of
the
PDPattached
to bracket
in the direction
of the arrow.
The angle can be adjusted from 0 ° to 15 °
by_+2 .
13
Howto
Assemble
twousing
support
pins with
the stand base and firmly secure both sides of the
support pins
8 screws
provided.
Ill
Assemble the PDP with the stand and firmly secure the PDP using 4 screws provided.
Twoormorepe0ple
shoold
carrythePDP.
NeverlaythePOP
on_hefloorbecouse
of possible
damage
_o_hescreen.
AJways
s_ore
thePOPgpright.
14
Remove the screws on the rear of the PDP.
Hang the two "T" shaped hangers on the square holes on the rear of the PDP.
Tighten the PDP and the speaker bracket using the screws removed from the PDP.
When
moving
yourPDP,
doNO'[h01d
thespeaker
connected
toy0grPDP.
I_maydamage
thebracket
damping
thespeoker
andyourPOP
togetherand
resultina dropofyourPDP
anda riskofpersonol
damage
andiniu_y.
15
Connect the speaker audio cable to the external speaker output jack on the rear of the PDP matching the
"+" and "-" ends of the cable with the diagram on the PDP.
Thespeakers
MUST
hc_ve
toapewerhandling
capebility
of10wu_sminimum
(impedance
8_).
When
youconnect
thespeaker
wiretotheexterna_
speaker
outconnector,
firstbindthespeaker
wireroundtheferritecuretosecure
_.
FerriteCores
The ferrite cores are used to attenuate undesired signals.
When connecting cables, attach one of these ferrite cores to the cable
near the connector.
16
Conn l ons
Connecting VHF and UHFAntennas ..............................................
18
Connecting Cable TV....................................................................
Connecting a VCR........................................................................
Connecting a Camcorder ..............................................................
Connecting a DVD Player..............................................................
19
21
22
23
Connecting a DTVReceiver ..........................................................
24
'lngVHF
UHFAntennas
Antennas
with
75-ohm
Round
Leads
If your antenna looks like this:
1
it has 75-ohm round leads.
Plug the antenna lead into the VHF/UHF terminal
on the PDP.
Use the Antenna Cobb, an accessory included
in the product package.
18
TV
You can connect different cable systems to your PDP, including cable without a cable box,
and cable with a cable box that descrambles some or all channels.
Cable
without
aCable
Box
1
Plug the incoming cable into the VHF/UHF terminal on
the PDP.
Use the Antenna Cabte, on accessory included
in the product package.
Cable
with
aCable
Box
that
Descrambles
AllChannels.
Find the on
cable
connected
to This
the ANTENNA
OUTbe
terminal
your
cable box.
terminal might
labeled "ANT OUT", "VHF OUT" or simply "OUT".
Connect the cable to the VHF/UHF terminal on the
PDP.
Use the Antenna Cabte, an accessory included
in the product package.
19
Cable
with
aCable
Box
that
Descrambles
Some
(But
Not
All)
Channels
To complete this connection you wi]] need a two-way splitter, an RF (A/B) switch, and four coaxia]
cables (which you can buy from your Samsung dealer or any electronics store).
1
Find and disconnect the cable that is connected to the ANTENNA IN terminal of
your cable box.
This terminal might be labeled "ANT IN",
"VHF IN" or simply, "IN". Connect this
cable to a two-way splitter.
Connect
a coaxial
PUT
terminal
of the cable
splitterbetween
and the an
IN OUTterminal of the cable box.
Ir_omlng
Cable
Incoming
Cable
Splitter
Splitter
Cable B_
ANTENNAa coaxial
Connect
OUT terminal
cable between
of the cable
the box
and the B-IN terminal of the A/B switch.
Incoming
Cable
Splitter
Cable Box
RF (/_)
Sw_h
Connect a coaxial
cable between
the box
ANTENNA
OUT terminal
of the cable
and the B-IN terminal of the A/B switch.
InCOming
Cable
S_ltter
Cable Box
RF (A_B)
Switch
Connect
the last
coaxial
cable switch
between
OUT
terminal
of the
RF (A/B)
andthe
the VHF/UHF terminal on the PDP.
After you've made this connection, set the A/B switch to the "A" position for normal viewing.
Set the A/B switch to the "B" position to view scrambled channels. (When you set the A/B switch
to "B", you will need to tune your Set-Top Box to the cable box's output channel, which is usually
channel 3 or 4.)
20
Connecting
aVCR
totheVideo
orS-Video/Audio
jack
PDP
Power Plug
Audio Cable
S-Video Cable
or
Connect the Video/Audio
AUDIO/VIDEO
cables between the AUDIO(L/R)/VIDEO
Video Cable
jacks on the PDP and
OUT jacks on the VCR. (Note: For better video, you can usean S-Videocable.)
VideotapePlayback:
1. Turn on your PDP.
2. Press the TV/VIDEO button to select "Video" or "S-Video".
3. Turn on your VCR, insert a videotape and press the play button.
21
',nga
Viewing
camcorder
tapes
Camcorder
PDP
Video Cable
Audio Cable
Connect a Video/Audio
VIDEO/AUDIO
cable between the AUDIO(L/R)/VIDEO
jacks on the PDPand the
OUTPUT jacks on the camcorder.
ViewingTapes
1. Turn on your PDP.
2.
Press the TV/VIDFO button to select "Video".
3. Turn on your camcorder and set it to Video Mode. (For details, refer to your camcorder
Owner's instructions.)
22
4.
Set the IN/OUT switch on your camcorder to OUT.
5.
Insert the tape into the camcorder and press the Play button.
nga DVD ayer(480i,480p)
This PDP displays the optimum picture in 720p mode.
Playing
DVD
PDP
DVD Player
Video Cable
Audio Cable
1 Connect
a Video Cable between the Y, Pb P, (COMPONENT)
Y/PB/PRoutput jacks on the DVD player.
2 Connect a Audio Cable between the AUDIO
input jacks on the PDPand
L/R(COMPONENT)
input jacks on the PDPand
the AUDIO OUT jacks on the DVD player.
To Play DVD:
1. Turn on your PDP.
2.
Press the TV/VIDEO button to select "COMPONENT".
3.
Turn on your DVD player, insert a DVD disc and press the Play button.
• For an explanation of Component video, see your DVD owner s instructions.
23
nga DWReceiver
(480p,720p,1080i)
This PDPdisplays the optimum picture in 720p mode.
Watching
DTV
PDP
DTV Receiver
Video Cable
Audio Cable
or
DVI Cable
Use a DVI-D connection cable. (sold separately)
Connect the cable or antenna to the antenna input jack on the DTV.
2 Connect a Video cable between the Y, P_,P, (COMPONENT) or DVI jack on the PDP and the
Y, P_,P_(VIDEO OUTPUT JACKS) on the DTV receiver.
3 Connect an Audio cable
between the COMPONENT
and the AUDIO OUTPUT jacks on the DTV receiver.
(L/R AUDIO) or DVI jacks on the PDP
ToWatchDTV:
1. Turn on your PDP.
2.
Press the TV/VIDEO button to select "COMPONENT"
3.
Turn on your DTV receiver.
or "DVI".
• For an explanation of Component video, see your DTV receiver owner's instructions.
24
Operation
Turningthe PDPOn and Off ..........................................................
Plug& Play Feature......................................................................
Memorizing the Channels..............................................................
26
28
31
Viewing an External Signal Source ................................................
36
Turning PDP
Turning
thePDP
Onand
Off
Press the POWER button on the remote control.
The PDPwill be turned on and you will be ready to use its
features.
You can also use the POWER (l/©)button on the front of the
PDP.
_!
ii_i
i____i!i_!_ii_i_ii_ii_iiii_
i iiiiiiii_iiiii_iii!iiiii_iii_!_
_i_
i!ii_iiii_i_!_ii_ii_i_
i iii_
_i_
_iiiiiiiii_ii_iiii_
ii!ii_
_i_i_ii_!_
_iiii!ili_ii_
i_
i!_i_i_i_!!,
!i_ii_ii_i_i!iii!iiii!_
!_!iiiiii_ili!i_
i!iiii!_i!ii!_
i!_
i
iiiiiii_iiiill
iii ¸i!i!ii_i!_ii_ii!!ii!i!_i
Viewing
the
Menus
and
Displays
Your PDP has a simple, easy-to-use menu system that appears on the PDPscreen. This system makes it
convenient and fast to use features on the PDP.Your PDPalso lets you display the status of many of your
PDP'sfeatures.
Viewing theMenus
With
the
power The
on, main
pressmenu
the MENU
button
on the
remote
control.
appears
on the
screen.
The input menu is selected.
Press the
the _1/I_/ENTER
• or • buttonsbuttons
to move
in the
menu.or
Press
to items
display,
change,
use the selected items. Press the ENTER (C_) button to
enter items in the menu. On screen menus disappear
from the screen automatically after about thirty seconds,
or you can press the MENU or EXIT button on your
remote control to exit the menu.
26
Displaying
StatusInformation
Press the INFO button on the remote control.
The PDPwill display the Picture mode, Sound mode, MTS,
Caption, and Clock.
27
ay Feature
When the television is initially powered ON, several basic customer settings proceed
automatically and subsequently. The following settings are available.
If the television
is inthe
Standby
POWER
button on
remote mode,
control.press the
Themessage
Plug&Playisdisplayed_
itflickersfe_e littlewhile,
andtheetheLanguage
menuisautomatically
displayed.
appropriate
•Select
or • the
button.
language by pressing the
Themessage
Antenna
inputcheckisdisplayed.
Press the ENTER button to confirm your choice.
Press the ENTER button.
28
Select
the correct
signal
source
(Air, STD, HRC and
IRC), then
press the
ENTER
button.
To start the search, press the ENTER button.
Thesearch
willendaetem_icelty.
Channels
aresortedendstoredin
anorderwhichreflects
theirposition
in thefrequency
range(with
lowest
firstendhighest
last).
Whenithasfinished,
theClock
Setmeeoisdispl0yed.
Tostopthesec_rch
beforeith0sfinished
orretoretoe0rma_
vMwieg,
press
theMENU
button.
Press
Press the
the ENTER
_1 or I_ button.
button to move to the Hour, Minute,
or am/pm.
Set the Hour, Minute, or am/pm by pressing the
• or • button.
When
it has
finished, the
message
Your which
Watching
is displayed,
and
then theEnjoy
channels
have been stored can be viewed.
29
ay Feature(continued)
If you want to reset this feature...
Press the
MENUthen
button.
the • or
• button to
select
"Setup",
pressPress
the ENTER
button.
Presspress
the • the
or ENTER
• button
to select 'M'scellaneous",
then
button.
Press the ENTER
• or • button.
button to select "Plug & Play".
For
furtherpage.
details on how to set, refer to the
previous
30
Memorlzlnl
Your PDP can memorize and store all of the available channels for both "off-air"
(antenna) and cable channels. After the available channels are memorized, use the
CH/_. and CH v buttons to scan through the channels. This eliminates the need to
change channels by entering the channel digits. There are three steps for memorizing
channels: selecting a broadcast source, memorizing the channels (automatic) and
adding and deleting channels (manual).
Selecting
the
Video
Signal-source
Before your television can begin memorizing the available channels, you must specify the type of signal
source that is connected to the PDP (i.e., an antenna or a cable system).
Press
MENU button.
Press
theENTER
• or •button.
button to
select the
"Channel",
then press
the
Press the ENTER button to select "Air/CATV".
3
Press the • or • button to select "Air", "STD",
"HRC" or "IRC'.
• If you are connected to an antenna, leave "Air"
displayed. If you connected cable, press the
• or • button to the display the type of cable
system: "STD', "HRC" or "IRC'.
(If you are not sure which type of cable system you
have, contact your cable company).
Press the MENU button to exit.
•
STD, HRC and IRC identify various types of cable TV systems. Contact your local cable company to
identify the type of cable system that exists in your particular area. At this point the signal source
has been selected. Proceed to "Storing Channels in Memory" (Next page).
31
Storing
Channels
inMemory
(Automatic
Method)
1
First, select the correct signal source (Air, STD, HRC
and IRC). See steps on previous page.
Press the MENU button. Press the • or • button to
select "Channel", then press the ENTER button.
Presspress
the • the
or ENTER
• button
to select "Auto Program",
then
button.
Quickwaytoaccess
thekgtomati_
Chonnel
Setting:
Justpress
the
"kUTO
PROG."
button
ontheremote
control.
Press
the ENTER
button.
The
PDPwill
begin
memorizing all of the available
channels.
After all the available channels are stored, the Auto
program menu reappears. Press the ENTER button to
stop.
Note
• The PDPautomatically cycles through all of the available channels and stores them in memory.
This takes about one to two minutes.
32
Adding
and
Erasing
Channels
(Manual
Method)
Use the
buttons
to directly select the channel
that
will number
be added
or erased.
Ex) Channel "4"
Press
ADD/DEL pressing
button, then
button.theRepeatedly
this press
buttonthe
willENTER
alternate
between "Add" and "Erase".
Press the MENU button to exit.
Note
* You can view any channel (including an erased channel) by using the number buttons on the remote
control.
33
ToView
Memorized
Channel
(PIP
Mode)
Press the
MENU button.
Pressthe
theENTER
• or •button.
button to
select
"Channel",
then press
Press
the • button.
or • button to select "Scan", then press
the
ENTER
Only the memorized channels are chosen.
Press the MENU button to stop.
34
Changing
Channels
Pressthe CHA
or CHv
button to change channels.
When you press the CHA or CHv
button, the PDPchanges channels
in sequence. You will see all the channels that the PDPhas memorized.
(ThePDPmust have memorized at least three channels.)
You will not see channels that were either erased or not memorized.
Pressthe numberbuttonsto go directly to a channel.Forexample,to select
channel27, press"2" then "7". TheTV will changechannelswhen you
pressthe secondnumber.
When you usethe numberbuttons,you can directly selectchannelsthat were
either erasedor not memorized. Tochange to single.digitchannels(0~9) faster,
press "0" before thesingle digit. (Forchannel "4" press "0" then "4".
Pressthe PRE-CHbutton. The TV will switch to the last channel viewed.
Toquickly switch between two channels that are far apart, tune to one
channel, then use the number button to select the second channel. Then,
use the PRE-CHbutton to quickly alternate between them.
Adjusting
the
Volume
Pressthe VOL + or VOL - button to increase or decrease the volume.
Using
Mute
Usin_theMUTEButtons
At any time,you cantemporarilycutoff the soundusingthe MUTEbutton.
Press
the MUTE
and theinsound
cuts off.
The word
"Mute"button
will appear
the lower-left
corner of the screen.
To turn press
mute off,
press+the
simply
the VOL
or MUTE
VOL - button
button.again, or
35
an
Use the remote control to switch between viewing signals from connected equipment,
such as VCRs, DVD, Set-Top box and the TV source (broadcast or cable).
Setting
theSignal
Source
Press the
MENU button. Press the ENTER button to
select
"Input".
Press the ENTER button to select "Source List".
Press
or • button.
button to select signal source, then
press the
the •ENTER
Notes
" When you connect equipment to the PDP,you can choose between the following sets of jacks:
AV, S-Video, Component, Monitor OUT, PC or DVI on the PDP's rear panel.
36
Assigning
Names
toExternal
input
mode
Press the
MENU button. Press the ENTER button to
select
"input".
Press the
or • button.
button to select "Edit Name", then
press
the •ENTER
3
Press the ENTER button.
• Press the • or • button to select external device:
VCR, DVD, Cable STB, HD STB, Satellite STB,
AV Receiver, DVD Receiver, Game, Camcorder,
DVD Combo, DHR or PC.
Set other signal sources (AV, S-Video, Component,
PC or DVI) using the same method as listed above.
Press the MENU button to exit.
Notes
• DHR : DVD HDD Recorder
37
Picture
Control
Customizing the Picture ................................................................
Using Automatic PictureSettings ....................................................
Selecting the Color Tone................................................................
40
41
42
DNle (Digital Natural Image engine) ............................................
Changing the ScreenSize ............................................................
Freezing the Picture......................................................................
Viewing the Picture-in-Picture
..........................................................
Selecting a Signal Source(Antenna or Cable) for PIP........................
43
44
46
47
52
You can use the on-screen menus to change the Contrast, Brightness, Sharpness, Color,
and Tint settings of your PDP.
Press the
MENU then
button.
Press
• orbutton.
• button to
select
"P'cture',
press
the the
ENTER
Press
or • button.
button to select "Custom", then
press the
the •ENTER
You will also see the items "Contrast", ' Br'ghtness",
"Sharpness", "Color" and "Tint".
Press
the • then
or • press
button
select the
item you wish
to
change,
thetoENTER
button.
Press the _1 or • button to change the value of the
item.
Press the MENU button to exit.
•
40
In the PC/DVi mode, you can't adjust the Color and Tint.
cture
Your PDP has automatic picture settings that allow you to adjust the video display easily.
Press
MENU then
button.
Press
• orbutton.
• button to
select the
"P'cture',
press
the the
ENTER
Quickway|oacce_thepicture
setting:
Justpress
the"RMODE"
bgtt0nontheremotecontrol
Press the ENTER button to select "Mode".
3
Press the • or • button to select "Dynamic",
"Standard", "Movie", or "Custom" picture setting.
• You can select "Entertain", "lnternet', "Text", or
"Custom" in PC/DVI mode.
Press the MENU button to exit.
41
ng
Press the
MENU then
button.
Press
• orbutton.
• button to
select
"P'cture',
press
the the
ENTER
Press
or • button.
button to select "Color Tone", then
press the
the •ENTER
3
Press the • or • button to select "Cool2", "Cool1 ",
"Normal", "Warm1" or "Warm2".
• You can select "Custom", "Cool", Normal" or
"Warm" in PC mode.
• You can select "Cool", "Normal" or "Warm"
in DVI mode.
Press the MENU button to exit.
42
Tone
DNle
Natura
Image
Samsung's New Technology brings you more detailed images with contrast,
white enhancement and 3D noise reduction.
Press
MENU then
button.
Press
• orbutton.
• button to
select the
"P'cture',
press
the the
ENTER
Press
the • button.
or • button to select "DNle",
the
ENTER
then press
Press the • or • button to select "On", "Off" or
"Oemo".
oOn : Switches on the DNle mode.
"Off: Switches off the DNle mode.
• Demo :The screen before applying DNle appears
on the right and the screen after applying
DNle appears on the left.
Press the MENU button to exit.
43
Screen size selection depends on the type of video input ( DVD, PC etc.).
Quick
waytoaccess
the
Screen
Size
menu:Just
press
the"P.
SIZE"
huron
ontheremote
control
Press the
MENU then
button.
Press
• orbutton.
• button to
select
"P'cture',
press
the the
ENTER
Press
the • button.
or • button to select "S'ze', then press
the ENTER
Press the
• press
or • the
button
to select
the screen size you
want,
then
ENTER
button.
Press the MENU button to exit.
" If you watch a still image or the 4:3 (Normal) mode for a long time (over 2 hours), an image may
be burned onto the screen.
View the monitor in 16:9(Wide) or Panorama mode as much as possible.
44
16:9(Wide)
I
INk
I
I_r_
16:9 Aspect Ratiothat fits DVD and Wide Screen
applications.
II
Panorama
Fitsa 16:9 picture onto a 4:3 screenand displays
it without clipping the image.
II
Zoom
Magnifies the 16:9 wide picture (in a vertical
direction) to fit the screen size.
Select _ by pressing the • or • button.
Use the • or • button to move the picture up and
down. After selecting I_}, use the • or • button
to magnify or reduce the picture size in a vertical
direction.
4 : 3(Normal)
Standard TV and VCRscreensize having a 4:3
Aspect Ratio.
•
In TV, VIDEO, S-VIDEO and Component (480i) modes, all screen modes can be selected.
(Wide -'-*Panorama "* Zoom "* Normal).
•
In PC/DVI mode, only 16:9 & 4:3 modes can be selected.
•
In Component (480p, 720p. 1080i) modes, Panorama mode can't be selected.
•
In Component (480p, 720p. 1080i) modes, you can move the picture on screen by pressing
the • or • button. (All screen modes)
• Changing the screen size to Normal, or Zoom during PIP mode will cause the PIPwindow to
disappear.
45
Freezing
Still
Press the STILLbutton on the remote control to freeze a
moving picture. Press again to cancel.
46
ewmg
cture
Selecting
thePIP
Screen
Press the MENU button. Press the • or • button to
select "P'cture', then press the ENTER button.
Press the
or • button.
button to select "PIP", then
press
the •ENTER
Press the ENTERbuff,on, then press the • or •
button to select On . The PIP image will appear in
the corner of the screen.
" Pressing the • or • button will alternate between
"On" and "Off".
Ne.te
"
Check if the V-Chip Lock (refer to page 90) is
ON if the RP On/Off will not function. RP does
not function when the V-Chip Lock is set to On.
Change the setting to Off and try it again.
Press the MENU button to exit.
PIPSettings
O : PIPand Swap Operate
X : PIPdoesn't Operate
x
x
x
x
O
0
O
x
x
x
x
O
0
O
O
x
x
x
x
O
0
x
x
x
x
x
x
x
0
o
O
x
x
x
x
0
o
O
x
x
x
x
0
o
O
x
x
x
x
47
Selecting
anExternal
Signal
You can use PIPto view a signal from an external source, such as a VCR.
Press the
MENU then
button.
Press
• orbutton.
• button to
select
"P'cture',
press
the the
ENTER
Press
the • button.
or • button to select "PIP", then press
the
ENTER
Press
or • button.
button to select "Source", then
press the
the •ENTER
4
Press the • or • button to cycle through all of the
available signal sources:
"TV", "AV", "S-V'deo', "Component", "PC" and
"DVI'.
The signal from these inputs will not appear if you
have not connected any equipment to the PDP's
respective input jacks.
5
Press the MENU button to exit.
Note
" The PIPfunction operates in Wide screen.
• Using Multi-Screen in the Normal or Zoom screen will change the size of the main screen to Wide
screen.
48
Swapping
theContents
ofthePIP
Image
and
Main
Image
Press the
MENU then
button.
Press
• orbutton.
• button to
select
"P'cture',
press
the the
ENTER
Press
the • button.
or • button to select "PIP", then press
the
ENTER
3
Press the • or • button to select "Swap", then
press the ENTER button.
• The image in the PIPwindow will appear on the
main screen, and vice versa.
Press the MENU button to exit.
49
Changing
theSize
ofthePIP
Window
Press the
MENU then
button.
Press
• orbutton.
• button to
select
"P'cture',
press
the the
ENTER
Press
the • button.
or • button to select "PIP", then press
the
ENTER
the
Press
ENTER
the • button.
or • button to select 'S'ze", then press
Presspress
the • the
or ENTER
• button
to select option you want,
then
button.
Press the MENU button to exit.
50
Changing
theLocation
ofthePIP
Image
Press the
MENU then
button.
Press
• orbutton.
• button to
select
"P'cture',
press
the the
ENTER
Press
the • button.
or • button to select "PIP", then press
the
ENTER
Press
or • button.
button to select "Position", then
press the
the •ENTER
Press the
or • the
button
to select
RP position you
want,
then• press
ENTER
button.
Press the MENU button to exit.
51
Cable)a
or
If the PIPsource is TV while PIP is ON, you can select the broadcasting source of PIP picture
separately from the main picture.
Press the
MENU then
button.
Press
• orbutton.
• button to
select
"P'cture',
press
the the
ENTER
Press
the
ENTER
the • button.
or • button to select "PIP", then press
Press the
the ENTER
• or • button.
button to select "Air/CAW",
press
then
If an antenna
is connected,
setting
"Air". the
If a
Cable
TV system
is providingthe
the
signal,is press
• or • button until the appropriate type of cable
system is selected ('STD", "HRC" or "IRC").
Pressthe MENU button to exit the menu.
52
Changing
thePIP
Channel
Press the
MENU then
button.
Press
• orbutton.
• button to
select
"P'cture',
press
the the
ENTER
Press
the • button.
or • button to select "PIP", then press
the
ENTER
Press
or • button.
button to select "Channel", then
press the
the •ENTER
Press the in
• the
or •PIPwindow.
button to change the channel that
appears
Press the MENU button to exit.
53
SoundControl
Customizing the Sound ................................................................
56
Using Automatic Sound Settings ....................................................
57
Choosing a Multi-Channel Sound (MTSjSoundtrack.......................... 58
Using the Auto Volume..................................................................
59
Setting the TruSurroundXT ............................................................
60
Selecting the Internal Mute ............................................................
61
m,zmg
Press the
MF:NU then
button.
Press
• orbutton.
• button to
select
"Sound",
press
the the
ENTER
Press
or • button.
button to select "Custom", then
press the
the •ENTER
Select
the option
(volume,the
balance,
to
be adjusted
by pressing
• or • equalizer)
button.
Press the • or • button to reach the required
setting.
Press the MF:NU button to exit.
_fyoumakeenychanges
t0theequalizer
settings,
thesound
Mode
iso_ometica_ly
switched
tothecustom
mode.
56
Press
MENU then
button.
Press
• orbutton.
• button to
select the
"Sound",
press
the the
ENTER
Press the ENTER button to select "Mode".
Press the
or • button
to select
"Standard",
"Mus'c
', •"Mov'e",
"Speech"
or "Custom"
sound
setting, then press the ENTER button.
Press the MENU button to exit.
57
Depending on the particular program being broadcast, you can listen to stereo, mono, or a
Separate Audio Program. (SAP audio is usually a foreign-language translation. Sometimes
SAP has unrelated information like news or weather.)
Press the
MENU then
button.
Press
• orbutton.
• button to
select
"Sound",
press
the the
ENTER
Quick
waytooccess
theMTSmenu:
Jus_
press
the"MTS"
burton
on
_he_emote
control
the
Press
ENTER
the • button.
or • button to select "MTS", then press
Press
the • then
or •press
button
selectbutton.
"Mono",
or "SAP",
the to
ENTER
"Stereo"
Press the MENU button to exit.
•
Choose Stereo for channels that are broadcasting in stereo.
•
Choose MQno for channels that are broadcasting in mono, or if you are having difficulty receiving a
stereo signal.
•
Choose SAP to listen to the Separate Audio Program, which is usually a foreign-language translation.
Note
T--'%Te
•
MTS function operates in TV mode only.
58
Using
theAutoVolume
Each broadcasting station has its own signal conditions, which can make it necessary to
adjust the volume every time the channel is changed. "Auto volume" lets you automatically
adjust the volume of the desired channel by lowering the sound output when the modulation signal is high or by raising the sound output when the modulation signal is low.
Press
MENU then
button.
Press
• orbutton.
• button to
select the
"Sound",
press
the the
ENTER
Presspress
the • the
or ENTER
• button
to select "Auto Volume",
then
button.
3
Press the • or • button to select "On", then press
the ENTER button.
• Pressing the • or • button will alternate
between "On" and "Off".
Press the MENU button to exit.
59
ng
XT
TruSurround XT is a patented SRStechnology that solves the problem of playing 5.1
multichannel content over two speakers. Trusurround delivers a compelling, virtual surround
sound experience through any two-speaker playback system, including internal television
speakers. It is fully compatible with all multichannel formats.
Press the
MENU then
button.
Press
• orbutton.
• button to
select
"Sound",
press
the the
ENTER
Press the
the •ENTER
or • button.
button to select "SRS TSXT", then
press
Press
the • ororStereo),
• button
to press
change
setting
(Off,
3D
Mono
then
the the
ENTER
button.
Press the MENU button to exit.
TruSurr0und
XT,SRS
andI _e_ ) Symbd
apetrademarks
ofSrSLabs,inc.
TruSurround
XT_echoology
isincorporated
underlicense
fromSRS
Lc_, Inc.
60
SRS(O)
,ng
InternaMute
The internal speakers can be muted in order to hear sound from external speakers you've
connected.
Press the
MENU then
button.
Press
• orbutton.
• button to
select
"Sound",
press
the the
ENTER
Press
the • the
or ENTER
• button
to select "internal Mute",
then press
button.
Press
the • button.
or • button to select "On", then press
the
ENTER
• Pressing the • or • button will alternate between
"On" and "Off".
Press the MENU button to exit.
61
Chonnel
Control
Fine Tuning Channels ....................................................................
64
,neTun,ng
Use fine tuning to manually adjust a particular channel for optimal reception.
Press the
MENU button.
Pressthe
theENTER
• or •button.
button to
select
"Channel",
then press
Press
or • button.
button to select ' F'ne Tune", then
press the
the •ENTER
Press the _1 or • button to adjust the fine tuning.
To
store
fine tuning
the TV's
press
thethe
ENTER
button.setting
(A starinicon(*)
willmemory,
appear.)
To reset the fine tuning to "0", press the • button
to select "Reset", then press the ENTER button.
Press the MENU button to exit.
64
Connecting
a PCandOperation
Connecting a PC..........................................................................
Adjusting the PCScreen................................................................
Changing the Positionof the Image................................................
PictureQuallty Adjustment ............................................................
Information..................................................................................
66
70
71
72
75
',nga
Connection to a Macintosh computer may require an adapter.
PDP
Use the DVI-D
connection cable.
(sold sepa rate_.._
--Orm
DVI Cable
PC Cable
DVI jac_'_,, ............ -(TheactualconfigI _
urationon your PC
I
may be different, _
dependingon the
modeL)
-_
Audio Cable
--
L
_
_,/_"
t7 I_ _
I
. ._.ii_oo.,._
1 Connect a PC (15pin) cable between the PC Output jack (or DVI jack) on the PC and the
RGB IN(or DVI IN) Input jack (15p D-SUB) on the PDP.
2 Connect a Audio cable between the Audio (RGB or DVI) on the PC and the Audio L/R (RGB
or DVI) input jacks on the PDP.
Towatchthe PC screen:
1. Turn on your PDP
2. Press the TV/VIDEO button on the remote control or SOURCE button on the front panel
to select "PC".
3. Turn on PC and check for PC system requirements. (Refer to pages 68 and 69 for PC
system requirements.)
4. Adjust the PC screen. (Refer to pages 70 and 75.)
66
Pin
Configuration
D-Sub Cable
DVI-D Cable (Digital-Only Connector)
" 15Pin Signal Cable (based on protruded pin)
FinNo.
PC IN
PCOUT
1
Red (R)
Red [R)
2
Green (G)
Green(G_
3
Blue (B)
Blue(B)
4
5
Grounding
GroundingIDDC)
Grounding
Grounding(BDC)
Fin No.
1
2
Signal Assignment
T.M.D.B. DatagT.M.D.S. Data2+
SiQnalAssiQnmenl
T.M.D.S. Data3+
+SV Power
6
Red [RJGrounding
Red [1_Grounding
3
4
5
6
7
8
9
Green(G)Grounding
BlueIB)Grounding
Ree_rved
Green(G) Grounding
7
DDC Data
19
T,M.D.S. DataO/5 Shield
Blue(BJGrounding
Reserved
g
9
No Connect
T,M.D.S. Data1-
20
21
T.M.D.G. DataST,M.D.S. DataS+
1O
SyncGrounding
BynoGrounding
10
11
T,M.D.S. Data1+
T,M.D.S. Data1/3 Shield
22
23
T,M.D.S. Clock Shield
T,M.D.G. Clock+
12
T,M.D.S. Data3-
24
T,M.D.S. Clock-
11
Grounding
Grounding
12
13
Data (DDC)
Horizontaleync.
Data (DDCI
Horizontal
sync.
14
Verticalsync.
Verticalsyno.
15
Clock(DDC!
Clock(DDC!
T.M.D.S. Data2M Shield
T,M.D.S. Data4T,M.D.S. Data4+
DDC Clock
PinNo.
13
14
15
16
17
18
Ground (for _5V)
Hot Plug Detect
T,M.D.S. DataOT,M.D.G. DataO+
Setting
upYour
PDP
(Plug
and
Play)
Our adoption of the new VESA® Plug and Play solution eliminates complicated and time consuming
setup. It allows you to install your monitor in a Plug and Play compatible system, without the usual
setup hassles and confusion. Your PC system can easily identify and configure itself for use with your
display. This monitor automatically tells the PC system its Extended Display Identification data (EDID)
using Display Data Channel (DDC) protocols.
67
How
toSet
upYour
PC
Software
(Windows
only)
The Windows display-settings for a typical computer are shown below. However, the actual screens
on your PC will probably be different, depending upon your particular version of Windows and your
particular video card. But even if your actual screens look different, the same, basic set-up information
will apply in almost all cases. (If not, contact your computer manufacturer or Samsung Dealer.)
On the windows screen, select in the following
sequence : Start -_ Settings -_ Control Panel.
t!i!_i!i!i!_i_Si!ii_i_'i_il
¸¸¸¸¸¸ _ _ _
32t_0DSC
.....
_,_n
DJpl_
y_r
se_e_L_n [ten_ _o view
descH_tion_
Mb_o_off _onle
"l'e C!'ll,_C_lSU_Om
AddNew
_
A_/F_ow
Ac_:beGamma
When the control panel screen appears, click on
"Display" and a display dialog-box will appear.
@
DaCe/Time
personalize
o_mp_ten
Ac_ib_lity
Find
Fat
Fot_
Gaffe
Cont_ller
_
_
HPJ_in
_der_
Fr_rn_
_yb_rd
L_Ll_d_t_
Nou_e
_ltirnedia
N_t_rk
_il_nd
F_
Pa_word_
Select the "Settings" tab in the display dialogbox.
The two key variables that apply to the PDP-PC
interface are "resolution" and "colors".
The correct settings for these two variables are:
"
Size (sometimes called "resolution")
:640 x 480 pixels.
" Color: "32-bit" color Shown at left is a typical
screen for "Display" dialog box.
If a vertical-frequency option exists on your
display settings dialog box, the correct value is
"60" or "60 Hz'. Otherwise, just click "OK"
and exit the dialog box.
Continued...
68
Notes_
Both screen position and size will vary, depending on the type of PC monitor and its resolution.
The table below shows all of the display modes that are supported:
Video Signal
Resolution
(DotX Line}
Vertical
Frequency(Hz)
Horizon_l
Frequency(KHz)
Vertical
Horizontal
Polarity
Polarity
70.086
31.469
N
P
85.080
37.861
N
P
640 X 400
85.080
37.861
P
N
720 X 400
70.087
85.039
31.469
37.927
P
P
N
N
59.940
31.469
N
N
72.809
37.861
N
N
75.000
37.500
N
N
N
N
640 X 350
640 X 480
IBM PC/ AT
Compatible
800 X 600
848 X 480
1024 X 768
85.061
43.269
56.250
35.156
N/P
N/P
60.317
37.897
P
P
72.188
48.077
P
P
75.000
85.061
46.875
53.674
P
P
P
P
60.000
29.838
72.000
36.072
75.000
37.650
60.004
48.363
N
N
70.069
56.476
N
N
75.029
60.023
P
P
84.997
63.677
P
P
nVidia chipset
• The interlace mode is not supported.
• The PDPoperates abnormally if a non-standard video format is selected.
• This sheet conforms to IBM/VESA regulations and is prepared on the basis of Analog Input.
• The DVI Mode is supported same as above table.
Notes;
•
When this PDP is used as a PC display, 32-bit color is supported.
•
Depending on the manufacturer, your PC display screen might appear different.
(and depending on your particular version of Windows.)
Check your PC instruction book for information about connecting your PC to a PDP.
•
If a vertical and horizontal frequency-select mode exists, select 60Hz (vertical) and 31.5kHZ
(horizontal).
•
In some cases, abnormal signals (such as stripes) might appear on the screen when the PC power
is turned off (or if the PC is disconnected). If so, press the TV/VIDEO button on the remote control
or SOURCE button on the front panel to enter the VIDEO mode. Also, make sure that the PC is
connected.
•
Connect only a PC monitor to the monitor output port while viewing the PC screen. (Otherwise,
random signals might appear).
69
Adjusting
theR.G.B
Preset:
•
Pressthe TV/VIDEO button to select "PC".
Press
MENU then
button.
Press
• orbutton.
• button to
select the
"Picture",
press
the the
ENTER
Presspress
the • the
or ENTER
• button
to select "Color Control",
then
button.
The "Color Control" is available only when
"Color Tone" is set in the custom mode.
Press
the • then
or • press
button
select button.
the item you want
to
change,
thetoENTER
Press the • or I_ button to change the value of the
item, using the on-screen gauge as your guide.
Press the MENU button to exit.
70
e Image
After connecting
the PDPto yourPC,adjustthe positionof the screenif it is not well-aligned.
Preset:
•
Pressthe TV/VIDEO button to select"PC."
Press
MENU then
button.
the • or
• button to
select the
"Setup",
pressPress
the ENTER
button.
Press
the • button.
or • button to select "PC", then press
the
ENTER
Presspress
the • the
or ENTER
• button
to select "Pos't'on ',
then
button.
Adjust
the position
of screen by pressing the
• / •/_1
/ • button.
Press the MENU button to exit.
71
Picture
Automatic
Adjustment
Preset:
•
Pressthe TV/VIDEO button to select "PC".
Press
MENU then
button.
• or
• button to
select the
"Setup",
pressPress
the the
ENTER
button.
Press
the • button.
or • button to select "PC", then press
the ENTER
Press
• or • button
select
"Auto the
Adjustment",
then to
press
the ENTER button.
The message "Auto Adjustment in progress"
appears on the screen and the picture adjustments
are automatically activated.
Press the MENU button to exit.
72
Coarse
Adjustment
Preset:
•
Pressthe TV/VIDEO button to select "PC".
Press
MENUthen
button.
• or
• button to
select the
"Setup",
pressPress
the the
ENTER
button.
Press
the • button.
or • button to select "PC", then press
the
ENTER
Press
the • the
or ENTER
• button
to select "image Lock",
then press
button.
Press the ENTER button to select "Coarse".
Remove picture noise (vertical stripes) on the screen
by pressing the _1 or I_ button. (If Coarse is not set
properly, vertical stripes will appear on the screen.)
Press the MENU button to exit.
73
Fine
Tuning
(Fine)
Preset:
•
Pressthe TV/VIDEO button to select "PC".
Press
MENU then
button.
• or
• button to
select the
"Setup",
pressPress
the the
ENTER
button.
Press
the • button.
or • button to select "PC", then press
the ENTER
Presspress
the • the
or ENTER
• button
to select "Image Lock",
then
button.
Press
the
ENTER
the • button.
or • button to select "F'ne', then press
Remove picture noise on the screen by pressing
the "4 or • button. (If Fine is not set properly, noise
will appear on the screen.)
Press the MENU button to exit.
74
)rm
,n
Preset:
•
Pressthe TV/VIDEO button to select "PC".
Press the
MENU then
button.
the • orbutton.
• button to
select
"Setup",
pressPress
the ENTER
Press
the • button.
or • button to select "PC", then press
the
ENTER
Presspress
the • the
or ENTER
• button
to select
",
then
button.
The 'lnformat'on
vertical,
horizontal frequencies and resolution appear.
Press the MENU button to exit.
75
TimeSetting
Setting the Clock .......................................................................
78
Setting the Sleep Timer...............................................................
79
Settlng the Timers......................................................................
80
ng
Press the
MENUthen
button.
the • or
• button to
select
"Setup",
pressPress
the ENTER
button.
Press
the • button.
or • button to select 'T'me", then press
the
ENTER
Press the •ENTER
or • button
buttontoto select
select"Clock".
correct hour.
Press
to select
"Minute.",
then
press the
the I_
• button
or • button
to select
correct
minute.
Press
then of
press
the
• the
or •I_ button
button to
to select
select "am/pm.",
the proper time
day
(am or pm).
Press the MENU button to exit.
78
ng
You can set your PDPto automatically turn off after a preset interval.
Press the
MENUthen
button.
the • or
• button to
select
"Setup",
pressPress
the ENTER
button.
Qgickway't0access
thesleep
timersetting:
Justpress
the"SLEEP"
b_ton
ontheremote
control
Press
the • button.
or • button to select "Time", then press
the
ENTER
Presspress
the • the
or ENTER
• button
to select "Sleep Timer",
then
button.
Press
the • stay
or •on.button
to selectranges
the time
interval
the
PDPto
The interval
from
30 to for
180 minutes.
Press
the
• the
or •• button to select "On"
"Activation",
or "Off".then press
Press the MENU button to exit.
79
ng
,mers
This PDPcan be set to turn on or off automatically at specific times that you choose.
Before using the timers, you must set the PDP's clock, as described previously.
Press the
MENUthen
button.
the • or
• button to
select
"Setup",
pressPress
the ENTER
button.
Press
the • button.
or • button to select "Time", then press
the
ENTER
Press the
the •ENTER
or • button.
button to select "On Timer", then
press
Press the I_ button to select "Hour", then press the
• or • button to select correct hour.
•Press
or •thebutton
I_ button
to select
to select
correct
"Minute.",
minute. then press the
I_ button
to select
press
the
•Press
or •thebutton
to select
the "am/pm",
proper timethen
of day
(am
or pro).
80
Press
press
the
• the
or •I_ button
button to
to select
select "Channel",
the channel then
you want
when PDP turns on.
I_ button
to select
"Volume",
then
•Press
or •thebutton
to select
the volume
level
youpress
wantthe
when PDP turns on.
Press
the
• the
or •I_ button to select
select "On"
'Act'vafon
or "Off".
", then press
If you
want
set Off Timer,
• or
button
to
select
"Offto Timer".
Set the press
"Off the
Timer"
just• as
you
set "On Timer".
0
Press the MENU button to exit.
81
Function
Description
Selecting a Menu Language .....................................................
84
Digital Noise Reduction...........................................................
85
Selecting the Film Mode ...........................................................
86
Setting the Melody Sound ........................................................
87
Setting the Blue Screen.............................................................
88
Viewing Closed Captions .........................................................
89
Using the V-Chlp .....................................................................
90
nga MenuLanguage
Press the
MENUthen
button.
the • or
• button to
select
"Setup",
pressPress
the ENTER
button.
Press the ENTER button to select "Language".
Press the • ' Engl'sh",
or • button
to select or
the"Espa_ol".
appropriate
language
"Fran?ais"
Press the MENU button to exit.
84
Noise
If the broadcast signal received by your TV is weak, you can activate the Digital Noise
Reduction feature to help reduce any static and ghosting that may appear on the screen.
Press the
MENUthen
button.
the • or
• button to
select
"Setup",
pressPress
the ENTER
button.
Press
or • button.
button to select "Digital NR", then
press the
the •ENTER
Presspress
the • the
or ENTER
• button
to select "On" or "Off",
then
button.
Press the MENU button to exit.
85
ng
m
On: Automatically senses and processes film signals from all sources and adjusts the
picture for optimum quality.
Off: Switches off the Film mode.
Press the
MENU then
button.
Press
• orbutton.
• button to
select
"P'cture',
press
the the
ENTER
Press the
or • button.
button to select "Film Mode", then
press
the •ENTER
Presspress
the • the
or ENTER
• button
to select "On" or "Off",
then
button.
Press the MENU button to exit.
•
86
Film mode is supported in TV, Video, S-Video and Component 480i.
ng
You can hear clear melody sound when the television is powered on or off.
Press the
MENUthen
button.
the • or
• button to
select
"Setup",
pressPress
the ENTER
button.
Presspress
the • the
or ENTER
• button
to select "Miscellaneous",
then
button.
the
Press
ENTER
the • button.
or • button to select "Melody",
press
Pressthe
• or • button to change the setting.
(On or Off).
87
ng
If no signal is being received or the signal is very weak, a blue screen automatically replaces
the noisy picture background. If you wish to continue viewing the poor picture, you must set
the "Blue Screen" mode to "Off".
Press the
MENUthen
button.
the • or
• button to
select
"Setup",
pressPress
the ENTER
button.
Press
the • the
or ENTER
• button
to select "Miscellaneous",
then press
button.
Press the ENTER
• or • button.
button to select "Blue Screen",
Press
• or • button to change the setting.
(On orthe
Off).
BlueScreen
isdisFloyed
whenthereis nosignal
fromanexternal
device
intheExternal
Mode,
regardless
oftheBtgeScreen
Setting,
88
Your TV decodes and displays the dosed captions that are broadcast with certain TV
shows. These captions are usually subtitles for the hearing impaired or foreign language
translations. All VCRs record the closed caption signal from te}evision programs, so
home-recorded video tapes also provide closed captions. Most prerecorded commercia_
video tapes provide closed captions as well Check for the closed caption symbol in
your television schedule and on the tape's packaging: c_.
Note: The Caption feature does not work with DVD or DTV signals.
Press the MENU button. Press the • or • button to
select "Setup", then press the ENTER button.
Press the • or • button to select "Caption", then
press the ENTER button.
Press the
the •ENTER
"Caption".
Press
or • button
buttontoto select
turn dosed
caption
on/off, then press the ENTER button.
Press
the • button.
or • button
to select
press
the
ENTER
Press the
• or "Made",
• button then
to select
"Text" or "Caption", then press the ENTER button.
4
Depending on the particular broadcast, it might be
necessary to make changes to "Channeis" and
"Field': Press the • / •/_11 / Ip. button to make the
changes. (Follow the same procedure as in steps
3 above.)
Press the MENU button to exit.
Note
4' Different channels and fields display different information: Field 2 carries additional information that
supp)ements the information in Field 1. (For example, Channel 1 may have subtitles in English,
while Channel 2 has subtitles in Spanish.)
89
The V-Chip feature automatically locks out programs that are deemed inappropriate for
children. The user must enter a PIN (personal ID number) before any of the V-Chip
restrictions are set up or changed.
Note: When the V-chip feature is activated, the PIP and auto channel program features
do not function.
Setting
UpYour
Personal
IDNumber
(PIN)
Press the
MENUthen
button.
the • or
• button to
select
"Setup",
pressPress
the ENTER
button.
2
Press the • or • button to select "V-Chip", then
press the ENTER button.
The message "Enter PIN" will appear. Enter your 4digit PIN number.
Note: The default PIN number of a new TV set is
"0-0-0-0".
The
"V-Chip"
screen
will appear.
Press
the the
• or •
button
to select
"Change
PIN", then
press
ENTER button.
The Change
screen
will appear.
digits
for yourpinPIN
and enter
them. Choose any 4As soon as the 4 digits are entered, the "Confirm
New PIN" screen appears. Re-enter the same 4 digits. When the Confirm screen disappears, your PIN
has been memorized.
Press the MENU button to exit.
/_/ot._e
• If you forget the PIN, press the remote-control buttons in the following sequence, which resets the pin
to 0-0-0-0 : Power Off. "_"Mute _" 8 _" 2 _" 4 _" Power On.
90
How
toEnable/Disable
theV-Chip
Press the
MENUthen
button.
the • or
• button to
select
"Setup",
pressPress
the ENTER
button.
2
Press the • or • button to select "V-Chip", then
press the ENTER button.
The message "Enter Pin" will appear. Enter your 4digit PIN number.
3
The "V-Chip" screen will appear. To enable the
V-Chip feature, press the ENTER button so that the
"V-Chip Lock" field is "On". (Pressing the • or •
button will alternate between "On" and "Off".)
Press the MENU button to exit.
91
How
toSet
upRestrictions
using
the"TV
guidelines"
First, set up a personal identification number PIN), and enable the V-Chip. (See previous section.
Parenta restrictions can be set up using either of two methods: The TV guide ines or the MPAA rating.
Press the
MENUthen
button.
the • or
• button to
select
"Setup",
pressPress
the ENTER
button.
2
Press the • or • button to select "V-Chip", then
press the ENTER button.
The message "Enter PIN" will appear. Enter your 4digit PIN number.
The
"V-Chip"
screen
will appear.
Press thethen
• orpress
•
button
to select
"TV Parental
Guidelines",
the ENTER button.
The
"TV
screen
appear.
Press
the Parental
• or • Guidelines"
button to select
onewill
of the
six ages
based categories:
TV-Y
TV-Y7
TV-G
TV-PG
TV-14
TV-MA
92
Young children
Children 7 and over
General audience
Parental guidance
Viewers 14 and over
Mature audience
5
At this point, one of the TV-Ratings is selected.
Press the ENTER button. Depending on your existing
setup, a symbol _ will be selected.
(Blank -- Unblocked, _-- Blocked)
While "_" is selected, press the • or • button to
block the category.
To select a different TV-Rating, press the • or •
button and then repeat the process.
Note 1: The TV-Y7, TV-PG, TV-14 and TV-MA have additional options. See the next step to
change any of the following sub-ratings:
FV: Fantasy violence
D: Sexually Suggestive Dialog
L: Adult Language
S: Sexual situation
V: Violence
Note 2: The V-Chip will automatically block certain categories that are "more restrictive".
For example, if you block "TV-Y" category, then TV-Y7 will automatically be blocked.
Similarly, if you block the TV-G category, then all the categories in the "young adult" group
will be blocked (TV-G, TV-PG, TV-14 and TV-MA). The sub-ratings (D, L, S, V) work together
similarly. (See next section.)
How
set the
D, L, S
and V sub-ratings.
First, to
select
oneFV,
of these
TV-Ratings:
TV-Y7, TV-PG, TV-14 or TV-MA (See Step 4, on previous
page).
Next, while the TV-Rating is selected, repeatedly press the ENTER button.
This will cycle through the available sub-ratings (FV, L, S, D or V).
A symbol "_" will be displayed for each sub-rating.
While "_"
is selected, press the •,
•,
_1, or • button to change the sub-rating.
To select a different TV-Rating, press the • or • button and then repeat the process.
Note: The V-chip will automatically block certain categories that are "More restrictive".
For example, if you block "L" sub-rating in TV-PG, then the "L" sub-ratings in TV-14 and TVMA will automatically be blocked.
Press
the MENU
buttonbased
to clear
screens.
(Or proceed to the next section, and set up
additional
restrictions
on all
thethe
MPAA
codes).
Note
• These categories consist of two separate groups: TV-Yand TV-Y7 (young children through age
7), and TV-G through TV-MA (everybody else).
The restrictions for these two groups work independently: If a household includes very young
children as well as young adults, the TV guidelines must be set up separately for each age
group. (See next step.)
93
How
toSet
upRestrictions
using
the
MPAA
Ratings:
G,PG,
PG-13,
R,NC-17,
X
TheMPAA rating systemusesthe Motion PictureAssociationof America (MPAA)system,and its main application is
for movies.When the V-Chiplock ison, the TVwill automaticallyblock any programs that are coded with objectionable ratings (eitherMPAA or TV-Ratings).
Press the
MENUthen
button.
the • or
• button to
select
"Setup",
pressPress
the ENTER
button.
2
Press the • or • button to select "V.Chip', then
press the ENTER button.
The message "Enter Pin" will appear. Enter your 4digit P)N number.
The
"V-Chip" screenwill
Pressthe
• or • button
to
select"MPAA
Rating",appear.
then press
the ENTERbutton.
4
The "MPAA Rating" screenwill appear.
Repeatedlypress the • or • button to selecta particular
MPAA category.
Pressingthe • or • button will cycle through the MPAA
categories:
G
General audience (no restrictions).
PG
Parentalguidance suggested.
.PG-13 PG-13 (?arentsstrongty cautloned).
R
R(Restricted.
Childrenunder 17 shouldbg eccompcmled
by an adult).
NCZl7
No children under age ]7.
X
NR
X (AduIts only).
Not rated•
While a particular category is selected, press the • or • button to activate it.
A selected symbol "_" will be displayed. Press the • or • button to select "@'.
Note: The V-Chip will automatically block any category that is "more restrictive". For example, if
you block the "PG-13" category, then "R", "NC-17" and "X" will automatically be blocked also.
94
How
toReset
the
TV
after
the
V-Chip
Blocks
aChannel
("Emergency
Escape")
If the TV is tuned to a restricted channel, the V-Chip will block it. The screen will go blank and the
following message will appear: "This channel is blocked by V-Chip".
To resume normal viewing, tune to a different channel using the number buttons.
Under certain conditions depending on the rating of the local TV programs the V-Chip might lock
out a the channe s. In this case, use the V-Chip function for an emergency escape':
Press the MENU button. Press the • or • button to select "Setup", then press the ENTER
button.
Press the • or • button to select "V-Chip", then press the ENTER button.
Enter your PIN number, and press the I_ button to temporarily disable the V-Chip Lock.
95
Appendix
TroubJeshootlng............................................................................
Care and Maintenance ................................................................
Specifications ............................................................................
98
99
1O0
Before you call a service technician, please scan this list of problems and possible solutions. It may save you
time and money.
98
With proper care, your PDPwill give you many years of service. Please follow these guidelines to get
the maximum performance from your PDP.
Identifying Problems
•
•
•
•
Do not put the PDP near extremely hot, cold, humid or dusty places.
Do not put the PDP near appliances that create magnetic fields.
Keep the ventilation openings clear.
Do not place the PDP on a rough and slanted surface, such as cloth or paper.
Liquids
•
Do not place liquids near or on the PDP.
Cabinet
•
•
•
Never open the cabinet or touch the parts inside.
Wipe your PDPwith a clean, dry cloth. Never use water, cleaning fluids, wax, or chemicals.
Do not put heavy objects on top of the cabinet.
Temperature
• If your PDPis suddenly moved from a cold to a warm place, unplug the power cord for at leasttwo
hoursso that moisturethat may have formed inside the unit can dry completely.
99
Exterior design and product specifications are subject to change without prior notice to improve
the performance of this product.
This PDPoperates as a Class B digital device.
(Note: Class B system is for home use.)
This PDP has been registered for residential use in terms of EMI.
NS42D4
SPP4231
1028 (W) X 86.4 (D)X 632.5 (H)mm
55 (W) X 21 (D)X 160 (H)mm
30kg(withoutstand)
1101
batteries)
12OVa,60Hz
330 W
I024(H) x 768(V)
107 Cm/42 inches
VHF,UHF(75Q unbalanced)
AV
S-VIDEO
COMPONENT- 480i / 480p / 72% / I080i
RGB: PCDSUB15P
DVI
AV/S-VIDEO
COMPONENT
PC
DVI
15W+ ] 5W (8 Q)- InternalSpeaker
1OO
Memo
101
Memo
102
Memo
103
1-800-SAMSUNG
(1-800-726-7864)
Samsung Electronics
Service Division
America
400 Valley Road, Suite 201
Mount Arlington, NJ 07856
www.samsungusa.com
Samsung Electronics Canada Inc.
Samsung Customer Care
7037 Financial Drive
Mississauga,
L5N 6R3
Ontario
www.samsung.ca
BN68-00631A-01


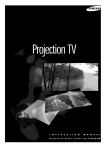
![PLAS A O ]-OR](http://vs1.manualzilla.com/store/data/005852706_1-5db0b7ed584537f0e62af161fb124638-150x150.png)