1
SAVING AND SELECTING SCENES
Once a DFR11EQ has been set up with a desired combination of settings, these settings can be
saved as a Scene. Ten scenes can be saved in internal memory (Onboard), while any number can be
saved to disk. Scenes are useful for reducing setup time when multiple units require similar settings.
Scenes are also useful for multi-purpose sound systems, or events which require changing settings
“on the fly”.
To Save a Scene Onboard
To save a scene to one of the ten onboard positions, follow these steps:
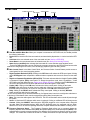
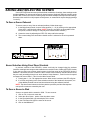
1. In the Main Control Panel, chose a Scene position (1 – 10) by clicking on the appropriate
Scene LED. It will illuminate yellow. (NOTE: Scenes 1 through 3 are accessible via the
front panel; scenes 4 through 10 may only be accessed via the software.)
2. Create the scene by adjusting the DFR, EQ, delay and limiter settings.
3. The current settings are saved when another scene is selected or the unit is powered
down.
2
1
3
Scene Selection Using Front Panel Controls
In previous versions of the DFR11EQ, scenes could only be changed using the software
interface, meaning that a computer was needed to execute this function. With the DFR11EQ Version
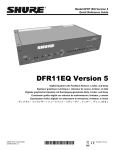
5, the user can select one of three saved scenes via the front panel of the DFR11EQ Version 5
hardware. This allows the user to select the three scenes most commonly used and save them so
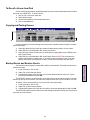
they are easily accessible through one–touch buttons. Scene buttons 1, 2 and 3 on the front panel
correspond to Scene LEDs 1, 2 and 3 on the Main Control Panel.
1. Press button 1, 2 or 3 for appropriate scene. When scene is selected, the LED will glow.
2. If no LEDs are glowing in the scene selection section of the hardware’s front panel, one
of the additional saved scenes has been selected using the software interface.
NOTE: The three Scene buttons on the front panel are preset to provide a flat response
until specific scenes are created by the user.
To Save a Scene to Disk
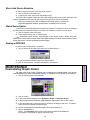
Scenes are saved with the extension .SCN. To save a scene:
1. Click on File in the main menu bar.
2. Select the Save Scene... option of the drop-down menu.
3. In the Description field, type a description of the scene.
4. In the File Name field, type the name of the scene.
5. Click on the OK button.
31
Table of Contents
SCENES