Download Cocos FLAT MP3 Player User manual
Transcript
User Manual
cocos-FLAT MP3-Player
I.
Description of keys and interfaces
LCD-Display
Power on/off
II.
Description of key-functions
III.
Menu operation
Music
Record
Voice
Radio
Phone Book
Text
System Setup
IV.
Key-Functions
Music- and Voice-Mode
Recording Mode
FM-Mode
V.
Playing music and recorded files
Basic Operation
Equalizer-Mode
Lyric Synchronous Display
Voice Recording
VI.
FM-Radio (only for certain models)
VII.
Phone Book
VIII.
Text reader
IX.
System Setup
Parameter Introduction
Detailed Instructions
X.
USB-Disk
XI.
Other Settings
Select different directories
Delete files
Play-Mode
Tempo Rate
Replay Mode
AB-Replay, Follow Read, Comparison
Replay Times
Replay gap
Reset
XII.
Installing a driver for Win 98
XIII.
Special Recommendation
Save removal of hardware
Private Space Function
Trouble Shooting
Technical Details
cocos-promotions gmbh | talheimer straße 32-d | 74223 flein, germany | phone 0049 (0) 7131/649 38-0 | fax 0049 (0) 7131/649 38-19
www.cocos-promotions.de | www.cocos-promotions.com | www.usb-sticks.de
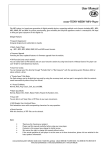
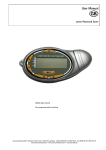
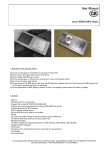
I. Keys and connections
▶■: Play/Pause
▶▶┃: Next, Forward
┃◀◀: Last, Rewind
MENU: Menu-button
REC: Recording-button
Vol +: increase volume
Vol -: decrease volume
III: ON/OFF
With Microphone, earphone jack and USB-port (push-button for the USB-port)
LCD-Display
The following items are displayed:
EQ-Mode, Bit/File Format, Repeat Mode, Volume Indicator, Battery Indicator, Mode Icon, Artist and song name,
Dance Movement, Number of songs, Play Time, Song No. and Total Time.
Power on/off
If you want to turn the Mp3-player on, please make sure that the main power button is on the position “on”. Short
press the Play-button (▶■), the introduction sequence appears on the display and the internal illumination will go
on. The player is now ready for use.
Press the Play-button and the ending sequence appears on the display, indicating that the player is turned off.
II. Description of key-functions
1. On/Off (on/play/pause/stop/off button)
Press this button when the player is turned off, in order to turn the player on.
When the player is turned on
short press for Pause
long press for Stop
When the player is in Standby-Mode
short press for Play
long press, in order to turn the player off
Please note:
After the introduction sequence, go to the main menu and select the Music-Mode. Short press the Menu-button
to enter the Music-Mode. The player then displays the current title, total title, play time, battery-indicator and
play back information, as well as the ID of the current track. Now, you will have to press the Play-button, in order
to start the play back.
cocos-promotions gmbh | talheimer straße 32-d | 74223 flein, germany | phone 0049 (0) 7131/649 38-0 | fax 0049 (0) 7131/649 38-19
www.cocos-promotions.de | www.cocos-promotions.com | www.usb-sticks.de
2
2. Next / fast forward (▶▶┃)
While in Play back-Mode
Short press this button, in order to forward to the next track; if you have reached the last title, the player will
automatically go forward to the first title.
Long press this button, in order to fast forward.
While in Menu-Mode
Press this button, in order to go forward in the menu.
3. Last / fast rewind (┃◀◀)
While in Play back-Mode
Short press this button, in order to go back to the previous track; if you have reached the first title, the player will
automatically go back to the last title.
Long press this button, in order to rewind fast.
While in Menu-Mode
Press this button, in order to go back in the menu.
4. Menu-Button (MENU)
While in Play back-Mode or if the player is ready for use, press this button to enter the main menu, see menu
operation.
5. Recording-button (REC)
While in Play back-Mode:
Press this button, in order to set the A-B Replay, Follow Read Function or Comparison Function (for details, please
read on)
Please note:
The following modes are available: Normal, Repeat one, Folder, Repeat Folder, Repeat all, Random, Intro.
While in Recording-Mode
Press this button one time, and the player will start recording. Press this button again, and the recording is
finished.
6. VOL +
Short press this button to increase the volume by one step.
Long press this button to increase the volume stepwise.
7. VOL –
Short press this button to decrease the volume by one step.
Long press this button to decrease the volume stepwise.
8. Main power button
Slide this button to the position “on”, in order to turn the player on.
Slide this button to the position “off”, in order to turn the player off.
Please always remember to have this button on “off”, if the player is not used.
cocos-promotions gmbh | talheimer straße 32-d | 74223 flein, germany | phone 0049 (0) 7131/649 38-0 | fax 0049 (0) 7131/649 38-19
www.cocos-promotions.de | www.cocos-promotions.com | www.usb-sticks.de
3
III. Menu operation
Press the Menu-button, when the player is turned on, in order to enter the main menu.
Key-functions for the Menus are as follows:
▶▶┃ (Next):
Next menu option; if you have reached the last menu item, the player will
automatically go forward to the first item.
┃◀◀ (Last):
Last menu option; if you have reached the first menu item, the player will
automatically go back to the last item again.
Menu-button: to enter the selected menu.
1. Main Menu
Music
Record
Voice
FM Radio
Phone Book
Text
System Setup
2. Submenus
Music
Play-Status:
Repeat
Equalizer
• Normal (playing files in current folder in normal sequence)
• Repeat one (only one music-file is played repeatedly)
• Folder (plays all music-files in the current folder in sequence)
• Repeat Folder (all music-files in the current folder are played
repeatedly)
• Repeat All (all music-files are played repeatedly)
• Random (plays music-files in the current folder randomly)
• Intro (only the first 10 seconds of every music-file are played)
• Natural (Normal)
• Rock
• Pop
• Classic
• Soft
• Jazz
• DBB
Tempo rate
Replay (A-B Replay)
Replay Times
Replay gap
Exit
cocos-promotions gmbh | talheimer straße 32-d | 74223 flein, germany | phone 0049 (0) 7131/649 38-0 | fax 0049 (0) 7131/649 38-19
www.cocos-promotions.de | www.cocos-promotions.com | www.usb-sticks.de
4
Stop-Status:
Local folder
Delete file
Delete all
Exit
NO/YES
NO/YES
Record
Stop-Status:
Local folder
REC type
• Fine REC
• Long REC
• Fine VOR
• Long VOR
Exit
Voice
Play-Status:
Repeat
• Normal (playing files in current folder in normal sequence)
• Repeat one (only one music-file is played repeatedly)
• Folder (plays all music-files in the current folder in sequence)
• Repeat Folder (all music-files in the current folder are played
repeatedly)
• Repeat All (all music-files are played repeatedly)
• Random (plays music-files in the current folder randomly)
• Intro (only the first 10 seconds of every music-file are played)
Tempo rate
Replay (A-B Replay)
Exit
Stop-Status:
Local folder
Delete file
Delete all
Exit
NO/YES
NO/YES
cocos-promotions gmbh | talheimer straße 32-d | 74223 flein, germany | phone 0049 (0) 7131/649 38-0 | fax 0049 (0) 7131/649 38-19
www.cocos-promotions.de | www.cocos-promotions.com | www.usb-sticks.de
5
FM Radio (only for certain models)
Stop-Status:
Save
Record
Stop-Status:
• Local Folder
• REC type
♦ 32K BPS
♦ 64K BPS
• Exit
Delete
Delete All
Normal Band
Japan Band
Auto Search
Search Level
Exit
NO/YES
NO/YES
Phone Book
Browse Tel
Import Tel file Confirm YES NO
Export Tel file Confirm YES NO
Exit
Text
browse file
browse speed
continue browse
Local folder
Exit
cocos-promotions gmbh | talheimer straße 32-d | 74223 flein, germany | phone 0049 (0) 7131/649 38-0 | fax 0049 (0) 7131/649 38-19
www.cocos-promotions.de | www.cocos-promotions.com | www.usb-sticks.de
6
System Setup
Record Time
Screen Protect Time
Screen Picture select different pictures
Language
• Simple Chinese
• English
• Trad Chinese
• Japanese
• Korean
• French
• German
• Italian
• Dutch
Power off
• Off time
• Sleep time
Replay Mode
• Manual replay
• Auto replay
• Portuguese
• Spanish
• Russian
• Arabic
• Thai
• Swedish
• Danish
• Czech
• Polish
• Slovakian
• Serbo Croatian
• Hungarian
• Romanian
• Turkish
• Slovenian
• Hebrew
Contrast
Online Mode
• Multi Drive
• Normal Only
• Encrypted Only
Memory info.
Firmware version
Firmware upgrade
Exit
cocos-promotions gmbh | talheimer straße 32-d | 74223 flein, germany | phone 0049 (0) 7131/649 38-0 | fax 0049 (0) 7131/649 38-19
www.cocos-promotions.de | www.cocos-promotions.com | www.usb-sticks.de
7
IV. Key-Functions
• Music-Mode and Voice-Mode
Keys
PLAY
Operation
Long press
Stop-Status
Power off
Play-Status
Power off
Play Submenu
Stop Submenu
Power off
Power off
MENU
Press
Long press
Play
enter the main
menu
Stop
enter the main
menu
exit the menu
enter the main
menu
exit the menu
enter the main
menu
Press
enter Stop
submenu
enter Play
submenu
Press
next song
play next song
confirm current
option or enter
next submenu
switch
submenu
confirm current
option or enter
next submenu
switch
submenu
continuous
forward
switch
submenu
continuous
forward
switch
submenu
continuous
fast backward continuous
backward
backward
increase volume increase volume --step by step
step by step
continuous
backward
---
increase volume
continuously
decrease
volume step by
step
---
NEXT
fast forward
Long press
LAST
Press
Long press
VOL +
Press
VOL -
Press longer
Press
Press longer
continuous
forward
previous song
decrease
volume
continuously
play previous
song
increase volume --continuously
decrease
--volume step by
step
--decrease
volume
continuously
-----
cocos-promotions gmbh | talheimer straße 32-d | 74223 flein, germany | phone 0049 (0) 7131/649 38-0 | fax 0049 (0) 7131/649 38-19
www.cocos-promotions.de | www.cocos-promotions.com | www.usb-sticks.de
8
• Recording Mode
Keys
Operation
Stop-Status
RecordingStatus
stop recording
PLAY
Long press
Power off
REC
MENU
Press
Long press
start recording
enter the main
menu
pause recording
--
Press
enter REC
submenu
--
• FM-Mode
Keys
PLAY
MENU
NEXT
LAST
Operation
Long press
FM-Menu
Power Off
Press
Long press
if stations already exist: exit the menu
next station;
without already existing
stations: not possible
enter main menu
enter main menu
Press
enter submenu
Press
increase gradually with
100 KHz steps or stop
search
Long press
increase search by 100
KHz continuously
decrease gradually with
100 KHz steps or stop
search
continuous forward
decrease search by 100
KHz continuously
increase volume step by
step
continuous backward
Press
Long press
VOL +
Press
Press longer
VOL -
Press
Press longer
FM-Submenu
Power Off
confirm current option
or enter next submenu
switch submenu
switch submenu
---
--increase volume
continuously
decrease volume step by --step
decrease volume
continuously
---
cocos-promotions gmbh | talheimer straße 32-d | 74223 flein, germany | phone 0049 (0) 7131/649 38-0 | fax 0049 (0) 7131/649 38-19
www.cocos-promotions.de | www.cocos-promotions.com | www.usb-sticks.de
9
V. Playing music and recorded files (when selecting the music record type)
Basic Operation
1. Long press the Play-button to turn the power on and then enter the Music-Mode. Press the Play-button
again to play music.
2. Select the desired music
Last-button: select the previous title
Next-button: select the next title
3. Volume adjustment
Vol + button: increase volume
Vol – button: decrease volume
Equalizer-Mode
1. While playing music:
2. Press the Menu-button to enter the Play-Submenu.
3. Press the Next-button to go to the Equalizer-Menu.
4. Press the Menu-button to enter the Equalizer-Menu.
5. Press the Next-button to choose the desired Equalizer sound and press the Menu-button for confirmation and
to exit the current menu.
Equalizer Options:
• Natural (Normal)
• Rock
• Pop
• Classic
• Soft
• Jazz
• DBB
Lyric Synchronous Display (Karaoke Function)
This player supports “.LRC” lyric files (users may download from http://www.51lrc.com) and the lyrics can be
displayed synchronously while playing music.
How to use lyric files?
Save the lyric file under the same name as that of the corresponding music file.
e.g. Music file name: GiGi-Sky.mp3
Lyric file name: GiGi-Sky.mp3
How to find out, whether lyrics exist or not?
If there are no lyrics to match the currently played song, the icon on the left top in the Music-Mode will change.
cocos-promotions gmbh | talheimer straße 32-d | 74223 flein, germany | phone 0049 (0) 7131/649 38-0 | fax 0049 (0) 7131/649 38-19
www.cocos-promotions.de | www.cocos-promotions.com | www.usb-sticks.de
10
Voice Recording
The player can save up to 99 recorded files in each directory!
1. Enter the main menu.
2. Press the Next- or Last-button to go to the menu-item “Record”.
3. Short press the Menu-button to enter the Record-menu.
4. Press the REC-button or Play-button to start recording. Short press the REC-button or Play-button to pause and
continue record. Long press the REC-button or Play-button to stop recording. “Saving…” will appear in the display
and the recording is saved.
5. Long press the Menu-button to exit the current menu.
The recording is saved in the current directory, that was set in “REC Stop-Submenu/main directory”!
If “Space Full” is displayed, then there is no more space available to record new files. Delete other files to create
some space!
If “Directory Full” is displayed, then there are 99 recorded files in the directory. Please select another directory!
Select REC type
1. In Stop-Mode (Record-menu), short press the Menu-button to enter the Record-submenu.
2. Press the Next-button to go to the menu-item “REC type”.
3. Short press the Menu-button to enter the REC type-menu.
4. Press the Next-button to select your desired REC type and press the Menu-button for confirmation and to exit
the current menu.
5. Press the REC-button or Play-button to start recording.
REC type details:
Fine REC: SP recording, WAV-format and good quality
Long REC: LP recording, ACT-format and average quality
Fine VOR: SP voice-control (voice-control: recording is paused if there is no sound), WAVformat
Long VOR: LP voice-control, ACT-format
Convert the ACT voice recordings into WAV-format
If you would like to listen to your voice-recordings on your computer, you will first have to convert them to WAVformat.
The converter can be found on the CD-ROM, included in the delivery.
Insert the CD-ROM and open the “act to wav CONVERTOR” folder. Double click on the application for installation.
Go to the programms and select “USB Flash Disk Utilities” and then “Sound Convert”.
The Conversion then will start.
This will allow you to convert voice-recordings into WAV or MP3 files.
cocos-promotions gmbh | talheimer straße 32-d | 74223 flein, germany | phone 0049 (0) 7131/649 38-0 | fax 0049 (0) 7131/649 38-19
www.cocos-promotions.de | www.cocos-promotions.com | www.usb-sticks.de
11
VI. FM-Radio (only for certain models)
1. Enter the main menu.
2. Press the Next-button to go to the FM-menu.
3. Press the Menu-button to enter the FM-menu.
Automatic Search
Long press the Next- or Last-button for about 2 seconds. The player will automatically select the next/last
available station.
Manual Search
Short press the Next- or Last-button and the player will go forward or backward step
by step.
4. Press the Menu-button again, in order to enter the FM-Submenu
• Automatic Search (Auto Search)
In the FM-submenu, select “Auto Search” and press the Menu-button for confirmation. Then the player can
automatically scan frequencies between 87.5 MHz and 108 MHz and save the scanned stations. Or see Automatic
Search above.
• Manual Search
Press the Last-button: backward by 100 KHz
Press the Next-button: forward by 100 KHz
• Saving the manually searched stations
Press the Menu-button to enter the FM-submenu and go to “Save” (Next- or Last-button). Again press the Menubutton to save the current station.
• Listening to the saved stations
If more than one station exists, press the Play-button to listen to the stations in sequence.
• Volume adjustment
VOL +: increase volume
VOL -: decrease volume
• FM Recording
Select the desired radio station. Press the Menu-button to enter the FM-submenu. Press the Next/Last-button to
go to the menu-item “REC type”. Press the Menu-button to enter the REC type-menu. Select your desired
recording-mode (32 or 64 K Bps) and press the Menu-button for confirmation and to exit the current menu.
Note:
The player supports US Band (FM 87 – 108 MHz) and Japan Band (FM 76 – 90 MHz), suitable for different areas.
(Press the Menu-button to enter the FM-Submenu and press the Next-button to select the desired frequency
channel)
If the current station is in STEREO, this icon “S” will be displayed.
For deleting saved stations, please see the section “Deleting Files”.
cocos-promotions gmbh | talheimer straße 32-d | 74223 flein, germany | phone 0049 (0) 7131/649 38-0 | fax 0049 (0) 7131/649 38-19
www.cocos-promotions.de | www.cocos-promotions.com | www.usb-sticks.de
12
VII. Phone Book
1. Enter the main menu.
2. Press the Next-button, to go to the menu-item “Phone Book”.
3. Press the Menu-button to enter the Phone Book-menu.
Submenu Options:
• Browse Tel.
The user can browse the Phone Book information of the MP3-player
• Import Tel file
Using the telephone directory processing tool can create the Tel. Book file Tel_save.bin in the PC; put it
then into the root directory of the U-disk and this
function can “import” it to the MP3-player.
• Export Tel file
This function can “export” the Tel. book information from the MP3-player and
saving it will make a readable text file of Tel_Expt.bin in the root directory of the
U-disk.
• Exit
Leave this mode and go back to the main menu.
VIII. Text reader
1. Enter the main menu.
2. Press the Next-or Last-button, to go to the menu-item “Text”.
3. Press the Menu-button to enter the Text-menu.
4. Select a menu-item.
5. Press the Menu-button to enter the Text-Mode.
Press the Play-button to turn pages backward.
Press the Last-button to turn pages forward.
Press the Next-button to turn pages backward.
6. Text selection
Press the Menu-button to enter the submenu.
Select the directory by pressing the Menu-button again.
Press the Menu-button to select the desired text.
Note:
The text-reader only supports .txt and .lrc format.
cocos-promotions gmbh | talheimer straße 32-d | 74223 flein, germany | phone 0049 (0) 7131/649 38-0 | fax 0049 (0) 7131/649 38-19
www.cocos-promotions.de | www.cocos-promotions.com | www.usb-sticks.de
13
IX. System Setup
1. Enter the main menu.
2. Press the Next- or Last-button to go to the menu-item “System Setup”.
3. Press the Menu-button to enter the System Setup-menu.
• Parameter Introduction
Record Time
Screen Protect Time
Screensaver picture
Language
Power Off
Replay Mode
Contrast
Online-Mode
Memory info.
Firmware version
Firmware upgrade
Exit
Set the time and date, when the recorded files are saved
Set a fixed time, after which the player will turn off the display (blank
screen)
Select picture
Select your desired language
Set a fixed time (minutes), after which the player will be turned off
automatically
Auto/Manual Replay
Set the desired contrast level of the display
Function, especially created for “private space”
Shows the total memory capacity and the percentage that has been used
Shows the firmware version
Special function for upgrading the firmware
exit the current menu
• Detailed Instructions
♦ “Record Time”
1. Go to the System Setup-menu. Press the Menu-button to enter the System Setup-menu.
2. Press the buttons Next/Last to go to the menu-item “Record Time”. Press the Menu-button to enter the Record
Time-menu.
3. Press the Vol + -button to set the time in the sequence of “YY-MM-DD” (Press the Vol - -button to set the time
in the opposite sequence).
4. Press the Next- or Last-button to adjust the numbers
increasing / decreasing numbers
5. Short press the Menu-button for confirmation and to exit the current menu.
♦ “Screen Protect Time”
“Screen Protect Time” refers to a certain time, after which the display of the player turns itself off automatically, if
there is no operation on the keys. If “0” is selected, then this function is invalid.
1. In the Menu “System Setup”, press the buttons Next/Last to go to the menu-item “Screen Protect Time”.
2. Short press the Menu-button to enter the “Screen Protect Time”-menu.
3. Press the buttons Next/Last in order to set the desired time.
4. Short press the Menu-button for confirmation and to exit the current menu.
♦” Screensaver Picture”
1. In the menu-item “System Setup”, press the buttons Next/Last to go to the menu-item “Screensaver Picture”.
2. Short press the Menu-button to enter the “Screensaver Picture”-menu.
3. Press the buttons Next/Last in order to select the desired picture.
4. Short press the Menu-button for confirmation and to exit the current menu.
cocos-promotions gmbh | talheimer straße 32-d | 74223 flein, germany | phone 0049 (0) 7131/649 38-0 | fax 0049 (0) 7131/649 38-19
www.cocos-promotions.de | www.cocos-promotions.com | www.usb-sticks.de
14
♦ “Language” Settings
1. In the System Setup-menu, press the buttons Next/Last to go to the menu-item “Language”.
2. Short press the Menu-button to enter the Language-menu.
3. Press the buttons Next/Last to select the desired language.
4. Short press the Menu-button for confirmation and to exit the current menu.
♦ “Power off”
1. In the System Setup-menu, press the buttons Next/Last to go to the menu-item “Power off”.
2. Short press the Menu-button to enter the menu.
3. Press the buttons Next/Last to select “Off Time” or “Sleep Time”.
4. Short press the Menu-button for confirmation and to exit the current menu.
“Off Time” means, that after a fixed period of time (unit: seconds), when there is no operation on the keys at the
Stop-Mode, the player turns itself off automatically in order to save energy (not during playback and recording). If
“0” is selected, the energy saving function is invalid.
“Sleep Time” means, that you can set a fixed period of time (unit: minutes) for the player to turn itself off
automatically, when there is no operation on the keys, no matter which mode the player is in. This function was
especially designed to be able to listen to music before sleeping.
Note: Setting “Sleep Time” is only valid once and the set time will be cleared after the power was turned off.
“Sleep Time” then needs to be set again the next time.
♦ “ Replay mode”
1. In the System Setup-menu, press the buttons Next/Last to go to the menu-item “Replay mode”.
2. Short press the Menu-button to enter the menu.
3. Press the buttons Next/Last to select “Manual replay” or “Auto replay”.
4. Short press the Menu-button for confirmation and to exit the current menu.
Manual replay
“Manual replay” means, that in the A-B Replay-Mode, the endpoint B can only be set manually.
Auto replay
“Auto(matic) replay” means that in the A-B Replay-Mode, the endpoint B will be set automatically (especially for
English Reading files without music).
♦ “Contrast”
1. In the System Setup-menu, press the buttons Next/Last to go to the menu-item “Contrast”.
2. Short press the Menu-button to enter the menu.
3. Press the buttons Next/Last to select your desired contrast-level.
4. Short press the Menu-button for confirmation and to exit the current menu.
♦ “Online Mode”
Some operating systems (under Windows 2K SP4) cannot support two driver letters on one USB-disk. Therefore, if
you are in the “private space” function, select which disk you are going to use, i.e. “normal only” or “encrypted
only”, for a correct display of the selected disk after connection to a PC.
cocos-promotions gmbh | talheimer straße 32-d | 74223 flein, germany | phone 0049 (0) 7131/649 38-0 | fax 0049 (0) 7131/649 38-19
www.cocos-promotions.de | www.cocos-promotions.com | www.usb-sticks.de
15
1. In the System Setup-menu, press the buttons Next/Last to go to the menu-item “Online Mode”.
2. Short press the Menu-button to enter the menu.
3. With the buttons Next/Last, you are able to switch between the following options:
• Multi Drive
• Normal Only
• Encrypted Only
4. Short press the Menu-button for confirmation and to exit the current menu.
♦ “Memory info.”
1. In the System Setup-menu, press the buttons Next/Last to go to the menu-item “Memory info.”
2. Short press the Menu-button to enter the menu-item “Memory info.”.
The number displayed represents the total memory capacity and the percentage refers to the capacity used.
3. Short press the Menu-button for confirmation and to exit the current menu.
♦ “Firmware version”
1. In the System Setup-menu, press the buttons Next/Last to go to the menu-item “Firmware version”.
2. Short press the Menu-button to enter the menu-item “Firmware version”.
The currently used firmware version is displayed.
3. Short press the Menu-button for confirmation and to exit the current menu.
♦ “Firmware upgrade”
1. In the System Setup-menu, press the buttons Next/Last to go to the menu-item “Firmware upgrade”.
2. Short press the Menu-button to enter the menu-item “Firmware upgrade”.
This function was especially designed for the Firmware Upgrade.
3. Short press the Menu-button for confirmation and to exit the current menu.
Caution:
➔ Firmware Upgrade is an operation to enhance and optimize the performance of the player. If the if Firmware
Upgrade wasn’t performed, there is no influence on the normal operation of the player.
➔ Incorrect operation of Firmware Upgrade may cause the player to work abnormally. Please read the manual
carefully before operation and a Firmware Upgrade should be operated by people with basic knowledge in
computer operation.
➔ The upgrading firmware is especially programmed for this player only and is not suitable for other players,
and another firmware is not suitable for this player.
♦ Exit
X. USB-Disk
The player supports standard USB-disk function with the operating systems Windows 98 (driver needed), Windows
2K and above (driver free).
The player supports power supply through USB, so it can be operated without a battery.
How to connect the player to a PC?
Turn the player on and connect it to a PC.
cocos-promotions gmbh | talheimer straße 32-d | 74223 flein, germany | phone 0049 (0) 7131/649 38-0 | fax 0049 (0) 7131/649 38-19
www.cocos-promotions.de | www.cocos-promotions.com | www.usb-sticks.de
16
The player will display three modes after being connected to a PC:
1. Standby-Status
2. Uploading-Status
3. Downloading-Status
Create new folder
99 songs can be saved per folder (or directory). If you want to copy more than 99 songs into your MP3-player, you
will have to create a new folder (or directory).
Simply go to “my computer” and open the external hard drive that represents your MP3-player.
To create a new folder (or directory): right click on any blank area, then select “New Folder” from the resulting
menu.
You can create up to 10 folders (including the ROOT-folder) with up to 99 songs per folder.
XI. Other Settings
• Select different directories/folders (at Stop-submenu)
Users can save files in different directories/folders (folders should be set up in the PC in advance), to manage and
play files according to different types. The player supports the identification of 99 subdirectories.
1. At the Stop-submenu , directories/folders can be selected (the directories/folders can be selected in recording
and playback mode).
2. Press the Menu-button to enter the Stop-submenu.
3. Press the Menu-button again, to enter “Local Folder”.
4. Press the Next- or Last-button to select your desired directory/folder.
5. Press the Menu-button to confirm the selected directories/folders.
• Delete files (at Stop-Submenu)
In Music-, Voice- and FM-Mode (starting with step 3), the corresponding files can be deleted.
1. At the Stop-Mode:
2. Press the Menu-button to enter the Stop-submenu.
3. Press the Next/Last-button to select “Delete file” or “Delete all”
4. Press the Menu-button to enter the Delete-menu.
5. Press the Next-switch to switch between “NO” and “YES”.
6. Press the Menu-button for confirmation and deletion starts.
• “Delete all” means, that all relevant files in the current mode in the current folder will be deleted. (For example,
“Delete all” is chosen in the Music-Mode, that means that all the music files in the current folder will be deleted,
while the recorded files will remain unchanged.)
cocos-promotions gmbh | talheimer straße 32-d | 74223 flein, germany | phone 0049 (0) 7131/649 38-0 | fax 0049 (0) 7131/649 38-19
www.cocos-promotions.de | www.cocos-promotions.com | www.usb-sticks.de
17
• Play-Mode (Play-submenu)
When playing music and recorded files, different Play-Modes can be selected (such as Repeat, Shuffle, etc.)
The first option in the Play-submenu is the Play-Mode “Repeat”. The player will play the files according to the
selected mode. Short press the Menu-button to enter the Repeat-menu.
Repeat - Options:
Normal: Playback of files in the current folder in normal sequence
Repeat One: one single music-file is played repeatedly
Folder: plays all music-files in the current folder in sequence
Repeat Folder: all music-files in the current folder are played repeatedly
Repeat All: all music-files are played repeatedly
Random: plays music-files in the current folder randomly
Intro: the first 10 seconds are played of every music-file
Short press the Menu-button again for confirmation and to exit the current menu.
• Tempo Rate (Play-Submenu)
When playing music (only for MP3-files) or recorded files, different tempo rates can be set (faster or slower)
without changing the tone and sound.
1. While playing music:
2. Press the Menu-button to enter the Play-submenu.
3. Press the Next-button to select “Tempo Rate”.
4. Press the Menu-button to enter the Tempo Rate-menu.
5. Press the Next-button for a faster tempo rate or press the Last-button for a slower tempo rate.
6. Press the Menu-button to confirm the desired tempo rate and to exit the current menu.
• Replay Mode
Entry through the Play-submenu.
♦ A-B Replay
1. At Music- or Voice-Mode, while files are played:
2. Press the Menu-button to enter the Play-submenu.
3. Press the Next/Last-buttons to select the menu-item “Replay”.
4. Press the Menu-button to enter the Replay-menu.
“A” blinks in the Replay-Mode icon A-B and the starting point “A” needs to be set.
5. Press the Next-button to set the starting point “A”.
After “A” is set, “B” blinks in the A-B icon and the ending point “B” needs to be set.
6. Press the Next-button to set the ending point “B”.
The A-B icon is now complete and the replay of the A-B segment begins. When the replay time reaches the time
set in advance, the player will quit the Replay-Mode. (Setting of the Replay Time can be done in “Replay Times”, a
following menu-item.)
While in the Replay-Mode, pressing the Last-button, can set “A” again, in order to select another segment.
cocos-promotions gmbh | talheimer straße 32-d | 74223 flein, germany | phone 0049 (0) 7131/649 38-0 | fax 0049 (0) 7131/649 38-19
www.cocos-promotions.de | www.cocos-promotions.com | www.usb-sticks.de
18
♦ Follow Read (this function does not exist for Voice-Mode)
1. While the A-B segment is playing, press the Next-button to enter the Follow Read-Mode.
2. The icon changes to the Follow Read-icon and the sound of the user is recorded. The recording time is as long as
the time of the A-B segment.
3. After recording, the icon changes and the original sound is played. Press the Next-button to enter the
comparison.
When pressing the Last-button, you will return to the status of “A-B Replay”.
♦ Comparison (this function does not exist for Voice-Mode)
1. Enter this mode and the icon changes to the Comparison-icon and the recorded sound of the user is played.
2. After playing the recorded sound is finished, the icon changes again and the original sound is played.
3. After playing the original sound, the recorded sound is played again. The whole procedure will continue (without
limitation of a set Replay time), until the Menu-button is pressed to exit.
When pressing the Last-button, you will return to the status of “Follow Read”.
For all three above mentioned operations, pressing the Menu-button means to fast exit the Replay-Mode.
• Replay times
Short press the Menu-button to enter this menu (Play-Submenu).
“Replay times” means, that after the A-B segment was played for a fixed period of time, the player will
automatically exit the Replay-Mode. (1 to 10 times)
Short press the Menu-button again to confirm the settings and to exit the current menu.
• Replay gap
Short press the Menu-button to enter this menu (Play-Submenu).
Replay Gap means the break period between different playing times (unit: seconds / 1 to 10 seconds).
Short press the Menu-button again to confirm the settings and to exit the current menu.
• Reset
If, for any reasons, your player is blocked and cannot be operated any more, you have the possibility to reset the
internal firmware.
Just turn your player off and then turn it on again. Reset is automatically carried out at startup.
XII. Installing a driver for Win 98
Please note, that you do not need any driver for WIN Me / Win 2000 / Win XP !!!
But if you use WIN 98, you need to install a driver. The driver is on the CD-ROM, included in the delivery.
cocos-promotions gmbh | talheimer straße 32-d | 74223 flein, germany | phone 0049 (0) 7131/649 38-0 | fax 0049 (0) 7131/649 38-19
www.cocos-promotions.de | www.cocos-promotions.com | www.usb-sticks.de
19
1. Unplug the MP3-player.
2. Insert the CD-ROM in the PC and open the folder “Driver For Win98 Users”.
3. Start the installation by clicking on “Win98 Driver.Exe”.
4. After the installation is completed, please restart your computer.
5. After the restart, you can connect your MP3-player to the PC and it will now be recognized automatically.
XIII. Special Recommendation
Safe removal of hardware
!!! Always follow this procedure to avoid problems with your player !!!
!!! Never unplug your player without using this procedure !!!
Before unplugging your player:
1. Double click on the “Safe Remove Hardware”-icon on the task bar.
2. From the “Safely Remove Hardware”-window, select “USB mass storage device” and click on the “Stop”-button.
3. The “Stop a Hardware device”-window will open up.
4. Click on “OK” and a “Safe To Remove Hardware”-window will now open up.
5. Click on “OK” and it is now safe to remove the USB-cable or player from the computer.
Private Space Function
Many MP3-users are puzzled over the problem of information disclosure and private data accessed by others.
When others borrow the MP3-player, normally all private information should be deleted, which may cause
problems.
However, the “Private Space” function, provided by this player, completely solves this serious problem.
Users can divide the USB-Disk of this player with the accessory tools into two parts of any proportions (Users will
see two driver letters on the PC; but SP4 should be installed for the operating system Windows 2K, otherwise only
one driver letter can be seen. Without such installation, users must choose “normal only” or “encrypted only” in the
“Online Mode” of the “System Setting”-Menu of the player), and one part can be encrypted as a private space,
which needs a password for the access (if users do not encrypt both parts, the USB-memory will be treated as two
disks.). This is the great “Private Space” function.
1. Connect the player to a PC.
2. Run the accessory installation tool “MP3 Player Disk Tool”.
3. First, there is a format tool. Select the option “Partition and encrypt” and set a desired capacity for the
encrypted disk, then choose the setting of username and password. Fill the username in the blank field of “New
username” and the password in the blank field of “New password”, then write the same password again in the
blank field of “New password Confirm”. After the above operation is finished, click on “Start” and the partition
begins.
4. After the partition is finished, click on “OK”, then restart the PC.
5. After restarting the PC, two disks will be displayed (only one driver letter will be displayed for Windows 2K SP4).
Click to access the encrypted disk.
cocos-promotions gmbh | talheimer straße 32-d | 74223 flein, germany | phone 0049 (0) 7131/649 38-0 | fax 0049 (0) 7131/649 38-19
www.cocos-promotions.de | www.cocos-promotions.com | www.usb-sticks.de
20
6. Run the executable file “RdiskDecrypt.exe” and write the username and password into the dialog box. If they are
correct, the disc can be accessed and files can be copied.
7. Username and password are required to access the encrypted disk with every connection to a PC.
* Note:
Dividing one disk into two parts may erase the data in it. Please backup the data in the disk before the partition.
And merging two parts to one disk may also erase the data.
* Warning:
Do not loose your username or password. Otherwise, you will not be able to access the encrypted disk. You will
have to merge the two parts in order to erase the encrypted disk and the data in it will be lost.
Trouble Shooting
No sound is heard from the
headphone
Characters in the display
are incorrect
Poor FM reception
• Check whether the volume is set on “0” and connect the headphone plug
firmly.
• Check whether the headphone plug is dirty.
• Corrupted MP3 may cause a static noise and the sound may be cut off.
Make sure, that the music files are not corrupted.
• Check if the right language was selected.
• Adjust the position of headphone and player.
• Turn off the power of other electric devices near the player.
• The headphones can be used as an antenna.
Download of music files
• Check whether the USB-cable is damaged and if it is connected properly.
fails
• Check whether the driver was installed correctly.
• Check whether the player’s memory is full.
The player cannot be turned • Check if the player was turned on, and the switch is on the position “on”.
on
The player is totally blocked Reset the firmware, as explained above (see article “Reset”)
cocos-promotions gmbh | talheimer straße 32-d | 74223 flein, germany | phone 0049 (0) 7131/649 38-0 | fax 0049 (0) 7131/649 38-19
www.cocos-promotions.de | www.cocos-promotions.com | www.usb-sticks.de
21
Technical Details
Dimensions
Weight
Display
USB speed
EMS memory
Power Supply
Recording
MP3, WMA, WMV, ASF
FM-Radio
Music formats
Working temperature
Supported operating
systems
31 mm x 80 mm x 12 mm
25 g (excluding battery)
Lattice (128*64) OLED
High Speed: USB 2.0 (Read: 1033 K Byte/s, Write: 955 K Byte/s)
Flash memory:128/256/512 mb, 1 gb
Rechargeable Lithium battery
Sample rate
8 KHz
Recording format
WAV (32K bps), ACT (8K bps)
Recording time
35 hours (ACT, 128 M Flash)
Max. output headphones
(L) 10mW + (R) 10mW (32Ohm)
MP3 Bit rate
8K bps – 320K bps
WMA, WMV, ASF Bit rate Frequency 5K bps – 384K bps
Response
20Hz to 20 KHz
SNR
85dB
Receiving Frequency range
76MHz – 96MHz /
87MHz – 108 MHz
Total stations (saving)
20 + 20
Max. output headphones
(L) 10mW + (R) 10mW (32Ohm)
SNR
45dB
MP1, MP2, MP3, WMA, WMV, ASF, WAV
-5 up to +40°C
Windows98/SE/ME/2K/XP
Note:
Product design and specifications may change without notice.
Rechargeable batteries have a limited number of charge cycles and may eventually need to be replaced. Battery
life and number of charge cycles vary, due to use and settings. Your battery has a one year warranty.
cocos-promotions gmbh | talheimer straße 32-d | 74223 flein, germany | phone 0049 (0) 7131/649 38-0 | fax 0049 (0) 7131/649 38-19
www.cocos-promotions.de | www.cocos-promotions.com | www.usb-sticks.de
22


