1
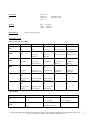
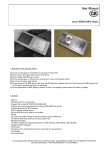
User Manual
cocos-MUSIC MP3-Player
First, we would like to thank you for choosing our product. Before first using this Mp3-player, please read this manual
carefully, in order to avoid damage to this player caused by wrong operation. Please save this manual for later purposes.
1. General
This player is the newest walkman-generation, which supports the music formats Mp1, Mp2, Mp3, WMA, WMV, ASP and WAV.
2. Caution
- Do not use this player in extreme hot, cold, dusty and damp areas.
- Please make sure, that the main power-switch is on the position “on”, before you use your player.
- Do not drop this player and save it from sharp impact, because this could damage the casing or hardware.
- Please recharge the battery in the following cases:
A: if displayed by the battery-indicator
B: the device turns itself automatically off, immediately after it was turned on
C: the keys won’t work
- Never disconnect the player abruptly while formatting or downloading and uploading, because this could lead to a
malfunction of the player.
- Please use this player in accordance with the use of a hard drive. Wrong handling can cause the loss of data. In this case, the
manufacturer can not be held liable.
3. Features
- Supports different formats, such as Mp1, Mp2, Mp3, WMA, WMV, ASP and WAV
- Supports stereo FM tune
- Supports U-disk function
- Supports lyric display (16 Chinese words) and displays the lyrics synchronously
- Dot matrix graphic LCD 96 * 64
- Different Repeat-Modes: Normal, repeat one, folder, repeat folder, repeat all, random, intro
- Visual auto picture combined with song-display makes this player convenient to use
- Supports different languages
- Recording up to 72 hours (256 mb) and low noise (VOX)
- 99 files can be saved under one directory
4. Delivery includes
1. MP3-Player
2. Stereo earphones
3. Installation CD
4. USB-cable
5. Power supply unit
one
one
one
one
one
5. System requirements
- Above Pentium 100 MHz
- Operation systems Windows 95 / 98 / 2000 / ME / XP or higher
- USB-Interface
- CD-ROM drive
cocos-promotions gmbh | talheimer straße 32-d | 74223 flein, germany | phone 0049 (0) 7131/649 38-0 | fax 0049 (0) 7131/649 38-19
www.cocos-promotions.de | www.cocos-promotions.com | www.usb-sticks.de
6. Introduction functions
The main menu of this player consists of six, respectively seven items: Music, Record, Voice, Sys Set (= System Settings), Tele
Book (Telephone directory), Ebook, FM (Radio) – only for certain models.
Keys:
Play-button ▶┃┃: On/Off, Play, Pause, Stop
MODE: Changing the working mode and entering the desired menu-item
REC: Start recording; Pause/Stop recording; setting the starting point “A” and ending point “B” of the A-B replay.
VOL: Adjust your desired volume
Last-button ┃◀◀: Short press to go to the previous menu-item or title; long press to fast rewind.
Next-button ▶▶┃: Short press to go to the next menu-item or title; long press to fast forward.
OFF / ON: main power-switch; to turn the power on/off
Earphone Jack
USB-interface
Display
the following items are displayed:
current title number
current playing time
total number of titles
repeat-mode
battery-indicator
total playing time of title
LYRICS
procedure-mode file-format
EQ-mode
cocos-promotions gmbh | talheimer straße 32-d | 74223 flein, germany | phone 0049 (0) 7131/649 38-0 | fax 0049 (0) 7131/649 38-19
www.cocos-promotions.de | www.cocos-promotions.com | www.usb-sticks.de
2
7. Basic functions
1. Turn the player on/off
Long press the Play-button to turn the player on or off.
2. Enter the main menu
Press the Mode-button to enter the main menu.
In order to switch between different menu-items, please press the Next- or Last-button. Then press the Mode-button to enter
the desired menu-item. Here are the different menu-items of the main menu:
Music
Record
Voice
Sys Set (= System settings)
Tele Book (telephone directory)
Ebook
FM – only for certain models
Main Menu
Status
Options
Options
I. Music
Play-Submenu
Repeat
Normal
Repeat One
Folder
Repeat Folder
Repeat All
Random
Intro
Equalizer
Natural
Rock
Pop
Classic
Soft
Jazz
DBB
Tempo rate
faster or slower
Replay
A-B Replay
Replay times
1 – 10 (times)
Replay gap
1 – 10 (seconds)
Exit
Stop-Submenu
Local folder
Delete file
Delete all
Exit
NO / YES
NO / YES
cocos-promotions gmbh | talheimer straße 32-d | 74223 flein, germany | phone 0049 (0) 7131/649 38-0 | fax 0049 (0) 7131/649 38-19
www.cocos-promotions.de | www.cocos-promotions.com | www.usb-sticks.de
3
II. Record
Stop-Submenu
Local folder
REC type
Fine REC, Long REC
Fine VOR, Long VOR
Exit
III. Voice
Play-Submenu
Repeat
Normal
Repeat One
Folder
Repeat Folder
Repeat All
Random
Intro
Tempo rate
faster or slower
Replay
A-B Replay
Exit
Stop-Submenu
IV. Sys Set
Local folder
Delete file
Delete all
Exit
NO / YES
NO / YES
Record Time
Language
Simple Chinese, Trad Chinese, English, Japanese,
Korean, German, French, Italian, Spanish, Swedish,
Czech, Dutch, Portuguese, Danmark, Polish, Russian
Power off
Off time
Sleep time
Replay mode
Manual
Automatic
Contrast
Online Mode
Multi Drive
Normal Only
Encrypted Only
Memory info.
capacity and percentage used
F/W (Firmware) version
F/W (Firmware) upgrade
Screen Savers
0 – 30 (seconds)
Exit
cocos-promotions gmbh | talheimer straße 32-d | 74223 flein, germany | phone 0049 (0) 7131/649 38-0 | fax 0049 (0) 7131/649 38-19
www.cocos-promotions.de | www.cocos-promotions.com | www.usb-sticks.de
4
Browse Tel.
Import Tel
Export Tel
Exit
V. Tele Book
DIR
FILE
LOOK
VI. Ebook
Confirm Yes / No
Confirm Yes / No
Dir Select
File Select
Text Read
only for models with radio
VII. FM (Radio)
3. Operation of Keys
• Music-Mode and Voice-Mode
Keys
Play-button
▶┃┃
Mode-button
MODE
Next-button
▶▶┃
Action
long press
Stop Status
turn off
Play Status
turn off
press
long press
play
enter main menu
pause/stop
exit from menu
enter main menu enter main menu
exit from menu
enter main menu
press
enter Stop
Submenu
next song
enter Play
Submenu
play next song
enter menu-item
enter menu-item
switch submenu
switch submenu
continuous
forward browse
previous song
fast forward
continuous
forward
switch submenu
continuous
forward
switch submenu
continuous
fast backward
backward browse
increase volume increase volume
continuous
backward
---
continuous
backward
---
long press Vol
and Next
press Vol and
Last
increase volume
continuously
decrease volume
increase volume
continuously
decrease volume
---
---
---
---
long press Vol
and Last
decrease volume
continuously
decrease volume
continuously
---
---
press
long press
Last-button
┃◀◀
press
long press
VOL (+)
VOL (-)
press Vol and
Next
play previous
song
Play Submenu
turn off
Stop Submenu
turn off
• Record-Mode
Keys
REC-button
REC
Mode-button
MODE
Action
long press
Stop Status
start recording
Record Status
stop recording
press
long press
start recording
enter main menu
pause recording
---
press
enter Record submenu
---
cocos-promotions gmbh | talheimer straße 32-d | 74223 flein, germany | phone 0049 (0) 7131/649 38-0 | fax 0049 (0) 7131/649 38-19
www.cocos-promotions.de | www.cocos-promotions.com | www.usb-sticks.de
5
4. Menu-Functions
4.1 Music
1. Enter the main menu.
2. Press the Next- or Last-button to go to the menu-item “Music”.
3. Press the Mode-button to enter the Music-Menu.
4. Press the Play-button to start the playback.
5. Press the Play-button again to pause the playback.
Play-Submenu:
Repeat, Equalizer, Tempo rate, Replay, Replay times, Replay gap, Exit
a) Repeat
1. During playback:
2. Short press the Mode-button to enter the Play-Submenu.
3. Press the Next- or Last-button to select the menu-item “Repeat”.
4. Press the Mode-button to enter the Repeat-Menu.
5. Press the Next- or Last-button to choose your desired option.
Repeat - Options:
Normal: Playback of files in the current folder in normal sequence
Repeat One: one single music-file is played repeatedly
Folder: plays all music-files in the current folder in sequence
Repeat Folder: all music-files in the current folder are played repeatedly
Repeat All: all music-files are played repeatedly
Random: plays music-files in the current folder randomly
Intro: the first 10 seconds are played of every music-file
6. Short press the Mode-button for confirmation and to exit the current menu.
b) Equalizer
1. During playback:
2. Short press the Mode-button to enter the Play-Submenu.
3. Press the Next- or Last-button to select the menu-item “Equalizer”.
4. Press the Mode-button to enter the Equalizer-Menu.
5. Press the Next-or Last-button to choose your desired Equalizer sound.
EQUALIZER-Sounds:
Natural
Rock
Pop
Classic
Soft
Jazz
DBB
6. Short press the Mode-button for confirmation and to exit the current menu.
cocos-promotions gmbh | talheimer straße 32-d | 74223 flein, germany | phone 0049 (0) 7131/649 38-0 | fax 0049 (0) 7131/649 38-19
www.cocos-promotions.de | www.cocos-promotions.com | www.usb-sticks.de
6
c) Tempo rate
Music- or Voice-Mode. When playing music (only for MP3-formats) or recorded files, different tempo rates can be set (faster
or slower) without changing the tone and sound.
1. During playback:
2. Short press the Mode-button to enter the Play-Submenu.
3. Press the Next- or Last-button to select the menu-item “Tempo rate”.
4. Press the Mode-button to enter the Tempo rate-Menu.
5. Press the Next-button for a faster tempo rate or press the Last-button for a slower tempo rate.
6. Press the Mode-button to confirm the desired tempo rate and to exit the current menu.
Note:
Setting the Tempo rate is valid for each music file until it is changed again.
d) Replay (A-B Replay)
1. During playback:
2. Short press the Mode-button to enter the Play-Submenu.
3. Press the Next- or Last-button to select the menu-item “Replay”.
4. Press the Mode-button to enter the Replay-Menu.
“A” blinks in the A-B-icon and the starting point “A” needs to be set.
5. Press the REC-button to set the starting point “A”.
After “A” is set, “B” blinks in the A-B-icon and the ending point “B” needs to be set.
6. Press the REC-button to set the ending point “B”.
The A-B-icon is now complete and the replay of the A-B segment begins. When the replay time reaches the time set in
advance, the player will quit the Replay-Mode.
While in the Replay-Mode, pressing the Last-button can set “A” again, in order to select another segment. (Setting of the
Replay time can be done in “Replay times”, a following menu-item.).
Press the Mode-button in order to stop the A-B Replay and to leave the Replay-Mode.
* At Replay-Mode, press Vol + / Vol – to set the Tempo Rate directly.
• Follow Read (this function does not exist for Voice-Mode)
1. While the A-B segment is playing, press the Next-button to enter the Follow Read-Mode.
2. The Replay-icon changes to the Follow Read-icon and the sound of the user is recorded. The recording time is as long as the
time of the A-B segment.
3. After recording, the icon changes again and the original sound is played. Press the Next-button to enter the comparisonmode.
* At this mode, pressing the Last-button means returning to the A-B Replay-Mode.
• Comparison (this function does not exist for Voice-Mode)
1. Enter this mode and the Replay-icon changes again and the recorded sound of the user is played.
2. After playing the recorded sound is finished, the icon changes one more time and the original sound is played.
3. After playing the original sound, the recorded sound is played again. The whole procedure will continue (without limitation
of a set Replay time), until the Mode-button is pressed to exit.
* At this mode, pressing the Last-button means returning to the Replay-Mode directly.
* Valid for all three modes above: Pressing the Mode-button means exiting the Replay-Mode directly.
cocos-promotions gmbh | talheimer straße 32-d | 74223 flein, germany | phone 0049 (0) 7131/649 38-0 | fax 0049 (0) 7131/649 38-19
www.cocos-promotions.de | www.cocos-promotions.com | www.usb-sticks.de
7
e) Replay times
1. During playback:
2. Short press the Mode-button to enter the Play-Submenu.
3. Press the Next- or Last-button to select the menu-item “Replay times”.
4. Press the Mode-button to enter the Replay times-Menu.
5. Press the Next- or Last-button to choose your desired number (1 – 10) of replays.
“Replay times” means, that after the A-B segment was played for a fixed period of time, the player will automatically exit the
Replay-Mode.
6. Short press the Mode-button for confirmation and to exit the current menu.
f) Replay gap
1. During playback:
2. Short press the Mode-button to enter the Play-Submenu.
3. Press the Next- or Last-button to select the menu-item “Replay gap”.
4. Press the Mode-button to enter the Replay gap-Menu.
5. Press the Next- or Last-button to choose your desired time (1 – 10 seconds).
“Replay gap” means the break period between the A-B Replays (unit: seconds).
6. Short press the Mode-button for confirmation and to exit the current menu.
Synchronous Lyric Display
This player supports “.LRC” lyric files (users may download from http://www.51lrc.com) and the lyrics can be displayed
synchronously while playing music.
How to use lyric files?
Save the lyric file under the same name as the corresponding music file.
e.g. Music file name: Andy-Water.mp3
Lyric file name: Andy-Water.mp3
How to find out, whether lyrics exist or not?
If there are no lyrics to match the currently played song, the icon on the left top in the Music-Mode will change.
.
1. The current song has a matching lyric file, but it isn’t displayed.
2. Press the Mode-button to return to the Play-Mode.
3. Long press the Mode-button to enter the Lyric files.
4. Browse lyrics manually.
Press VOL for browsing
cocos-promotions gmbh | talheimer straße 32-d | 74223 flein, germany | phone 0049 (0) 7131/649 38-0 | fax 0049 (0) 7131/649 38-19
www.cocos-promotions.de | www.cocos-promotions.com | www.usb-sticks.de
8
Stop-Submenu:
Local folder, Delete file, Delete all, Exit
a) Local folder
1. In Stop-Mode, press the Mode-button to enter the Stop-Submenu.
2. Press the Mode-button to enter the menu-item “Local folder”, where folders can be chosen.
3. Press the Next- or Last-button to choose your desired folder.
4. Press the Mode-button to confirm the chosen folder.
Note:
Independent folders can be saved in corresponding modes, such as Music-Mode, Record-Mode and Voice-Mode, i.e. the three
modes are not bound to correspond with the same folder.
b) Delete files
1. While in Stop-Mode:
2. Press the Mode-button to enter the Stop-Submenu.
3. Press the Next- or Last-button to select “Delete file” or “Delete all”.
4. Press the Mode-button to enter the chosen Delete-Menu.
5. Press the Next-button to switch between “NO” and “YES”.
6. If “YES” is chosen, press the Mode-button for confirmation and deletion starts.
7. If “NO” is chosen, press the Mode-button to cancel the deletion.
• “Delete all” means, that all relevant files in the current mode in the current folder will be deleted. (for example, “Delete all”
is chosen in Music-Mode, that means that all the music
files in the current folder will be deleted, while the recorded files will remain unchanged.)
• When deleting files in the PC; please make sure to release the player safely before pulling out the cable, otherwise the files
may not be deleted.
4.2 Record
1. Enter the main menu.
2. Press the Next- or Last-button to go to the menu-item “Record”.
3. Press the Mode-button to enter the Record-Menu.
4. Press the REC-button to start recording.
5. Short press the REC-button to pause the recording.
6. Long press the REC-button to stop and save the recording.
* While recording, the player will stop and save the recording automatically, when the battery is on low and the user should
then recharge the battery.
* The recording will not be saved, if the power supply is cut off abruptly while recording.
Note:
- The recorded file is saved in the current folder set in “Recording Stop submenu / Local folder”.
- If “space is full” is displayed on the Display, the player’s memory is full. Please delete other files to make some space
available.
- If “folder is full” is displayed on the Display, the current directory has already 99 recorded files. Please switch then to
another directory.
cocos-promotions gmbh | talheimer straße 32-d | 74223 flein, germany | phone 0049 (0) 7131/649 38-0 | fax 0049 (0) 7131/649 38-19
www.cocos-promotions.de | www.cocos-promotions.com | www.usb-sticks.de
9
Stop-Submenu:
Local folder, REC type, Exit
a) Local folder
1. In Stop-Mode, press the Mode-button to enter the Stop-Submenu.
2. Press the Mode-button to enter the menu-item “Local folder”.
3. Press the Mode-button again to enter the Local folder-Menu, where folders can be chosen.
4. Press the Next- or Last-button to choose your desired folder.
5. Press the Mode-button to confirm the chosen folder.
b) REC type
1. While being in the status of Stop Recording:
2. Press the Mode-button to enter the Stop-Submenu.
3. Press the Next- or Last-button to go to the menu-item “REC type”.
4. Press the Mode-button to enter the REC type-Menu.
5. Press the Next-or Last-button to select the desired recording type:
Fine REC: exquisite recording in WAV-format and good music quality
Long REC: long recording in ACT-format and normal music quality
Fine VOR: exquisite sound-controlled recording in WAV-format
Long VOR: long sound-controlled recording in ACT-format
* Sound-controlled recording means, that the recording will be paused, when there is no sound.
6. Press the Mode-button to confirm the selected recording type and to exit the current menu.
7. Press the REC-button to start recording.
4.3 Voice (playback of the recorded files)
1. Enter the main menu.
2. Press the Next- or Last-button to go to the menu-item “Voice”.
3. Press the Mode-button to enter the Voice-Menu.
4. Press the Play-button to start the playback.
5. Press the Play-button again to pause the playback.
Play-Submenu:
Repeat, Tempo rate, Replay, Exit
a) Repeat
1. During playback:
2. Short press the Mode-button to enter the Play-Submenu.
3. Press the Next- or Last-button to select the menu-item “Repeat”.
4. Press the Mode-button to enter the Repeat-Menu.
5. Press the Next- or Last-button to choose your desired option.
Repeat - Options:
Normal: Playback of files in the current folder in normal sequence
Repeat One: one single music-file is played repeatedly
Folder: plays all music-files in the current folder in sequence
Repeat Folder: all music-files in the current folder are played repeatedly
Repeat All: all music-files are played repeatedly
Random: plays music-files in the current folder randomly
Intro: the first 10 seconds are played of every music-file
6. Short press the Mode-button for confirmation and to exit the current menu.
cocos-promotions gmbh | talheimer straße 32-d | 74223 flein, germany | phone 0049 (0) 7131/649 38-0 | fax 0049 (0) 7131/649 38-19
www.cocos-promotions.de | www.cocos-promotions.com | www.usb-sticks.de
10
b) Tempo rate
Music- or Voice-Mode. When playing music (only for MP3-formats) or recorded files, different tempo rates can be set (faster
or slower) without changing the tone and sound.
1. During playback:
2. Short press the Mode-button to enter the Play-Submenu.
3. Press the Next- or Last-button to select the menu-item “Tempo rate”.
4. Press the Mode-button to enter the Tempo rate-Menu.
5. Press the Next-button for a faster tempo rate or press the Last-button for a slower tempo rate.
6. Press the Mode-button to confirm the desired tempo rate and to exit the current menu.
Note:
Setting the Tempo rate is valid for each music file until it is changed again.
c) Replay (A-B Replay)
1. During playback:
2. Short press the Mode-button to enter the Play-Submenu.
3. Press the Next- or Last-button to select the menu-item “Replay”.
4. Press the Mode-button to enter the Replay-Menu.
“A” blinks in the A-B-icon and the starting point “A” needs to be set.
5. Press the REC-button to set the starting point “A”.
After “A” is set, “B” blinks in the A-B-icon and the ending point “B” needs to be set.
6. Press the REC-button to set the ending point “B”.
The A-B-icon is now complete and the replay of the A-B segment begins.
While in the Replay-Mode, pressing the Last-button can set “A” again, in order to select another segment. Press the Modebutton in order to stop the A-B Replay and to leave the Replay-Mode.
* At Replay-Mode, press Vol + / Vol – to set the Tempo Rate directly.
Stop-Submenu:
Local folder, Delete file, Delete all, Exit
a) Local folder
1. In Stop-Mode, press the Mode-button to enter the Stop-Submenu.
2. Press the Mode-button to enter the menu-item “Local folder”, where folders can be chosen.
3. Press the Next- or Last-button to choose your desired folder.
4. Press the Mode-button to confirm the chosen folder.
Note:
Independent folders can be saved in corresponding modes, such as Music-Mode, Record-Mode and Voice-Mode, i.e. the three
modes are not bound to correspond with the same folder.
cocos-promotions gmbh | talheimer straße 32-d | 74223 flein, germany | phone 0049 (0) 7131/649 38-0 | fax 0049 (0) 7131/649 38-19
www.cocos-promotions.de | www.cocos-promotions.com | www.usb-sticks.de
11
b) Delete files
1. While in Stop-Mode:
2. Press the Mode-button to enter the Stop-Submenu.
3. Press the Next- or Last-button to select “Delete file” or “Delete all”.
4. Press the Mode-button to enter the chosen Delete-Menu.
5. Press the Next-button to switch between “NO” and “YES”.
6. If “YES” is chosen, press the Mode-button for confirmation and deletion starts.
7. If “NO” is chosen, press the Mode-button to cancel the deletion.
• “Delete all” means, that all relevant files in the current mode in the current folder will be deleted. (for example, “Delete all”
is chosen in Music-Mode, that means that all the music files in the current folder will be deleted, while the recorded files
will remain unchanged.)
• When deleting files in the PC; please make sure to release the player safely before pulling out the cable, otherwise, the files
may not be deleted.
4.4 Sys Set (System settings)
1. Enter the main menu.
2. Press the Next- or Last-button to go to the menu-item “Sys Set”.
3. Press the Mode-button to enter the System-Menu.
4. Select the desired submenu with the buttons Last or Next.
• Parameter Description
Record Time
Language
Power off
Replay Mode
Contrast
Online Mode
Memory info.
F/W version (Firmware
version)
F/W upgrade (firmware
upgrade)
Screen Savers
Exit
Set the time and date, when the recorded files are saved
Select your desired language
Set a fixed time, after which the player will be turned off automatically
Set the working status on Replay-Mode
Set the desired contrast level of the LCD-Display
Function, especially created for “private space”
Shows the total memory capacity and the percentage that has been used
Shows the current firmware version
Special function for upgrading the firmware
Set the desired time, when the screen saver should be activated
exit from the current menu
• Instructions
• “Record Time”
1. Enter the System-Menu (Sys Set).
2. Press the Next- or Last-button to go to the menu-item “Record Time”.
3. Press the Mode-button to enter the Record Time-Menu.
4. Press the Vol-button to set the time, in the sequence of “YY-MM-DD”. After pressing the Vol-button, the icon of the year is
blinking.
5. Now, press the Next- or Last-button to adjust the numbers.
6. Press the Mode-button for confirmation and to exit the current menu.
cocos-promotions gmbh | talheimer straße 32-d | 74223 flein, germany | phone 0049 (0) 7131/649 38-0 | fax 0049 (0) 7131/649 38-19
www.cocos-promotions.de | www.cocos-promotions.com | www.usb-sticks.de
12
• “Language”
1. Enter the System-Menu (Sys Set).
2. Press the Next- or Last-button to go to the menu-item “Language”.
3. Press the Mode-button to enter the Language-Menu.
4. Press the Next- or Last-button to go to the desired language.
5. Press the Mode-button for confirmation and to exit the current menu.
Available language options:
Simple Chinese
Trad Chinese
English
Japanese
Korean
Spanish Portuguese
German Swedish Danish (“Danmark”)
French
Czech
Polish
Italian
Dutch
Russian
• “Power off”
1. Enter the System-Menu (Sys Set).
2. Press the Next- or Last-button to go to the menu-item “Power off”.
3. Press the Mode-button to enter the Power off-Menu.
4. Press the Next -button to switch between the two options “Off time” and “Sleep time”.
5. Press the Mode-button for confirmation and to exit the current menu.
“Off Time” means, that after a fixed period of time (unit: seconds), when there is no operation on the keys at the Stop-Mode,
the player turns itself off automatically in order to save energy. If “0” is selected, the energy saving function is invalid.
“Sleep Time” means, that you can set a fixed period of time (unit: minutes) for the player to turn itself off automatically, when
there is no operation on the keys, no matter which mode the player is in. This function was especially designed to be able to
listen to music before sleeping.
Note: Setting the Sleep Timer is only valid once and the set time will be cleared after the power was turned off. “Sleep Time”
then needs to be set again the next time.
• “Replay mode”
1. Enter the System-Menu (Sys Set).
2. Press the Next- or Last-button to go to the menu-item “Replay mode”.
3. Press the Mode-button to enter the Replay mode-Menu.
4. Press the Next-button to switch between the two options “Manual” and “Automatic”.
5. Press the Mode-button for confirmation and to exit the current menu.
“Manual” means, that, at the A-B Replay-Mode, the endpoint B can only be set manually.
“Automatic” means, that at the A-B Replay-Mode, the endpoint B will be set automatically (especially for English Reading files
without music).
cocos-promotions gmbh | talheimer straße 32-d | 74223 flein, germany | phone 0049 (0) 7131/649 38-0 | fax 0049 (0) 7131/649 38-19
www.cocos-promotions.de | www.cocos-promotions.com | www.usb-sticks.de
13
• “Contrast”
1. Enter the System-Menu (Sys Set).
2. Press the Next- or Last-button to go to the menu-item “Contrast”.
3. Press the Mode-button to enter the Contrast-Menu.
4. Press the Next- or Last-button to set your desired contrast-level..
5. Press the Mode-button for confirmation and to exit the current menu.
• “Online Mode”
1. Enter the System-Menu (Sys Set).
2. Press the Next- or Last-button to go to the menu-item “Online Mode”.
3. Press the Mode-button to enter the Online-Menu.
4. Press the Next-button to switch between the options “Multi Drive”, “Normal Only” and “Encrypted Only”.
5. Press the Mode-button for confirmation and to exit the current menu.
Some operating systems (under Windows 2K SP4) cannot support two driver letters on one USB-disk. Therefore, if you are in
the “private space” function, select which disk you are going to use, i.e. “normal only” or “encrypted only”, for a correct display
of the selected disk after connection to a PC. For a more detailed description, please read the corresponding paragraph in this
manual.
• “Memory info.”
1. Enter the System-Menu (Sys Set).
2. Press the Next- or Last-button to go to the menu-item “Memory info.”.
3. Press the Mode-button to enter the Memory-Menu.
5. Press the Mode-button to exit the current menu.
The number displayed represents the total memory capacity and the percentage refers to the capacity used.
• “F/W version” (Firmware version)
1. Enter the System-Menu (Sys Set).
2. Press the Next- or Last-button to go to the menu-item “F/’W version”.
3. Press the Mode-button to enter the Firmware-Menu.
The currently used firmware version is displayed.
4. Press the Mode-button to exit the current menu.
• “F/W upgrade” (Firmware upgrade)
1. Enter the System-Menu (Sys Set).
2. Press the Next- or Last-button to go to the menu-item “F/’W upgrade”.
3. Press the Mode-button to enter the Upgrade-Menu.
4. Press the Mode-button to exit the current menu.
This function was especially designed for the Firmware Upgrade. For a more detailed description, please see item No. 6 in this
manual.
Caution:
• Firmware Upgrade is an operation to enhance and optimize the performance of the player. If the Firmware Upgrade was not
performed, there is no influence on the normal operation of the player.
• Incorrect operation of Firmware Upgrade may cause the player to work abnormally. Please read the manual carefully before
operation and a Firmware Upgrade should be operated by people with basic knowledge in computer operation.
• The upgrading firmware is especially programmed for this player only and is not suitable for other players, and another
firmware is not suitable for this player.
cocos-promotions gmbh | talheimer straße 32-d | 74223 flein, germany | phone 0049 (0) 7131/649 38-0 | fax 0049 (0) 7131/649 38-19
www.cocos-promotions.de | www.cocos-promotions.com | www.usb-sticks.de
14
• “Screen Savers”
1. Enter the System-Menu (Sys Set).
2. Press the Next- or Last-button to go to the menu-item “Screen Savers”.
3. Press the Mode-button to enter the Screen Saver-Menu.
4. Press the Next- or Last-button to set your desired time (0 – 30 seconds), when the screen saver should be activated.
5. Press the Mode-button to exit the current menu.
• Exit
4.5 Tele Book (Telephone directory)
1. Enter the main menu.
2. Press the Next- or Last-button to go to the menu-item “Tele Book”.
3. Press the Mode-button to enter the Telephone-Menu.
4. Submenu Options:
• Browse Tel.
The user can browse the Telephone book information in the MP3-player.
• Import Tel
Using the telephone directory processing tool can create the Tel. Book file Tel_save.bin in the PC; put it then into the
root directory of the U-disk and this
function can “import” it to the MP3-player.
• Export Tel
This function can “export” the telephone information from the MP3-player and
saving it will make a readable text file of Tel_Expt.bin in the root directory of the
U-disk.
• Exit
Leave this mode and go back to the main menu.
4.6 Ebook
1. Enter the main menu.
2. Press the Next- or Last -button to go to the menu-item “Ebook”.
3. Press the Mode-button to enter the Ebook-Menu.
Options:
DIR
FILE
LOOK
Dir Select
File Select
Text Read
4. Press the Mode-button to exit the current menu.
cocos-promotions gmbh | talheimer straße 32-d | 74223 flein, germany | phone 0049 (0) 7131/649 38-0 | fax 0049 (0) 7131/649 38-19
www.cocos-promotions.de | www.cocos-promotions.com | www.usb-sticks.de
15
4.7 FM-Radio (only for certain models)
1. Enter the main menu.
2. Press the Next- or Last-button to go to the menu-item “FM”.
3. Press the Mode-button to enter the FM-Menu.
4. Press the Mode-button to enter the FM-Submenu.
FM-Submenu:
Search mode, Freq mode, Search Station, Auto Search, Search level, Save Station, Delete Station, Select Band, REC type
• Search-Mode
Select Search-Mode in the FM-Submenu and then press the Mode-button to enter the Search-Menu:
FREQ-Mode:
Press the Next- or Last-button and the player will forward or backward with 100 KHz in single steps to manually search
stations.
Press the Next- or Last-button for about 2 seconds, and the player will scan forward or backward with 100 KHz continuously;
then stop at a scanned station. If you want to stop scanning, press the Next- or Last-button.
Search Station:
If the player has more than one station saved, press the Next- or Last-button to listen to the stations.
Auto Search:
When selecting the Auto Search function, the player can automatically scan frequencies between 87.5 MHz and 108 MHz and
save the scanned stations.
• Search Level
There are eight levels; the Auto Search function demands a higher intensity of the signal, the higher the levels are.
• Save
The stations are manually scanned in sequence. US-Band and Japan-Band can each save a maximum of 20 stations.
• Delete
Delete the saved radio station.
• Select Band
In the FM-Submenu, select the corresponding menu and press the Mode-button to enter the Select Band-Menu, then press
the Next-button to choose US-Band (FM 87 – 108 MHz) or Japan-Band (FM 76 – 90 MHz). Press the Mode-button again for
confirmation.
• REC type
In the FM-Submenu, select the corresponding menu and press the Mode-button to enter the REC type-Menu, then press the
Next- or Last-button to choose “Fine REC” (exquisite recording) or “Long REC” (long hour recording). Press the Mode-button
again for confirmation.
Note:
If the current station is in STEREO, the icon “S” will appear in the display.
cocos-promotions gmbh | talheimer straße 32-d | 74223 flein, germany | phone 0049 (0) 7131/649 38-0 | fax 0049 (0) 7131/649 38-19
www.cocos-promotions.de | www.cocos-promotions.com | www.usb-sticks.de
16
5. USB-Disk
The player supports standard USB-disk function with the operating systems Windows 98 (driver needed), Windows 2K and
above (driver free), Mac OS 10.3 and above, Linux Redhat 8.0 and above.
The player supports power supply through USB. At Standby-Mode, press the Mode-button to go to the main menu, then select
to enter the desired mode.
The player also supports Suspend-Mode.
How to connect the player to a PC?
Turn the player on and plug the USB-cable in to enter the Mode 1.
The player will display three modes after being connected to a PC:
1. Standby-Mode
2. Downloading-Mode
3. Uploading-Mode
6. Firmware Upgrade
The player supports Firmware Upgrade or maintenance through installing special tools on the PC.
1. Enter the main menu.
2. Press the Next- or Last-button to go to the menu-item “Sys Set” (System Settings).
3. Press the Mode-button to enter the System-Menu.
4. Press the Next- or Last-button to go to the menu-item “F/W upgrade”.
5. Press the Mode-button to enter the Upgrade-Menu.
6. Connect the player to the PC.
7. Run the upgrading tool “MP3 Player Update” on the PC, then click on “choose firmware of new version”.
8. Choose the new firmware programme (you may find it in the accessory CD or can download it from our website).
9. Click on “Start” and the system will start the upgrade.
10. It will be displayed, if the upgrade was successful.
7. Strong Recommendation
Private Space Function
Many Mp3-users are puzzled over the problem of information disclosure and private data accessed by others. When others
borrow the Mp3-player, normally all the private information should be deleted, which may cause problems.
However, the “Private Space” function, provided by this player, completely solves this big problem.
Users can divide the U-Disk of this player with the accessory tools into two parts of any proportions (Users will see two driver
letters on the PC; but SP4 should be installed for the operating system Windows 2K, otherwise only one driver letter can be
seen. Without such installation, users must choose “normal only” or “encrypted only” in the “Online Mode” of the “System
Setting”-Menu of the player), and one part can be encrypted as a private space, which needs a password for the access (If
users do not encrypt both parts, the USB-memory will be treated as two disks.). This is the great “Private Space” function.
1. Connect the player to a PC.
2. Run the accessory installation tool “MP3 Player Disk Tool”.
3. First, there is a format tool. Select the option “Partition and encrypt” and set a desired capacity for the encrypted disk, then
choose the setting of username and password. Fill the username in the blank field of “New username” and the password in
the blank field of “New password”, then write the same password again in the blank field of “New password Confirm”. After
the above operation is finished, click on “Start” and the partition begins.
cocos-promotions gmbh | talheimer straße 32-d | 74223 flein, germany | phone 0049 (0) 7131/649 38-0 | fax 0049 (0) 7131/649 38-19
www.cocos-promotions.de | www.cocos-promotions.com | www.usb-sticks.de
17
4. After the partition is finished, click on “OK”, then restart the PC.
5. After restarting the PC, two disks will be displayed (only one driver letter will be displayed for Windows 2K SP4). Click to
access the encrypted disk.
6. Run the executable file “RdiskDecrypt.exe” and write the username and password into the dialog box. If they are correct,
the disc can be accessed and files can be copied.
7. Username and password are required to access the encrypted disk with every connection to a PC
* Note:
Dividing one disk into two parts may erase the data in it. Please backup the data in the disk before the partition. And merging
two parts to one disk may also erase the data.
* Warning:
Do not loose your username or password. Otherwise, you will not be able to access the encrypted disk. You will have to merge
the two parts in order to erase the encrypted disk and the data in it will be lost.
Trouble Shooting
No power
• Check whether the battery has been inserted properly.
No sound is heard (earphones)
• Check whether the volume is set on “0” and connect the earphone plug firmly.
• Check whether the earphone plug is dirty.
• Corrupted MP3 may cause a static noise and the sound may be cut off. Make
sure, that the music files are not corrupted.
Characters in the display are
incorrect
Poor FM reception
• Check if the right language was selected.
Download of music files fails
• Adjust the position of the earphones and player.
• Turn off the power of other electric devices near the player.
• The earphones can be used as an antenna.
• Check whether the USB-cable is damaged and if it is connected properly.
• Check whether the driver was installed correctly.
• Check whether the player’s memory is full.
cocos-promotions gmbh | talheimer straße 32-d | 74223 flein, germany | phone 0049 (0) 7131/649 38-0 | fax 0049 (0) 7131/649 38-19
www.cocos-promotions.de | www.cocos-promotions.com | www.usb-sticks.de
18
Technical Details
1. Built-in FLASH
64 / 128 / 256 / 512 mb / 1024 / 2048 gb
2. Music standard
MP1, MP2, MP3, WMA, WMV, ASF
3. FM
76 MHz – 96 MHz / 87 MHz – 108 MHz
4. FM accuracy
96 * 64 dot and matrix
6. Various languages
Simple Chinese, Trad Chinese, English, Japanese, Korean, German, French, Italian, Spanish,
Swedish, Czech, Dutch, Portuguese, Danish, Polish, Russian
7. Power source
3.7 V/LI battery
8. Interface
USB 1.1 (read: 1000K byte ; write: 800K byte)
9. Recording format
WAV (32kbps), ACT (8kbps)
10. Recording time standard / time AG8 / 36 hours (128m)
11. Supported compact speed rate MP3 (8kbps – 32kbps), WMA, WMV, ASF (5kbps – 384kbps)
12. Frequency response
20Hz – 20 KHz
13. Distortion
< 0.1 %
14. SNR
> 8.5 db
15. Transmitting speed
> 4M bps
16. Frequency output
(L) 10 mW + (R) 10 mW (320 Ohm)
17. Working temperature
- 5 up to + 40 ° C
18. Supported operating systems
Windows 98/SE/ME/2K/XP, Mac OS 10, Linux 2.4.2
cocos-promotions gmbh | talheimer straße 32-d | 74223 flein, germany | phone 0049 (0) 7131/649 38-0 | fax 0049 (0) 7131/649 38-19
www.cocos-promotions.de | www.cocos-promotions.com | www.usb-sticks.de
19