1
Operating Instructions Administrator Reference
1
Introduction ............................................................................................................................ 7
How to Read This Manual ..................................................................................................... 9
Confirming a Network Environment.................................................................................. 11
Print Server Configuration ...................................................................................................................12
Netware Configuration .........................................................................................................................13
1. Windows 2000 Print Server Configuration
Configuring the Protocols .................................................................................................... 14
Configuring TCP/IP and IPP for Printing ............................................................................................14
Configuring NetBEUI for Printing .......................................................................................................16
Installing Software................................................................................................................ 18
Installing SmartNetMonitor for Client .................................................................................................18
Installing the PCL 5c or RPCS Printer Driver......................................................................................19
Installing the PostScript Printer Driver ................................................................................................24
Changing Port Settings .........................................................................................................................29
Setting Up Options ............................................................................................................... 30
Setting the Printer Shared ................................................................................................... 33
Operating Instructions Administrator Reference
2
2. Windows XP Print Server Configuration
Configuring the Protocols .................................................................................................... 34
Configuring TCP/IP and IPP for Printing ............................................................................................34
Installing Software................................................................................................................ 37
Installing SmartNetMonitor for Client .................................................................................................37
Installing the PCL 5c or RPCS Printer Driver......................................................................................38
Installing the PostScript Printer Driver ................................................................................................43
Changing Port Settings .........................................................................................................................47
Setting Up Options ............................................................................................................... 48
Setting the Printer Shared ................................................................................................... 51
3. Windows NT 4.0 Print Server Configuration
Configuring the Protocols .................................................................................................... 52
Configuring TCP/IP and IPP for Printing ............................................................................................52
Configuring NetBEUI for Printing .......................................................................................................54
Installing Software................................................................................................................ 56
Installing SmartNetMonitor for Client .................................................................................................56
Installing the PCL 5c or RPCS Printer Driver......................................................................................57
Installing the PostScript Printer Driver ................................................................................................62
Changing Port Settings .........................................................................................................................66
Setting Up Options ............................................................................................................... 67
Setting the Printer Shared ................................................................................................... 70
Operating Instructions Administrator Reference
3
4. NetWare Configuration
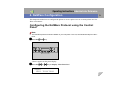
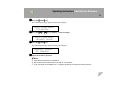
Configuring the NetWare Protocol using the Control Panel............................................ 71
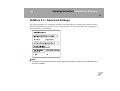
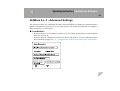
NetWare 3.x - Advanced Settings........................................................................................ 76
Installing SmartNetMonitor for Admin................................................................................................77
Setting Up as a Print Server..................................................................................................................77
Setting Up as a Remote Printer ............................................................................................................79
NetWare 4.x, 5 - Advanced Settings.................................................................................... 83
Installing SmartNetMonitor for Admin................................................................................................84
Setting Up as a Print Server..................................................................................................................84
Setting Up as a Remote Printer ............................................................................................................88
5. Using SmartNetMonitor for Admin
Installing SmartNetMonitor for Admin ............................................................................. 94
Changing the Network Interface Board Configuration.................................................... 95
Locking the Menus on the Printer's Control Panel........................................................... 96
Changing the Paper Type .................................................................................................... 97
Managing the Number of Copies to be Printed ................................................................. 98
Configuring the Energy Save Mode.................................................................................... 99
Setting a Password.............................................................................................................. 100
6. Using a Web Browser
Going to the Top Page ........................................................................................................ 102
Configuring the Network Interface Board Settings............................................................................103
Operating Instructions Administrator Reference
4
7. Monitoring and Configuring the Printer
Changing Names and Comments ...................................................................................... 108
SmartNetMonitor for Admin ..............................................................................................................109
Web Browser ......................................................................................................................................111
Displaying the Status of Printer ........................................................................................ 113
SmartNetMonitor for Admin ..............................................................................................................113
SmartNetMonitor for Client ...............................................................................................................114
Web Browser ......................................................................................................................................115
8. Making Printer Settings with the Control Panel
Menu Chart ......................................................................................................................... 116
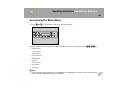
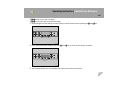
Accessing the Main Menu .................................................................................................. 120
Paper Input Menu .............................................................................................................. 122
Paper Input Parameters.......................................................................................................................122
Changing the Paper Input Menu.........................................................................................................125
List/Test Print Menu .......................................................................................................... 129
List/Test Print Parameters ..................................................................................................................129
Printing a Configuration Page ............................................................................................................130
Interpreting the Configuration Page ...................................................................................................133
Maintenance Menu ............................................................................................................. 136
Maintenance Menu Parameters .........................................................................................................137
Changing the Maintenance Menu.......................................................................................................141
System Menu ...................................................................................................................... 149
System Parameters.............................................................................................................................150
Changing the System Menu...............................................................................................................156
Operating Instructions Administrator Reference
5
Host Interface Menu........................................................................................................... 159
Host Interface Parameters ..................................................................................................................160
Changing the Host Interface Menu.....................................................................................................168
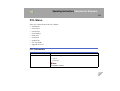
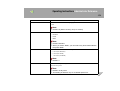
PCL Menu ........................................................................................................................... 171
PCL Parameters ..................................................................................................................................171
Changing the PCL Menu ....................................................................................................................174
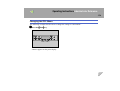
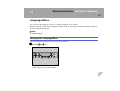
Language Menu .................................................................................................................. 177
Changing the Language Menu............................................................................................................177
9. Appendix
SNMP................................................................................................................................... 180
Spool Printing ..................................................................................................................... 181
Remote Maintenance by telnet .......................................................................................... 183
Using telnet.........................................................................................................................................183
Commands List...................................................................................................................................184
Getting Printer Information over the Network ............................................................... 206
Printer current status...........................................................................................................................206
Printer configuration...........................................................................................................................208
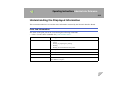
Understanding the Displayed Information ...................................................................... 212
Print Job Information..........................................................................................................................212
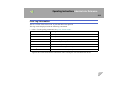
Print Log Information.........................................................................................................................213
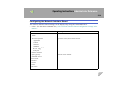
Configuring the Network Interface Board..........................................................................................214
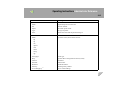
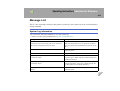
Message List ........................................................................................................................ 219
System Log Information.....................................................................................................................219
Operating Instructions Administrator Reference
6
Precautions .......................................................................................................................... 228
Connecting a Dial Up Router to a Network .......................................................................................228
PostScript Printing from Windows.....................................................................................................230
NetWare Printing................................................................................................................................230
Using DHCP .......................................................................................................................................231
Configuring a WINS Server ...............................................................................................................233
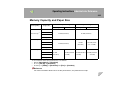
Memory Capacity and Paper Size..................................................................................... 235
Specifications....................................................................................................................... 237
Mainframe ..........................................................................................................................................237
Options ...............................................................................................................................................241
Information about Installed Software .............................................................................. 247
expat ...................................................................................................................................................247
JPEG LIBRARY ................................................................................................................................248
NetBSD...............................................................................................................................................248
INDEX ................................................................................................................................. 251
Operating Instructions Administrator Reference
Introduction
To get maximum versatility from this machine all operators should carefully read and follow the instructions in this manual. Please keep this manual in a handy place near the machine.
Please read the Safety Information before using this machine. It contains important information related
to USER SAFETY and PREVENTING EQUIPMENT PROBLEMS.
Important
Contents of this manual are subject to change without prior notice. In no event will the company be
liable for direct, indirect, special, incidental, or consequential damages as a result of handling or operating the machine.
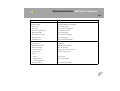
Software Version Conventions Used in This Manual
• NetWare 3.x means NetWare 3.12 and 3.2.
• NetWare 4.x means NetWare 4.1, 4.11 and IntranetWare.
Trademarks
Apple, AppleTalk, EtherTalk, LaserWriter, Macintosh are registered trademarks of Apple Computer,
Inc.
Ethernet is a registered trademark of Xerox Corporation.
Microsoft, Windows, Windows NT are registered trademarks of Microsoft Corporation in the United
States and/or other countries.
Netscape, Netscape Navigator are registered trademarks of Netscape Communications Corporation.
Novell, NetWare, NDS are registered trademarks of Novell, Inc.
PostScript is a registered trademark of Adobe Systems, Incorporated.
PCL is a registered trademark of Hewlett-Packard Company.
7
Operating Instructions Administrator Reference
8
Solaris is a trademark or registered trademark of Sun Microsystems, Inc. in the United States and other
countries.
Other product names used herein are for identification purposes only and might be trademarks of their
respective companies. We disclaim any and all rights in those marks.
The proper names of the Windows operating systems are as follows:
• The product name of Windows® 95 is Microsoft® Windows 95.
• The product name of Windows® 98 is Microsoft® Windows 98.
• The product name of Windows® Me is Microsoft® Windows Millennium Edition (Windows Me).
• The product names of Windows® XP are as follows:
Microsoft® Windows® XP Professional
Microsoft® Windows® XP Home Edition
• The product names of Windows® 2000 are as follows:
Microsoft® Windows® 2000 Advanced Server
Microsoft® Windows® 2000 Server
Microsoft® Windows® 2000 Professional
• The product names of Windows NT® 4.0 are as follows:
Microsoft® Windows NT® Server 4.0
• Microsoft® Windows NT® Workstation 4.0
Operating Instructions Administrator Reference
How to Read This Manual
Symbols
In this manual, the following symbols are used:
R WARNING:
This symbol indicates a potentially hazardous situation which, if instructions are not followed, could
result in death or serious injury.
R CAUTION:
This symbol indicates a potentially hazardous situation which, if instructions are not followed, may result in minor or moderate injury or damage to property.
* The statements above are notes for your safety.
Important
If this instruction is not followed, paper might be misfed, or data might be lost. Be sure to read this.
Preparation
This symbol indicates the prior knowledge or preparations required before operating.
Note
This symbol indicates precautions for operation, or actions to take after misoperation.
Limitation
This symbol indicates numerical limits, functions that cannot be used together, or conditions in which
a particular function cannot be used.
Reference
This symbol indicates a reference.
9
Operating Instructions Administrator Reference
10
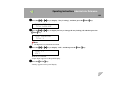
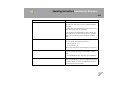
[
]
Keys that appear on the machine's panel display.
Keys and buttons that appear on the computer's display.
{
}
Keys built into the machine's control panel.
Keys on the computer's keyboard.
Operating Instructions Administrator Reference
11
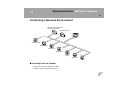
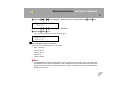
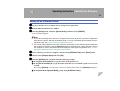
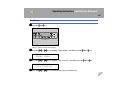
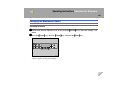
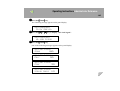
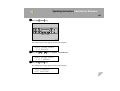
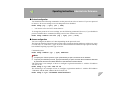
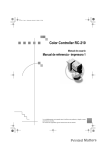
Confirming a Network Environment
Windows 2000, Windows XP,
Windows NT (Server)
NetWare (Server)
Windows 95/98/Me
Windows 2000
Windows XP
Windows NT
NetWare
(Client)
Macintosh
UNIX
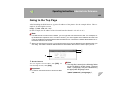
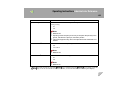
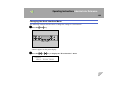
❖ Connecting Printer and Computer
• Network connection (Ethernet cable)
• Parallel connection (parallel cable)
Operating Instructions Administrator Reference
12
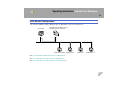
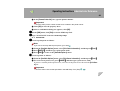
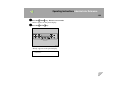
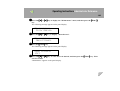
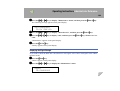
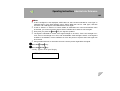
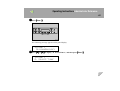
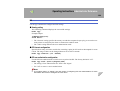
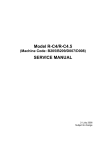
Print Server Configuration
You can use Windows 2000, Windows XP, or Windows NT 4.0 as a print server.
Print Server
Windows 2000, Windows XP and
Windows NT 4.0 Print Server
Windows 95/98/Me
Windows 2000
See p.14 “Windows 2000 Print Server Configuration”.
See p.34 “Windows XP Print Server Configuration”.
See p.52 “Windows NT 4.0 Print Server Configuration”.
Windows XP
Windows NT 4.0
Operating Instructions Administrator Reference
13
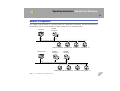
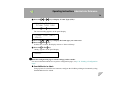
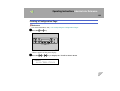
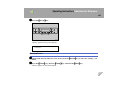
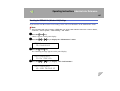
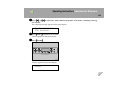
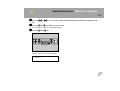
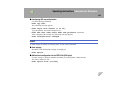
Netware Configuration
For setting up the machine as a network printer in a NetWare environment. The Network Interface
Board allows you to use the machine as either a print server or a remote printer.
Print Server
NetWare
File Server
Windows 95/98/Me Windows 2000 Windows XP Windows NT 4.0
Remote Printer
NetWare
Print Server
NetWare
File Server
Windows 95/98/Me Windows 2000
See p.71 “NetWare Configuration”.
Windows XP Windows NT 4.0
Operating Instructions Administrator Reference
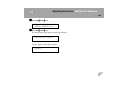
1. Windows 2000 Print Server Configuration
To use a printer connected to the Ethernet interface, select "SmartNetMonitor", "Standard TCP/IP Port"
or "LPR Port" when installing the printer driver.
• SmartNetMonitor
See p.14 “Configuring the Protocols” and p.18 “Installing Software” and p.19 “Installing the PCL
5c or RPCS Printer Driver” or p.24 “Installing the PostScript Printer Driver”.
• Standard TCP/IP Port, LPR Port
See p.14 “Configuring the Protocols” and p.19 “Installing the PCL 5c or RPCS Printer Driver” or
p.24 “Installing the PostScript Printer Driver”.
Note
❒ If you want to use "LPR Port", "Print Services for UNIX" must be installed.
Configuring the Protocols
Configuring TCP/IP and IPP for Printing
Follow these instructions to configure the Network Interface Board and Windows 2000 to use the
TCP/IP protocol and IPP.
Preparation
To use NetBEUI, use the SmartNetMonitor for Client port.
14
Operating Instructions Administrator Reference
15
Configuring the printer
Configure the printer to use the TCP/IP protocol.
• Confirm that the TCP/IP protocol is set to be active. (The factory default is active.)
• Assign an IP address and make other settings required for using the TCP/IP protocol.
Reference
For more information about how to make the above settings, see "Windows 2000 Configuration" in
Printer Client Reference that comes with this printer.
If DHCP is used to assign IP addresses, see p.231 “Using DHCP”.
Note
❒ After setting the IP address, use the ping command to confirm that it has been set correctly.
A Click [Start], point to [Programs], point to [Accessories] and then click [Command Prompt].
B Type the following: (Example IP address is 192.168.15.16)
C:> ping 192.168.15.16
If the address has been configured correctly, the following message appears.
Reply from 192.168.15.16
If the address has been configured incorrectly, the following message appears.
Request timed out.
Configuring a Windows 2000 computer
Follow these steps to configure a Windows 2000 computer to use the TCP/IP protocol.
A Click [Start] on the taskbar, point to [Settings], and then click [Network and Dial-up Connections].
B Click [Local Area Connection]. On the [File] menu, click [Properties].
Operating Instructions Administrator Reference
16
C Confirm that "Internet Protocol (TCP/IP)" is selected in the [Components checked are used by
this connection:] box under the [General] tab.
Note
❒ If the check box for TCP/IP protocol is not selected, select the box.
❒ If the TCP/IP protocol is not installed, click [Install] under the [General] tab and install it. For more
information about installing the TCP/IP protocol, see Windows 2000 Help.
D Configure the TCP/IP protocols with an appropriate IP address, subnet mask and other settings.
Confirm with the network administrator that the settings are correct.
Configuring NetBEUI for Printing
Follow these instructions to configure the Network Interface Board and Windows 2000 to use the NetBEUI protocol.
Configuring the printer
Configure the printer to use the NetBEUI protocol.
• Confirm that the NetBEUI protocol is set to be active. (The factory default is active.)
Reference
For more information about how to make the above settings, see "Windows 2000 Configuration" in
Printer Client Reference that comes with this printer.
Operating Instructions Administrator Reference
17
Configuring a Windows 2000 computer
Follow these steps to configure a Windows 2000 computer to use the NetBEUI protocol.
A Click [Start] on the taskbar, point to [Settings], and then click [Network and Dial-up Connections].
B Click [Local Area Connection]. On the [File] menu, click [Properties].
C Confirm that "NetBEUI Protocol" is selected in the [Components checked are used by this connection:] box under the [General] tab.
Note
❒ If the check box for the NetBEUI protocol is not selected, select the box.
❒ If the NetBEUI protocol is not installed, click [Install] under the [General] tab and install it. For more
information about installing the NetBEUI protocol, see Windows 2000 Help.
Operating Instructions Administrator Reference
18
Installing Software
Installing SmartNetMonitor for Client
A Close all applications that are running.
B Insert the CD-ROM into the CD-ROM drive.
Auto Run will start the installer.
Note
❒ Auto Run might not automatically work with certain OS settings. In this case, launch "Setup.exe"
located on the CD-ROM root directory.
C Select a language to change the interface language, and then click [OK].
The following languages are available: Cestina (Czech), Dansk (Danish), Deutsch (German), English (English), Espanol (Spanish), Francais (French), Italiano (Italian), Magyar (Hungarian), Nederlands (Dutch), Norsk (Norwegian), Polski (Polish), Portugues (Portuguese), Suomi (Finnish),
Svenska (Swedish)
D Click [SmartNetMonitor for Client / Admin].
E Click to select [SmartNetMonitor for Client], and then click [Next >].
F Follow the instructions on the screen.
Note
❒ If you are required to restart the computer after the installation of SmartNetMonitor for Client, restart the computer and continue with necessary configurations.
Operating Instructions Administrator Reference
19
Installing the PCL 5c or RPCS Printer Driver
A Close all applications that are running.
B Insert the CD-ROM into the CD-ROM drive.
Auto Run will start the installer.
Important
❒ Never have two versions of the same printer driver installed on your system at the same time. When
upgrading to a new version of the printer driver, delete the old version, and then install the new one.
Note
❒ Auto Run might not automatically work with certain OS settings. In this case, launch "Setup.exe"
located on the CD-ROM root directory.
C Select a language to change the interface language, and then click [OK].
The following languages are available: Cestina (Czech), Dansk (Danish), Deutsch (German), English (English), Espanol (Spanish), Francais (French), Italiano (Italian), Magyar (Hungarian), Nederlands (Dutch), Norsk (Norwegian), Polski (Polish), Portugues (Portuguese), Suomi (Finnish),
Svenska (Swedish)
D Select [PCL/RPCS Printer Drivers].
E The software license agreement appears in the [License Agreement] dialog box.
After reading through all of the contents, click [I accept the agreement] to agree with the license
agreement, and then click [Next >].
F Select the printer drivers you want to use when the "Select Program" dialog box appears, and
then click [Next >].
You can select more than one printer driver.
Operating Instructions Administrator Reference
20
G Select the printer model(s) you want to use.
To change the printer name, change it in the [Change settings for 'Printer Name'] box.
H Double-click the printer name to display the printer settings.
Note
❒ The details shown for [Comment:], [Driver:], and [Port:] vary depending on the operating system
being used, the model of printer selected, and the port being used.
I Click [Port:], and then select the port you want to use.
• SmartNetMonitor
• Standard TCP/IP Port
• LPR Port
SmartNetMonitor
A Click [Add].
B Select [SmartNetMonitor], and then click [OK].
C Select a printer you want to use.
❖ TCP/IP
A
Click [TCP/IP], and then click [Search].
Available printers will be listed.
B Click the printer you want to use, and then click [OK].
Note
❒ Printers that respond to an IP broadcast from the computer will be displayed. To print to a
printer not listed here, click [Specify Address], and then type the IP address or host name.
Operating Instructions Administrator Reference
21
❒ You cannot add an address partially similar to that already used. For example, when
“192.168.0.2” is already used, “192.168.0.2xx” cannot be used. Similarly, when
“192.168.0.20” is already used, “192.168.0.2” cannot be used.
❖ NetBEUI
A
Click [NetBEUI], and then click [Search].
A list of printers that can be used by the NetBEUI protocol appears.
B Click the printer you want to use, and then click [OK].
Note
❒ Printers that respond to a broadcast from the computer will be displayed. To print to a
printer not listed here, click [Specify Address], and then type the NetBEUI address. Confirm
the NetBEUI address on the network is on the configuration page. For more information
about printing the configuration page, see p.130 “Printing a Configuration Page”. NetBEUI
address appears as “\\RNPxxxx\xxx” on the configuration page. Type the printer's network
path name in the form of "%%Computer name\Share name". Do not type "\\" as head characters but "%%".
❒ You cannot print to printers beyond routers.
❖ IPP
A
Click [IPP].
The IPP setting dialog box appears.
B To specify the IP address of the printer, type "http://printer's-ip-address/ printer" or
"ipp://printer's-ip-address/printer" in the [Printer URL] field.
(Example IP address is 192.168.15.16)
http://192.168.15.16/printer
ipp://192.168.15.16/printer
C As necessary, type the names to distinguish the printer in [IPP Port Name]. Type a different
name from those of any existing port name.
If you omit this, the address typed in [Printer URL] will be set as the IPP port name.
Operating Instructions Administrator Reference
22
D
If a proxy server and IPP user name are used, click [Detailed Settings] and configure the
necessary settings.
Note
❒ For more information about these settings, see SmartNetMonitor for Client Help.
E
Click [OK].
Standard TCP/IP Port
A Click [Add].
B Select [Port:], and then click [Add].
C Select [Standard TCP/IP], and then click [OK].
D Click [Next] in the "Add Standard TCP/IP Printer Port Wizard" window.
E Type the printer name or IP address in the "Printer Name or IP Address" box.
F Click [Finish] in the "Add Standard TCP/IP Printer Port Wizard" window.
LPR Port
A Click [Add].
B Select [Port:], and then click [Add].
C Select [LPR Port], and then click [OK].
D Type the printer's IP address in the "Name or address of server providing lpd" box.
E Type "lp" in the "Name of printer or print queue on that server" box, and then click [OK].
J Make sure the location for the selected printer is shown after [Port:].
K Double-click [Shared] to display the shared settings.
Operating Instructions Administrator Reference
23
L To share the printer, check the left side of the [Shared] box.
M Click the box under [Shared name] to install the alternative driver for the necessary system.
Note
❒ Check [Shared] to start installation of an alternative driver ([Windows NT 4.0/2000], [Windows 95/98])
has already been selected.
❒ You can add an alternative driver after installation. See p.33 “Setting the Printer Shared”.
N Configure the default printer as necessary.
❖ Default Printer
Check [Default Printer] to set the printer as the default printer.
O Click [Continue] to start printer driver installation.
Note
❒ During installation, the [Digital Signature Not Found] dialog box may appear. In this case, click [Yes]
to continue the installation.
P When the [Select Program] dialog box appears, click [Finish].
Q When the [Installation completion] dialog box appears, click [Finish].
R Set up the options.
Note
❒ You must set up the options when bidirectional transmission is disabled. For more information
about the status of bidirectional transmission, see p.31 “Bidirectional transmission”.
Reference
For more information about option settings, see p.30 “Setting Up Options”.
Operating Instructions Administrator Reference
24
Installing the PostScript Printer Driver
A Close all applications that are running.
B Insert the CD-ROM into the CD-ROM drive.
Auto Run will start the installer.
Important
❒ Never have two versions of the same printer driver installed on your system at the same time.
When upgrading to a new version of the printer driver, delete the old version, and then install the
new one.
Note
❒ Auto Run might not automatically work with certain OS settings. In this case, launch "Setup.exe"
located on the CD-ROM root directory.
C Select a language to change the interface language, and then click [OK].
The following languages are available: Cestina (Czech), Dansk (Danish), Deutsch (German), English (English), Espanol (Spanish), Francais (French), Italiano (Italian), Magyar (Hungarian), Nederlands (Dutch), Norsk (Norwegian), Polski (Polish), Portugues (Portuguese), Suomi (Finnish),
Svenska (Swedish)
Note
❒ The printer driver with the selected language will be installed. The printer driver will be installed
in English if you select the following languages: Cestina, Magyar, Polski, Portugues, Suomi
D Click [PostScript 3 Printer Driver].
"Add Printer Wizard" starts.
E Click [Next >].
Operating Instructions Administrator Reference
25
F Select the port you want to use.
• SmartNetMonitor
• Standard TCP/IP Port
• LPR Port
SmartNetMonitor
A Click [Create a new port:].
B Select [SmartNetMonitor], and then click [Next >].
C Select a printer you want to use.
❖ TCP/IP
A
Click [TCP/IP], and then click [Search].
Available printers will be listed.
B Click the printer you want to use, and then click [OK].
Note
❒ Printers that respond to an IP broadcast from the computer will be displayed. To print to a
printer not listed here, click [Specify Address], and then type the IP address or host name.
❒ You cannot add an address partially similar to that already used. For example, when
“192.168.0.2” is already used, “192.168.0.2xx” cannot be used. Similarly, when
“192.168.0.20” is already used, “192.168.0.2” cannot be used.
❖ NetBEUI
A
Click [NetBEUI], and then click [Search].
A list of printers that can be used by the NetBEUI protocol appears.
Operating Instructions Administrator Reference
26
B
Click the printer you want to use, and then click [OK].
Note
❒ Printers that respond to a broadcast from the computer will be displayed. To print to a
printer not listed here, click [Specify Address], and then type the NetBEUI address. Confirm
the NetBEUI address on the network is on the configuration page. For more information
about printing the configuration page, see p.130 “Printing a Configuration Page”. NetBEUI
address appears as “\\RNPxxxx\xxx” on the configuration page. Type the printer's network
path name in the form of "%%Computer name\Share name". Do not type "\\" as head characters but "%%".
❒ You cannot print to printers beyond routers.
❖ IPP
A
Click [IPP].
The IPP setting dialog box appears.
B To specify the IP address of the printer, type "http://printer's-ip-address/ printer" or
"ipp://printer's-ip-address/printer" in the [Printer URL] field.
(Example IP address is 192.168.15.16)
http://192.168.15.16/printer
ipp://192.168.15.16/printer
C As necessary, type the names to distinguish the printer in [IPP Port Name]. Type a different
name from those of any existing port name.
If you omit this, the address typed in [Printer URL] will be set as the IPP port name.
D If a proxy server and IPP user name are used, click [Detailed Settings] and configure the
necessary settings.
Note
❒ For more information about these settings, see SmartNetMonitor for Client Help.
E
Click [OK].
Operating Instructions Administrator Reference
27
Standard TCP/IP Port
A Click [Create a new port:].
B Select [Standard TCP/IP] in [Create a new Port], and then click [Next].
C Click [Next] in the "Add Standard TCP/IP Printer Port Wizard" window.
D Type the printer name or IP address in the "Printer Name or IP Address" box, and then
click [Next>].
E Click [Finish] in the "Add Standard TCP/IP Printer Port Wizard" window.
LPR Port
A Click [Create a new port:].
B Select [LPR Port] in [Create a new Port], and then click [Next].
C Type the printer's IP address in the "Name or address of server providing lpd" box.
D Type "lp" in the "Name of printer or print queue on that server" box, and then click [OK].
G Confirm to select the name of the printer whose driver you want to install, and then click [Next >].
H Change the name of the printer if you want, and then click [Next >].
Configure the default printer as necessary. Check [Yes] to set the printer as the default printer.
I Check [Share as:], and then click [Next >].
To change the printer name, change it in the [Share as:] box.
Note
❒ Check [Shared] to start installation of an alternative driver ([Windows NT 4.0/2000], [Windows 95/98])
has already been selected.
❒ You can add an alternative driver after installation. See p.33 “Setting the Printer Shared”.
Operating Instructions Administrator Reference
28
J Select whether or not you want to print a test page, and then click [Next>].
K Click [Finish].
Start printer driver installation.
Note
❒ During installation, the [Digital Signature Not Found] dialog box may appear. In this case, click [Yes]
to continue the installation.
L Set up the options.
Reference
For more information about option settings, see p.30 “Setting Up Options”.
Operating Instructions Administrator Reference
29
Changing Port Settings
Follow the steps to change SmartNetMonitor for Client settings, such as the proxy server settings or
IPP URL.
Note
❒ There are no settings for the NetBEUI protocol.
A From the [Printers] window, click the icon of the printer you want to use. On the [File] menu,
click [Properties].
B Click the [Ports] tab, and then click [Configure Port].
The [Port Settings] dialog box appears.
• For TCP/IP protocol, you can configure Timeout Settings.
Note
❒ If you cannot set items on the [Recovery/Parallel Printing] tab, follow the procedure below.
A Click [Cancel] to close the [Port Configuration:] dialog box.
B Start SmartNetMonitor for Client, and then right-click the SmartNetMonitor for Client icon
on the taskbar.
C Click [Extended Features Settings], and then select the [Set Recovery/Parallel Printing for each
port] check box.
D Click [OK] to close the [Extended Features Settings] dialog box.
• For IPP, you can configure User Settings, Proxy Settings and Timeout Settings.
Note
❒ For more information about these settings, see SmartNetMonitor for Client Help.
Operating Instructions Administrator Reference
30
Setting Up Options
You must set up installed options, paper size and feed direction with the printer driver when bidirectional transmission is disabled.
Limitation
❒ To change the printer settings requires Manage Printers permission. Members of the Administrators
and Power Users groups have Manage Printers permission by default. When you set up options,
log on using an account that has Manage Printers permission.
A Click [Start] on the taskbar, point to [Settings], and then click [Printers].
The [Printers] window appears.
B Click the icon of the printer you want to use. On the [File] menu, click [Properties].
Note
❒ When you open the Printer Properties dialog box for the first time after installing the RPCS printer
driver, the confirmation window appears. After that, the initial display of the Printer Properties dialog box appears.
C Click the [Accessories] tab.
Note
❒ If you use the RPCS printer driver, Click [Change Accessories] tab.
❒ If you use the PostScript 3 printer driver, Click [Device Settings] tab.
D Select options you have installed from the [Options] group, and then make any settings you require.
E Click [OK] .
Operating Instructions Administrator Reference
31
- Bidirectional transmission
When bidirectional transmission is enabled, the information about the paper size and feed direction setting is automatically sent to the printer by a computer. You can also confirm the printer status from your
computer.
• Bidirectional transmission is supported by Windows 95/98/Me, Windows 2000, Windows XP and
Windows NT 4.0.
• If you use the RPCS printer driver and bidirectional transmission is enabled, the [Change Accessories] tab is shaded.
Note
❒ The RPCS printer driver supports bidirectional transmission and updates the printer status automatically.
❒ The PCL 5c printer driver supports bidirectional transmission, you can update the printer status
manually.
❒ The PostScript 3 printer driver does not support bidirectional transmission.
To support bidirectional transmission, the following conditions are required:
❖ When connecting with a parallel cable
•
•
•
•
The computer must support bidirectional transmission.
The printer must be set to bidirectional transmission.
The Interface cable must support bidirectional transmission.
The machine must be connected to the computer using the standard parallel cable and parallel
connector.
• Under Windows 2000, [Enable bidirectional support] must be selected and [Enable printer pooling] must not be selected on the [port] tab with RPCS printer driver.
Operating Instructions Administrator Reference
32
❖ When connecting with the network
• The printer must be set to bidirectional transmission.
• SmartNetMonitor for Client included on the CD-ROM must be installed, and the TCP/IP protocol must be used.
• Under Windows 2000, [Enable bidirectional support] must be selected and [Enable printer pooling] must not be selected on the [port] tab with RPCS printer driver.
Operating Instructions Administrator Reference
33
Setting the Printer Shared
Limitation
❒ To change the printer settings requires Manage Printers permission. Members of the Administrators
and Power Users groups have Manage Printers permission by default. When you set up options,
log on using an account that has Manage Printers permission.
A Click [Start] on the taskbar, point to [Settings], and then click [Printers].
The [Printers] window appears.
B Click the icon of the printer you want to use. On the [File] menu, click [Properties].
C Select [Shared as:] under the [Sharing] tab.
D To share a printer with the users running a different version of Windows, click [Additional Drivers...].
Note
❒ If you have installed an alternative driver by checking [Shared], you do not have to follow this step.
E Click [OK].
Operating Instructions Administrator Reference
2. Windows XP Print Server Configuration
To use a printer connected to the Ethernet interface, select "SmartNetMonitor", "Standard TCP/IP Port"
or "LPR Port" when installing the printer driver.
• SmartNetMonitor
See p.34 “Configuring the Protocols” and p.37 “Installing Software” and p.38 “Installing the PCL
5c or RPCS Printer Driver” or p.43 “Installing the PostScript Printer Driver”.
• Standard TCP/IP Port, LPR Port
See p.34 “Configuring the Protocols” and p.38 “Installing the PCL 5c or RPCS Printer Driver” or
p.43 “Installing the PostScript Printer Driver”.
Note
❒ If you want to use "LPR Port", "Print Services for UNIX" must be installed.
Configuring the Protocols
Configuring TCP/IP and IPP for Printing
Follow these instructions to configure the Network Interface Board and Windows XP to use the TCP/IP
protocol and IPP.
34
Operating Instructions Administrator Reference
35
Configuring the printer
Configure the printer to use the TCP/IP protocol.
• Confirm that the TCP/IP protocol is set to be active. (The factory default is active.)
• Assign an IP address and make other settings required for using the TCP/IP protocol.
Reference
For more information about how to make the above settings, see "Windows XP Configuration" in
Printer Client Reference that comes with this printer.
If DHCP is used to assign IP addresses, see p.231 “Using DHCP”.
Note
❒ After setting the IP address, use the ping command to confirm that it has been set correctly.
A Click [Start], point to [All Programs], point to [Accessories], and then click [Command Prompt].
B Type the following: (Example IP address is 192.168.15.16)
C:> ping 192.168.15.16
If the address has been configured correctly, the following message appears.
Reply from 192.168.15.16
If the address has been configured incorrectly, the following message appears.
Request timed out.
Operating Instructions Administrator Reference
36
Configuring a Windows XP computer
Follow these steps to configure a Windows XP computer to use the TCP/IP protocol.
A Click [Start] on the taskbar, point to [Control Panel], and then click [Network and Internet Connections].
B Click [Local Area Connection]. On the [File] menu, click [Properties].
C Confirm that "Internet Protocol (TCP/IP)" is selected in the [Components checked are used by
this connection:] box under the [General] tab.
Note
❒ If the check box for TCP/IP protocol is not selected, select the box.
❒ If the TCP/IP protocol is not installed, click [Install] under the [General] tab and install it. For more
information about installing the TCP/IP protocol, see Windows XP Help file.
D Configure the TCP/IP protocols with an appropriate IP address, subnet mask and other settings.
Confirm with the network administrator that the settings are correct.
Operating Instructions Administrator Reference
37
Installing Software
Installing SmartNetMonitor for Client
A Close all applications that are running.
B Insert the CD-ROM into the CD-ROM drive.
Auto Run will start the installer.
Note
❒ Auto Run might not automatically work with certain OS settings. In this case, launch "Setup.exe"
located on the CD-ROM root directory.
C Select a language to change the interface language, and then click [OK].
The following languages are available: Cestina (Czech), Dansk (Danish), Deutsch (German), English (English), Espanol (Spanish), Francais (French), Italiano (Italian), Magyar (Hungarian), Nederlands (Dutch), Norsk (Norwegian), Polski (Polish), Portugues (Portuguese), Suomi (Finnish),
Svenska (Swedish)
D Click [SmartNetMonitor for Client / Admin].
E Click to select [SmartNetMonitor for Client], and then click [Next >].
F Follow the instructions on the screen.
Note
❒ If you are required to restart the computer after the installation of SmartNetMonitor for Client, restart the computer and continue with necessary configurations.
Operating Instructions Administrator Reference
38
Installing the PCL 5c or RPCS Printer Driver
A Close all applications that are running.
B Insert the CD-ROM into the CD-ROM drive.
Auto Run will start the installer.
Important
❒ Never have two versions of the same printer driver installed on your system at the same time.
When upgrading to a new version of the printer driver, delete the old version, and then install the
new one.
Note
❒ Auto Run might not automatically work with certain OS settings. In this case, launch "Setup.exe"
located on the CD-ROM root directory.
C Select a language to change the interface language, and then click [OK].
The following languages are available: Cestina (Czech), Dansk (Danish), Deutsch (German), English (English), Espanol (Spanish), Francais (French), Italiano (Italian), Magyar (Hungarian), Nederlands (Dutch), Norsk (Norwegian), Polski (Polish), Portugues (Portuguese), Suomi (Finnish),
Svenska (Swedish)
D Select [PCL/RPCS Printer Drivers].
E The software license agreement appears in the [License Agreement] dialog box.
After reading through all of the contents, click [I accept the agreement] to agree with the license
agreement, and then click [Next >].
Operating Instructions Administrator Reference
39
F Select the printer drivers you want to use when the "Select Program" dialog box appears, and
then click [Next >].
You can select more than one printer driver.
G Select the printer model(s) you want to use.
To change the printer name, change it in the [Change settings for 'Printer Name'] box.
H Double-click the printer name to display the printer settings.
Note
❒ The details shown for [Comment:], [Driver:], and [Port:] vary depending on the operating system
being used, the model of printer selected, and the port being used.
I Click [Port:], and then select the port you want to use.
• SmartNetMonitor
• Standard TCP/IP Port
• LPR Port
SmartNetMonitor
A Click [Add].
B Click [OK].
C Select a printer you want to use.
❖ TCP/IP
A
Click [TCP/IP], and then click [Search].
Available printers will be listed.
Operating Instructions Administrator Reference
40
B
Click the printer you want to use, and then click [OK].
Note
❒ Printers that respond to an IP broadcast from the computer will be displayed. To print to a
printer not listed here, click [Specify Address], and then type the IP address or host name.
❒ You cannot add an address partially similar to that already used. For example, when
“192.168.0.2” is already used, “192.168.0.2xx” cannot be used. Similarly, when
“192.168.0.20” is already used, “192.168.0.2” cannot be used.
❖ IPP
A
Click [IPP].
The IPP setting dialog box appears.
B To specify the IP address of the printer, type "http://printer's-ip-address/ printer" or
"ipp://printer's-ip-address/printer" in the [Printer URL] field.
(Example IP address is 192.168.15.16)
C
D
http://192.168.15.16/printer
ipp://192.168.15.16/printer
As necessary, type the names to distinguish the printer in [IPP Port Name]. Type a different
name from those of any existing port name.
If you omit this, the address typed in [Printer URL] will be set as the IPP port name.
If a proxy server and IPP user name are used, click [Detailed Settings] and configure the
necessary settings.
Note
❒ For more information about these settings, see SmartNetMonitor for Client Help.
E
Click [OK].
Operating Instructions Administrator Reference
41
Standard TCP/IP Port
A Click [Add].
B Select [Standard TCP/IP], and then click [OK].
C Click [Next] in the "Add Standard TCP/IP Printer Port Wizard" window.
D Type the printer name or IP address in the "Printer Name or IP Address" box.
E Click [Finish] in the "Add Standard TCP/IP Printer Port Wizard" window.
LPR Port
A Click [Add].
B Select [LPR Port], and then click [OK].
C Type the printer's IP address in the "Name or address of server providing lpd" box.
D Type "lp" in the "Name of printer or print queue on that server" box, and then click [OK].
J Make sure the location for the selected printer is shown after [Port:].
K Double-click [Shared] to display the shared settings.
L To share the printer, check the left side of the [Shared] box.
M Click the box under [Shared name] to install the alternative driver for the necessary system.
Note
❒ Check [Shared] to start installation of an alternative driver ([Windows NT 4.0/2000], [Windows 95/98])
has already been selected.
❒ You can add an alternative driver after installation. See p.51 “Setting the Printer Shared”.
Operating Instructions Administrator Reference
42
N Configure the default printer as necessary.
❖ Default Printer
Check [Default Printer] to set the printer as the default printer.
O Click [Continue] to start printer driver installation.
Note
❒ During installation, the [Hardware Installation] dialog box may appear. In this case, click [Continue
Anyway] to continue the installation.
P When the [Select Program] dialog box appears, click [Finish].
Q When the [Installation completion] dialog box appears, click [Finish].
R Set up the options.
Note
❒ You must set up the options when bidirectional transmission is disabled. For more information
about the status of bidirectional transmission, see p.49 “Bidirectional transmission”.
Reference
For more information about option settings, see p.48 “Setting Up Options”.
Operating Instructions Administrator Reference
43
Installing the PostScript Printer Driver
A Close all applications that are running.
B Insert the CD-ROM into the CD-ROM drive.
Auto Run will start the installer.
Important
❒ Never have two versions of the same printer driver installed on your system at the same time.
When upgrading to a new version of the printer driver, delete the old version, and then install the
new one.
Note
❒ Auto Run might not automatically work with certain OS settings. In this case, launch "Setup.exe"
located on the CD-ROM root directory.
C Select a language to change the interface language, and then click [OK].
The following languages are available: Cestina (Czech), Dansk (Danish), Deutsch (German), English (English), Espanol (Spanish), Francais (French), Italiano (Italian), Magyar (Hungarian), Nederlands (Dutch), Norsk (Norwegian), Polski (Polish), Portugues (Portuguese), Suomi (Finnish),
Svenska (Swedish)
Note
❒ The printer driver with the selected language will be installed. The printer driver will be installed
in English if you select the following languages: Cestina, Magyar, Polski, Portugues, Suomi
D Click [PostScript 3 Printer Driver].
"Add Printer Wizard" starts.
Operating Instructions Administrator Reference
44
E Click [Next >].
F Select the port you want to use.
• SmartNetMonitor
• Standard TCP/IP Port
• LPR Port
SmartNetMonitor
A Click [Create a new port:].
B Select [SmartNetMonitor], and then [Next >].
C Select a printer you want to use.
❖ TCP/IP
A
Click [TCP/IP], and then click [Search].
Available printers will be listed.
B Click the printer you want to use, and then click [OK].
Note
❒ Printers that respond to an IP broadcast from the computer will be displayed. To print to a
printer not listed here, click [Specify Address], and then type the IP address or host name.
❒ You cannot add an address partially similar to that already used. For example, when
“192.168.0.2” is already used, “192.168.0.2xx” cannot be used. Similarly, when
“192.168.0.20” is already used, “192.168.0.2” cannot be used.
Operating Instructions Administrator Reference
45
❖ IPP
A
Click [IPP].
The IPP setting dialog box appears.
B To specify the IP address of the printer, type "http://printer's-ip-address/ printer" or
"ipp://printer's-ip-address/printer" in the [Printer URL] field.
(Example IP address is 192.168.15.16)
C
D
http://192.168.15.16/printer
ipp://192.168.15.16/printer
As necessary, type the names to distinguish the printer in [IPP Port Name]. Type a different
name from those of any existing port name.
If you omit this, the address typed in [Printer URL] will be set as the IPP port name.
If a proxy server and IPP user name are used, click [Detailed Settings] and configure the
necessary settings.
Note
❒ For more information about these settings, see SmartNetMonitor for Client Help.
E
Click [OK].
Standard TCP/IP Port
A Click [Create a new port:].
B Select [Standard TCP/IP] in [Create a new Port], and then click [Next].
C Click [Next] in the "Add Standard TCP/IP Printer Port Wizard" window.
D Type the printer name or IP address in the "Printer Name or IP Address" box, and then
click [Next>].
E Click [Finish] in the "Add Standard TCP/IP Printer Port Wizard" window.
Operating Instructions Administrator Reference
46
LPR Port
A Click [Create a new port:].
B Select [LPR Port] in [Create a new Port], and then click [Next].
C Type the printer's IP address in the "Name or address of server providing lpd" box.
D Type "lp" in the "Name of printer or print queue on that server" box, and then click [OK].
G Confirm to select the name of the printer whose driver you want to install, and then click [Next >].
H Change the name of the printer if you want, and then click [Next >].
Configure the default printer as necessary. Check [Yes] to set the printer as the default printer.
I Check [Share as:], and then click [Next >].
To change the printer name, change it in the [Share as:] box.
Note
❒ Check [Shared] to start installation of an alternative driver ([Windows NT 4.0/2000], [Windows 95/98])
has already been selected.
❒ You can add an alternative driver after installation. See p.51 “Setting the Printer Shared”.
J Select whether or not you want to print a test page, and then click [Next>].
K Click [Finish].
Start printer driver installation.
Note
❒ During installation, the [Hardware Installation] dialog box may appear. In this case, click [Continue
Anyway] to continue the installation.
Operating Instructions Administrator Reference
47
L Set up the options.
Reference
For more information about option settings, see p.48 “Setting Up Options”.
Changing Port Settings
Follow the steps to change SmartNetMonitor for Client settings, such as the proxy server settings or
IPP URL.
A From the [Printers and Faxes] window, click the icon of the printer you want to use. On the [File]
menu, click [Properties].
B Click the [Ports] tab, and then click [Configure Port].
The [Port Settings] dialog box appears.
• For TCP/IP protocol, you can configure Timeout Settings.
Note
❒ If you cannot set items on the [Recovery/Parallel Printing] tab, follow the procedure below.
A Click [Cancel] to close the [Port Configuration:] dialog box.
B Start SmartNetMonitor for Client, and then right-click the SmartNetMonitor for Client icon
on the taskbar.
C Click [Extended Features Settings], and then select the [Set Recovery/Parallel Printing for each
port] check box.
D Click [OK] to close the [Extended Features Settings] dialog box.
• For IPP, you can configure User Settings, Proxy Settings and Timeout Settings.
Note
❒ For more information about these settings, see SmartNetMonitor for Client Help.
Operating Instructions Administrator Reference
48
Setting Up Options
You must set up installed options, paper size and feed direction with the printer driver when bidirectional transmission is disabled.
Limitation
❒ To change the printer settings requires Manage Printers permission. Members of the Administrators
and Power Users groups have Manage Printers permission by default. When you set up options,
log on using an account that has Manage Printers permission.
A Access the [Printers and Faxes] window from [Start] on the taskbar.
The [Printers and Faxes] window appears.
B Click the icon of the printer you want to use. On the [File] menu, click [Properties].
Note
❒ When you open the Printer Properties dialog box for the first time after installing the RPCS printer
driver, the confirmation window appears. After that, the initial display of the Printer Properties dialog box appears.
C Click the [Accessories] tab.
Note
❒ If you use the RPCS printer driver, Click [Change Accessories] tab.
❒ If you use the PostScript 3 printer driver, Click [Device Settings] tab.
D Select options you have installed from the [Options] group, and then make any settings you require.
E Click [OK] .
Operating Instructions Administrator Reference
49
- Bidirectional transmission
When bidirectional transmission is enabled, the information about the paper size and feed direction setting is automatically sent to the printer by a computer. You can also confirm the printer status from your
computer.
• Bidirectional transmission is supported by Windows 95/98/Me, Windows 2000, Windows XP and
Windows NT 4.0.
• If you use the RPCS printer driver and bidirectional transmission is enabled, the [Change Accessories] tab is shaded.
Note
❒ The RPCS printer driver supports bidirectional transmission and updates the printer status automatically.
❒ The PCL 5c printer driver supports bidirectional transmission, you can update the printer status
manually.
❒ The PostScript 3 printer driver does not support bidirectional transmission.
To support bidirectional transmission, the following conditions are required:
❖ When connecting with a parallel cable
•
•
•
•
The computer must support bidirectional transmission.
The printer must be set to bidirectional transmission.
The Interface cable must support bidirectional transmission.
The machine must be connected to the computer using the standard parallel cable and parallel
connector.
• Under Windows XP [Enable bidirectional support] must be selected and [Enable printer pooling]
must not be selected on the [port] tab with RPCS printer driver.
Operating Instructions Administrator Reference
50
❖ When connecting with the network
• The printer must be set to bidirectional transmission.
• SmartNetMonitor for Client included on the CD-ROM must be installed, and the TCP/IP protocol must be used.
• Under Windows XP [Enable bidirectional support] must be selected and [Enable printer pooling]
must not be selected on the [port] tab with RPCS printer driver.
Operating Instructions Administrator Reference
51
Setting the Printer Shared
Limitation
❒ To change the printer settings requires Manage Printers permission. Members of the Administrators
and Power Users groups have Manage Printers permission by default. When you set up options,
log on using an account that has Manage Printers permission.
A Access the [Printers and Faxes] window from [Start] on the taskbar.
The [Printers and Faxes] window appears.
B Click the icon of the printer you want to use. On the [File] menu, click [Properties].
C Select [Shared as:] under the [Sharing] tab.
D To share a printer with the users running a different version of Windows, click [Additional Drivers...].
Note
❒ If you have installed an alternative driver by checking [Shared], you do not have to follow this step.
E Click [OK].
Operating Instructions Administrator Reference
3. Windows NT 4.0 Print Server Configuration
To use a printer connected to the Ethernet interface, select "SmartNetMonitor" or "LPR Port" when installing the printer driver.
• SmartNetMonitor
See p.52 “Configuring the Protocols” and p.56 “Installing Software” and p.57 “Installing the PCL
5c or RPCS Printer Driver” or p.62 “Installing the PostScript Printer Driver”.
• LPR Port
See p.52 “Configuring the Protocols” and p.57 “Installing the PCL 5c or RPCS Printer Driver” or
p.62 “Installing the PostScript Printer Driver”.
Note
❒ If you want to use “LPR Port", "Microsoft TCP/ IP Printing" must be installed.
Configuring the Protocols
Configuring TCP/IP and IPP for Printing
Follow these instructions to configure the Network Interface Board and Windows NT to use the TCP/IP
protocol and IPP.
Configuring the printer
Configure the printer to use the TCP/IP protocol.
• Confirm that the TCP/IP protocol is set to be active. (The factory default is active.)
• Assign an IP address and make other settings required for using the TCP/IP protocol.
52
Operating Instructions Administrator Reference
53
Reference
For more information about how to make the above settings, see "Windows NT 4.0 Configuration"
in Printer Client Reference that comes with this printer.
If DHCP is used to assign IP addresses, see p.68 “Bidirectional transmission”.
Note
❒ After setting the IP address, use the ping command to confirm that it has been set correctly.
A Click [Start], point to [Programs], and then click [Command Prompt].
B Type the following: (Example IP address is 192.168.15.16)
C:> ping 192.168.15.16
If the address has been configured correctly, the following message appears.
Reply from 192.168.15.16
If the address has been configured incorrectly, the following message appears.
Request timed out.
Configuring a Windows NT computer
Follow these steps to configure a Windows NT computer to use the TCP/IP protocol.
A Open [Control Panel] and double-click the [Network] icon. Confirm that "TCP/IP Protocol" is
listed in the [Network protocols] box under the [Protocols] tab.
Note
❒ If the TCP/IP protocol is not installed, click [Add] under the [Protocols] tab and install it. For more
information about installing the TCP/IP protocol, see Windows NT Help.
B Configure the TCP/IP protocols with an appropriate IP address, subnet mask and other settings.
Confirm that the settings are correct with the network administrator.
Operating Instructions Administrator Reference
54
C Click the [Services] tab, and confirm that "Microsoft TCP/IP Printing" is installed.
If "Microsoft TCP/IP Printing" is not installed, click [Add] under the [Services] tab, and install it.
For more information about installing and configuring network services, see Windows NT Help.
Configuring NetBEUI for Printing
Follow these instructions to configure the Network Interface Board and Windows NT to use the NetBEUI protocol.
Preparation
To use NetBEUI, use the SmartNetMonitor for Client port.
Configuring the printer
Configure the printer to use the NetBEUI protocol.
• Confirm that the NetBEUI protocol is set to be active. (The factory default is active.)
Reference
For more information about how to make the above settings, see "Windows NT 4.0 Configuration"
in Printer Client Reference that comes with this printer.
Operating Instructions Administrator Reference
55
Configuring a Windows NT computer
Install the NetBEUI protocol on the Windows NT computer, and change the LAN adapter number (Lana Number).
A Open [Control Panel] and double-click the [Network] icon. Confirm that "NetBEUI Protocol" is
listed in the [Network Protocols] box under the [Protocols] tab.
Note
❒ If the NetBEUI protocol is not installed, click [Add...] under the [Protocols] tab, and install it. For
more information about installing the NetBEUI protocol, see Windows NT Help.
B Change the Lana Number. Click the [Services] tab, click "NetBIOS Interface" in the [Network
Services:] box , and then click [Properties:].
C Click the Lana Number corresponding the Nbf protocol of the [Network Route] headline, and
then click [Edit].
D Type "0" as the Lana Number.
Note
❒ If another protocol’s Lana Number is configured at “0”, change it to another number other than
“0”.
E Click [OK].
F Click [Close], and then close the [Network] dialog box.
G After confirming the message to restart, click [Yes].
Note
❒ After you change the Lana Number, you must restart the computer.
Operating Instructions Administrator Reference
56
Installing Software
Installing SmartNetMonitor for Client
A Close all applications that are running.
B Insert the CD-ROM into the CD-ROM drive.
Auto Run will start the installer.
Note
❒ Auto Run might not automatically work with certain OS settings. In this case, launch "Setup.exe"
located on the CD-ROM root directory.
C Select a language to change the interface language, and then click [OK].
The following languages are available: Cestina (Czech), Dansk (Danish), Deutsch (German), English (English), Espanol (Spanish), Francais (French), Italiano (Italian), Magyar (Hungarian), Nederlands (Dutch), Norsk (Norwegian), Polski (Polish), Portugues (Portuguese), Suomi (Finnish),
Svenska (Swedish)
D Click [SmartNetMonitor for Client / Admin].
E Click to select [SmartNetMonitor for Client], and then click [Next >].
F Follow the instructions on the screen.
Note
❒ If you are required to restart the computer after the installation of SmartNetMonitor for Admin,
restart the computer and continue with necessary configurations.
Operating Instructions Administrator Reference
57
Installing the PCL 5c or RPCS Printer Driver
A Close all applications that are running.
B Insert the CD-ROM into the CD-ROM drive.
Auto Run will start the installer.
Important
❒ Never have two versions of the same printer driver installed on your system at the same time.
When upgrading to a new version of the printer driver, delete the old version, and then install the
new one.
Note
❒ Auto Run might not automatically work with certain OS settings. In this case, launch "Setup.exe"
located on the CD-ROM root directory.
C Select a language to change the interface language, and then click [OK].
The following languages are available: Cestina (Czech), Dansk (Danish), Deutsch (German), English (English), Espanol (Spanish), Francais (French), Italiano (Italian), Magyar (Hungarian), Nederlands (Dutch), Norsk (Norwegian), Polski (Polish), Portugues (Portuguese), Suomi (Finnish),
Svenska (Swedish)
D Select [PCL/RPCS Printer Drivers].
E The software license agreement appears in the [License Agreement] dialog box.
After reading through all of the contents, click [I accept the agreement] to agree with the license
agreement, and then click [Next >].
F Select the printer drivers you want to use when the "Select Program" dialog box appears.
Operating Instructions Administrator Reference
58
G Select the printer model(s) you want to use.
To change the printer name, change it in the [Change settings for 'Printer Name'] box.
H Double-click the printer name to display the printer settings.
Note
❒ The details shown for [Comment:], [Driver:], and [Port:] vary depending on the operating system
being used, the model of printer selected, and the port being used.
I Click [Port:], and then select the port you want to use.
• SmartNetMonitor
• LPR Port
SmartNetMonitor
A Click [Add].
B Select [SmartNetMonitor], and then click [OK].
C Select a printer you want to use.
❖ TCP/IP
A
Click [TCP/IP], and then click [Search].
Available printers will be listed.
B Click the printer you want to use, and then click [OK].
Note
❒ Printers that respond to an IP broadcast from the computer will be displayed. To print to a
printer not listed here, click [Specify Address], and then type the IP address or host name.
Operating Instructions Administrator Reference
59
❒ You cannot add an address partially similar to that already used. For example, when
“192.168.0.2” is already used, “192.168.0.2xx” cannot be used. Similarly, when
“192.168.0.20” is already used, “192.168.0.2” cannot be used.
❖ NetBEUI
A
Click [NetBEUI], and then click [Search].
A list of printers that can be used by the NetBEUI protocol appears.
B Click the printer you want to use, and then click [OK].
Note
❒ Printers that respond to an broadcast from the computer will be displayed. To print to a
printer not listed here, click [Specify Address], and then type the NetBEUI address. Confirm
the NetBEUI address on the network is on the configuration page. For more information
about the printing of configuration page, see p.130 “Printing a Configuration Page”. NetBEUI address appears “\\RNPxxxx\xxx” on a configuration page. Type the printer's network path name in form of "%%Computer name \Share name". Do not type "\\" as head
characters but "%%".
❒ You cannot print to printers beyond routers.
❖ IPP
A
Click [IPP].
The IPP settings dialog box appears.
B To specify the IP address of the printer, type "http://printer's-ip-address/ printer" or
"ipp://printer's-ip-address/printer" in the [Printer URL] field.
(Example IP address is 192.168.15.16)
http://192.168.15.16/printer
ipp://192.168.15.16/printer
Operating Instructions Administrator Reference
60
C
As necessary, type the names to distinguish the printer in [IPP Port Name]. Type a different
name from those of any existing port name.
If you omit this, the address typed in [Printer URL] will be set as the IPP port name.
D If a proxy server and IPP user name are used, click [Detailed Settings] and configure the
necessary settings.
Note
❒ For more information about these settings, see SmartNetMonitor for Client Help.
E
Click [OK].
LPR Port
A Click [Add].
B Select [LPR Port], and then click [OK].
C Type the printer's IP address in the "Name or address of server providing lpd" box.
D Type "lp" in the "Name of printer or print queue on that server" box, and then click [OK].
J Make sure the location for the selected printer is shown after [Port:].
K Double-click [Shared] to display the shared settings.
L To share the printer, check the left side of the [Shared] box.
M Click the box under [Shared name] to install the alternative driver for the necessary system.
Note
❒ Check [Shared] to start installation of an alternative driver ([Windows NT 4.0/2000], [Windows 95/98])
has already been selected.
❒ You can add an alternative driver after installation. See p.70 “Setting the Printer Shared”.
Operating Instructions Administrator Reference
61
N Configure the default printer as necessary.
❖ Default Printer
Check [Default Printer] to set the printer as the default printer.
O Click [Continue] to start printer driver installation.
Note
❒ During installation, the [Digital Signature Not Found] dialog box may appear. In this case, click [Yes]
to continue the installation.
P When the [Select Program] dialog box appears, click [Finish].
Q When the [Installation completion] dialog box appears, click [Finish].
R Set up the options.
Note
❒ You must set up the options when bidirectional transmission is disabled. For more information
about the status of bidirectional transmission, see p.68 “Bidirectional transmission”.
Reference
For more information about option settings, see p.67 “Setting Up Options”.
Operating Instructions Administrator Reference
62
Installing the PostScript Printer Driver
A Close all applications that are running.
B Insert the CD-ROM into the CD-ROM drive.
Auto Run will start the installer.
Important
❒ Never have two versions of the same printer driver installed on your system at the same time.
When upgrading to a new version of the printer driver, delete the old version, and then install the
new one.
Note
❒ Auto Run might not automatically work with certain OS settings. In this case, launch "Setup.exe"
located on the CD-ROM root directory.
C Select a language to change the interface language, and then click [OK].
The following languages are available: Cestina (Czech), Dansk (Danish), Deutsch (German), English (English), Espanol (Spanish), Francais (French), Italiano (Italian), Magyar (Hungarian), Nederlands (Dutch), Norsk (Norwegian), Polski (Polish), Portugues (Portuguese), Suomi (Finnish),
Svenska (Swedish)
Note
❒ The printer driver with the selected language will be installed. The printer driver will be installed
in English if you select the following languages: Cestina, Magyar, Polski, Portugues, Suomi
D Click [PostScript 3 Printer Driver].
"Add Printer Wizard" starts.
Operating Instructions Administrator Reference
63
E Click [Next >].
F Select the port you want to use.
• SmartNetMonitor
• LPR Port
SmartNetMonitor
A Click [Create a new port:].
B Select [SmartNetMonitor], and then [New Port...].
C Select a printer you want to use.
❖ TCP/IP
A
Click [TCP/IP], and then click [Search].
Available printers will be listed.
B Click the printer you want to use, and then click [OK].
Note
❒ Printers that respond to an IP broadcast from the computer will be displayed. To print to a
printer not listed here, click [Specify Address], and then type the IP address or host name.
❒ You cannot add an address partially similar to that already used. For example, when
“192.168.0.2” is already used, “192.168.0.2xx” cannot be used. Similarly, when
“192.168.0.20” is already used, “192.168.0.2” cannot be used.
❖ NetBEUI
A
Click [NetBEUI], and then click [Search].
A list of printers that can be used by the NetBEUI protocol appears.
Operating Instructions Administrator Reference
64
B
Click the printer you want to use, and then click [OK].
Note
❒ Printers that respond to a broadcast from the computer will be displayed. To print to a
printer not listed here, click [Specify Address], and then type the NetBEUI address. Confirm
the NetBEUI address on the network is on the configuration page. For more information
about printing the configuration page, see p.130 “Printing a Configuration Page”. NetBEUI
address appears as “\\RNPxxxx\xxx” on the configuration page. Type the printer's network
path name in the form of "%%Computer name\Share name". Do not type "\\" as head characters but "%%".
❒ You cannot print to printers beyond routers.
❖ IPP
A
Click [IPP].
The IPP setting dialog box appears.
B To specify the IP address of the printer, type "http://printer's-ip-address/ printer" or
"ipp://printer's-ip-address/printer" in the [Printer URL] field.
(Example IP address is 192.168.15.16)
http://192.168.15.16/printer
ipp://192.168.15.16/printer
C As necessary, type the names to distinguish the printer in [IPP Port Name]. Type a different
name from those of any existing port name.
If you omit this, the address typed in [Printer URL] will be set as the IPP port name.
D If a proxy server and IPP user name are used, click [Detailed Settings] and configure the
necessary settings.
Note
❒ For more information about these settings, see SmartNetMonitor for Client Help.
E
Click [OK].
Operating Instructions Administrator Reference
65
LPR Port
A Select [Add Port:].
B Select [LPR Port] in [Create a new Port], and then click [Next].
C Type the printer's IP address in the "Name or address of server providing lpd" box.
D Type "lp" in the "Name of printer or print queue on that server" box, and then click [OK].
G Confirm to select the name of the printer whose driver you want to install, and then click [Next >].
H Change the name of the printer if you want, and then click [Next >].
Configure the default printer as necessary. Check [Yes] to set the printer as the default printer.
I Check [Shared:], and then click [Next >].
To change the printer name, change it in the [Share Name:] box.
Note
❒ Check [Shared] to start installation of an alternative driver ([Windows NT 4.0/2000], [Windows 95/98])
has already been selected.
❒ You can add an alternative driver after installation. See p.70 “Setting the Printer Shared”.
J Select whether or not you want to print a test page, and then click [Next>].
K Click [Finish].
Start printer driver installation.
L Set up the options.
Reference
For more information about option settings, see p.67 “Setting Up Options”.
Operating Instructions Administrator Reference
66
Changing Port Settings
Follow the steps to change SmartNetMonitor for Client settings, such as the proxy server settings or
IPP URL.
Note
❒ There are no settings for the NetBEUI protocol.
A From the [Printers] window, click the icon of the printer you want to use. On the [File] menu,
click [Properties].
B Click the [Ports] tab, and then click [Configure Port].
The [Port Settings] dialog box appears.
• For TCP/IP protocol, you can configure Timeout Settings.
Note
❒ If you cannot set items on the [Recovery/Parallel Printing] tab, follow the procedure below.
A Click [Cancel] to close the [Port Configuration:] dialog box.
B Start SmartNetMonitor for Client, and then right-click the SmartNetMonitor for Client icon
on the taskbar.
C Click [Extended Features Settings], and then select the [Set Recovery/Parallel Printing for each
port] check box.
D Click [OK] to close the [Extended Features Settings] dialog box.
• For IPP, you can configure User Settings, Proxy Settings and Timeout Settings.
Note
❒ For more information about these settings, see SmartNetMonitor for Client Help.
Operating Instructions Administrator Reference
67
Setting Up Options
You must set up installed options, paper size and feed direction with the printer driver when bidirectional transmission is disabled.
Limitation
❒ To change the printer settings requires Full Control Access permission. Members of the Administrators and Power Users groups have Full Control Access permission by default. When you set up options, log on using an account that has Full Control Access permission.
A Click [Start] on the taskbar, point to [Settings], and then click [Printers].
The [Printers] window appears.
B Click the icon of the printer you want to use. On the [File] menu, click [Properties].
Note
❒ When you open the Printer Properties dialog box for the first time after installing the RPCS printer
driver, the confirmation window appears. After that, the initial display of the Printer Properties dialog box appears.
C Click the [Accessories] tab.
Note
❒ If you use the RPCS printer driver, Click the [Change Accessories] tab.
❒ If you use the PostScript 3 printer driver, Click the [Device Settings] tab.
D Select options you have installed from the [Options] group, and then make any settings you require.
E Click [OK] .
Operating Instructions Administrator Reference
68
- Bidirectional transmission
When bidirectional transmission is enabled, the information about the paper size and feed direction setting is automatically sent to the printer by a computer. You can also confirm the printer status from your
computer.
• Bidirectional transmission is supported by Windows 95/98/Me, Windows 2000, Windows XP and
Windows NT 4.0.
• If you use the RPCS printer driver and bidirectional transmission is enabled, on Windows 95/98/Me,
the unavailable functions are shaded.
Note
❒ The RPCS printer driver supports bidirectional transmission and updates the printer status automatically.
❒ The PCL 5c printer driver supports bidirectional transmission, you can update the printer status
manually.
❒ The PostScript 3 printer driver does not support bidirectional transmission.
To support bidirectional transmission, the following conditions are required:
❖ When connecting with a parallel cable
•
•
•
•
The computer must support bidirectional transmission.
The printer must be set to bidirectional transmission.
The Interface cable must support bidirectional transmission.
The machine must be connected to the computer using the standard parallel cable and parallel
connector.
• Under Windows NT 4.0 [Enable bidirectional support] must be selected and [Enable printer pooling] must not be selected on the [port] tab with RPCS printer driver.
Operating Instructions Administrator Reference
69
❖ When connecting with the network
• The printer must be set to bidirectional transmission.
• SmartNetMonitor for Client included on the CD-ROM must be installed, and the TCP/IP protocol must be used.
• Under Windows NT 4.0 [Enable bidirectional support] must be selected and [Enable printer pooling] must not be selected on the [port] tab with RPCS printer driver.
Operating Instructions Administrator Reference
70
Setting the Printer Shared
Limitation
❒ To change the printer settings requires Full Control Access permission. Members of the Administrators and Power Users groups have Full Control Access permission by default. When you set up options, log on using an account that has Full Control Access permission.
Use the [Printers] window to set up the printer.
A Click [Start] on the taskbar, point to [Settings], and then click [Printers].
The [Printers] window appears.
B Click the icon of the printer you want to use. On the [File] menu, click [Properties].
C Select [Shared] in the [Sharing] tab.
Note
❒ If you use alternate drivers for Windows 95/98/Me client, service pack 4 or more is required. And
install the appropriate printer driver for each client.
D To share a printer with the users running a different version of Windows, click [Additional Drivers...].
Note
❒ If you have installed an alternative driver by checking [Shared], you do not have to follow this step.
E Click [OK].
The printers attached to the network are displayed.
Operating Instructions Administrator Reference
4. NetWare Configuration
This chapter describes how to configure the printer to use as a print server or a remote printer in a NetWare environment.
Configuring the NetWare Protocol using the Control
Panel
Note
❒ The IPX/SPX protocol must be installed on your computer. If it is not, see Windows Help for instructions.
A Press the {Menu}} key.
ZHBS010E
"Menu" appears on the panel display.
B Press the {U} or {T} key to display "Host Interface".
Menu:
Host Interface
71
Operating Instructions Administrator Reference
72
C Press the {Enter #}} key.
The following message appears on the panel display.
Host Interface:
I/O Buffer
D Press the {U} or {T} key to display "Network Setup".
Host Interface:
Network Setup
E Press the {Enter #}} key.
The following message appears on the panel display.
Network Setup:
IP Address
F Select the NetWare protocol.
Note
❒ All protocols are active by the default.
❒ Do not select protocols that are not used on your network.
❒ If you use Pure IP on NetWare 5.1, configure the printer to active the TCP/IP protocol.
Operating Instructions Administrator Reference
73
A Press the {U} or {T} key to display "Active Protocol", and then press the {Enter #}
} key.
Active Protocol:
TCP/IP
B Press the {U} or {T} key to display "NetWare".
C Press the {Enter #}
} key.
The current setting appears on the panel display.
NetWare:
*Active
G Select the frame type for NetWare.
Select one of the following items if necessary.
• Auto (Default)
• Ethernet 802.3
• Ethernet 802.2
• Ethernet ll
• Ethernet SNAP
Note
❒ In most situations, use the default setting ("Auto "). When you first select "Auto ", the frame type
first detected by the printer is adopted. If the network can use more than two frame types, the
printer may fail to select the correct frame type if "Auto " is selected. In this case, select the appropriate frame type.
Operating Instructions Administrator Reference
74
A Press the {U} or {T} key to display "Frame Type (NW)".
Network Setup:
Frame Type (NW)
B Press the {Enter #}
} key.
The current setting appears on the panel display.
Frame Type (NW):
*Auto
C Press the {U} or {T} key to display the frame type you want to use.
D Press the {Enter #}
} key.
In about two seconds, the display returns to "Network Setup".
E Press the {On Line}
} key.
"Ready" appears on the panel display.
Ready
H Print the configuration page to check settings you have made.
For more information about how to print a configuration page, see p.130 “Printing a Configuration
Page”.
❖ SmartNetMonitor for Admin
Using a printer in a NetWare environment, configure the NetWare printing environment by using
SmartNetMonitor for Admin.
Operating Instructions Administrator Reference
75
Note
❒ If you configure the NetWare printing environment by using SmartNetMonitor for Admin under
the following environments, NetWare Client provided by Novell is required.
•
NDS mode in Windows 95/98/Me
•
NDS or Bindary mode in Windows 2000/Windows NT 4.0
❒ Use the version of Novell Client provided with your operating system or the latest version.
❖ Printers listed by SmartNetMonitor for Admin
SmartNetMonitor for Admin displays a list of printers, which are connected to the network.
If you cannot find out the printer from the displayed list, refer to the configuration page printed
from the printer. For more information about printing a configuration page, see p.130 “Printing
a Configuration Page”.
Operating Instructions Administrator Reference
76
NetWare 3.x - Advanced Settings
The actual procedures for configuring the printer differ depending on whether the Network Interface
Board is configured as a print server or as a remote printer. This section describes how to configure it
in the NetWare 3.x environment.
Note
❒ This section assumes NetWare is functional and that the necessary environment for NetWare Print
Service is available.
Operating Instructions Administrator Reference
77
Installing SmartNetMonitor for Admin
Install SmartNetMonitor for Admin on your computer. For the installation procedure, see p.94 “Installing SmartNetMonitor for Admin”.
After installing SmartNetMonitor for Admin, go to p.77 “Setting Up as a Print Server” to use this computer as a print server, or to p.79 “Setting Up as a Remote Printer” to use it as a remote printer.
Setting Up as a Print Server
A Log on to the file server as Supervisor or a Supervisor equivalent.
B Run SmartNetMonitor for Admin.
C Click the [Group] menu, and click [Search Device], and then select [IPX/SPX].
A list of printers appears
Note
❒ If you cannot identify which printer to configure from the list of printers, print Configuration Page
from the printer and find the desired printer. For more information about printing the Configuration Page, see p.130 “Printing a Configuration Page”.
❒ If no printer name appears on the list, match the frame types of the IPX/SPX protocol between
the computer and printer. Use the [Network] dialog box of Windows to change the frame type of
the computer. For more information about changing the frame type of equipment, see p.71 “Configuring the NetWare Protocol using the Control Panel”.
D Select a printer you want to configure, and then click [NIB Setup Tool] on the [Tools] menu.
E Click to select [Wizard], and then click [OK].
Operating Instructions Administrator Reference
78
F Type the device name into the [Device Name] box and comment into the [Comment] box as necessary, and then click [Next].
G Select the [NetWare] check box, and then click [Next].
H Click to select [Bindery Mode], type the file server name into the [File Server Name:] box, and
then click [Next].
In the [File Server Name:] box, type the name of the file server in which a print server is to be created.
You can also select a file server from the list that appears by clicking [Browse].
I Type the print server name into the [Print Server Name] box, and the printer name into the
[Printer Name] box, and the print queue name into the [Print Queue Name] box, and then click
[Next].
• In the [Print Server Name] box, type the name of the NetWare print server within 47 characters.
• In the [Printer Name] box, type the name of the NetWare printer.
• In the [Print Queue Name] box, type the name of the print queue to be added to NetWare.
J After confirming the settings, click [Next].
The settings take effect, and the NIB Setup Tool exits.
K Exit SmartNetMonitor for Admin.
L Turn the printer power off and on.
Note
❒ To confirm that the printer is configured correctly, type the following from the command prompt.
F:> USERLIST
❒ If the printer works as configured, the name of the print server appears as an attached user.
Operating Instructions Administrator Reference
79
Setting Up as a Remote Printer
A Log on to the file server as Supervisor or a Supervisor equivalent.
B Run the SmartNetMonitor for Admin.
C Click the [Group] menu, and click [Search Device], and then select [IPX/SPX].
A list of printers appears.
Note
❒ If you cannot identify which printer to configure from the list of printers, print the Configuration
Page from the printer and find the desired printer. For more information about printing the Configuration Page, see p.130 “Printing a Configuration Page”.
❒ If no printer name appears on the list, match the frame types of the IPX/SPX protocol between
the computer and printer. Use the [Network] dialog box of Windows to change the frame type of
the computer. For more information about changing the frame type of equipment, see p.71 “Configuring the NetWare Protocol using the Control Panel”.
D Select a printer you want to configure, and then click [NIB Setup Tool] on the [Tools] menu.
E Click to select [Property Sheet] and click [OK].
F Click the [NetWare] tab, and then make the following settings.
A In the [Print Server Name] box, type the name of the print server.
B In the [File Server Name] box, type the name of the file server in which a print server is to be
created.
By clicking [Browse], you can select a file server among those listed in the [Browse] dialog box.
C In the [Print Server Operation Mode] group, click [As Remote Printer].
Operating Instructions Administrator Reference
80
D In the [Remote Printer No.] box, type the printer number.
Important
❒ Use the same printer number as that to be created in the printer server.
E Click [OK] to close the property sheet.
F After a confirmation dialog box appears, click [OK].
G On the [NIB] menu, click [Exit] to exit the NIB Setup Tool.
H Type "PCONSOLE" from the command prompt.
F:> PCONSOLE
I Create a print queue as follows:
Note
❒ If you use a currently defined print queue, go to step J.
A From the [Available Options] menu, select [Print Queue Information], and then press {Enter}
}.
B Press {INSERT}
}, and then type a print queue name.
C Press {ESC}
} to return to the [Available Options] menu.
J Create a printer as follows:
A From the [Available Options] menu, select [Print Server Information], and then press {Enter}
}.
B To create a new print server, press {INSERT}
}, and then type a print server name.
If you use a currently defined print server, select one of the print servers shown in the [Print Server] list.
Important
❒ Use the same name as that specified in the NIB Setup Tool. (Step F - A).
Operating Instructions Administrator Reference
81
C From the [Print Server Information] menu, select [Print Server Configuration].
D From the [Print Server Configuration] menu, select [Printer Configuration].
E Select the printer which is indicated as "Not Installed".
Important
❒ Use the same number as that specified as Remote Printer No. using the NIB Setup Tool.
(Step F - D).
F If you change the name of the printer, type a new name.
A name "Printer x" is assigned to the printer. The “x” stands for the number of the selected printer.
G As type, select [Remote Parallel, LPT1].
The IRQ, Buffer size, Starting form, and Queue service mode are automatically configured.
H Press the {ESC}
} key, and then click [Yes] in the confirmation dialog box.
I Press the {ESC}
} key to return to [Print Server Configuration Menu].
K Assign print queues to the created printer as follows:
A From [Print Server Configuration Menu], select [Queues Serviced By Printer].
B Select the printer created in step J.
C Press the {INSERT}
} key to select a queue serviced by the printer.
Note
❒ You can select more than one queue at a time.
D Follow the instructions on the screen to make other necessary settings.
When you have finished the above steps, confirm that the queues are assigned.
L Press the {ESC}} key until "Exit?" appears, and then select [Yes] to exit PCONSOLE.
Operating Instructions Administrator Reference
82
M Start the print server by typing the following from the console of the NetWare Server.
If it is running, restart it after exiting it.
❖ To exit
CAREE: unload pserver
❖ To start
CAREE: load pserver print_server_name
Note
❒ If the printer works as configured, "Waiting for job" appears.
Operating Instructions Administrator Reference
83
NetWare 4.x, 5 - Advanced Settings
The actual procedures for configuring the printer differ depending on whether the Network Interface
Board is configured as a print server or as a remote printer. This section describes how to configure it
in the NetWare 4.x, 5 environment.
❖ To use NetWare 5
• If you use Pure IP, use the printer as a print server. You cannot use the printer as a remote printer
when you use Pure IP.
• If you use Pure IP, configure the printer to use the TCP/IP protocol. For more information about
how to make the settings, see p.71 “Configuring the NetWare Protocol using the Control Panel”.
Operating Instructions Administrator Reference
84
Installing SmartNetMonitor for Admin
Install SmartNetMonitor for Admin on your computer. For the installation procedure, see p.94 “Installing SmartNetMonitor for Admin”.
After installing SmartNetMonitor for Admin, go to p.84 “Setting Up as a Print Server” to use this computer as a print server, or to p.88 “Setting Up as a Remote Printer” to use it as a remote printer.
Setting Up as a Print Server
A Log on to the file server as Supervisor or a Supervisor equivalent.
B Run SmartNetMonitor for Admin.
C Click the [Group] menu, and click [Search Device], and then select [IPX/SPX] or [TCP/IP].
A list of printers appears.
Note
❒ If you use Pure IP, select [TCP/IP].
❒ If you cannot identify which printer to configure from the list of printers, print the Configuration
Page from the printer and find the desired printer. For more information about printing the Configuration Page, see p.130 “Printing a Configuration Page”.
❒ If no printer name appears in the list, match the frame types of the IPX/SPX protocol between
the computer and printer. Use the [Network] dialog box of Windows to change the frame type of
the computer. For more information about changing the frame type of equipment, see p.71 “Configuring the NetWare Protocol using the Control Panel”.
Operating Instructions Administrator Reference
85
D Select a printer you want to configure, and then click [NIB Setup Tool] on the [Tools] menu.
Note
❒ If you use Pure IP, see p.86 “Using Pure IP in the NetWare 5 Environment”
E Click to select [Wizard], and then click [OK].
F Type the device name into the [Device Name] box and comment into the [Comment] box as necessary, and then click [Next].
G Select the [NetWare] check box, and then click [Next].
H Click to select [NDS Mode], type the file server name into the [File Server Name:] box, the NDS
tree name into the [NDS Tree:] box and the context into the [NDS Context:] box, and then click
[Next].
In the [File Server Name:] box, type the name of the file server in which a print server is to be created.
You can also select a file server from the list that appears by clicking [Browse].
By clicking [Browse], you can select a NDS context among those listed in the [Browse] dialog box.
As a context, object names are typed from a lower object and divided by a period. For example, if
you want to create a print server into NET under DS, type "NET.DS".
I Type the print server name into the [Print Server Name] box, and the printer name into the
[Printer Name] box, and the print queue name into the [Print Queue Name] box, and the print
queue volume into the [Print Queue Volume], and then click [Next].
• In the [Print Server Name] box, type the name of the NetWare print server within 47 characters.
• In the [Printer Name] box, type the name of the NetWare printer.
• In the [Print Queue Name] box, type the name of the print queue to be added to NetWare.
• In [Print Queue Volume], type the print queue volume. As a volume, object names are typed from
a lower object and divided by a period. You can select a volume by clicking [Browse].
Operating Instructions Administrator Reference
86
J After confirming the settings, click [Next].
The settings take effect, and the NIB Setup Tool exits.
K Exit SmartNetMonitor for Admin.
L Turn the printer power off and on.
Note
❒ To confirm that the printer is configured correctly, type the following from the command prompt.
F:> NLIST USER /A/B
❒ If the printer works as configured, the name of the print server appears as an attached user.
Using Pure IP in the NetWare 5 Environment
A Log on to the file server as Admin or an Admin equivalent.
B Run SmartNetMonitor for Admin.
C Click [Property Sheet], and then click [OK].
The [NIB Setup Tool] dialog box appears.
D Click the [NetWare] tab, and make the following settings.
A In the [Print Server Name:] box, type the name of the print server.
B In the [File Server Name:] box, type the name of the file server in which a print server is to
be created.
By clicking [Browse], you can select a file server among those listed in the [Browse File Server]
dialog box.
Operating Instructions Administrator Reference
87
C In the [NDS Context:] box, type the context of the print server.
By clicking [Browse], you can select NDS tree and a NDS context among those listed in the
[Browse Context] dialog box.
As context, object names are typed from a lower object and divided by a period. For example, if
you want to create a print server into Net under DS, type "NET.DS".
D In the [Print Server Operation Mode] group, click [As Print Server].
E Click [OK] to close the property sheet.
F After a confirmation dialog box appears, click [OK].
E Exit SmartNetMonitor for Admin.
After this step, go to step H on p.88 “Setting Up as a Remote Printer”.
Operating Instructions Administrator Reference
88
Setting Up as a Remote Printer
A Log on to the file server as Admin or an Admin equivalent.
B Run the SmartNetMonitor for Admin.
C Click the [Group] menu, and click [Search Device], and then select [IPX/SPX].
A list of printers appears.
Note
❒ If you cannot identify which printer to configure from the list of printers, print the Configuration
Page from the printer and find the desired printer. For more information about printing the Configuration Page, see p.130 “Printing a Configuration Page”.
❒ If no printer name appears on the list, match the frame types of the IPX/SPX protocol between
the computer and printer. Use the [Network] dialog box of Windows to change the frame type of
the computer. For more information about changing the frame type of equipment, see p.71 “Configuring the NetWare Protocol using the Control Panel”.
D Select a printer you want to configure, and then click [NIB Setup Tool] on the [Tools] menu.
E Click to select [Property Sheet], and then click [OK].
F Click the [NetWare] tab, and make the following settings.
A In the [Print Server Name] box, type the name of the print server.
B In the [File Server Name] box, type the name of the file server in which a print server is to be
created.
By clicking [Browse], you can select a file server among those listed in the [Browse] dialog box.
Operating Instructions Administrator Reference
89
C In the [NDS Context] box, type the context in which the print server is to be created.
By clicking [Browse], you can select context among those listed in the [Browse] dialog box.
As context, object names are typed from a lower level object and divided by a period. For example, if you want to create a print server into NET under DS, type "NET.DS".
D In the [Print Server Operation Mode] group, click [As Remote Printer].
E In the [Remote Printer No.] box, type the number of the printer.
Important
❒ Use the same number as that of the printer to be created in the print server.
F Click [OK] to close the property sheet.
G On the [NIB] menu, click [Exit] to exit the NIB Setup Tool.
H From Windows, run NWadmin.
Reference
For more information about NWadmin, see the documentation that comes with the NetWare.
I Create a print queue as follows:
A Select the container object the print queue is located in among those in the directory tree,
and then click [Create] on the [Object] menu.
B In the [Class of new object] box, click "Print Queue", and then click [OK].
Operating Instructions Administrator Reference
90
C In the [Print Queue name] box, type the name of the print queue.
D In the [Print Queue Volume] box, click the [Browse] button.
E In the [Available objects] box, click the volume in which the print queue is created, and then
click [OK].
F After confirming the settings, click [Create].
J Create a printer as follows:
A Select the container object the printer is located in, and then click [Create] in the [Object]
menu.
B In the [Class of new object] box, click "Printer", and then click [OK]. When you are using
NetWare 5, click "Printer (Non NDPS)".
C In the [Printer name] box, type the name of the printer.
D Click [Define additional properties] to check a box, and then click [Create].
K Assign print queues to the created printer as follows:
A Click [Assignments], and then click [Add] in the [Assignments] group.
B In the [Available objects] box, click the queue created in step I, and then click [OK].
C Click [Configuration], and in the [Printer type] box, select [Parallel] using the drop-down
menu, and then click [Communication].
D Click [Manual load] in the [Communication type] group, and then click [OK].
E After confirming the settings, click [OK].
L Create a print server as follows:
A Select the context specified using the NIB Setup Tool (Step I - A), and on the [Object]
menu, click [Create].
Operating Instructions Administrator Reference
91
B In the [Class of new object] box, click "Print Server", and then click [OK]. When you are
using NetWare 5, click "Print Sever (Non NDPS)".
C In the [Print Server name] box, type the name of the print server.
Important
❒ Use the same name as that specified using the NIB Setup Tool. (Step F - A).
D Click [Define additional properties] to check a box, and click [Create].
M Assign the printer to the created print server as follows:
A Click [Assignments], and then click [Add] in the [Assignments] group.
B In the [Available objects] box, click the queue created in the step K, and then click [OK].
C In the [Printers] group, click the printer assigned in step B, and then click [Printer Number].
D Type the printer number, and then click [OK].
Important
❒ Use the same number as that specified as Remote Printer No. using the NIB Setup Tool.
(Step F - E).
E After confirming the settings, click [OK].
N Start the print server by typing the following from the console of the NetWare Server.
If it is running, restart it after exiting it.
❖ To exit
CAREE: unload pserver
❖ To start
CAREE: load pserver print_server_name
Operating Instructions Administrator Reference
5. Using SmartNetMonitor for Admin
Using SmartNetMonitor for Admin, you can not only monitor the status of network printers, but also
allows you to change the configurations of the Network Interface Board using the TCP/IP protocol or
IPX/SPX protocol.
SmartNetMonitor for Admin is equipped with the following functions.
• Device Information function
• Checks the printer's network settings and detailed information of devices.
• Checks the number of pages printed for each computer, using the user codes.
• Checks the results of print jobs executed from the computer.
• Enables you to change the printer's network settings.
• Device Settings function
• Limits the settings to be done from the control panel, and disables changes to be made to some
of the items.
• Enables the selection of paper type loaded in the printer.
• Energy Saver function
• Switches to the Energy Saver mode, and wakes up from the Energy Saver mode.
• System Status function
• Checks the information on printing, paper exhaustion, and such, on the computer.
• Groups function
• Monitors multiple printers at the same time. When there are many printers, you can create groups
and classify the printers to facilitate management.
92
Operating Instructions Administrator Reference
93
OS
Protocol Stack
Microsoft Windows 95/98/Me
TCP/IP provided with Windows 95/98/Me
IPX/SPX provided with Windows 95/98/Me
NetWare network client provided with Windows 95/98
Novell Client for Windows 95/98
Microsoft Windows 2000
TCP/IP provided with Windows 2000
IPX/SPX provided with Windows 2000
NetWare Client provided with Windows 2000
Novell Client for Windows NT/2000
Microsoft Windows XP
TCP/IP provided with Windows XP
IPX/SPX provided with Windows XP
NetWare Client provided with Windows XP
Novell Client for Windows XP
Microsoft Windows NT 4.0
TCP/IP provided with Windows NT
IPX/SPX provided with Windows NT
Client Service for NetWare provided with Windows NT
Novell Client for Windows NT/2000
Note
❒ Select the appropriate protocol stack for your operating system.
Operating Instructions Administrator Reference
94
Installing SmartNetMonitor for Admin
A Close all applications that are running.
B Insert the CD-ROM into the CD-ROM drive.
Auto Run will start the installer.
Note
❒ Auto Run might not automatically work with certain OS settings. In this case, launch "Setup.exe"
located on the CD-ROM root directory.
C Select a language to change the interface language, and then click [OK].
The following languages are available: Cestina (Czech), Dansk (Danish), Deutsch (German), English (English), Espanol (Spanish), Francais (French), Italiano (Italian), Magyar (Hungarian), Nederlands (Dutch), Norsk (Norwegian), Polski (Polish), Portugues (Portuguese), Suomi (Finnish),
Svenska (Swedish)
D Select [SmartNetMonitor for Client / Admin] installation, and then click [Next].
E The software license agreement appears in the [License Agreement] dialog box.
After reading through all of the contents, click [I accept the agreement] to agree with the license
agreement, and then click [Next >].
F Follow the instructions on the screen.
Note
❒ If you are required to restart the computer after the installation of SmartNetMonitor for Admin,
restart the computer and continue with necessary configurations.
Operating Instructions Administrator Reference
95
Changing the Network Interface Board Configuration
A Run SmartNetMonitor for Admin.
B Click the [Group] menu, point to [Search Device], and then select [TCP/IP] or [IPX/SPX]. A list of
printers appears.
Note
❒ Select the protocol of the printer you want to change its configuration.
C On the list, Select a printer you want to change its configuration.
D From the [Tools] menu, select [NIB Setup Tool].
The NIB Setup Tool starts up.
E Select [Wizard] or [Property Sheet], and then click [Next].
• When configuring the Network Interface Board for the first time, select [Wizard].
• When changing the configuration of the Network Interface Board or configuring it in detail, select [Property Sheet].
Selecting [Wizard]
A Fill in the necessary items, and then click [Next].
Selecting [Property Sheet]
A A configuration list appears on the dialog box.
For more information about each item on the dialog box, see SmartNetMonitor for Admin Help.
Operating Instructions Administrator Reference
96
Locking the Menus on the Printer's Control Panel
A Run SmartNetMonitor for Admin.
B Click the [Group] menu, point to [Search Device], and then select [TCP/IP] or [IPX/SPX].
A list of printer appears.
Note
❒ Select the protocol of the printer you want to change its configuration.
C Select a desired printer.
D From the [Tools] menu, point [Device Settings], select [Lock Operation Panel Menu].
The Web browser starts up, and the screen that prompts you to type the user name and a password
appears.
E Type the user name and the password, and then click [OK].
The general configuration window appears.
F From the [Lock Operation Panel Menu] pull-down menu, select [Apply].
Note
❒ The Panel Lock function that can be set here is the same as that on the control panel of this machine.
G Click [Apply].
H Exit the Web browser.
Operating Instructions Administrator Reference
97
Changing the Paper Type
A Run SmartNetMonitor for Admin.
B Click the [Group] menu, point to [Search Device], and then select [TCP/IP] or [IPX/SPX].
A list of printer appears.
Note
❒ Select the protocol of the printer you want to change its configuration.
C On the list, Select a printer whose paper type you want to change.
D From the [Tools] menu, point [Device Settings], select [Select Paper Type].
The Web browser starts up, and the screen that prompts you to type the user name and a password
appears.
E Type the user name and the password, and then click [OK].
The paper type configuration window appears.
F Select the sheet type, and then click [Apply].
G Exit the Web browser.
Operating Instructions Administrator Reference
98
Managing the Number of Copies to be Printed
Preparation
Optional User Account Enhance Unit Type B must be installed to manage the number of copies to
be printed. For more information about installing the User Account Enhance Unit Type B, see "User
Account Enhance Unit Type B" in the Option Setup Guide.
A Run SmartNetMonitor for Admin.
B Click the [Group] menu, point to [Search Device], and then select [TCP/IP] or [IPX/SPX].
A list of printer appears.
Note
❒ Select the protocol of the printer you want to change its configuration.
C On the list, Select a printer whose statistics information you want to manage.
D From the [Tools] menu, select [User Management Tool].
The screen that prompts you to type a password appears.
E Type the password, and then click [OK].
Note
❒ The factory default password is "password".
The User Code Maintenance Tool starts up.
For more information about using the User Management Tool, see SmartNetMonitor for Admin
Help.
Operating Instructions Administrator Reference
99
Configuring the Energy Save Mode
A Run SmartNetMonitor for Admin.
B Click the [Group] menu, point to [Search Device], and then select [TCP/IP] or [IPX/SPX].
A list of printer appears.
Note
❒ Select the protocol of the printer you want to change its configuration.
C Select the device you want to make a setting for.
You do not need to select anything if you want to make a setting for all the devices in the group.
D Click [Group] and point to [Energy Save Mode].
E To make a setting only for the device you have selected, click [Set Individually].
F To make a setting for all the devices in the group, click [Set By Group].
G Then select any energy saver mode from the menu that appears.
Operating Instructions Administrator Reference
100
Setting a Password
A Run SmartNetMonitor for Admin.
B Click the [Group] menu, point to [Search Device], and then select [TCP/IP] or [IPX/SPX].
A list of printer appears.
Note
❒ Select the protocol of the printer you want to change its configuration.
C On the list, Select a printer you want to change its configuration.
D From the [Tools] menu, select [NIB Setup Tool].
The NIB Setup Tool starts up.
Note
❒ To prevent the Network Interface Board configuration from being changed accidentally by someone other than the network administrator, you can set a password in [NIB Setup Tool] that is different from the network password. Click [Option] to set a password in [NIB Setup Tool].
E Select [Property Sheet], and then click [OK].
F Click the [Password] tab.
G Click [Change Password], and enter a password, and then click [OK].
Operating Instructions Administrator Reference
6. Using a Web Browser
101
The Network Interface Board functions as a Web server or as a network printer. You can use a Web
browser to view the printer status and configure the Network Interface Board.
❖ Configuring the printer
This requires the TCP/IP protocol to be installed. After the printer has been configured to use the
TCP/IP protocol, it will be possible to adjust the settings using a Web browser.
Reference
For more information about configuring the printer to use the TCP/IP protocol, see “CONFIGURING THE PRINTER FOR THE NETWORK” in the Quick Installation Guide.
❖ Operating system browser requirements
OS
Browser
Windows 95/98/Me
Windows 2000
Windows XP
Windows NT 4.0
Microsoft Internet Explorer 4.01 or later
Netscape Navigator 4.06 or later
Mac OS 8.1 or later
Mac OS X v10.1
Solaris 2.5/2.6/2.7/7/8
Limitation
❒ Sometimes after clicking [Back] , the previous page may not appear. In this case, click [Refresh]
or [Reload] .
❒ The text on the screen may disappear or be aligned incorrectly if the font size settings of the
browser are too large. It is recommended that you use a font size equal to or smaller than "10
points" with Netscape Navigator, and "Medium" or smaller with Internet Explorer.
Operating Instructions Administrator Reference
102
Going to the Top Page
After launching the Web Browser, type the IP address of the printer. See the example below. This example is for the English version.
http://192.168.15.16/
(In this example, the IP address of the Network Interface Board is 192.168.15.16.)
Note
❒ If a DNS server is used on the network, you can type the host name as an URL. For example, http://webmonitor.netprinter.com/. In order to do this, you must register the IP address and the host
name of the Network Interface Board with the DNS server. Consult the network administrator for information about how to do this.
❒ When you use the proxy server, you must set up the proxy server address for the Web browser you
are using. Consult the network administrator for information about how to set the proxy server.
1. Header Buttons
You can register favorite URLs with [URL]. To
view the Help section, click [Help].
Important
❒ It costs to use the browser to access a Website.
Note
❒ The Help file is stored in the following folder
on the CD-ROM in HTML format. The third
folder, "(Language)" may be substituted by
an appropriate language name.
\HELP\WSMHLP\(Language)\
Operating Instructions Administrator Reference
103
2. Menu Buttons
Buttons to configure the Network Interface Board
and confirm the status of the printer.
Note
❒ When you click [Network Config], a dialog
box appears requesting the user name and
a password. Type only the password in this
dialog box. The factory default password is
"password".
❒ The password is the same as that used for
remote maintenance and that used in the
NIB Setup Tool. If you change a password
with the Web browser, other passwords are
also changed.
3. Status
Displays the name and comments of the Network
Interface Board, and the printer status.
Configuring the Network Interface Board Settings
A Start the Web browser.
B Point your browser at the URL or IP address of the printer (e.g. http://XXX.XXX.XXX.XXX
where the Xs are the number of the IP address).
The status of the printer you chose appears on the Web browser.
C Click [Configuration].
The dialog box for entering the password and user name is displayed.
D Enter your user name and password, and then click [OK].
To use the factory default account, enter no user name and type "password" for the password.
Operating Instructions Administrator Reference
104
E Click the item you want to configure, and then make all the settings.
The following items can be configured:
❖ [General]
Configure the general settings for the machine here.
❖ [TCP/IP]
Configure the TCP/IP-related settings for the Network Interface Board, the optional 802.11b Interface Unit, and the optional 1394 Interface Unit.
❖ [SNMP]
Configure the appropriate community settings here. Up to 10 types of community names can be
registered.
❖ [NetWare]
Configure the settings for printing in a NetWare environment here.
❖ [AppleTalk]
Configure the Network Interface Board or the optional 802.11b Interface Unit settings related to
the AppleTalk protocol.
❖ [NetBEUI]
Configure the Network Interface Board or the optional 802.11b Interface Unit settings related to
the NetBEUI protocol here.
❖ [IEEE 1394]
Configure the optional 1394 Interface Unit settings related to IP over 1394 and SCSI print (SBP-2).
Limitation
❒ This page is displayed when the optional 1394 Interface Unit is installed.
Operating Instructions Administrator Reference
105
❖ [IPP Authentication]
If using the IPP protocol, configure the authentication settings for printing here.
❖ [Paper Type]
Select the paper type loaded in the machine from the drop-down menu.
❖ [Password]
Follow the procedure below to change the password.
Enter the password to change the network and machine settings or delete spooled print jobs.
❖ [IEEE 802.11b (Wireless LAN)]
Configure the optional 802.11b Interface Unit settings related to communication.
Limitation
❒ This page is displayed when the optional 802.11b Interface Unit is installed.
Verifying the Network Interface Board Settings
A Start the Web browser.
B Point your browser at the URL or IP address of the printer (e.g. http://XXX.XXX.XXX.XXX
where the Xs are the number of the IP address).
The status of the printer you chose appears on the Web browser.
C Click [Config. Reference].
The dialog box for entering the password and user name is displayed.
Operating Instructions Administrator Reference
106
D Click the item you want to check.
The following items can be checked:
❖ [General]
Shows general settings for the machine.
❖ [TCP/IP]
Shows the TCP/IP-related settings for the Network Interface Board, the optional 802.11b Interface Unit, and the optional 1394 Interface Unit.
❖ [NetWare]
Shows the settings for printing in a NetWare environment.
❖ [AppleTalk]
Shows the Network Interface Board or the optional 802.11b Interface Unit settings related to the
AppleTalk protocol.
❖ [NetBEUI]
Shows the Network Interface Board or the optional 802.11b Interface Unit settings related to the
NetBEUI protocol.
❖ [IEEE 1394]
Shows the optional 1394 Interface Unit settings related to IP over 1394 and SCSI print (SBP-2).
❖ [IEEE 802.11b (Wireless LAN)]
Shows the optional 802.11b Interface Unit settings related to communication.
Operating Instructions Administrator Reference
107
- Linking the address (URL) to the [Help] button
You can link the address (URL) of the [Help] button to the Help files on the computer or on a Web server.
A Copy the Help files on the CD-ROM to a desired location. The Help files are located in folders labeled with abbreviated language names. For example, English Help files are in the [EN] folder. Be
sure to copy the entire [EN] folder to the new location.
B Using a Web browser, navigate to the Top Page, and then click [Network config].
C Type your password, (it is not necessary to type a user name), and then click [OK].
D Type the path to the Help files in the [Help URL] box.
If you copied the Help files to "C:\HELP\EN", type "file://C:/HELP/". For example if you copied
the files to a Web server and the index URL is "http://a.b.c.d/HELP/EN/index.html", type "http://a.b.c.d/HELP/".
E Click [Apply].
When a warning message appears, select to continue the configuration.
Operating Instructions Administrator Reference
7. Monitoring and Configuring the Printer
Changing Names and Comments
You can change printer names and make a comment on printers to easily identify the printers listed on
SmartNetMonitor for Client.
The following utilities are used to change printer names and comments.
❖ SmartNetMonitor for Admin
Allows you to change names and comments when the TCP/IP protocol or IPX/SPX protocol is
available. You can install SmartNetMonitor for Admin from the CD-ROM that comes with the
printer. For more information about installing SmartNetMonitor for Admin, see p.84 “Installing
SmartNetMonitor for Admin”.
❖ Web Browser
Allows you to change names and comments when the TCP/IP protocol is available.
Note
❒ Each of the names, in a TCP/IP protocol form (printer name) and in a NetBEUI protocol form, is
changed individually. Comments are, however, common to both of them.
❒ The factory default name consists of "RNP" and the last 3 bytes of the MAC address on the Network Interface Board. For example, when the MAC address is 00:00:74:62:7D:D5, the factory
default name is "RNP627DD5". Comments are not configured.
108
Operating Instructions Administrator Reference
109
SmartNetMonitor for Admin
A Run SmartNetMonitor for Admin.
B Click the [Group] menu, point to [Search Device], and select [TCP/IP] or [IPX/SPX]. A list of printers appears.
Note
❒ Select the protocol of the printer you want to change its configuration.
C On the list, Select a printer whose Network Interface Board you want to change its configuration.
D From the [Tools] menu, select [NIB Setup Tool].
The NIB Setup Tool starts up.
E Select [Property Sheet], and then click [OK].
TCP/IP
A Click the [General] tab, and then type the device name into the [Device Name] box and comment into the [Comment] box.
• In the [Device Name] box, type the name of the printer within 13 characters. The factory default name consists of "RNP" and the last 3 bytes of the MAC address on the Network Interface Board. For example, when the MAC address is 00:00:74:62:7D:D5, the factory default
name is "RNP627DD5". No name of 9 characters is permitted if the prefix is "RNP". Also,
when DHCP is selected as an IP address setting, the number of characters is limited to 13
characters.
• In the [Comment] box, type any comment on printers within 31 characters.
Operating Instructions Administrator Reference
110
NetBEUI
A Click the [General] tab, and then type the comment into the [Comment] box.
In the [Comment] box, type any comment on printers within 31 characters.
B Click the [NetBEUI] tab.
C Type the computer name into the [Computer Name] box.
• In the [Computer Name] box, type the name that helps you to identify printers using the NetBEUI protocol. The factory default name consists of "RNP" and the last 3 bytes of the MAC
address on the Network Interface Board. For example, when the MAC address is
00:00:74:62:7D:D5, the factory default name is "RNP627DD5". A maximum of 13 characters consisting of uppercase English letters, numeric, or symbols (except "*+,/:;<=>?[\]|. and
space) can be used. No name is permitted if the prefix is "RNP". You must avoid the duplication of the same name on a network.
F Click [OK].
The NIB Setup Tool exits, and the setting is transmitted to the printer.
G Exit SmartNetMonitor for Admin.
Operating Instructions Administrator Reference
111
Web Browser
A Run the Web browser.
B Type the address "http:// (IP address of the printer you want to change the settings)".
The status of the selected printer is displayed on the Web browser.
C Click [Configuration].
A dialog box that prompts you to type the user name and a password appears.
D Type the user name and the password, and then click [OK].
Type only the password in this dialog box. The factory default password is "password".
E Change names and comments.
TCP/IP
A Click the [General] tab, and then type the name into the [Printer Name] box and comment
into the [Comment] box.
• In the [Printer Name] box, type the name of the printer within 13 characters. The factory default name consists of "RNP" and the last 3 bytes of the MAC address on the Network Interface Board. For example, when the MAC address is 00:00:74:62:7D:D5, the factory default
name is "RNP627DD5". No name of 9 characters is permitted if the prefix is "RNP". Also,
when DHCP is selected as an IP address setting, the number of characters is limited to within
13 characters.
• In the [Comment] box, type any comment on printers within 31 characters.
Operating Instructions Administrator Reference
112
B Click the [IEEE 1394], and then type the name into the [Device Name:] box when you change
the device name for IEEE 1394 (IP over 1394) interface.
• In the [Device Name:] box, type the name of the printer within 13 characters. The factory default name consists of "RNP" and the last 5 bytes of the EUI-64 on the IEEE 1394 (IP over
1394) interface. For example, when the EUI-64 is 00:00:74:00:02:01:0A:66, the factory default name is "RNP0002010A66". No name of 13 characters is permitted if the prefix is
"RNP".
NetBEUI
A Click [NetBEUI].
B Type the name into the [Computer Name] box and comment into the [Comment] box.
• In the [Computer Name] box, type the name that helps you to identify printers using the NetBEUI protocol. The factory default name consists of "RNP" and the last 3 bytes of the MAC
address on the Network Interface Board. For example, when the MAC address is
00:00:74:62:7D:D5, the factory default name is "RNP627DD5". A maximum of 13 characters consisting of uppercase English letters, numeric, or symbols (except "*+,/:;<=>?[\]|. and
space) can be used. No name is permitted if the prefix is "RNP". You must avoid the duplication of the same name on a network.
F Click [Apply].
The setting is transmitted to the printer.
G Exit the Web browser.
Operating Instructions Administrator Reference
113
Displaying the Status of Printer
You can view the status of printers using SmartNetMonitor for Admin, SmartNetMonitor for Client, or
Web browser.
SmartNetMonitor for Admin
A Run SmartNetMonitor for Admin.
B Click the [Group] menu, point to [Search Device], and then select [TCP/IP] or [IPX/SPX].
The status of printers is indicated with an icon in the list.
Note
❒ For more information about the status icons, see SmartNetMonitor for Admin Help.
C Getting further information, click the desired printer to select from the list, and then click
[Open] on the [Device] menu.
The status of the printer is displayed on the dialog box.
Note
❒ For more information about each item on the dialog box, see Help.
Operating Instructions Administrator Reference
114
SmartNetMonitor for Client
Viewing the status of printers using SmartNetMonitor for Client, you must, in advance, configure
SmartNetMonitor for Client so it monitors the printer whose status you want to view.
Monitoring Printers
A Run SmartNetMonitor for Client.
The SmartNetMonitor for Client icon appears at the right end of the taskbar.
B Right-click the SmartNetMonitor for Client icon, and check if the desired printer is configured on the pop-up menu that appears.
If it is configured, see p.115 “Displaying the Status of Printers”.
C If the desired printer is not configured, click [Options] on the pop-up menu.
The [SmartNetMonitor for Client - Options] dialog box appears.
D Click the printer to be monitored, and select the [To Be Monitored] check box from the [Monitoring Information Settings] group.
Note
❒ Selecting the [Displayed on Task Bar] check box will bring up the status of a printer with an icon on
the SmartNetMonitor for Client icon on the task tray.
E Click [OK].
The dialog box closes and the configured printer is monitored.
Operating Instructions Administrator Reference
115
Displaying the Status of Printers
A Run SmartNetMonitor for Client.
B The status of printers is displayed on the SmartNetMonitor for Client icon on the task tray.
Note
❒ For more information about the status icons, see Help.
C Getting further information on the status, right-click the SmartNetMonitor for Client icon,
and then click the desired printer.
The status of the printer is displayed on the dialog box.
Note
❒ For more information about each item on the dialog box, see Help.
Web Browser
A Run the Web browser.
B Type the address "http:// (IP address of the printer whose status you want to view)".
The status of the selected printer is displayed on the Web browser.
C Click [Status] and you can check the status of the printer.
Note
❒ For more information about each item, see Help.
Operating Instructions Administrator Reference
8. Making Printer Settings with the Control Panel
Menu Chart
This section describes how to change the default settings of the printer and provides information about
the parameters included in each menu.
Category
Function Menu
Sample Print
*1
Select Action / Error File(s)
Locked Print
*1
Select Action / Error File(s)
Paper Input ⇒ p.122
Bypass Size
Paper Type
Tray Locking
Tray Priority
List/Test Print ⇒ p.129
Config. Page
Menu List
Color Demo Page
PS Config. Page
PCL Config.Page
Hex Dump
Maintenance ⇒ p.136
Color Regist.
Image Density
Registration
PlainPaper Type
116
Operating Instructions Administrator Reference
117
Category
Maintenance ⇒ p.136
Function Menu
Maint. Reset
HDD Format *2
ROM Update *3
4C.Graphic Mode
WL.LAN Signal *4
WL.LAN Defaults
Print Area
Key Repeat
Menu Protect *5
Series Prnt.Job *5
System ⇒ p.149
MisfeedRecovery
Prt. Err Report
Auto Continue
Memory Overflow
Copies
Printer Lang.
Sub Paper Size
Page Size
Duplex *6
Operating Instructions Administrator Reference
118
Category
System ⇒ p.149
Function Menu
Energy Saver 1
E. Saver2 Timer
Unit of Measure
Resolution
B&W Page Detect
Spool Printing *2
Letterhead Mode *5
E.Saver2 OnOff *5
Host Interface ⇒ p.159
I/O Buffer
I/O Timeout
Network Setup *7
IEEE 1394 Setup *8
IEEE 802.11b *9
USB Setting *5
Operating Instructions Administrator Reference
119
Category
PCL Menu ⇒ p.171
Function Menu
Orientation
Form Lines
Font Source
Font Number
Point Size
Font Pitch
Symbol Set
Ext. A4 Width
Append CR to LF
Language ⇒ p.177
*1
*2
*3
*4
*5
*6
*7
*8
*9
The "Sample Print" menu and the "Locked Print" menu appear only when the optional Printer Hard Disk
is installed.
The “HDD Format” and the "Spool Printing" menu appears only when the optional Printer Hard Disk is
installed.
ROM Update is not currently used.
The "WL.LAN Signal" menu appears only when "IEEE 802.11b" is selected in "LAN Type" in the Host
Interface menu.
While the printer is On Line, press the {Enter #}
} key, and then press the {Escape}
} key, finally press the
{Menu}
} key. You can access the "Menu Protect", "Series Prnt.Job" "Letterhead Mode", "E.Saver2
OnOff", "USB Setting" on the panel display.
The “Duplex” menu appears only when the optional AD440 is installed.
The “Network Setup” menu appears only when the optional Network Interface Unit or 802.11b Interface
Unit is installed.
The “IEEE 1394 Setup” menu appears only when the optional 1394 Interface Unit is installed.
The “IEEE 802.11b” menu appears only when the optional 802.11b Interface Unit is installed.
Operating Instructions Administrator Reference
120
Accessing the Main Menu
Press the {Menu}
} key, and "Menu" appears on the panel display.
ZHBS010E
This menu shows the following 9 items which can be displayed one by one by pressing the {U} or {T} key.
• Sample Print
• Locked Print
• Paper Input
• List/Test Print
• Maintenance
• System
• Host Interface
• PCL Menu
• Language
Note
❒ If the optional Printer Hard Disk is not installed, the "Sample Print" menu and the "Locked Print"
menu cannot be displayed on the control panel.
Operating Instructions Administrator Reference
121
❒ {T}: Press to go to the next page.
❒ {U}: Press to go back to the previous page.
❒ After making the printer settings, be sure to return to the previous menu by pressing the {Escape}
} key.
ZHBS020E
❒ After making the printer settings, press the {On Line}
} key to return to the "Ready" condition.
ZHBS050E
❒ The revised settings are not canceled even if the power switch is turned off.
Operating Instructions Administrator Reference
122
Paper Input Menu
There are 4 menu items in the "Paper Input" menu.
• Bypass Size
• Paper Type
• Tray Locking
• Tray Priority
Reference
For more information about loading paper in the tray, see the Option Setup Guide.
Paper Input Parameters
Menu
Bypass Size
Description
The paper size for the bypass tray.
For more information about paper sizes that can be set in the bypass tray, see "Paper and Other Media Supported by This Printer" in the Maintenance Guide.
8 1/2 x 14, 8 1/2 x 11, 5 1/2 x 8 1/2, 7 1/4 x 10 1/2, 8 x 13, 8 1/2 x 13, 8 1/4 x 13,
A4 (210x297), B5JIS (182x257), A5 (148x210), A6 (105x148), 16K (195x267),
4 1/8 x 9 1/2, 3 7/8 x7 1/2, C5 Env(162x229), C6 Env(114x162), DL
Env(110x220), Custom Size
Note
❒ Default: A4 (210x297) (Metric version), 11 x 8 1/2 (Inch version)
Operating Instructions Administrator Reference
123
Menu
Paper Type
Description
If you use different kinds of paper, set the paper type for Tray 1, Tray 2, Tray 3
or Bypass Tray.
For more information about paper sizes that can be set in each tray, see the Maintenance Guide.
❖ Tray 1, Tray 2, Tray 3
Plain Paper, Recycled Paper, Special Paper, Color Paper, Letterhead, Preprinted, Prepunched, Bond Paper
❖ Bypass Tray
Plain Paper, Recycled Paper, Special Paper, Color Paper, Letterhead, Preprinted, Prepunched, Labels, Bond Paper, Cardstock, Transparency, Thick
Paper, Thick:Dup.Back, Glossy Paper
Note
❒ Default : Plain Paper
❒ Only the installed trays appear on the panel display.
Operating Instructions Administrator Reference
124
Menu
Tray Locking
Description
If you use different kinds of paper, you can lock a tray to prevent printing on
wrong paper such as letterhead or colored paper. When "Auto Select" is selected
in the Paper Source selections from the printer driver, the locked tray will not be
used. You can select each tray set to on or off.
Tray 1, Tray 2, Tray 3
Note
❒ Default : Off
❒ Only the installed trays appear on the panel display.
❒ You can lock multiple trays.
❒ If you want to use the locked tray, you must select the tray from the
printer driver and the control panel each.
❒ When a locked tray is selected from the printer driver, the printer
does not search for another tray.
Tray Priority
You can set which tray should be checked first when "Auto tray Select" is selected in the Paper Source selections from the printer driver. When printing from
DOS, the tray selected here is used when no tray is selected for a print job.
Tray 1, Tray 2, Tray 3
Note
❒ Default : Tray 1
❒ Only the installed trays appear on the panel display.
❒ It is recommended that you load paper of the size and direction you
most frequently use in the tray selected with "Tray Priority".
Operating Instructions Administrator Reference
125
Changing the Paper Input Menu
Tray Locking
A Press the {Menu}} key.
ZHBS010E
"Menu" appears on the panel display.
B Press the {U} or {T} key to display "Paper Input", and then press the {Enter #}} key.
Menu:
Paper Input
Operating Instructions Administrator Reference
126
C Press the {U} or {T} key to display "Tray Locking", and then press the {Enter #}} key.
Paper Input:
Tray Locking
D Press the {U} or {T} key to display the tray to change the tray locking off, and then press the
{Enter #}
} key.
Tray Locking:
Tray 1
Note
❒ The Bypass Tray would not be locked.
E Press the {U} or {T} key to display "Off", and then press the {Enter #}} key.
Tray 1:
*Off
Wait for two seconds.
"Paper Input" appears on the panel display.
F Press the {On Line}} key.
"Ready" appears on the panel display.
Operating Instructions Administrator Reference
127
Tray Priority
A Press the {Menu}} key.
ZHBS010E
"Menu" appears on the panel display.
B Press the {U} or {T} key to display "Paper Input", and then press the {Enter #}} key.
Menu:
Paper Input
C Press the {U} or {T} key to display "Tray Priority", and then press the {Enter #}} key.
Paper Input:
Tray Priority
D Press the {U} or {T} key to select the tray type you want to use.
Operating Instructions Administrator Reference
128
E Press the {Enter #}} key. Wait for two seconds.
"Menu" appears on the panel display.
F Press the {On Line}} key.
ZHBS050E
"Ready" appears on the panel display.
Ready
Operating Instructions Administrator Reference
129
List/Test Print Menu
There are 6 menu items in the "List/Test Print" menu.
• Config. Page
• Menu List
• Color Demo Page
• PS Config. Page
• PCL Config.Page
• Hex Dump
List/Test Print Parameters
Menu
Description
Config. Page
You can print the current configuration of the printer. See p.130 “Printing a Configuration Page”.
Menu List
You can print the Menu List which shows the function menus of this printer.
Color Demo Page
You can print the Color Demo Page.
PS Config. Page
You can print a list of the installed PS Fonts.
PCL Config.Page
You can print the current configuration of the PCL.
Hex Dump
You can print the Hex Dump.
Operating Instructions Administrator Reference
130
Printing a Configuration Page
Reference
For more information, see p.133 “Interpreting the Configuration Page”.
A Press the {Menu}} key.
ZHBS010E
"Menu" appears on the panel display.
B Press the {T} or {U} key to display the "List/Test Print" menu.
Menu:
List/Test Print
Operating Instructions Administrator Reference
131
C Press the {Enter #}} key.
ZHBS040E
The following message appears on the panel display.
List/Test Print:
Config. Page
D Press the {Enter #}} key.
The following message appears on the panel display.
Printing...
In a short time, the printing of the configuration page will start.
Important
❒ If you cannot print the configuration page, check for an error message appears on the panel display. For more information about error messages, see "Troubleshooting" in the Maintenance
Guide.
Operating Instructions Administrator Reference
132
E Press the {On Line}} key.
ZHBS050E
"Ready" appears on the panel display.
Ready
Operating Instructions Administrator Reference
133
Interpreting the Configuration Page
System Reference
❖ Printer ID
Shows the serial number assigned to the board by its manufacturer.
❖ Firmware Version
• Firmware
Shows the version number of the printer controller firmware.
• Engine
Shows the version number of the printer engine firmware.
• NCS
Shows the version number of the Network Interface Board.
❖ Pages Printed
Shows the total number of pages printed by the printer to date.
❖ Total Memory
Shows the total amount of memory (SDRAM) installed on the printer.
❖ Controller Option
The item(s) appears when the controller option(s) is installed.
❖ Printer Language
Shows the version number of the printer language.
Operating Instructions Administrator Reference
134
❖ Options
Shows the options that you installed.
Paper Input
Shows the settings made under the "Paper Input" menu.
Reference
For more information, see p.122 “Paper Input Menu”.
Maintenance
Shows the settings made under the “Maintenance” menu.
Reference
For more information, see p.136 “Maintenance Menu”.
System
Shows the settings made under the "System " menu.
Reference
For more information, see p.149 “System Menu”.
Operating Instructions Administrator Reference
135
PCL Menu
Shows the settings made under the "PCL Menu".
Reference
For more information, see p.171 “PCL Menu”.
Host Interface
Shows the settings made under the "Host Interface" menu.
When DHCP is active on the network, the actual IP Address, Subnet Mask and Gateway Address appear in parentheses on the configuration page.
Reference
For more information about the "Host Interface" menu, see p.159 “Host Interface Menu”.
Interface Information
Shows the interface information.
Error Log
Shows the log of printer errors.
Operating Instructions Administrator Reference
136
Maintenance Menu
There are 13 menu items in the "Maintenance" menu.
• Color Regist.
• Image Density
• Registration
• PlainPaper Type
• Maint. Reset
• HDD Format
• ROM Update
• 4C.Graphic Mode
• WL.LAN Signal
• WL.LAN Defaults
• Print Area
• Key Repeat
• Menu Protect
• Series Prnt.Job
Operating Instructions Administrator Reference
137
Maintenance Menu Parameters
Menu
Color Regist.
Description
You can adjust the color alignment for each color (black, cyan, magenta, yellow)
Reference
For more information about how to registration, see "Adjusting the
Color Registration" in the Maintenance Guide.
Image Density
❖ Prt. Test Sheet
You can print the registration test sheet.
❖ Black, Cyan, Magenta, Yellow
You can specify per color the image density in the range of -10 to +10.
❖ Reset→
→Defaults
This function returns settings to their default values.
Operating Instructions Administrator Reference
138
Menu
Registration
Description
❖ Prt. Test Sheet
You can print the registration test sheet.
Tray 2, Tray 3, Duplex.BackSide
❖ Adjustment
You can select the start position for printing on page.
Horiz.: Tray 2, Horiz.: Tray 3, Horiz.:Dup.Back
-15 to +15 (by 1)
One step is 1/300 inch (0.8 mm)
Note
❒ The registration values are not default.
❒ Only the installed trays appear on the panel display.
PlainPaper Type
You can select the type of plain paper you wish to use as a default.
❖ Tray 1, Tray 2, Tray 3, Bypass Tray
Maint. Reset
•
Thin
•
Normal
Maintenance Reset allows the user to reset each internal unit counters such as the
Transfer Belt and Fusing Unit. These counters can be reset at anytime, but are
necessary at the time of unit reinstallation.
For more information, see "Replacing Consumables" in the Maintenance Guide.
HDD Format
You can format the Printer Hard Disk.
Available when the optional Printer Hard Disk is installed.
Reference
For more information about formatting the Printer Hard Disk, see
"Printer Hard Disk Type 3000" in the Option Setup Guide.
Operating Instructions Administrator Reference
139
Menu
Description
ROM Update
This menu is not currently used.
4C.Graphic Mode
This setting adjusts how much each color of toner overlaps when printing. If
characters or lines are blurred, selecting [Text Priority] may make them clearer.
Select [Photo Priority] for normal use.
Note
❒ Default:Photo Priority
WL.LAN Signal
You can check the signal strength when using the wireless LAN.
Reference
For more information about displaying the signal strength. See
p.144 “Displaying the Signal Strength”.
WL.LAN Defaults
You can reset the wireless LAN settings to the default.
Print Area
You can extend the printable area by about 2.5 mm (0.01 inch).
•
Normal
•
Enlarge Area
Note
❒ Default:Normal
Key Repeat
The default setting [On] enables the user to scroll through menu items and settings by holding the key down continuously, the [Off] setting requires the user to
press the key for each Cursor/Scroll movement.
Operating Instructions Administrator Reference
140
Menu
Menu Protect *1
Description
This procedure lets you protect menu settings against accidental changes. It
makes it impossible to change the menu settings you make with the normal procedure unless you perform the required key operation. In a network environment,
protecting settings restricts changes to menu settings to network administrators.
•
Level 1
•
Level 2
•
Off
Note
❒ While the printer is On Line, press the {Enter #}
} key, and then press
the {Escape}
} key, finally press the {Menu}
} key. You can access the
"Menu Protect" menu on the panel display.
❒ You can protect the "Maintenance", "System ", "Host Interface"
and "Language" menu on Level 1.
❒ You can protect the "Paper Input", "Maintenance", "System ",
"Host Interface" and "Language" menu on Level 2.
Series Prnt.Job *1
You can print series of print jobs without time intervals between them when jobs
are sent from the same computer, PDL, and interface.
Note
❒ Default: On
❒ When the Job Reset key is pressed, all jobs sent to the machine
will be canceled.
*1
While the printer is On Line, press the {Enter #}
} key, and then press the {Escape}
} key. Finally, press the
} key. You can access the "Menu Protect", and "Series Prnt.Job" menu on the panel display.
{Menu}
Operating Instructions Administrator Reference
141
Changing the Maintenance Menu
Protecting the menus
A Check if the On Line indicator is on. If not, press the {On Line}} key to enter the "Ready" condition.
B Press the {Enter #}} key, then the {Escape}} key, and then the {Menu}} key.
ZHBS060E
"Menu" appears on the panel display.
Operating Instructions Administrator Reference
142
C Press the {U} or {T} key to display the "Maintenance" menu, and then press the {Enter #}}
key.
The following message appears on the panel display.
Maintenance:
Color Regist.
D Press the {U} or {T} key to display "Menu Protect".
Maintenance:
Menu Protect
E Press the {Enter #}} key.
The following message appears on the panel display.
Menu Protect:
*Off
F Press the {U} or {T} key to select the levels desired, and then press the {Enter #}} key. Wait
for two seconds.
"Maintenance" appears on the panel display.
Operating Instructions Administrator Reference
143
G Press the {On Line}} key.
ZHBS050E
"Ready" appears on the panel display.
Ready
Removing Protect
A Check if the On Line indicator is on. If not, press the {On Line}} key to enter the "Ready" condition.
B Press the {Enter #}} key, then the {Escape}} key, and then the {Menu}} key.
"Menu" appears on the panel display.
Operating Instructions Administrator Reference
144
C Press the {U} or {T} key to display "Maintenance" menu, and then press the {Enter #}} key.
The following message appears on the panel display.
Maintenance:
Color Regist.
D Press the {U} or {T} key to display "Menu Protect", and then press the {Enter #}} key.
E Press the {U} or {T} key to display "Off", and then press the {Enter #}} key. Wait for two seconds.
"Maintenance" appears on the panel display.
F Press the {On Line}} key.
"Ready" appears on the panel display.
Displaying the Signal Strength
If you need to check the IEEE 802.11b (Wireless LAN) signal, select "WL.LAN Signal" in the "Maintenance" menu.
A Press the {Menu}} key.
“Menu” appears on the panel display.
B Press the {T} or {U} key to display the “Maintenance” menu.
Menu:
Maintenance
Operating Instructions Administrator Reference
145
C Press the {Enter #}} key.
The following message appears on the panel display.
Maintenance:
Color Regist.
D Press the {T} or {U} key to display "WL.LAN Signal".
Maintenance:
WL.LAN Signal
E Press the {Enter #}} key.
One of the following messages appears on the panel display.
WL.LAN Signal
Good
100%
WL.LAN Signal
Fair
50%
WL.LAN Signal
Poor
30%
WL.LAN Signal
Unavailable 18%
Operating Instructions Administrator Reference
146
Note
❒ If "WL.LAN Signal" is not displayed, "IEEE 802.11b" has not been selected for "LAN Type" in
"Network Setup" of the Host Interface menu. Select "IEEE 802.11b" for "LAN Type", and then
check the "WL.LAN Signal" in the Maintenance menu again.
❒ If "802.11 Ad hoc" or "Ad hoc" in "Comm. Mode" of "IEEE 802.11b" in the Host Interface menu
is selected, you cannot check the signal. Select "Infrastructure" and then check it again.
❒ Every time you press the {Enter #}
} key, the signal is updated.
❒ The signal is indicated as "Good" if the signal strength is 76-100%, "Fair" if the strength is 4175%, "Poor" if the strength is 21-40%, and "Unavailable" if the strength is 0-20%. If the signal is
unstable or unavailable, remove obstacles or move the printer to a place where the signal can
be received.
❒ Using wireless devices or microwave sources near the printer might affect the signal.
F Press the {Escape}} key.
G Press the {On Line}} key.
“Ready” appears on the panel display.
Ready
Operating Instructions Administrator Reference
147
Resetting the IEEE 802.11b (Wireless LAN) Settings
If you need to reset the wireless LAN setting, select "WL.LAN Defaults" in the Maintenance menu.
Note
❒ The five items that can be reset in "IEEE 802.11b" of the Host Interface menu are "Comm. Mode",
"Channel", "Trans. Speed", " WEP Setting ", and "SSID".
A Press the {Menu}} key.
“Menu” appears on the panel display.
B Press the {T} or {U} key to display the “Maintenance” menu.
Menu:
Maintenance
C Press the {Enter #}} key.
The following message appears on the panel display.
Maintenance:
Color Regist.
D Press the {T} or {U} key to display "WL.LAN Defaults".
Maintenance:
WL.LAN Defaults
Operating Instructions Administrator Reference
148
E Press the {Enter #}} key.
WL.LAN Defaults
Reset→Defaults
F Press the {Enter #}} key.
The following message appears on the panel display.
Defaults reset
The wireless LAN setting value is reset.
“Ready” appears on the panel display.
Ready
Operating Instructions Administrator Reference
149
System Menu
There are 14 menu items in the "System " menu.
• MisfeedRecovery
• Prt. Err Report
• Auto Continue
• Memory Overflow
• Copies
• Printer Lang.
• Sub Paper Size
• Page Size
• Duplex
• Energy Saver 1
• E. Saver2 Timer
• Unit of Measure
• Resolution
• B&W Page Detect
• Spool Printing
• Letterhead Mode
• E.Saver2 OnOff
Operating Instructions Administrator Reference
150
System Parameters
Menu
MisfeedRecovery
Description
You can select whether Misfeed Recovery is enabled. When it is on, printing restarts after the misfed paper has been cleared.
•
On
•
Off
Note
❒ Default: On
Prt. Err Report
You can select whether or not to have an error report printed when a printer error
or memory error occurs.
•
On
•
Off
Note
❒ Default: Off
Operating Instructions Administrator Reference
151
Menu
Auto Continue
Description
You can set whether Auto Continue is enabled. When it is on, printing continues
after a system error occurs.
•
Off
•
0 minutes
•
1 minute
•
5 minutes
•
10 minutes
•
15 minutes
Note
❒ Default: Off
❒ When it is on, and certain types of error occur, the current job might
be canceled, and the machine automatically resumes the next job.
Memory Overflow
You can select whether the memory overflow error report should be printed.
•
Not Print
•
Error Report
Note
❒ Default: Not Print
Printer Lang.
You can specify how many pages to print.
This setting is disabled if the number of pages to print has been specified with the
printer driver or a command.
•
1-999
Operating Instructions Administrator Reference
152
Menu
Printer Lang.
Description
You can specify the printer language.
•
Auto Detect
•
PCL
•
PS
Note
❒ Default: Auto Detect
Sub Paper Size
You can enable the Sub Paper Size feature. When you select "Auto ", the printer
substitutes the paper of a certain size which is to be an alternative if the paper currently specified is not loaded. When you select "Off", the printer uses the paper
in the current specified paper input tray regardless of its size.
•
Auto
•
Off
Note
❒ Default: Off
Page Size
You can specify the default paper size.
8 1/2 x 14, 8 1/2 x 11, 5 1/2 x 8 1/2, 7 1/4 x 10 1/2, 8 x 13, 8 1/2 x 13, 8 1/4 x 13,
A4, B5, A5, A6, 16K, 4 1/8 x 9 1/2, 3 7/8 x7 1/2, C5 Env(162x229), C6
Env(114x162), DL Env(110x220), Custom Size
Note
❒ Default:
•
Metric: A4
•
Inch: 8 1/2 x 11
Operating Instructions Administrator Reference
153
Menu
Duplex
Description
You can select whether you want to print on both sides of each page.
•
Off
•
Short Edge Bind
•
Long Edge Bind
Note
❒ Default: Off
❒ This menu appears only when the optional AD440 is installed.
Energy Saver 1
You can set On/Off for the Energy Save Mode level 1. This is Preheat mode.
•
On
•
Off
Note
❒ Default: On
❒ When the printer switches to Energy Saver mode, the Power indicator turns off, while the On Line indicator stays on.
E. Saver2 Timer
You can set how many minutes the printer waits before switching to Energy Saver mode. Energy Saver mode reduces electric power consumption.
5 minutes, 15 minutes, 30 minutes, 45 minutes, 60 minutes.
Note
❒ Default: 60 minutes
❒ When the printer switches to Energy Saver mode, the Power indicator turns off, while the On Line indicator stays on and "Energy
Save Mode" is displayed on the panel display.
Operating Instructions Administrator Reference
154
Menu
Unit of Measure
Description
You can select "mm" or "inch" for the custom paper size.
Note
❒ Default: mm (Metric version), inch (Inch version)
Resolution
You can set the print resolution in dots per inch.
❖ PCL
300 x 300 dpi, 600 x 600 dpi
❖ PS3
600 x 600 dpi, 1200 x 1200 dpi, 1200 x 600 dpi
Note
❒ Default: PCL 600 x 600 dpi, PS3 600 x 600 dpi
B&W Page Detect
You can specify whether the Black & White Page Detect feature is enabled.
•
On
•
Off
Note
❒ Default: On
Operating Instructions Administrator Reference
155
Menu
Spool Printing
Description
You can select whether all of the print data is spooled to the Printer Hard Disk
before printing.
•
On
•
Off
Note
❒ Default: Off
❒ Spooling stores the print job sent by a computer temporarily in the
printer, transfers the print job, and then prints it.
❒ This menu appears Only when the optional Printer Hard Disk is installed.
Letterhead Mode *1
You can select the letterhead printing mode.
•
Off
•
Auto Detect
Note
❒ Default: Off
E.Saver2 OnOff *1
You can set On/Off for the Energy Save Mode level 2.
•
On
•
Off
Note
❒ Default: On
*1
While the printer is On Line, press the {Enter #}
} key, and then press the {Escape}
} key. Finally, press the
} key. You can access the "Letterhead Mode", "E.Saver2 OnOff" menu on the panel display.
{Menu}
Operating Instructions Administrator Reference
156
Changing the System Menu
The following example describes how to change the settings for "E. Saver2 Timer".
A Press {Menu}}.
ZHBS010E
"Menu" appears on the panel display.
B Press {U} or {T} to display "System ".
Menu:
System
Operating Instructions Administrator Reference
157
C Press {Enter #}}.
ZHBS040E
The following message appears on the panel display.
System :
MisfeedRecovery
D Press {U} or {T} to display "E. Saver2 Timer", and then press {Enter #}}.
System :
E. Saver2 Timer
Operating Instructions Administrator Reference
158
E Press {U} or {T} to select how many minutes the printer waits before switching to Energy
Saver mode.
The following message appears on the panel display.
E. Saver2 Timer
*30 minutes
F Press {Enter #}}. Wait for two seconds.
"Menu" appears on the panel display.
G Press {On Line}}.
ZHBS050E
"Ready" appears on the panel display.
Ready
Operating Instructions Administrator Reference
159
Host Interface Menu
There are 6 menu items in the "Host Interface" menu.
• I/O Buffer
• I/O Timeout
• Network Setup
• IEEE 1394 Setup
• IEEE 802.11b
• USB Setting
Note
❒ For more information about the "Network Setup", see "Configuring the printer for the Network" in the
Quick Installation Guide.
Operating Instructions Administrator Reference
160
Host Interface Parameters
Menu
I/O Buffer
Description
You can set the size of the I/O Buffer. Normally it is not necessary to change this
setting.
128 KB, 256 KB, 512 KB
Note
❒ Default: 128 KB
I/O Timeout
You can set how many seconds the printer should wait before ending a print job.
If data from another port often appears in the middle of the print job, you should
increase the timeout value.
10 seconds, 15 seconds, 20 seconds, 25 seconds, 60 seconds
Note
❒ Default: 15 seconds
Operating Instructions Administrator Reference
161
Menu
Network Setup
Description
❖ DHCP
You can set how the Network Interface Board acquires TCP/IP settings.
Note
❒ Default: On
Reference
See "Configuring the Printer for the Network" in the Quick Installation Guide.
❖ IP Address
You can set the IP address.
Limitation
❒ When DHCP is On, its setting cannot be changed. If you want
to change the setting, Make the setting for DHCP Off. Consult
the network administrator for information about how to make
the setting for the network.
Note
❒ Default: All zero
Reference
See "Configuring the Printer for the Network" in the Quick Installation Guide.
Operating Instructions Administrator Reference
162
Menu
Description
❖ Subnet Mask
You can set the Subnet mask.
Limitation
❒ When DHCP is On, its setting cannot be changed. If you want
to change the setting, Make the setting for DHCP Off. Consult
the network administrator for information about how to make
the setting for the network.
Note
❒ Default: All zero
Reference
See "Configuring the Printer for the Network" in the Quick Installation Guide.
❖ Gateway Address
You can set the gateway address.
Limitation
❒ When DHCP is On, its setting cannot be changed. If you want
to change the setting, Make the setting for DHCP Off. Consult
the network administrator for information about how to make
the setting for the network.
Note
❒ Default: All zero
Reference
See "Configuring the Printer for the Network" in the Quick Installation Guide.
Operating Instructions Administrator Reference
163
Menu
Description
❖ Frame Type (NW)
You can set the Frame type for NetWare.
Note
❒ Default: Auto
❖ Active Protocol
You can set the active protocol.
TCP/IP, NetWare, NetBEUI, AppleTalk
Note
❒ Default: All Active
Operating Instructions Administrator Reference
164
Menu
Description
❖ Ethernet
You can select the speed of the network that the printer is connected to.
Auto , 10 Mbps, 100 Mbps
Note
❒ Default: Auto
Reference
See "Configuring the Printer for the Network" in the Quick Installation Guide.
❖ LAN Type
You can select Ethernet or IEEE 802.11b for the LAN Type.
Note
❒ Default: Ethernet
❒ Appears Only when the optional 802.11b Interface Unit is installed.
Reference
For more information about Network Setup, see "Configuring
the Printer for the Network" in the Quick Installation Guide.
Operating Instructions Administrator Reference
165
Menu
IEEE 1394 Setup *1
Description
You can make settings for using IEEE 1394. This menu appears only when the
optional IEEE 1394 board is installed.
❖ IP Address1394
You can set the IP address for IEEE 1394 (IP over 1394).
Note
❒ Default: All zero
❖ Subnet Mask1394
You can set the Subnet Mask for IEEE 1394 (IP over 1394).
Note
❒ Default: All zero
❖ IP over 1394
You can activate IP over 1394.
Note
❒ Default: Active
❖ SCSI print
You can activate SCSI print.
Note
❒ Default: Active
❖ Bidi-SCSI print
You can activate bidirectional transmission for SCSI print.
Note
❒ Default: On
Operating Instructions Administrator Reference
166
Menu
IEEE 802.11b *2
Description
You can make settings for using the wireless LAN. This menu appears only when
the optional 802.11b Interface Unit is installed.
❖ Comm. Mode
You can set the transmission mode for IEEE 802.11b.
Note
❒ Default: 802.11 Ad hoc
❖ Channel
The selectable channels are 1-11 (Inch version) and 1-13 (Metric version).
Note
❒ Default: 11
❖ Trans. Speed
You can set the transmission speed for IEEE 802.11b.
Note
❒ Default: Auto
Operating Instructions Administrator Reference
167
Menu
Description
❖ SSID
You can set for SSID in Infrastructure mode and 802.11 Ad hoc mode.
Limitation
❒ Select "¥" if you want to enter "/" in the SSID. Also, "¥" appears
when printing the configuration page, read it as "/".
Note
❒ The characters that can be used are ASCII 0x20-0x7e (32
bytes).
❒ A SSID value is set automatically to the nearest access point if
the setting has not been made.
❒ If the setting has not been made for 802.11 Ad hoc mode, the
same value as for Infrastructure mode or an "ASSID" value is
set automatically.
❖ WEP Setting
You can set the code for IEEE 802.11b.
Note
❒ Default: Not Active
❒ With a 64-bit WEP, you can use 10 digit hexadecimal. With a
128-bit WEP, you can use 26 digit hexadecimal.
USB Setting
You can set the transmission speed for USB.
Note
❒ Default: Auto
*1
*2
Appears only when the optional 1394 Interface Unit is installed.
Appears only when the optional 802.11b Interface Unit is installed.
Operating Instructions Administrator Reference
168
Changing the Host Interface Menu
The following example describes how to change the setting for "I/O Timeout".
A Press the {Menu}} key.
ZHBS010E
"Menu" appears on the panel display.
B Press the {U} or {T} key to display the "Host Interface" menu.
Menu:
Host Interface
Operating Instructions Administrator Reference
169
C Press the {Enter #}} key.
ZHBS040E
The following message appears on the panel display.
Host Interface:
I/O Buffer
D Press the {U} or {T} key to display "I/O Timeout".
Host Interface:
I/O Timeout
E Press the {Enter #}} key.
The following message appears on the panel display.
I/O Timeout:
*15 seconds
Operating Instructions Administrator Reference
170
F Press the {U} or {T} key to select how many minutes the printer waits before ending a print
job.
G Press the {Enter #}} key. Wait for two seconds.
"Host Interface" appears on the panel display.
H Press the {On Line}} key.
ZHBS050E
"Ready" appears on the panel display.
Ready
Operating Instructions Administrator Reference
171
PCL Menu
There are 9 menu items in the "PCL Menu".
• Orientation
• Form Lines
• Font Source
• Font Number
• Point Size
• Font Pitch
• Symbol Set
• Ext. A4 Width
• Append CR to LF
PCL Parameters
Menu
Orientation
Description
You can set the page orientation.
•
Portrait
•
Landscape
Note
❒ Default: Portrait
Operating Instructions Administrator Reference
172
Menu
Form Lines
Description
You can set the number of lines per page.
5-128
Note
❒ Default: 64 (Metric version), 60 (Inch version)
Font Source
You can set the location of the default font.
•
Resident
•
RAM
•
HDD
Note
❒ Default: Resident
❒ When you select "RAM", you can select only fonts downloaded to
the printer RAM.
Font Number
You can set the ID of the default font you want to use.
•
0 to 50 (for Resident)
•
0 to 44 (for RAM)
•
1 to 32767 (for HDD)
Note
❒ Default: 0
Point Size
You can set the point size you want to use for the default font.
4 to 999.75 by 0.25
Note
❒ Default: 12.00 points
❒ This setting is effective only for a variable-space font.
Operating Instructions Administrator Reference
173
Menu
Font Pitch
Description
You can set the number of characters per inch you want to use for the default font.
0.44 to 99.99 by 0.01
Note
❒ Default: 10.00 pitch
❒ This setting is effective only for a fixed-space font.
Symbol Set
You can specify the set of print characters for the default font. The available options are as follows:
Roman-8, ISO L1, ISO L2, ISO L5, PC-8, PC-8 D/N, PC-850, PC-852, PC8-TK,
Win L1, Win L2, Win L5, Desktop, PS Text, VN Intl, VN US, MS Publ, Math8, PS Math, VN Math, Pifont, Legal, ISO 4, ISO 6, ISO 11, ISO 15, ISO 17, ISO
21, ISO 60, ISO 69, Win 3.0
Note
❒ Default: Roman-8
Ext. A4 Width
You can extend the width of the printable area for an A4 sheet leaving a narrow
margin on the sides.
•
On
•
Off
Note
❒ Default: Off
Append CR to LF
By adding a CR code to each LF code, you can print text data clearly.
•
On
•
Off
Note
❒ Default: Off
Operating Instructions Administrator Reference
174
Changing the PCL Menu
The following example describes how to change the setting for "Orientation".
A Press the {Menu}} key.
ZHBS010E
"Menu" appears on the panel display.
Operating Instructions Administrator Reference
175
B Press the {U} or {T} key to display "PCL Menu", and then press the {Enter #}} key.
ZHBS040E
The following message appears on the panel display.
PCL Menu:
Orientation
C Press the {Enter #}} key.
Orientation:
*Portrait
D Press the {U} or {T} key to select the orientation desired, and then press the {Enter #}} key.
Wait for two seconds.
"PCL Menu" appears on the panel display.
Operating Instructions Administrator Reference
176
E Press the {On Line}} key.
ZHBS050E
"Ready" appears on the panel display.
Ready
Operating Instructions Administrator Reference
177
Language Menu
You can select the languages you use. Available language are as follows:
English, German, French, Italian, Spanish, Dutch, Swedish, Norwegian, Danish, Finnish, Portuguese,
Czech, Polish and Hungarian.
Note
❒ Default: English
Changing the Language Menu
You can change the language by the following procedures.
A Press the {Menu}} key.
ZHBS010E
"Menu" appears on the panel display.
Operating Instructions Administrator Reference
178
B Press the {U} or {T} key to display "Language".
Menu:
Language
C Press the {Enter #}} key.
ZHBS040E
The following message appears on the panel display.
Language:
*English
D Press the {U} or {T} key until the language you want to select appears on the panel display.
E Press the {Enter #}} key. Wait for two seconds.
"Menu" appears on the panel display.
Operating Instructions Administrator Reference
179
F Press the {On Line}} key.
ZHBS050E
"Ready" appears on the panel display.
Ready
Operating Instructions Administrator Reference
9. Appendix
SNMP
The Network Interface Board functions as a SNMP (Simple Network Management Protocol) agent using the UDP and IPX protocols. Using the SNMP manager, you can get information about the printer.
The factory default community names are "public" and "admin". You can get MIB information using
these community names.
Reference
You can configure SNMP from the command line using telnet. See p.191 “SNMP”.
You can configure SNMP from SmartNetMonitor for Admin using the NIB Setup Tool. See Help for
SmartNetMonitor for Admin.
You can configure SNMP from your Web browser. See Help on the CD-ROM.
Limitation
❒ The optional 1394 Interface Unit supports TCP/IP only.
❒ The kinds of supported MIBs differ depending on the printer.
❖ Supported MIBs
•
•
•
•
MIB-II
PrinterMIB
HostResourceMIB
RicohPrivateMIB
180
Operating Instructions Administrator Reference
181
Spool Printing
With Spool Printing, the whole data of a print job is saved in the Printer Hard Disk before printing. To
use this function, set it from the menu. See p.149 “System Menu”.
Important
❒ Do not turn off the printer or the computer when a print job is being spooled and the Data In indicator
is blinking. If you do, the print job will remain in the Printer Hard Disk and be printed when the printer
is turned on.
Limitation
❒ Spool Printing does not appear unless the optional Printer Hard Disk is installed.
❒ Data that has been received in the protocol other than LPD or IPP cannot be spooled.
❒ Up to 50 jobs (approximately 1000 MB) can be spooled at a time.
❒ When Spool Printing is on, the size of a single print job cannot exceed 500 MB.
❒ When sending spooled print jobs from more than one computer at the same time, up to five LPR
jobs and one IPP job can be spooled. Jobs exceeding the maximum number cannot be spooled.
Wait until the number of spooled print jobs falls below the maximum.
Note
❒ When "On" is selected, the first print will take time.
Note
❒ Spool jobs stored in the machine can be viewed or deleted using a Web browser.
Operating Instructions Administrator Reference
182
- Viewing/Deleting spool jobs in a Web browser
Launch the Web browser and enter the machine's IP address in the address bar. This displays the top
page.
Example : http://192.168.0.10
(In this example, the IP address of the machine is 192.168.0.10)
Click “Admin Info”, and then “Spool Printing Job List (Printer)” to display the spool jobs. To delete,
check the box next to the name of the file you want to delete. Enter the password *1 , and then click
[Delete]. For more information, see p.103 “Configuring the Network Interface Board Settings”.
*1
The default password is “password”.
- Setting Spool Printing
Spool Printing can be set using telnet or a Web browser.
• Using a Web browser
Click ”Configuration”, and then “General”. Set “Spool Printing”to “Enable”.
• Using telnet
Enter “spoolsw spool on” to set Spool Printing.
Reference
For more information about how to set up the spool printing, see the Help file.
Operating Instructions Administrator Reference
183
Remote Maintenance by telnet
You can view the printer status and configure the Network Interface Board using telnet.
Note
❒ You should specify a password so that only the network administrator, or a person having network
administrator privileges, can use remote maintenance.
Using telnet
The following is a sample procedure in using telnet.
Limitation
❒ Only one person at a time can be logged on to do remote maintenance.
A Use the IP address or the host name of the printer to start telnet.
% telnet IP_address
Note
❒ In order to use the host name instead of the IP address, you must write it to the "/etc/hosts" file.
B Type the password.
Note
❒ The factory default is "password".
C Type a command.
Reference
For more information about telnet commands, see p.184 “Commands List”.
Operating Instructions Administrator Reference
184
D Exit telnet.
msh> logout
When the configuration is changed, a confirmation message requests whether or not the changes
should be saved.
E Type "yes" to save the changes, and then press {Enter}}.
If you do not want to save the changes, type "no", and then press {Enter}
}. If you want to make additional changes, type "return" at the command line, and then press {Enter}
}.
Note
❒ If the "Can not write NVRAM information" message appears, the changes are not saved. Repeat
the steps above.
❒ The Network Interface Board is reset automatically when the settings are changed.
❒ When the Network Interface Board is reset, the active print job which has already been sent to
the printer will finish printing. However, jobs that have not been sent yet will be canceled.
Commands List
This is a list of commands that can be used via remote maintenance.
Note
❒ Type "help" to see a list of commands that can be used.
msh> help
❒ Type "help command_name" to display information about the syntax of that command.
msh> help command_name
Operating Instructions Administrator Reference
185
TCP/IP address
Use the ifconfig command to configure TCP/IP (IP address, subnet mask, broadcast address, default
gateway address) for the machine.
❖ Reference
msh> ifconfig
❖ Configuration
msh> ifconfig interface_name parameter address
Interface name
Interface to be configured
ether
Ethernet Interface *1
naf0
ip1394 *2
fwip0
wlan *3
wi0
*1
*2
*3
IEEE 1394 Interface
*2
IEEE 802.11b Interface
*3
If you did not enter the interface name, it will be automatically set to the Ethernet interface.
Available when the optional 1394 Interface Unit is installed.
You can specify an interface when installing the optional 802.11b Interface Unit.
Parameter
Meaning
(no parameter)
IP address
netmask
subnet mask
broadcast
broadcast address
Operating Instructions Administrator Reference
186
❖ Changing the Interface
You can specify either the LAN interface or IEEE 802.11b interface when using the optional
802.11b Interface Unit.
msh> ifconfig interface up
Note
❒ You cannot specify the IEEE 1394 interface.
The following is an example for configuring an IP address of 192.168.15.16 on Ethernet interface.
msh> ifconfig ether 192.168.15.16
The following is an example for configuring a subnet mask of 255.255.255.0 on Ethernet interface.
msh> ifconfig ether netmask 255.255.255.0
Note
❒ This affects the configuration of the Network Interface Board of the IP address that is used.
❒ The TCP/IP setting is the same as that for the LAN interface and IEEE 802.11b interface.
❒ To type an address using hexadecimal, prefix it by “0x”.
Operating Instructions Administrator Reference
187
- Address
❖ Subnet Mask
A number used to mathematically “mask” or hide the IP address on the network by eliminating those
parts of the address that are alike for all the machines on the network.
Note
❒ To get the above addresses, contact your network administrator.
❒ The subnet mask is the same as that for the LAN interface and IEEE 802.11b interface.
❒ When installing the optional 1394 Interface Unit, set the subnet so that it does not overlap with the
LAN interface or the IEEE 1394 interface.
Access Control
Use the access command to view and configure access control. You can also specify two or more access
ranges.
❖ Reference
msh> access
❖ Configuration
msh> access ✩ range start-address end-address
• ✩ represents a target number between 1 and 5. (Up to five access ranges can be registered and
selected.)
Example: To specify accessible IP addresses between 192.168.0.10 and 192.168.0.20:
msh> access 1 range 192.168.0.10 192.168.0.20
Operating Instructions Administrator Reference
188
Note
❒ The access range restricts the workstations from which printing is possible by means of an address. If you do not need to restrict printing, make the setting “0.0.0.0”.
❒ The entry is invalid if the start address is greater than the end address.
❒ Up to five access ranges can be specified. The entry is invalid if the target number is omitted.
❒ When using a Web browser, telnet or SmartNetMonitor for Client/Admin, you can use an IP address that has not been restricted by access control.
❖ Access Control Initialization
msh> access flush
Note
❒ This restores the factory-default settings so that all access ranges become "0.0.0.0".
DHCP
Use the set command to configure the boot method.
msh> set parameter {on|off}
"on" means active and "off" means inactive.
Parameter
Meaning
dhcp
DHCP (Dynamic Host Configuration Protocol)
Note
❒ The default is "on".
❒ When you use DHCP, the server also needs to be configured.
❒ DHCP takes precedence over all other settings.
Operating Instructions Administrator Reference
189
Protocol
Use the set command to allow/prevent remote access for each protocol.
msh> set protocol {up | down}
Protocol
appletalk
tcpip
“up” means active and “down” means inactive.
netware
netbeui
scsiprint *1
ip1394 *1
lpr
ftp
rsh
diprint
web
snmp
ipp
*1
Available when the optional 1394 Interface Unit is installed.
Note
❒ If you prohibit remote access using TCP/IP and then log out, you cannot use remote access. If this
was a mistake, you can use the control panel to allow access by TCP/IP.
❒ When you prevent access via TCP/IP, you are also prevented from using ip1394, lpr, ftp, rsh, diprint,
web, snmp and ipp.
Operating Instructions Administrator Reference
190
Printer status
The following commands can be used to get information about the current status of the printer.
msh> command
Command
Information that is displayed
status
Status of printer.
Information about the print jobs.
info
Information about the paper tray, output tray, and
printer language.
prnlog [ID]
Lists the last 16 print jobs.
Note
❒ More information about any print job is displayed when the ID number is added after the prnlog command.
Reference
For more information about the meaning of the data returned with these commands, see p.212 “Understanding the Displayed Information”.
Network Interface Board configuration settings information
Use the show command to display the Network Interface Board configuration settings.
msh> show [-p]
Note
❒ Add "-p" to the show command to have information displayed on screen at one time.
Operating Instructions Administrator Reference
191
Reference
For more information about the meaning of the data returned with this command, see p.214 “Configuring the Network Interface Board”.
System log information
Use the syslog command to display information stored in the printer's system log.
msh> syslog
Reference
For more information about the displayed information, see p.219 “System Log Information”.
SNMP
Use the snmp command to display and edit SNMP configuration settings such as the community name.
Note
❒ You can configure from ten SNMP access settings numbered 1–10.
❒ Default access settings 1 and 2 are as follows:
Number
1
2
Community name
public
admin
IP address
0.0.0.0
0.0.0.0
Access type
read-only
read-write
trap off
trap off
Operating Instructions Administrator Reference
192
❖ Display
Shows the SNMP information and available protocols.
msh> snmp ?
msh> snmp [-p] [registered_number]
Note
❒ If the -p option is added, you can view the settings one by one.
❒ Omitting the number displays all access settings.
❖ Community name configuration
You can set the community name of the Network Interface Board.
msh> snmp number name community_name
Note
❒ The community name must be within 15 characters.
❖ Access type configuration
You can select the access type from those listed below.
msh> snmp number type access_type
Access type
Type of access which is permitted
read
Read only
write
Read and write
trap
User is notified of trap messages.
no
All access is denied.
Operating Instructions Administrator Reference
193
❖ Protocol configuration
You should use the following command to set the protocols to active or inactive. If you set a protocol
to inactive, all access settings set to use that protocol are disabled.
msh> snmp {ip | ipx} {on | off}
• "on" means active and "off" means inactive
To change the protocol of access settings, use the following command. However, if you disabled a
protocol with the above command, making it active here will have no effect.
msh> snmp number active {ip | ipx} {on | off}
❖ Access configuration
You can configure an address of a host depending on the protocols used.
The Network Interface Board accepts requests only from hosts having addresses with access types
of "read-only" or "read-write". Type "0" to have Network Interface Board accept requests from any
host without requiring a specific type of access.
Command syntax:
msh> snmp number {ip | ipx} address
Note
❒ To specify the TCP/IP protocol, type ip followed by a space, and then the IP address.
❒ To specify the IPX/SPX protocol, type ipx followed by a space and then the IPX address followed
by a decimal and then the MAC address of the Network Interface Board.
The following is an example of how to configure registration number 3 with the IP address
192.168.15.16.
msh> snmp 3 ip 192.168.15.16
The following is an example of how to configure registration number 3 with the IPX address
7390A448, and the MAC address 00:00:74:62:5C:65.
msh> snmp 3 ipx 7390A448:000074625C65
Operating Instructions Administrator Reference
194
IPP
Use the ipp command to configure the IPP settings.
❖ Viewing setting
The following command displays the current IPP settings.
msh> ipp
Example output:
timeout=900(sec)
auth basic
• The "timeout" setting specifies how many seconds the computer keeps trying to access the network printer to send print jobs when no connection could be made.
• The "auth" setting indicates the user authorization mode.
❖ IPP timeout configuration
Specifies how many seconds to wait before canceling a print job if it has been interrupted for some
reason. The range of time can be changed between 30 to 65535 seconds.
msh> ipp timeout {30 -65535}
❖ IPP user authorization configuration
Use the IPP user authorization to restrict users to print with IPP. The factory default is "off" .
msh> ipp auth {basic|digest|off}
• The setting of user authorization are "basic" and "digest".
• Use "off" to remove a user's authorization.
Note
❒ If you select "basic" or "digest", see next section "Configuring IPP user authorization" for more
information about how to configure the user name.
Operating Instructions Administrator Reference
195
❖ Configuring IPP user authorization
Use the following command:
msh> ipp user
The following message appears.
msh> Input user number (1 to 10):
Type the number, user name and password.
msh> IPP user name:user1 msh> IPP password:*******
After configuring the settings, the following message appears.
User configuration changed.
SPRINT
To make setting for IEEE 1394 (SCSI print), use the sprint command.
❖ View settings
The IEEE 1394 (SCSI print) settings are displayed.
msh> sprint
❖ Bidirectional configuration for the IEEE 1394 (SCSI print)
Use this setting to configure whether the IEEE 1394 (SCSI print) is bidirectional.
The factory default is "on".
msh> sprint bidi [on/off]
Operating Instructions Administrator Reference
196
Direct Printing Port
The direct printing port allows printing directly from a computer, connected to the network, to the printer.
Use the diprint command to change the direct printing port settings.
❖ View settings
The following command displays the current direct printing port settings.
msh> diprint
Example output:
port 9100
timeout=300(sec)
bidirect off
• The “Port” specifies the port number of the direct printing port.
• The “bidirect” setting indicates whether the direct printing port is bidirectional.
❖ Setting timeout
You can specify the timeout interval to use when receiving data from the network.
msh> diprint [0~65535]
Note
❒ The factory default is 300 seconds.
❒ If 0 is set, timeout is disabled.
❖ Bidirectional configuration for the direct printing port
Use this setting to configure whether the direct printing port is bidirectional.
The factory default is “off”.
msh> diprint bidirect {on|off}
Operating Instructions Administrator Reference
197
SMB
Use the smb command to configure or delete the computer name or workgroup name for NetBEUI.
msh >smb parameter
Parameter
Settings
smb comp
Your computer name consisting of up to 13 characters
smb group
Workgroup name consisting of up to 15 characters
smb comment
Comment consisting of up to 31 characters
smb clear comp
Clears complete name
smb clear group
Clears Workgroup name
smb clear comment
Clears comment
ROUTE
Use the route command to control the routing table.
This command allows you to configure and display routing information. You can change the network
configuration from a remote computer using this command.
Note
❒ The maximum number of routing tables are 16.
Parameter
Topics of setting
route add {host | net} destination
gateway
Adds a host/network route to "destination", and a gateway address to "gateway"
in the table. Host becomes the default setting.
Operating Instructions Administrator Reference
198
Parameter
Topics of setting
route delete {host | net} destination
Deletes a host/network route from the table. Host becomes the default setting.
route get {destination}
Displays only route information corresponding to a specified destination. When
the destination is unspecified, all routing information is displayed.
route active {host | net} destination *1 on/off
You can turn the specified destination on or off. Host becomes the default setting.
route add default gateway *1
You can set the default gateway address.
route flush
Deletes all routing information.
*1
IP address
SLP
Use this command to configure SLP settings.
You can search the NetWare server using SLP in the PureIP environment of NetWare 5. Using the slp
command, you can configure the value of TTL which can be used by SLP multi-cast-packet.
Note
❒ The default value of TTL is "1". A search is executed only within a local segment. If the router does
not support multi-cast, the settings are not available even if the TTL value is increased.
❒ The acceptable TTL value is 1 - 255.
msh> slp ttl {1 -255}
Operating Instructions Administrator Reference
199
Setting IEEE 802.11b
To make setting for IEEE 802.11b, use the wiconfig command.
Limitation
❒ You can make settings when installing the optional 802.11b Interface Unit.
❖ View settings
The following command displays the current IEEE 802.11b settings.
msh> wiconfig
The IEEE 802.11b card information is displayed.
msh> wiconfig cardinfo
Note
❒ If the IEEE 802.11b interface is not working correctly, the IEEE 802.11b card information is not
displayed.
❖ Configuration
msh> wiconfig parameter
Parameter
Value to be configured
mode [ap|adhoc|802.11adhoc]
You can set infrastructure mode (ap) , 802.11 ad hoc
mode(802.11adhoc) or ad hoc mode (adhoc).
The default is ad hoc mode.
Operating Instructions Administrator Reference
200
Parameter
Value to be configured
ssid ID value
You can set for SSID in infrastructure mode.
The characters that can be used are ASCII 0x20-0x7e
(32 bytes).
A SSID value is set automatically to the nearest access
point if the setting has not been made.
If the setting has not been made for ad hoc mode, the
same value as for infrastructure mode or an "ASSID"
value is set automatically if the setting has not been
made.
channel frequency channel no.
You can set the channel.
You can specify from following channel.
•
Metric Version :1-13
•
Inch Version :1-11
Set the same channel for all the machines you are using.
enc [on|off]
You can enable or disable the WEP function. To enable
the WEP function, specify [on]; to disable it, specify
[off].
To start the WEP function, enter the correct WEP key.
key [key value]
With a 64-bit WEP, you can use 10 digit hexadecimal.
With a 128-bit WEP, you can use 26 digit hexadecimal.
To use this function, set the same WEP key for all the
ports that transmit to each other.
Operating Instructions Administrator Reference
201
Parameter
Value to be configured
auth [open|shared]
You can set the authorized mode when using WEP. The
specified value and the authorized mode are as follows:
open: Open system authorized (default)
shared: Shared key authorized
rate [auto|11m|5.5m|2m|1m]
You can set the IEEE 802.11b transmitting speed.
The transmitting speed you specify here is the speed at
which data is sent. You can receive data at any speed.
auto: automatically set (default)
11m: 11 Mbps fixed
5.5m: 5.5 Mbps fixed
2m: 2 Mbps fixed
1m: 1 Mbps fixed
WINS
Use the wins command to configure the WINS server settings
For more information about WINS server settings, see p.233 “Configuring a WINS Server”.
❖ Configuration
Use the set command to make WINS active or inactive.
msh> set wins {on|off}
• "on" means active and "off" means inactive.
Operating Instructions Administrator Reference
202
❖ Viewing setting
The following command displays the WINS server IP address.
msh> wins
Example out put:
wins: primary server 0.0.0.0 secondary server 0.0.0.0
Note
❒ If DHCP is used to start from the network, the current WINS server address is displayed. This
address, however, is not displayed if DHCP is not used.
❒ If the IP address obtained from DHCP differs from the WINS IP address, the DHCP address is
the valid address.
❖ Address configuration
Use this command to configure a WINS server IP address.
msh> wins {primary|secondary} IP_address
Note
❒ Use the "primary" to configure a primary WINS server IP address.
❒ Use the "secondary" to configure a secondary WINS server IP address.
AutoNet
Use the set command to configure Autonet.
Note
❒ For more information about Autonet, see p.232 “Using AutoNet”.
msh>set autonet {on|off}
Select "on" to activate Autonet, and "off" to deactivate it.
Operating Instructions Administrator Reference
203
Changing the Host Name
Use the hostname command to change the printer name.
msh> hostname [interface_name ] printer_name
interface name
Interface to be configured
ether
Ethernet interface *1
wlan
*2
ip1394 *3
*1
*2
*3
IEEE 802.11b interface
IEEE 1394 interface
If you did not enter the interface name, it will be automatically set to the Ethernet interface.
If you install the optional 802.11b Interface Unit, you can set the command.
If you install the optional 1394 Interface Unit, you can set the command.
Note
❒ Enter the printer name using up to 13 characters.
❒ You cannot use a printer name starting with RNP or rnp.
❒ The Ethernet interface and IEEE 802.11b interface will have the same printer name.
SNTP
The printer clock can be synchronized with a NTP server clock using the Simple Network Time Protocol (SNTP). To change the SNTP settings, use the sntp command.
Limitation
❒ SNTP supports the NTP servers running xnptd V3 and V4.
Operating Instructions Administrator Reference
204
❖ Reference
msh> sntp
❖ NTP Server Address Configuration
You can specify the IP address of the NTP server.
msh> sntp server IP_address
❖ Interval Configuration
You can specify the interval at which the printer synchronizes with the operator-specified NTP server.
msh> sntp interval polling_time
Note
❒ The factory default setting is 3600 seconds.
❒ You can set the interval from 16 to 16384 seconds.
❒ If you set 0, the printer synchronizes with the NTP server only when you turn the printer on. After
that, the printer does not synchronize with the NTP server.
❖ Time-zone Configuration
You can specify the time difference between the printer clock and the NTP server clock.
msh> sntp timezone +/-hour_time
Example: To set the time-zone difference to +8 hours:
msh> sntp timezone +08:00
Note
❒ The time is in 24-hour notation.
Operating Instructions Administrator Reference
205
Changing the Password
Use the passwd command to change the remote maintenance password.
Important
❒ Be sure not to forget or lose the password.
Note
❒ The default factory password is "password".
A Type "passwd".
msh> passwd
B Type the current password.
Old password:
C Type the new password.
New password:
Note
❒ The password must consist of 3 to 8 alphanumeric characters and symbols. Upper and lower
case characters are considered unique. For example, R is different from r.
❒ The password is the same as that used in the configuration of the Network Interface Board using
a Web browse and that used in the NIB Setup Tool. If you change a password from telnet, other
passwords are also changed.
D Type the new password once again.
Retype new password:
Operating Instructions Administrator Reference
206
Getting Printer Information over the Network
Printer current status
You can check the printer's status using the telnet command.
❖ telnet
Use the status command.
Messages
Description
Add Toner: Cyan
The toner cartridge is empty.
Add Toner: Magenta
The toner cartridge is empty.
Add Toner: Yellow
The toner cartridge is empty.
Calibrating...
The printer is calibrating or the photoconductor unit is being supplied.
Color Regist Error
The color registration error has occurred.
Energy Save Mode
The printer is in Energy Saver Mode.
Hardware Problem Black PCU
The photoconductor unit is not set correctly.
Hardware Problem Bypass Tray
An error has occurred in the Bypass Tray.
Hardware Problem Color PCU
The photoconductor unit is not set correctly.
Hardware Problem DIMM
An error has occurred in the DIMM.
Hardware Problem Ethernet
An error has occurred in the Ethernet interface.
Hardware Problem HDD
An error has occurred in the optional Printer Hard Disk.
Hardware Problem IEEE1394
An error has occurred in the IEEE 1394 interface.
Hardware Problem NV-RAM
An error has occurred in the optional Account Enhance Unit.
Operating Instructions Administrator Reference
207
Messages
Description
Hardware Problem Option RAM
An error has occurred in the optional Memory Unit.
Hardware Problem Parallel I/F
An error has occurred in the parallel interface.
Hardware Problem USB
An error has occurred in the USB interface.
Hardware Problem Wireless Board
An error has occurred in the IEEE 802.11b (Wireless LAN) interface.
Hardware Problem Wireless Card
An error has occurred in the IEEE 802.11b (Wireless LAN) card.
Hex Dump Mode
The printer is in Hex Dump Mode.
Offline
The printer is offline and cannot print data.
Please Wait
The printer is initializing the development unit.
The printer is initializing HDD.
Processing...
Print data is being processed.
Ready
Printing is available.
Replace Black PCU
It is time to replace the photoconductor unit.
Replace Color PCU
It is time to replace the photoconductor unit.
Replace Fusing Unit
It is time to replace the fusing unit.
Resetting Job...
Job is being reset.
Toner is Almost Empty: Black
The toner cartridge is almost empty.
Toner is Almost Empty: Cyan
The toner cartridge is almost empty.
Toner is Almost Empty: Magenta
The toner cartridge is almost empty.
Toner is Almost Empty: Yellow
The toner cartridge is almost empty.
Waiting...
The printer is waiting for the next data to print.
Operating Instructions Administrator Reference
208
Messages
Description
Warming Up...
The printer is warming up.
Waste Toner is Almost Full
The waste toner is full.
Printer configuration
You can check the printer configuration using telnet.
❖ telnet
Use the info command.
Note
❒ "*" (asterisk) is displayed with the current setting.
❒ Regarding *1 - *5, see the following table.
Item
Description
Input Tray
No.
ID number of the paper tray
Name
Name of the paper tray*1
PaperSize
Paper size loaded in the paper tray*2
Status
Current status of the paper tray*3
Output Tray
No.
ID number of the output tray
Name
Name of the output tray*4
Status
Current status of the output tray*5
Operating Instructions Administrator Reference
209
Item
Description
Printer Language
No.
ID number of the printer language used by the printer
Name
Name of the printer language used in the printer
Version
Version of the printer language
❖ *1 Input Tray: Name
Name
Description
Tray X
Name of installed paper tray. (X is the number of tray.)
Bypass Tray
Bypass Tray
❖ *2 Input Tray: PaperSize
Paper Size
Description
A4 (210 × 297 mm)
A4 (210 × 297) K
B5JIS (182 × 257 mm)
B5 (182 × 257) K
A5 (148 × 210 mm)
A5 (148 × 210) K
A6 (105 × 148 mm)
A6 (105 × 148) K
8 1/2 × 14
LG (8 1/2 × 14) K
8 1/2 × 11
LT (8 1/2 × 11) K
5 1/2 × 8 1/2
5 1/2 × 8 1/2 K
Custom(XXXxYYY mm)
Custom Size
7 1/4 × 10 1/2
7 1/4 × 10 1/2 K
Operating Instructions Administrator Reference
210
Paper Size
Description
8 1/4 × 13
8 1/4 × 13 K
8 1/2 × 13
8 1/2 × 13 K
4 1/8 × 9 1/2
4 1/8 × 9 1/2 K
3 7/8 × 7 1/2
3 7/8 × 7 1/2 K
DL (110 × 220 mm)
DL (110 × 220) K
C5 Env (162 × 229 mm)
C5 Env (162 × 229) K
8 × 13
8×13 K
C6 Env (114 × 162 mm)
C6 Env (114 × 162) K
8K (267 × 390 mm)
8K (267 × 390) K
16K (195 × 267 mm)
16K (195 × 267) K
NCS
There is no tray.
**
The paper size is not selected.
❖ *3 Input Tray: Status
Status
Description
Normal
NoTray
There is no paper tray
PaperEnd
There is no paper in the paper tray
Operating Instructions Administrator Reference
211
❖ *4 Output Tray: Name
Name
Standard Tray
Description
Output Tray
❖ *5 Output Tray: Status
Status
Description
Normal
----
PaperExist
There is paper in the output tray
OverFlow
Output tray is full of paper
Error
Other errors
Operating Instructions Administrator Reference
212
Understanding the Displayed Information
This section describes how to read the status information returned by the Network Interface Board.
Print Job Information
The status of the print job can be viewed using the following commands.
• telnet : Use the status command. See p.190 “Printer status” .
Item name
Meaning
Rank
Print job status.
•
Active
Printing or preparing for printing.
•
Waiting
Waiting to be transferred to the printer.
Owner
Print request user name.
Job
Print request number.
Files
The name of the document.
Total Size
The size of the data (spooled).
The default is “0 bytes”.
Operating Instructions Administrator Reference
213
Print Log Information
This is a record of the most recent 16 jobs that have been printed.
This log can be displayed with the following commands.
• telnet : Use the prnlog command. See p.190 “Printer status” .
Name
Meaning
ID
Print request ID.
User
Print request user name.
Page
The number of pages that is printed.
Result
The result of the print request.
Time
The time when the print request was received
User ID *1
User ID that is to be configured in the printer driver.
JobName *1
The name of the document for printing.
*1
Appears the UserID and JobName information when entering the info command with the ID.
Operating Instructions Administrator Reference
214
Configuring the Network Interface Board
The Network Interface Board settings can be displayed by using the commands below.
• telnet : Use the show command. See p.190 “Network Interface Board configuration settings information” .
Item name
Meaning
Common
Mode
Protocol Up/Down
Up means active, Down means inactive.
AppleTalk
TCP/IP
NetWare
NetBEUI
IP over 1394 *1
*4
SCSI print *4
Ethernet interface
Syslog priority
NVRAM version
Device name
Comment
Location
Contact
Soft switch
Internal version number.
Operating Instructions Administrator Reference
215
Item name
Meaning
AppleTalk
Mode
AppleTalk protocol in selection.
Net
Network number.
Object
Macintosh printer name.
Type
The type of printer.
Zone
Name of the zone that the printer belongs to.
TCP/IP
Mode
Up means active, Down means inactive.
ftp
lpr
rsh
diprint
web
telnet
snmp
ipp
EncapType
Frame type.
dhcp
Dynamic Host Configuration Protocol (on/off)
Address
IP address.
Netmask
Subnet mask.
Broadcast
Broadcast address.
Gateway
Default gateway address.
Access Range[✩] *2
Access Control Range.
Operating Instructions Administrator Reference
216
Item name
Meaning
Primary WINS
Primary WINS server address.
Secondary WINS
Secondary WINS server address.
Time server
NTP server address
Time Zone
NTP server time difference
Time server polling time
Synchronizes interval
Home page URL
URL of homepage.
Home page link name
URL name of homepage.
Help page URL
URL of help page.
SNMP protocol
Protocol used with SNMP.
NetWare
EncapType
Frame type.
RPRINTER number
Remote printer number.
Print server name
Print server name.
File server name
Name of the connect file server.
Context name
Context of print server.
Switch
Mode
Active mode.
NDS/Bindery
(this value is fixed)
Packet negotiation
Print job timeout
Time of the job timeout.
Operating Instructions Administrator Reference
217
Item name
Meaning
NetBEUI
Switch
Mode
(this value is fixed)
Direct print
(this value is fixed)
Notification
Notification of print job completion.
Workgroup name
Name of the workgroup.
Computer name
Name of the computer.
Comment
Comment.
Share name[1]
IEEE 802.11b
Share name (name of the printer type).
*3
SSID
SSID being used.
Channel range
Channels available for use.
Channel
Channel being used.
Communication mode
IEEE 802.11b interface transmitting mode.
Rate
IEEE 802.11b interface speed.
WEP encryption
Whether WEP is enabled or disabled.
Auth
Validity or invalidity of the authorized mode setting when using
WEP.
Encryption key
WEP key.
Operating Instructions Administrator Reference
218
Item name
IP over 1394 *1
Meaning
*4
Device name
Address
IP address.
Netmask
Subnet mask.
Broadcast
Broadcast address.
SCSI print *4
Bidi.
Shell mode
*1
*2
*3
*4
Bidirectional setting (on/off).
Mode of the remote maintenance tool.
The optional 1394 Interface Unit supports TCP/IP only.
✩ represents a target number between 1 and 5.
You can display the item names when installing the optional the optional 802.11b Interface Unit.
You can display the item names when installing the optional 1394 Interface Unit.
Operating Instructions Administrator Reference
219
Message List
This is a list of messages written in the printer's system log. The system log can be viewed using the
syslog command.
System Log Information
You can use the following methods to view the system log.
• telnet : Use the syslog command. See p.184 “Commands List” .
Message
Description and Solutions
Access to NetWare server <file server name> denied. Ei- (In print server mode) Cannot log in to the file server.
ther there is no account for this print server on the NetMake sure that the print server is registered on the file
Ware server or the password was incorrect.
server. If a password is specified for the print server, delete it.
add_sess: community<community name> already defined. The same community name already exists. Use another
community name.
add_sess: session<community name>already defined.
A requested community name is not defined.
add_sess: bad trap addr:<IpAddress>, community:
<community name>
The IP address (0.0.0.0.) is unavailable when the community access type is TRAP. Specify the host IP address for
the TRAP destination.
add_sess_ipx: bad trap addr: <IPX address>, community: The IPX address (00:00:00:00:00:00) is unavailable
<community name>
when the community access type is TRAP. Specify the
host IPX address for the TRAP destination.
add_sess_ipx: community <community name> already
defined.
The same community name already exists. Use another
community name.
Operating Instructions Administrator Reference
220
Message
Description and Solutions
add_sess_ipx: session_ipx<community name> not defined. A requested community name is not defined.
ANONYMOUS FTP LOGIN FROM <IP address>,
<password>
An anonymous login has been made with a password
<password> from the host <IP address>.
anpd start. (AppleTalk)
An anpd (AppleTalk Network Package Daemon) has
started.
Attach FileServer =<file server name>
Attached to the file server as a nearest server.
Attach to print queue <print queue name>
(In print server mode) Attached to the print queue name.
Cannot create service connection
(In remote printer mode) Cannot establish a connection
with the file server. The number of file server users may
exceed the maximum number that the file server can handle.
Cannot find rprinter (<print server name>/<printer
number>)
The printer having the number displayed on the print
server does not exist. Make sure that the number of the
printer is registered in the print server.
Change IP address from DHCP Server.
The IP address changes when DHCP LEASE is renewed.
To always assign the same IP address, set a static IP address to the DHCP server.
child process exec error! (process name)
Failed to start the network service. Turn the printer off
and then on. If this does not work, contact your service or
sales representatives.
Connected DHCP Server(<DHCP server address>).
The IP address was successfully received from the DHCP
server.
connection from <IP address>
Logged on from the host <IP address>.
Operating Instructions Administrator Reference
221
Message
Description and Solutions
Could not attach to FileServer<error number>
(In remote printer mode) Cannot attach to the file server.
For some reason, the file server refuses the connection.
Check the file server configuration.
Could not attach to PServer<print server>
(In remote printer mode) Cannot attach to the print server.
For some reason, the print server refuses the connection.
Check the print server configuration.
Current Interface Speed:xxxMbps
The speed of the network (10 Mbps or 100 Mbps).
Current IP address <current IP address>
The IP address <current IP address> was received from
the DHCP server.
Current IPX address<IPX address>
The current IPX address.
DHCP lease time expired.
DHCP lease time has expired. The printer tries to discover the DHCP server again. The IP address used up to now
becomes invalid.
DHCP server not found.
The DHCP server cannot be found. Make sure the DHCP
server is running on the network.
dhcpcd start.
A dhcpcd (DHCP client service) has started.
Duplicate IP=<IP address>(from <MAC address>).
The same IP address is used. An IP address must be
unique. Check the address of the device indicated in
<MAC address>.
Established SPX Connection with PServer,
(In remote printer mode) A connection with the print
server has been established.
(RPSocket=<socket number>, connID=
<connection ID>)
exiting
lpd service has ended and the system is exiting the process.
Operating Instructions Administrator Reference
222
Message
Description and Solutions
Exit pserver
(In print server mode) Exits the print server because the
necessary print server settings have not been made.
Frametype =<frame type name>
The <frame type name> is configured to be used on NetWare.
httpd start.
An httpd has started.
IEEE 802.11b Card Firmware REV.IEEE 802.11b Card
Firmware REV.
This is the wireless LAN card's firmware version.
IEEE 802.11b current channel <Channel>
The current channel is displayed.
The value chosen by the user is displayed in ad hoc mode.
The channel used in the access point is displayed in infrastructure mode.
(Example: Current channel is 11.)
IEEE 802.11b current channel 11
IEEE 802.11b MAC Address = <MAC Address>
The IEEE 802.11b I/F MAC address is displayed.
(Example: Current MAC address is
00:00:74:XX:XX:XX.)
IEEE 802.11b MAC Address =
00:00:74:XX:XX:XX
IEEE 802.11b SSID <ssid> (AP MAC Address < MAC
Address>)
The SSID of the access point used in infrastructure mode
and the MAC address of the access point are displayed.
(Example: Current MAC address is xx:xx:xx:xx:xx:xx
and SSID value is "test-ssid".)
IEEE 802.11b SSID test-ssid (AP MAC Address
xx:xx:xx:xx:xx:xx)
Operating Instructions Administrator Reference
223
Message
IEEE 802.11b <transmission mode> mode
IEEE 802.11b Tx Rate <Transfer Speed>
Description and Solutions
This is the IEEE 802.11b transmission mode.
•
IEEE 802.11b [infrastructure] mode : in infrastructure
mode
•
IEEE 802.11b [802.11 ad hoc] mode : in 802.11 adhoc
mode
•
IEEE 802.11b [ad hoc] mode : in adhoc mode
The IEEE 802.11b transmitting speed (set speed) is displayed.
(Example: Current Tx Rate is 11Mbps.)
IEEE 802.11b Tx Rate 11Mbps
inetd start.
An inetd has started.
<interface> started with IP: <IP address>
<IP address> has been set for <Interface> and <Interface> started.
<Interface>: Subnet overlap.
Subnet from Netmask and the IP address you tried to set
for <Interface> overlap the subnet for another interface.
Set Subnet so that it does not overlap with another interface.
IPP cancel-job: permission denied.
The printer could not authenticate the name of the user attempting to cancel a job.
ipp disable.
Printing with ipp is disabled.
ipp enable.
Printing with ipp is enabled.
IPP job canceled. jobid=%d.
The spooled job has been canceled due to an error or by
user request.
Operating Instructions Administrator Reference
224
Message
Description and Solutions
job canceled. jobid=%d.
The spooled job has been canceled due to an error or by
user request.
LeaseTime=<lease time>(sec), RenewTime=<renew time> The resource lease time that was received from the DHCP
(sec).
server is <lease time> in seconds. The renewal time is
also <renew time> in seconds.
Login to fileserver <file server name>
(<IPX|IP>,<NDS|BINDERY>)
(In print server mode) Logged in to the file server with
NDS or BINDERY mode.
multid start.
Data transmission service for multiprotocols has started.
nbstart start. (NetBEUI)
The service for NetBEUI protocol stack setting has started.
NBT Registration Broadcast(<NetBIOS name>)
Use a local broadcast to map <NetBIOS name> with the
IP address.
nbtd start.
A nbtd (NetBIOS over TCP/IP Daemon) has started.
(Available only in DHCP mode)
NetBEUI Computer Name =<computer name>
The NetBEUI Computer Name is defined as <computer
name>.
nmsd start. (NetBEUI)
A nmsd (Name Server Daemon) has started.
npriter start. (NetWare)
(In remote printer mode) NetWare service has started.
nwstart start. (NetWare)
The service for NetWare protocol stack setting has started.
Open log file <file name>
(In print server mode) The specified log file has been
opened.
papd start. (AppleTalk)
AppleTalk print service has started.
Operating Instructions Administrator Reference
225
Message
Description and Solutions
permission denied.
Job cancellation was determined to be unauthorized after
checking the user name and host address (except for
ROOT authorization).
phy release file open failed.
Replacing the Network Interface Board is required. Contact your sales or service representatives.
Print queue <print queue name> cannot be serviced by
printer 0, <print server name>
(In print server mode) The print queue name cannot be
serviced. Make sure that print queue volume exists on the
specified file server.
Print server <print server name> has no printer.
(In print server mode) The printer object is not assigned
to the print server <print server name>. Using NWadmin,
assign the printer object, and then restart the printer device.
Print session full
Cannot accept the print session.
Printer <printer name> has no queue
(In print server mode) The print queue is not assigned to
the printer. Using NWadmin, assign the print queue to the
printer, and then restart it.
pserver start. (NetWare)
(In print server mode) NetWare service has started.
Required computer name (<Computer name>) is duplicated The same computer name is detected on the network. The
name
start job determines the computer name by adding the
computer name to the suffix (0,1....). Configure a new
computer name that is unique.
Required file server (<file server name>) not found
Cannot find the required file server.
restarted.
LPD has started.
Operating Instructions Administrator Reference
226
Message
Description and Solutions
sap enable, saptype=<SAP type>, sapname=<SAP name> The SAP function has started. The SAP (SAP type and
SAP name) packet is issued to advertise the service on the
SAP table on the NetWare server.
Set context to <NDS context name>
A <NDS context name> has been set.
shutdown signal received. network service rebooting...
Rebooting the network service.
smbd start. (NetBEUI)
An smbd (SMB (Server Message Block) service) has
started.
Snmp over ip is ready.
Communication over TCP/IP with SNMP is available.
Snmp over IP over 1394 is ready.
Communication over IP over 1394 with SNMP is available.
Snmp over ipx is ready.
Communication over IPX with SNMP is available.
snmpd start.
SNMP service has started.
started.
Direct print service has started.
The print server received error <error number> during at- Cannot log in to the file server. The print server is not regtempt to log in to the network.Access to the network was istered or the password is specified. Register the print
denied.Verify that the print server name and password are server without specifying a password.
correct.
win2kspd protocol-DOWN (APPEXIT).
NVRAM setting ioctl (SPIO CAPPEXIT) of device
SBP2TSP was set by protocol-DOWN.
SCSI print is not receiving data.
win2kspd protocol-UP (APPENTRY).
NVRAM setting ioctl (SPIO CAPPENTRY) of device
SBP2TSP was set by protocol-UP.
SCSI print is not receiving data.
win2kspd started.
SCSI print (SBP-2) service has started.
Operating Instructions Administrator Reference
227
Message
Description and Solutions
WINS name refresh :Server No Response
There has been no response to the update request from the
server. Confirm that the WINS server address is correct
and the WINS server is working properly.
WINS name registration/refresh error code(errornumber) Set Net BIOS names those do not overlap with each other.
Confirm that the WINS server address is correct and the
WINS server is working properly.
WINS name registration:Server No Response
There has been no response to the registration request
from the server. Confirm that the WINS server address is
correct and the WINS server is working properly.
WINS server address0.0.0.0
The WINS server address has not been specified. Specify
the WINS server address to match the printer name with
WINS.
WINS Server=<WINS server address> NetBIOS
Name=<NetBIOS name>
The printer name has been successfully registered in
<WINS server address>.
WINS wrong scopeID
The scope ID is wrong.
Specify the correct scope ID.
write error occurred. (diskfull)
The hard disk became full while the spool file was being
written.
Wait until enough HDD space becomes available as
printing proceeds.
write error occurred. (fatal)
A fatal error occurred while the spool file was being written.
Turn the printer off and then on. If this does not work,
contact your service or sales representative.
Operating Instructions Administrator Reference
228
Precautions
Please pay attention to the following when using the Network Interface Board. When configuration is
necessary, follow the appropriate procedures below.
Connecting a Dial Up Router to a Network
When the NetWare file server and the printer are on the opposite side of a router, packets are continuously sent back and forth, possibly causing communication charges to increase. Because the packet
transmission is a specification of NetWare, you need to change the configuration of the router. If the
network you are using does not allow you to configure the router, configure the printer.
Configuring the router
Filter the packets so that they do not pass over the dial-up router.
Note
❒ The MAC address of the printer doing the filtering is printed on the printer configuration page. For
more information about printing a configuration page, see the Option Setup Guide that comes with
the printer.
❒ For more information about configuring the printer if the router cannot be configured, see the instructions below.
Operating Instructions Administrator Reference
229
Configuring the printer with NetWare
A Follow the setup method in this manual, configure the file server.
B Set the Frame type for a NetWare environment.
Reference
For more information about selecting a Frame type, see p.71 “Configuring the NetWare Protocol
using the Control Panel”.
Configuring the printer without NetWare
A While not printing, the Network Interface Board sends packets on the network. Set the NetWare to inactive.
Reference
For more information about selecting a protocol, see p.71 “Configuring the NetWare Protocol using the Control Panel”.
Operating Instructions Administrator Reference
230
PostScript Printing from Windows
When printing PostScript from Windows, see the PostScript 3 Supplement.
NetWare Printing
Form Feed
You should not configure the form feed on NetWare. The form feed is controlled by the printer driver
on Windows. If the NetWare form feed is configured, the printer might not print properly. If you want
to change the form feed setting, always configure it on Windows.
• With Windows 95/98/Me, clear the [Form feed] check box under the [Printer Settings] tab in the
Printer Properties dialog box.
• With Windows 2000, clear the [Form feed] check box under the [NetWare Settings] tab in the Printer
Properties dialog box.
• With Windows NT 4.0, clear the [Form feed] check box under the [NetWare Settings] tab in the Printer Properties dialog box.
Banner Page
You should not configure a banner page on NetWare. If you want to change the banner page setting,
always configure it on Windows.
• With Windows 95/98/Me, clear the [Enable banner] check box under the [Printer Settings] tab in the
Printer Properties dialog box.
Operating Instructions Administrator Reference
231
• With Windows 2000, clear the [Enable banner] check box under the [NetWare Settings] tab in the
Printer Properties dialog box.
• With Windows NT 4.0, clear the [Enable banner] check box under the [NetWare Settings] tab in the
Printer Properties dialog box.
Printing after resetting the printer
After resetting the remote printer, it will be cut off from the print server for about 30-40 seconds before
connecting again. Due to the NetWare specification, print jobs may be accepted, but they will not be
printed during this interval.
When using the printer as a remote printer, wait about 2 minutes after resetting the printer before attempting to print.
Using DHCP
You can use the printer under a DHCP environment. You can also register the printer NetBIOS name
on a WINS server when it is running.
Limitation
❒ DHCP cannot be used with IEEE 1394 (IP over 1394). Set a fixed IP address with the control panel,
telnet or a Web browser.
•
See the Setup Guide.
•
See p.185 “TCP/IP address”.
•
See p.103 “Configuring the Network Interface Board Settings”.
Operating Instructions Administrator Reference
232
Note
❒ Printers that register the printer NetBIOS name on a WINS server must be configured for the WINS
server. See p.201 “WINS”.
❒ Supported DHCP server is Windows NT 4.0 Server Service Pack 4 or later, Windows 2000 Server
and NetWare 5.
❒ If you do not use the WINS server, reserve the printer's IP address in the DHCP server so that the
same IP address is assigned every time.
❒ DHCP relay-agent is not supported. If you use DHCP relay-agent on a network via an ISDN line, it
will result in expensive line charges. This is because your computer connects to the ISDN line whenever a packet is transferred from the printer.
Using AutoNet
If the printer IP address is not assigned by a DHCP server automatically, a temporary IP address starting
with 169.254 which is not used on the network can be selected automatically by the printer.
Limitation
❒ You must change the setting to "on" to use AutoNet. See p.202 “AutoNet”.
Note
❒ The IP address assigned by the DHCP server is given priority to that selected by AutoNet.
❒ You can confirm the current IP address on the configuration page. For more information about the
configuration page, see p.130 “Printing a Configuration Page”.
❒ When AutoNet is running, the NetBIOS name is not registered on the WINS server.
Operating Instructions Administrator Reference
233
Configuring a WINS Server
The printer can be configured to register its NetBIOS name with a WINS server when power is turned
on. This enables the NetBIOS name of the printer to be specified from SmartNetMonitor for Admin
even under a DHCP environment.
This section describes how to configure the WINS server.
Note
❒ The WINS Server is supported with Windows NT 4.0 Server Service Pack 4 or later, and Windows
2000 Servers WINS Manager.
❒ For more information about the WINS Server settings, see Windows Help.
❒ If there is no reply from the WINS Server, the NetBIOS name will be registered by broadcast.
❒ The NetBIOS name consists of up to 13 alphanumeric characters.
Using a Web browser
A Start the Web browser.
B Point your browser at the URL or IP address of the printer (e.g. http://XXX.XXX.XXX substituting the Xs with the IP address).
The status of the printer you chose appears on the Web browser.
C Click Network Config.
The dialog box for entering the password and user name is displayed.
D Enter your user name and password, and then click [OK].
To use the factory default account, enter no user name and type "password" for the password.
Operating Instructions Administrator Reference
234
E Click TCP/IP.
F Set WINS to active and enter the IP address of the WINS server in Primary WINS Server and
Secondary WINS Server.
G Click Refresh.
H Exit the Web browser.
Using telnet
A Connect to the remote printer using telnet.
B Use the set command to make WINS active.
msh> set wins on
C Specify the IP addresses (primary and secondary) using the following commands.
msh> wins primary Ipaddress
msh> wins secondary Ipaddress
Note
❒ To confirm the current configuration, use the show command.
D Log out from telnet.
Operating Instructions Administrator Reference
235
Memory Capacity and Paper Size
Non-Duplex Printing
Print Quality
Duplex Printing
Paper Size
Can be printed
Guaranteed
Can be printed
Guaranteed
A4
600×600 dpi *1
B5
64 MB (Standard)
64 MB (Standard)
LT
Legal
1200×600 dpi
*2
A4
B5
64 MB (Standard)
LT
64 MB
(Standard)
128 MB (Standard + 64 MB)
Legal
1200×1200 dpi *3
A4
B5
LT
64 MB
(Standard)
128 MB (Standard 128 MB (Standard 192 MB (Standard
+ 64 MB)
+ 64 MB)
+ 128 MB)
Legal
*1
To set resolution from each printer driver is as follows:
• RPCS: [600 x 600 dpi] on [Resolution]
• PCL 5c: [600 dpi] on [Resolution]
• PostScript 3: [600dpi] on [Resolution] and [Fast] on [Gradation]
Reference
For more information about how to set the printer driver, see printer driver's Help.
Operating Instructions Administrator Reference
236
*2
To set resolution from each printer driver is as follows:
• RPCS: [1200 x 600 dpi] on [Resolution]
• PostScript 3: [600dpi] on [Resolution] and [Standard] on [Gradation]
Reference
*3
For more information about how to set the printer driver, see printer driver's Help.
To set resolution from each printer driver is as follows:
• RPCS: [1200 x 1200dpi] on [Resolution]
• PostScript 3: [1200dpi] on [Resolution] and [Standard] on [Gradation]
Reference
For more information about how to set the printer driver, see printer driver's Help.
Operating Instructions Administrator Reference
237
Specifications
Mainframe
❖ Configuration:
Desktop
❖ Print Process:
Laser beam scanning & Electrophotographic printing
Mono component toner development
4 drums tandem method
❖ Printing Speed:
Monochrome: Maximum 20 pages per minute (A4K), Maximum 21 pages per minute (11×81/2K)
Color: Maximum 16 pages per minute (A4K), Maximum 17 pages per minute (11×81/2K
First print Speed: Pre Heat On (Default): 15.5 sec, Pre Heat Off: 25 sec or less
❖ Interface:
• Network Standard Model
Standard:
• Parallel (Bidirectional IEEE1284)
• Ethernet (10/100Base-TX)
• USB (USB1.1, USB2.0 *1 )
*1
It requires a USB computer port and cable that support USB 2.0.
Operating Instructions Administrator Reference
238
Optional:
• IEEE 1394 (SCSI print, IP over 1394)
• IEEE 802.11b (Wireless LAN)
• BluetoothTM
• Basic
Standard:
• Parallel (Bidirectional IEEE1284)
• USB (USB1.1, USB2.0 *1 )
*1
It requires a USB computer port and cable that support
Optional:
• Ethernet (10/100Base-TX)
• IEEE 1394 (SCSI print, IP over 1394)
• IEEE 802.11b (Wireless LAN)
• BluetoothTM
❖ Resolution:
1200 × 1200 dpi (RPCS, PostScript 3)
1200 × 600 dpi (RPCS, PostScript 3)
600 × 600 dpi (PCL 5c, RPCS, PostScript 3)
300 × 300 dpi (PCL 5c *1 , RPCS)
*1
monochrome only
❖ Printer Language:
PCL 5c, RPCS, Adobe PostScript Level 3
Operating Instructions Administrator Reference
239
❖ Fonts:
PCL 5c
Agfa Font 35 Manager Intellifonts, 10 TrueType fonts, and 1 Bitmap font Agfa
Font Manager available, 31 fonts
PostScript 3
136 fonts
❖ Paper size:
See "Paper and Other Media" in the Maintenance Guide.
❖ Paper Weight:
See "Paper and Other Media" in the Maintenance Guide.
❖ Media Type:
See "Paper and Other Media" in the Maintenance Guide.
❖ Power Source:
220 - 240 V, 50/60Hz
❖ Power Consumption:
Printing
1300 W or less
Energy Saver
9 W or less
❖ Noise Emission *1 :
Sound Power Level
Mainframe only
During Printing
63 dB (A)
Stand-by
40 dB (A)
Operating Instructions Administrator Reference
240
Sound Pressure level *2
Mainframe only
Stand by
34 dB (A)
During Printing
45 dB (A)
*1
*2
The preceding measurements made in accordance with ISO7779 are actual values.
Measured at the position of a bystander.
❖ Dimensions:
Width
Printer only
(tray not extended)
419 mm (16.5 inches)
Depth
536 mm (21.1 inches)
❖ Weight:
Approximately 30 kg (66.1 lb) (toner cartridge and power cord included)
❖ Warm-up Time:
Less than 30 seconds (23°C, 73F) *1
*1 When no error.
❖ Paper Input Capacity:
Standard Paper Tray
530 sheet tray *1
Bypass Tray
100 sheet *2
Optional Paper Feed Units
530 sheet paper tray × 2 *1
*1
*2
Paper weight: 80 g/m2 (20 lb. bond)
You can load up to 10 envelopes at the same time.
Height
395 mm (15.5 inches)
Operating Instructions Administrator Reference
241
❖ Paper Output Capacity:
Standard 250 sheets (80 g/m2 (20 lb.bond))
❖ Memory:
Standard 64 MB, up to 384 MB (with the optional Memory Unit)
❖ Network:
Protocol: TCP/IP, NetBEUI*1, IPX/SPX, AppleTalk
*1 To use NetBEUI, use the SmartNetMonitor for Client port.
Options
PAPER FEED UNIT Type 3000
❖ Dimensions (W × D × H):
410 × 536 × 146 mm (16.1 × 21.1 × 5.8 inches)
❖ Paper size:
A4, B5(JIS), 8 1/2 × 14, 81/2 × 11
❖ Paper weight:
60 - 105 g/m2, (16 - 28 lb. bond)
❖ Weight:
Less than 7.42 kg (16.3 lb)
Operating Instructions Administrator Reference
242
AD440
❖ Dimensions (W × D × H):
355 × 237 × 69 mm (12.8 × 9.3 × 2.7 inches)
Note
❒ This option is built into the machine.
❖ Paper size:
A4, B5(JIS), 8 1/2 × 14, 81/2 × 11
❖ Paper weight:
60 - 105 g/m2 (16 - 28 lb. bond)
❖ Weight:
Less than 0.74 kg (1.6 lb. bond)
Printer Hard Disk Type 3000
❖ Storage Capacity (Formatted):
10 GB
❖ Specifications:
•
•
•
•
Spool print data to collate
Spool Sample/Locked Print data
Store PostScript fonts
Store log data
Operating Instructions Administrator Reference
243
Note
❒ You can install PostScript fonts with this optional Printer Hard Disk Type 3000. With Macintosh,
types of fonts supported are PostScript Type 1 and PostScript Type 2. To download them, use
Printer Utility for Mac.
Memory Unit Type C 64/128/256MB
❖ Module Type:
SO-DIMM (Small Outline Dual-in-line Memory Module)
❖ Memory Type:
SDRAM (Synchronous Dynamic RAM)
❖ Number of Pins:
144 pins
User Account Enhance Unit Type B
❖ Capacity:
64 KB
❖ Specifications:
Store User Code (Up to 400 users)
Operating Instructions Administrator Reference
244
Network Interface Board Type 3000
❖ Topology:
Ethernet (10Base-T/100Base-TX)
❖ Protocols:
TCP/IP, NetBEUI, IPX/SPX, AppleTalk
❖ Interface Connector:
RJ45
❖ Required Cable:
STP (Shielded Twisted-Pair) cable
Category / Type 5 or better
1394 Interface Unit Type 4510
❖ Interface:
IEEE Std. 1394-1955 compliant, IEEE Std. 1394-2000 compliant.
❖ Interface Connector:
IEEE 1394 (6 pins × 2)
❖ Required cable:
IEEE 1394 interface cable (6 pins x 4 pins, 6 pins x 6 pins)
Important
❒ You cannot plug devices together to create loops.
❒ Do not use a cable more than 4.5 meters long.
Operating Instructions Administrator Reference
245
❖ Connectable number of devices in a bus:
Maximum 63
❖ Allowed cable hops in a bus:
Maximum 16
❖ Data Transmission:
400 Mbps (Maximum)
❖ Power supply:
Non power supply
Cable Power repeated (IEEE 1394a-2000 compliant)
802.11b Interface Unit TypeA (R-WL11)
❖ Transmission Spec.:
Based on IEEE 802.11b (Wireless LAN)
❖ Protocol:
TCP/IP, NetBEUI, IPX/SPX, AppleTalk
Note
❒ SmartNetMonitor and WebStatusMonitor are supported.
❖ Data Transfer Speed:
Auto select from below speed
1Mbps, 2Mbps, 5.5Mbps, 11Mbps
Operating Instructions Administrator Reference
246
❖ Frequency Range:
• Inch version:
2412-2462 Mhz (1-11 channels)
• Metric version:
2412-2472 Mhz (1-13 channels)
❖ Transmittable Distance:
1Mbps 400m *1
2Mbps 270m *1
5.5Mbps 200m *1
11Mbps 140m *1
*1 These figures are a guideline for outdoor use. In general, the transmittable distance indoors is 10-100
m, depending on the environment.
❖ Transmission Mode:
ad hoc mode and infrastructure mode
Operating Instructions Administrator Reference
247
Information about Installed Software
expat
Use of the software installed on this product, including the controller (hereinafter "software") and the expat
Version 1.95.2 application software (hereinafter "expat 1.95.2"), is subject to the following conditions:
The product manufacturer provides warranty and support to the software of the product including expat
1.95.2 and the product manufacturer allows the initial developer of expat 1.95.2 to be free from these
obligations.
Copyright (c) 1998, 1999, 2000 Thai Open Source Software Center Ltd
and Clark Cooper
Permission is hereby granted, free of charge, to any person obtaining a copy of this software and associated
documentation files (the "Software"), to deal in the Software without restriction, including without limitation the rights to use, copy, modify, merge, publish, distribute, sublicense, and/or sell copies of the Software,
and to permit persons to whom the Software is furnished to do so, subject to the following conditions:
The above copyright notice and this permission notice shall be included in all copies or substantial portions of the Software.
THE SOFTWARE IS PROVIDED "AS IS", WITHOUT WARRANTY OF ANY KIND, EXPRESS OR IMPLIED, INCLUDING BUT NOT LIMITED TO THE WARRANTIES OF MERCHANTABILITY, FITNESS
FOR A PARTICULAR PURPOSE AND NONINFRINGEMENT. IN NO EVENT SHALL THE AUTHORS
OR COPYRIGHT HOLDERS BE LIABLE FOR ANY CLAIM, DAMAGES OR OTHER LIABILITY,
WHETHER IN AN ACTION OF CONTRACT, TORT OR OTHERWISE, ARISING FROM, OUT OF OR
IN CONNECTION WITH THE SOFTWARE OR THE USE OR OTHER DEALINGS IN THE SOFTWARE.
Note
❒ Information on expat 1.95.2 is available at:
http://expat.sourceforge.net/
Operating Instructions Administrator Reference
248
JPEG LIBRARY
• The software installed on this product is based in part on the work of the Independent JPEG Group.
NetBSD
Copyright Notice of NetBSD
For all users to use this product:
This product contains NetBSD operating system:
For the most part, the software constituting the NetBSD operating system is not in the public domain;
its authors retain their copyright.
The following text shows the copyright notice used for many of the NetBSD source code. For exact
copyright notice applicable for each of the files/binaries, the source code tree must be consulted.
A full source code can be found at http://www.netbsd.org/.
Copyright © 1999, 2000 The NetBSD Foundation, Inc.
All rights reserved.
Redistribution and use in source and binary forms, with or without modification, are permitted provided
that the following conditions are met:
A Redistributions of source code must retain the above copyright notice, this list of conditions and the
following disclaimer.
B Redistributions in binary form must reproduce the above copyright notice, this list of conditions and
the following disclaimer in the documentation and/or other materials provided with the distribution.
C All advertising materials mentioning features or use of this software must display the following acknowledgment:
This product includes software developed by the NetBSD Foundation, Inc. and its contributors.
Operating Instructions Administrator Reference
249
D
Neither the name of The NetBSD Foundation nor the names of its contributors may be used to endorse or promote products derived from this software without specific prior written permission.
THIS SOFTWARE IS PROVIDED BY THE NETBSD FOUNDATION, INC. AND CONTRIBUTORS ''AS IS'' AND ANY EXPRESS OR IMPLIED WARRANTIES, INCLUDING, BUT NOT LIMITED TO, THE IMPLIED WARRANTIES OF MERCHANTABILITY AND FITNESS FOR A
PARTICULAR PURPOSE ARE DISCLAIMED. IN NO EVENT SHALL THE FOUNDATION OR
CONTRIBUTORS BE LIABLE FOR ANY DIRECT, INDIRECT, INCIDENTAL, SPECIAL, EXEMPLARY, OR CONSEQUENTIAL DAMAGES (INCLUDING, BUT NOT LIMITED TO, PROCUREMENT OF SUBSTITUTE GOODS OR SERVICES; LOSS OF USE, DATA, OR PROFITS;
OR BUSINESS INTERRUPTION) HOWEVER CAUSED AND ON ANY THEORY OF LIABILITY, WHETHER IN CONTRACT, STRICT LIABILITY, OR TORT (INCLUDING NEGLIGENCE
OR OTHERWISE) ARISING IN ANY WAY OUT OF THE USE OF THIS SOFTWARE, EVEN IF
ADVISED OF THE POSSIBILITY OF SUCH DAMAGE.
Authors Name List
All product names mentioned herein are trademarks of their respective owners.
The following notices are required to satisfy the license terms of the software that we have mentioned
in this document:
• This product includes software developed by the University of California, Berkeley and its contributors.
• This product includes software developed by Jonathan R. Stone for the NetBSD Project.
• This product includes software developed by the NetBSD Foundation, Inc. and its contributors.
• This product includes software developed by Manuel Bouyer.
• This product includes software developed by Charles Hannum.
• This product includes software developed by Charles M. Hannum.
Operating Instructions Administrator Reference
250
•
•
•
•
•
•
•
•
•
•
•
•
•
•
•
•
•
•
•
This product includes software developed by Christopher G. Demetriou.
This product includes software developed by TooLs GmbH.
This product includes software developed by Terrence R. Lambert.
This product includes software developed by Adam Glass and Charles Hannum.
This product includes software developed by Theo de Raadt.
This product includes software developed by Jonathan Stone and Jason R. Thorpe for the NetBSD
Project.
This product includes software developed by the University of California, Lawrence Berkeley Laboratory and its contributors.
This product includes software developed by Christos Zoulas.
This product includes software developed by Christopher G. Demetriou for the NetBSD Project.
This product includes software developed by Paul Kranenburg.
This product includes software developed by Adam Glass.
This product includes software developed by Jonathan Stone.
This product includes software developed by Jonathan Stone for the NetBSD Project.
This product includes software developed by Winning Strategies, Inc.
This product includes software developed by Frank van der Linden for the NetBSD Project.
This product includes software developed for the NetBSD Project by Frank van der Linden
This product includes software developed for the NetBSD Project by Jason R. Thorpe.
The software was developed by the University of California, Berkeley.
This product includes software developed by Chris Provenzano, the University of California, Berkeley, and contributors.
Operating Instructions Administrator Reference
INDEX
1394 Interface Unit Type 4510, 244
4C.Graphic Mode, 136
A
Access Control, 187
Append CR to LF, 171
Auto Continue, 149
Autonet, 232
telnet, 202
B
Bidirectional transmission, 31, 49, 68
B&W Page Detect, 149
Bypass Size, 122
C
cable, 244
Changing Names and Comments, 108
SmartNetMonitor for Admin, 109
Web Browser, 111
Color Demo Page, 129
Color Regist., 136
community name, 192
Config. Page, 129, 130
251
Configuration
Windows 2000, 14
Windows XP, 34
configuration
NetWare, 71
NetWare 3.x, 76
NetWare 4.x, 5, 83
Windows NT 4.0, 52
Configuring, 108
Configuring NetBEUI for Printing
Windows 2000, 16
Windows NT 4.0, 54
Configuring the Protocols
Windows 2000, 14
Windows NT 4.0, 52
Windows XP, 34
Copies, 149
D
DHCP, 188, 231
dial up router, 228
Displaying the Status of Printer, 113
SmartNetMonitor for Admin, 113
SmartNetMonitor for Client, 114
Web Browser, 115
Duplex, 149
Operating Instructions Administrator Reference
252
E
Energy Saver 1, 149
E.Saver2 OnOff, 149
E. Saver2 Timer, 149
Escape key, 121
Ext. A4 Width, 171
F
Font Number, 171
Font Pitch, 171
fonts, 239
Font Source, 171
Form Lines, 171
G
Getting Printer Information over the Network, 206
H
HDD Format, 136
Hex Dump, 129
Host Interface, 120, 159, 160
Host Name, 203
I
IEEE 1394 Setup, 159
IEEE 802.11b, 159, 199
Image Density, 136
information
Network Interface Board configuration, 190, 214
print job, 212
print log, 213
system log, 191, 219
Installing
SmartNetMonitor for Admin, 94
SmartNetMonitor for Client, 18, 37, 56
Installing Software
Windows 2000, 18
Windows NT 4.0, 56
Windows XP, 37
I/O Buffer, 159
I/O Timeout, 159
IP address, 185
IPP, 194
IPP for Printing
Windows 2000, 14
Windows NT 4.0, 52
Windows XP, 34
K
Key Repeat, 136
Operating Instructions Administrator Reference
253
L
LAN adapter number (Lana Number), 55
Language, 120, 177
Letterhead Mode, 149
List/Test Print, 120, 129
List/Test Print Parameters, 129
Locked Print, 120
M
Maintenance, 120, 136, 137
Maint. Reset, 136
Making Printer Settings with the Control Panel, 116
memory, 241
Memory Capacity and Paper Size, 235
Memory Overflow, 149
Memory Unit Type C 64/128/256MB, 243
menu, accessing, 120
menu, changing, 177
Menu Chart, 116
Menu key, 120
Menu List, 129
Menu Protect, 136
message, 219
MIB, 180
MisfeedRecovery, 149
Monitoring, 108
N
NetWare, 71
NetWare 3.x, 76
NetWare 4.x, 5, 83
NetWare Printing, 230
Network Interface Board, 241
Network Interface Board Type 3000, 244
Network Setup, 159
NIB, 241
O
On Line key, 121
options, 241
Orientation, 171
P
Page Size, 149
Paper Input, 120, 122
Paper Type, 122
Password, 205
password, 103
PCL, 171
PCL Config.Page, 129
PCL Menu, 120
PlainPaper Type, 136
Point Size, 171
PostScript Printing from Windows, 230
Operating Instructions Administrator Reference
254
precautions, 228
Print Area, 136
Printer Hard Disk Type 3000, 242
Printer Lang., 149
printer status, 190
Prt. Err Report, 149
PS Config. Page, 129
Pure IP, 86
R
Registration, 136
remote printer, setup
NetWare 4.x, 5, 88
Resolution, 149
ROM Update, 136
S
Sample Print, 120
SDRAM, 241
Series Prnt.Job, 136
Setting Up as a Print Server
NetWare3.x, 77
NetWare4.x/NetWare5.1, 84
Setting Up as a Remote Printer
NetWare3.x, 79
NetWare4.x/NetWare5.1, 88
Setting Up Options
Windows 2000, 30
Windows NT 4.0, 67
Windows XP, 48
Share Setting
Windows 2000, 33
Windows NT 4.0, 70
Windows XP, 51
SmartNetMonitor for Admin
Installing, 94
SmartNetMonitor for Client
Installing, 18, 37, 56
SMB, 197
SNMP, 180, 191
sntp, 203
specifications, 237
Spool Printing, 149
subnet mask, 187
Sub Paper Size, 149
Symbol Set, 171
System, 120, 149
Operating Instructions Administrator Reference
255
T
TCP/IP for Printing
Windows 2000, 14
Windows NT 4.0, 52
Windows XP, 34
telnet, 183
Autonet, 202
WINS, 201
Tray Locking, 122
Tray Priority, 122
U
Unit of Measure, 149
USB Setting, 159
User Account Enhance Unit Type B, 243
Using a Web Browser, 101
Using SmartNetMonitor for Admin, 92
W
Windows 2000, 14
Share Setting, 33
Windows NT 4.0, 52
Share Setting, 70
Windows XP, 34
Share Setting, 51
WINS, 233
telnet, 201
WL.LAN Defaults, 136
WL.LAN Signal, 136
Operating Instructions Administrator Reference
256
Copyright © 2002
Operating Instructions Administrator Reference
257
EE
GB
G081-6620