1
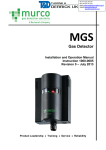
Gas Detector
Installation and Operation Manual
Instruction 6309-9000
Revision 3 – August 2013
Product Leadership • Training • Service • Reliability
MGS-150 Manual
WARRANTY POLICY
BACHARACH, INC. WARRANTS THIS INSTRUMENT, EXCLUDING SENSORS, TO BE
FREE FROM DEFECTS IN MATERIALS AND WORKMANSHIP FOR A PERIOD OF TWO
YEARS FROM THE DATE OF PURCHASE BY THE ORIGINAL OWNER. THE SENSORS
HAVE A WARRANTY PERIOD OF ONE YEAR FROM THE DATE OF PURCHASE. IF
THE PRODUCT SHOULD BECOME DEFECTIVE WITHIN THIS WARRANTY PERIOD,
WE WILL REPAIR OR REPLACE IT AT OUR DISCRETION.
THE WARRANTY STATUS MAY BE AFFECTED IF THE INSTRUMENT HAS NOT BEEN
USED AND MAINTAINED PER THE INSTRUCTIONS IN THIS MANUAL OR HAS BEEN
ABUSED, DAMAGED, OR MODIFIED IN ANY WAY. THIS INSTRUMENT IS ONLY TO BE
USED FOR PURPOSES STATED HEREIN. THE MANUFACTURER IS NOT LIABLE FOR
AUXILIARY INTERFACED EQUIPMENT OR CONSEQUENTIAL DAMAGE.
DUE TO ONGOING RESEARCH, DEVELOPMENT, AND PRODUCT TESTING, THE
MANUFACTURER RESERVES THE RIGHT TO CHANGE SPECIFICATIONS WITHOUT
NOTICE. THE INFORMATION CONTAINED HEREIN IS BASED ON DATA CONSIDERED
ACCURATE. HOWEVER, NO WARRANTY IS EXPRESSED OR IMPLIED REGARDING
THE ACCURACY OF THIS DATA.
ALL GOODS MUST BE SHIPPED TO THE MANUFACTURER BY PREPAID FREIGHT.
ALL RETURNED GOODS MUST BE PRE-AUTHORIZED BY OBTAINING A RETURN
MERCHANDISE AUTHORIZATION (RMA) NUMBER. CONTACT THE MANUFACTURER
FOR A NUMBER AND PROCEDURES REQUIRED FOR PRODUCT TRANSPORT.
SERVICE POLICY
BACHARACH, INC. MAINTAINS AN INSTRUMENT SERVICE FACILITY AT THE
FACTORY. SOME BACHARACH DISTRIBUTORS / AGENTS MAY ALSO HAVE
REPAIR FACILITIES, HOWEVER, BACHARACH ASSUMES NO LIABILITY FOR
SERVICE PERFORMED BY ANYONE OTHER THAN BACHARACH PERSONNEL.
REPAIRS ARE WARRANTED FOR 90 DAYS AFTER DATE OF SHIPMENT
(SENSORS, PUMPS, FILTERS AND BATTERIES HAVE INDIVIDUAL
WARRANTIES). SHOULD YOUR INSTRUMENT REQUIRE NON-WARRANTY
REPAIR, YOU MAY CONTACT THE DISTRIBUTOR FROM WHOM IT WAS
PURCHASED OR YOU MAY CONTACT BACHARACH DIRECTLY.
IF BACHARACH IS TO DO THE REPAIR WORK, SEND THE INSTRUMENT,
PREPAID, TO BACHARACH, INC. AT THE FOLLOWING ADDRESS.
BACHARACH, INC.
621 HUNT VALLEY CIRCLE
NEW KENSINGTON, PA 15068
ATTENTION: SERVICE DEPARTMENT
ALWAYS INCLUDE YOUR RMA #, ADDRESS, TELEPHONE NUMBER, CONTACT
NAME, SHIPPING/BILLING INFORMATION AND A DESCRIPTION OF THE
DEFECT AS YOU PERCEIVE IT. YOU WILL BE CONTACTED WITH A COST
ESTIMATE FOR EXPECTED REPAIRS PRIOR TO THE PERFORMANCE OF ANY
SERVICE WORK. FOR LIABILITY REASONS, BACHARACH HAS A POLICY OF
2
6309-9000 Rev 3
MGS-150 Manual
PERFORMING ALL NEEDED REPAIRS TO RESTORE THE INSTRUMENT TO
FULL OPERATING CONDITION.
PRIOR TO SHIPPING EQUIPMENT TO BACHARACH, CONTACT OUR OFFICE
FOR AN RMA # (RETURNED MERCHANDISE AUTHORIZATION). ALL RETURNED
GOODS MUST BE ACCOMPANIED WITH AN RMA NUMBER.
PACK THE EQUIPMENT WELL (IN ITS ORIGINAL PACKING IF POSSIBLE), AS
BACHARACH CANNOT BE HELD RESPONSIBLE FOR ANY DAMAGE INCURRED
DURING SHIPPING TO OUR FACILITY.
NOTICES
COPYRIGHTS: THIS MANUAL IS SUBJECT TO COPYRIGHT PROTECTION; ALL
RIGHTS ARE RESERVED UNDER INTERNATIONAL AND DOMESTIC
COPYRIGHT LAWS. THIS MANUAL MAY NOT BE COPIED OR TRANSLATED, IN
WHOLE OR IN PART, IN ANY MANNER OR FORMAT, WITHOUT THE WRITTEN
PERMISSION OF BACHARACH, INC.
ALL SOFTWARE UTILIZED AND/OR DISTRIBUTED BY BACHARACH IS SUBJECT
TO COPYRIGHT PROTECTION. ALL RIGHTS ARE RESERVED. NO PARTY MAY
USE OR COPY SUCH SOFTWARE IN ANY MANNER OR FORMAT, EXCEPT TO
THE EXTENT THAT BACHARACH GRANTS THEM A LICENSE TO DO SO. IF THIS
SOFTWARE IS BEING LOADED ONTO MORE THAN ONE COMPUTER, EXTRA
SOFTWARE LICENSES MUST BE PURCHASED.
TECHNICIAN USE ONLY
THIS UNIT MUST BE INSTALLED BY A SUITABLY QUALIFIED TECHNICIAN WHO
WILL INSTALL THIS UNIT IN ACCORDANCE WITH THESE INSTRUCTIONS AND
THE STANDARDS IN THEIR PARTICULAR INDUSTRY/COUNTRY. OPERATORS
OF THE UNIT SHOULD BE AWARE OF THE REGULATIONS AND STANDARDS IN
THEIR INDUSTRY/COUNTRY FOR THE OPERATION OF THIS UNIT. THESE
NOTES ARE ONLY INTENDED AS A GUIDE AND THE MANUFACTURER BEARS
NO RESPONSIBILITY FOR THE INSTALLATION OR OPERATION OF THIS UNIT.
FAILURE TO INSTALL AND OPERATE THE UNIT IN ACCORDANCE WITH THESE
INSTRUCTIONS AND WITH INDUSTRY GUIDELINES MAY CAUSE SERIOUS
INJURY INCLUDING DEATH AND THE MANUFACTURER WILL NOT BE HELD
RESPONSIBLE IN THIS REGARD.
6309-9000 Rev 3
3
MGS-150 Manual
Table of Contents
Section 1.
Overview .................................................................................... 5
1.1. General Information..................................................................................... 5
1.2. Technical Specifications ............................................................................... 6
Section 2.
2.1.
2.2.
2.3.
2.4.
2.5.
2.6.
2.7.
Installation and Wiring................................................................ 8
General Placement Guidelines ..................................................................... 9
Components and Access Overview .............................................................. 9
Machinery Rooms ...................................................................................... 12
Refrigerated Spaces ................................................................................... 14
Chillers........................................................................................................ 14
Air Conditioning (Direct Systems VRF/VRV) ............................................... 15
Remote Sensor Head Installation ............................................................... 16
Section 3.
Housing Dimensions ................................................................. 17
Section 4.
Operation and Stabilization ...................................................... 21
Section 5.
Configurations .......................................................................... 22
5.1. Overview .................................................................................................... 22
5.2. Adjusting the Alarm Set Point .................................................................... 22
Section 6.
6.1.
6.2.
6.3.
6.4.
6.5.
6.6.
6.7.
Functional Tests and Calibration ............................................... 23
Introduction ............................................................................................... 23
Bump Testing ............................................................................................. 25
Calibration Overview .................................................................................. 28
Calculating Calibration Voltage .................................................................. 29
Calibrating Semiconductor (SC) Sensors .................................................... 29
Calibrating Electrochemical (EC) Sensors ................................................... 30
Calibrating Infrared (IR) Sensors ................................................................ 30
Section 7.
Troubleshooting........................................................................ 31
CE Declaration of Conformity ........................................................................ 32
4
6309-9000 Rev 3
MGS-150 Manual
Section 1.
Overview
1.1. General Information
The MGS-150 is a state-of-the-art fixed gas detector which can detect a
wide range of different gases. The gas sensors can be used on a standalone basis or integrated into Controls or Building Management Systems
(BMS).
The MGS-150 can be used:
• in new buildings/areas that require continuous monitoring with
high tech gas sensor transmitters.
• to add gas detection solutions to an existing system.
Typical detection applications include the detection of:
• refrigerant gases
• combustible gases
• toxic gases and/or volatile organic compounds.
The MGS Controller is an optional device used to remotely monitor up to
six MGS-150 devices. For more information, refer to the MGS Controller
manual (P/N 6709-9000).
Electrochemical and Infrared Board
Semiconductor Board
Figure 1. MGS-150 Sensor Board (EC, IR, and SC)
6309-9000 Rev 3
5
MGS-150 Manual
1.2. Technical Specifications
Specification
Power Supply
Monitoring LEDs
Audible Alarm
Analog Outputs
Relay Outputs
IP Rating
Temperature
Rating
Humidity Rating
Dimensions/
Weights per
Enclosure Type
(see Note
below)
Approvals
Description
12-24 VDC, 12-24 VAC 50/60 Hz, 2 W max.
Power consumption (12V): 60mA (EC), 153mA (SC), 136mA (IR)
Power: Green LED
Alarm: Red LED
Buzzer, enable/disable
4-20 mA; 0-5 V; 0-10 V; 1-5 V; 2-10 V
1 relay rated 1 A @ 24 VAC/VDC; Delay: 0, 1, 5, or 10 minutes
IP41 (standard); IP66 (optional)
Sensor
IP41 Housing
IP66 Housing
IR and SC (all)
-4° to 122° F
(-20° to 50° C)
-40° to 122° F
(-40° to 50° C)
EC (all but NH3)
-4° to 104° F
(-20° to 40° C)
-4° to 104° F
(-20° to 40° C)
EC (NH3)
-4° to 104° F
(-20° to 40° C)
-40° to 104° F
(-40° to 40° C)
0-95% non-condensing
Housing
Dimensions
3.35” x 5.59” x 2.09”
IP41 (standard)
86 x 142 x 53 mm
6.89” x 6.5” x 3.29”
IP66 (optional)
175 x 165 x 82 mm
6.89” x 8.9” x 3.29”
w/ Splash Guard
175 x 225 x 82 mm
6.89” x 6.1” x 3.29”
w/ Remote Sensor
175 x 155 x 82 mm
6.89” x 6.1” x 3.29”
w/ Exd Sensor Head
175 x 155 x 82 mm
6.89” x 6.1” x 3.29”
w/PRV Sensor Head
175 x 155 x 82 mm
6.89” x 4.9” x 3.29”
w/ Airflow/Duct
175 x 125 x 82 mm
5.51” x 7.09” x 3.54”
Exd (ATEX only)
140 x 180 x 90 mm
CE; UL/CSA/IEC/EN 61010-1
Weight
6.3 oz
180 g
1 lb 6 oz
629 g
1 lb 9 oz
700 g
1 lb 11 oz
790 g
2 lb 10 oz
1185 g
2 lb 0.3 oz
916 g
1 lb 4 oz
578 g
4 lb 15 oz
2234 g
NOTE: Enclosures listed above are for all models/
configurations except IR Halogen, which use the standard IP41
enclosure with a different temperature rating.
6
6309-9000 Rev 3
MGS-150 Manual
NOTE: The hazardous area EXd Gas Monitor products are
designed with individually certified EXd main housing
enclosures and certified EXD remote or attached sensor
enclosures. The main housing enclosure and its PCB
assembly are also EXd certified, but the final EXd Gas Monitor
assemblies (main enclosure and/or sensor assembly) are not
currently EXD certified, but are pending additional testing.
Supported CFM/Duct Sizes for the Duct Mount Housing
Units
Duct Size
Inches
12 x 12
12 x 24
18 x 18
24 x 24
24 round
Feet
1x1
1x2
1.5 x 1.5
2x2
Pi x 1 x 1
1
2
2.25
4
3.14
2
Area (ft )
CFM
2800
3000
3400
3800
4000
4400
4800
5000
5400
5800
6000
6400
6800
7000
7400
7800
8000
8400
8800
9000
9400
9800
10000
6309-9000 Rev 3
Ft/min (Based on CFM and Duct Size)
2800
3000
3400
3800
4000
4400
4800
5000
5400
5800
6000
6400
6800
7000
7400
7800
8000
8400
8800
9000
9400
9800
10000
n/a
n/a
n/a
n/a
n/a
n/a
n/a
2500
2700
2900
3000
3200
3400
3500
3700
3900
4000
4200
4400
4500
4700
4900
5000
n/a
n/a
n/a
n/a
n/a
n/a
n/a
n/a
n/a
2578
2667
2844
3022
3111
3289
3467
3556
3733
3911
4000
4178
4356
4444
n/a
n/a
n/a
n/a
n/a
n/a
n/a
n/a
n/a
n/a
n/a
n/a
n/a
n/a
n/a
n/a
n/a
n/a
n/a
n/a
n/a
n/a
2500
n/a
n/a
n/a
n/a
n/a
n/a
n/a
n/a
n/a
n/a
n/a
n/a
n/a
n/a
n/a
n/a
2548
2675
2803
2866
2994
3121
3185
7
MGS-150 Manual
Section 2.
Installation and Wiring
WARNING: Explosion hazard! Do not mount the MGS in an
area that may contain flammable liquids, vapors, or aerosols.
Operation of any electrical equipment in such an environment
constitutes a safety hazard.
CAUTION: The MGS contains sensitive electronic components
that can be easily damaged. Do not touch nor disturb any of
these components.
NOTE: The mounting location of the monitor should allow it to
be easily accessible for visual monitoring and servicing.
NOTE: The monitor must be connected by a marked, suitably
located and easily reached switch or circuit-breaker as means
of disconnection.
NOTE: Connect monitor power and signaling terminals using
wiring that complies with local electrical codes or regulations for
the intended application.
NOTE: This instrument can be equipped with a semiconductor
sensor for the detection of refrigerant, combustible and VOC
gases. Semiconductor sensors are not gas specific and
respond to a variety of other gases including propane exhaust,
cleaners, and solvents. Changes in temperature and humidity
may also affect the sensor’s performance.
8
6309-9000 Rev 3
MGS-150 Manual
2.1. General Placement Guidelines
NOTE: The MGS-150 should be installed plumb and level
and securely fastened to a rigid mounting surface.
Sensors must be located within the appropriate wire lengths from the
central control unit (if used).
In all cases the sensor supplied is designed for maximum sensitivity to a
particular gas. However, in certain circumstances false alarms may be
caused by the occasional presence of sufficiently high concentrations of
other gaseous impurities. Examples of situations where such
abnormalities may arise include the following:
•
•
•
Plant room maintenance activity involving solvent or paint fumes
or refrigerant leaks.
Accidental gas migration in fruit ripening/storage facilities
(bananas - ethylene, apples - carbon dioxide).
Heavy localized exhaust fumes (carbon monoxide, dioxide,
propane) from engine-driven forklifts in confined spaces or close
to sensors.
Bacharach recommends setting the alarm delay to minimize false
alarms.
2.2. Components and Access Overview
NOTE: The wiring is the same for the electro-chemical,
semi-conductor, and infrared models. The controller wiring is
the same for all controllers.
There is a 5-minute power-up delay to allow the sensor to stabilize.
Refer to Figure 2 and Figure 3 for internal components and wiring.
6309-9000 Rev 3
9
MGS-150 Manual
Figure 2. EC or IR Sensor Components and Wiring
10
6309-9000 Rev 3
MGS-150 Manual
1.
Figure 3. SC Sensor Components and Wiring
6309-9000 Rev 3
11
MGS-150 Manual
Item
Description
Enclosure
Access
To open the standard sensor enclosure, turn the cable
clamp 1/2 turn counter-clockwise to loosen the internal
gland nut, depress the clip on top of the enclosure and
open. Reverse to close. (Note: For the IP66 enclosure,
use the four bolts on the front cover.)
Power
12-24V AC/DC, connect at positions 0V and +V at
connector block CN1.
• For AC: Jumper A is on, D is off. (See Figure 2
and Figure 3.
• For DC: Jumper A is off, D is on. (Default factory
setting is DC.)
Use 2 wires, typically 18 AWG (minimum).
Output
Connect two wires to terminal block CN2 positions 0V
and V or I for voltage or current, respectively.
• Connect 4-20mA at CN2 positions 0V and I
• Connect voltage output at CN2 positions 0V and V
Relay Set
Point
P1 sets the trip point for the relay and audible alarm
using the 0- 5V scale (measure at test points 0V and
alarm test point TP1). Default factory setting is 50% of
the range.
Time
Delay
A time delay for the operation of the relay and audible
alarm can be selected using jumpers JP5 and JP6.
Default factory setting is zero.
Audible
Alarm
The audible alarm can be disabled using jumper JP3.
Default factory setting is enabled.
2.3. Machinery Rooms
There is no absolute rule in determining the number of sensors and their
locations. However, a number of simple guidelines will help to make a
decision. Sensors monitor a point as opposed to an area. If the gas leak
does not reach the sensor then no alarm will be triggered. Therefore, it
is extremely important to carefully select the sensor location. Also
consider ease of access for maintenance.
The size and nature of the site will help to decide which method is the
most appropriate to use. Locations requiring the most protection in a
machinery or plant room would be around compressors, pressurized
12
6309-9000 Rev 3
MGS-150 Manual
storage vessels, refrigerant cylinders or storage rooms or pipelines. The
most common leak sources are valves, gauges, flanges, joints (brazed or
mechanical), filling or draining connections, etc.
•
•
When mechanical or natural ventilation is present, mount a
sensor in the airflow.
In machinery rooms where there is no discernable or strong
airflow then options are:
Point Detection, where sensors are located as near as
possible to the most likely sources of leakage, such as the
compressor, expansion valves, mechanical joints or cable
duct trenches.
Perimeter Detection, where sensors completely surround the
area or equipment.
•
•
For heavier-than-air gases such as halocarbon and
hydrocarbon refrigerants such as R404A, propane, and butane
sensors should be located near ground level.
For lighter-than-air gas (e.g., ammonia), the sensor needs to
be located above the equipment to be monitored on a bracket or
high on a wall within 12 in (300 mm) of (or on) the ceiling –
provided there is no possibility of a thermal layer trapped under
the ceiling preventing gas from reaching the sensor.
NOTE: At very low temperatures (e.g., refrigerated
cold store), ammonia gas becomes heavier than air.
•
•
•
•
•
With similar density or miscible gases (e.g., CO or CO2), sensors
should be mounted about head high (about 5 ft [1.5 m]).
Sensors should be positioned just far enough back from any
high-pressure parts to allow gas clouds to form and be detected.
Otherwise, a gas leak might pass by in a high-speed jet and not
be detected by the sensor.
Make sure that pits, stairwells and trenches are monitored since
they may fill with stagnant pockets of gas.
If a pressure relief vent (PRV) pipe is fitted to the system, it may
be a requirement to mount a sensor to monitor this vent pipe. It
could be positioned about 6 feet (2 m) above the PRV to allow
gas clouds to form.
For racks or chillers pre-fitted with refrigerant sensors, these
should be mounted so as to monitor the compressors. If extract
ducts are fitted the airflow in the duct may be monitored.
6309-9000 Rev 3
13
MGS-150 Manual
2.4. Refrigerated Spaces
In refrigerated spaces, sensors should be located in the return airflow to
the evaporators on a sidewall (below head-high is preferred), or on the
ceiling, not directly in front of an evaporator. In large rooms with multiple
evaporators, sensors should be mounted on the central line between 2
adjacent evaporators, as turbulence will result in airflows mixing.
2.5. Chillers
In the case of small water- or air-cooled enclosed chiller units mount the
sensor so as to monitor airflow to the extract fans. With larger models
also place a sensor inside the enclosure under or adjacent to the
compressors.
In the case of outdoor units:
•
For enclosed air-cooled chillers or the outdoor unit for
variable refrigerant volume and variable refrigerant flow (VRV/VRF)
systems, mount the sensor so as to monitor airflow to the extract fan.
With large units also place a sensor inside the enclosure under or
adjacent to the compressors.
In the case of non-enclosed outdoor units:
•
•
•
•
•
If there is an enclosed machinery section locate a sensor there.
In the case of units with enclosed compressors, mount sensors in the
enclosures.
Where you have protective or acoustic panels mount the sensor low
down under the compressors where it is protected by the panels.
With air-cooled chillers or air-cooled condensers with non-enclosed
condenser sections it is difficult to effectively monitor leaks in the coil
sections. With some designs it will be possible using an airflow
sensor to monitor airflow to the start–up fans in the front or rear
sections.
If there is a possibility of refrigerant leaks into a duct or air-handling
unit install a sensor to monitor the airflow.
Weatherproof sensors should be used for unprotected outdoor
applications.
14
6309-9000 Rev 3
MGS-150 Manual
2.6. Air Conditioning (Direct Systems VRF/VRV)
For compliance with EN378, at least one detector shall be installed in
each occupied space being considered and the location of detectors
shall be chosen in relation to the refrigerant and they shall be located
where the refrigerant from the leak will collect. In this case refrigerants
are heavier than air and detectors should have their sensors mounted
low, e.g., at less than bed height in the case of an hotel or other similar
Category Class A spaces. Ceilings or other voids if not sealed are part of
the occupied space.
CAUTION: Monitoring ceiling voids in a hotel room would
not strictly comply with EN378.
Do Mount In-Room Sensors…
Don’t Mount Sensors…
…at less than the normal heights of the
occupants. E.g., in a hotel room this is less
than bed height (between 8 and 20 inches
[200 and 500 mm] off the floor).
…under mirrors.
…away from drafts and heat sources like
radiators, etc.
…at vanity units.
… to avoid sources of steam.
…in or near bathrooms.
6309-9000 Rev 3
15
MGS-150 Manual
2.7. Remote Sensor Head Installation
If you do not wish to surface mount the MGS, a brushed stainless steel
faceplate is available. The remote sensor is mounted in an electrical
back box 1.7 in (44 mm) deep to which the vented faceplate is fitted.
CAUTION: To avoid component mix-up, do not remove sensor
boards from multiple units at the same time. Alternatively, label
them, or match the serial number on the main PCB and the remote
sensor PCB when reinstalling.
1. Remove the connector from the sensor PCB to feed the cable
through the housing.
2. Immediately refit the connector to the sensor board in the back of the
box. The MGS and remote sensor must be kept together as they are
calibrated together and are a matched pair.
To clean, the faceplate should be lightly dusted.
IMPORTANT: Do not spray the MGS-150 with cleaning or
polishing aerosols.
16
6309-9000 Rev 3
MGS-150 Manual
Section 3.
Housing Dimensions
Figure 4. MGS-150 Standard Housing
6309-9000 Rev 3
17
MGS-150 Manual
Figure 5. IP66 Housing with Splashguard
18
6309-9000 Rev 3
MGS-150 Manual
Figure 6. IP66Airflow Duct Mount Housing
Units = mm
Figure 7. Exd Housing
6309-9000 Rev 3
19
MGS-150 Manual
9.8 feet
(3 meters)
Typical
For Dimensions and Mounting Locations , See Figure 5.
Figure 8. IP66 Housing with Remote Sensor Head
NOTE: For the Exd Remote Sensor Head and 16.4 ft (5 m) cable,
the thread varies based on the model.
20
6309-9000 Rev 3
MGS-150 Manual
Section 4.
Operation and Stabilization
On powering up, the MGS-150 will sense for the presence of gas after an
initial warm-up delay of 5 minutes. The green LED will flash at 1 second
intervals during the warm-up.
In an alarm condition:
• green LED stays on and the red LED is on
• audible alarm operates (if not disabled and after delay, if set).
• relay output activates (after a delay, if set)
• V and I output changes proportionally with gas concentration.
In a fault condition:
• green LED will be off and the red LED will be on
• voltage/current fault output will activate:
o 2mA on the 4-20mA output
o 0.5V on the 1-5V output
o 1.0V on the 2-10V output.
The typical time for various sensor types to stabilize is shown below.
Sensor Type
Stabilization Time
Electrochemical (EC)
20-30 seconds
Semiconductor (SC)
1-3 minutes
Infrared (IR)
2 minutes
On power up, the electrochemical sensor outputs a signal voltage
normally below the set alarm level. Semiconductors output over the +
max scale, i.e., > 5V. Both move towards zero as they stabilize.
If sensors have been in long-term storage or the detectors have been
turned off for a long period, stabilization is much slower. However, within
1-2 hours sensors should have dropped below the alarm level and be
operational. You can monitor progress exactly by monitoring the 0-10V
output. When the output settles around zero the sensor is stabilized. In
exceptional circumstances the process can take up to 24 hours or more.
6309-9000 Rev 3
21
MGS-150 Manual
Section 5.
Configurations
5.1. Overview
Function
Description
Time Delay
Available on the audible alarm and relay to avoid false
alarms. This is set with jumpers. The default delay is
0 minutes. You may wish to set to 15 minutes during
start up. See Figure 2 and Figure 3 for setting the
jumpers.
Audible
Alarm
The units have an internal audible alarm. You can
disable this by jumper, but the default setting is
“enabled” in compliance with EN378. See Figure 2
and Figure 3 for setting the jumpers.
Output
Decide which output is required: 4-20mA, 1-5V, 0-10V,
relay outputs, etc. See Figure 2 and Figure 3 for
setting the jumpers.
5.2. Adjusting the Alarm Set Point
This process is the same for all versions using pot P1 and test points 0V
and REF1.
Step
Adjusting the Alarm Relay
1
Locate Pot P1 and use it to adjust the set point at which the
relay activates.
2
Monitor the output between test points 0V (negative) and
REF1 (positive) until the correct setting is reached. See
example below.
Example: For a sensor range of 0-1000 ppm, calculate the voltage to
set the relay at 100 ppm.
𝐀𝐥𝐚𝐫𝐦 𝐏𝐨𝐢𝐧𝐭 𝐕𝐨𝐥𝐭𝐚𝐠𝐞 = 𝐀𝐥𝐚𝐫𝐦 𝐕𝐚𝐥𝐮𝐞 ×
𝐀𝐥𝐚𝐫𝐦 𝐏𝐨𝐢𝐧𝐭 𝐕𝐨𝐥𝐭𝐚𝐠𝐞 = 𝟏𝟎𝟎 𝐩𝐩𝐦 ×
So the alarm voltage setting is 0.5 Volts.
22
𝟓𝐕
𝐌𝐚𝐱 𝐑𝐚𝐧𝐠𝐞
𝟓𝐕
= 𝟎. 𝟓 𝐕
𝟏𝟎𝟎𝟎 𝐩𝐩𝐦
6309-9000 Rev 3
MGS-150 Manual
Section 6.
Functional Tests and Calibration
6.1. Introduction
To comply with the requirements of EN378 and the European F-GAS
regulation, sensors must be tested annually. However, local regulations
may specify the nature and frequency of this test.
CAUTION: Check local regulations on calibration or testing
requirements.
CAUTION: The MGS contains sensitive electronic
components that can be easily damaged. Do not touch nor
disturb any of these components
NOTE:
The MGS is calibrated at the factory. After
installation, a zero adjustment maybe required due to
differences in environmental conditions.
IMPORTANT: If the MGS is exposed to a large leak it should
be tested to ensure correct functionality by electrically
resetting the zero setting and carrying out a bump test. See
procedures below.
IMPORTANT: Bacharach recommends annual checks and
gas calibration.
Bacharach also recommends sensor
replacement every 3 years or as required. Calibration
frequency may be extended based on application, but should
never exceed 2 years.
IMPORTANT: In applications where life safety is critical,
calibration should be done quarterly (every 3 months) or on a
more frequent basis. Bacharach is not responsible for setting
safety practices and policies. Safe work procedures including
calibration policies are best determined by company policy,
industry standards, and local codes.
6309-9000 Rev 3
23
MGS-150 Manual
IMPORTANT:
Failure to test or calibrate the unit in
accordance with applicable instructions and with industry
guidelines may result in serious injury or death. The
manufacturer is not liable for any loss, injury, or damage
arising from improper testing, incorrect calibration, or
inappropriate use of the unit.
IMPORTANT: Before testing the sensors on-site, the MGS
must have been powered up and allowed to stabilize.
IMPORTANT: The testing and/or calibration of the unit must
be carried out by a suitably qualified technician, and must be
done:
•
•
in accordance with this manual
in compliance with locally applicable guidelines and
regulations.
Suitably qualified operators of the unit should be aware of the
regulations and standards set down by the industry/country
for the testing or calibration of this unit. This manual is only
intended as a guide and, insofar as permitted by law, the
manufacturer accepts no responsibility for the calibration,
testing, or operation of this unit.
The frequency and nature of testing or calibration may be
determined by local regulation or standards.
EN378 and the F-GAS Regulation require an annual check in
accordance with the manufacturer’s recommendation.
NOTE: For improved accuracy and response, the instrument
should be zeroed and calibrated in the environment in which
it is being installed.
There are two concepts that need to be differentiated:
•
•
24
bump test
calibration.
6309-9000 Rev 3
MGS-150 Manual
Exposing the sensor to a gas and observing its
response to the gas. The objective is to establish if the
sensor is reacting to the gas and all the sensor outputs
are working correctly. There are two types of bump test.
Bump Test
Calibration
Quantified:
A known concentration of gas is
used.
Non-Quantified:
A gas of unknown concentration
is used.
Exposing the sensor to a calibration gas, setting the
“zero” or standby voltage to the span/range, and
checking/adjusting all the outputs, to ensure that they
are activated at the specified gas concentration.
CAUTION: Before you carry out the test or calibration:
•
Advise occupants, plant operators, and supervisors.
•
Check if the MGS is connected to external systems such
as sprinkler systems, plant shut down, external sirens
and beacons, ventilation, etc. and disconnect as
instructed by the customer.
•
Deactivate alarm delays if selected at JP5, JP6 as per
Figure 2 and Figure 3.
•
For bump test or calibration the MGS should be powered
up for 24 hours. The instrument should be fully stabilised
per Section 4.
6.2. Bump Testing
After installation, the units should be bump tested. Expose the sensors
to appropriate test gas (NH3, CO2, etc.). The system will alarm when the
test gas ppm value is above the alarm level. The gas should put the
system into alarm and light the red LED. The delay prevents the audible
alarm from sounding and the relay from switching (if delay is set).
With a bump test you can see the functions of the sensor - the red LED
will light, the relay and audible alarm will function, and the output (0-10V,
for example) will show the gas level.
Ideally bump tests are conducted on site in a clean air atmosphere.
6309-9000 Rev 3
25
MGS-150 Manual
NOTE: Prior to carrying out a bump test, check and adjust
the zero setting as described in the Calibration section.
NOTE: Procedures for bump test and calibration vary
depending on the sensor technology used and the gas in
question. The MGS is available in three sensor versions:
Semiconductor (SC), Electrochemical (EC) and Infrared (IR).
NOTE: Do not pressurize the sensor.
NOTE:
For semiconductor sensors, you MUST use
calibration gas in a balance of air (not N2).
IMPORTANT: After a semiconductor or electrochemical
sensor is exposed to a substantial gas leak, the sensor
should be checked and replaced if necessary.
NOTE: To test the audible alarm and/or relay function, check
the delay is set at zero and expose to gas. You can mute the
audible alarm by removing jumper 3.
Step
26
Bump Testing Using Calibration Gas Cylinders
1
Remove the enclosure lid of
the gas detector (not in an
exhaust area).
2
Connect a voltmeter to
monitor sensor response (in
Volts DC). Monitor the
response between pins 0V
and VS.
3
Expose the sensor to gas from the cylinder. You can place
the entire MGS into a plastic bag or use a plastic hose/hood
to direct gas to the sensor head. A response of above 80% is
acceptable.
6309-9000 Rev 3
MGS-150 Manual
Figure 9. Gas Cylinder and Test Hardware
Gas ampoules are convenient and inexpensive alternatives to using gas
cylinders for bump testing.
Step
Bump Testing Using Gas Ampoules
1
Make sure that both the ampoules and the calibration beaker
are clean and dry.
2
Unscrew the beaker hold screw and place the ampoule so that
it sits in the base of the beaker (see Figure 10).
3
Tighten the wing-nut screw onto
the ampoule without breaking it.
4
Remove the enclosure lid of the
gas detector.
5
Connect a voltmeter between
pins 0V and VS to monitor
sensor response (in Volts DC).
6
Place the beaker over the sensor head using the multi sensor
adaptor to fit the sensor, or, if an Exd, IP66 or Remote sensor
head version, screw the beaker on the remote sensor head
M42 thread or M35 thread adaptor. It should be as tight fitting
as possible to allow maximum gas exposure.
6309-9000 Rev 3
27
MGS-150 Manual
Step
Bump Testing Using Gas Ampoules
7
Tighten the wing-nut screw onto the ampoule until it shatters
allowing the gas to diffuse in the beaker. It should be left in
place for approximately 5 min.
8
The voltage output will increase. This confirms that the sensor
is responding. A response equivalent to at least 50% of the
test gas (typical) will confirm that the system is in order if
tested with the unit’s specified span gas.
9
Remove the beaker from the sensor. Carefully remove any
ampoule remains from the gas detector and beaker.
Figure 10. Gas Ampoules for Bump Testing
6.3. Calibration Overview
There are two adjustments required: zero and span. They are monitored
at 0V and VS using a 0-5V scale. If the sensor range is 0-1000 ppm,
then 5V=1000 ppm.
Bacharach offers a calibration kit that consists of a calibration gas
cylinder, a flow regulation valve with flexible non-absorbent tubing and
vented calibration hood. Tools required:
•
•
•
Gas cylinder with the appropriate gas and concentration
A voltmeter (crocodile clips recommended)
Screwdriver (depending on housing).
The MGS has three sensor PCB versions: semiconductor (SC),
electrochemical (EC), and infrared (IR).
28
6309-9000 Rev 3
MGS-150 Manual
6.4. Calculating Calibration Voltage
Sensor outputs are linear. As long as you have a gas cylinder of known
concentration you can calibrate to any desired range.
Example: For a sensor range of 0-1000 ppm and a cylinder of the target
gas at 800 ppm:
𝐕𝐨𝐥𝐭𝐚𝐠𝐞 = 𝐓𝐚𝐫𝐠𝐞𝐭 𝐆𝐚𝐬 𝐕𝐚𝐥𝐮𝐞 ×
𝐕𝐨𝐥𝐭𝐚𝐠𝐞 = 𝟖𝟎𝟎 𝐩𝐩𝐦 ×
𝟓𝐕
𝐒𝐞𝐧𝐬𝐨𝐫 𝐑𝐚𝐧𝐠𝐞
𝟓𝐕
= 𝟒𝐕
𝟏𝟎𝟎𝟎 𝐩𝐩𝐦
So the output voltage signal should be adjusted to 4V.
6.5. Calibrating Semiconductor (SC) Sensors
Step
Calibrating Semiconductor (SC) Sensors
1
Locate Pot P2 which is used to adjust the zero point.
2
Monitor the output between 0V (negative) and VS (positive).
3
Adjust Pot P2 to 0 V or slightly positive (0.01 V is acceptable).
4
Locate Pot P3 which is used to calibrate the range (span) of
the sensor.
5
Monitor the output between 0V (negative) and VS (positive).
6
Expose the sensor to calibration gas and allow to stabilize
(approximately 6 minutes).
7
Adjust pot P3 to the voltage calculated in section 6.4 (page
29).
NOTE:
For semiconductor sensors, you MUST use
calibration gas in a balance of air (not N2).
6309-9000 Rev 3
29
MGS-150 Manual
6.6. Calibrating Electrochemical (EC) Sensors
There are two adjustments required: zero and span. They are monitored
at 0V and VS using a 0-5V scale. If the sensor range is 0-1000 ppm,
then 5V=1000 ppm.
Step
Calibrating Electrochemical (EC) Sensors
1
Locate Pot VR201 which is used to adjust the zero point.
2
Monitor the output between 0V (negative) and VS (positive).
3
Adjust Pot VR201 to 0V or slightly positive (0.01 V is
acceptable).
4
Locate Pot VR202 which is used to calibrate the range (span)
of the sensor.
5
Monitor the output between 0V (negative) and VS (positive).
6
Expose the sensor to calibration gas and allow to stabilize
(approximately 6 minutes).
7
Adjust pot VR202 to the voltage calculated in section 6.4
(page 29).
6.7. Calibrating Infrared (IR) Sensors
Step
30
Calibrating Infrared (IR) Sensors
1
Locate Pot VR203 which is used to adjust the zero point.
2
Monitor the output between 0V (negative) and VS (positive).
3
Expose the sensor to pure 99% nitrogen until output is stable
(approximately 3 minutes).
4
Adjust Pot VR203 to 0 V or slightly positive (0.01 V is
acceptable).
5
Locate Pot VR202 which is used to calibrate the range (span)
of the sensor.
6
Monitor the output between 0V (negative) and VS (positive).
7
Expose the sensor to calibration gas and allow to stabilize
(approximately 3 minutes).
8
Adjust pot VR202 to the voltage calculated in section 6.4
(page 29).
6309-9000 Rev 3
MGS-150 Manual
Section 7.
Troubleshooting
Symptom
Green and Red light
off
Red light on, green led
off (indicates a fault)
Alarms in the absence
of a leak
6309-9000 Rev 3
Possible Cause(s)
• Check power supply. Check wiring.
• MGS-150 was possibly damaged in
transit. Check by installing another
MGS-150 to confirm the fault.
• Sensor may be disconnected from
printed circuit board. Check to see
sensor is properly inserted into board.
• The sensor has been damaged or has
reached the end of life and needs to be
exchanged. Contact Bacharach for
instructions and support.
• Try setting an alarm delay.
• Perform a bump test to ensure proper
operation.
31
MGS-150 Manual
DECLARATION OF CONFORMITY
The manufacturer of the
products covered by this
declaration:
Bacharach, Inc.
621 Hunt Valley Circle
New Kensington, PA 15068
Year conformity is
declared:
2012
Product(s):
MGS
Model(s):
MGS Transmitter
The undersigned hereby declares that the above referenced products are in conformity
with the provisions of the following standard(s) and is in accordance with the following
directive(s).
Directive(s):
2004/108/EC
EU EMC Directive
2006/95/EC
Low Voltage Directive (LVD)
Standard(s):
Electromagnetic Compatibility
(EMC) Standard
EN 50270: 2006
Safety Standard
IEC61010-1: 2010
EN61010-1: 2010
Signature:
Name:
Title:
Date:
Doug Keeports
VP of Product Development
31 July 2013
The technical documentation file required by this directive is maintained at the corporate
headquarters of Bacharach, Inc.
32
6309-9000 Rev 3
MGS-150 Manual
6309-9000 Rev 3
33
MGS-150 Manual
34
6309-9000 Rev 3
MGS-150 Manual
6309-9000 Rev 3
35
MGS-150 Manual
World Headquarters
621 Hunt Valley Circle, New Kensington, Pennsylvania 15068
Phone: 724-334-5000 • Toll Free: 1-800-736-4666 • Fax: 724-334-5001
Website: www.MyBacharach.com • E-mail: [email protected]
36
6309-9000 Rev 3