1
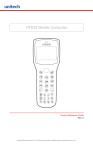
unitech
Unitech HT580
Users Manual
Rev. B
Preface
About This Manual
This manual explains how to install, operate and maintain the HT580 Mobile Computer.
No part of this publication may be reproduced or used in any form, or by any electrical
or mechanical means, without permission in writing from the manufacturer. This includes
electronic or mechanical means, such as photocopying, recording, or information
storage and retrieval systems. The material in this manual is subject to change without
notice.
© Copyright 2007 Unitech Electronics Co., Ltd. All rights reserved.
Microsoft, Windows and ActiveSync are either registered trademarks or trademarks
of Microsoft Corporation. Other product names mentioned in this manual may be
trademarks or registered trademarks of their respective companies and are hereby
acknowledged.
Regulatory Compliance
CE, FCC, BSMI
Warranty
• Terminal is covered by a 1-year limited warranty
Notices
The HT580 Portable Terminal and the Li-ion Battery Pack are packaged separately. You
will have to install the Battery Pack when you receive your terminal. Please ensure that
the Li-Ion Battery Pack is properly installed and fully charged prior to initial use of the
HT580.
Battery Charge Notice
It is important to consider the environment temperature whenever you are charging
the Lithium-Ion battery pack. The process is most efficient where the temperature
is average or slightly cooler. It is essential that you charge the batteries within the
specified range of -5°C to 50°C. Charging batteries outside of the specified range could
damage the batteries and shorten their charging life cycle.
Storage and Safety Notice
Although charged Lithium-Ion batteries may be left unused for several months, their
capacity may deplete due to build up of internal resistance. If this occurs, the battery
will require recharging prior to use. Lithium-Ion batteries may be stored at temperatures
between-20°C to 60°C, however they may deplete more rapidly at the high end of this
range. It is recommended batteries are stored within normal room temperature ranges.
USB Driver Installation
The HT580’s USB driver is located on the CD included in this package, or available for
download at http://www.ute.com. To activate USB, please install the driver first.
ii
Table of Contents
Preface
About This Manual
Regulatory Compliance. . . . . . . . . . . . . . . . . . . . . . . . . . . . . . . . . . . . . . . . . . . . i
Warranty . . . . . . . . . . . . . . . . . . . . . . . . . . . . . . . . . . . . . . . . . . . . . . . . . . . . . . . . i
Notices. . . . . . . . . . . . . . . . . . . . . . . . . . . . . . . . . . . . . . . . . . . . . . . . . . . . . . . . . ii
Battery Charge Notice . . . . . . . . . . . . . . . . . . . . . . . . . . . . . . . . . . . . . . . . . . . ii
Storage and Safety Notice . . . . . . . . . . . . . . . . . . . . . . . . . . . . . . . . . . . . . . . ii
USB Driver Installation . . . . . . . . . . . . . . . . . . . . . . . . . . . . . . . . . . . . . . . . . . ii
Chapter 1
Getting Started
Introducing the HT580. . . . . . . . . . . . . . . . . . . . . . . . . . . . . . . . . . . . . . . . . . . . . . . . . . 7
Support . . . . . . . . . . . . . . . . . . . . . . . . . . . . . . . . . . . . . . . . . . . . . . . . . . . . . . . . . . . . 8
Features . . . . . . . . . . . . . . . . . . . . . . . . . . . . . . . . . . . . . . . . . . . . . . . . . . . . . . . . . . . . 9
Package Contents. . . . . . . . . . . . . . . . . . . . . . . . . . . . . . . . . . . . . . . . . . . . . . . . . . . . 10
Battery Storage and Safety Precautions . . . . . . . . . . . . . . . . . . . . . . . . . . . . . . . . . . 11
Review Main Battery . . . . . . . . . . . . . . . . . . . . . . . . . . . . . . . . . . . . . . . . . . . . . . . . 11
Charging. . . . . . . . . . . . . . . . . . . . . . . . . . . . . . . . . . . . . . . . . . . . . . . . . . . . . . . . . . 11
Powering the HT580 On/Off . . . . . . . . . . . . . . . . . . . . . . . . . . . . . . . . . . . . . . . . . . . . 11
Communication Cradle. . . . . . . . . . . . . . . . . . . . . . . . . . . . . . . . . . . . . . . . . . . . . . . . 12
Communication Cradle LED Icons. . . . . . . . . . . . . . . . . . . . . . . . . . . . . . . . . . . . . . . 14
Chapter 2
Using the Hardware
HT580 Keypad. . . . . . . . . . . . . . . . . . . . . . . . . . . . . . . . . . . . . . . . . . . . . . . . . . . . . . . 14
Barcode Scanning Spectrum . . . . . . . . . . . . . . . . . . . . . . . . . . . . . . . . . . . . . . . . . . . 15
Operating the HT580 . . . . . . . . . . . . . . . . . . . . . . . . . . . . . . . . . . . . . . . . . . . . . . . . . . 15
Setting the Date/Time . . . . . . . . . . . . . . . . . . . . . . . . . . . . . . . . . . . . . . . . . . . . . . . . . 16
iii
Device Settings. . . . . . . . . . . . . . . . . . . . . . . . . . . . . . . . . . . . . . . . . . . . . . . . . . . . . . 17
Backlight. . . . . . . . . . . . . . . . . . . . . . . . . . . . . . . . . . . . . . . . . . . . . . . . . . . . . . . . . . 17
Scanner. . . . . . . . . . . . . . . . . . . . . . . . . . . . . . . . . . . . . . . . . . . . . . . . . . . . . . . . . . 18
Autorun. . . . . . . . . . . . . . . . . . . . . . . . . . . . . . . . . . . . . . . . . . . . . . . . . . . . . . . . . . . 18
Memory . . . . . . . . . . . . . . . . . . . . . . . . . . . . . . . . . . . . . . . . . . . . . . . . . . . . . . . . . . 18
Buzzer . . . . . . . . . . . . . . . . . . . . . . . . . . . . . . . . . . . . . . . . . . . . . . . . . . . . . . . . . . . 18
Key . . . . . . . . . . . . . . . . . . . . . . . . . . . . . . . . . . . . . . . . . . . . . . . . . . . . . . . . . . . 19
Modem . . . . . . . . . . . . . . . . . . . . . . . . . . . . . . . . . . . . . . . . . . . . . . . . . . . . . . . . . . . 19
Supervisor Mode . . . . . . . . . . . . . . . . . . . . . . . . . . . . . . . . . . . . . . . . . . . . . . . . . . . . . 20
Communication . . . . . . . . . . . . . . . . . . . . . . . . . . . . . . . . . . . . . . . . . . . . . . . . . . . . 20
Terminal. . . . . . . . . . . . . . . . . . . . . . . . . . . . . . . . . . . . . . . . . . . . . . . . . . . . . . . . . . 21
FormCaching (Supervisor Mode) . . . . . . . . . . . . . . . . . . . . . . . . . . . . . . . . . . . . . . . 22
Power . . . . . . . . . . . . . . . . . . . . . . . . . . . . . . . . . . . . . . . . . . . . . . . . . . . . . . . . . . . 26
Password . . . . . . . . . . . . . . . . . . . . . . . . . . . . . . . . . . . . . . . . . . . . . . . . . . . . . . . . . 26
Barcode. . . . . . . . . . . . . . . . . . . . . . . . . . . . . . . . . . . . . . . . . . . . . . . . . . . . . . . . . . 26
Diagnostic . . . . . . . . . . . . . . . . . . . . . . . . . . . . . . . . . . . . . . . . . . . . . . . . . . . . . . . . 29
System . . . . . . . . . . . . . . . . . . . . . . . . . . . . . . . . . . . . . . . . . . . . . . . . . . . . . . . . . . . 30
FormCaching. . . . . . . . . . . . . . . . . . . . . . . . . . . . . . . . . . . . . . . . . . . . . . . . . . . . . . . . 30
Chapter 3
Communication
USB Communication. . . . . . . . . . . . . . . . . . . . . . . . . . . . . . . . . . . . . . . . . . . . . . . . . . 31
Bluetooth Communication . . . . . . . . . . . . . . . . . . . . . . . . . . . . . . . . . . . . . . . . . . . . 32
Communication Program. . . . . . . . . . . . . . . . . . . . . . . . . . . . . . . . . . . . . . . . . . . . . . 34
Modem Communication. . . . . . . . . . . . . . . . . . . . . . . . . . . . . . . . . . . . . . . . . . . . . . . 36
Calling from a PC . . . . . . . . . . . . . . . . . . . . . . . . . . . . . . . . . . . . . . . . . . . . . . . . . . . 28
Calling from a Terminal . . . . . . . . . . . . . . . . . . . . . . . . . . . . . . . . . . . . . . . . . . . . . . 28
Update Firmware . . . . . . . . . . . . . . . . . . . . . . . . . . . . . . . . . . . . . . . . . . . . . . . . . . . . . 38
iv
Chapter 1
Getting Started
Introducing the HT580
Thank you for choosing the HT580 from Unitech Electronic Co. Ltd. This Portable
Data Collection Terminal is one of the most user-friendly handheld terminals on the
market - perfect for small retailers. Developed under the C language, the HT580’s
proprietary Operating System is capable of helping you develop and run application
programs specifically designed by you for your own unique business. Weighing only
150g (5.3 oz), the light weight of the HT580 is ideal for the long work days typical in a
retail environment. Despite its light weight, the HT580 is unusually robust - capable of
sustaining 1.2 meter (4 foot) drops to a concrete floor.
We believe the HT580 will more than satisfy your own unique retail requirements.
The HT580 standard package includes the HT580 terminal, communication cradle,
adaptor, USB & RS232 Y cable, holster, and strap. Additionally, two alternative types
of communication/charging cradles - RS232 and Modem - are offered as options.
Chapter 1 Getting Started
Support
Unitech’s professional support team is available to quickly answer your questions or
technical-related issues. Should an equipment problem occur, please contact the
Unitech regional service representatives nearest you. Please go to their websites, listed
below, for complete contact information:
UTC (China) http://www.ute.com.cn
UTT (Taipei, Taiwan) http://www.unitech.com.tw
APAC (Taipei, Taiwan) http://www.unitech-adc.com
UTJ (Japan) http://www.unitech-japan.co.jp
UTA (USA, Canada) http://www. ute.com
UTA (Latin America) http://www.latin.ute.com
UTI (Europe) http://www.unitech-europe.nl
Chapter 1 Getting Started
Features
Operating System
• Proprietary in C Language
• CPU: ST-UPSD3354DV
System Memory
• 2MB Flash ROM
Display
• 128 x 64 pixels
• 16 x 4 characters or 12 x 4 characters
• Back-Lit
Input
• 18 alphanumeric keys (1 scan trigger)
Communication
• Bluetooth V1.1
• USB1.1
• RS232
• Modem
Barcode Reader
• CCD Scanner
• Supports: China Postal Code,
Codabar, Code 32,
Code 39, Code 93, Code 128,
IATA 2 of 5, Industrial 2 of 5,
Telepen, Interleaved 2 of 5,
MSI, UPC/EAN
Environmental
• Operating Temp: 0°~50°C (32°~122° F)
• Storage Temp: -20°~70°C (-4°~158° F)
• Humidity: 20%~85% RH; not condensed
• Environmental Sealing: IP42
• Drop Spec: 4 foot free drop to concrete
• Electrostatic Discharge: 8 KV air discharge
4 KV contact discharge
Enclosure
• 123mm x 55mm x 25mm
• 150g (5.3 oz)
Battery
• One 3.7V 730mAh Li-Ion battery
• Up to 8 hours battery Life
Chapter 1 Getting Started
Package Contents
This section is designed to familiarize you with the HT580 and its cradle. For detailed
explanations on some of the functions, please refer to subsequent chapters.
HT580 Main Body
HT580 Battery
Position
HT580 Li-ion
Battery
HT580 Top and
Bottom View
Charging and
communication
cable
HT580 Charging/
Communication
Cradle
Featuring: RS232
and modem
Modem Cradle
Back View
RS232 Cradle
Back View
10
Chapter 1 Getting Started
Battery Storage and Safety Precautions
Batteries should be stored at normal room temperature. Avoid placing them in any
situation where explosion or damage could possibly occur. The Li-Ion batteries may
lose their charge if not used for several months due to back up and internal resistance.
If this happens, we suggest recharging prior to use.
Remove Main Battery
To remove the main battery, press down on the release button while pushing out the
cover on the unit. We suggest that the battery not be removed, if possible.
Charging
When starting to operate the HT580, the main battery must be fully charged before the
first use. The HT580 is equipped with a 3.7V 730mAh Lithium-Ion battery. For
charging, use the 5 volt AC adaptor and the RS232 communication cable. It takes 8
hours to fully charge the main battery when empty. We suggest users recharge the
battery regularly after long hours of use.
This icon shown in the menu indicates the current battery capacity status.
Powering the HT580 On/Off
To power the HT580 on make sure that the battery has been charged accordingly (see
page 11). Hold down the power button for a second. The screen on the HT580 will
flash and the unit will go through a power-up process to load the screen, Autorun, and
battery status.
To power the HT580 off hold down the power button for 3-seconds. The unit has a
security feature that requires it be held down for 3-seconds so that unit is not
accidentally shut off while it is in use.
11
Chapter 1 Getting Started
Communication Cradle
The HT580’s battery can be charged by placing the HT580 into its charging/communication
cradle - part number: 5000-601558 (RS232-USB) / 5000-601557 (Modem)
Positioning Terminal Into Cradle
1. Figure A - Proper Position
Figure A shows the proper way to insert
your terminal while using the cradle to
transmit data or to charge.
Please note that the connector in the
bottom of the cradle may be damaged
if you use excessive force to insert the
terminal.
Front View
2. Figure B - Improper Position
Figure B shows the improper way to
insert the terminal into the cradle.
Do not insert the terminal into the cradle
incorrectly. It will not function properly
and damage can occur.
Back View
12
Chapter 1 Getting Started
Communication Cradle LED Icons
This LED light (Red) shows the power status of the cradle itself. An Illuminated light indicates
the cradle is charging. To identify if the terminal is fully charged, it may be necessary to check
the terminal LCD.
This LED light (Green) shows transmission status of the cradle itself. An illuminated light
indicates that data is in transmission.
HT580 Communication with the Host
USB client 1.1 connection through cable
RS232/Modem Cradle Communication
Interface Port
The HT580 communicates via the RS232 communication port located on the bottom of the
unit. You can connect the HT580 directly via the communication cable to your PC’s RS232
port for data transfer, or connect via the cradle.
Pin Assignment
Pin
Name
Pin
Name
1
US-POWER
7
DSR
2
GND
8
GND
3
DC-IN
9
DTR
4
USB DP
10
TXD
5
CTS
11
RXD
6
RTS
12
USB DP
13
Chapter 2
Using the Hardware
HT580 Keypad
The HT580 keypad consists of 18 rubber keys and one power key. The keypad is configured
into three different modes: Numeric mode, Command mode, and Alphabetic mode.
The keypad is configured in Numeric mode by default, Command mode when the light green
CMD key is selected, or Alphabetic mode when the blue ALPHA key is selected.
Keypad Description
ESC
MENU
SCAN
C
ENTER
ALPHA
CMD
To power on the unit press the power key
located on the top right cover of the device.
Returns you back to the previous menu.
Press MENU to scroll items you require.
Press SCAN to trigger scanning function or to
perform as the ENTER key while in Setting
mode.
Press C to delete.
Press ENTER to save changes or to go to the
next page.
Press ALPHA to switch to Alphabet. Any
alphabetical character (in blue print) can be
activated with the ALPHA key
Press CMD to perform delimiters such as “#”,
“$”, etc. Any delimiter (printed in green) can be
activated with the CMD key.
14
Chapter 2 Using the Hardware
Barcode Scanning Spectrum
Operating the HT580
After powering on the HT580, you will see the Main Menu as below:
HT580 V1.15
1. SETTING
2. TERMINAL
3. RUN EASYJOB
There are 3 options: Setting, Terminal, and Run EasyJob.
NOTE: The 3rd option “3. RUN EASYJOB” will only be displayed if the device contains an
EasyJob Program. Please refer to the EasyJob Manual for more information.
15
Chapter 2 Using the Hardware
Setting the Date/Time
Setting System
The Setting menu does 2 major functions – User Mode settings and Supervisor
settings.
Since barcode scanning is disabled in menu mode, the SCAN key is used as the
ENTER key. While on Setting mode, the user can use the following two ways to select
any item.
• Press the MENU key to move to the target item and then press the SCAN/ENTER key
• Directly press the item number associated with the setting, to enter the setting options
After selecting the Setting menu from the main screen, there are four setting options:
1. DATE & TIME
2. DEVICE
3. MODEM
4. SUPERVISOR
DATE & TIME
The Date & Time page will appear as it is shown below:
YYYY-MM-DD
2000-01-08
HH-MM-DD
05:50:35
Press numeric keys to input correct date and time. Once complete, press ENTER to
save the revised settings. To return to the previous menu, press ESC.
16
Chapter 2 Using the Hardware
Device Settings
Device settings are the HT580’s basic settings as shown in menu below.
1. BACKLIGHT
2. SCANNER
3. AUTORUN 4. MEM
5. BUZZER 6. KEY
Backlight
The HT580’s backlight can be turned on automatically after a key is pressed, and it will
automatically turn off after predefined period time if no keys are pressed. The time-out
period will be reset if any keys are pressed. In the HT580, the time-out period can be set to
10, 20, 30 or 60 seconds. The backlight can also be set to always off, or always on.
Use the MENU button to adjust setting. Below are the options you may choose.
ITEM
ON 10 SECS
ON 20 SECS
ON 30 SECS
ON 60 SECS
Always
Off
DESCRIPTION
The backlight turns on after pressing a key, and turns off
automatically after 10 seconds
The backlight turns on after pressing a key, and turns off
automatically after 20 seconds
The backlight turns on after pressing a key, and turns off
automatically after 30 seconds
The backlight turns on after pressing a key, and turns off
automatically after 60 seconds
Backlight always stays on
Backlight always stays off
17
Chapter 2 Using the Hardware
Scanner
Scanner selection changes the way your barcode scanner acts. Below are the possible
modes of operation, and explanations of what they do.
ON NORMAL
ON FLASH
OFF
Default operating mode. (One trigger, one scan). The scanning
beam will be emitted when the SCAN key is pressed, and the
scanning beam will turn off when it is released. The scanning
beam will automatically turn off when a barcode is successfully
read.
After pressing scan, the scanner beam will be emitted
continuously, flashing on and off, until the scan key is pressed
again.
Turns off the scanner. The scanning beam will not be emitted
after pressing SCAN key
Autorun
The Autorun feature is used to automatically run a specific program when powering on the HT580. Below
is a list of the five possible options for the autorun configuration, and explanations of what they do.
ITEM
DESCRIPTION
Terminal Mode
Always run terminal mode after powering on the HT580
FormCaching
Always run FormCaching after powering on the HT580.
EasyJob
Always run EasyJob after powering on HT580.
Resume
Load previous program running before powering off.
OFF
Always start at the main menu.
Memory
The Memory setting is used to display total memory and free space on the HT580.
Buzzer
The Buzzer setting will allow you turn the buzzer on the keys ON/OFF. Press MENU to
switch between ON/OFF. Default setting is ON.
18
Chapter 2 Using the Hardware
Key
The Key setting is used to switch the functionality of the ENTER key, with that of the
ESCAPE key. Once this setting is enabled, the ESCAPE key will act as the ENTER
key, and the ENTER key will act as the ESCAPE key.
Modem
Unitech provides a modem cradle as an accessory for the HT580. With the cradle, a
user can transfer data through the phone line.
In general, a system administrator needs to setup a host PC to automatically dial out
to the modem cradle and issue the command for either data communication or remote
control. For such configuration, it is necessary to setup the device to automatically pick
the phone up when the host calls the modem. This is done with the “AUTO ANSWER”
option.
The user can also directly call the remote host PC from the modem cradle via the
HT580. To do this, it is necessary to set up the remote PC’s phone number in the
HT580.
Below is a list of the options for modem settings and a description of what they do.
ITEM
PHONE NUMBER
AUTO ANSWER
DIAL OUT
HANG UP
DESCRIPTION
To set up the remote PC’s phone number
Send ATS0=1 [enter] to modem cradle. The modem cradle will
automatically pick up the phone after one ring tone. You will get
an error message if HT580 is not plugged into the cradle or if
the modem cradle is powered off.
Dial Out calls the host PC. The PC must wait for a phone call.
Hangs up the phone call if the HT580 is connected.
19
Chapter 2 Using the Hardware
Supervisor Mode
When entering into Supervisor mode, you will be required to input a password. The
default password is “580”. From the Supervisor settings menu, you are given the
following options:
1. COMM
3.FORM
5.PSWD
7. DIAG
2. TERM
4. PWR
6. BAR
8. SYS
Communication < COMM >
This feature is used to set up communication ports, options and protocols. Below are all
of the settings and their options.
ITEM
OPTIONS
DEFAULT
PORT
BAUD RATE
RS232/USB , BLUETOOTH, MODEM
9600bps, 19200bps, 38400bps, 57600
bps
PARITY
DATA BITS
STOP BITS
PROTOCOL
ADDRESS
NONE, ODD, EVEN
8, 7
1, 2
MULTI, NONE
“A” ~ “Y” or “0” ~ “6”
RS232/USB
Default for both RS232
and Bluetooth is
38400bps.
NONE
8
1
Multi
A
Port
The 4 port interfaces are connected to the same serial port on the HT580. If modem or
RS232 is selected, any output data from the HT580 will be sent to those ports. (If USB
is selected, the HT580 still communicates via serial port emulation.) For Bluetooth,
please refer to the section “Communication” for a guide through Bluetooth
communication setup.
Address
It is necessary to set a unique address if the user wants to identify each terminal
separately for communication. There are 32 different available addresses, “A” ~ “Y” and
“0” ~ “6”.
20
Chapter 2 Using the Hardware
Protocol
To communicate with Unitech’s PT series devices, the HT580 provides multi-protocol.
Please refer to the communication section and multi-protocol for more details.
NOTE: HT580’s built-in Bluetooth modem is fixed at 38400bps. If the user
changes the port option to Bluetooth, the baud rate will automatically be changed to
38400bps.
Terminal < TERM >
The TERM command enables the HT580 to run a built-in Terminal emulator. The HT580
will operate as a dumb ASCII terminal when the user select this feature and disable the
Formcaching menu.
To change the communication settings of Terminal Mode, proceed to the Supervisor
Mode and enter Term Setup. When finished, go to the Ready Mode menu and press 2.
Terminal ID
Each HT580 “Terminal” can be identified by an 8-character string Terminal ID assigned
by the user. Initially, the default ID is “HT580”. Valid characters for assigning Terminal
ID are alphanumeric characters (‘A’-’Z’, ‘0’-’9’). Hit ENTER to make the selection.
Online
Use the [ ] key to toggle between below 3 modes, then hit ENTER to make the
selection.
ITEM
LOCAL
DESCRIPTION
The HT580 does not transmit gathered data to
RS232/USB/Bluetooth.
REMOTE NONE The HT580 will output data gathered from the bar code port or
keypad to its RS- RS232/USB/Bluetooth with None protocol.
REMOTE MULTI The HT580 will output data gathered from the bar code port or
keypad to its RS- RS232/USB/Bluetooth with Multi-Protocol.
Echo
Use the [ ] key to toggle between ON and OFF, then hit ENTER to make the selection.
The collected data will be displayed on the HT580 LCD when Echo is set to ON,
otherwise data will not be displayed when it is set to OFF.
21
Chapter 2 Using the Hardware
AutoLF
Use the [ ] key to toggle between ON or OFF, then hit ENTER to make the selection.
When AutoLF is set to ON, the HT580 will append a LF (10 hex) character to the input
data block.
Mode Use the [ ] key to toggle between BLOCK and CHAR, then hit ENTER to make the
selection.
Line/Page
Use the [ ] key to toggle among LINE, PAGE and BOTH, then hit ENTER to make the
selection.
FormCaching < FORM >
FormCaching is a built-in application generator on the HT580 which allows users to
create a data entry application from the device by specifying field prompt, field length,
data type, input method, delimiter, etc, without writing a program and loading it to the
HT580. Entry data can be processed in batch mode or 2 real time modes.
Batch mode
Stores your data (according to your settings) into “FORM.DAT”. The
user can use the communication program to get this file from the
device to a PC.
On line None
Directly sends the record data via RS232/USB or Bluetooth (according
to your port settings) after recording your data. Data will still be stored
into “FORM.DAT.”
On line Multi
Follows Unitech’s Multi-protocol. Data will be stored in the system area
and wait for a remote polling command.
To provide a convenient way to distribute Formcaching settings, users are able to import
and export FormCaching settings from one HT580 to another.
22
Chapter 2 Using the Hardware
When in setting mode, there are 3 options – SETTING, IMPORT and EXPORT as shown
in menu below.
1. SETTING
2. IMPORT
3. EXPORT
EXPORT
IMPORT
SETTING
Saves FormCaching’s configuration as “FORM.SET”.
Changes FormCaching configuration from the “FORM.SET” file.
Configures FormCaching‘s operation flow.
When SETTING is selected, the HT580 will first ask the user to specify data fields in
four categories, including field prompt, data length, data type and device type. After
defining all of the data field options, use the ESC key to end the setup. Below is a table
describing all of the FormCaching Setting options.
FormCaching Specification
DATA FIELD DEFINITION: maximum field number= 8
Category
Range
FIELD PROMPT
Max.16 characters
1-48
MIN/MAX
Field LENGTH
Field type
1.NUMERIC
2.ALPHANUM
DEVICE TYPE
1.KEY ONLY
2.SCAN ONLY
3.BOTH
Description
set field prompting
Set minimum and maximum
field length
Numeric data (0~9) or
alphanumeric data
(20H~FCH)
Input by keyboard only, bar
code scanning only or both
23
Chapter 2 Using the Hardware
DATA RECORD DEFINITION
Category
Range
Between Field
1. Append Screen
2. Clear Screen
FIELD DELIMITER
1. ,
2. ;
3. SPACE
4. TAB
5. FIXED LENGTH
RECORD DELIMITER
1. CR
2. LF
3. CRLF
1. NONE
2. MMDD
3. YYYYMMDD
4. DDMMYY
5. YYYYMMDD
6. DDMMYYYY
1. NONE
2. HHMM
3. HHMMSS
4. SSMMHH
1. Batch
2. Online None
3. Online Multi
0-6
DATE STAMP FIELD
TIME STAMP FIELD
Trans Mode
FIELD DELAY
Description
1. Append Screen: Prompt will
be displayed on next line
according to previous cursor
place. If cursor is already on the
last line, it will scroll one line up.
2. Clear Screen: It will clear
screen and then display
Assign field delimiter, “Fixed
Length” mean to store data
according to maxi length setting,
it will automatically append
spaces to end of field data if
length of input data are less
than maxi. length
Assign record delimiter
Assign date stamp and specify
the format of date stamp
Assign time stamp and specify
the format of time stamp
Defines the way your data is
stored
Specify time delay between
each record input in second
24
Chapter 2 Using the Hardware
When FormCaching is enabled, a data file named FORM.DAT will be created in the
HT580. FORM.DAT stores the data as entered by the user when using the
FormCaching program. The HT580 will not allow the user to redefine the data fields in
FormCaching once the FORM.DAT has been created. The file FORM.DAT must be
deleted in order to implement any change in the configuration of FormCaching.
Running FormCaching
The HT580 built-in application FormCaching can be run from the main menu by
selecting the terminal option, then selecting 2. Formcaching. The FormCaching
application will follow the prompt settings previously defined by the user to request
input, and stores the data in the FORM.DAT file.
HT580 FormCaching Defaults
The HT580 enables FormCaching with the default settings:
DATA FIELD DEFINITION: Field number=2
Category
Field #1 FIELD PROMPT
DATA LENGTH
FIELD TYPE
DEVICE TYPE
Field #2 FIELD PROMPT
DATA LENGTH
DATA TYPE
DATA RECORD DEFINITION
Category
FIELD DELIMITER
RECORD DELIMITER
DATE STAMP FIELD
TIME STAMP FIELD
FIELD DELAY
Setting
ITEM:
20
ALPHANUM
BOTH
QTY:
8
ALPHANUM
Setting
,
CR
NONE
NONE
1
25
Chapter 2 Using the Hardware
Power < PWR >
The unit will automatically power off if nothing is scanned or keyed after the set amount
of time. Use the MENU key to set the auto-off time-out to 1, 2, 5, 10, or 15 minutes,
select DISABLE to disable the auto power-off
Password <PSWD>
The Password Setting allows the user to change the default password. The default
password is “580”
Barcode < BAR >
This option is used to configure individual barcode symbologies. After entering the
configuration menu, the LCD will display the BARCODE Setup as shown below.
<BARCODE SETUP>
CODE 39
ON
Setup decoding of HT580 supported bar code symbologies:
Symbology
Code 39
I 2 of 5
Code 32
Function
Decoding
full ASCII
Check Digit
Start/stop Character
Decoding
Check Digit
First digit
Last digit
Decoding
First digit
Last digit
Option
ON/OFF
ON/OFF
ON/OFF
Send/No-send
ON/OFF
ON/OFF
SEND/NOT SEND
SEND/NOT SEND
ON/OFF
SEND/NOT SEND
SEND/NOT SEND
Default
ON
OFF
OFF
NO SEND
ON
OFF
SEND
SEND
ON
SEND
SEND
26
Chapter 2 Using the Hardware
Symbology
Matrix 2 of 5
Function
Decoding
Check Digit
Industrial 2 of 5 Decoding
Codabar
Decoding
Check Digit
Default
ON
OFF
ON
ON
OFF
CHINA POST
ON
OFF
MSI
IATA 2 of 5
CODE 11
EAN-13
EAN-8
UPC-A
Option
ON/OFF
ON/OFF
ON/OFF
ON/OFF
ON / ON&Not Send / ON & SEND /
OFF
ON/OFF
Decoding
Check Digit
ON / ON&Not Send / ON & SEND /
OFF
ON/OFF
Decoding
CHECK DIGIT SINGLE MOD 10/DOUBLE MOD 10/
MOD
DOUBLE MOD 11+10
ON & Send / ON & NOT SEND
Check Digit
ON/OFF
Decoding
Check Digit
ON / ON &Not Send / ON&SEND / OFF
ON/OFF
Decoding
Check Digit
ON / ON&Not Send / ON&SEND / OFF
ON/OFF
Decoding
ISBN
ON/OFF
ISBN
ON/OFF
Leading Digit Send/No-send
Send/No-send
Check Digit
ON/OFF
Decoding
Leading Digit SEND/NOT SEND
SEND/NOT SEND
Check Digit
ON/OFF
Decoding
EXPEND to
ON/OFF
EAN-13
Leading Digit ON/OFF
ON/OFF
Check Digit
OFF
SINGLE
MOD 10
OFF
OFF
OFF
OFF
OFF
ON
OFF
OFF
Send
Send
ON
Send
Send
ON
OFF
Send
Send
27
Chapter 2 Using the Hardware
Symbology
UPC-E
Function
Decoding
UPC-E0
UPC-E1
EXPEND TO
UPC-A
Leading Digit
Check Digit
CODE 93
Decoding
Code 128
Decoding
EAN128
EAN128
CODE ID
EAN128
FUNC CH
Telepen
Decoding
UK PLESSEY Decoding
Check Digit
Option
ON/OFF
ON/OFF
ON/OFF
ON/OFF
Default
ON
ON
ON
OFF
SEND/NOT SEND
SEND/NOT SEND
ON/OFF
ON/OFF
ON/OFF
ON/OFF
Send
Send
OFF
ON
ON
OFF
NOT SEND/SEND
NOT SEND
ON/OFF
ON/OFF
SEND/NOT SEND
ON
OFF
Send
28
Chapter 2 Using the Hardware
Diagnostic <Diag>
The HT580 has a built-in diagnostics program to test the terminal’s hardware. The test
routines are data destructive. Therefore, before running the diagnostic program, make
sure you back up the data on the HT580.
NOTE: When a hardware or software service has been made on the HT850, such as
maintenance, repair or upgrade, it is strongly recommended to run the diagnostic program.
1. VER
3. LCD
5. PWR
7. RTC
ITEM
VER
SCAN
LCD
COMM
PWR
KEY
RTC
MEM
2. SCAN
4. COMM
6. KEY
8. MEM
DESCRIPTION
Display firmware version for the HT580 and Decoder.
Tests barcode input by scanning barcode labels. Press the ESC key to
return to the diagnostics menu.
Darken the dots of the LCD screen and cycle power to the LCD backlight
to check if the LCD functions OK
Connect to the PC’s communication testing program to test the USB/
RS232 communication
Tests Battery power
Tests every key response
Current time/date is displayed
Tests RAM condition
29
Chapter 2 Using the Hardware
System <SYS>
There are 4 options given in the System menu as shown below – Warm Start, Cold
Start, Update F/W and Update Decoder.
1. WARM START
2. COLD START
3. UPDATE F/W
4. UPDATE DEC
Warm Start
Cold Start
Warm boots the HT580
Reboots the HT580, erasing all data and returning all configurations
to default.
Update Firmware Update firmware. (See page 38)
Update Dec
Unit must be sent in to Unitech for this update.
Another way to Cold/Warm start HT580 by combination keys:
COLD START: While the unit is OFF. Press and hold the CMD/ALPHA keys and press
the POWER key simultaneously.
WARM START: While the unit is OFF. Press and hold the ALPHA key and press the
POWER key simultaneously.
FormCaching
After configuring the Formcaching you can press “2” from the main menu to enter
Formcaching’s data input. Input data will be stored on the HT580 as the file “Form.dat”.
You can use the communication tool to upload it back to PC. You can delete it from the
HT580 after it has been successfully uploaded to PC.
30
Chapter 3
Communication
USB Communication
To connect the HT580 to PC via USB, you need to install the USB driver which will
redirect data to a virtual COM port. You can get the USB driver from HT580 CD.
Windows will prompt with the new device dialog box when the HT580 is first connected
to the PC via USB. Please direct the dialogue box to the Unitech USB driver folder and
then follow its prompting to install the driver.
Then, check for the correct COM port number from Control Panel System
Hardware Device manager. Then you can find correct COM number from “USB
Serial Port” under option “Connection Port (COM and LPT)”
In the HT580, you should change the default communication port to “RS232/USB” from
Setting Supervisor COMM
31
Chapter 3 Communication
Bluetooth Communication
To use Bluetooth communication, you must change the HT580’s port setting to Bluetooth. To do this, go to from Setting Supervisor Comm Port
If there is no Bluetooth support from your PC you should connect a USB Bluetooth
dongle and install the appropriate drivers. Then, continue with the following steps:
1. Power on HT580 and then Run Bluetooth manager from PC
2. Click New Connection button
3. Select proper mode – Express Mode or Custom Mode. The user can specify the
COM port number if selecting custom mode
4.
32
Chapter 3 Communication
5. Search for all Bluetooth devices within range and then list them on the screen. All of
the HT580’s will be displayed as “UNITECH” in this screen. Click the Next button
6. You will be prompted to enter a PIN code. The HT580’s default PIN (Pass key) is
“0580.” After entering the PIN, your computer will sync with the HT580 and will be added
to your devices list. Right click the icon to connect it.
7. You can also check the correct PORT number from “Detail”
NOTE: HT580’s BT Device name is fixed on “UNITECH”, so you will see a lots of “UNITECH”
on Bluetooth Manager if you want to connect several HT580’s to single PC. User may not be
able to identify which one is the correct HT580 to map to list, so it is suggested to power on
one HT580 at a time when making a connection. Please note its MAC address from DETAIL.
33
Chapter 3 Communication
Communication Program
Easy Job is also bundled with the communication program “MultiEj”. To run MultiEj
complete the following steps:
Locate the HT580 EasyJob Program folder as shown below.
You can also access MultiEJ by going to HT580 Easy Job. Select Tool
Communication as below diagram
34
Chapter 3 Communication
MultiEj program will launch as shown below.
From here, you can:
• Drag and drop files from PC folder to HT580 directory to execute download function
• Drag and drop files from HT580 directory to PC folder to execute upload function
• Directly select files on HT580 directory area and delete.
Before using MultiEj for communication, you should setup the correct port number and
communication parameter by clicking the Options icon on the menu bar.
35
Chapter 3 Communication
Click NEW button to select a new COMM port and configure its proper communication
parameter. Then, click OK to finish the settings. From here you can select the proper
port from Connection List Box
After selecting the proper COMM port, you will find icons of Date/Time, Warm Start, and
Cold Start changed from grey to color, indicating that they are enabled.
Download / Upload / Delete / Execute will also become colored if you select click files
on local file area or remote files area
Modem Communication
For the HT580, Unitech provides a modem cradle to enable the modem communication
function between a PC and the HT580. A user must connect the phone line to cradle
and HT580 still connect to cradle with RS232 interface.
There are 2 ways to connect:
• Calling from a PC
• Calling from a Terminal
36
Chapter 3 Communication
Calling from a PC
To call the modem from a PC, the HT580’s modem cradle should be set to automatically
pick up an external call. Place the HT580 into the cradle with the cradle connected and
powered on. Execute Setting
Modem and then select AUTO ANSWER to let the
HT580 send “ATS0=1” to the modem board. Then, the cradle can automatically pick up
an external call after one ring tone. (After executing “Auto Answer”, it is not
recommended to power off the cradle, or the “Auto Answer” function will disable)
From the PC, you can use MultiEj to do a modem communication with the HT580. You
can set up the modem functions from the options by checking “Modem”.
Following these steps, set up the correct Initial command and dial the number.
37
Chapter 3 Communication
Calling from a Terminal
Currently, the HT580 can support dialing the modem from the firmware. EasyJob will
provide modem functionality in the future.
On the PC side, you can use MultiEJ or similar software to AutoAnswer. To do this,
place the HT580 into the cradle and connect the phone line. Then, follow the steps
below:
• Execute Setting Modem Phone and input the correct phone number
• Then, execute Setting Modem Dial out, to connect to remote device
To stop communication, execute Setting
Modem
Hang, to hang up phone.
Updating Firmware
Unitech provides firmware as a zip file, which is named as “HT580Vx.xx.zip”. There are
8 files needed to complete the update: “bank0.bin” through “bank7.bin”.
You can get the latest firmware image from your supplier or contact Unitech directly.
Firmware will be in a compressed zip file. You can use the MultiEJ to download those 8
files into the HT580. After the 8 files have been download into HT580, execute HT580’s
Setting Supervisor SYS and then select 3.UPDATE F/W. The HT580 will automatically update the firmware and cold start terminal.
Make sure the unit is charging while the update is in process to ensure the update
completes successfully. Please refer to the section “Communication” for more detailed
information to transfer files to the HT580 from a PC.
38