1
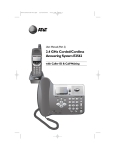
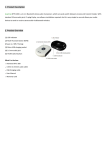
LU 252976139A D86C EN.book Page 1 Vendredi, 3. août 2007 9:56 09
User Guide
Préliminaire.fm Page i Lundi, 3. septembre 2007 11:57 11
INTRODUCTION
Dear customer:
Thank you for purchasing a SAGEM DECT telephone; we appreciate your trust in us.
This product was manufactured with the upmost care, should you encounter any difficulties during its use, we
recommend that you refer to this user guide. You can also find information on the following site:
http://www.sagem.com/faq
For your comfort and safety, we ask that you read the following paragraph carefully:
Recommendations and safety instructions
For more details, refer to paragraph “Recommendations of security”, page 34.
Your telephone DECT comprises a small-size removable plastic part (drawer of SIM card) being
able to be introduced By measurement of precaution, to hold this drawer of SIM card out of reach
children.
Your DECT telephone must not be installed in a humid room (wash room, bathroom, laundry room,
kitchen, etc.) unless it is 1.50 m away from a water point, or outside. Your telephone must be
operated at temperatures ranging from 5°C to 45°C.
Only use the supplied power adapter, connect it to the base socket according to the installation
instructions provided in this booklet and the indications on the identification label affixed to it
(voltage, current, electric network frequency). As a safety measure, you can use the power adaptors
to cut off the 240V current in case of danger. They must be located near to the device, and must be
easily accessible.
This telephone was designed for use on the public switched telephone network (PSTN). In case of
a problem you must first contact your reseller. Only use the supplied telephone cord.
For your personal safety, never place your handset on the base without the batteries, or without the
battery cover, you could get an electric shock.
To avoid damaging your handset, only use certified rechargeable AAA batteries NiMH 1.2 V
600 mAH, never use non rechargeable batteries. Insert the batteries in the handset battery
compartment respecting polarity.
At the end of their useful life, batteries must be disposed of according to the recycling instructions
presented in this booklet.
Your DECT telephone has an inside radio range of about 50 metres and up to 300 metres in open
space. The immediate presence of metal parts (of a television for example), or of any electric
appliance may result in range reduction.
Some sensitive medical equipment and safety equipment may be affected by the radio-frequency
transmissions of your telephone. In all cases, we ask that you respect the safety recommendations.
In areas where storms are frequent, we recommend that you protect your telephone line using a
surge protection device.
This equipment does not function in the case of an electric network shutdown: For the
emergency calls, use a self-contained cord telephone.
The CE marking certifies that the product meets the essential requirements of Directive 1999/5/CE
of the European Parliament and of the Council pertaining to microwave radio equipment and
telecommunication terminal equipment, for the safety and health of users, for electromagnetic
interference. Furthermore, it efficiently uses the frequency spectrum attributed to ground and spatial
communication to prevent damaging interference.
The declaration of compliance may be looked up on the www.sagem.com site, section "support"
or can be obtained from the following address:
SAGEM AUSTRALASIA PTY LTD
ABN: 43 003 099 812
Unit 1, 7-9 Orion Road
Lane Cove NSW 2066
P.O. Box 4072
Lane Cove 1595
Australia
LU 252976139A D86C EN.book Page 3 Vendredi, 3. août 2007 9:56 09
CONTENTS
Your telephone
Unpacking
Your base
Your handset
Connecting the base
Handset set-up
Replacing the batteries
Installation of a SIM card
4
Menu structure
11
Cordless Handset
13
General operations
Switch handset On/Off
Lock handset keypad
Make an external call
Pre-dialing for a call
Mute function
Hands-free operation
Answer an external call
Adjust volume
End a call
Last numbers redialing
Caller Display
View caller list
Delete Caller Display records
Store a Caller Display number
in phonebook
Call back from caller list
Intercom
Make an intercom call
Incoming call - when you are making
an intercom call
Call transfer and Conference
Text (SMS)
SMS Text Message Writing
Write
Inbox
Draft
Outbox
Service Centre
Quick enter to phonebook
Store a number into phonebook
Store a last number into phonebook
Change a stored number
Delete a stored number
SIM copy
Phonebook transfer between handsets
Quick dial
Make a call from phonebook
Display
4
4
5
7
8
9
10
Wallpaper setting
Contrast setting
Alarm/Clock
13
13
13
13
13
13
14
14
14
14
14
15
15
15
17
17
17
17
18
18
18
19
19
19
19
19
20
20
20
20
Sound Settings
23
Handset Volume
HS Ring
Internal Ring
BS Ring
Tone
23
23
23
23
24
Appendix
Care and Maintenance
Problems
25
25
25
25
26
26
26
26
26
27
27
27
28
28
28
28
29
30
30
30
30
31
31
31
Features
32
Environment
33
Packaging
Batteries
The product
3
22
22
22
Handset Settings
Auto answer
Register a new handset to a base
Economy Mode
Handset Name
Language
Resetting the handset (default HS)
Room monitor
Base settings
Change PIN (Personal Identification
Number)
Remove HS
Default BS
Flash Time
Pause Time
Call log
Auto-Delete
To View caller list
Delete Caller Display records
Store a Caller Display number
in phonebook
Call back from caller list
16
16
21
21
Clock Setting
Alarm Setting
Settings
15
15
16
16
21
33
33
33
Recommendations of security
34
Warranty
35
LU 252976139A D86C EN.book Page 4 Vendredi, 3. août 2007 9:56 09
YOUR TELEPHONE
Unpacking
Place the box in front of you, open it and make sure it contains the following items:
• one base,
• one handset,
• one battery compartment cover,
• a desk charger fitted with its power supply unit,
• one equipped power adapter,
• one telephone line cord,
• a rechargeable battery unit,
• this user guide.
In the case of purchasing a Duo Pack, you will find in addition for each additional handset:
• a desk charger fitted with its power supply unit,
• an additional battery flap,
• a rechargeable battery unit.
In the case of purchasing a Single Pack, you will find :
• one handset,
• a desk charger fitted with its power supply unit,
• one battery compartment cover,
• a rechargeable battery unit,
• this user guide.
Your base
It fits well into your family and professional environment.
Handset location
Base button
Pressed briefly:
- handset paging.
Held down:
- handset registration.
LED Flashes during a call
4
LU 252976139A D86C EN.book Page 5 Vendredi, 3. août 2007 9:56 09
YOUR TELEPHONE
Your handset
With its user-friendly design, you will appreciate how easy it is to hold and its quality during
conversations.
Color graphics
display
Earpiece
Navigator
Redial
Program keys
Pick up/Hang up
Turn on/off the
handset
R key
Handsfree
Alphanumeric
keypad
Microphone
The navigator key, a rapid selection tool.
R key
Navigating Redial
Handsfree
5
LU 252976139A D86C EN.book Page 6 Vendredi, 3. août 2007 9:56 09
YOUR TELEPHONE
Banner icons
Icons
Indication
Antenna symbol for indication in range.
It is ON when the base is found.
It blinks when the handset is out of range or searching
for a base.
Battery symbol for indicating 3 different battery levels.
Handsfree speakerphone.
It is ON whenever the speakerphone is activated.
It is OFF whenever the speakerphone is not activated.
No ring symbol.
It is ON when the ringer volume was set to zero level.
Phone on symbol for indicating external line seizure.
It is ON when an external call is connected.
It blinks when there is an external incoming call or an
external call is held.
Internal call symbol for indicating internal line seizure.
It is ON when an internal call is connected.
It blinks when there is an internal incoming call or an
internal call is held.
Keypad locked symbol for indicating keypad is locked.
It is ON whenever the keypad is locked.
Alarm icon.
It is ON when an alarm clock has been activated.
When the battery charge icon is at minimum, your screen will not be lit and the volume
level of the hands-free function will be decreased until the battery is recharged.
6
LU 252976139A D86C EN.book Page 7 Vendredi, 3. août 2007 9:56 09
YOUR TELEPHONE
Connecting the base
Before making any connections, please refer to the safety instructions presented at
the beginning of this user guide.
Place the base where it should be located. Plug the
Telephone socket
telephone line connector (as shown in the
illustration) into the telephone socket under the base
and connect the other end to the telephone wall
socket.
Connect the power connector under the base and
the other end of the cord to the power socket.
The power supply indicator located on the base is
green. Place the base in its final location.
7
Power socket
LU 252976139A D86C EN.book Page 8 Vendredi, 3. août 2007 9:56 09
YOUR TELEPHONE
Handset set-up
1
Insert the battery unit (mark 1) in its
housing, then insert the small connector
(mark 2) in its slot, with the wire orientation
shown in the second figure.
2
Place the cover back (mark 3) on the
handset by pushing upwards until it is
completely closed.
Black wire
Red wire
Remove the protection film on the screen,
place the set on the desktop charger for full
battery charging.
The charge icon appears on screen,
indicating the battery's status. A full icon
indicates the battery unit is charged.
Insertion
direction
3
Use only certified rechargeable battery units. Upon first use, to guarantee
optimum charging, leave the set on its charger for at least 12 hours. The battery unit
may be hot while charging. This condition is absolutely normal, and safe.
8
LU 252976139A D86C EN.book Page 9 Vendredi, 3. août 2007 9:56 09
YOUR TELEPHONE
Replacing the batteries
Hold down the Talk key
to turn off the
handset. Turn it around so that the battery
compartment is accessible.
Exert a pressure on the compartment battery
and slip the compartment battery downwards.
Disconnect the small connector, then remove
the old battery unit. Place the new battery unit
in its housing, then connect the small
connector in its slot, with the wires placed as
shown in the second figure on the previous
page.
Place the cover back on the handset by
pushing upwards until it is completely closed.
Scrap the used battery unit according to the
recycling instructions in the Environment
section of this manual.
To prevent any damage, use only the battery unit supplied with the set.
9
LU 252976139A D86C EN.book Page 10 Vendredi, 3. août 2007 9:56 09
YOUR TELEPHONE
Installation of a SIM card
Take your base, remove the compartment of SIM card (reference mark 2) located on the right
side .
Take your SIM card (reference mark 3) and slide it in the compartment by taking account of
the direction of insertion (printed circuit of the visible card and notch on the right).
Insert the compartment unit and SIM card in the housing located on the basis (reference
mark 1) .
2
3
Recommendation of safety ;
Your telephone DECT comprises a small-size removable plastic part (drawer of
SIM card) being able to be introduced By measurement of precaution, to hold
this drawer of SIM card out of reach children.
10
LU 252976139A D86C EN.book Page 11 Vendredi, 3. août 2007 9:56 09
MENU STRUCTURE
Text
Phonebook
Display
Alarm/Clock
Sound Settings
Write
Inbox
Draft
Outbox
Service Center
New Entry
View Entry
Edit Entry
Delete Entry
Delete All
PB transfer
Quick Dial
Copy from SIM
Wallpaper
Contrast
Level 1
Level 2
Level 3
Clock Setting
Alarm Setting
Handset Volume
HS Ring
Earpiece
(Vol 1-5)
Speaker
(Vol 1-5)
Melody
Volume
Internal Ring
(Vol 1-5)
Melody
Volume
(Vol 1-5)
Melody
BS Ring
Volume
Tone
Key Tone
Charge tone
Battery low
Out of Range
List end tone
11
(Vol 1-5)
LU 252976139A D86C EN.book Page 12 Vendredi, 3. août 2007 9:56 09
MENU STRUCTURE
Settings
Handset Set
Auto answer
Register HS
Economy mode
Handset Name
Language
Default HS
Room Monitor
Base Set
Change PIN
Remove HS
Default BS
Flash Time
PauseTime
Call log
Auto-Delete
Caller ID
Answer Machine
Handset Set.
Auto answer
Register HS
Dim Mode
Handset Name
Reset Handset
Room Monitor
Base Settings
Change PIN
Remove HS
Default BS
Flash Time
PauseTime
Call log
Auto-Delete
12
LU 252976139A D86C EN.book Page 13 Vendredi, 3. août 2007 9:56 09
CORDLESS HANDSET
General operations
Switch handset On/Off
1. Press and hold Talk button to switch the handset off in the idle mode.
2. Press Talk button to switch the handset on in the idle mode.
Lock handset keypad
1. Press and hold "*" button to lock handset keypad in the idle mode.
2. Press and hold "*" button again to unlock handset keypad in the idle mode.
Make an external call
1. Press Talk or press Speaker on/off button.
2. Key in phone number.
OR
Pre-dialing for a call
1. Key in phone number that you want to dial in the idle mode, if you make a mistake, press
soft key
to clear digits one by one from the display.
2. Press Talk or Speaker on/off button
to make a call.
3. While making the pre-dialing, can enter a pause by pressing the soft key "P".
Mute function
You can switch to secret mode at any time during your conversation. Your handset
microphone will be switched off and the other person will not be able to hear you.
1. Press Talk or press Speaker on/off button to answer an external call.
2. Press soft key Mute (
) to mute the microphone. Press soft key Un-mute (
continue your conversation.
3. Press soft key "Option" to view the phonebook/redial list and record a call.
13
) to
LU 252976139A D86C EN.book Page 14 Vendredi, 3. août 2007 9:56 09
CORDLESS HANDSET
Hands-free operation
Hands-free lets you talk to your caller without holding the handset. It also enables other people
in the room to listen to both sides of your conversation.
1. In the idle mode, press Speaker On/Off key, speakerphone icon
shows on the handset
display and dial tone can be heard over the handset speaker. You can dial the number to
make a call.
2. When there is an incoming call, press Speaker On/Off key, speakerphone icon
shows
on the handset display, you can talk to caller without holding handset.
Answer an external call
Press Talk or press Speaker on/off button
to answer an external call.
Adjust volume
During talking mode, press up or down button to increase or decrease volume level, there are
three volume levels shown by 1, 2, 3, 4 & 5 digitals on the display.
1. During hand-free mode, press up or down button to increase or decrease volume level,
there are four volume levels shown by 1, 2, 3, 4 and 5 digitals on the display.
2. Call duration timer is recording the call duration.
End a call
Press Talk button
to end an external call. Last call duration will shown on the display.
Last numbers redialing
1. Press the soft key "Redial" (Left Soft key in Standby mode).
2. Press Up or Down button to select a number.
3. Press Talk or Speaker on/off button.
14
LU 252976139A D86C EN.book Page 15 Vendredi, 3. août 2007 9:56 09
CORDLESS HANDSET
Caller Display
The ring on handset will be blinking, while there is unread of new CID in record.
View caller list
1. Press the Down/CID button, the most recent caller's name and number are shown on the
display.
2. Press Up or Down button to view the caller list.
Delete Caller Display records
1. Press the Down/CID button, the most recent caller's name and number are shown on the
display.
2. Press Up or Down button to select one
3. Press soft key "Option" to select Delete (Delete All?).
4. Press soft key " OK " to delete the record (delete all records).
Note: if you do not want to delete the current record, you can press back button to go back
to standby mode.
Store a Caller Display number in phonebook
1. Press the Down/CID button, the most recent caller's name and number are shown on the
display.
2. Press Up or Down button to select one.
3. Press Option to select Save to P. Book (phonebook).
4. Press soft key " OK "three times to store the number and name into phonebook.
Note: if you do not want to save the current entry, you can press back button to go back to
standby mode.
Call back from caller list
1. Press the Down/CID button, the most recent caller's name and number are shown on the
display.
2. Press Up or Down button to select one.
3. Press Talk or Speaker on/off button to call back .
15
LU 252976139A D86C EN.book Page 16 Vendredi, 3. août 2007 9:56 09
CORDLESS HANDSET
Intercom
To communicate between handsets, both handsets must be matched to a single base, and
must be within range of the base.
This unit shall support the intercom call between 2 (or more up to 5) registered handsets of the
same base station and conference call between 2 registered handsets and 1 external line.
Make an intercom call
- Press and hold " #/INT " button on the handset 1 in standby mode, a list of handset which is
available to call is shown.
- Use the keypad to enter the number of the desired handset. To select the specific handset
2, the audio dial tone can be heard in the earpiece for 20 seconds. If you want to exit internal
call mode, press back key to return to standby.
- Press Talk/Speaker On/Off button on the handset 2 to answer the call from handset 1.
- Press Talk/Speaker On/Off button or put back on cradle to terminate the internal call and
then go back to standby.
Incoming call - when you are making an intercom call
1. Press Talk key to answer external call and then put the internal call on hold or press Talk
again to release the current internal call. The handset will then ring.
2. Press Talk to answer the incoming external call.
Call transfer and Conference
This function is only accessible when two handsets or more are registered to the same base.
During communication, you can transfer the call to another handset.
- When handset1 is having an external call, press and hold #/INT to start an intercom
connection. The external call will be on hold and the phone icon will blink.
- Press 2 key to call handset2. When the handset2 answer the call,
- Press Option and select "Call Transfer" from the Menu. The external call will be transfer to
handset 2 .
- Alternatively, select Switch Calls to toggle between the held external call and internal call.
The held call icon will flash.
Start a 3-party conference call, select Conference. In the conference call mode, press Option
key to select "Switch to Ext" to talk to external caller; select "Switch to Int" to talk to internal
caller.
To retake the call before it is picked up by the handset called, press and hold #/INT key.
16
LU 252976139A D86C EN.book Page 17 Vendredi, 3. août 2007 9:56 09
TEXT (SMS)
SMS Text Message Writing
To write SMS message, select Text icon from Main Menu.
Select Write and then press OK. Input letter, number, or symbol using the keypad according
to below table:
Remark: The capital letters are accessible by pressing the "# "key.
Alphanumeric keypad key correspondance depending on the activated mode
(capital letters or small letters).
- Press Menu button to enter Main menu:
- Press Up or Down button to select Write/Inbox/Draft/Outbox/Service Center.
Write
- Press OK to start write short messages.
- Press OK when finish writing.
- Key in the receiver's number or select the number from Phonebook. Press OK after inputted
the receiver's number.
- Select Send SMS to release the SMS or Save SMS to Save the SMS text into Draft box.
Inbox
This folder contains the read messages that you have chosen to keep.
When selected Inbox, you can:
- Check the Receive message.
- Review message.
17
LU 252976139A D86C EN.book Page 18 Vendredi, 3. août 2007 9:56 09
TEXT (SMS)
-
Reply message.
Forward message.
Save the sender's number into Phonebook.
Call sender
Delete an or all message in the inbox.
Draft
This folder contains the messages that you wrote and that have not been sent out.
-
Press OK to view Draft box.
Press Read button to read SMS text messages.
Press ESC button to exit Menu.
Press Option to Edit SMS/Send SMS/Delete/Delete All text messages.
Press ESC button to exit Menu.
Outbox
This folder contains the unread messages.
When selected Outbox, you can:
- Review message.
- Edit message.
- Resend message.
- Save message into Draft.
- Delete an or all message.
Service Centre
This function is for changing the numbers of the SMS centres (depending on the operator).
You can define an SMS centre number for reception and one for transmission.
Press OK, the following items will appear on the display:
- Outgoing Nr.
- Incoming Nr.
18
LU 252976139A D86C EN.book Page 19 Vendredi, 3. août 2007 9:56 09
PHONEBOOK OPERATIONS
Quick enter to phonebook
Press the middle Soft key "
" during the standby mode.
Store a number into phonebook
- Key in a phone number, if you make a mistake, press soft key
to clear one digit at a
time from the display.
- Press soft key "Option".
- Press the Up or Down button select "Save to P. Book".
- Press soft key "OK" to key in Name.
- Press soft key "OK" the phone number you want save will appear on the display.
- Press soft key "OK" to select VIP tone.
- Press soft key "OK" to save the phone number into "Phonebook".
Store a last number into phonebook
-
Press the left Soft key "Redial".
Press soft key "Option".
Press Up or Down button to select "Save to P. Book".
Press soft key "OK" to key in Name.
Press soft key "OK", the phone number you want save will appear on the display.
Press soft key "OK" to select VIP tone.
Press soft key "OK" to save the phone number into Phonebook.
Change a stored number
- Press the soft key "
" during the standby mode to enter Phonebook.
- Key-in the 1st character or press the Up or Down button to find an entry you want, the name
and number will appear on the display alternately.
- Press the soft key "Option" to select "Edit Entry".
- Press soft key "OK" to edit name.
- Press soft key "OK" to edit phone number.
- Press soft key "OK" to select VIP tone.
- Press soft key "OK" to save the changes.
Delete a stored number
- Press the soft key "
" during the standby mode to enter Phonebook.
- Key-in the 1st character or press the Up or Down button to find an entry you want, the name
and number will appear on the display alternately.
- Press soft key "Option" to select "Delete Entry" (if select "Delete All").
19
LU 252976139A D86C EN.book Page 20 Vendredi, 3. août 2007 9:56 09
PHONEBOOK OPERATIONS
- Press soft key " OK " to delete the entry (Delete all entry).
SIM copy
- Insert SIM card into base units.
- Press the soft key "
" in the standby mode to enter Phonebook.
- Press soft key "Option" to select "Copy from SIM".
- Press soft key "OK" to copy all entries from the SIM card.
Phonebook transfer between handsets
- Press the soft key "
" on the handset 1 in the standby mode to enter Phonebook.
- Press soft key "Option" on the handset 1 to select "PB transfer".
- Press soft key " OK " on the handset 1, the "Handset 2" that had registered same base will
be highlighted will appear on the display.
- Press soft key "OK" on the handset 1, the "PB Trans To Handset 2" will appear on the
handset 1 display, the "PB Trans From Handset 1" will appear on the handset 2 display.
- Press soft key "Accept" on the handset 2 to receive all entries from handset 1 Phonebook.
- Press soft key "Abort" on the handset 1 or "Reject" on the handset 2 to cancel Phonebook
transferring.
Quick dial
-
Press the soft key "
" in the standby mode to enter Phonebook.
Key-in the 1st character or press the Up or Down button to find an entry you want.
Press soft key "Option" to select "Quick Dial".
Press soft key "OK" to enter a number (1~9).
Press soft key "OK" to confirm.
Press and hold the digit key (1~9) to find the quick dial number.
Press Talk or Speaker On/Off key to make quick dialing.
Make a call from phonebook
- Press the soft key "
" during the standby mode to enter Phonebook.
- Key-in the 1st character or press the Up or Down button to find an entry you want, the name
and number will appear on the display alternately.
- Press the Talk button.
20
LU 252976139A D86C EN.book Page 21 Vendredi, 3. août 2007 9:56 09
DISPLAY
Wallpaper setting
This menu allows is for changing the your handset idle screen picture.
-
Press Menu to select Display.
Press OK to select Wallpaper ( 1-6) .
The image is displayed on the screen.
Press OK to keep this image as the background display or use the navigation (up/down)
button to select a different one.
Contrast setting
-
Press Menu to select Display.
Press OK to select Contrast.
Press OK to select contrast level(1,2,3).
Press OK to confirm and save.
21
LU 252976139A D86C EN.book Page 22 Vendredi, 3. août 2007 9:56 09
ALARM/CLOCK
Clock Setting
The base manages the time displayed on the handset, so the time indicated on your handset
should be re-verified after any loss of electric power. If the time is not set correctly, proceed as
indicated above to set the time.
- Press Menu.
- Press Navigation (up/down/left/right) button to select Alarm/Clock.
- Press OK to select Clock Setting.
A screen displays the current date and time.
- Press OK to set the time/day (hh:mm DD-MM-YY).
- Press OK to confirm and save.
Alarm Setting
The alarm function enables you to activate the handset ringer every day at a set time.
When the alarm is triggered the selected ring tone sounds for 60 seconds through the handset
speaker and an alert screen is displayed. To turn off the alarm press any key.
-
-
Press Menu.
Press Navigation (up/down/left/right) button to select Alarm/Clock.
Press OK.
Press Up or Down button to select Alarm Setting.
Press OK.
An information screen shows the alarm clock status.
- the time at which the handset will ring,
- if the alarm is on or off.
Press Edit to edit time.
Press OK to confirm and saved.
Press Up or down button to select Alarm Tone.
Press OK to select alarm tone (1,2,3).
Press OK to confirm and saved.
Press Up or down button to select Alarm: on/off.
Press On or Off button to select on or off.
Press ESC to go back standby mode.
22
LU 252976139A D86C EN.book Page 23 Vendredi, 3. août 2007 9:56 09
SOUND SETTINGS
-
Press Menu.
Press Navigation (up/down/left/right) button to select Sound Setting.
Press OK.
Press Up or Down button to select one of the below item:
Handset Volume
HS Ring
Internal Ring
BS Ring
Tone
Handset Volume
-
Press OK to enter Earpiece/Speaker setting.
Press Up or Down button to select Earpiece/Speaker.
Press OK.
Press Right/Left button to set the Earpiece/Speaker volume level.
Press OK to confirm and save.
HS Ring
-
Press OK to enter Melody/Volume setting.
Press Up or Down button to select Melody/Volume.
Press OK.
Press Up/Down/Left/Right button to set the Melody/Volume.
Press OK to confirm and save.
Internal Ring
-
Press OK to enter Melody/Volume setting.
Press Up or Down button to select Melody/Volume.
Press OK.
Press Up/Down/Left/Right button to set the Melody/Volume.
Press OK to confirm and save.
BS Ring
-
Press OK to enter Melody/Volume setting.
Press Up or Down button to select Melody/Volume.
Press OK.
Press Up/Down/Left/Right button to set the Melody/Volume.
Press OK to confirm and save.
23
LU 252976139A D86C EN.book Page 24 Vendredi, 3. août 2007 9:56 09
SOUND SETTINGS
Tone
-
Key Tone: press On/Off button to set key tone On/Off.
Charge tone: press On/Off button to set charge tone On/Off.
Battery low: press On/Off button to set battery low tone On/Off.
Out of Range: press On/Off button to set key tone On/Off.
List End Tone: press On/Off button to set list end tone On/Off.
24
LU 252976139A D86C EN.book Page 25 Vendredi, 3. août 2007 9:56 09
SETTINGS
-
Press Menu button.
Press Navigation (up/down/left/right) button to select the Settings.
Press OK.
Press Up or Down button to select one of the below item:
Handset Settings
Base Settings
Handset Settings
- Press OK.
- Press Up or Down button to select one of the below item:
Auto answer
Register HS
Economy mode
Handset Name
Language
Default HS
Room Monitor
Auto answer
- Press On/Off button to set Auto answer on/off (if set to on, during an incoming call you can
take the handset from base unit to directly answer the call).
Register a new handset to a base
- Press OK to enter PIN (Personal Identification number).
- Enter PIN number 0000(default: 0000).
- Press OK to register handset to Base.
Note: if you want to register handset to base, you should be press and hold base Page button
until you hear beep tone.
Note: if you do not want register handset to base you can press Back button to go back
standby model.
- After registration is completed, the handsets will suggest the available Handset number
(from 1-5). You can choose the number you want to associate by pressing the corresponding
digit key. (press 1 key to choose Handset number 1).
25
Réglages.fm Page 26 Vendredi, 3. août 2007 10:21 10
SETTINGS
Economy Mode
- Press On/Off button to set Economy mode on/off.
Handset Name
- Press OK to enter handset name writing.
- Key in name.
- Press OK to confirm and save.
Language
- Press OK to choose the desired language from the language list.
- Press Up or Down button to select the language.
- Press OK to confirm and save.
Resetting the handset (default HS)
When you reset your handset, all the parameters are reset to their initial value (factory
settings).
- Press OK, Confirm icon appear on the display.
- Press OK to confirm.
Room monitor
You can use your handset to monitor a room. This allows you, for example, to monitor a baby's
room.
To do so, place one of the handsets in the room to be monitored. This unit will be in "sender"
mode.
The other handset will remain with you, it is in "receiver" mode.
-
Press OK, "Call To" will appear on the display.
Key in another handset number that had registered to the same base.
Press OK, "Intercom" will appear on the display.
After set first handset to Room Monitor On, the other handset will ring while first handset
receives some voice.
- Press Talk or Speaker On/Off key on the other handset to monitor first handset.
26
LU 252976139A D86C EN.book Page 27 Vendredi, 3. août 2007 9:56 09
SETTINGS
Base settings
- Press OK.
- Press Up or Down button to select one of the below item:
Change PIN
Remove HS
Default BS
Flash Time
Pause Time
Call log
Auto-Delete
Change PIN (Personal Identification Number)
The base code (0000 being the default setting) is required to access certain security functions.
It must be composed of 4 digits.
If the programmed code is the default one (0000):
- Press OK.
- Enter new PIN number XXXX.
- Press OK.
- Re-enter PIN number XXXX.
- Press OK to confirm and save.
In the opposite case:
- Press OK.
- Enter old PIN number XXXX .
- Press OK.
- Enter new PIN number XXXX.
- Press OK.
- Re-enter PIN number XXXX.
- Press OK to confirm and save.
Remove HS
This function enables you to de-register a handset from your base. This may be necessary if
you have lost a handset or if you already have 5 handsets registered to the same base.
- Press OK, Unregistered icon and HS number appear on the display.
- Enter the number of the handset you want to delete.
- The deleted Handset will display "Unregistered" until it register again.
27
LU 252976139A D86C EN.book Page 28 Vendredi, 3. août 2007 9:56 09
SETTINGS
Default BS
When you reset your base, all the base parameters are reset to their initial values (factory
settings).
- Press OK, Confirm icon appear on the display.
- Press OK to confirm.
Flash Time
If you connect your telephone to a private automatic branch exchange or use it in a foreign
country, you may need to modify the flash duration in order to use your telephone correctly
with regard to the following functionalities: call waiting, 3 way calling.
Contact your provider, who will supply the appropriate time period, and proceed to the new
settings.
- Press OK.
- Press Up or Down button to select 80/250/600ms flash time.
- Press OK to confirm and save.
Pause Time
You can insert a pause in the dialling sequence.
- Press OK.
- Press Up or Down button to select 0/1/2/3/4s pause time.
- Press OK to confirm and save.
Call log
- Press OK to select All Call or Missed Call.
- Press OK to confirm and save.
Note: If "Missed Call" is selected, the following criteria will be considered during "Call Waiting
CID"(1st call + incoming 2nd call with CID): No action (Ignore the 2nd call and continue
conversation with 1st call): 2nd call will be missed calls and displayed on the CID list,
Answer the 2nd call and on-hold/ end 1st call: 2nd call will not be missed calls and will
not displayed on the CID list.
If "All Call" is selected, the following criteria will be considered during "Call Waiting CID"
(1st call + incoming 2nd call with CID): No action (Ignore the 2nd call and continue
conversation with 1st call): 2nd call will be displayed as new calls in the CID list.
28
LU 252976139A D86C EN.book Page 29 Vendredi, 3. août 2007 9:56 09
SETTINGS
Auto-Delete
- Press OK.
- Press Up or Down button to select Enable/Disable.
- Press OK to confirm and save.
Note: This function is for SMS memory management. If the setting 'Auto-Delete' is enabled,
in each full box, inbox, outbox and draft box, the oldest SMS will be deleted in order to
get room for a new SMS automatically. In case the setting 'Auto-Delete' is disabled no
SMS will be deleted in any box. The user receives an error message of the appropriate
box if it is full. The default setting is enabled.
29
LU 252976139A D86C EN.book Page 30 Vendredi, 3. août 2007 9:56 09
CALLER ID
Your phone caller ID list size is 20 records of name and number of 24 digits number and
12 characters with date and time.
#20
Handset
(20)
Save to P. Book
Delete
25188668
Delete All?
09:26 12.08
Menu
Esc
Option
back
OK
To View caller list
- Press the Down/CID key, the most recent caller's name and number are shown on the
display as illustration.
- Press navigation key (up or down) to view the caller list.
Delete Caller Display records
- Press the Down/CID key, the most recent caller's name and number are shown on the
display as illustration.
- Press navigation key (up or down) to select one.
- Press soft key Option to select Delete (Delete All?).
- Press soft key OK to delete the record (delete all records).
Note: if you do not want to delete the current record, you can press ESC/Phone Off key.
Store a Caller Display number in phonebook
- Press the Down/CID key, the most recent caller's name and number are shown on the
display as illustration.
- Press navigation key (up or down) to select one.
- Press soft key Option to select Save to P. Book (phonebook).
- Press soft key OK three times to store the number and the name into phonebook.
Note: if you do not want to save the current entry, you can press ESC/Phone On key.
Call back from caller list
- Press the Down/CID key, the most recent caller's name and number are shown on the
display as illustration.
- Press navigation key ( up or down) to select one.
- Press Phone On or Speaker on/off key to call back.
30
LU 252976139A D86C EN.book Page 31 Vendredi, 3. août 2007 9:56 09
APPENDIX
Care and Maintenance
Use a slightly damp cloth to wipe the base and handset, do not use a dry cloth as this may
cause electrostatic charges.
Problems
Refer to the table presented below in case of an operational malfunction:
Problems
Remedies
The handset display is
blank.
Make sure the batteries are properly installed.
Place the handset on the base and fully charge the batteries.
To increase the life of your batteries, you can perform this
operation about every two months.
If these precautionary measures do not resolve this issue,
replacement batteries are available through your reseller. To
replace your batteries, refer to see pargraph "Replacing the
batteries", page 9.
As time goes by, you may notice a slight decrease in battery
performance. Use your handset until the battery is fully
discharged, and then charge it for at least 12 hours.
The handset does not
ring during an incoming
call.
Make sure that the telephone is properly connected and that
you have a dial tone.
Make sure your telephone is not set to silent mode ( see
pargraph "Sound Settings", page 23).
No radio link between the
handset and base.
The network indicator
icon flashes
Make sure the handset is registered by moving closer to the
base, if it is registered correctly, the handset screen should
display its own handset number.
Otherwise, register the handset to the base. see pargraph
"Register a new handset to a base", page 25.
You obtain a "busy" dial
tone for each dialled
number.
Make sure no one else is using another handset (if the
intrusion mode is deactived).
Make sure that the dial mode (tone or pulse dialling) is
compatible with your telephone line or your automatic branch
exchange.
You cannot send
or receive SMS.
Make sure you have subscribed to a caller display service.
Find out if the SMS service is in fact activated on your line.
Obtain the server numbers from your service provider and
make sure they are identical to the numbers on your handset.
31
Caractéristiques.fm Page 32 Lundi, 3. septembre 2007 12:00 12
FEATURES
Telephone features
Number of channels
10 x 12 = 120
Radio frequency band
1,88 - 1,90 GHz
Autonomy
standby time
180 hours
Duplex mode
TDMA
talk time
15 hours
Spacing between
1,728 MHz
Bit rate
1152 Kbit/s
open space
up to 300 m
Modulation
GFSK
inside building
up to 50 m
Handset range
Vocoding
ADPCM
Base dimensions
150 x 105 x 24 mm
Transmitting power
250 mW
Base weight
132
Base operating voltage
240 V , 50/60 Hz
Handset dimensions
152 x 38 x 20 mm
Charging time
15 hours
Handset weight
102 g
All of this data is provided to you for information purposes only. Sagem Communication
reserves the right to make any changes without notice.
32
LU 252976139A D86C EN.book Page 33 Vendredi, 3. août 2007 9:56 09
ENVIRONMENT
Preservation of the environment is an essential concern of Sagem Communication. The desire
of Sagem Communication is to operate systems observing the environment and consequently
it has decided to integrate environmental performances in the life cycle of its products, from
manufacturing to commissioning, use and elimination.
Packaging
The presence of the logo (green dot) means that a contribution is paid to an
approved national organisation to improve packaging recovery and recycling
infrastructures.
To facilitate recycling, please respect the sorting rules set up locally for this
kind of waste.
Batteries
If your product contains batteries, they must be disposed of at appropriate
collection points.
The product
The crossed-out waste bin stuck on the product or its accessories means that
the product belongs to the family of electrical and electronic equipments.
In this respect, the European regulations ask you to dispose of it selectively:
• At sales points in the event of the purchase of similar equipment.
• At the collection points made available to you locally (drop-off centre,
selective collection, etc.).
In this way you can participate in the re-use and upgrading of Electrical and Electronic
Equipment Waste, which can have an effect on the environment and human health.
33
LU 252976139A D86C EN.book Page 34 Vendredi, 3. août 2007 9:56 09
RECOMMENDATIONS OF SECURITY
WARNING
Please read and follow the handling instructions for the battery before use.
Improper use of the battery may cause heat, fire, rupture, damage or capacity deterioration of
the battery, and cause serious injury.
•
•
•
•
•
•
•
•
•
•
•
•
Do not put the battery into a fire or heat the battery. Do not store the battery in high
temperature environment.
Do not connect the battery reversed in positive (+) and negative (-) contacts in the
handset.
Do not let the battery terminals (+ and -) contacts whith a wire or any metal (like a metal
necklace or a hairpin) when carried or stored together. This may cause short-circuit.
Do not drive a nail in, hit with a hammer, or stamp on the battery, do not strike the battery
in other ways.
Do not disassemble or alter the batteries outside structure.
Do not submerge the battery in water. Do not store or use handset/battery in wet
conditions.
Battery should be charged and discharged only with provided charger and handset, in
compliance with correct operation and connection contents.
Do not use the battery in others equipments than this handset.
Do not use different types and /or models of batteries in this phone such as dry batteries,
nickel-metal hydride batteries, or nickel-cadmium batteries, or other lithium batteries. It
may cause explosion, fire or heat.
Do not leave the battery in handset if it generates a bad smell and/or heat, changes colour
and/or shape, leaks electrolyte, or cause any other abnormality.
In case young children use the handset, instruct them about these safety warnings and
ensure the battery/handset is correctly used by them at all times.
Do not use the handset in other than the following conditions, otherwise, the battery might
cause heat , fire, rupture, deterioration of its performance.
Operating environment:
- Charge : 0°C to +45°C
- Discharge : -20°C to +60°C
- Storage environment : -20°C to +45°C
34
LU 252976139A D86C EN.book Page 35 Vendredi, 3. août 2007 9:56 09
WARRANTY
Product Warranty
Sagem Guarantees your product for 12 months from date of purchase against any defect in
materials or workmanship under conditions of normal use and service and subject to proof of
the date of purchase being provided and subject to the conditions specified below.
The benefits conferred by this warranty are in addition to all other rights and remedies in
respect of the product that the consumer has under the Trade Practices Act and similar State
and Territory laws.
Warranty Service Conditions
Subject to your statutory rights referred to above, Sagem expressly limits its liability with
respect to its products to the person who purchases the Product from the Sagem authorised
retailer. Subject to your statutory rights referred to above, Sagem expressly limits its liability
with respect to its products to whichever is the lowest amount out of:
A. The cost of having the goods repaired;
B. The cost of replacing the goods; or
C. The cost of obtaining equivalent goods.
Subject to your statutory rights referred to above, in the event of the goods requiring service
underwarranty, the owner is responsible for the cost of transportation to the authorised service
organisation. Whilst in transit the goods are at the owner’s risk. Subject to your statutory rights
referred to above, should the goods be found to be in sound working order by the authorised
service organisation the owner may be charged a service fee.
Subject to your statutory rights referred to above, the goods will not be eligible for service
under this warranty if:
A. Proof of date of purchase cannot be provided;
B. The goods are not branded Sagem;
C. The goods have been rented to another person;
D. The defect was caused by an accident, misuse, abuse, improper installation or operation,
lack of reasonable care, unauthorised modification, loss of parts, tampering or attempted
repair by a person not authorised by Sagem; or
E. The product has been damaged by lightning or a mains power surge.
Do you really need service?
Before calling for service under this warranty have you:
- Checked that all cables are securely connected as detailed in the User Guide?
- Referred to the User Guide to ensure that the features are being used correctly?
- If you are trying to access a network service such as Call Waiting, confirmed with your
network provider that you have access to this feature?
35
LU 252976139A D86C EN.book Page 36 Vendredi, 3. août 2007 9:56 09
WARRANTY
IMPORTANT
Please retain this booklet with your sales receipt as proof of the date of purchase.
© COPYRIGHT 2007 Sagem Corporation Limited
This work is copyright. All rights reserved. Other than for purposes and subject to conditions
prescribed under the Copyright Act, no part of it may in any form or by any means, mechanical,
photocopying, scanning, recording or otherwise) be reproduced, stored in a retrieval system
or transmitted without prior permission from Sagem Corporation Limited.
ABN 43 003 099 812
SAGEM is a registred trademark of Sagem Communication (SAFRAN Group).
Copyright © Sagem Communication (SAFRAN Group)
All rights reserved
36
Notes.fm Page 100 Lundi, 30. octobre 2006 10:08 10
...................................................................................................................................
...................................................................................................................................
...................................................................................................................................
...................................................................................................................................
...................................................................................................................................
...................................................................................................................................
...................................................................................................................................
...................................................................................................................................
...................................................................................................................................
...................................................................................................................................
...................................................................................................................................
...................................................................................................................................
4 COUV.fm Page 37 Lundi, 3. septembre 2007 12:00 12
User Manual
Data subject to change without notice
*252976139B*
Sagem Communication
Société anonyme au capital de 300 272 000 € - 480 108 158 RCS PARIS
27, rue Leblanc - 75512 PARIS CEDEX 15 - FRANCE
www.sagem.com