1
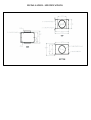
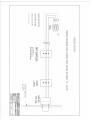
INLINE BLOWER INSTALLATION FOR INLB300, INLB600 & INLB1200
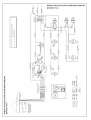
WARNING: ELECTRICAL CONNECTIONS SHOULD ONLY BE MADE BY A LICENSED ELECTRICIAN
NOTE: All models use the same housing/enclose
1. Before making any electrical connection make sure your electric is turned off
2. Check that the fan’s impeller is moving freely
3. Unit is designed to be mounted in any position
4. For ideal implementation, close proximity of the blower to its discharge point will improve the unit’s
performance
5. Accessibility to the unit location is important in the planned duct run.
6. When unit is not in its ideal location use larger duct work for longer runs.
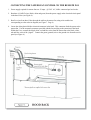
7. Sheet metal screws are provided for “L” bracket attachment to the housing. Screws must be positioned
within 1” of the edge of the housing.
8. Seal all ducting connections with cold weather metal tape.
9. The unit should be hung on the “L” brackets using wood screws (not provided).
10. Rubber padding may be added to the insulation of the unit to reduce/eliminate potential vibrations (not
provided).
CLEANING
1. Periodically check exhaust exit for blockage, i.e., bird nests, leaves, etc
2. Periodically inspect the unit ducting and the ventilation exit point for grease build-up
3. If present in the installation, periodically check the dapper for any obstructions.