1
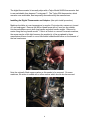
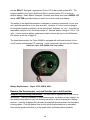
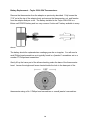
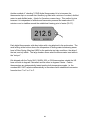
The picture on the left above shows how the thermometer & adaptor should look upon
receipt. Unscrew the 7/16” nut and remove the thermometer, nut, & ferrules as a unit
as shown on the right picture above. Set the thermometer, nut & ferrules aside for the
time being but be careful that the ferrules do not fall off and disappear “forever”.
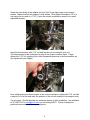
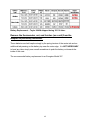
Remove the existing M6 x 8 mm allen-head capscrew using a 5 mm long-handle allen
wrench. The existing copper or Teflon sealing washer will likely come off semi-attached
to the capscrew. If not, remove it from the machined recess in the grouphead and set
aside as an emergency spare. Clean the recess and the seating surface for the new
copper washer with a water-moistened Q-tip as necessary. A few swipes should do it.
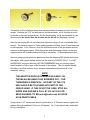
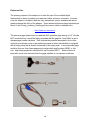
Remove (unscrew) the protective plastic cap from the adaptor’s M6 threads and screw
the adaptor with copper sealing washer into the machine FINGER-TIGHT. It is NOT
NECESSARY and most definitely NOT RECOMMENDED that you use any type of
thread sealant or Teflon tape on the threads of the adaptor. The soft copper washer
will deform and thus conform to any surface irregularities and perform all of the
necessary sealing.
NOTE
THE ADAPTOR SHOULD SCREW IN AS EASILY AS
THE M6 ALLEN HEAD PLUG SCREWED OUT – THE
THREADING IS IDENTICAL. NO PART OF THE 7/16
HEX SHOULD BE TOUCHING ANY PART OF THE
GROUP-HEAD. IF THIS IS NOT THE CASE, STOP ALL
WORK AND GIVE ME A CALL AT 301-587-5033 OR
SEND AN EMAIL TO ME ([email protected]) AS SOON
AS IS PRACTICABLE.
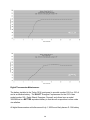
Using a short 7/16" combination wrench (preferable) or 6” Crescent wrench, tighten the
adaptor fitting an additional 1/8 turn or 45 degrees. An 11 mm wrench also works well.
Do not overtighten.
7