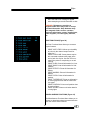
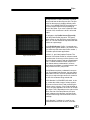
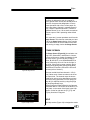
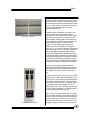
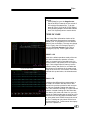
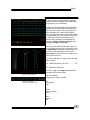
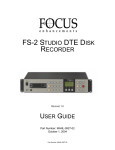
1
Electronics Diversified, Inc.
Bijou
Plus
and
Control Console
User Manual
Revision 4, September 2004
©2004 Electronics Diversified, Inc.
070-0720-00
Bijou
Table of Contents
About the Manual ………………………………………………………………………………………….. 5
About the Bijou……………………………………………………………………………………………... 5
Section I - System Details and Assembly for Operation
Rear Panel…………………………………………………………………………………………………..
Assembly…………………………………………………………………………………………………….
Front Panel………………………………………………………………………………………………….
Control Keys………………………………………………………………………………………………...
Screen Keys………………………………………………………………………………………………...
Action Keys………………………………………………………………………………………………….
Number Keys………………………………………………………………………………………………..
XY & AB Fader Control Keys……………………………………………………………………………...
Main Menu…………………………………………………………………………………………………..
Default Settings 1
Default Settings 2
Clear Functions
Save to Disk
Load from Disk
Print Functions
Miscellaneous Functions
Section II - Bijou Operations
Initial Operation………………………………..……………………………………………………………
Protecting Prerecorded Show Information…………………………...………………………………….
Patch Screen…………………………………………………………...…………………………………..
Patch at Level…..…………………………………………………………………………………………..
Non-Dim………………………………………………………………...…………………………………...
Parking…………..…………………………………………………………………………………………..
Profile Screen…………………………………………………………..…………………………………...
Operating the Bijou as a Manual Control Console………………….…………………………………..
Stage Screen…………………………………………………………...…………………………………..
Help…………………………………………………………………………………………………………..
Crossfader Display……………………………………………………..…………………………………..
Submaster Output Display…………………………………………….…………………………………..
To Operate in 2-scene Manual Mode………………………………...…………………………………..
Grandmaster…………………………………………………………….…………………………………..
Channel Fader Operation:2-Scene…………………………………...…………………………………..
Operate in 1-scene Manual Mode…………………………………….…………………………………..
Grandmaster…………………………………………………………….…………………………………..
Channel Fader Operation: 1-Scene…………………………………..…………………………………..
Memory or Automated Preset Operation…………………………….…………………………………..
Recording a cue from levels set with the Channel Faders
Loading The Cue to a Crossfader
Timed Faders
Fade take
Different up and Down times
Creating a cue with delays
Setting Levels via the Keypad (Data Entry) & The Encoder Wheel
To Clear a Crossfader
To Clear Channel Levels to 0
2
7
8
10
11
11
13
16
16
17
25
25
26
27
29
30
30
32
33
33
34
34
34
35
35
38
39
41
41
Bijou
Table of Contents
Remainder Dim
Types of Cues…………………………………….…………………………………...……………………
Preset
Track
Multistart Preset
Multipart
Running Cues out of Numerical Sequence………………………………………...……………………
Link
Load Cue or Go To Cue
Go to in Time/ Sneak Function
Running Two Different Prerecorded Cue Stacks
Modifying an Existing Cue……………………….…………………………………...……………………
Channel Levels
Update Key
Cue Preview Screen……………………………...………………………………………………………..
Modifying an Existing Cue's Attributes…………………………………………………………………...
Cue Preview Screen
Cue List Screen
Delete a Cue…………………………………………………………………………...……………………
Submasters………………………………………..…………………………………...……………………
Sub Preview Screen
Naming a Sub
Operation of Submasters………………………...…………………………………...…………………...
Working Submasters on Multiple Pages
Recording Submasters from the Stage Screen
Deleting a Submaster
Submaster Type
Timed Submasters
Merging Submasters into a Cue
Sub List Screen
Effects……………………………………………...…………………………………...……………………
Creating an Effect
Inserting and Deleting Steps
Effect Types
Deleting an Effect
Running an Effect
To Clear an Effect off of a Submaster
Macros……...……………………………………..…………………………………...……………………
Creating a Macro
To Run a Macro
To Delete a Macro
Section III - Intelligent Lighting Controls
Indroduction…………………………………………………………………………………………………
Screens……………………………...…………….…………………………...……………………………
Type Setup Screens……………………………...…………………………...…………………………...
Assigning Attributes to the Wheels
Device Setup Screens………………………………………………………...…………………………...
Position Setup Screen……………………………………………………………………………………..
Screen Description
3
50
53
56
57
57
60
60
63
69
73
75
76
76
78
79
Bijou
Table of Contents
Setting Up a Device
Creating a Position with Multiple Features
Home Key
Step Key
Device Key (F1)
Master Key (F2)
Jump Key (F3)
Action Setup Screen……………………………...…………………………...…………………………...
Single Step
Special Attribute Timing
Loops
Running and Stopping an Action
Running Positions and Actions as Part of a Show...........................................................................
Remote Video……………………………………………………………………………………………….
Hook-Up of Remote Video
Keyboard…………………………………………………………………………………………………….
Printers………………………………………………………………………………………………………
Setup of Printer
Designer’s Remote…………………………………………………………………………………………
Service Info………………………………………………………………………………………………….
4
84
87
88
88
89
89
90
Bijou
ABOUT THE MANUAL
This manual, like most operations manuals, is
divided into sections. The first section is the boring section and contains the details about what all
of the “Parts” are. Unfortunately, if you are new to
lighting control and do not learn the parts, their
locations, and functions, you will not be able to do
the more interesting things, such as create cues
and effects. Unlike some, we do not think that the
length of the manual is in direct proportion to the
abilities and flexibility of the control console; it will
not take you long. So, take the time to read the
first section. Then, move on to the interesting
stuff in the second section. Here, you will learn
how to run the tool that you have purchased. After that, you can go to the third section of the
manual to learn about the various accessories,
internal parts, and technical specifications of the
console.
ABOUT THE BIJOU
The Bijou is a full memory operation lighting control console with the added (optional) capability to
operate as a 2-Scene preset/1-Scene manual
preset board. The Bijou allows the user the ability
to operate in either or both modes of operation for
true operator flexibility. The console gives the
operator two distinct and independent sets of
cross faders. This allows the operator to run manual 2-Scene fades on the XY cross faders and at
the same time operate preprogrammed cues/
scenes/presets from the other AB set of faders.
Or the XY and AB cross faders can be operated
simultaneously with two total separate and independent cue stacks. Both sets of cross faders
incorporate [Go] buttons with manual override for
independent control of any fade action.
The Bijou is a hands on, operators’ board with 12
pages of 24 submasters. Submasters can be operated via bump buttons, sliders (manually), or as
timed action controls. They can also be used as
presets. The submasters are also used to control
the powerful effect package.
5
Bijou
So, unpack your Bijou from its shipping box, locate all of the parts and pieces, and you can set it
up. It is recommended that you keep the shipping
box and materials in storage (if space permits) to
use in the unlikely event that the board has to be
sent back to the factory for service.
The User Manual is supplied with your system.
Copies of this manual my be obtained from Electronics Diversified, Inc. for a nominal charge or
free via our website www.edionline.com. ©2002,
by Electronics Diversified, Inc. All rights reserved.
No part of this manual may be reproduced by any
means, graphic, electronic, or mechanical, including photocopying, recording, taping, or information storage and retrieval systems, without the
express written permission of Electronics Diversified, Inc., except in connection with installation,
repair and maintenance of Electronics Diversified,
Inc. systems.
6
Bijou
Section I: System Details and Assembly for Operation
To operate the Bijou console, carefully open the
packing/shipping boxes and locate the following:
•
•
•
•
•
•
Control console
Universal Power Pack/power cord (may be 2
pieces)
Alphanumeric Keyboard (optional)
VGA/SVGA display (may be owner provided)
DMX cable (optional)
Computer disk/s (PC format, 3.5” HD)
(optional)
1. Place the console on a stable, flat, and clean
surface that is large enough to hold all of the
accessories.
2. Place the VGA/SVGA display behind the
console in a comfortable viewing position.
3. Place the Alphanumeric Keyboard behind, or
to the side of, the console.
WARNING: Dust, smoke, and liquids can ruin
any piece of quality electronics. Keep
operation areas clean and do not allow
contamination of equipment.
REAR PANEL
Located on the rear of the console are the input
and output jacks, power jack, and the ON/OFF
power switch. Control cables furnished with the
console mate these outputs to the system
connection plates in your facility.
There are four types of connectors on the back of
the Bijou:
• Heavy duty XLR connectors
• Standard computer grade ‘D’ style connectors
• Standard computer grade ‘5’ pin DIN connectors
• Ethernet jack (RJ-45)
All XLR connectors are keyed and locking. All
DIN connectors are keyed. Both XLR and DIN
connectors are rotated to align the key position
for insertion. Tighten thumbscrews to ensure
proper connection. All connectors mate smoothly
7
Bijou
with no undue force. DO NOT force connectors
into position. Since many components use the
same style of connector, take the time to familiarize yourself with the location of each connector
prior to plugging in each device/accessory to ensure proper operation.
1. DMX OUTPUT (Dimmers 1-512) (5-Pin XLR)
2. DMX OUTPUT (Dimmers 513-1024) (5-Pin
XLR)
3. HHR INPUT (Optional accessory) (Hand Held
Remote Control) (5-Pin XLR)
4. CONTROL FREAK INPUT (Optional for (5pin XLR)
5. ETHERNET OUTPUT (Optional) IEEE
802.2/803.2 compliant UTP (RJ 45)
6. PRINTER OUTPUT (DB 25)
7. ALPHA NUMERIC KEYBOARD (5-Pin DIN)
8. VGA/SVGA MONITOR OUTPUT (D15, 3row, VGA standard)
9. REMOTE VIDEO (5-Pin XLR)
10. ON/OFF POWER SWITCH
11. POWER INPUT (100-250v, 50-60 Hz, 0.7-0.3
Amp)
ASSEMBLY
Prior to assembly, refer to REAR PANEL for location of appropriate jacks/plugs.
Like all micro-processor based controls, the Bijou
is sensitive to power fluctuations on standard
power lines. The console should be plugged into
an isolated circuit with a full equipment ground
and a UL approved surge suppresser. It is recommended that if an UPS (uninterrupted power supply) was not part of the original purchase contract, that you purchase one to protect the console (and your shows). An UPS can be purchased from EDI or at your local computer or office supply store.
To assemble the Bijou:
1. Plug the Universal Power Pack/cord into the
Power Input jack located on the back of the
console (left hand side for 48/96 and 72/144
versions). Make sure that the ON/OFF
8
Bijou
switch is in the OFF position.
2. Plug the parallel blade U-Ground end into a
surge protected outlet. DO NOT plug the
console into the same outlet/circuit with
motors or SCR/TRIAC controlled devices.
3. Locate and plug the optional Alphanumeric
Keyboard into its jack located on the back of
the console.
Note: The Bijou is designed to operate with
any standard PC/AT keyboard. The console
can be shipped with a remote keyboard as
optional equipment. Some manufacturers of
AT after-market keyboards are known to be
incompatible.
4. Assemble the VGA/SVGA monitor.
A. Plug in the parallel blade U-Ground plug
into a grounded outlet.
B. Plug the video cable into the D15, 3 row,
video standard plug located on the back
of the control console.
C. Locate the ON/OFF switch on the monitor
and turn it to the ON position.
5. Locate the DMX cable.
A. Plug the DMX cable into the 1-512 DMX
output jack.
B. Plug the other end of the DMX cord into a
DMX input jack connected to the
dimmers.
6. Locate the disk drive on the right end of the
control console (when viewed from an
operator’s position).
A. Push the eject button. This ejects the
plastic protector sheet that was placed in
the drive for transport.
B. Insert any 3.5”, 1.44 MB, high-density,
PC formatted disk into the disk drive. Unformatted disks must be formatted prior
to recording show information to disk.
C. Disks can be formatted on any standard
PC.
7. Find the ON/OFF switch located on the back
of the control console and turn the switch to
ON. This lights two blue LEDs, dotting the I &
J in the Bijou name on the front of the
console. The console boots up with the Stage
Screen ON, and the display ready for
operation.
9
Bijou
FRONT PANEL
The Bijou is a micro-processor based control system with all operational instruction sets and control routines embedded in read-only memory. The
control console front panel allows access to these
instructions and routines through key selections.
All key selections are echoed on the system command line located at the bottom of the monitor.
The Bijou and Bijou Plus are available as MEMORY OPERATION only boards or as a combination MANUAL (2-scene/1-scene) and MEMORY
boards. If the board has 2-scene/1-scene capabilities, there are two rows of sliders arranged in
groupings of 24, 48, or 72 to the left or above the
XY Cross Faders.
Note: In all discussions of operation, key caps are
represented in [ ]. So, the term [Stage] equals the
control console key with “Stage” silk screened on
it.
1
6
7
3
5
2
4
Figure 1-Front Panel
On all configurations of the Bijou, you find the
following front panel controls (Refer to Figure 1):
1. CROSS FADER SECTION: Location of XY
and AB Cross Faders: Load, Fade Take, Go,
Stop/Rev, Grand Master Fader, and Blackout
Switch.
2. CONTROL KEYS: Selects active display
screens for monitor and accesses channels
and level information. Organizes recording,
playback, and editing sequences. Starts and
stops automated features.
3. ENCODER WHEEL: Adjusts selected
channel levels proportionally.
4. SUBMASTER/EFFECTS FADERS: Controls
a manual and timed Submaster and Effects
via fade handles or associated bump buttons.
5. DISK DRIVE (located on right side): Off-line
storage of recorded information.
On 2-scene Preset versions of the Bijou:
6. FADE HANDLES (located on the left in two
rows): Sets channel output levels in 2-scene
and 1-scene manual operation.
7. BUMP BUTTONS (located in a row below the
Fade Handles): Drives the associated chan10
Bijou
nel output instantly to 100% when pressed;
returns to 0% when released.
Screen Keys
XY and
AB Fade
Control
Keys
Action Keys
CONTROL KEYS
Primary access to the control system is via the
keypad controls located on the front panel of the
console. The keypads are grouped together under common control heading for ease of operation. There are four groups of keys (Figure 2):
• Screen Keys
• Action Keys
• Number Keys
Number Keys • XY and AB Fade Control Keys
Figure 2-Control Keys
Figure 3-Screen Keys
SCREEN KEYS
The Screen Keys (Figure 3) access the primary
displays of the control console. The control console display screen can be changed at any point
by selecting a different Screen Key. Changing
screens does not affect or stop an action that was
set in the previous screen.
Several Screen Keys can access two screens.
The primary screen is silk screened on the top of
the key and the secondary (second hit) screen is
silk screened on the front edge of the key cap.
STAGE [Stage]
It is recommended that you execute all actions
from the Stage Screen.
• Shows active output of the control console.
• Shows channel levels from all sources
(except PARKED channels).
• Shows active operation of Submasters and
Effects.
• Shows active status of XY, AB, Grand Master
Faders, and Blackout switch.
• Cues/Presets can be recorded or rerecorded.
• Fade times can be altered.
• Primary screen for running most shows.
11
Bijou
Figure 4-Cue
Preview
Screen
CUE PREVIEW [Cue/List] (first hit) (Figure 4)
Preview screen that allows you to view and modify Cues/presets that are not presently active on
stage (blind recording). New Cues/presets can
be created blindly in this screen.
Figure 5-Cue
List Screen
Figure 6Track Screen
Figure 7-Sub
Preview
Screen
Figure 8-Sub
List Screen
Figure 9Patch Screen
CUE LIST [Cue/List] (second hit) (Figure 5)
Displays operational information (#, Type, Times,
Name) for 27 Cues per page and allows for modification of times and attributes.
TRACK [Track] (Figure 6)
Displays Cues/presets and the related channel
level information in a spread sheet format. Channel levels can be edited (blind) in this screen.
SUB PREVIEW (Figure 7)
[Submaster/List] (first hit)
Displays the attributes and channel levels of individual Submasters. A Submaster’s channel levels, type, times, and name are created or modified in this screen.
SUB LIST [Submaster/List] (second hit) (Figure 8)
Displays Submasters in numerical order, by page,
and with the associated name. Used to locate
and quickly identify specific Submasters for use in
hands-on (live action) operation.
PATCH [Patch/Profile] (first hit) (Figure 9)
Shows the system patch tables by dimmer. Dimmers can be assigned to channels with proportional levels and profiles. Dimmers may also be
PARKED at a level, bypassing both the Grand
Master and the Blackout switch. One-to-One
patches cannot be edited.
12
Bijou
Figure 10Profile Screen
Figure 11Effect
Screen
PROFILE [Patch/Profile] (second hit) (Figure 10)
Lists the default (1) profile, three Preheat (2-4), a
Square Law (5) and a Ballast profile (6) as well as
19 additional user-modifiable profiles for adjusting
the turn on curve of individual dimmers.
EFFECT [Effect Macro] (first hit) (Figure 11)
Creates Effects. To assign channels to steps at
levels, set step time, and select Effect type and
name.
MACRO [Effect Macro] (second hit) (Figure 12)
Shows the key strokes used to build each macro.
Macros can be created and viewed from the
Stage Screen.
Figure 12Macro Screen
SETUP [Setup] (Figure 13)
Show all of the user-definable system parameters
and allows for modification of the parameters. In
addition, these screens provide access to disk
and print functions.
Figure 13-Setup
Screen
It is recommended that you spend time going
through each step in these screens to become
familiar with the functions prior to operation of the
console. Use the Action Keys [Next] and [Last] to
toggle through the different functions.
ACTION KEYS
For the following keys refer to Figure 14:
[Record]
First key used in a record sequence for recording
Cue/presets and Submasters.
[Update]
Automatically records levels that have been modified in an existing Cue.
[Delete]
Deletes Cues, Submasters, Effects, and Macros.
Figure 14-Action Keys
13
Bijou
[Last]
Moves (in numerical order) to the last item in sequence.
[Next]
Moves (in numerical order) to the next item in
sequence.
Examples:
Next Submaster, next Effect, etc.
[Cue]
Accesses Cue memories.
[Sub-master]
Accesses Submaster memories.
[Effect]
Accesses Effect memories used in assigning
memories to Submasters.
[Page Up]
Changes position of display screen to see the last
major full screen block of information.
[Page Down]
Changes position of display to see the next major
full screen block of information.
For the following keys refer to Figure 15:
[F1], [F2], [F3]
The 3 ‘F’ (function) keys are SOFT keys. This
means that the function of these keys changes for
each screen. Function keys are defined by the
use of magenta color codes in the lower right
corner of each individual screen.
[Time]
Assigns fade times during the record process.
[Check]
Performs Channel Checks (Stage) and Dimmer
Checks (Patch) in the Stage and Patch Screens.
[Create Macro]
Starts and stops the keystroke sequences for recording a macro.
Figure 15-Action Keys
14
Bijou
[Macro #]
Activates Macros. Use with a number between 1
and 2,500 and [Enter] to activate a macro.
[Thru]
Bridge key between channel selections and level
setting.
Example:
[2] [5] [THRU] [3] [2]
[Except]
Bridge key between channel selections and level
setting.
Example:
[2] [5] [THRU] [3] [2] [EXCEPT] [2] [8]
[Run]
Activates RUN commands for intelligent lighting
features. The command runs either an action or a
position, depending on which screen the command is active in.
[Step]
Allows you to work within two menus on one
screen.
[And]
Bridge key between channel selections and level
setting.
Example:
[2] [5] [THRU] [3] [2] [AND] [9] [8] [EXCEPT] [2]
[8]
[At]
Bridge key between channel selections and level
setting.
Example:
[2] [5] [THRU] [3] [2] [AND] [9] [8] [EXCEPT] [2]
[8] [AT] [FL]
[Cue Only]
In Tracking Mode of operation, levels are modified only for the selected Cue. The use of this key
in the record sequence resets the levels for the
next Cue as hard levels without tracking.
[Clear]
Clears keystrokes that have been entered.
15
Bijou
NUMBER KEYS
For the following keys refer to Figure 16:
NUMBER KEY PAD
Number Keys are the primary means of entering
values into Cues, times, Submasters, and Effects.
Number Keys are always reflected on the system
Command Line (lower left screen).
NUMBER KEYS [1] through [0]
Make a selection by entering the value of the
Command Line.
Figure 16-Number Keys
DECIMAL KEY [.]
Inserts additional steps between whole number
Cues or to identify tenth seconds in timing operations.
FL KEY [FL]
Also called FULL, this key assigns a value of
100% to a level in a command line sequence.
ENTER KEYS [Enter]
The final keystroke in most command line sequences.
Example:
[2] [5] [Thru] [3] [2] [And] [9] [8] [At] [FL] [Enter].
XY & AB FADER CONTROL KEYS
For the following keys refer to Figure 17:
The Fader Control Keys are the primary means of
assigning control functions to the two sets of
Cross Faders for playback. Fader keys coordinate with the Fader display on the Stage Screen.
Fader keys can load, start, stop, reverse
(backup), or take manual control of a fade.
[Load]
Loads a Cue stack to the desired Fader. Operates as a READY TO FADE INTO or as a GO TO
(faded into immediately) function, depending on
selections made in Setup Screens.
Figure 17-XY & AB Fader Control Keys
[Fade Take]
Selects Manual or Automated actions with
prerecorded times for Cues loaded to the Cross
16
Bijou
Faders.
[Stop/Rev]
Stops the fade in progress on the associated
Cross Fader. A second press backs up to the previous Cue (prior to [Go]). Each additional press of
this button backs through all of the remaining
Cues (prior to [Go]) in the cue stack.
[Go]
Starts an automated fade loaded to the associated Cross Faders.
MAIN MENU
The Setup Screen (Figure 18) is divided into two
columns. The left column lists the topics that may
be addressed and the right column lists the items
that may be modified and configured and actions
that can be taken under that topic.
By using the [Next] and [Last] keys, you step
through the seven Setup topics. As you step
through the column, the green headings change
to light blue, indicating the active category. As
you step through the topics in the left column, the
right side of the screen changes to show the
items available for configuring and addressing in
the selected category.
Figure 18-Setup Screen
To select an item from the right, simply enter the
item number. The [F2] and [F3] keys serve as
YES and NO commands for making changes that
require a yes or no answer.
DEFAULT SETTING 1 (Figure 19)
Figure 19-Default Settings1
1. CUE TIMES: Sets a predetermined in and out
fade rate for Cues as they are being recorded. Used to speed the Cue writing process; only variations from the standard are
entered in the record process. The default is
5 seconds unless reset by the user.
2. NUMBER OF CHANNELS: It is best to set
the maximum number of channels being used
in the system. This prevents the processor
from showing too many channels and wasting
17
Bijou
processor memory.
3. ONE SCENE: Toggles between 2-scene preset and 1-scene preset manual operation for
consoles with 2-scene manual operation features. To change, use [F2] or [F3], then press
the [Enter] key.
4. ACTIVE PATCH PAGE: Sets the patch page
number. The Bijou can use one of three individual dimmer-to-channel (assignment)
patches. Default is one-to-one. With this default, every dimmer in the system is controlled
by a channel of the same numeric placement
at a maximum level of 100% (FL) and is using
the default Profile #1.
To select a patch for operation, enter:
[0] [Enter].
For one-to-one, enter:
[1] [Enter] for Patch Page 1, or [2] [Enter] for
Patch Page 2.
5. CUE DEFAULT TRACK: YES places the default for all Cues being recorded as Tracking
Cues. NO places the default for all Cues being recorded as Preset Cues.
• TRACKING CUE: You can create a Cue
without setting a level for a channel
(although that channel had a level in the
previous Cue). The level for the new
channel TRACKS through and into the
Cue being created.
• PRESET CUE: You must create a Cue
with a set level for the channel, regardless of whether the channel had a level in
the previous cue.
6. RECORD SUBS IN A CUE: YES indicates
that when a Submaster is active, the Submaster’s output (live, on stage) is recorded as
part of any Cue or Submaster that you record
in the stage screen. NO means that Submasters can be in use but will not be recorded
into Cues.
7. DISABLE EDITING: YES means that you
cannot accidentally record over Cues,
patches, Subs, Effects, disks, etc. without first
coming to this screen and changing the selection to NO.
8. WHEEL EFFECTS NULL: A null level means
NO LEVEL and is not the same as a level of
0. If Yes is selected, all selected channels
18
Bijou
lock to the wheel, even if there is a null level.
As the wheels rotate (clockwise) to increase
levels, all selected channels increase output
levels. If NO is chosen, any channel selected
has a null level, is ignored, and remains at
null output. Only the selected channels that
have an existing output level of 0 or greater
increases when the wheel is moved.
9. LOAD IS GO TO: YES means that any Cue
selected by the [Load] key is instantly loaded
to the stage when the [Enter] key is pushed.
The sequence is: [Load] [2] [Enter]. To go to
a Cue IN TIME, you follow the same sequence with the insertion of time.
Example:
To go to Cue 2 in a 5 count, the sequence
is : [Load] [2] [Time] [5] [Enter].
For NO, the chosen sequence is the same,
but any Cue selected by the [Load] key is
loaded to the selected Cross Fader, ready to
fade into (in time) when the [Go] key is
pushed.
DEFAULT SETTING 2 (Figure 20)
Figure 20-Default Settings 2
1. DISPLAY HELP: At the center of the Stage
Screen, below the Channel Section, is a dynamic that provides operational keystroke
sequences as you program the Bijou (see
page 33).The Help section is designed to assist the operator by letting them know what
keystrokes are logical for the present operation. By selecting NO, you can remove the
Help Window from the Stage Screen.
2. UPDATE AB FADER: YES is the normal
mode of operation if you plan to use the
board in either 2-scene or 1-scene manual
operation simultaneously with memory mode
operation. This mode assumes that you are
creating memory Cues and is recording the
Cues on the AB Cross Faders. This mode
also assumes that you want to use the
[Update] key to confirm and store any modifications that you make to an existing Cue.
NO makes the [Update] key active on the XY
Fader and not on the AB. To prevent acciden19
Bijou
3.
4.
5.
6.
7.
8.
9.
tal modification of the wrong preset, the
[Update] key cannot be active on both Cross
Fader stacks at the same time.
2-SCENE START: Bijou consoles that are
configured for 2-scene and 1-scene manual
operation have channel Fade Handles with
silk screened labels, starting at 1 and progressing upward numerically. In some instances, you may wish to manipulate this
section of the board to control channels
higher than the numbers silk screened on the
console. To do so, set the channel number
that addresses Fade Handle 1, and the rest
of the Fade Handles sequentially fall in line.
Example:
For Fade Handle 1 to control Channel 97 from
the Default Settings 2 menu, push [3] [9] [7]
[Enter]. To change Fader Handle 1 back to \
Channel 1, push [3] [1] [Enter].
LEVELS FOR CHECK: Allows you to set a
maximum output level for a dimmer or channel check using the [Check] and [Next] [Last]
keys in the Stage or Patch Screens.
CF HOME RESTRICTED: (Default: YES) Bijou Plus/Control Freak Home Restricted. Only
affects first two attributes.
MIDI ID: (Default: 0)
MIDI OUT ENABLED: (Default: NO)
MIDI XY GO NOTE: (Default: 0) For XY GO.
MIDI AB GO NOTE: (Default: 1) For AB GO.
CLEAR FUNCTIONS (Figure 21)
The Clear Functions Menu allows you to selectively clear items from the system memory one at
a time or, by accessing item number 0, clearing
all memory.
Figure 21-Clear Options
1. CLEAR CUES: Clears Cue memory functions.
2. CLEAR SUBS: Clears Submaster memory
functions.
3. CLEAR EFFECTS: Clears Effects memory
functions.
4. CLEAR MACROS: Clears Macros memory
functions.
5. CLEAR PATCH: Clears patch memory func20
Bijou
tions.
6. UNITY PATCH
7. FACTORY SETUP: Restores original factory
default settings without clearing Cues, Effects, Submasters, etc. To restore, select [7]
[Enter], then after the prompt of ARE YOU
SURE?, select [Enter] to confirm.
8. DEFAULT PROFILES: Restores all 25 dimmer profiles to the original default settings.
9. CLEAR CF: Clears all moving light functions
including device types, devices, positions and
actions.
0. CLEAR ALL: Clears all user-recorded
information from the system memory.
SAVE TO DISK (Figure 22)
The Save To Disk Menu is used to transfer any
recorded information from the console to the disk
for off-line storage. This menu allows the individually listed items to be transferred one at a time.
Or, by selecting number 8, all memory can be
saved to the disk at the same time. The Bijou
uses only 3.5” HD floppy disks formatted for IBM
compatible PC’s. Disk formatting can be done on
a PC.
Figure 22-Save to Disk Options
1. SAVE CUES: Save To Disk functions that
allows you to save Cues to recorded memory.
2. SAVE SUBS: Save To Disk functions that
allows you to save Submasters to recorded
memory.
3. SAVE EFFECTS: Save To Disk functions that
allows you to save Effects to recorded memory.
4. SAVE MACROS: Save To Disk functions that
allows you to save Macros to recorded memory.
5. SAVE PATCH: Save To Disk functions that
allows to save patches to recorded memory.
6. SAVE PROFILES: Save To Disk functions
that allows you to save specific profiles to
recorded memory.
7. SAVE CF INFO: Save all moving lights functions including device types, devices, positions, and actions.
8. SAVE ALL: Allows you the ability to save all
21
Bijou
user-recorded information to disk. This provides a backup in the event that the board
memory is overwritten.
9. FORMAT DISK: Formats a floppy disk so that
it can store Bijou shows.
LOAD FROM DISK (Figure 23)
The Load From Disk Menu is used to transfer
prerecorded information from the disk to the
memory of the control console. This menu allows
the individually listed items to be transferred one
at a time. Or, by selecting number 8, all items can
be loaded at the same time.
Figure 23-Load Disk Options
1. LOAD CUES: Load From Disk function allows
you to selectively load Cue portions of memory from disk to console memory.
2. LOAD SUBS: Load From Disk function allows
you to selectively load Submaster portions of
memory from disk to console memory.
3. LOAD EFFECTS: Load From Disk function
allows you to selectively load Effects portions
of memory from disk to console memory.
4. LOAD MACROS: Load From Disk function
allows to selectively load Macros portions of
memory from disk to console memory.
5. LOAD PATCH: Load From Disk function allows you to selectively load patch portions of
memory from disk to console memory.
6. LOAD PROFILES: Load From Disk function
allows you to selectively load profile portions
of memory from disk to console memory.
7. LOAD CF INFO: Load From Disk all moving
light information from disk to console memory
8. LOAD ALL: Loads all from disk and over
writes console memory.
A disk may be write protected to prevent alteration of stored data. To write protect a disk:
1. Orient the diskette so that the round metal
circle is pointed towards you.
2. Push the write protect tab (located in the
lower right-hand corner) down to open the
slot. When this slot is open, the disk is protected and no new data can be recorded. A
Write Protected disk causes an UNFOR22
Bijou
MATTED DISK error message to appear
when attempting to record information to disk.
WARNING: Diskettes are sensitive to
magnetic fields which may erase or corrupt
recorded information. Keep diskettes away
from magnetic fields, such as: speakers,
telephone bells/ringers, motors, transformers,
power supplies (i.e. Little Lights), dimmers,
etc.
PRINT FUNCTIONS (Figure 24)
The Print Functions Menu allows you access to
all print features.
Figure 24-Print options
1. PRINT JUST LEVELS: Allows you the ability
to print only the channel output levels for
each Cue.
2. PRINT EXTRA LINE: Some printers require
this command to advance the paper at the
end of each line of print. Use the YES command if the printer is overprinting or not advancing.
3. PRINT CUES: Prints all information for Cues.
4. PRINT SUBS: Prints all information for Submasters.
5. PRINT EFFECTS: Prints all information for
Effects.
6. PRINT MACROS: Prints all information for
Macros.
7. PRINT PATCH: Prints all information for
patches.
8. PRINT TYPE/DEVICE: Prints out information
on moving light devices and the various device types
9. PRINT POSITION: Prints out all position data
for moving lights
0. PRINT ACTION: Prints out all action data for
moving lights
MISCELLANEOUS FUNCTIONS (Figure 25)
The Miscellaneous Functions Menu allows you to
activate or deactivate optional accessories and to
reset the console clock functions.
23
Bijou
Figure 25-Miscellaneous Functions
1. HHR (Hand Held Remote): If you purchased
a system with the optional Hand Held Remote, this position is toggled [F2] to show
YES. If your system does not have this option, toggle [F3] to show NO.
2. TIME HOUR: Sets the hour on the system
clock (upper right hand corner of all screens).
To set the time, enter [2] [the hour of the day]
[Enter].
Example:
For 9 o’clock, the entry is: [2] [9] [Enter]. For
11 o’clock, the entry is: [2] [1] [1] [Enter].
3. TIME MINUTE: Sets the minute on the system clock. To set the minutes, enter [3] [# of
minutes] [Enter].
Example:
For 15 minutes, the entry is: [3] [1] [5] [Enter].
4. 24-TIME DELAY: Allows the clock to display
time in MILITARY/INTERNATIONAL time.
This needs to be selected if using SMPTE or
MIDI show control functions that are AM and
PM dependent. Select 24 Hour Display before setting the hour.
The clock should be set to the proper time. The
time remains accurate even with the power
turned off. The board has a built-in battery
backup to protect from memory loss.
The following functions allow the user to pass a
group of channels and their level setting in the
form of a SNAPSHOT. These snapshots are created when a submaster has been programmed.
These shapshots are used to program CopyCat
and Subcommander presets. To snapshot a submaster, the handle number it is associated with
and the page must be completed in the following
fields.
4. SNAPSHOT PAGE #: Selects the submaster
handle
5. SNAPSHOT HANDLE #: Selects the submaster page
6. SEND SNAPSHOT: Select this field to send a
snapshot out.
24
Bijou
Section II: Bijou Operations
INITIAL OPERATION
O.K., we are going to actually start operating the
machine rather than just looking at it! But, as we
have no way of knowing if you just got the
console from the factory, or if it has been in use
for years and you are just a new user, please
complete these steps so that you can follow
along:
Figure 26-Stage Screen
Figure 27-XY & AB Faders
Figure 28-Grand Master Fader
1. Turn ON the console and the VGA/SVGA
display screen. The system boots up to the
Stage Screen (Figure 26).
2. Move the 2-scene preset Faders down to 0
(do so only if the 2-scene preset Faders are
located on the left of the console).
3. Move the XY and AB Faders (Figure 27)
down to the [Stop/Rev] key.
4. Move the Grand Master (Figure 28) down to
0. In the top of all screens, there are the
words “Grand Master” in green with an output
level shown in white (if there is an output
level). If the Grand Master is turned to 0 or
OFF, the output level is shown in red.
5. Turn the Blackout switch (Figure 28) to the off
position. A red LED light appears above the
switch and the word BLACKOUT appears at
the top center of all screens in red.
6. Move all Submasters/Effects sliders (Figure
29) down to 0.
PROTECTING PRERECORDED
SHOW INFORMATION
Figure 29-Submasters/Effects Sliders
1. Locate the disk drive on the far right end of
the console.
2. Eject the disk (if there is one already in the
machine).
3. Mark the date and time that the disk is
ejected.
4. Find two new and unused 3.5” High Density
PC formatted disks.
5. Insert one of the disks into the disk drive.
6. Enter [Setup]. The Setup Screen will appear.
7. Press Next to “Save to Disk”
Figure 30-Default Setting 1 Screen
25
Bijou
8. Press [8] (Save All) [Enter] from the Save To
Disk screen.
9. Eject the disk once everything is saved.
10. Write the time and date on the disk.
11. Write your name and the date on the new
disk and insert it into the disk drive.
12. Use the [Last] key to go the Clear Functions.
13. Hit [0] Clear All [Enter]. This removes any
prerecorded show information from the system.
PATCH SCREEN
Figure 31-Patch Screen
To begin, you need to understand what a patch
is. In lighting systems, many light fixtures must
“plug” into dimmer circuits. When several light
fixtures are used together and do not need individual control, the light fixtures may be “plugged”
into a single dimmer. Often, fixtures on many dimmers are performing the same functions and can
be controlled together. An example of this is the
dimmers that control the auditorium house lights.
In many cases, it would be nice to control all of
the house lights on one Channel/Fader. To do
this, dimmers are Patched (plugged into) a Channel/Fader via the Patch Screen (Figure 31). Although the Patch Screen lists DMR (dimmers),
this is a DMX control address. In addition, dimmers can be used to control any device that uses
USITT DMX 512 control protocol for its operation.
This can include items such as: color scrollers,
moving lights, fog machines, relay panels, etc.
To get to the Patch Screen, push the [Patch/
Profile] key once. The Patch Screen appears on
the display. The Bijou has two patch tables that
can be modified by the user and one default (oneto-one) patch that cannot be modified. The patch
allows you to assign one or more dimmers to a
channel. You can assign a fade-in curve for each
dimmer. In addition, dimmers can be Parked or
changed to Non-Dim units in this screen.
To select PATCH Page 1 or PATCH Page 2 for
modification, press the [F2] followed by [1] [Enter]
or [2] [Enter].
26
Bijou
Neither patch is in use by the board until the
patch is an ACTIVE PATCH. To make the patch
active:
1. Press [Setup] (Default Settings 1 ) [4] Active
Patch [0] for “one to one” patch OR press [1]
for PATCH Page 1 OR [2] for PATCH Page 2
2. Press [Enter] to confirm the active patch.
If you are just learning the system, leave the default One-To-One patch as the active patch for
now.
On the Patch Screen, there are ninety dimmers
listed at a time with DMR 1-90 listed on the first
screen. DMR (dimmers) are shown as blue numbers. Using the [Page Up] and [Page Down] keys
allows you to see 1024 dimmers.
The number of dimmers and DMX devices in your
system limits the number of dimmers that you
need to patch.
PATCH AT LEVEL
Figure 32-Number Keys
Figure 33-Action Keys
DMR (dimmers) are assigned to CHN (Channels/
Faders shown as green numbers) using the
[Thru] [And] [Except] [At] and Number keys
(Figures 32 and 33).
Example:
To make CHN 1 control DMR 3, hit:
[3] [At] [1] [Enter].
This puts the control dimmer 3 onto channel 1
with an output of 100% and Profile 1. Most common output levels for dimmers is 100%. The LEV
(white) row is left blank unless you input a level
other than 100%.
The Default Profile is 1. If you do not enter a profile for a dimmer, the system assumes Profile 1
and leaves the PRF (brown) row empty. By leaving the LEV (white) and PRF (brown) rows empty,
it is easier to find those dimmers that have specifically modified the output of the dimmer.
To perform the same function, but give the dimmer a maximum output of 80%, the keystrokes
27
Bijou
are: [3] [At] [1] [At] [8] [0] [Enter].
Dimmer
Channel
Maximum
Level
Profile
Figure 34-Patch Screen Sample
To make fixtures appear to have equal outputs,
assign dimmers different output levels. But, you
must keep the same CHN (Channel/Fader) control. This is needed if you are running out of fixtures and have to use a 500 watt 6” fresnel and
an old 1,000 watt 8” fresnel to light an area. The
1000 watt is twice as bright as the 500 watt. But,
if you have them on separate dimmers and give
the dimmer controlling the 1,000 watt fresnel a
maximum output of 65%, it appears that both fixtures have the same output. By playing around
with different levels, you are able to make the
levels match exactly in intensity so that the one
channel of control works.
You may need to use different profiles for dimmers controlled by the same channel if using the
6” and 8” fresnels mentioned above. The filament
in the 1,000 watt fresnel is substantially larger
and takes more energy to get it to start giving off
light than the 500 watt filament. To get the 1,000
watt fresnel and 500 watt filament to fade up at
the same time on the single channel of control
may require that you PREHEAT the filament
(refer to the NON-DIM section). To do this, assign
the two dimmers different profiles.
Example:
To give the dimmer a preheat profile, press:
[3] [At] [1] [At] [8] [0] [At] [2] [Enter].
Sometimes you may need to change only the
LEV (dimmer output level) or the PRF (profile) of
DMR (dimmers) or reassign DMR to CHN
(channels) without changing the LEV or PRF. To
do this, select the dimmer numbers to be modified.
Example:
[1] [Thru] [5] [Except] [4] [At] [At] [5] [5] [Enter].
This changes dimmers 1, 2, 3, and 5 output levels
to 55% but does not change the CHN (channel)
assignments.
28
Bijou
Another way to do this is to use the [F3] (figure
35) Edit key in the sequence to select what you
wish to change.
Example:
If the you want to change the LEV of DMR 6, 7, 8,
9, 10, and 12 to 75% without changing the CHN
(channel) assignments, the sequence using the
[F3] key ( is: [6] [Thru] [1] [0] [And] [1] [2] [At]] [F3]
[7] [5] [Enter].
Figure 35-[F3] Key
As you press the [F3] key, note that the EDIT
prompt box, located in the lower left of the
screen, changes from CHANNEL to LEVEL to
PROFILE with each key hit.
Example:
To modify only the PRF (profile), enter:
[6] [Thru] [1] [0] [And] [1] [2] [At] [5] [Enter].
Or, using the [F3] key, the sequence is:
[6] [Thru] [1] [0] [And] [1] [2] [At] [F3] [F3] [5]
[Enter].
NON-DIM
Dimmers can be patched and operated as NonDim. A Non-Dim goes from 0 to 100% instantly. A
Non-Dim can be used to turn on fog machines,
mirror balls, prop radios, or televisions. To assign
a dimmer as a Non-Dim, select the DMR and assign it to a CHN. Then, press the [At] [.], followed
by a LEV. The LEV in this case is the position in
the fade where the Non-Dim turns ON or off.
Example:
To make DMR 5 a Non-Dim, which turns ON as
channel 3 reaches 65%, the sequence is:
[5] [At] [3] [At] [.] [6] [5] [Enter].
On the screen is a red N next to the LEV of 65.
The red N indicates that the associated dimmer is
now a Non-Dim (ON/OFF).
29
Bijou
PARKING
Parking a dimmer allows you to turn the dimmer
ON to a specific level that cannot be turned OFF
with the Grandmaster Fader, Blackout switch, or
with inhibitive Submasters. This is helpful when
you need to use a dimmer circuit for backstage
work lights that need to stay ON during onstage
blackouts. Another use is controlling music stand
lights in the orchestra pit. As most light stands are
too bright, Parking allows you to dim the lights to
a level both comfortable for the musicians and the
audience.
To Park a dim:
1. Select the DMR number. Enter [At]
2. Enter [FL] for the CHN (channel). Enter [At]
3. Enter the LEV for dimmer output.
Example:
To Park Dimmer 1 at 80%, use the following sequence:
[1] [At] [FL] [At] [8] [0] [Enter].
Note that in the LEV for DMR 1 on the screen, it
shows PRK in green. This indicates to you that
the dimmer has been parked. Now, every time
you turn ON the control console, Dimmer 1 turns
ON to a level of 80%.
To clear the Patch back to a One-To-One Patch,
LVL full, using Profile 1 you can choose one of
two options:
A. To clear only the Patch page currently being
worked on, press [F1] [Enter].
B. To clear both Patch pages, go to the Setup
Screen [Setup] and press [Next] [Next] (Clear
Functions) [5] (Clear Patch) [Enter].
For the purpose of learning the board, clear both
pages back to One-To-One at this time.
PROFILE SCREEN
Definition: A Profile is used to determine the rela30
Bijou
tionship between a Fader (automatic or manual
control) and how the dimmer turns ON. The first
Profile on the screen is the Bijou default profile.
Profile 1 is a LINEAR PROFILE that has the output of the dimmer equal to the percentage of
travel of the Fader. If you raise a Channel Fader
to a level of 65, the dimmer is at 65% of its total
output.
To navigate to the Profile Screen (Figure 36),
push the [Patch/Profile] key twice. The green/
yellow column on the right of the screen lists Profiles 1-25. The row across the top shows the fade
position as a percentage.
On the Profile Screen, Profile 1 is entered automatically as the system default. The need to modify or select a profile other than Profile number 1,
is limited to special case applications.
Figure 36-Profile Screen
Profiles 2, 3, and 4 are listed as Preheat. The
selection of a Preheat Profile for a dimmer sends
a small amount of current out of the dimmer, even
when the dimmer control Fader and Grandmaster
is at 0. Preheat Profiles are often used for outdoor dramas where condensation in a fixture
could cause lamp failure or cracked lenses if suddenly turned from OFF (cold) to ON.
A cold filament requires a substantial current to
glow. By preheating the filament, the lamp fades
rather than POP ON. The three preheat choices
allow you to select the right amount of current for
the size of the filament being worked with.
Figure 37-Profile Screen
Profile Number 6 is SQUARE LAW which, in theory, makes the visible output of a lamp equal to
the percent of travel of the Fader controlling the
dimmer output. In theory, if the Fader is faded up
to 35m, the lamp appears to be at 35% of its total
light output. This is dependent on the optics of the
fixture, the size of the lamp filament, the input
power voltages to the dimmers, and the length
and size of the wiring from the dimmer to the fixture/lamp.
Profile Number 7 is ballast. It is used for nonincandescent fixtures such as neon, cold cath31
Bijou
ode, and fluorescent that need a higher starting
current to ignite/light.
Profiles Number 8-25 are user-configurable to
allow you to modify dimmer outputs. To modify a
Profile, navigate to it by using the [Next] [Last]
keys or use [F3] followed by the desired Profile
Number.
Example:
To modify Profile 17:
1. Select Profile 17 by hitting [F3] [1] [7] [Enter]
2. Enter the percentage of the Fader output
from the top row.
3. Press the [At] key.
4. Enter the percentage of the dimmer input desired.
5. Press the [Enter] key.
Example:
To make Profile 17 have a dimmer output of 30%
when the Fader is at 45, the sequence is:
[4] [5] [At] [3] [0] [Enter].
Note the change in the 45% column of Profile 17.
To clear any modifications made to profiles on
this screen:
1. Go to the Setup Screen [Setup].
2. Press [Next] [Next]. This takes you to Clear
Functions.
3. Press [8].
4. Press [Enter] at the ARE YOU SURE?
prompt.
5. Return to the Patch Screen. The change
made to the profile has been cleared.
All 25 profiles may be modified to suit your needs.
It is suggested that Profiles 1-7 be left at the factory defaults.
OPERATING THE BIJOU AS A
MANUAL CONTROL CONSOLE
Before operating the Bijou, it is necessary to complete the first ten steps of Section II. Once these
steps are completed, simply press the [Stage] key
to proceed.
32
Bijou
The Bijou is designed to work in a manual, 2scene, preset mode. As we have already done a
Clear All, the system has defaulted to 2-scene
Preset operation with a One-To-One patch. So,
for the time being, Channel 1 operates Dimmer 1
only, Channel 2 operates Dimmer 2, Channel 3
operates Dimmer 3, etc. All are set at a maximum
dimmer output of 100% operating under default
Profile 1.
All 2-scene and 1-scene operations work from the
Stage Screen. This does not mean that you have
to be in the Stage Screen display of the console
to run dimmers but to see the status of the channels running on stage, look at the Stage Screen.
STAGE SCREEN
Figure 38-Stage Screen
The Stage Screen (Figure 38) is used when running Cues, Submasters, and Effects in 2-scene,
1-scene, and memory modes of operation. At the
top of the screen, you see the title STAGE in
green, BLACK OUT in red, GRANDMASTER in
green, followed by 00 in red. On the far right, is
the clock. If the clock is not set correctly, press
[Setup] [Next] [Next] [Next] [Next] [Next] [Next]
Miscellaneous Functions, and set the hour and
minutes (refer to Section I).
The next vertical block lists channels 1-150 (in
blue). Below each of these numbers is the channel output level. The channel output levels are
displayed in various colors dependent on where
the level is being generated. You can quickly review all 512 channels levels by using the [Page
Up] and [Page Down] keys.
Directly below the Channel Block is the Operator
Information Block. The left side of the block is, for
now, blank. In the center of the block is the Help
section. On the far right are the [F1], [F2], and
[F3] key functions in magenta.
HELP
Figure 39-Help section
The Help section (Figure 39) is designed to assist
33
Bijou
the operator by letting them know what keystrokes are logical for the present operation. This
screen is a dynamic screen and changes as the
you input data to reflect the next keystroke
choices.
Example:
If you enter a channel number, the screen
changes to tell the operator that the next logical
keys are [And], [Thru], [Except], or [At].
This screen works in conjunction with the keystroke command line that appears in white in the
lower left portion of the screen. Look at the Help
section with every keystroke on the Stage
Screen to understand the function of the keystroke.
Once the Help section is no longer needed, turn it
OFF by pressing [Setup] [Next] (Default Settings
2) [1] (Display Help) [F3] (No) [Enter].
CROSS FADER DISPLAY
The Cross Fader Display (Figure 40) is divided in
half. The left-hand side displays the status of the
XY Faders and the right-hand side displays the
status of the AB Faders. This display will be described in detail in various sections of this manual.
Figure 40-Cross Fader Display
SUBMASTER OUTPUT DISPLAY
Directly below the Cross Fader Display is the
Submaster Output Display. The functions of this
display are detailed in the Submaster Section.
Figure 41-Submaster Output Display
TO OPERATE IN 2-SCENE MANUAL
MODE
Note: If your Bijou is the Memory Operation Only
version, and does not have two rows (one above
the other) of Fade Handles on the left end of the
console, skip this section.
34
Bijou
To begin operating in 2-scene Manual Mode:
1. Turn the Blackout switch to the OFF position.
LED will turn off.
2. Press [F1] (Figure 43) [Enter]. This configures
the XY Cross Fader for 2-scene preset operation.
Figure 42-Blackout Switch
Figure 43-[F1] Key
Note that in the Cross Fader Display, the Cue is
set for X as Scn1 (Scene 1) and Y as Scn2
(Scene 2) for the Faders. Both the X and Y Fader
operate by being physically moved up or down so
that the times of the XY Fader are MAN. Manual
Cue action does not have a TYPE and cannot be
assigned a screen NAME; the slots of the XY
Fader remain blank. The LEV is FL for the Y
Fader and blank for the X Fader.
2-scene operation is a strong teaching tool because it requires that the board operator learn the
timing and rhythms of the production in order to
match the cross fade to the action. For the purpose of discussion, only Fade Handles 1-24 will
be used as all 2-scene Preset versions of the Bijou contain a minimum of 24 Fade Handles.
GRANDMASTER
To see set levels on stage, the Blackout switch
must be OFF (LED OFF) and the Grandmaster
faded to its full position. Except for Parked dimmers, the Grandmaster is in proportional control
of all Channel/Fader outputs from the control
console. It can be used to do fade to black Cues
for set changes and for blackouts at the end of a
scene. At this time, the Grandmaster is turned to
its full position.
CHANNEL FADER OPERATION:
2-SCENE
The Bijou has 2 rows of Fade Handles, one
above the other (Figure . In 2-scene operation,
the related Channel number (i.e., 1-24) for both
the top and bottom row of Faders are the large
35
Bijou
numbers located between the two rows of Faders
(below the bottom row are smaller numbers that
are their respective Channel numbers when operating in 1-scene mode). The X Fader controls the
top row of Fade Handles and the Y Fader
controls the bottom row .
Figure 44-Fade Handles
In Manual mode of operation of a board, if you
intend to repeat the same Cues at several
performances, it is recommended that the operators make up Cue Sheets. Cue Sheets list the
Channel/Fader numbers with a space below so
that the operator can write down the output level
that the Fader is set to for a particular Cue
number. It is also good to provide space to
indicate the Cue’s cross fade time and which
scene (X or Y) it is set on. Examples of Cue sheet
styles, as well as room for notes, are available in
many of the stage lighting and stage management books available today. As this manual cannot afford the space to discuss the requirements
of designing a light plot or the process involved in
the selection of fixture types, hanging, circuiting
and focusing fixtures, a basic reading of appropriate texts on the subject is highly recommended.
To set a Cue, the operator/designer/director
determines which Fade Handles need to be set
and through trial and error decides at what level
each Channel needs to be set at for any given
Cue.
To set the first Cue (you will use the row of Fade
Handles on the X side), set Fade Handles 1-5 at
a level of 50%. The console is silk screened with
10% gradation marks between every two Faders
to assist you (see Figure 45). You should see on
your display screen that Channels 1-5 do not
indicate any levels. This is because you have the
XY Cross Fader in the down or Y position and no
levels are being transmitted as of yet.
Figure 45- XY Fader Controls
Note: The silk screen gradations are not as accurate as a digital (display) screen and the manual
levels you set may not be exact when brought up
on stage. But as minor differences in levels are
rarely apparent to audience members, this is not
normally a problem. This form of manual opera36
Bijou
tion has and is being used to great affect in all
levels of professional and non-professional performing arts world wide.
Now, move the XY Cross Fader up to the X side
to fade into this first Cue. Now that the XY Cross
Fader is in the up position, you can set the next
set of Channel levels for the next Cue on the
bottom of the Y row of Fade Handles. Set Fade
Handles 6-10 at full (10) on the bottom row of
Fade Handles. Again note that there is no
indication on the display screen that you did this
as you have not crossed over to the other side.
To go from the top scene (Scene 1) to the bottom
scene (Scene 2), move the XY Cross Fader down
to the Y side. As you do the crossfade, the
channel levels for channels 1-5 fade out and the
levels for channels 6-10 fade up to full at the
same time. You have now created and faded into
two Cues. To do a show with many Cues,
continue by now resetting the Fade Handles on
the top (X) row, fading across to those levels,
then resetting the bottom (Y) row, fade across to
it, reset the top row, fade into it, reset the bottom
row, etc. Continue this process until you have
created and written down all of the looks you
need for your show.
It must be remembered that in 2-scene Preset, 1scene Preset, and for the manual use of Submasters, the output levels are set by your hand and
not recorded into the board. So, you will have to
write (pencil is best, directors and designers
always change their minds) out all of the Cue
numbers with their associated Channel/Fader
levels, cross fade time, and which bank of Fade
Handles the Cue is set on (top X or bottom Y).
Remember, a written hard copy of Cue
information is a good idea even in memory mode
of operation. Computer disks can be erased,
overwritten, or damaged. Power surges, due to
lightning, can scramble board’s on board
memory. So, learning to use written Cue Sheets
is a good idea that may save your show in the
future.
37
Bijou
OPERATE IN 1-SCENE MANUAL
MODE
Well, 2-scene preset operation is used primarily
for running a sequence of predetermined Cues in
a production. 1-scene operation is more often
used for creating looks “On The Fly.” By
switching to 1-scene operation, you double the
number of manual Fade Handles that you have at
your finger tips. This allows for greater flexibility
of control. Many times, this operation is combined
with the use of Submasters and bump buttons for
performances with little or no prior rehearsal time.
In this form of operation, a chart (jazz term) or
magic sheet (lighting term) is created that tells the
operator what area of the stage (Down Left,
Down Center, Up, Center, Podium, Drummer,
etc.) and what color of light each channel
controls. Then, as those areas are used on the
stage, the operator can quickly access the correct
lights for the area and turn them on to an
appropriate level. All of this takes practice and
experience to be done well, but in live music
performance, it is a proven and well used way of
doing shows.
Another use of both 2-scene (but more often 1scene) is to manually establish a lighting look on
stage and then record that look to a memory
preset. The use of this function is covered in a
later section covering memory operations. Be
aware that both 2-scene and 1-scene operation
can be used independent of memory operation or
in conjunction with memory operation. The choice
is up to the operator based on the needs of the
production. This makes the Bijou an extremely
flexible control console.
To switch to 1-scene operation:
1. Turn the Blackout switch to the OFF position.
This makes the red BLACK OUT at the top of
the Stage Screen disappear.
2. Press [Setup] [3] [F2] [Enter]. This takes you
to the Setup Screen and allows you to
change the console operation from 2-scene
38
Bijou
to 1-scene.
3. Press [Stage] to return to the Stage Screen.
The XY Cross Fader is now configured for 1scene preset operation.
Note that in the Cross Fader Display the CUE has
been set for X as Scn 1 (Scene 1). The X Fader
will operate by physically sliding it up or down, so
the fade times are MAN (manual). Manual Cue
action does not have a TYPE and cannot be assigned a screen NAME, so their slots remain
blank. With the XY Fader in the down position
(above the [Stop/Rev] key), the LEV (level)
should be blank for the X Fader. In 1-scene operation, the Y Fader is not active and can be ignored.
For the purpose of this discussion, only Fade
Handles 1-24 will be used as all 2-scene/1-scene
Preset versions of the Bijou contain a minimum of
24 Fade Handles. But in 1-scene mode of operation, the lower row of Fade Handles extend
(double) the channel count with manual Fader
handles. So, if you have a Bijou 24/48 in 1-scene
operation, the Fade Handles will control channels
1-48 (note the silk screened numbers between
the Faders and the bump buttons).
GRANDMASTER
To see set levels on stage, the Blackout switch
must be OFF (LED OFF) and the Grandmaster
faded to its full position (Figure 46). Except for
Parked dimmers, the Grandmaster is in proportional control of all Channel/fader outputs from
the control console. It can be used to do fade to
black Cues for set changes and for blackouts at
the end of a scene. At this time, the Grandmaster
is turned to its full position.
CHANNEL FADER OPERATION:
1-SCENE
Figure 46-Grand Master Fader
(In Full Position)
To begin:
39
Bijou
1. Set Channels/Faders, numbers 1-10, at full.
The X or XY Cross Fader is in the down
(OFF) position. There is no output and you
cannot see any associated levels on the display screen.
2. Move the X or XY Cross Fader to the (full)
position. The display screen indicates the X
LEV is at full and the Channels 1-10
have faded to full.
WARNING: If you accidentally lean on a bump
button (Figure 47), lights may turn on.
Figure 47-Channel Bump Buttons
In most cases when operating from 1-scene
mode, you do not set a Cue up, go into it, fade in,
fade out, set, in, out, etc. Once the initial look is
set in 1-scene operation, it can be later modified
by moving Fade Handles; individually or in
groups. As Channels/Faders are moved, the output of the related channel changes on the display
and on stage. As in all manual operation, this is
“Live Action,” on stage, in real time.
CHANNEL BUMP BUTTONS
(2-SCENE AND 1-SCENE
OPERATION)
The channel bump buttons (Figure 47) are
located directly below the Fade Handles on the
left end of the board. Each bump button is associated with the Channel/Fader above it. There is
only one bump button for the two rows of Faders.
The channel number for the bump button is the
same as the large silk-screened channel number
located between the two rows of Faders.
The channel bump buttons are active only when
the XY Faders ([F1] [Enter]) are loaded for 2scene or 1-scene operation. When configured in
this manner, the bump buttons become an instant
ON switch. When pushed, the bump button drives
the associated channel output to full, even if the X
or Y Faders output level is set to 0. The uses for
bump buttons range from lightning flashes to a
momentary special on a soloist.
40
Bijou
MEMORY OR AUTOMATED PRESET
OPERATION
Ok, you bought this Memory console so that you
would not have to write down channel levels and
recreate them night after night. All you really want
to do is push the [Go] button at the right time and
the rest is the stage manager’s problem, right?
So, how do you record a set of Cues and play
them back? It is time to learn. Cues can be created and played back on either the XY or AB
Cross Faders, but we will start just where we left
off with the board set for 1-scene operation on the
XY Cross Fader.
IF YOU JUST OPENED THE MANUAL TO THIS
SPOT...Complete the following steps before continuing:
1. Turn ON the board. The board will boot up to
the Stage Screen.
2. Go back to the section on PROTECTING
PRE-RECORDED SHOW INFORMATION.
This will ensure that you do not mess up any
show information that may already be recorded in the board and may be needed for a
show that starts in the next hour.
3. Press [Setup] [3] [F2] [Enter].
4. Press [Stage] [F1] [Enter]. This loads the XY
Cross Faders for manual 1-scene operation.
5. Make sure that the Blackout switch is in the
OFF position, that the Grandmaster is in the
full ON position (10), and that the XY fade is
in the up position (near [Load] and [Fade
Take] ).
RECORDING A CUE FROM LEVELS SET WITH
THE CHANNEL FADERS
Example:
To record your first Cue/preset:
1. Press [Stage]. This takes the you to the
Stage Screen.
2. Push Fade Handles 1-10 up to a level of 10
(100%).
41
Bijou
3. Press [Record] (Figure 48) . The command
line states RECORD CUE.
4. Press [1].
5. Press [Enter].
6. Cue 1 has just been recorded.
Figure 48-Record Key
Repeat these steps over and over to achieve a
desired show.
Note: Anytime you record a Cue on the Stage
Screen, you will be recording all levels that are
sent to the dimmers. This includes all Fader handles, Manually entered, Effect, and Submaster
output levels and can include the levels of Cues
active on the other Cross Fader. If you are working on the AB Cross Fader and have Cues loaded
and operating on the XY, the levels from the XY
Cue is added to the levels being recorded. There
are two exceptions to this rule. The first being
that you can park a dimmer. The second exception is that in the Setup Screen, you can select
[6] (Record Subs in Cue) [F3] [Enter]. In both
cases, the output of the channels controlled are
ignored in the Cue recording process.
Many shows are created in this manner when
using a limited number of channels. It is often
faster to reset Fader handles than to do keyboard
data entry. And, in many cases, when you are
“Winging It On The Fly,” the first night of the
show, but want to be able to repeat the action the
next day, it is a great way to record on the fly
while running the show manually.
The first time you create a Cue, it is not assigned
to a Cross Fader for operation. Since the Cue is
not assigned to a Cross Fader, nothing on the
screen indicates that the Cue actually exists. To
ensure that the Cue is present, press [Cue/List]
twice. The Cue List shows that Cue 1 is PR with
an up time of 5 seconds, a down time of 5 seconds, and no delays, link, or name. Use the accessory alphanumeric keyboard to add a name.
The Cue List Screen is a convenient means of
editing/changing the functional operation or name
of a Cue.
42
Bijou
LOADING THE CUE TO A CROSS FADER
Figure 49-[Load] and
[Fade Take] Keys
Example:
To load Cue 1 to a Cross Fader:
1. Press [Stage] to return to the Stage Screen.
2. Pull Channel/ Faders 1-10 down to OFF. This
clears the screen.
3. Press [Load] above the AB Faders (Figure
49). The command lines says LOAD CUE.
This allows you to see Cue 1 on stage.
4. Press [1] [Enter]. Cue 1 is loaded to either the
A or the B side of the AB Cross Fader.
The Cue is always loaded so that it is the next
Cue to fade into (unless you change the Setup to
make the [Load] key function as a Go-To-Cue).
TIMED FADES
Figure 50-Time Window
Example:
To manually fade Cue 1:
1. Press [Stage]. This takes you to the Stage
Screen.
2. Load Cue 1 on the AB Crossfader.
3. Press the [Fade Take] key, located above the
AB Cross Fader (Figure 49), until MAN disappears in the Time Window (Figure 50) of the
screen for AB. This means that you can fade
the Cue using the [Go] button.
4. Cue 1 to 100% by using the AB Cross Fader.
5. Press [Load] [Enter]. This clears (uploads)
the AB Cross Fader.
Example:
To run Cue 1 with the default 5 count from the
Stage Screen:
1. Press the [Fade Take] key located above the
AB Cross Fader. This removes the MAN operation from the AB Cross Faders.
2. Press [Load] [1] [Enter]. This loads Cue 1
with its associated In and Out time. On the
screen, Cue 1 is loaded with a fade rate of 5
seconds, ready to fade in.
3. Press the [Go] button. This starts the automated Cue.
Look at the Fader Information Window. Next to
43
Bijou
either the A or B, is an arrow pointing up. This
indicates which side of the Cross Fader is fading
up. As you fade from one side to the other, the
LEV windows changes at the rate of the Cross
Fades that are assigned up and down times.
Different Fade Times
To record a Cue with a fade time that differs from
the Default time, add the use of the [Time] key
(Figure 51) followed by the [#] key(s). The [#] key
(s) represent the number of seconds into the record
sequence.
Figure 51-Time Key
Example:
For Cue 1 with a 3 second Cross fade sequence,
the sequence is [Record] [1] [Time] [3] [Enter]
(from the Stage Screen).
FADE TAKE
Figure 52-[Fade Take] Key
At any time during the playback of prerecorded
Cues, you can restore manual control of the
Cross Faders by pressing the Cross Fader’s associated [Fade Take] (Figure 52) button. This immediately places all fade action back to the Fader
handles rather than the [Go] button. To return to
[Go] button operation, press [Fade Take] again.
DIFFERENT UP AND DOWN TIMES
The up and down times of a Cue can vary for
many different artistic or mechanical reasons on
stage. With the Bijou, you can set different times
for the fade down and fade up sections of a Cue,
based on production needs.
Example:
Going from a bright, fully lit stage down to a special on one or two performers. If you fade a special ON at the same time that you fade out the
rest of the stage, the change is often too fast for
the human eye to adjust. So, the special appears
extremely dark and weak for a period of time as
your eyes adjusts to the change. But, if you fade
the special up fast so that it is close to full before
44
Bijou
the rest of the stage slowly fades out, the audience’s eyes are given an easier transition and
adjust faster to the change in the stage picture.
Example:
To create a Cue with different up and down
times:
1. Press [Stage] to go to the Stage Screen.
2. Push Fade Handles numbers 11 through 15
up to an output of 50%.
3. Press [Record] [2] [Time]. The command line
now reads RECORD CUE 2 with an up and
down arrow next to the command line. This
indicates that you may now enter the time for
the cross fade.
4. Press [3] for a 3 second fade. This creates an
up time of 3 seconds and a down time of 3
seconds.
5. Press [Time]. The command line reads RECORD CUE 2 TIME (UP/DOWN ARROW) 3
TIME (DOWN ARROW).
6. Press [8] [Enter]. This command changes the
fade down time to 8 seconds. So, the complete command reads:[Record] [2] [Time] [3]
[Time] [8] [Enter].
7. Press [Cue/List] two times. A Cue 2 with different up and down fade rates is now recorded.
8. Return to [Stage].
9. Press AB [Load] [2] [Enter]. The user is now
ready to fade into Cue 2 in time.
10. Press [Go] to fade to Cue 2 in time.
CREATING A CUE WITH DELAYS
Sometimes, putting a delay on the up or down
starting time can assist with dramatic impact.
Example:
To create a Cue with delays:
1. Hit [Stage] to go to the Stage Screen.
2. Press [Record] [#] to create a Cue.
3. Press [Time] [#] (up time in seconds) [Time]
[#] (down time in seconds) [Time] [#] (Delay
fade up time [#] (delay fade down time)
[Enter].
45
Bijou
Example:
You may want a fully lit stage to fade to almost
blackout on an 8 count and then have a bright
special POP on a character on stage.
To do this:
1. Create Cue 3 with just the special.
2. Clear the AB Cross Fader by pressing [Load]
[Enter].
3. Make sure that all Fade Handles are down
and OFF.
4. Push Channel/Fader 26 up to full.
5. Press [Record] [3] [Time] [1] [Time] [8] [Time]
[7] [Time] [0] [Enter]. This creates Cue 3 with
an up time of 1 second, a down time of 8 seconds, a delay of 7 seconds on the up, and a
delay of 0 seconds on the down.
To see how this operates:
1. Push the Channel/Fader 26 down to OFF.
2. Press [Load] [1] [Enter] [Go]. This fades you
into Cue 1 time.
3. Press [Go] again. This fades you from Cue 1
to Cue 2.
4. Look at the Time Window in the Cross Fader
Display. The Time for Cue is displayed in
brown instead of the white that you have
seen up to this point. The brown indicates to
you that the Cue has a delay associated with
its timing. So, you will not be taken off guard
by the Cue actions.
5. Press the [Go] button one more time to watch
how the delay affects your Cues. You can
see what happens if you focus on CHN 1 and
26 on the display screen as CHN 1 is part of
the fade down time and CHN 26 is part of the
fade up time with the delay on the up.
More Examples…
Example:
To create Cue 1 with an up and down time of 10
seconds and with a delay of 5 seconds on each,
enter:
[Record] [1] [Enter] [Time] [1] [0] [Time] [5]
[Enter].
46
Bijou
Example:
To create Cue 2 with an up time of 6 seconds, a
down time of 10 seconds, a delay on the up of 8
seconds, and a delay on the down of 7 seconds,
enter:
[Record] [2] [Enter] [Time] [6] [Time] [1] [0] [Time]
[8] [Time] [7] [Enter].
SETTING LEVELS VIA THE KEYPAD (DATA
ENTRY) & THE ENCODER WHEEL
Channel levels do not have to be set via the Fade
Handles. All 512 channels can be addressed
through the Action and Number Keys (Figures 53
and 54).
A cue can only be recorded in the Stage Screen,
but channel levels for that cue can be viewed and
changed from the Stage, Cue Preview, and
Track Screens via keypad entry.
To set channel levels via the keypad, start by entering the channel(s) that need addressing. This
can be one channel at a time.
Figure 53-Number Keys
Figure 54-Action Keys
Example:
Press [Stage] [1] [At] [FL] [Enter]. Now on the
Stage Screen is CHANNEL 1 (yellow indicating it
is the channel addressed) at FL with the level
now in brown (not white). The brown indicates
that the level has been entered manually (via the
keypad) and has not been recorded to a Cue. To
change the level, simply re-hit the [At] key and
enter a new level.
Example:
To set all channels to the same level:
1. Press [Stage] [Enter]. This highlights all
channel numbers in yellow.
2. Press [At] [#] (level) [Enter]. All channel are
now set at the same level.
OR, simply press:
[Stage] [#] (channel number) [Thru] [#] (channel
number) [At] [#] (level) [Enter].
Examples:
To set channel 5 at a level of 50% from the Stage
47
Bijou
Screen, you enter:
[5] [At] [5] [Enter].
To set channel 7 thru 10 at a level of 25% from
the Stage Screen, you enter:
[7] [Thru] [1] [0] [At] [2] [5] [Enter].
To set channel 19 at a level 0f 5% from the Stage
Screen, you enter:
[1] [9] [At] [0] [5] [Enter].
Figure 55-Encoder Wheel
To return the levels to their previous settings,
press [At]. [At] addresses the channels again.
After pressing [At], you can hit [Enter] to either
finish or continue on and adjust all brown levels
using the Encoder Wheel (Figure 55). To adjust
the brown levels rotate the Encoder Wheel
counter clockwise to decrease the level. Rotate
the Encoder Wheel clockwise to increase the
level. When finished, press [Enter]. To clear all
the manuals, press [Enter] twice and all of the
manuals will be cleared from the screen.
Practice
If you are just learning the control console and
wish to try features not yet discussed, it is recommended that you record at least 15 Cues into
memory. Cues can have any Cue number from 1
to 1,000 and do not have to be recorded in numerical order. You can skip Cue numbers or insert [.] Cues in between whole number Cues, and
when loaded to a Cross Fader, the Cues play
back in order automatically.
TO CLEAR A CROSS FADER
Sometimes when recording Cues or prior to a
show, you may wish to clear the Cross Faders of
prerecorded Cues. To do so, press [Load] [Enter]
for the appropriate Cross Fader. This is useful for
creating Cues from scratch or a black stage. Another way to clear the stage of unwanted channels is to use the Remainder Dim function.
48
Bijou
TO CLEAR CHANNEL LEVELS TO 0%
To set all channel levels to 0%, press [1] [Thru]
[5] [1] [2] [At] [0] [Enter]. This sets all channel levels to 0%. Next, go to the Cue 0 using the [Load]
key. Cue 0 is a default Blackout Cue and can not
be user-modified.
If you plan to return to a Blackout look on stage
repeatedly in your Cue process, you may wish to
record this look as a Cue. This allows you to use
it as prerecorded Cue that operates automatically
via the [Go] button or as a building block for starting new Cues. Many designers record a Blackout
Cue that blacks out the stage but leaves some
running lights or orchestra pit lights on. This is
often recorded as the first Cue of the show so
that the designer can do a “blackness check” as
part of the pre-show dimmer checks.
The second method of clearing channel levels
(which is faster) is to press [Enter]. Pressing this
button makes the command line read ALL AT.
Now press [At] [0] [Enter]. To set all channels to a
level other than 0%, insert a level after the [At]
key and all 512 channels go to the next level.
Also, use [Enter] [At] with the Encoder Wheel to
adjust the overall level of a Cue. Or, use this
function to set all of the channels to the same
level.
REMAINDER DIM
The Remainder Dim function is used when you
want to start setting a Cue from scratch. Using
the [Load] [Enter] function blacks out the stage
which can cause a safety problem or distract the
performers. The Remainder Dim function allows
you to enter levels for a select number of channels using the recording sequence [#] (channel)
[At] [#] (level) [F2] [Enter]. [#] [At] [#] sets the
channel’s level. [F2] takes all of the other channels that are up in the preset to 0% or OFF.
[Enter] runs the Cue.
Note: The Rem Dim function has no Effect on the
output of Channel/Fader handles, Submasters, or
Effects that you may have running.
49
Bijou
Example:
1. Press [Stage] to go to the Stage Screen.
2. Set the levels for Channels 6-10 at a level of
55% with the Remainder Dim. To do this,
press [6] [Thru] [1] [0] [At] [5] [5] [F2] [Enter].
Every channel except 6-10 now has a brown
level of 0. Hit [Enter] twice to restore levels.
TYPES OF CUES
In the Cross Fader information window of the
Stage and Preview Screens there is a window
labeled TYPE. It is possible to run five different
types of Cues on the Bijou. The user can change
the Cue Type in the Cue Preview (Figure 57),
Cue List, and Track Screens (Figure 56) by
pressing the [F3] key. These Types include:
PRESET = PR
Figure 56-Track Screen
Preset is the default operations mode of the console and is the easiest to operate. In Preset
mode, no channel level is recorded into a Cue
(preset) unless it is physically set to an output on
stage. It is the digital equal to manual 1-scene
operation where, after each Cue, all Faders are
taken down to 0% and then all are reset to new
levels for the next Cue. In this mode, if the Channel/Fader isn’t up and active, the channels aren't
up.
TRACK = TR
Figure 57-Cue Preview Screen
Tracking works differently than preset mode. In
this mode, the console uses the level for that
channel in the previous preset for each new preset until you physically change that channel’s
level. This is similar to working in 1-scene manual
operation. Instead of taking all of the Fade Handles down to 0% at the end of the Cue, you only
change the Fade Handles that are going to a new
level in the next Cue and leave the others alone.
So, some other levels TRACK through the rest of
the Cue. Tracking can only inherit levels from a
previous tracking cue. Tracks cannot inherit properties from a preset cue.
50
Bijou
To make the Bijou a Tracking board all of the
time, change to this mode as the default in the
Setup Screen (see Figure 58) To do this, press
[Setup] [5] [F2] [Enter].
Figure 58-Default Settings1
Figure 59-Cue
Type Window
Example:
To track a new cue only,
1. Press [Stage] to go to the Stage Screen.
2. Press [1] [Thru] [1] [0] [At] [5] [0] [Enter] to
record channels 1-10 at 50% (channel levels
currently appear in brown).
3. Press [Record] [1] [Enter] to record channels
1-10 at level 50% to Cue 1. A command
prompt asks, ALREADY EXISTS, ARE YOU
SURE?, press [Enter] to confirm. The levels
for channels 1-10 now appear in white since
the levels are assigned to a Cue.
4. Press [Cue/List] to go to the Cue Preview
Screen.
5. Press [Cue] [1] [Enter] [F3] [F3] [Enter]. This
changes Cue 1’s Type to TRACK shown in
the Cue Type Window (Figure 59).
6. Press [Cue] [2] [Enter] to create Cue 2.
7. Press [F3] [F3] [Enter] to change Cue 2’s
Type to TRACK. Channel 1-10 now have a
level of 0.
8. Press [1] [Thru] [1] [0] [At] [Enter]. Now channels 1-10 read at level 50 in gray.
AUTOSTART PRESET = AP & AUTOSTART
TRACK = AT
An Autostart Cue is used when you want the
completion of one Cue to activate (push) the [Go]
button. Any Cue that has a TYPE that includes
Autostart, automatically starts [Go] immediately
upon completion of the previous Cue. Autostart
does not change either the Preset or Tracking
operation of a Cue; it automates the [Go] button
so that you do not have to push it. In preprogrammed shows, it is possible to use the
Autostart feature to run the entire show with only
one push of the [Go] button. This seldom works
with live action shows.
51
Bijou
Example:
1. Press [Stage] to go to the Stage Screen.
2. Create Cues 1-4 ([Record] [#] [Enter]).
3. Press [Cue/List] to go to the Cue Preview
Screen.
4. Press: [Cue] [3] [Enter] [F3] [F3] [F3] [Enter]
[Cue] [4] [Enter] [F3] [F3] [F3] [Enter]
There are now two Cues that are Type AP
(Autofollow Preset).
5. Return to the Stage Screen. Make sure MAN
is off. If MAN is in the time colum, press the
[Fade Take] key.
6. Press [Load] (above XY Cross Faders) [1]
[Enter].
7. Press the [Go] button to run through the Cue
1.
8. Press [Go] again to run through Cue 2. Cue 3
goes as soon as the fade into Cue 2 is complete. Cue 4 starts automatically as soon as
Cue 3 is complete.
MULTIPART = MP
Figure 60-Cue List Screen
Multipart Cues are sequentially numbered Cues
that all start together with one press of the [Go]
button. Four consecutive Cues can operate with
an MP TYPE designation on either the AB and/or
XY Faders at any one time.
Example:
The user wishes to have Cues 6, 7, 8, 9, and 10
all start at the same time. To do this:
1. Press [Stage] to go to the Stage Screen.
2. Create Cues 6-11 ([Record] [#] [Enter]).
3. Go to the Cue List Screen (Figure 60) [Cue/
List] [Cue/List].
4. Press [Cue] [7] [Enter]. This moves the yellow
cursor (>) down to Cue 7’s attribute line.
5. Press [F3] five times until MULTIPART appears on the command line in the lower left of
the screen.
6. Press [Enter]. The TYPE column entry for
Cue 7 changes to MP.
7. Go to Cue 8 and repeat the process.
8. Repeat for Cues 9 and 10 until all Cues are
tagged MP.
9. Return to the Stage Screen.
52
Bijou
10. Press [Load] [6] (Cue) [Enter] to the AB Cross
Faders.
11. Press [Go] to fade into the Cue. When you
press [Go], Cue 6 is faded into and, at the
same time, Cues 7, 8, 9, and 10 are also
faded into.
You now see Cue 5 loaded and ready to fade
into. You also see a new set of dialogs to the left
of the help screen. It reads:
AB
LEV
PARTS
CUE
7
8
9
10
This shows that you have a multipart Cue ready
to run. As soon as you press [Go], all of the Cues
that are part of the set begin. The LEV column
indicates the progression of the fade in. When all
of the Cues complete, the fade in this section of
the screen clears. At this point, you see that Cue
10 is loaded on the Cross Fader and waiting for
[Go].
The Bijou is capable of running two simultaneous
sets (one on the XY and one on the AB Faders)
of MP Cues, each with four parts. Note that all
MP (multipart) cues
RUNNING CUES OUT OF
NUMERICAL SEQUENCE
LINK
On the Cue List Screen, there is a column for
Link (see Figure 61). To access the Link column,
use the [F2] key.
Figure 61-Link Column
A link allows you to modify the numerical sequence that Cues run in. You create Cues 1-25
and load Cue 1 onto the AB Cross Fader and
cross fade into it. Cue 2 automatically loads to the
other side of the Cross Fader ready for you to
cross fade into it. From this point on as you run
53
Bijou
through the Cues, they load in strict numerical
order. This is the preferred way of operating in
most theatrical productions. But there are times
when you may need to run a production out of
sequence.
Example:
The production is a dance concert and each
dance number has it’s own sequence of Cues
using Cues 1-100.
On the third night of the performance, a soloist
breaks a toe and cannot perform a number. The
dance number uses Cues 34-46. Since the
dancer cannot perform the number, the Cue sequence is now 1-33 to 47-100.
To make it possible to still automatically run the
entire show in sequence:
1. Press [Cue/List] [Cue/List] to go to the Cue
Preview Screen.
2. Use the [Next] key 33 times OR press [Cue]
[3] [3] [Enter] (which positions the page on
screen) to Cue 33.
3. Press [F2] (Link key, see Figure 62).
4. Enter the number of the Cue that is intended
to Link to Cue 33 (in this case [4] [7] [Enter].)
Now, as you run the Cues, the Bijou ignores
Cues 34-46.
Figure 62-F Key Window
If, the next night, the operator finds out that the
broken toe was only a sprain and the number is
put back in the performance, the operator can
clear the Link. To do so, go to the Cue List
Screen and change the Link for Cue 33 to [F2] [0]
[Enter]. Putting a 0 in the Link column clears it.
Now all 100 Cues run in order.
LOAD CUE OR GO TO CUE
Figure 63-Option 9,
“Load is Go to,” of the
Setup Screen
The [Load] key is also used as a Go-To-Cue key.
The Default Setup (Factory Setup)(see Figure 63)
of the Bijou is for the [Load] key to load a Cue
onto either the XY or AB Cross Fader ready to
fade into it in time; by either using the Fader handles or the [Go] button. Pressing the [Go] button
slows reaction time. When the [Load] key is set
54
Bijou
as a “Go to Cue” Key, you do not have to use the
[Go] key. [Load] [#] [Enter] will immediately bring
Cue # up on stage.
Example:
An actor is nervous on opening night. In the middle of the second act, the actor skips 5 pages of
dialogue and 2 lighting Cues. In response, the
operator can immediately go out of sequence to
the Cue that corresponds to where the actor has
advanced.
To make the [Load] key a Go-To-Cue key:
1. Press [Setup] to go to the Setup Screen.
2. Press [9] [F2] [Enter].
3. Return to the Stage Screen (Press [Stage]).
4. Press [Load] [#] [Enter] to instantly go to any
desired Cue that is out of sequence.
The one drawback is that the Cue put on stage in
a TIME 0 SECONDS will POP ON. This may distract the actors and audience. A Go to Cue in
Time is better.
GO TO CUE IN TIME/ SNEAK FUNCTION
To lessen the visual impact of going to a Cue out
of sequence, it is often advisable to sneak the
Cue onto the stage IN TIME. With the Bijou, this
is easy to do using the Go-To-Sequence, but
adding [Time] to the sequence. The keystroke is:
[Load] [#] (Cue) [Time] [#] (in seconds) [Enter].
Example:
Go-To-Cue 5 in a time of 20 seconds. You enter:
[Load] [5] [Time] [2] [0] [Enter].
RUNNING TWO DIFFERENT PRERECORDED
CUE STACKS
The Bijou can run two different Cue sequences,
one on the XY Fader and the other on the AB
Fader, at the same time.
Example:
To run two Cue sequences:
55
Bijou
1. Press [Load] [1] [Enter] on the XY Fader.
2. Press [Load] [1] [0] [Enter] on the AB Fader.
3. Press [Fade Take] on the AB and XY Cross
Faders to set the Faders to automatic operation .
With both Cross Faders loaded, you can now
press both or either [Go] buttons and run through
the Cues with each Cross Fader maintaining its
proper numeric Cue sequence.
A good use of this ability is running the basic
show Cues (say Cues 0.5 through 300) on the AB
Cross Fader while running more complicated
Cues on the XY Cross Fader. Or instead, use one
set of Cross Faders for control of color changes
on a Cyclorama while leaving the other Cross
Fader for lighting Cues only.
MODIFYING AN EXISTING CUE
CHANNEL LEVELS
THE UPDATE KEY [Update] (Figure 64)
Every show that you work on requires small (or
major) changes to the levels of the channels. To
make these changes, modify the channel levels
via the Fade Handles or the digital input. Then,
go through the whole record Cue number sequence entering the times, delays, etc. If you are
only modifying the channel levels, make the
changes, then push [Update] [Update]. Either sequence records any modified or new channel levels into the previously recorded Cue.
Figure 64-[Update] Key
The [Update] key works only with the active cue
on the AB faders. [Update] does not operate in
the middle of a fade. Wait until the fade is complete to update a Cue or don’t start cross fading
until the Cue is completely updated.
Example:
1. Go to Stage Screen (press [Stage])
2. Load Cue 1 to the AB faders (press [Load] [1]
[Enter] )
3. Change Channel 5 to 20% (press [5] [At] [2]
[Enter] ) Channel 5 will show a level of 20 in
56
Bijou
brown
4. Hit [Update]. Screen will read “Update Cue 1”
5. Hit [Update] again to confirm. Channel 5’s
level will turn from brown to white.
THE CUE PREVIEW SCREEN
To access the Cue Preview Screen (Figure 65),
press the [Cue/List] key once. This screen allows
you to modify any and all prerecorded Cues and
to create new Cues. This can be done in what is
known as a BLIND RECORD method of operation
because this screen can record or modify Cues
that are not outputting levels to dimmers. This is
handy when trying to run Cues on stage and, at
the same time, make changes or corrections to
Cues and record new Cues ready to run onstage.
To select a Cue to work on, press [Cue] [#]
[Enter]. From this point on, programming is done
just as it is in the Stage Screen; using the channels [Thru] [And] [Except] [At] [Time] keys, the
[F2] (Link) key, [F3] (Type) key, and the alpha
keyboard to set name and Cue attributes.
When changing Cue output levels in the Cue Preview Screen, you do not have to use either the
[Record] or the [Update] keys to confirm changes
all changes are automatically confirmed by the
console.
Figure 65-Cue Preview
and Cue/ Cue List key
It is possible to have a Cue/preset on the Stage
Screen (live) and modify the Cue/preset in the
Cue Preview Screen (blind) at the same time.
When doing this, any changes that are made do
not appear on stage until the next time you fade
into a Cue.
MODIFYING AN EXISTING CUE’S
ATTRIBUTES
CUE PREVIEW SCREEN
In this screen, you do not have to use the strict
57
Bijou
sequence of keystrokes used in the Stage
Screen to enter times or types. The Cue Preview
Screen always opens to the same Cue that is live
onstage (Stage Screen). To change to a different
Cue, press [Cue] [#] [Enter] OR use the [Next]
[Last] keys to sequence through all of the Cues.
After accessing the desired Cue ([Cue] [#]), modification of the following Cues is allowed:
LINKING: To link the present Cue to any other
Cue out of numerical sequence. To link the two
Cues, press: [Cue] [#] (present Cue) [Enter] [F2]
[#] (Cue being linked to) [Enter]. From the Cue
List0 Screen, look at the present Cue and under
the column titled LINK, you now see the number
of the Cue that the present Cue is linked to.
TYPE: Press [Cue] [#] [Enter] to select a Cue.
Press [F3] to select a Cue type operation followed
by [Enter] to confirm selection.
TIME: Each press of the [Time] key advances you
from time up to time down delay and then to delay on the up to delay on the down. Enter a time
in seconds and follow it by an [Enter] to confirm.
This makes the changes to the preset. The default up and down times are 5 seconds.
Example:
To enter an up and down time of 10 seconds for
Cue 1, enter:
[Cue] [1] [Enter] [Time] [1] [0] [Enter].
NAME OF CUE: At any time in this screen, use
the accessory alpha keyboard to give the selected Cue a name.
CUE LIST SCREEN
This screen is a sequential listing of all Cues by
number with the operational attributes of the
Cues. To access any given Cue, use the [Page
Up] [Page Down] and [Next] [Last] keys (Figure
67) to cursor up or down to any given Cue or simply press [Cue] [#] [Enter] to quickly go to the desired Cue. After accessing the desired Cue, modification of the following Cues is allowed:
58
Bijou
LINKING: To link the present Cue to any other
Cue out of numerical sequence. To link the two
Cues, press: [Cue] [#] (present Cue) [Enter] [F2]
[#] (Cue being linked to) [Enter]. From the Cue
List Screen (Figure 66), look at the present Cue
and under the column titled LINK, you now see
the number of the Cue that the present Cue is
linked to.
TYPE: Press [Cue] [#] [Enter] to select a Cue.
Press [F3] to select a Cue type operation followed
by [Enter] to confirm selection.
Figure 66-Cue List Screen
Figure 67-[Last], [Next], [Page
Up], [Page Down] and Keys
TIME: Each press of the [Time] key advances you
from time up to time down, and then to delay on
the up to delay on the down. Enter a time in seconds and follow it with an [Enter] to confirm. This
makes the changes to that preset.
Example:
To enter an up and down time of 10 seconds for
Cue 1, enter:
[Cue] [1] [Enter] [Time] [1] [0] [Enter].
NAME OF CUE: At any time in this screen, use
the alpha keyboard to give the selected Cue a
name.
TRACK SCREEN
The Track Screen [Track] (Figure 68) displays
prerecorded Cues in a spread sheet format. This
makes it easy for you to see what channel levels
are used for several Cues at one time. This allows for fast confirmation of channel levels that
may have changed in a Cue stack. The maximum
number of Cues that can be displayed at one time
is 27.
The Cues are listed in sequential order, in a vertical column, in white, and on the left of the screen.
To access specific Cues, press the [Page Down]
[Page Up] and [Next] [Last] keys (Figure 69).
Once the desired Cue is accessed, if needed, use
the [F3] [Enter] keys to change the desired Cue
type.
Figure 68-Track Screen
59
Bijou
Figure 69-[Last],
[Next], [Page Up],
[Page Down] and
Keys
Channel numbers appear in blue across the top
of the screen with the channel output level listed
below it for each Cue. Channel output levels are
shown in either white or gray. Gray indicates that
the Cue associated with that level is a Tracking
Cue and that the level for the channel is TRACKING IN from the previous Cue(s).
Figure 70-Action Keys
In the Track Screen, any changes that you make
are instantly recorded into the Cue memory and
do not require the use of [Record] or [Update]
keys to confirm entry. To make changes to channel levels, use all of the key sequences that are
usable in the Stage and Cue Preview Screens to
include: [And] [Thru] [Except] [At] and[Cue Only]
(Figure 70). But unlike the Stage and Cue Preview Screens, in the Track Screen, you are unable to create new Cues. You may only modify
existing prerecorded Cues.
DELETE A CUE
You can easily delete any Cue in the Stage, Cue
Preview, Cue List, or Track Screens. To delete
a Cue, press: [Delete] [#] [Enter]. In the command
line, the following question appears: ARE YOU
SURE? Press [Enter] to confirm deletion of the
Cue.
SUBMASTERS
Submasters are used in 2-scene Preset, 1-scene
Preset, and Automated Memory modes of operation. Or, if desired, Submasters can operate independently as stand alone control.
To understand what a Submaster is, we need to
define them. Earlier in the manual, we stated that
more than one fixture can be PLUGGED into a
dimmer. To reduce the number of items that the
we need to address in each Cue/operation, we
can group dimmers that work together by patching the dimmers (digitally plugging) into channels.
To further reduce the number of items to address,
we can GROUP channels together and digitally
address the individual group for programming. If
60
Bijou
you give a group a physical handle to manually
manipulate as well as digitally enter (addressed
via keystrokes), it is a Submaster.
The Bijou has 24 Submasters with associated tricolored LEDs and Bump Buttons located on the
right end of the console. There are 12 pages of
these Submasters for a total of 288 groups of
memories. Submaster memories are addressable
via the keyboard (for use in creating Cues) or via
the Submaster, Fader, and bump buttons for
manual control. Operation of Submasters can
make use of Stage, Sub Preview (Figure 71),
and Sub List (Figure 72) Screens.
Figure 71-Sub Preview Screen
Due to the many different Submaster control options, the Bijou makes use of color coding in both
the Stage Screen Submaster window (Figure 73)
and on the console Submaster LEDs. On the
Stage Screen, the Submasters are shown on the
bottom of the screen as:
E/Pg: Effect Number (if in yellow) and Submaster
page if in green.
Sub: Handle numbers 01 02 03 04……………24.
LEV: Submaster output level.
The color coding on the Stage Screen and the
Submaster LEDs are as follows:
Figure 72-Sub List Screen
Figure 73-Submaster
Window of the Stage Screen
Type of Submaster
Stage Screen Console Sub LED
OFF
not recorded
Gray
NORM
Manual operation
Green
INHB
Inhibitive
Red
61
Bijou
SOLO
Bright Red
Effect loaded to Sub
Yellow Orange
SUB PREVIEW SCREEN
To get to this screen, press the [Sub-master/List]
(Figure 74) key one time. The majority of the
screen is devoted to blue channel numbers.
These are the same channels as on the Stage
Screen. Use these channels in the same manner.
To record a Submaster, enter channel levels using the number keys [0] through [9] in combination with [Thru] [And] [Except] [At] and [Enter]
keys to set the output levels.
Figure 74- Submaster/List Key
For the purpose of learning how Submasters
work, you need to have (or create) at least two
Submasters on two separate pages of memories.
To see if the board has existing Submaster
memories, go to the Sub List Screen (second hit
of [Sub-master/List] key). Here is a list of all recorded Submasters with the Submaster type and
attributes. For the purpose of training, assume
that no Submasters are recorded and when you
press [Sub-master/List] to return to the Sub Preview Screen, make sure that no channel levels
are showing for Pg 1 Sub 1 (lower left of screen).
Example:
To begin:
1. Press [1] [Thru] [5] [At] [FL] [Enter]. Note that
no [Record] [Submaster] key sequences are
needed to confirm the entry.
2. Look at the bottom of the Sub Preview
Screen. It states: Sub 1 Page 1 Type NORM
3. Press [Sub-master/List] to go to the Sub List
Screen. The user now has Pg 1 Sub 1 with
no name.
NAMING A SUB
To name a Submaster, you use the accessory
alpha keyboard to enter a name for the desired
62
Bijou
Submaster when working/viewing it on the Sub
Preview Screen.
Example:
To enter a Submaster name:
1. For Submaster Pg 1 Sub 1, type in the name
WORK LIGHTS.
2. Press [Sub-master/List]. This returns to the
Sub List Screen and the name has been
entered.
Figure 75-[Sub-master] Key
Example:
To record a Submaster on Pg (page) 2:
1. Press [Sub-master/List] to go to the Sub Preview Screen.
2. Press [F2] [2] [Enter]. The page number in
the lower part of the screen is now Pg 2.
3. Press [Sub-master] (Figure 75) [2] [Enter].
This changes the screen to reflect that you
are now working on Pg 2 Sub 2 (lower
screen).
4. Enter channels [6] [Thru] [10] [And] [2] [0] [At]
[5] [5] [Enter]. Channels 6, 7, 8, 9, 10, and 20
are now at a level of 55% maximum output
for this Submaster and the Type is NORM.
A Submaster does not exist unless it has at least
one channel with an output level entered.
OPERATION OF SUBMASTERS
Now that two Submasters are recorded, press
[Stage] to return to the Stage Screen. At the bottom of the Stage Screen you find the following:
Pg: There are 12 pages of Submaster memories
available. This window allows you to select which
page of memories to record Submaster memories
to.
Sub: This is the Submaster handle location, 1-24.
At this point, you see no page numbers after PG:,
as page 1 is the default.
Example:
To change the page for all 24 Submaster han63
Bijou
dles:
1. Press (action key) [Sub-master] [F2]. This
brings up SUB PAGE in the command line at
the bottom of the screen, then the page number [1] though [1] [2] that you want active on
the stage. Then, [Enter] when finished. This
puts a green 2 above all Sub numbers, indicating that page 2 of Submaster memories is
active on the Submaster fade handles.
2. Repeat the process to go back to page 1 by
pressing [Sub-master] [F2] [1] [Enter]. Now
no page number is listed after Pg:, indicating
that you are on default page 1.
Example:
To see how the NORM (green) operates:
1. Go to the Stage Screen.
2. Run Submaster 1’s Fader handle up and
down.
3. Watch the levels of channels 1-5 follow the
Fader with the output level shown in green;
increasing as the handle raises, decreasing
as the handle lowers.
WORKING SUBMASTERS ON MULTIPLE
PAGES
To increase the flexibility of the Bijou, it is possible to have Submaster memories from different
pages active on the Submaster fade handles at
the same time.
At this point, you have Sub: 01 (indicated in
green) active on page 1. Now, make Pg: 2 Sub: 2
(created in the section, Naming a Sub) active. To
do this, press [Submaster] [2] [F2] [2] [Enter].
Now, both Sub: 01 and 02 are in green, indicating
that Sub: 01 and 02 are active. Sub: 02 also has
a page number (Pg: 2) above it.
RECORDING SUBMASTERS FROM THE
STAGE SCREEN
To record a Submaster from the Stage Screen,
you must be on the Submaster Pg:# that you wish
to record to.
64
Bijou
Example:
To record a Submaster:
1. Press [Stage] to go to the Stage Screen.
2. Press [Sub-master] [F2] [#] (page) [Enter].
This takes you to the page number.
3. Press [Record] [Sub-master] [#] (Submaster)
[Enter]. Now the Submaster is recorded on a
specific page.
Example:
To record Submaster 3 on page 4:
1. Press [Stage] to go to the Stage Screen.
2. Press [Sub-master] [F2] [4] [Enter]. This takes
you to page 4.
3. Press [Record] [Sub-master] [3] [Enter]. This
records Submaster 3 on page 4.
DELETING A SUBMASTER
If you do not like the recorded Submaster memories, you can choose to delete all existing Submaster memory or an just an individual Submaster. To get rid of all existing Submaster memory,
press: [Setup] [Next] [Next] (Clear Functions) [2]
(Clear Subs) [Enter].
Most of the time, you want to only get rid of one
or more of the Submaster memories.
Example:
You want to delete Pg: 2 Sub: 2.
1. Go to the Stage Screen.
2. Have the Submaster memory Pg: 2 Sub: 2
active at the bottom of the page.
3. Press [Sub-master] [F2] [2] [Enter]. This loads
page 2 Submaster memories.
4. Press [Delete] [Sub-master] [2] [Enter]. This
removes the Submaster memory from the
system.
Note: [Delete] [Sub-master] only works on the
Stage Screen.
Figure 76-Channel Bump Buttons
SUBMASTER TYPE– NORMAL OR NOT
The Bijou’s default for all Submasters is: NORM,
or normal, manual operation. In this mode, to op65
Bijou
Figure 77-Submaster
Type Window of the Sub
Preview Screen
erate a Submaster, either use the Submaster
Fader handle or the associated bump button
(Figure 76). Pressing the bump button or pushing
the Submaster fade handle up raises the output
levels to the maximum output recorded in the
Submaster memory. But, this is not the only type
of Submaster available for use. Return to the Sub
Preview Screen and use the [Last] or [Next]
keys to go back to Pg: 1 Sub: 1. On the Sub Preview Screen is a Type Window. The Type Window is now normal for Pg:1 Sub: 1. Changing the
Type means changing how the Submaster operates. To change the Type, press [F3]. Once the
desired Type is indicated in the command line at
the lower left of the screen (see Figure 77), select
the Type by pressing [Enter].
The Types of operation include:
NORM: Normal manual operation via the Submaster fade handle or bump button. In this mode,
as you raise the Submaster Fader, the output
increases. When you push the bump button, the
output of the Submaster instantly goes to FULL
and remains there until the bump button is released. In both cases, the controlled channels are
added to (or PILED ON) whatever other levels
are active on stage-from Cues or manual operations.
INHB: Inhibitive mode. Think of this as a
“Reverse Fader”. In operation, as you raise the
inhibitive Fader from 0 to 10, the lighting channels
associated with that Submaster go down and not
up. This is useful when you have a fixture that
goes out of focus and you do not want to rewrite
every Cue in the middle of the show. Instead, record that channel to a Submaster at [F1] and
make that Submaster’s Type, INHB. Then, bring
up the Submaster Fader handle and that channel
is faded out of the stage output. When a Submaster is in INHB mode, the channel levels on the
Stage Screen react in red and the Sub number
and Submaster Fader LED are red as well.
SOLO: In solo mode of operation, the Submaster
Fader handle has no function. Solo mode only
works with bump buttons. When you press the
Submaster bump button, the channels associated
66
Bijou
with that Submaster go on to the maximum recorded output and all other channels from all
other sources go to OFF. This is a LAST ACTION
mode of operation.
OFF: When a Submaster is set to OFF, both its
fade handle and bump button are disabled.
TIMED SUBMASTERS
At the bottom of the Sub Preview Screen, are
three windows: Time Up, Hold, and Time Down
(see Figure 78). The time features work with
either the NORM or INHB modes of operation
and are activated by the Submaster’s bump button. The first press of the [Time] key allows you to
set a time for the Submaster to fade from OFF to
FULL output. The second press of the [Time] key
allows you to set how long the Submaster’s output remains at FULL. The third press of the
[Time] allows you to enter the time it takes the
output to fade to OFF once the delay is over.
Figure 78-Time Up, Hold, and
Time Down Windows of the
Sub Preview Screen
Example:
To see how this works:
1. Use Pg:1 Sub: 1.
2. Press [Time] [5] [Time] [3] [Time] [2] [Enter].
This sets a 5 second fade up, a hold time of 3
seconds, and a 2-second fade out.
3. Go to the Stage Screen ([Stage]).
4. Press and release the bump button for Pg: 1
Sub: 1. The Submaster outputs automatically
change based on the times entered.
It is possible to have a timed Submaster fade up
to FULL and remain ON until you press the bump
button a second time to start the fade out.
Example:
1. Go back to the Sub Preview Screen.
2. Press [Time] [Time] [FL]. In the command line
at the lower left of the screen, now appears
HOLD FOREVER.
3. Press [Enter].
4. Go back to the Stage Screen.
5. Press the Pg: 1 Sub: 1 bump button. The levels fade up and stay ON until you press the
bump button again to start the fade out.
67
Bijou
MERGING A SUBMASTER INTO A CUE
As stated at the beginning of this section, a Submaster is a GROUP of channels that are controllable from one Fader/handle. Many times, you
can speed the Cue recording process by calling
up a GROUP at a level rather than all of the individual channels. The Bijou is capable of storing
288 different groups of looks to Submaster Fader/
handles. This is seen in the Cue building process.
Manually: Make the desired Submaster active on
the Stage Screen, and then raise its associated
Fader up to the desired output level. Then, you
record those levels into the desired Cue by using
the record sequence Cues. This works well, but
limits access to working Submaster group memories to the 24 active memories at any one time.
For access to all 288 groups of Submasters controlled channels, use the control keys.
1. Press [Sub-master] and enter the number of
the Submaster memory. [0] [#] for memories
1-9 or [#] [#] for memories 10-24.
2. Press [F2] [#] (for the page number of the
Submaster you are trying to access (page 112)).
3. Press [Enter] to complete the statement.
4. Use the submaster handle and set the level
Example:
Merge Submaster 2 on Page 2 into a cue at a
level of 75%. To do this:
1. Go to the Stage Screen.
2. Press [Sub-master] [2] [F2] [2]
3. Raise Submaster handle 2 to 75%
4. Re-record the cue.
SUB LIST SCREEN
This screen lists all of the Submaster memories,
in numerical order by page. You cannot do any
editing on this page. It is a read-only screen.
68
Bijou
EFFECTS
Effects are sequential, automated lighting
changes. Effects can be as simple as a repeated
ON/OFF or so complex that the Effects involve all
512 channels of dimmers that the Bijou controls.
CREATING AN EFFECT
The Effect Screen [Effect/Macro] (Figure 79) is
used to create an Effect. In the lower left of the
screen you see the Effect number. To change to
a different Effect, press [Effect] (see Figure 80)
[#] [Enter]. This takes you to the desired Effect.
You do not have to create Effects in any numerical order or sequence.
On the left side of the screen is a vertical column
of 100 steps for each Effect (color code green).
To go to a specific step in an Effect, scroll up or
down using the [Next] [Last] keys or press [F2] [#]
(for the number of the step you wish to go to)
[Enter].
Once you are at the desired step, assign channels at specific levels to that step using the same
keys strokes used in the Preview and Submaster
Screens. These key strokes include: [0] - [9],
[And], [Except], [Thru], [At], [Enter].
Figure 79-Effect Screen and
[Effect/Macro] Key
Figure 80-[Effect] Key
Example:
To get started:
1. Press [Effect] [1] [Enter] to go to Effect #1.
2. Press [F2] [1] [Enter] to go to step #1.
3. Press [1] [And] [3] [At] [FL] [Enter].
4. Press [Next]. This advances you to the next
step.
5. Press [2] [And] [4] [At] [FL] [Enter].
6. Press [Next].
7. Press [3] [And] [5] [At] [FL] [Enter].
8. Press [Next].
9. Press [4] [And] [6] [At] [FL] [Enter].
10. Press [Next].
Now you have Effect 1 with default time 0. The
time is set using the [Time] key and entering either seconds or tenths of seconds. The time is
how long each step is at FULL on stage. So, if
you enter [Time] [.] [5] [Enter], each one of the
69
Bijou
four steps created stays at FULL for a half second.
WARNING: You cannot have more than 10
effects loaded onto the submasters at one
time.
WARNING: Many theatrical lighting fixtures
have large filaments that take time to heat up
and start to glow. The filaments also takes
time to cool off and stop glowing once the
power is turned off. If the steps of an Effect
run too fast, the filaments may not have time
to go ON and OFF.
INSERTING AND DELETING STEPS
To insert a step:
1. Go back to the Effect Screen.
2. Press [F2] [#] (step) [F1]
To delete a step:
1. Press [Delete] [F2] [#] (step number for deletion). The command line at the lower left of
the screen reads DELETE STEP #.
2. Press [Enter] to complete the action. This
deletes the desired step, moves up all subsequent steps, and renumbers them.
EFFECT TYPES
The Effect that you created has a Default Operations Mode of Forward. If you press the [F3] key,
the operational choices under Type include:
FORWARD: In a forward Effect, the sequence
starts at the lowest step and progresses to the
highest. Next, the sequence starts over at the
lowest step and progresses to the highest. The
sequence then repeats this process over and
over.
Example:
For a 4-step Effect, the sequence is:
1,2,3,4, 1,2,3,4, 1,2,3,4, 1,2,3,4, 1,2,3,4, 1,2,3,4,
and so on and so forth. Each step active for .5
seconds.
70
Bijou
BOUNCE: In a bounce Effect, the sequence
starts at the lowest step and progresses to the
highest number step and then reverses, going to
the lowest number step. Next, the sequence
again reverses and goes back up to the highest
number.
Example:
For a 4-step Effect, the sequence is:
1,2,3,4,3,2,1,1,2,3,4,3,2,1.
REVERSE: This is the exact reverse of Forward.
Reverse starts at the highest and progresses to
the lowest.
Example:
For a 4-step Effect, the sequence is:
4,3,2,1,4,3,2,1,4,3,2,1.
SINGLE: Starts with the lowest numerical step
and progresses to the highest. Unlike Forward,
Bounce, and Reverse, this mode only runs
through the steps one time. This Effect is useful
in creating explosion Effects.
Example:
For a 4-step Effect, the sequence is:
1,2,3,4.
DELETING AN EFFECT
To delete an Effect from the Effect Screen, press
[Delete] [#] [Enter]. This brings up the question,
ARE YOU SURE?, on the command line. To confirm that the Effect is ready for deletion, press
[Enter] again.
To delete an Effect from the Stage Screen, press
[Delete] [Effect] [#] (Effect number) [Enter].
RUNNING AN EFFECT
Effects do not automatically run just because you
create them. You have to go to the Stage Screen
to make an Effect operational. Loading an Effect
onto a Submaster runs the Effects.
71
Bijou
Example:
To load an Effect, select an Effect to run (in this
case, Effect #1), and the Submaster to control it
(for this demonstration, use Sub 24).
To load Effect #1 onto Sub 24, press:
[Sub-master] [2] [4] [Effect] [1] [Enter].
This loads a yellow 01 on the E/Pg: line, directly
above a yellow 24 on the Sub: line of the Submaster control section of the Stage Screen. Any
yellow numbers in this section indicates that an
Effect has been loaded to operate with that Submaster.
To run the Effect, you can fade it up at any rate
by using the Submaster Fader. Or, you can turn it
ON instantly by using the Submaster bump button
(the instant ON bump button option is best when
using a Single Mode Effect as lighting). Effects
run as long as you have the Submaster up or the
bump button pressed. You can load only one Effect per Submaster Fader. But, you can run any
or all of them at any time.
The user can have the Submaster Fader control
only an Effect by loading it on a Submaster Fader
that has no prerecorded memory. Or, you can
load an Effect onto a prerecorded Submaster
memory and run them together.
Example:
A case in which you may want to combine an Effect onto a prerecorded Submaster memory is an
Effect created to flicker lights used to simulate a
fire combined with fixtures focused to give the
impression of the general warm glow from the
fire.
TO CLEAR AN EFFECT OFF OF A
SUBMASTER
To clear an Effect from a Submaster, all you have
to do is press: [Sub-master] [#] [Effect] [Enter].
72
Bijou
MACROS
A macro is a way to reduce the number of key
strokes it takes to do a repetitive operation. The
Bijou has a Macro Screen (Figure 81) [Effect/
Macro] that allows you to see the keystrokes that
make up a macro. To look at a different macro,
use the [Next] [Last] keys to step through all recorded Macros. Or, if you know which macro you
want to see, press [Macro#] (see Figure 82) [#]
[Enter]. This takes you to the desired screen.
CREATING A MACRO
You can create a macro from any screen. But, if it
is a macro that the you intend to use from a specific screen, it is always best to start at that
screen.
Figure 81-Macro Screen
Example:
To create a macro:
1. Press [Create Macro](see Figure 82)
(followed by the number you want it to be) [1]
to [2] [5] [0] [0] (1-2500).
2. Press [Enter]. At this point, you see a flashing
red MACRO in the top center of the screen.
This indicates that every keystroke that you
press from this point on is part of the macro.
Example:
A useful macro:
1. Press [Create Macro] [1] [Enter] [Setup]
[Next] [Next] [Next] [8] [Create Macro]. This is
the SAVE ALL macro.
Figure 82-[Create Macro] Key
The final [Create Macro] ends the record sequence, removes the flashing red MACRO from
the top of the screen, and completes the macro.
Now, go back to the Stage Screen.
TO RUN A MACRO
To run a macro from any screen, press [Macro#],
followed by the number of the macro you want to
run [1], then [Enter], which makes the macro run.
73
Bijou
Example:
To run and save the macro just created:
1. Press [Macro#] [1] [Enter]. This runs macro 1.
2. Press [Setup]. The setup screen is shown
3. Press [next] 3 times. “Save To Disk” is highlighted. (make sure that a disk is inserted.
4. Choose SAVE ALL.
5. Press [Enter] at the ARE YOU SURE? Command prompt. All the work is saved to disk.
TO DELETE A MACRO
From the Stage or Macro Screen, you can delete
any macro by pressing [Delete] [Macro] [#]
(number of the macro) [Enter]. A command
prompt asks, ARE YOU SURE? Press [Enter] to
confirm.
74
Bijou
Section III: Intelligent Lighting Controls
INTELLIGENT LIGHTING DEVICE
CONTROLS (for Control Freak and
Bijou Plus models)
Intelligent Lighting Devices all use DMX address
and output levels to control them. A moving light
can have 10 or more DMX address that control
their attributes which can include; color, up/down
(tilt), left/right (pan), type of gobo, etc. Each
attribute is assigned its own DMX address and by
changing the DMX output level the attribute is
manipulated. An example of this would be
moving up as the DMX level goes up from 0 to
100 and moving down as the DMX level goes
from 100 to 0.
Any DMX lighting board can control Intelligent
Lighting Devices simply by patching the Fixtures
DMX addresses to control channels and then
manipulating/adjusting those channel output
levels via cues, Submasters or effects. In fact
many times when using just a couple of moving
lights it is easiest and quickest if you setup the
moving lights attributes on individual Submaster
handles and then just move the handles to make
fast and easy changes of position, color, etc. If
you can set it up so that Fixture 1 has:
Sub 1 = Pan
Sub 2 = Tilt
Sub 3 = Color
Sub 4 = Gobo
Sub 5 = Iris
Sub 6 = Shutter
Sub 7 and so on.....
Then put Fixture 2’s attributes on:
Sub 13 = Pan
Sub 14 = Tilt
Sub 15 = Color
Sub 16 = Gobo
Sub 17 = Iris
Sub 18 = Shutter
Sub 19 and so on....
If you have more than 2 fixtures you can use
several pages of Subs to control them manually.
75
Bijou
But you will find that if you are attempting to control a lot of Intelligent Lighting Fixtures that it can
be easier to have dedicated controls designed
specifically for that purpose. To provide that
EDI’s Bijou control console can be upgraded with
the addition of the Control Freak outrigger or, the
Bijou Plus comes with the Control Freak built in.
The following items and control commands are
for Bijou Plus consoles and Control Freak outrigger and are not applicable to the standard Bijou
console.
SCREENS
•
•
•
Figure 83-Type Setup Screen
•
Type Setup Screen: This screen allows you
to create a profile of the type of fixtures being
used. To create a profile, assign the fixture’s
attributes (pan, tilt, color, etc.) to the wheels
of the Bijou Plus/Control Freak.
Device Setup Screen: This screen assigns
physical devices to the desired starting addresses and fixture types.
Position Setup Screen: This screen allows
you to create POSITIONS. POSITITIONS are
any combination of devices set at any position, color, gobo, setting, etc. This is done by
moving the devices and setting the attributes
to the Bijou Plus/Control Freak’s wheels.
Action Setup Screen: This screen allows
you to string a number of positions together
to form a sequence for timed movement.
TYPE SETUP SCREEN
This screen is where you create profiles of fixture
types (see Figure 83). To do this, list the attributes of the fixture. Examples of attributes are
color, pan, gobo, etc. The Bijou can handle up to
25 attributes.
Example:
To create profiles of fixture types:
1. Find the list of the feature’s attributes, either
76
Bijou
in the fixture’s documentation or on the web.
2. Enter the screen. The yellow pointer is
pointing to the Type number and name. Position the yellow arrow by using the [Next] and
[Last] keys.
3. Naming the Type. Type in the fixture’s
name. Hit next and the arrow will point to
attribute 1
Example:
> Number: 1
> Name: Scan 250
4. Naming the Attribute. Type in the attribute
type’s name using the keyboard.
5. Enter the attribute names in order with the
optional computer keyboard. (see Table 1)
6. Verify that the width of the attributes is
correct. If the attribute has values of 0-255
the width is 8-bit. If the attribute has values of
0-65535 the width is 16-bit. The values come
up as 8-bit automatically so you only have to
change them if 16-bit is needed. (see Table
2)
7. Use the F1 key to select the width as needed
8. Type 8 or 16.
9. Press the [Enter] key. The mastering value is
used to tie multiple devices together.
10. Use [Next] and [Last] to select an attribute (if
not already selected).
11. Press [F2] to select mastering. (This is a way
of linking multiple fixtures through their type.
For more information on mastering turn to
page 81) You have three choices: none,
straight, and inverted The value of the [F]
keys changes to the three mastering types.
11. Press the [F] key with the desired type (e.g.
[F3] for inverted).
ASSIGNING ATTRIBUTES TO WHEELS
Assign each attribute to a wheel on the Bijou
Plus/Control Freak. The Bijou Plus/Control Freak
has a trackball with two axes. The X-axis is horizontal. The Y-axis is vertical. There are also 4
wheels labeled A, B, C, and D. The following is
an example on how to structure your attributes on
the controls
77
Bijou
Figure 84-Type Setup Screen
with Assigned Attributes Wheels
Example:
1. Group the attributes in pages (since there are
more attributes than wheels). It does not have
to be sequential.
2. Put Pan and Tilt on X and Y.
3. Put Focus, Dimmer, and Shutter on one
page.
4. Put Colors on another page.
5. Put Gobos on another page.
6. Press [F3] to select the source from the
source options column.
7. Select the desired wheel and page by using
the table on the right hand of the screen.
PAGE 1 is the default of each letter. Although
the source options to the right may state: 3: A
PAGE 1, it only appears as A on the Type
Setup Screen (see example on Figure 84.
8. Move the yellow pointer up to the top for
more attributes.
9. Type in the attribute number and press
[Enter].
10. Repeat the above steps for the new attribute
type.
DEVICE SETUP SCREEN
Figure 85-Device Setup Screen
In the Device Setup screen (Figure 85), assign
each physical device to the attribute type (that
was created in the Type Setup Screen) and its
starting DMX address. You can assign up to 40
devices. Note that if you want two or more devices to act identically, set the DMX address on
the units to the same address and treat them as a
single device on the Bijou Plus/Control Freak.
On the device, there is a way to program the
DMX address. The devices need different starting
addresses to run independently. The starting address has to be spaced to cover the amount of
attributes each device has.
Example:
Device 1 starts at address 5 and has 10 attributes
(all 8-bit). This device uses DMX addresses 5
through 14, one for each attribute. So you must
address the next device at 15 or higher.
Figure 86-Device Setup Screen
with start addresses assigned
1. Move the yellow pointer to the desired device
78
Bijou
Figure 87– Position Setup Screen
using the [Next] and [Last] keys.
2. Type in the device name with the computer
keyboard (see example in Figure 85.
3. Move the yellow pointer to the next location
and type in the next name. Repeat until all of
the device names are entered.
4. Add the start address of each device.
Addresses 1-512 comes out of the first DMX
out and addresses 513-1024 come out of the
second DMX out. Many users keep the first
DMX out for conventional lights and use the
second DMX out for moving lights. To use the
second DMX output just add 512 to the device’s starting number.
Example:
If the starting address set on the attribute is 1,
adding 512 gives the console an address of
513 (see example in Figure 86).
5. Select the type for each device.
6. Press [F3] to select type and enter the number desired.
7. Press [Enter] to complete the command. The
type’s name automatically comes up.
POSITION SETUP SCREEN
This screen allows you to create positions. A position is any set of devices at a desired location.
Select a device, move it to a position, and set the
intensity, color, gobo, and other attributes (see
Figure 87). Then select another device and do
the same thing. This collection of device settings
is called a position.
You spend the most time in this screen. Everything on the screen is actively output to the attribute. If it isn’t, check the last two screens and the
addressing on the attributes.
SCREEN DESCRIPTION
This screen is broken into four parts:
• Top Left: This is the Last Position Window.
It displays the last recorded position. This
identifies which number to use to record the
next position.
79
Bijou
•
Figure 88-Device Window
•
•
Figure 89-Type Window
Bottom Left: This is the Device Window
(see Figure 88). In this window, enter the
desired device number.
Right: This is the Type Window (see Figure
88). When you select a device, this window
displays the device’s type and attributes.
When you move the wheels, the values are
shown in this window. You can also JUMP
to this window and manually enter the
values.
Bottom: Shows what Source Page you are
in. This area also shows the resolution of
the wheels and whether there is an
activated hold Effect.
SETTING UP A DEVICE
Example:
When you first enter the screen it is blank with the
yellow arrow directly under DEVICE.
1. Press [F1] [#] (device number) [Enter]. The
device number and its name appear in the
device window. The list of attributes for the
device appear on the right.
2. Move the wheels on the Bijou Plus/Control
Freak. The source page is 1. You can see the
levels change next to the attributes assigned
to those wheels. To switch the source page
use the [Page Up] and [Page Down] keys.
3. Move the device to the position desired.
4. Change the intensity, colors, and gobos to
your preference. The actual device is responding on stage. If not, check the device
setup.
5. Record the device once it is set to the right
position (location/color/intensity).
6. Press [Record] [#] [Enter].
Example:
[Record] [5] [Enter].
7. Move the device’s location and/or change
other attribute levels by using the wheels.
8. Record this as a new position. Continue
building and recording a number of positions.
80
Bijou
CREATING A POSITION FOR MULTIPLE
DEVICES
Figure 90-Run Key
as an Action Key
Example:
To create a position for multiple devices:
1. Go through the above steps to setup a position for a device.
2. Move the yellow pointer down the line using
the [Next] key.
3. Select another device and position it
4. Record the position after positioning all of the
devices: [Record] [#] [Enter].
CALLING UP A RECORDED POSITION
Figure 91-Run Key
Moving Lights Keypad
Example:
To call up a recorded position:
1. Press [Run] [#] [Enter] (see Figures 90 and
91 for Run keys). For this example, we will
use position number 5. So, we enter:[Run]
[5] [Enter].
Helpful Hint: Record a number of starting positions. Then build from these positions.
Figure 92-[Home] Key
Example:
If you find yourself always moving the attribute to
straight down and full shutter, record this as a
position. Then when recording new positions,
bring this up, move it where you want it, and record a new position. This is similar to creating a
series of HOMES.
THE HOME KEY (Figure 92)
Each device can have a recorded home.
Example:
To create a recorded home:
1. Bring the device up and position it.
2. Set the attributes to any value you wish.
3. Press [Record] [Home]. Now, whenever you
bring that device up again just press [Home].
In the Setup Screen, there is a flag to have
HOME use all attributes or just the XY attribute.
81
Bijou
THE STEP KEY (Figure 93)
This key changes the resolution. This is mainly
used for 16-bit values. There are two choices:
Coarse and Fine.
COARSE: allows for large changes in the levels.
FINE: allows you to zero in on a specific spot.
THE SHIFT RIGHT KEY (Figure 94)
Figure 93-[Step] Key
This key activates the hold function. The hold
function allows you to hold an attribute. You have
three choices of attributes: none, X, and Y.
Example:
If you choose to hold Y, its value does not change
when moving the wheel.
THE DEVICE KEY (F1)
This key changes the device being used.
Figure 94-[Shift Right] Key
THE MASTER KEY (F2)
Use this key to allow certain attributes on a number of attributes to track each other. The number
in the master column shows who is mastering
that device.
HOW IT WORKS
NONE: the device does not do anything.
STRAIGHT: the devices follow in the same direction (master goes right, slave goes right).
INVERTED: the devices follow in the opposite
direction (master right, slave left).
You can have one or all of the attributes follow
the master.
82
Bijou
Select which attributes follows in the Type Setup
Screen (see Figure 95) in the mastering column
by pressing [F3]. Afterwards, select either [F1] or
[F2] for straight or [F3] for inverted. If no selection
is made the mastering is removed from that attribute. Then press [Enter}.
After the master has moved a device, you can still
go to the device (by the yellow pointer) and
change any of its values. When you are familiar
with recording positions one by one, mastering
can be used.
Example:
You want 2, 3, and 4 to mimic everything device 1
does for the set of positions you are about to record. The device type must be changed to allow
attributes to copy off anther fixture.
Figure 95-Type Setup Screen
with mastering selected for
specific attributes
Figure 96-Position Setup Screen
1. Go to the Type Setup screen.
2. Press [Next]. This will put the cursor on the
first attribute.
3. Press [F3] for Mastering.
4. Press [F2] for Straight.
5. Repeat for all attributes.
Next, Select the fixtures to be slaved and position
the fixture through the master fixture.
1. Go to the Positions Screen. (see Example in
Figure 96)
2. Press [F1](Device)[1][Enter]. Device 1 appears.
3. Press [Next]. The cursor will drop to the next
line
4. Press [F1](Device)[2][Enter]. Device 2 appears.
5. Press [F2](Master)[1][Enter]. Device 2 is now
to master off of Device 1.
6. Press [Next]. The cursor will drop to the next
line
7. Press [F1](Device)[3][Enter]. Device 3 appears.
8. Press [F2](Master)[1][Enter]. Device 2 is now
to master off of Device 1.
9. Press [Next]. The cursor will drop to the next
line
10. Press [F1](Device)[4][Enter]. Device 4 appears.
11. Press [F2](Master)[1][Enter]. Device 2 is now
83
Bijou
to master off of Device 1.
12. Press [Next]. The cursor will drop to the next
line
13. Place the cursor on the first device and move
the wheels. The devices should synchronously move with each other.
THE JUMP KEY (F3)
This key moves the yellow pointer from the Device Window on the right to the Type Window
(Figure 97) on the left and back. Now, the [Next]
and [Last] keys can be used to move through the
attributes of the selected device.
Figure 97 - Type Window
When the pointer is on the right side of the
screen, the F keys change to:
[F1] = Value
[F2] = Time
F3] = Jump
•
•
Use the Value [F1] key to manually type in
position values (0 –255).
Use the Time [F2] key to assign special
times to the attributes. This time is used in
the Action Screen (Table 7) to override the
default step time. For now, leave it blank.
ACTION SETUP SCREEN
An action runs a set of positions. The Action
Setup screen (Figure 98) allows you to combine a
series of positions to create an action.
Figure 98-Action Setup Screen
Example:
If you want to run a continuous chase for positions 1 through 4, create a list of positions and
setup the times. There is a time for the fade between two positions and a time (delay) that you
want to pause on a position.
1. Using the [Next] and [Last] key, move the
yellow pointer down to the line next to the
word ACTION.
2. Select Action 1 by pressing [1][Enter].
3. Press [Next]. This will put the arrow on
LOOP.
4. Press [F1][Enter] to loop continuously.
5. Press [Next]. This will put the cursor under
84
Bijou
the heading POSTION.
6. Press [1], This will select Position 1 as the
first position.
7. Press [Time] [5] [Time] [5] [Enter]. The fade
time is set for 5 seconds to go to position 1
and wait for 5 seconds.
8. Repeat sequence for positions 2, 3, and 4.
This is the series of positions you want to
chain together.
SINGLE STEP
Single step is a way to override the times. If
single step is YES, then press the [Step] button to
move from position to position. This is used to
cycle through the steps when setting up a sequence for the first time. Leave it as NO for now.
To override the times:
1. Enter the desired times. Use [Next] and [Last]
to move the pointer to the desired position.
2. Press [Time] once to put in the fade time.
3. Press [Time] twice to put in the delay time.
The Time column shows the length of time it
takes for the device to move from one position to another. The Delay column shows how
long the device stays at the position before it
starts fading to the next position.
4. Press [Enter] to confirm.
In the above example, assume that each position
is the same device just moving around the room.
When running, the device:
1. Moves from a 0 setting to position 4 in 1 second.
2. Waits 0 seconds before going to position 5.
3. Fades to position 5 in 2 seconds.
4. Waits 2.2 seconds before going to position 6.
5. Fades to position 6 in 3 seconds.
6. Waits 3.7 seconds before going to position 7.
7. Fades to position 7 in zero seconds (snap).
8. Waits 5.1 seconds before going to position 8.
9. Fades to position 8 in 4 seconds.
10. Waits 0 seconds before going to position 9.
11. Fades to position 9 in 5 seconds.
12. Waits 0 seconds before going to position 10.
85
Bijou
13. Fades to position 10 in 6 seconds.
14. Waits 0 seconds before going to position 4
(loop).
15. Fades to position 4 in 1 second.
Many devices have a built-in fade delay. So even
when the device is told to move in 0 seconds, the
device slows the fade automatically.
SPECIAL ATTRIBUTE TIMING
There is a way to have one (or more) attribute(s)
fade faster than the rest.
Example:
The user wants to have the color change at zero
time while the device pans in 10 seconds. The
user needs to go back to the Position Setup
Screen and fill in the time on the desired attribute.
Figure 99-Run Action Command
Rule: The action uses its time unless the attribute
in that position has a time. This means that you
should leave all of the times in the position screen
blank except for the time that needs to move
faster (e.g. color = 0). The action’s default time
needs to be the longest time. This means that
any special attribute times in the Position Setup
Screen must be shorter than the time next to the
position in the Action Screen.
LOOPS
A loop is when a list goes from the last position to
the first. Decide how many times this list should
loop. If the action only runs through the list once
then the number of loops is 0. If the action runs
through the list 4 times then the number of loops
is 3. The user also has the choice of continuous
([F1]). Simply, move the pointer up to LOOPS
and enter the number.
RUNNING AND STOPPING AN ACTION
Example:
86
Bijou
To run an action:
Press [Run] [Enter]. This runs the action
shown.
Example:
To stop an action:
Press [Run] [0] [Enter].
RUNNING POSITIONS AND
ACTIONS AS PART OF A SHOW
FROM THE STAGE SCREEN
By Keyboard:
• Action: Press [Run] (command shows
RUN ACTION) (see Figure 99). Then
press [5] [Enter].
• Position: Press [Run] [F2] (command
shows RUN POSITION) [8] [Enter].
• Number (e.g. [Run] [Enter]).
Loading Positions on a Submaster Handle:
Example:
1. Press [Sub-master] [5] [Run] [3] [Enter].
This puts position 3 on Submaster 5.
• The user can load up all 24 Submaster
handles.
• Only one position running at a time.
• To remove the position, hit
[Submaster][5][Run][0].
Creating a Macro:
Example:
To create a macro:
1. Press [Effect] [Effect] to go the Macro
Screen.
2. Press [F1] in the macro screen. This brings
up the special Macros.
3. Choose either RUN ACTION or RUN POSITION.
4. Type in the number and press [Enter].
Started by a Cue:
Example:
1. Create a macro and place that macro in
87
Bijou
the Cue. For this example, create macro 4
that says RUN POSITION 5.
2. Go to Cue list and put macro 4 on Cue 3.
When Cue 3 starts, position 5 comes up.
To clear the position, make another position
macro and add that into the next Cue. Actions
work in the same way.
Positions and actions are LAST ACTION. If a
position is started with a Cue (macro), press a
Submaster button (which has a position
loaded). The first position stops and the new
position starts.
REMOTE VIDEO
The console can be fitted to output the Super
VGA signal to remote locations (distances
greater than 25 feet). When fitted with this
option, the 4-pin XLR connector will output the
signal.
When installed with a system, a remote video
receiver is required to interface to a standard
SVGA monitor.
NOTE: Handle with care!
HOOK-UP OF REMOTE VIDEO
Connect 4-pin XLR from labeled video port at
station or back of the console
Connect SVGA monitor cable to DB 15-pin
lableld Monitor.
Connect 120VAC power transformer cable to
Power in position.
Configure Video output (item #3) on
Peripherals/Utiltiies menu screen.
Switch on SVGA.
KEYBOARD (optional)
The Bijou is designed to operate with any
standard IBM PC/AT keyboard.
If you encounter problems with using any
keyboard, please contact the factory.
Some manufacturers of AT aftermarket
keyboards have been known to be
incompatable.
88
Bijou
PRINTERS
The Bijou Console is equipped with a parallel
printer output port configured for Epson Standard
protocol.
Printers tested:
Citizen GSX-190
Panasonic KX-P1124
Citizen 200GX
Panasonic KX-P2023
Epson FX-870
SET UP PRINTER:
Load paper and test printer functions as identified
in printer
manual.
Configure printer for standard Epson protocol. Set
switch for
line-feed on carrige return.
Turn off power to printer.
Connect printer cable to console printer port.
Connect printer cable to printer output.
Turn on printer power.
DESIGNER’S REMOTE
The Bijou Consoles support a Designer’s Remote
console which offers duplicate keypad features
remote from the control console. Coupled with the
Bijou’s remote capacity, the
Designer’s Remote offers the features of the
console with interactive video support.
The Designer’s remote is supplied with a 4-pin XLR
connector on the rear output plate.
Connect this 4-pin XLR to a mated connector on a
receptacle plate or on the back of the console.
When connected, follow the instructuction for
connection of the Remote Video.
89
Bijou
SERVICE
EDI offers a 24 hour Service/Support Network.
For technical questions about this product or operational assistance, ask for Customer Service at:
Telephone:…………………………………………………………………………….1-800-547-2690
FAX:…………………………………………………………………………………...1-503-629-9877
Internet………………………………………………………………………………..www.edionline.com
Internet E-Mail:………………………………………………………………………[email protected]
If your Bijou Console needs repair, call: 1-503-645-5533 for a Return Materials Authorization number. A shipping address will be furnished.
This console is a product of:
1675 N.W. Cornelius Pass Road, Hillsboro, Oregon 97214 USA
90