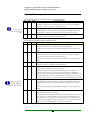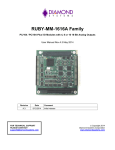
1
STX104
Integrated Analog PC/104 Card with One Mega-Sample FIFO
Revision: January 1, 2005
Applies to Product Revision-G or higher
Apex Embedded Systems
Reference Manual
1
STX104 Reference Manual
Apex Embedded Systems
116 Owen Road
Monona, WI 53716
Phone 608.256.0767 • Fax 608.256.0765
Copyright Notice:
Copyright © 1997-2005 by Apex Embedded Systems. All rights reserved.
Legal Notice:
Apex Embedded Systems’ sole obligation for products that prove to be
defective within 1 year from date of purchase will be for replacement or
refund. Apex Embedded Systems gives no warranty, either expressed or
implied, and specifically disclaims all other warranties, including warranties
for merchantability and fitness. In no event shall Apex Embedded Systems’
liability exceed the buyer's purchase price, nor shall Apex Embedded Systems
be liable for any indirect or consequential damages.
This warranty does not apply to products which have been subject to misuse
(including static discharge), neglect, accident or modification, or which have been
soldered or altered during assembly and are not capable of being tested.
DO NOT USE PRODUCTS SOLD BY APEX EMBEDDED SYSTEMS AS
CRITICAL COMPONENTS IN LIFE SUPPORT DEVICES OR SYSTEMS!
Products sold by Apex Embedded Systems are not authorized for use as critical
components in life support devices or systems. A critical component is any
component of a life support device or system whose failure to perform can be
reasonably expected to cause the failure of the life support device or system, or to
affect its safety or effectiveness.
2
Table of Contents
SUPPORT POLICY........................................................................................... VI
GENERAL SUPPORT POLICY.................................................................................VI
RECOMMENDED SEQUENCE IN OBTAINING CUSTOMER SUPPORT ..........................VI
NEED CUSTOM MODIFICATIONS? .........................................................................VI
WELCOME .......................................................................................................VII
BENEFITS AND FEATURES .............................................................................2
EXECUTIVE SUMMARY .........................................................................................2
PHOTO ..................................................................................................................3
ADC DATA GATHERING AND CONVERSION SUMMARY .......................................4
Single Conversion ...........................................................................................4
Programmable Burst .......................................................................................4
Trigger Sources ...............................................................................................4
HARDWARE CONFIGURATION.....................................................................5
BASE ADDRESS AND CONFIGURATION .................................................................5
EXAMPLE BASE ADDRESS ....................................................................................5
BASE ADDRESS TABLE .........................................................................................6
COMPATIBILITY SELECTION AND EXTENDED FUNCTIONS ....................................6
Compatibility...................................................................................................7
FIFO Superset Functionality ..........................................................................7
16-Bit DAC Mode............................................................................................7
16-Sample Moving Average Filter ..................................................................9
HIGH VIBRATION ENVIRONMENTS .......................................................................9
REGISTER SET..................................................................................................10
REGISTER SET SUMMARY ...................................................................................10
Definition of Terms........................................................................................10
ADC DATA REGISTER ........................................................................................11
Bit Definitions ...............................................................................................11
Software Examples ........................................................................................12
Using the REP INSW Instruction ..................................................................12
Voltage Input Conversion..............................................................................13
ADC SOFTWARE TRIGGERING ADC ..................................................................15
Bit Definitions ...............................................................................................15
CHANNEL REGISTER ...........................................................................................16
Bit Definitions ...............................................................................................16
FIFO Reset ....................................................................................................17
iii
Acquisition Controller Reset .........................................................................17
Moving Average Filter Reset.........................................................................17
Examples .......................................................................................................17
SS&H Output.................................................................................................17
DIGITAL INPUT/OUTPUT REGISTER ....................................................................18
Bit Definitions ...............................................................................................18
ADC STATUS REGISTER .....................................................................................19
Bit Definitions ...............................................................................................19
CLEAR INTERRUPT REGISTER .............................................................................20
Bit Definitions ...............................................................................................20
FIFO Interrupt ..............................................................................................20
ADC CONTROL REGISTER ..................................................................................21
Bit Definitions ...............................................................................................21
INTERRUPT SUMMARY........................................................................................23
PACER CLOCK CONTROL REGISTER ...................................................................24
Bit Definitions ...............................................................................................24
ADC CLOCK AND TRIGGERING SUMMARY ........................................................25
FIFO STATUS REGISTERS ...................................................................................26
Bit Definitions ...............................................................................................26
ADC CONFIGURATION REGISTER .......................................................................27
Bit Definitions ...............................................................................................27
Gain summary ...............................................................................................27
8254 COUNTER/TIMER REGISTERS .....................................................................28
Bit Definitions ...............................................................................................28
DAC DATA REGISTERS ......................................................................................29
Legacy Bit Alignment ....................................................................................29
16-Bit DAC Mode..........................................................................................29
Bit Definitions ...............................................................................................29
Software Examples ........................................................................................30
Output Voltage Conversion...........................................................................30
DAC Wiring...................................................................................................30
DAS1602 COMPATIBILITY CONFIGURATION AND STATUS REGISTER ................31
Bit Definitions ...............................................................................................31
CALIBRATION ..................................................................................................33
DAC Calibration ...........................................................................................33
ADC Calibration ...........................................................................................33
CONNECTOR SUMMARY...............................................................................35
I/O CONNECTOR J7.............................................................................................35
UNIPOLAR OR BIPOLAR ANALOG INPUT J9.........................................................36
DIFFERENTIAL OR SINGLE ENDED ANALOG INPUT J8.........................................36
DAC RANGE SETTINGS J5..................................................................................36
SPECIFICATION ...............................................................................................37
iv
Analog Inputs ................................................................................................37
Analog Outputs..............................................................................................37
Digital I/O .....................................................................................................38
Counter/Timers..............................................................................................38
General..........................................................................................................38
APPLICATION NOTES ....................................................................................39
APPLICATION NOTE S01: CONTINUOUS HIGH SPEED SAMPLING ........................39
General Operation ........................................................................................39
Hardware Configuration...............................................................................39
Software Configuration .................................................................................39
APPLICATION NOTE S02: MINIMIZING ISR TIMING WHEN USING REP INSW
INSTRUCTION AND ILLUSTRATES 200,000 SAMPLES PER SECOND CAPABILITY...41
APPLICATION NOTE S03: SINGLE INTERRUPT PER BURST OPERATION ..............44
LIMITED WARRANTY ....................................................................................49
v
Support Policy
General Support Policy.
We support all hardware products for a period of 3 months from time of delivery.
See limited warranty terms.
Recommended sequence in obtaining customer support
Review user manuals for additional information not found in demo software.
Go to our website at www.apexembedded.com/support.html.
Contact us via email at [email protected]. Technical support related
inquiry answered typically within a 24-hour period.
Need custom modifications?
Contact us for customization or modifications to our standard product. If you need
large quantities we can generally save you money through optimizing card designs to
meet your exact needs.
vi
Welcome
Dear Valued Customer:
Thank you for your interest in our products and services.
Apex Embedded Systems "Continuous improvement" policy utilizes customer
feedback to improve existing products and create new product offerings based on
needs of our customers.
Continued Success,
Apex Embedded Systems
Caution
A discharge of static electricity from your hands can seriously damage
certain electrical components on any circuit board. Before handling any
board, discharge static electricity from yourself by touching a grounded
conductor such as your computer chassis (your computer must be turned
off). Whenever you handle a board, hold it by the edges and avoid
touching any board components or cable connectors.
vii
Copyright (c) 1997-2005 by Apex Embedded Systems
Need something different? Please let us know.
Chapter
Benefits and Features
The STX104 provides high functionality while making life a little easier
Executive Summary
What is the STX104? The STX104 is a 16-channel 16-bit analog input and 2-channel
16-bit analog output card. The STX104 incorporates a large one mega-sample FIFO.
What are the Benefits to using the STX104? The STX104 has the following
benefits:
•
•
•
•
•
•
•
•
•
•
•
•
One mega-sample FIFO data storage provides continuous data streaming
from ADC to CPU with reduction in interrupt overhead and relaxation of
interrupt latencies.
200,000 Samples per second.
16-Sample moving average filters for data noise reduction
Compatible with DAS16jr/16 and DAS1602 for using existing 3rd party
drivers
16-bit data read (ADC data) operations double effective PC/104 bus
bandwidth
16-bit data write (DAC data) operations reduce software overhead
Use REP INSW (286 or higher CPU) to read-in blocks of ADC data from
FIFO further increasing bandwidth and reducing complexity.
Burst mode with only one interrupt generated per complete scan, thus
reducing interrupt overhead and increasing effective throughput.
One interrupt per 512-samples is possible in FIFO mode
On-board LED to indicate that the STX104 is being addressed. By observing
the LED you can quickly determine system activity.
Polarized locking I/O connector. This eliminates board failures due to
incorrect connector orientation.
Extremely low DC drift
2
Copyright (c) 1997-2005 by Apex Embedded Systems
Need something different? Please let us know.
•
•
•
•
Photo
ADC Gain
(R5)
External trigger input (DIN0) is deglitched preventing unwanted ADC
triggers. Minimum valid pulse width required is 200nS.
Industrial temperature range from -40oC to +85oC
No tantalum capacitors or electrolytic capacitors used in the design
Single +5V supply operation
DAC-1 Gain
(R2)
8/16 Channel Select (J8)
ADC Offset
(R4)
DAC- 2 Gain
(R1)
Unipolar /
Bipolar (J9)
I/O Connector (J7)
Base Address and
Mode Select (J6)
DAC Range
Set (J5)
3
Status LED
Copyright (c) 1997-2005 by Apex Embedded Systems
Need something different? Please let us know.
ADC Data Gathering and Conversion Summary
Single Conversion
Compatibility Modes (M0 jumper):
DAS16jr/16:
Polled, Interrupt or DMA
DAS1602:
Polled, Interrupt or DMA
With FIFO Superset Enabled (M1 jumper):
DAS16jr/16:
Polled, Interrupt or DMA
DAS1602:
Polled, Interrupt or DMA
General Algorithm:
1. Wait for trigger
2. ADC Sample and convert
3. Increment multiplexer to next channel
4. Done
Programmable
Burst
Compatibility Modes (M0 jumper):
DAS16jr/16:
none
DAS1602:
Polled, Interrupt or DMA. FIFO status registers
not available. Interrupt generated for every sample
taken.
With FIFO Superset Enabled (M1 jumper):
DAS16jr/16:
none
DAS1602:
Polled, Interrupt or DMA. FIFO status registers
Available for reading. Interrupt generated for
each burst (scan) completion.
General Algorithm:
1. Wait for trigger
2. Sample n-channels (set by BL[3:0]) at maximum sampling rate (10 uS)
3. Done
Trigger Sources
TS1
0
1
1
TS0
X
0
1
Trigger Function
Software triggered ADC sampling only
Trigger on rising edge of DIN0
Trigger on pacer clock output (CT_OUT2)
4
Copyright (c) 1997-2005 by Apex Embedded Systems
Need something different? Please let us know.
Chapter
Hardware Configuration
Base Address and Configuration
1
3
5
7
9
11
13
15
17
19
21
23
25
2
4
6
8
10
12
14
16
18
20
22
24
26
A9
A8
A7
A6
A5
A4
1MHz
DMA3
M4
M3
M2
M1
M0
Base Address
Clock Source 10MHz/1MHz
DMA 1/3
Mode Selection
Example Base Address
Base Address = 768 or 0x300 ( 11 0000 00002 )
Clock Source = 1 MHz
DMA = 1
Mode = DAS16jr/16 compatibility, no 16-bit transfers, no FIFO, 12-Bit DAC data.
1
3
5
7
9
11
13
15
17
19
21
23
25
2
4
6
8
10
12
14
16
18
20
22
24
26
A9
A8
A7
A6
A5
A4
1MHz
DMA3
M4
M3
M2
M1
M0
Base Address
Clock Source 10MHz/1MHz
DMA 1/3
Not used
16-sample moving average filter
12-Bit legacy DAC, 16-bit DAC
Allow FIFO
DAS16 / DAS1602
5
Copyright (c) 1997-2005 by Apex Embedded Systems
Need something different? Please let us know.
Base Address Table
Base Address
A9
A8
A7
0x220
1
0
0
0x240
1
0
0
0x250
1
0
0
0x260
1
0
0
0x280
1
0
1
0x290
1
0
1
0x2A0
1
0
1
0x2B0
1
0
1
0x2C0
1
0
1
0x2D0
1
0
1
0x2E0
1
0
1
0x2F0
1
0
1
0x300*
1
1
0
0x310
1
1
0
0x320
1
1
0
0x330
1
1
0
0x340
1
1
0
0x350
1
1
0
0x360
1
1
0
0x370
1
1
0
0x380
1
1
1
0x390
1
1
1
0x3A0
1
1
1
0x3B0
1
1
1
0x3C0
1
1
1
0x3D0
1
1
1
0x3E0
1
1
1
0x3F0
1
1
1
Note:
1 = Jumper installed, 0 = Jumper not installed.
* Factory Default
A6
0
1
1
1
0
0
0
0
1
1
1
1
0
0
0
0
1
1
1
1
0
0
0
0
1
1
1
1
A5
1
0
0
1
0
0
1
1
0
0
1
1
0
0
1
1
0
0
1
1
0
0
1
1
0
0
1
1
A4
0
0
1
0
0
1
0
1
0
1
0
1
0
1
0
1
0
1
0
1
0
1
0
1
0
1
0
1
Compatibility Selection and Extended Functions
Mode
M4 M3 M2 M1
DAS16jr/16 + DAC02 Compatibility*
0
X
X
0
DAS1602 Compatibility w/1MegaSample FIFO
0
X
X
0
(Single interrupt per sample during burst)
DAS1602 Compatibility and FIFO Status Registers Visible
0
X
X
1
(Single interrupt per burst completion)
Enable FIFO Superset Functionality
0
X
X
1
16-bit DAC Registers
0
X
1
X
16-Sample moving average filter for all 8 or 16 ADC channels
0
1
X
X
Note:
1 = Jumper installed, 0 = Jumper not installed, X = Don’t care.
* Factory Default
6
M0
0
1
1
X
X
X
Copyright (c) 1997-2005 by Apex Embedded Systems
Need something different? Please let us know.
The DAS1602 compatibility offers ADC sample bursting as well as ADC trigger
blocking.
Compatibility
The STX104 is compatible with DAS16jr/16 and the DAS1602. The DAS16jr/16
mode supports 8-bit or 16-bit systems (XT or AT, respectively). The DAS1602 is
intended for use with 16-bit systems only (AT). Jumper position M0 selects one of
these compatibility modes.
FIFO Superset
Functionality
Data FIFO superset functionality can be selected for either the DAS16jr/16 or the
DAS1602 compatibility modes. The FIFO superset functionality is very similar to
other cards on the market. Stuffing jumper position M1 enables FIFO superset
functionality. Note that for the DAS1602 compatibility mode, the 1 mega-sample
FIFO is enabled, however to maintain register compatibility the FIFO status registers
are only visible once the M1 jumper is installed.
16-Bit DAC Mode
The 16-bit DAC mode allows the DAC registers to provide 12-bit legacy functionality
as well as full 16-bit DAC functionality. Stuffing jumper M2 allows for full 16-bit
DAC operation.
12-Bit DAC Legacy Mode (M2 jumper not stuffed)
Base Address + 4
D7
D6
DA7
DA6
D5
DA5
D/A Channel-A Low Byte
D4
D3
DA4
X
Base Address + 5
D7
D6
DA15
DA14
D5
DA13
D/A Channel-A High Byte
D4
D3
D2
DA12
DA11
DA10
D2
X
D1
X
Read/Write
D0
X
D1
DA9
Read/Write
D0
DA8
16-Bit DAC Mode (M2 jumper stuffed)
Base Address + 4
D7
D6
DA7
DA6
D5
DA5
D/A Channel-A Low Byte
D4
D3
DA4
DA3
D2
DA2
D1
DA1
Read/Write
D0
DA0
Base Address + 5
D7
D6
DA15
DA14
D5
DA13
D/A Channel-A High Byte
D4
D3
D2
DA12
DA11
DA10
D1
DA9
Read/Write
D0
DA8
7
Copyright (c) 1997-2005 by Apex Embedded Systems
Need something different? Please let us know.
Unipolar or Bipolar Analog Input
1 2
J9
Jumper
0*
1
Function
Bipolar Analog Inputs ( +/- values accepted )
Unipolar Analog Inputs ( + values only )
* Factory Default
Note:
1 = Jumper installed, 0 = Jumper not installed.
Differential or Single Ended Analog Input
1 2
J8
Jumper
0*
1
Function
Differential Inputs, 8-channels
Single-Ended Inputs, 16-channels
* Factory Default
Note:
1 = Jumper installed, 0 = Jumper not installed.
DAC Range Settings J5
DA1_R
DA1_UB
DA2_R
DA2_UB
1
3
5
7
2
4
6
8
DAC-1 Range
DAC-1 Bipolar
DAC-2 Range
DAC-2 Bipolar
DIO3
DIO2
DIO1
DIO0
J5
DA1_UB DA1_R
DAC-1 Range
0
0
0 to +5 Volts *
0
1
0 to +10 Volts
1
0
-5 to +5 Volts
1
1
-10 to +10 Volts
* Factory Default
Note:
1 = Jumper installed, 0 = Jumper not installed.
DA2_UB DA2_R
DAC-2 Range
0
0
0 to +5 Volts *
0
1
0 to +10 Volts
1
0
-5 to +5 Volts
1
1
-10 to +10 Volts
* Factory Default
Note:
1 = Jumper installed, 0 = Jumper not installed.
8
Copyright (c) 1997-2005 by Apex Embedded Systems
Need something different? Please let us know.
16-Sample Moving
Average Filter
Installing jumper M3 enables the 16-sample moving average filter for all channels. The
filter can be reset (or cleared) by writing to the Channel Register. The moving average
filter is enabled for all channels and operates completely transparent to ADC
acquisition modes. The ADC values read out will be the current sample plus the last
fifteen samples summed together and divided by sixteen (average of sixteen ADC
samples). It is important to recognize that after the filter is reset or at the beginning of
data sampling that it may require at least 16-data samples per channel be taken until the
data becomes current. In other words, there is an inherent 16-sample delay in the
ADC data that is read out of the ADC Data Register.
The following example illustrates how you would take care of the first 16-samples in a
continuous sampling data stream. Say you need to take 100 samples per second over
four channels continuously using the moving average filter. The following outline
below shows how you could pre-process the data.
1.
Write to the Channel Register to sample from channel 0 to channel 3.
This also clears the moving average filter. Set a software start-up flag
to true to indicate that the first 16-sample times is a start-up period.
2.
Set up triggering for 100 samples per second per channel. If you are
using Burst mode, then the triggering rate must be 100Hz, otherwise
the triggering rate must be 400Hz.
3.
Wait for CNV to become zero. This takes approximately 6uS while
the moving average filter is cleared.
4.
Throw out the first 16-samples per channel. This can be
accomplished by using the software start up flag to indicate that we are
in a start up mode. Once 64-samples have been read (16-samples x 4channels), the software start up flag is cleared and normal sampling
operation resumes.
5.
Now, sample and process data normally.
For high speed sampling where the one mega-sample FIFO is used, a similar software
design philosophy could be used where the first 16-data sample sets read out of the
FIFO are ignored. Alternatively, if data has been stored directly to a file, during file
processing the first 16-sample sets could be ignored. The best location of taking care
of the data sample lag time is very much dependent on your specific application and
requirements.
High Vibration Environments
Apex offers factory installed surface mount zero ohm resistors to replace all jumpers.
9
Copyright (c) 1997-2005 by Apex Embedded Systems
Need something different? Please let us know.
Chapter
Register Set
Register Set Summary
Offset
Offset
Write Register
Read Register
(Decimal) (Hex)
0
0
ADC Software Triggering
ADC LSB Data
1
1
None
ADC MSB Data
2
2
Channel Register ***
Channel Register
3
3
Digital Output
Digital inputs
4
4
DAC Channel-A LSB
None
5
5
DAC Channel-A MSB (Update Channel-A) None
6
6
DAC Channel-B LSB
None
7
7
DAC Channel-B MSB (Update Channel-B) None
8
8
Clear Interrupts Register
ADC Status Register
9
9
ADC Control Register
ADC Control Register
10
A
Pacer Clock Control Register
*FIFO Flags Register
11
B
ADC Configuration Register
ADC Configuration Register
12
C
8254 Counter/Timer 0 Data
8254 Counter/Timer 0 Data
13
D
8254 Counter/Timer 1 Data
8254 Counter/Timer 1 Data
14
E
8254 Counter/Timer 2 Data
8254 Counter/Timer 2 Data
15
F
8254 Counter/Timer Configuration Register *FIFO Data Status Register
1028
404
DAS1602 Conversion Disable Register **
None
1029
405
DAS1602 Burst Mode Enable Register **
None
1030
406
DAS1602 Function Enable Register **
None
1031
407
None
DAS1602 Extended Status Register **
* Available in FIFO Superset mode only (jumper M1 installed)
** Available only in DAS1602 compatibility mode (jumper M0 installed)
*** Writing to this register will reset the acquisition controller, FIFO and moving average filter.
Definition of Terms
ADC =
DAC =
FIFO =
LSB =
MSB =
Trigger =
Burst =
Analog-to-Digital Converter
Digital-to-Analog Converter
First-In-First-Out
Least Significant Byte
Most Significant Byte
Trigger causes an ADC sample
Channels scanned as fast as possible per trigger
10
Copyright (c) 1997-2005 by Apex Embedded Systems
Need something different? Please let us know.
ADC Data Register
Bit Definitions
Base Address + 0
D7
D6
AD07
AD06
D5
AD05
ADC LSB
D4
D3
AD04
AD03
D2
AD02
D1
AD01
Read
D0
AD00
Base Address + 1
D7
D6
AD15
AD14
D5
AD13
ADC MSB
D4
D3
AD12
AD11
D2
AD10
D1
AD09
Read
D0
AD08
AD[15:0]
= ADC data word. AD0 is the least significant bit. AD15 is the most
significant data bit.
A reading of 010 (0x0000) represents a negative full scale input and a
value of 6553510 (0xFFFF) represents an input of positive full scale.
The two registers can both be read simultaneously by simply reading
the data as a 16-bit I/O transaction (Examples: “in ax, dx” or
“inpw(base_address+0)” ).
The ADC LSB register provides the least significant data byte and the ADC MSB
register provides the most significant data byte. Each of the two registers can be read
in any order (when FIFO Superset is not enabled). Writing any data to the ADC LSB
register issues a software trigger.
Data bandwidth between the STX104 and CPU (PC/104 ISA bus) can be doubled
by simply reading the ADC register as a 16-bit register. Software examples are
shown below.
When FIFO Superset is enabled (M1 jumper installed) the ADC data is read out
of the FIFO as either a word or a byte at a time. To read out the data correctly as
a byte at a time, you must first read the LSB and then the MSB. Once the MSB is
read, the FIFO is considered to be read and FIFO is advanced to the next value to
be read (if not empty). You may continue to read the data until the FIFO empty
flag is set. It is possible to continuously sample analog inputs (continuous ADC
sampling or triggering) and continuously read FIFO without any breaks in
sampling.
It is the programmer’s responsibility to be sure that data is read out in the correct
sequence, as well as starting and stopping the acquisition as required.
11
Copyright (c) 1997-2005 by Apex Embedded Systems
Need something different? Please let us know.
Software
Examples
Examples of how to read the ADC data:
8-Bit Read in C/C++:
unsigned ad_value[16];
...
adc_value(channel) = inportb(base_address+0) + ( inportb(base_addres+1) << 8 );
...
16-Bit Read in C/C++:
unsigned ad_value[16];
...
adc_value(channel) = inpw(base_address+0);
...
8-Bit Read and FIFO enabled in C/C++:
unsigned ad_value[16];
...
if ( fifo_not_empty() == true ) /* function to check fifo status */
{
adc_value(channel) = inportb(base_address+0) + ( inportb(base_addres+1) << 8 );
}
...
16-Bit Read and FIFO enabled in C/C++:
unsigned ad_value[16];
...
if ( fifo_not_empty() == true ) /* function to check fifo status */
{
adc_value(channel) = inpw(base_address+0);
}
...
Using the REP
INSW Instruction
Using the REP INSW instruction provides a very high speed mechanism for reading
out ADC data from the FIFO. This instruction is available on 286 CPUs and above.
In fact, this is faster and easier to use than DMA; both in implementation and
execution. Using REP INSW alleviates video problems related with DMA as well as
improved CPU timing management (i.e. DMA adds timing holes in the system that are
not easily managed by simple real-time kernels). The speed of any ISA bus I/O
transaction is dependent on the CPU ISA bus speed which is usually set in the BIOS
setup; use this setting with caution as it may affect performance of other cards and/or
can cause data loss. This is usually available on many CPU cards.
16-Bit Read with FIFO enabled in C/C++ using REP INSW:
typedef unsigned short WORD;
void insw(WORD port, void *buf, int count)
{
_ES = FP_SEG(buf);
/* Segment of buf */
_DI = FP_OFF(buf);
/* Offset of buf */
_CX = count;
/* Number to read */
_DX = port;
/* Port
*/
asm
REP INSW;
}
12
Copyright (c) 1997-2005 by Apex Embedded Systems
Need something different? Please let us know.
void main()
{
unsigned *data[512];
...
insw(0x300, data, 512);
...
}
Voltage Input
Conversion
Input
Range
± 10V
± 5V
± 2.5V
± 1.25V
0-10V
0-5V
0-2.5V
0-1.25V
Resolution
305uV
153uV
76uV
38uV
153uV
76uV
38uV
19uV
/* assumes 512 samples in FIFO */
Input Voltage
-FS
+FS
-10
+10
-5
+5
-2.5
+2.5
-1.25
+1.25
0.00
+10
0.00
+5
0.00
+2.5
0.00
+1.25
Binary Code
-Full Scale
+Full Scale
0000 0000 0000 0000
1111 1111 1111 1111
0000 0000 0000 0000
1111 1111 1111 1111
0000 0000 0000 0000
1111 1111 1111 1111
0000 0000 0000 0000
1111 1111 1111 1111
0000 0000 0000 0000
1111 1111 1111 1111
0000 0000 0000 0000
1111 1111 1111 1111
0000 0000 0000 0000
1111 1111 1111 1111
0000 0000 0000 0000
1111 1111 1111 1111
An example of general conversion in C/C++ is shown below illustrating how to set
the gain and use it to determine the actual input voltage.
/****************************************************************************
Apex Embedded Systems
September 25, 2002
STX104 Analog Input Demo
****************************************************************************/
#include <conio.h>
#include <stdio.h>
#include <dos.h>
/****************************************************************************/
float adc_gain[8] = { 20.0/65536.0, 10.0/65536.0, 5.0/65536.0, 2.5/65536.0,
10.0/65536.0, 5.0/65536.0, 2.5/65536.0, 1.25/65536.0 };
float adc_offset[8] = { -10.0, -5.0, -2.5, -1.25, 0.0, 0.0, 0.0, 0.0 };
/****************************************************************************/
float Adc_Voltage ( void )
{
long sum;
int index;
float voltage;
/* take several samples and average - especially useful for calibration */
sum = 0;
outportb(0x308, 0x00); /* reset INT bit */
for ( index=0; index <256; index++ )
{
outportb(0x300, 0x00); /* start a sample */
while ( (inportb(0x308) & 0x10) == 0x00 ); /* wait for sample */
sum = sum + ((long)inpw(0x300));
outportb(0x308, 0x00); /* reset INT bit */
}
sum = sum / 256;
index = inportb( 0x30B ) & 0x07;
voltage = ( (float) sum ) * adc_gain[index] + adc_offset[index];
return voltage;
}
13
Copyright (c) 1997-2005 by Apex Embedded Systems
Need something different? Please let us know.
/****************************************************************************/
void main()
{
int x,y;
/* base address set to factory default at 0x300 */
/* initialize STX104 */
outportb(0x309, 0x00); /* no interrupts, no DMA and s/w trigger */
outportb(0x302, 0x00); /* look at channel zero only */
printf("0) +10.0V
input\n");
printf("1) +5.0V
input\n");
printf("2) +2.5V
input\n");
printf("3) +1.25V input\n");
printf("9) Quit this test\n");
do {
y = inportb( 0x30B ) & 0x07;
if ( (y & 0x04) == 0x00 ) printf("Bipolar: ");
else printf("Unipolar: ");
y = y & 0x03;
printf(" Gain=");
if ( y == 0 )
printf("10V,
");
else if ( y == 1 ) printf(" 5V,
");
else if ( y == 2 ) printf(" 2.5V, ");
else if ( y == 3 ) printf(" 1.25V,");
printf(" Voltage = %+10.6f
\r", Adc_Voltage());
if ( kbhit() )
{
y = getch();
/* set gain */
if ( y == '0' )
else if ( y == '1'
else if ( y == '2'
else if ( y == '3'
else if ( y == '9'
}
} while ( x != 9 );
printf("\n\n");
)
)
)
)
}
14
{
{
{
{
x
x
x
x
x
=
= 0;
= 1;
= 2;
= 3;
9;
outportb(
outportb(
outportb(
outportb(
0x30B,
0x30B,
0x30B,
0x30B,
x
x
x
x
);
);
);
);
}
}
}
}
Copyright (c) 1997-2005 by Apex Embedded Systems
Need something different? Please let us know.
ADC Software Triggering ADC
Base Address + 0
D7
D6
X
X
Bit Definitions
X
D5
X
Start ADC Conversion
D4
D3
X
X
D2
X
D1
X
Write
D0
X
= Don’t care
Writing any data to this register will invoke a software trigger, only if it is selected in the
ADC control register TS[1:0].
15
Copyright (c) 1997-2005 by Apex Embedded Systems
Need something different? Please let us know.
Channel Register
Base Address + 2
D7
D6
LC3
LC2
Bit Definitions
D5
LC1
Channel Scan
D4
D3
LC0
FC3
D2
FC2
D1
FC1
Read/Write
D0
FC0
CH[3:0]
= Current Channel to be sampled. See ADC Status Register. This
value is sent to the analog multiplexers to set the current analog
channel to be sampled. This value can be read in the ADC Status
Register.
FC[3:0]
= First Channel. This is the first analog channel that is sampled.
When this value is written, it will also set the current-channel ( CH
= FC ).
LC[3:0]
= Last Channel. This is the last analog channel that is sampled. Once
this channel has been sampled, the current-channel value will wrap
to the first-channel value.
The channel register contains first-channel and the last-channel in the scanning range of the
analog multiplexer. When the channel register is written the first-channel value is also
written to the current-channel which sets the analog channel to be sampled. Upon an
ADC trigger, the ADC samples the current-channel, and the multiplexer is advanced to
the next channel. The current-channel value will wrap from the last-channel to the to the
first-channel once the last-channel as been sampled.
The current-channel value is incremented only when the ADC is sampled or triggered.
For every ADC trigger, the current-channel is incremented. The current-channel is
presented as CH[3:0] in the ADC Status Register.
If the STX104 is configured for differential input mode, the most significant bit of the
current-channel (and therefore first- and last-channel) is ignored.
If the FIFO function is enabled, the user software must track the channel being read
out of the FIFO. In other words, it is the software which must maintain
synchronization.
If the first-channel is the same as the last-channel, then the analog channel (multiplexer) is
not changed. This can be useful for sampling the same channel continuously.
It is recommended to have first-channel < last-channel to prevent confusion of the
channel sequencing as illustrated in examples (C) and (D) below.
16
Copyright (c) 1997-2005 by Apex Embedded Systems
Need something different? Please let us know.
FIFO Reset
Writing to the channel register will reset the FIFO when the FIFO Superset mode is
enabled (jumper M1 is installed) and/or DAS1602 mode enabled (jumper M0 is
installed).
Acquisition
Controller Reset
Writing to the Channel Register resets the internal acquisition controller in all modes.
Moving Average
Filter Reset
Writing to the Channel Register also resets the internal moving average filter in all
modes when jumper M3 is installed. The CNV bit (see Status Register) will become
active for approximately six microseconds while the moving average filter is reset.
Examples
Example channel sequencing (all in hexadecimal values):
a)
LC = D, FC = 3
16-Channel, Single Ended:
8-Channel, Differential:
3,4,5,6,7,8,9,A,B,C,D,3,4,5,...
3,4,5,3,4,5,...
b)
LC = 1, FC = 9
16-Channel, Single Ended:
8-Channel, Differential:
9,A,B,C,D,E,F,0,1,9,A,B,C,...
1,1,1,1,...
c)
LC = 6, FC = 5
16-Channel, Single Ended:
8-Channel, Differential:
5,6,5,6,...
5,6,5,6,...
LC = 5, FC = 6
16-Channel, Single Ended:
8-Channel, Differential:
5,6,7,8,9,A,B,C,D,E,F,0,1,2,3,4,5,6,7,8,9,...
6,7,0,1,2,3,4,5,6,7,0,1,2,...
d)
SS&H Output
The Start Sample and Hold (SS&H) signal, at pin 14 of the I/O connector, is a TTL
output used to drive the sample and holds line of external simultaneous sample and
hold cards. The behavior of the SS&H output signal is related to the Channel Register.
Writing any value to the Channel Register will bring the SS&H line active high. The
SS&H line will go low, indicating a hold, when the first_channel sampling has completed
(i.e. the input multiplexers now looking at the next channel). The SS&H line will
return high when last_channel has been sampled and the multiplexers wrap back to the
first_channel.
17
Copyright (c) 1997-2005 by Apex Embedded Systems
Need something different? Please let us know.
Digital Input/Output Register
Bit Definitions
Base Address + 3
D7
D6
CM1
CM0
D5
0
Digital Inputs
D4
D3
0
DIN3
Base Address + 3
D7
D6
X
X
D5
X
Digital Outputs
D4
D3
X
DOUT3
DIN[3:0]
D2
DIN2
GATE0
D1
DIN1
D2
DOUT2
D1
DOUT1
Read
D0
DIN0
TRIG
Write
D0
DOUT0
= Digital Inputs.
DIN0 also functions as an ADC external trigger input. As a trigger
input, it is deglitched by an internal match-filter and requires a
minimum pulse width of no less than 200nS. See the Interrupt
Summary section for further functionality.
DIN2 also functions as counter-zero gate input.
DOUT[3:0] = Digital Outputs. These bits are write only. Non-inverted digital
output bits. You must maintain a copy in software for bit
manipulation.
CM[1:0]
= Compatibility mode. These bits are set to zero for DAS16jr/16
mode. These bits are set to one for DAS1602 mode
compatibility.
X
= Don’t care
18
Copyright (c) 1997-2005 by Apex Embedded Systems
Need something different? Please let us know.
ADC Status Register
The ADC status register provides ADC status information.
Base Address + 8
D7
D6
CNV
UB
Bit Definitions
D5
SD
Status Register
D4
D3
INT
CH3
D2
CH2
D1
CH1
Read
D0
CH0
CNV
= ADC Conversion (and/or burst in DAS1602 mode) in progress.
Writing to the Channel Register may cause the CNV bit to become
active indicating that a STX104 internal reset is in progress (typically less
than 1uS, and less than 10uS when moving average filter is enabled).
1 = ADC conversion, scan or acquisition reset in progress.
0 = ADC Idle (default)
UB
= Unipolar / Bipolar ADC input mode setting (J9):
0 = bipolar. Measure both negative and positive input
voltages (J9 not stuffed)
1 = unipolar. Measure only positive input values
SD
= Single-ended / Differential ADC input mode setting (J8):
0 = Single-ended
1 = Differential (J8 not stuffed)
INT
= Interrupt request status bit.
0 = No interrupt pending (default)
1 = Interrupt is pending; ADC trigger or burst conversion
has completed
Note: ADC conversions continue to occur on schedule (via selected
trigger source) regardless of whether this bit is cleared. If a new
conversion occurs before this bit is cleared, an over-run condition has
occurred. Therefore, the programmer must ensure that the interrupt
rate is not faster than the capacity of the CPU and software to respond.
If FIFO Superset is enabled (jumper M1 stuffed), then the only overrun that will occur is if the FIFO is full (FIFO Full flag is true or
FF=’1’). Thus, interrupt latency requirements are greatly relaxed.
If ADC interrupts are not enabled, this bit can still be used to determine
when an ADC conversion has occurred when polling this bit.
CH[3:0]
= Current ADC channel. This is the channel currently selected on the
board and is the channel that will be used for the next ADC
conversion provided CNV=0 (unless a new value is written to the
channel register). The CH[3:0] will change shortly after an ADC
trigger.
X
= Don’t care
Interrupt
Overflow
19
Copyright (c) 1997-2005 by Apex Embedded Systems
Need something different? Please let us know.
Clear Interrupt Register
Base Address + 8
D7
D6
X
X
Bit Definitions
X
D5
X
Clear Interrupt
D4
D3
X
X
D2
X
D1
X
Write
D0
X
= Don’t care
Writing any data to this location clears any pending ADC interrupts, setting the INT
bit to zero.
FIFO Interrupt
When the FIFO Superset mode is enabled (jumper M1 stuffed), writing any data to
this location clears any pending FIFO interrupts setting the FF_INT bit to zero. See
FIFO Flags Register.
20
Copyright (c) 1997-2005 by Apex Embedded Systems
Need something different? Please let us know.
ADC Control Register
Without FIFO Superset Enabled (jumper not installed at M1).
Base Address + 9
D7
D6
AIE
INT2
D5
INT1
Control Register
D4
D3
INT0
X
D2
DMA
D1
TS1
Read/Write
D0
TS0
D2
DMA
D1
TS1
Read/Write
D0
TS0
FIFO Superset Enabled (jumper installed at M1).
Base Address + 9
D7
D6
AIE
INT2
Bit Definitions
AIE
INT[2:0]
FIE
DMA
TS1
TS0
X
D5
INT1
Control Register
D4
D3
INT0
FIE
= ADC Interrupt Enable.
0 = Disable interrupt (default)
1 = Enable interrupt
= Interrupt select:
000 = Not valid, interrupts disabled (default)
001 = Not valid, interrupts disabled
010 = IRQ2
011 = IRQ3
100 = IRQ4
101 = IRQ5
110 = IRQ6
111 = IRQ7
= FIFO Interrupt Enable (only when jumper M1 is installed):
0 = Disable FIFO interrupt (default)
1 = Enable FIFO interrupt
= Direct Memory Access (DMA) enable:
0 = Disable DMA transactions (default)
1 = Enable DMA transactions
The DMA request lines are tri-stated until the DMA bit is enabled,
thus allowing multiple DMA devices to share the selected DMA
channel provided that they are not enabled at the same time.
= Trigger select or trigger enable:
0 = Disable hardware trigger, software trigger only (default)
1 = Enable hardware trigger (source selected with TS0 bit)
= Trigger select:
0 = External trigger using DIN0. Rising edge on DI0 generates
ADC conversions (default)
1 = Internal trigger using counter/timer. Rising edge on the
output of counter/timer two (8254) generate
ADC conversions.
= Don’t Care
21
Copyright (c) 1997-2005 by Apex Embedded Systems
Need something different? Please let us know.
The control register is used to configure interrupts, select DMA mode and select
ADC trigger source.
See Interrupt Summary for more information on interrupts.
DMA
We strongly encourage you to use the REP INSW instruction as it performs
better than DMA and is substantially simpler to set up and use. Note that DMA
performs I/O to memory transfers a byte at a time (DMA 1 and DMA 3 are byte
wide transfers) while REP INSW performs I/O to memory transfers a word at a
time. If you are designing a real-time system, you will have better timing control
over your system by using REP INSW instruction over DMA. Since processor
generated I/O cycles are faster than DMA generated cycles (typically 350ns versus
800ns), data transfer can take place faster than DMA.
When DMA is enabled, the 1 mega-sample FIFO is used internally.
In DMA mode, receiving a terminal count from the CPU will generate an
interrupt, if the interrupt is enabled. If you are in DAS1602 mode (jumper M0 is
installed), receiving a terminal count will set the Conversion Disable bit to false,
thus disabling any additional ADC triggers (or sampling). Writing 0x00 to the
Conversion Disable Register will allow ADC sampling to continue.
In order to use DMA, you must set up the computer’s DMA controller and page
registers before enabling DMA on the STX104 board.
The speed of any ISA bus I/O transaction is dependent on the CPU ISA bus speed
which is usually set in the BIOS setup; use this setting with caution as it may affect
performance of other cards and/or can cause data loss. This is usually available on
many CPU cards.
22
Copyright (c) 1997-2005 by Apex Embedded Systems
Need something different? Please let us know.
Interrupt Summary
Without FIFO Superset Enabled (jumper not installed at M1).
One interrupt per
sample when in burst
mode
AIE
0
FIE
X
DMA
1
Interrupt Function
No interrupt generated.
Poll INT to determine when a DMA terminal count is received from the DMA
controller to indicate completion of the DMA transfer.
1
X
0
Interrupt generated when an ADC conversion has completed. Write to the Clear
Interrupt Register to clear the interrupt. In DAS1602 compatibility mode (jumper
M0 installed), an interrupt is generated for each sample when in burst mode.
1
X
1
Interrupt generated when a DMA terminal count is received from the DMA
controller to indicate completion of the DMA transfer.
FIFO Superset Enabled (jumper installed at M1).
AIE
0
FIE
0
DMA
0
Interrupt Function
No interrupt generated.
Poll INT to determine when an ADC conversion has completed.
Poll INT_FF to determine when 512 additional samples have been queued to the
FIFO.
0
X
1
No interrupt generated.
Poll INT to determine when a DMA terminal count is received from the DMA
controller to indicate completion of the DMA transfer.
Poll INT_FF to determine when 512 additional samples have been queued to the
FIFO.
1
X
1
Interrupt generated when a DMA terminal count is received from the DMA
controller to indicate completion of the DMA transfer.
0
1
0
Interrupt generated when 512 additional samples are deposited in the FIFO. Write
to the Clear Interrupt Register to clear the interrupt.
Poll INT to determine when deglitched DIN0 rising-edge has occurred. By
connecting CT_OUT0 or CT_OUT2 to DIN0 you can create a polled timing
function. Any external input can produce a polled rising-edge. If GCTRL bit is set
then this can be used to detect the beginning of pacer clock gating (i.e. start of one
or more samples). Writing to the Clear Interrupt Register will also clear the INT bit.
1
0
0
Interrupt generated when an ADC conversion has completed. Write to the Clear
Interrupt Register to clear the interrupt. In DAS1602 compatibility mode (jumper
M0 installed), an interrupt is generated for each burst completion when in burst
mode.
Poll INT_FF to determine when 512 additional samples have been queued to the
FIFO.
1
1
0
Interrupt generated when 512 samples deposited in the FIFO. Write to the Clear
Interrupt Register to clear the interrupt.
Interrupt generated when deglitched DIN0 rising-edge has occurred. By connecting
CT_OUT0 or CT_OUT2 to DIN0 you can create an interrupt timing function.
Any external input can produce an interrupt. If GCTRL bit is set then this can be
used to detect the beginning of pacer clock gating (i.e. start of a group of samples).
Writing to the Clear Interrupt Register will also clear the INT bit.
One interrupt per
burst completion
when in burst mode
23
Copyright (c) 1997-2005 by Apex Embedded Systems
Need something different? Please let us know.
Pacer Clock Control Register
DAS16jr/16 Compatibility Mode (M0 jumper not stuffed).
Base Address + 10
D7
D6
X
X
D5
X
Pacer Clock Control
D4
D3
X
X
D2
X
D1
CT_SRC0
Write
D0
GCTRL
D2
X
D1
CT_SRC0
Write
D0
GCTRL
DAS1602 Compatibility Mode (M0 jumper stuffed).
Base Address + 10
D7
D6
BL3
BL2
Bit Definitions
BL[3:0]
D5
BL1
Pacer Clock Control
D4
D3
BL0
X
= Burst Length. Determines the number of conversions per trigger
when in burst mode. One to sixteen samples (single-ended) or up
to eight channels (differential) in a burst. When not in Burst mode,
then these bits have no function. The burst length is only used in
the DAS1602 compatibility mode.
If BL[3:0]=0x0, then 1-channel burst is performed. If BL[3:0]=0xF,
then 16-channel burst is performed.
CT_SRC0
= Counter 0 Clock Source:
1 = Counter 0 Clock Source is a 100KHz on-board reference
frequency. CT_SRC0 (J7.4) gates this signal. When this
bit is high (default), the 100KHz signal runs, otherwise
the 100KHz clock is stopped.
0 = Counter 0 Clock Source to Counter 0 is an inverted
polarity copy of CT_CLK0 input. CT_CLK0 is
connected to a 10K ohm pull-up resistor.
GCTRL
= Counters 1 and 2 gate control:
0 = Counters 1 and 2 run freely with no gating.
1 = Counters 1 and 2 are gated by DIN0 (J7.12). DIN0 is
connected to a 10K ohm pull-up resistor.
X
= Don’t care
Details on how to use the counter/timer control bits are shown in schematic form on
the following page.
24
Copyright (c) 1997-2005 by Apex Embedded Systems
Need something different? Please let us know.
ADC Clock and Triggering Summary
The drawing below summarizes the triggering and pacer clock mechanisms in the basic
DAS16 mode.
+5V
+5V
10K
10K
CT_CLK0 (J7.4)
CT_GATE0 (J7.10)
8254
CLOCK
CT_SRC0
100 KHz
COUNTER 0
OUT
COUNTER 1
OUT
COUNTER 2
OUT
CT_OUT0 (J7.3)
GATE
10 MHz
0
1 MHz
1
+5V
CLOCK
GATE
10K
1MHz
Jumper
CLOCK
GCTRL
CT_OUT2 (J7.2)
GATE
DIN0 (J7.12)
External Trigger
Pacer Clock Trigger
0
0
1
ADC Sample
1
ADC Trigger Source
TS0
TS1
Software Trigger
TS1
0
1
1
TS0
X
0
1
Trigger Function
Software triggered ADC sampling only
Trigger on rising edge of DIN0
Trigger on pacer clock output (CT_OUT2)
25
Copyright (c) 1997-2005 by Apex Embedded Systems
Need something different? Please let us know.
FIFO Status Registers
The FIFO Status Registers are only available when FIFO Superset is Enabled (M1
jumper stuffed).
Bit Definitions
Base Address + 10
D7
D6
FF_INT
X
D5
FF
Base Address + 15
D7
D6
FBR7
FBR6
D5
FBR5
FIFO Flags Register
D4
D3
FE
FBR11
D2
FBR10
D1
FBR9
Read
D0
FBR8
FIFO Data Status Register
D4
D3
D2
FBR4
FBR3
FBR2
D1
FBR1
Read
D0
FBR0
FF_INT
= FIFO Data Interrupt. An interrupt will occur for 512 or more
samples queued in the FIFO. This bit can be polled and/or use
to generate an interrupt to the CPU (setting FIE bit true in the
ADC Control Register).
0 = No FIFO interrupt (default at reset or power-up)
1 = FIFO interrupt active. To Clear Interrupt Register, write
any value at Clear Interrupt Register.
FF
= FIFO Full Flag.
0 = FIFO not full (default at reset or power-up)
1 = FIFO full/overflow has occurred.
FE
= FIFO Empty Flag.
1 = Empty (default at reset or power-up)
0 = FIFO not empty, data is present
FBR[11:0]
= FIFO Data Blocks Remaining. This provides a mechanism for
measuring amount of data remaining within the FIFO. Each block
is 256 samples. For example, if FBR=0x05 then at least 1,280
samples remain to be read out of the STX104 FIFO. If FBR=0x00
and FE=’0’ then there are less than 256 samples remaining to be
read out of the FIFO. When FBR>0, use REP INSW to read in
256 samples at a time (1 block). When FBR=0, use a software loop
that monitors the FE bit while reading in the samples until the
FIFO is empty.
X
= Don’t Care
Note that writing to the Channel Register will reset the FIFO.
26
Copyright (c) 1997-2005 by Apex Embedded Systems
Need something different? Please let us know.
ADC Configuration Register
Bit Definitions
Base Address + 11
D7
D6
X
X
D5
X
Analog Configuration
D4
D3
X
X
D2
X
D1
G1
Write
D0
G0
Base Address + 11
D7
D6
X
X
D5
X
Analog Configuration
D4
D3
X
0
D2
ADBU
D1
G1
Read
D0
G0
ADBU
= ADC bipolar/unipolar:
0 = bipolar setting (jumper J9 not installed)
1 = unipolar setting
G[1:0]
= ADC gain setting:
00 = gain of x1 (default)
01 = gain of x2
10 = gain of x4
11 = gain of x8
X
= Don’t care
Writing to this register sets the analog input gain for all 8/16 analog inputs. The
ADBU bit is set by hardware. The current input gain is determined by reading this
register.
Gain summary
Input Range
± 10V
± 5V
± 2.5V
± 1.25V
0-10V
0-5V
0-2.5V
0-1.25V
Resolution
305uV
153uV
76uV
38uV
153uV
76uV
38uV
19uV
ADBU
0
0
0
0
1
1
1
1
G1
0
0
1
1
0
0
1
1
G0
0
1
0
1
0
1
0
1
The ADC data range is –3276810 to 3276710 for each of the input ranges listed below.
See the software example in the ADC Data Register section earlier in this chapter.
The gain setting is the ratio between the ADC full-scale range and the effective input
signal range. For example, if the ADC full-scale range is 0-10V, a gain setting of 2
creates an input signal range of 0-5V, and gain setting of 4 creates an input range of 02.5V.
27
Copyright (c) 1997-2005 by Apex Embedded Systems
Need something different? Please let us know.
8254 Counter/Timer Registers
Data registers to/from the each of the three counter/timers.
Base + 12
D7
D7
D6
D7
8254 Counter/Timer 0 Data
D5
D4
D3
D5
D4
D3
D2
D2
D1
D1
Read/Write
D0
D0
Base + 13
D7
D7
D6
D7
8254 Counter/Timer 1 Data
D5
D4
D3
D5
D4
D3
D2
D2
D1
D1
Read/Write
D0
D0
Base + 14
D7
D7
D6
D7
8254 Counter/Timer 2 Data
D5
D4
D3
D5
D4
D3
D2
D2
D1
D1
Read/Write
D0
D0
8254 Counter/Timer Mode Configuration Register
D6
D5
D4
D3
D2
SC0
RW1
RW0
M2
M1
D1
M0
Write
D0
BCD
Counter/Timer configuration register.
Base + 15
D7
SC1
Bit Definitions
BCD
=
Binary Coded Decimal (BCD) Counter (4 decades) if set to one,
otherwise 16-bit binary counter.
M[2:0]
=
Counter/Timer Mode Select:
000 = Mode 0, Interrupt on terminal count
001 = Mode 1, Hardware retriggerable one-shot
X10 = Mode 2, Rate generator
X11 = Mode 3, Square wave generator
100 = Mode 4, Software triggered strobe
101 = Mode 5, Hardware triggered strobe (retriggerable)
RW[1:0]
=
Read/Write:
00 = Counter latch command
01 = Read/Write least significant byte only
10 = Read/Write most significant byte only
11 = Read/Write least significant byte first, then
most significant byte.
SC[1:0]
=
Select Counter:
00 = Select Counter 0
01 = Select Counter 1
10 = Select Counter 2
11 = Read-Back Command (see read operations)
28
Copyright (c) 1997-2005 by Apex Embedded Systems
Need something different? Please let us know.
DAC Data Registers
Legacy Bit
Alignment
16-Bit DAC Mode
Bit Definitions
12-Bit DAC Legacy Mode (M2 jumper not stuffed).
Base Address + 4
D7
D6
DB7
DB6
DAC Channel-A Low Byte (LSB)
D5
D4
D3
D2
DB5
DB4
X
X
D1
X
Read/Write
D0
X
Base Address + 5
D7
D6
DB15
DB14
DAC Channel-A High Byte (MSB)
D5
D4
D3
D2
DB13
DB12
DB11
DB10
D1
DB9
Read/Write
D0
DA8
Base Address + 6
D7
D6
DB7
DB6
DAC Channel-B Low Byte (LSB)
D5
D4
D3
D2
DB5
DB4
X
X
D1
X
Read/Write
D0
X
Base Address + 7
D7
D6
DB15
DB14
DAC Channel-B High Byte (MSB)
D5
D4
D3
D2
DB13
DB12
DB11
DB10
D1
DB9
Read/Write
D0
DA8
DAC Integer Bit Alignment (M2 jumper stuffed).
Base Address + 4
D7
D6
DA7
DA6
DAC Channel-A Low Byte (LSB)
D5
D4
D3
D2
DA5
DA4
DA3
DA2
D1
DA1
Read/Write
D0
DA0
Base Address + 5
D7
D6
DA15
DA14
DAC Channel-A High Byte (MSB)
D5
D4
D3
D2
DA13
DA12
DA11
DA10
D1
DA9
Read/Write
D0
DA8
Base Address + 6
D7
D6
DB7
DB6
DAC Channel-B Low Byte (LSB)
D5
D4
D3
D2
DB5
DB4
DB3
DB2
D1
DB1
Read/Write
D0
DB0
Base Address + 7
D7
D6
DA15
DA14
DAC Channel-B High Byte (MSB)
D5
D4
D3
D2
DA13
DA12
DB11
DB10
D1
DB9
Read/Write
D0
DA8
DA[15:4]
=
DAC Channel-A data word in 12-Bit mode. DA4 is the least
significant bit and DA15 is the most significant data bit.
DB[15:4]
=
DAC Channel-B data word in 12-Bit mode. DA4 is the least
significant bit and DA15 is the most significant data bit.
DA[15:0]
=
DAC Channel-A data word in 16-Bit mode. DA0 is the least
significant bit and DA15 is the most significant data bit.
DA[15:0]
=
DAC Channel-B data word in 16-Bit mode. DA0 is the least
significant bit and DA15 is the most significant data bit.
29
Copyright (c) 1997-2005 by Apex Embedded Systems
Need something different? Please let us know.
Updating DAC
Outputs
Each channel is updated once the MSB is written. Writing only the MSB will update
the DAC channel output. The results of changing jumper settings at J5 will only take
affect after writing the MSB on the DAC output. The two 8-bit DAC registers can be
written simultaneously by writing the data as a 16-bit I/O transaction (Examples: “out
dx, ax” or “outpw(base_address+4, dac_value)” ).
DAC outputs are available in either DAS16jr/16 or DAS1602 modes. The DAC
outputs are always enabled and available for use. The DAC output bit alignments can
be adjusted for either 12-bit legacy operation or full 16-bit DAC mode.
At power-up or reset the DAC outputs are at set to zero volts.
Software
Examples
Examples of how to write to the DAC output register in 16-bit DAC mode.
8-Bit Writes in C/C++:
unsigned int dac_value;
...
outportb( base_address+4, dac_value & 0xFF );
outportb( base_address+5, dac_value >> 8 );
...
16-Bit Write in C/C++:
unsigned int dac_value;
...
outpw( base_address+4, dac_value );
...
Output Voltage
Conversion
DAC Wiring
Output
Range
± 10V
± 5V
0-10V
0-5V
Resolution
305uV
153uV
153uV
76uV
Input Voltage
-FS
+FS
-10
+10
-5
+5
0.00
+10
0.00
+5
Binary Code
-Full Scale
+Full Scale
0000 0000 0000 0000
1111 1111 1111 1111
0000 0000 0000 0000
1111 1111 1111 1111
0000 0000 0000 0000
1111 1111 1111 1111
0000 0000 0000 0000
1111 1111 1111 1111
The DAC output should be wired as shown below.
VO = VL
DAC_OUT
+
+
DAC
VO
AGND
VL
-
current path
30
Load
Copyright (c) 1997-2005 by Apex Embedded Systems
Need something different? Please let us know.
DAS1602 Compatibility Configuration and Status Register
These registers are only available in DAS1602 Compatibility Mode (jumper M0 is
stuffed).
Bit Definitions
Base+1028
D7
CD7
D6
CD6
Conversion Disable Register
D5
D4
D3
CD5
CD4
CD3
D2
CD2
D1
CD1
Write
D0
CD0
Base+1029
D7
BME7
D6
BME6
Burst Mode Enable Register
D5
D4
D3
BME5
BME4
BME3
D2
BME2
D1
BME1
Write
D0
BME0
Base+1030
D7
FE7
D6
FE6
Function Enable Register
D5
D4
D3
FE5
FE4
FE3
D2
FE2
D1
FE1
Write
D0
FE0
Base+1031
D7
0
D6
BME
Extended Status Register
D5
D4
D3
FE
CD
0
D2
0
D1
WS
Read
D0
CLK
FE[7:0]
=
DAS1602 Function Enable Register. On power-up or reset
the DAS1602 functions are disabled. Writing 0x40 (6410) to
this register enables the DAS1602 functions. Writing a 0x00
to this register disables DAS1602 functions.
CD[7:0]
=
Conversion Disable Register. On power-up or reset the
conversion triggers are enabled. This register is only
available if FE bit is true (DAS1602 Functions are enabled).
Writing a 0x00 to this register enables ADC triggering.
Writing 0x40 (6410) to this register disables ADC triggering.
If the FIFO Superset jumper M1 is not installed, then when
conversions are disabled, the FIFO is reset. If the jumper
M1 is installed, the FIFO is only reset by writing to the
channel register.
BME[7:0]
=
Burst Mode Enable Register. On power-up or reset the
burst mode is disabled. This register is only available if FE
bit is true (DAS1602 Functions are enabled). Writing a 0x00
to this register disables ADC burst mode. Writing 0x40
(6410) to this register enables ADC burst mode.
BME
=
Burst Mode Enabled:
0 = disabled (default)
1 = enabled
31
Copyright (c) 1997-2005 by Apex Embedded Systems
Need something different? Please let us know.
FE
=
DAS1602 Function Enabled:
0 = disabled, DAS16jr/16 functionality only (default)
1 = enabled
CD
=
Conversions Allowed:
0 = ADC Conversions Disabled
1 = ADC Conversions Allowed (default)
WS
=
Wait States. This bit is always zero for no wait states.
CLK
=
Counter/Timer clock source:
0 = 1MHz selected (based on jumper 1MHz)
1 = 10MHz selected
Note that when DMA mode is enabled, receiving a terminal count will disable
ADC triggering (CD=’0’). Writing 0x00 to the Conversion Disable Register will
allow ADC triggering to occur.
32
Copyright (c) 1997-2005 by Apex Embedded Systems
Need something different? Please let us know.
Chapter
Calibration
Calibration made easy
DAC Calibration
Perform the following procedure to adjust DAC channel one:
1.
2.
3.
4.
5.
Select the desired output range by adjusting jumper settings at J5.
Install jumper M2 to select 16-bit DAC output.
Output full scale by writing 65535 (0xFFFF) to the DAC one output
register.
Adjust potentiometer DA1_G (R2) until the desired full scale is reached.
If you have selected 0-5V output, then adjust the output (J7 pin 17 to J7
pin 18) for 5.0000 volts.
Calibration is complete.
Perform the following procedure to adjust DAC channel two:
6.
7.
8.
9.
10.
ADC Calibration
Select the desired output range by adjusting jumper settings at J5.
Install jumper M2 to select 16-bit DAC output.
Output full scale by writing 65535 (0xFFFF) to the DAC two output
register.
Adjust potentiometer DA2_G (R1) until the desired full scale is reached.
If you have selected 0-5V output, then adjust the output (J7 pin 16 to J7
pin 18) for 5.0000 volts.
Calibration is complete.
Perform the following procedure to adjust ADC input. We recommend averaging
ADC values over at least 256 samples in order to provide the most accurate calibration
possible, reference the Voltage Input Conversion section under the ADC Data
Register description. This calibration uses the DAC outputs, therefore, the DAC
outputs must be calibrated first. Note that the potentiometer PGA_OFF (R3) is
factory calibrated and does not need adjustment.
33
Copyright (c) 1997-2005 by Apex Embedded Systems
Need something different? Please let us know.
1.
2.
3.
4.
5.
6.
7.
8.
9.
Select the desired input mode by configuring J8 for differential or singleended inputs.
Select the desired input range by configuring J9 for unipolar or bipolar
inputs.
Set the desired gain by writing to the ADC Configuration Register
(base_address + 11) to the desired ADC input gain. Note that the best
overall calibration will be achieved when the ADC gain is set to x8.
Set the Channel Register (base_address + 2) to zero so that we are
observing input channel zero.
Offset Adjustment.
a. In the case of single-ended inputs (jumper J8 installed), short J7 pin 35
to J7 pin 37; effectively connecting the single-ended input to analog
ground. In the case of differential inputs (jumper J8 not installed),
short J7 pin 35 and pin 36 to J7 pin 37; effectively connecting the
differential input to analog ground.
b. While performing ADC conversions and reading the ADC value,
adjust potentiometer ADC_OFFSET (R4) until the nearest zero value
can be achieved.
Remove all jumpers from the I/O connector at J7.
Gain Adjustment.
a. In the case of single-ended inputs (jumper J8 installed), connect J7 pin
35 to J7 pin 17; effectively connecting the single-ended input to the
DAC output. In the case of single-ended inputs (jumper J8 not
installed), connect J7 pin 36 to J7 pin 17 and pin 35 to J7 pin 37;
effectively connecting the differential input to the DAC output. We
are using the DAC output as it gives us the best analog signal to
calibrate against (while in the field). You can alternatively, connect a
known reference voltage that you have in your laboratory.
b. Adjust the DAC output for ADC full-scale input minus two LSB.
Measure this value using a calibrated voltmeter to the accuracy you
require.
c. While performing ADC conversions and reading the ADC value,
adjust potentiometer ADC_GAIN (R5) until full scale minus two LSB
is achieved. This can be achieved through averaging ADC values.
Please reference ADC Conversion Register for software example on
how to average data.
Remove all jumpers from the I/O connector at J7.
Repeat steps 5 through 8 until the ADC input is calibration to within the
accuracy you need or +/- 2 LSB.
34
Chapter
Copyright (c) 1997-2005 by Apex Embedded Systems
Need something different? Please let us know.
Connector Summary
I/O Connector J7
+5V POWER
CT_OUT0
DOUT3
DOUT1
DIN3
DIN1
DGND
-5V
DAC_OUT_1
No Connection (NC)
CH7 LOW / CH15
CH6 LOW / CH14
CH5 LOW / CH13
CH4 LOW / CH12
CH3 LOW / CH11
CH2 LOW / CH10
CH1 LOW / CH9
CH0 LOW / CH8
AGND
No Connection (NC)
1
3
5
7
9
11
13
15
17
19
21
23
25
27
29
31
33
35
37
39
2
4
6
8
10
12
14
16
18
20
22
24
26
28
30
32
34
36
38
40
CT_OUT2
CT_CLK0
DOUT2
DOUT0
CT_GATE0 / DIN2
TRIG / DIN0
SSH
DAC_OUT_2
AGND
AGND
CH7 / CH7 HIGH
CH6 / CH6 HIGH
CH5 / CH5 HIGH
CH4 / CH4 HIGH
CH3 / CH3 HIGH
CH2 / CH2 HIGH
CH1 / CH1 HIGH
CH0 / CH0 HIGH
No Connection (NC)
No Connection (NC)
DIO5
DIO4
DIO3
DIO2
DIO1
DIO0
J7
Name
Direction
Name
Direction
CT_OUT0
CT_CLK0
CT_OUT2
TRIG/DIN0
DIN1
CT_GATE0/DIN2
DIN3
DOUT0
DOUT1
DOUT2
Output
Input
Output
Input
Input
Input
Input
Output
Output
Output
DOUT3
DAC_OUT_1
DAC_OUT_2
CHn LOW /CHn
CHn HIGH /CHn
+5V POWER
-5V
CHn
DGND
AGND
SSH*
Output
Output
Output
Input
Input
Output
Output
Input
Output
* See Channel Register Description for more details
35
Copyright (c) 1997-2005 by Apex Embedded Systems
Need something different? Please let us know.
Unipolar or Bipolar Analog Input J9
1 2
J9
Jumper
0*
1
Function
Bipolar Analog Inputs ( +/- values accepted )
Unipolar Analog Inputs ( + values only )
* Factory Default
Note:
1 = Jumper installed, 0 = Jumper not installed.
Differential or Single Ended Analog Input J8
1 2
J8
Jumper
0*
1
Function
Differential Inputs, 8-channels
Single-Ended Inputs, 16-channels
* Factory Default
Note:
1 = Jumper installed, 0 = Jumper not installed.
DAC Range Settings J5
DA1_R
DA1_UB
DA2_R
DA2_UB
1
3
5
7
2
4
6
8
DAC-1 Range
DAC-1 Bipolar
DAC-2 Range
DAC-2 Bipolar
DIO3
DIO2
DIO1
DIO0
J5
DA1_UB DA1_R
DAC-1 Range
0
0
0 to +5 Volts *
0
1
0 to +10 Volts
1
0
-5 to +5 Volts
1
1
-10 to +10 Volts
* Factory Default
Note:
1 = Jumper installed, 0 = Jumper not installed.
DA2_UB DA2_R
DAC-2 Range
0
0
0 to +5 Volts *
0
1
0 to +10 Volts
1
0
-5 to +5 Volts
1
1
-10 to +10 Volts
* Factory Default
Note:
1 = Jumper installed, 0 = Jumper not installed.
36
Copyright (c) 1997-2005 by Apex Embedded Systems
Need something different? Please let us know.
Chapter
Specification
Analog Inputs
ADC Resolution
No missing codes guaranteed
Number of Channels
Maximum Sampling Rate
Input Type
Input Polarity
Input Ranges
Input Sensitivity
Input Impedance
Noise Characteristics
DC Drift or Zero Drift
Input Bias Current
Absolute Maximum Input Voltage
Common Mode Voltage Range
Common Mode Rejection Ratio
Integral Linearity Error
Differential Linearity
Accuracy
Gain Drift
Trigger Sources
Trigger Modes
Data Transfer
Analog Outputs
Resolution
Number of Channels
Output Voltage Ranges
Output Coupling
Output Impedance
16-bits (1/65536 of full scale).
8 differential or 16 single-ended
200,000 Samples Per Second (200 KSPS)
True differential or single-ended.
Unipolar/Bipolar jumper selectable.
Bipolar: ±10V, ±5V, ±2.5V, ±1.25V
Unipolar: 0 to 10V, 0 to 5V, 0 to 2.5V 0 to 1.25V
19uV
Differential: 20MΩ min. resistance in parallel with 47pF
Single-Ended: 20MΩ min. resistance in parallel with 27pF
Gaussian behavior with maximum peak-to-peak internal
noise of less than 1.5-LSB RMS over all input ranges and
operating temperatures (1.2-LSB RMS typical). Jumper
selectable 16-bit moving average filter drops noise to less
than 1-LSB RMS over all input ranges and operating
temperatures (0.6-LSB RMS typical).
±2ppm/°C
50nA maximum
±35V
±10V
70dB at 60Hz
±1.5 LSB (±3 LSB on 1.25V range)
±1 LSB
0.003% of reading ( or ±1 LSB)
±7ppm/°C
Programmable internal 32-bit timer, external source
(DIN0/TRIG) or software polled.
Gated pacer, software polled. (Gate must be disabled by
software after trigger event)
From 1Mega-sample FIFO via interrupt, DMA or software
16-bits
2 DACs
±10V, ±5V, 0-10V, 0-5V. Maximum current to 5 milliamps
per channel. Each channel independently configurable by
jumpers.
DC
less than one ohm (0.7Ω typical), from 0 to ±5mA
37
Copyright (c) 1997-2005 by Apex Embedded Systems
Need something different? Please let us know.
Output short-circuit
Offset Error
Gain Error
Differential non-linearity
Settle Time
Integral non-linearity
Monotonicity Guaranteed
±35mA continuous
less than 8 LSB
Adjustable to 0 LSB by potentiometer
±1 LSB maximum
10 microseconds
±1 LSB maximum
Digital I/O
Number of Inputs
Input Voltage
Input Current
Number of Outputs
Output Voltage
Output Current
4 TTL compatible
Logic 0: 0.0V min, 0.8V max; Logic 1: 2.0V min, 5.5V max
± 1uA max
4 TTL compatible
Logic 0: 0.0V min, 0.4V max; Logic 1: 2.4V min, 3.3V max
±12mA per line max
Counter/Timers
A/D Pacer Timer
Clock Source
General Purpose
Interrupt/DMA Trigger
32-bit down counter (2 82C54 counters cascaded)
Jumper selectable 1 MHz or 10 MHz on-board clock source
16-bit down counter (1 82C54 counter)
End of analog input conversion
General
Operating temperature range
Storage temperature range
Factory Calibration
Humidity
Power Supply
Interface
-40 to 85°C
-55 to 125°C
Full NIST Traceable
0 to 95% non-condensing
+5 VDC ± 5% at less than 350mA
PC/104 8- or 16-bit
38
Copyright (c) 1997-2005 by Apex Embedded Systems
Need something different? Please let us know.
Chapter
Application Notes
Application Note S01: Continuous High Speed Sampling
An application requires 16-Channel Single-Ended inputs with bipolar +/-10 Volt input
voltage range. Requirement is for 100KSPS combined on all sixteen channels, or
6.25KSPS per channel. The data will be queued up within the FIFO, and while data is
being sampled continuously, the CPU will be reading ADC data in bursts of 65536
samples every 500mS on average. The starting and stopping of ADC sampling is to be
under software control. The STX104 is to reside at base address 0x300.
General Operation
The GCTRL bit (Pacer Clock Control Register) will be used to start and stop the ADC
sampling process. In effect, the GCTRL bit becomes the gating mechanism to enable
or inhibit ADC sampling (triggering). Counter 1 and 2 will be set up as rate generators
with a time period of 10uS. The trigger source will be set to internal trigger using the
counter/timer (TS[1:0]=”11”). Counter 0 output will be tied to DIN0 to provide a
software time out mechanism by polling the INT bit in the status register; when the
INT bit is set, 500mS has elapsed and it is time to read-out data.
Hardware
Configuration
Hardware jumpers and physical wiring:
1. Set Base Address (0x300 is factory default)
2. Clock source set to 10MHz (no jumper installed at 1MHz)
3. DAS16jr/16 compatibility (no jumper installed at M0)
4. Allow FIFO superset (jumper installed at M1)
5. Bipolar analog inputs (no jumper installed at J9)
6. Single-Ended analog inputs (jumper installed a J8)
7. Analog inputs properly wired to the I/O connector J7.
8. CT_OUT0 is connected to DIN0
Software
Configuration
The following pseudo code illustrates register configurations
1. Control Register set to 0x00
2. Write any value to Clear Interrupt Register to clear any pending interrupts
39
Copyright (c) 1997-2005 by Apex Embedded Systems
Need something different? Please let us know.
3. Pacer Clock Control Register set to 0x00
4. Analog Configuration Register set to 0x00
5. Setup counter/timer 1 to provide a 1uS time-out period by writing 0x74 to the
counter/timer configuration register. Next, write 0x0A and 0x00 to
counter/timer 1 data register.
6. Setup counter/timer 2 to provide a 10uS time-out period by writing 0xB4 to
the counter/timer configuration register. Next, write 0x0A and 0x00 to
counter/timer 2 data register.
7. Setup counter/timer 0 to provide a 500mS time-out period by writing 0x34 to
the counter/timer configuration register. Next, write 0x50 and 0xC3 to
counter/timer 0 data register.
8. Reset the FIFO and set the channel register. Write 0xF0 to the channel
register. Wait for CNV bit to be cleared.
9. Reset the INT bit by writing to the Clear Interrupt Register.
10. Control Register set to 0x03.
11. Wait for INT bit to be set. When set, clear it by writing to the status register.
Next, set the Pacer Clock Control Register to 0x01 to begin sampling.
12. Wait for INT bit to be set. When set, clear it by writing to the status register.
Next, perform ADC reads until the FIFO is empty (FE=’1’) or 65536 samples
have been read-out.
13. Go to step #10.
/****************************************************************************/
void main()
{
/* base address set to factory default at 0x300 */
/* initialize STX104 */
outportb(0x309, 0x00); /* no interrupts, no DMA and s/w trigger */
outportb(0x308, 0x00); /* clear any pending interrupts
*/
outportb(0x30A, 0x00); /* set pacer clock */
outportb(0x30B, 0x00); /* Gain set to 10V */
outportb(0x30F, 0x74); /* Set up Counter/Timer #1
*/
outportb(0x30D, 0x0A); /* for 1uS output interval.
*/
outportb(0x30D, 0x00); /* Uses a 10MHz clock.
*/
outportb(0x30F, 0xB4); /* Setup Counter/Timer #2
*/
outportb(0x30E, 0x0A); /* for 10uS output interval.
*/
outportb(0x30E, 0x00); /* Uses a 1MHz clock pulse from CT1
*/
outportb(0x30F, 0x34); /* Set up Counter/Timer #0
*/
outportb(0x30C, 0x50); /* for 500mS time out period.
*/
outportb(0x30C, 0xC3); /* Uses a 10MHz clock.
*/
outportb(0x308, 0x00); /* clear any pending interrupts
*/
outportb(0x309, 0x03); /* trigger adc using counter/timer
*/
/* sync up with our 500mS timer */
while ( (inportb(0x308) & 0x10) == 0x00 ); /* wait for INT */
outportb(0x308, 0x00); /* clear any pending interrupts
*/
outportb(0x30A, 0x01); /* set pacer clock */
while (1)
{
if ( (inportb(0x308) & 0x10) == 0x10 ) /* if 500mS has past */
{
outportb(0x308, 0x00); /* clear interrupt */
Read_STX104_FIFO();
/* get the data */
}
else
{
/* do other things here */
}
}
40
Copyright (c) 1997-2005 by Apex Embedded Systems
Need something different? Please let us know.
Application Note S02: Minimizing ISR Timing When Using REP
INSW instruction and Illustrates 200,000 Samples per Second
capability.
Using the REP INSW is an effective way to increase system throughput and have
better control over system timing. When you get a FIFO interrupt from the STX104,
you will want to keep your interrupt service routine (ISR) as fast as possible. Let your
main-line code take care of actually reading out the FIFO. In this example the sample
rate is set to 200,000 samples per second, so the FIFO interrupts will occur at 2.56mS
intervals (or 390 interrupts per second). Simplified example code is shown below.
/****************************************************************************
Apex Embedded Systems
September 29, 2002
STX104 REP INSW Example
****************************************************************************/
#include <conio.h>
#include <stdio.h>
#include <dos.h>
/****************************************************************************/
/* These are the port addresses of the 8259 Programmable
Interrupt Controller (PIC).
*/
#define IMR
0x21
/* Interrupt Mask Register port */
#define ICR
0x20
/* Interrupt Control Port
*/
/* An end of interrupt needs to be sent to the Control Port of
the 8259 when a hardware interrupt ends. */
#define NSEOI
0x20
/* End Of Interrupt */
/****************************************************************************/
void interrupt (*old_isr_handler)(...);
int isr_count;
int prev_isr_count;
int mask;
int first_channel;
int last_channel;
int interrupt_number;
int base_address;
unsigned int ff_status;
int fbr, prev_fbr;
unsigned char ff_ff, ff_fe, ff_int;
/****************************************************************************/
void insw(WORD port, void *buf, int count)
{
_ES = FP_SEG(buf);
/* Segment of buf */
_DI = FP_OFF(buf);
/* Offset of buf */
_CX = count;
/* Number to read */
_DX = port;
/* Port
*/
asm
REP INSW;
41
Copyright (c) 1997-2005 by Apex Embedded Systems
Need something different? Please let us know.
}
/****************************************************************************/
void interrupt STX104_Isr( ... )
{
disable();
isr_count++; /* acquired at least two 256-sample FIFO blocks */
/* clear interrupt */
outportb(base_address+8, 0x00);
outportb(ICR, NSEOI);
enable();
}
/****************************************************************************/
void Install_Isr( int int_number )
{
unsigned char mask;
old_isr_handler = getvect( int_number+8 );
setvect( int_number+8, Tracer_Isr );
mask = 0x01 << int_number;
outportb(IMR, inportb(IMR) & ~mask); /* turn on PIC */
}
/****************************************************************************/
void Restore_Isr( int int_number )
{
unsigned char mask;
mask = 0x01 << int_number;
outportb(IMR, inportb(IMR) | mask); /* turn off PIC */
setvect( int_number+8, old_isr_handler );
}
/****************************************************************************/
void Get_Fifo_Status( void )
{
ff_status = ( ((unsigned int)inportb(base_address+10)) << 8 ) |
((unsigned int)inportb(base_address+15));
fbr = ff_status & 0x0fff;
if ( (ff_status & 0x1000)!=0x0000 ) ff_fe = 1;
else ff_fe = 0;
if ( (ff_status & 0x2000)!=0x0000 ) ff_ff = 1;
else ff_ff = 0;
if ( (ff_status & 0x8000)!=0x0000 ) ff_int = 1;
else ff_int = 0;
}
/****************************************************************************/
void Initialize( void )
{
/* initialize variables */
prev_isr_count = 0; /* not currently used */
base_address = 0x300;
last_channel = 15; first_channel = 0; interrupt_number = 3;
/* Initialize STX104 */
outportb(base_address+9, 0x00);
outportb(base_address+3, 0x00);
outportb(base_address+8, 0x00);
outportb(base_address+10, 0x00);
outportb(base_address+11, 0x00);
outportb(base_address+2, 0x00);
outportb(base_address+1030,0x40); /* function enable */
outportb(base_address+1028,0x40); /* disable triggers */
Install_Isr( interrupt_number );
/* set counter/timer 1 & 2 to generate trigger every 5uS */
outportb(0x30F,0x74); /* 10MHz clock source assummed */
outportb(0x30D,0x0A); /* 1uS output */
42
Copyright (c) 1997-2005 by Apex Embedded Systems
Need something different? Please let us know.
outportb(0x30D,0x00);
outportb(0x30F,0xB4);
outportb(0x30E,0x05); /* 5*1uS output */
outportb(0x30E,0x00);
outportb(base_address+11,0x00); /* gain of 10V */
/* channels = # + 1 */
mask = (last_channel & 0x0F) - (first_channel & 0x0F);
mask = mask << 4; /* burst amount */
mask = mask | 0x00;
outportb(base_address+10, mask);
mask = ((last_channel & 0x0F)<<4) | (first_channel & 0x0F);
outportb(base_address+2, mask); /* reset acquisition and fifo */
isr_count = 0; /* count indicates number of blocks gathered */
/* the following CNV test has been added to test for STX104
internal reset as a result of writing to Channel Register */
/* wait for CNV to be false to make sure reset complete */
while ( (inportb(base_address+8) & 0x80) == 0x80 ); /* wait */
mask = 0x00 | ((interrupt_number & 0x07)<<4) | 0x08 | 0x03;
outportb(base_address+9, mask);
outportb(base_address+1029,0x40); /* enable bursting */
outportb(base_address+1028,0x00); /* enable triggers */
}
/****************************************************************************/
void Terminate()
{
Restore_Isr( interrupt_number );
}
/****************************************************************************/
void main(void)
{
unsigned int data_buffer[32000];
int i, wait;
Initialize();
/* wait for at least one block */
wait = 0xff
while ( wait == 0xff )
{
if (isr_count > 0 ) wait = 0x00;
}
/* Interrupts Off */
Get_Fifo_Status();
Outportb( base_address+9, ( inportb(base_address+9) & 0x70 ) );
/* Read in n-blocks */
Get_Fifo_Status();
samples = fbr*256; /* read in n-blocks of data into the buffer */
insw(base_address, &data_buffer, samples);
/* Read in the remaining samples */
Get_Fifo_Status();
i = samples;
while ( ff_fe == 0 )
{
data_buffer[i] = inpw( base_address );
i++;
Get_Fifo_Status();
}
Terminate();
}
43
Copyright (c) 1997-2005 by Apex Embedded Systems
Need something different? Please let us know.
Application Note S03: Single Interrupt per Burst Operation
This application note illustrates how to implement burst sampling with one interrupt
per burst operation when in DAS1602 compatibility mode and M1 jumper is not
installed (FIFO jumper not installed). In the software example shown below the setup
is for ten burst operations per second with only one interrupt per burst operation.
In order to maintain strict DAS1602 compatibility (M1 jumper not installed), the
internal logic is designed such that during a burst operation one interrupt per sample is
generated, so to obtain only one interrupt per burst operation, requires a bit different
approach.
You will need to provide the following wiring at the I/O connector to generate only
one interrupt per burst operation. We need to run wires externally to connect the
counter/timers and DIN0 appropriately as shown below:
CT_OUT2 (J7.2) CT_GATE0 (J7.10)
CT_OUT0 (J7.3) DIN0 (J7.12)
The timing diagram below illustrates what we are attempting to do.
Begin Burst
Interrupt Here
CT OUT2
CT OUT0
n +1 sample
}
{ times
per burst
Basically, CT_OUT2 generates a trigger to begin each burst operation. CT_OUT0 will
generate an interrupt at the end of the burst operation by driving DIN0. In our
example counter/timer 1&2 are configured as a rate generator to generate pulses ten
times per second. Since we want to sample 16-channels during one burst operation,
we set the time out duration to 17-sample times (or about 170uS). The added 10uS
time interval provides additional guard time to ensure the burst has completed.
Counter/Timer 0 must be set up as hardware retriggerable one-shot (mode 1).
Counter/Timer 1&2 must be set up as rate generators (mode 2) and run freely with no
gating (GCTRL=1). Counter/timer 0 will use the 100KHz on board oscillator
(CT_SRC0=1). The trigger source will be the counter/timers (TS1=1 and TS0=1).
The interrupts will be enabled such that a rising edge on DIN0 will generate an
interrupt (AIE=1, FIE=1 and DMA=0).
44
Copyright (c) 1997-2005 by Apex Embedded Systems
Need something different? Please let us know.
Example code is shown below. It is assumed that a jumper is installed at postion M0
in order to enable DAS1602 compatibility, and jumper M1 installed to provide DIN0
interrupt generation.
/****************************************************************************
Apex Embedded Systems
January 14, 2003
STX104 Low Duty Cycle Sample Bursting
Performs one burst ten times per second. One interrupt is
generated for each burst.
****************************************************************************/
#include <conio.h>
#include <stdio.h>
#include <dos.h>
/****************************************************************************/
/* These are the port addresses of the 8259 Programmable
Interrupt Controller (PIC).
*/
#define IMR
0x21
/* Interrupt Mask Register port */
#define ICR
0x20
/* Interrupt Control Port
*/
/* An end of interrupt needs to be sent to the Control Port of
the 8259 when a hardware interrupt ends. */
#define NSEOI
0x20
/* End Of Interrupt */
/****************************************************************************/
void interrupt (*old_isr_handler)(...);
int isr_count;
int prev_isr_count;
int mask;
int first_channel;
int last_channel;
int burst_count;
unsigned int data_buffer[16];
int interrupt_number;
int base_address;
unsigned int ff_status;
int fbr, prev_fbr;
unsigned char ff_ff, ff_fe, ff_int;
/****************************************************************************/
void insw(WORD port, void *buf, int count)
{
_ES = FP_SEG(buf);
/* Segment of buf */
_DI = FP_OFF(buf);
/* Offset of buf */
_CX = count;
/* Number to read */
_DX = port;
/* Port
*/
asm
REP INSW;
}
/****************************************************************************/
void interrupt STX104_Isr( ... )
{
disable();
isr_count++; /* useful for debugging */
/* read samples to buffer */
insw(base_address+0, &data_buffer, burst_count );
/* clear interrupt */
outportb(base_address+8, 0x00);
outportb(ICR, NSEOI);
enable();
}
/****************************************************************************/
void Install_Isr( int int_number )
{
unsigned char mask;
old_isr_handler = getvect( int_number+8 );
45
Copyright (c) 1997-2005 by Apex Embedded Systems
Need something different? Please let us know.
setvect( int_number+8, Tracer_Isr );
mask = 0x01 << int_number;
outportb(IMR, inportb(IMR) & ~mask);
/* turn on PIC */
}
/****************************************************************************/
void Restore_Isr( int int_number )
{
unsigned char mask;
mask = 0x01 << int_number;
outportb(IMR, inportb(IMR) | mask); /* turn off PIC */
setvect( int_number+8, old_isr_handler );
}
/****************************************************************************/
void Initialize( void )
{
/* initialize variables */
prev_isr_count = 0; /* not currently used */
base_address = 0x300;
last_channel = 15; first_channel = 0; interrupt_number = 3;
burst_count = last_channel – first_channel + 1;
/* Initialize STX104 */
outportb(base_address+3, 0x00);
outportb(base_address+8, 0x00);
outportb(base_address+9, 0x00);
outportb(base_address+10, 0x00);
outportb(base_address+11, 0x00);
outportb(base_address+2, 0x00);
outportb(base_address+1030,0x40); /* function enable */
outportb(base_address+1028,0x40); /* disable triggers */
Install_Isr( interrupt_number );
/* set counter/timer 1 & 2 with pulse 10 times per second */
outportb(0x30F,0x74); /* 10MHz clock source assummed */
outportb(0x30D,0xE8);
outportb(0x30D,0x03);
outportb(0x30F,0xB4);
outportb(0x30E,0xE8);
outportb(0x30E,0x03);
/* set counter/timer 0 to be hardware triggerable, 17uS one-shot */
outportb(0x30F,0x32);
outportb(0x30C,0x11);
outportb(0x30C,0x00);
/* gain of 10V */
outportb(base_address+11,0x00);
/* set burst counter, CT_SRC0=1, and GCTRL=0 */
mask = (last_channel & 0x0F) - (first_channel & 0x0F);
mask = mask << 4; /* burst amount */
mask = mask | 0x02;
outportb(base_address+10, mask);
/* set channel register and reset acquisition controller and FIFO */
mask = ((last_channel & 0x0F)<<4) | (first_channel & 0x0F);
outportb(base_address+2, mask); /* reset acquisition and fifo */
isr_count = 0; /* count indicates number of blocks gathered */
/* the following CNV test has been added to test for STX104
internal reset as a result of writing to Channel Register */
/* wait for CNV to be false to make sure reset complete */
while ( (inportb(base_address+8) & 0x80) == 0x80 ); /* wait */
/* set ADC control register */
mask = 0x80 | ((interrupt_number & 0x07)<<4) | 0x08 | 0x03;
outportb(base_address+9, mask);
outportb(base_address+1029,0x40); /* enable bursting */
outportb(base_address+1028,0x00); /* enable triggers */
}
/****************************************************************************/
void Terminate()
{
Restore_Isr( interrupt_number );
}
46
Copyright (c) 1997-2005 by Apex Embedded Systems
Need something different? Please let us know.
/****************************************************************************/
void main(void)
{
unsigned int data_buffer[32000];
int i, wait;
Initialize();
/*
main loop – doing something useful here
*/
Terminate();
}
47
Copyright (c) 1997-2005 by Apex Embedded Systems
Need something different? Please let us know.
Application Note S04: Performing Raster or Line Scans.
This application note outlines two simple methods of implementing line or raster
scan functionality using the STX104 board. In either case, one could use the
DAC outputs to drive X and Y coordinates. This application note illustrates the
use of the large FIFO and burst mode. Detailed FIFO readout is described in
Application note S02.
Software triggered line scan sampling method:
1. STX104 hardware configuration: Install M0 and M1 configuration jumpers to
enable DAS1602 bursting capability and extended FIFO functions,
respectively.
2. Set up STX104 board to perform burst sampling and set for software
triggering.
3. Initialize X and Y positions.
4. Begin line or raster scan by adjusting the X and Y positions as needed.
5. At a predetermined X-position issue a software trigger, this will start a sample
burst (only one trigger per burst required when M1 jumper installed). Let the
STX104 perform the burst sampling and deposit the samples into the FIFO.
6. Repeat step #5 until line scan is complete.
7. At the end of the line scan, read the entire FIFO contents from the STX104
to software. See Application note S02 for details.
8. Go to step #4.
Timer/Counter triggered line scan sampling method:
1. STX104 hardware configuration: Install M0 and M1 configuration jumpers to
enable DAS1602 bursting and extended FIFO functions, respectively. Tie
DIN0 to +5V.
2. Set up STX104 board to perform burst sampling using hardware triggering
and keep gating to counter/timer off (GCTRL=1).
3. Initialize X and Y positions.
4. Begin line or raster scan by adjusting the X and Y positions as needed. In
addition, load counter/timer 1 & 2 with appropriate sample timing (this is to
keep the sample timing the same from line to line). Now set GCTRL=0 to
begin sampling at the chosen trigger time intervals.
5. Adjust X position (and possibly Y position) as required while the STX104
performs the sample bursting and deposits the samples into the FIFO.
6. Repeat step #5 until line scan is complete.
7. At the end of the line scan, set GCTRL=1 and read the entire FIFO contents
from the STX104 to software for further analysis.
8. Go to step #4.
48
Copyright (c) 1997-2005 by Apex Embedded Systems
Need something different? Please let us know.
Apex Embedded Systems
PC-Based Solutions for Industrial and Portable Applications
Limited Warranty
Unless altered by written agreement, APEX EMBEDDED SYSTEMS (APEX)
warrants to the original purchaser for a period of one year from the date of original
purchase, that the products shall be free from defects in material and workmanship.
APEX's obligation under this warranty is limited to replacing or repairing, at its option
and its designated site, any products (except consumables) within the warranty period
that are returned to APEX in the original shipping container(s) with an APEX RMA
number referenced on the shipping documents.
This warranty will not apply to products that have been misused, abused, or
altered. This warranty will not apply to prototypes of any kind, engineering
services, software or products under pre-release status. Any returns must be
supported by a Return Material Authorization (RMA) number issued by APEX.
APEX reserves the right to refuse delivery of any shipment containing any
shipping carton which does not have an RMA number displayed on the outside.
Purchaser shall prepay transportation to APEX's location. If returned parts or
products are repaired under the terms of this warranty, APEX will pay return
transportation charges. Allow six (6) to eight (8) weeks for warranty repairs.
THE FOREGOING WARRANTY IS IN LIEU OF ALL WARRANTIES,
EITHER EXPRESSED OR IMPLIED, INCLUDING, WITHOUT
LIMITATION, ANY IMPLIED WARRANTY OF MERCHANTABILITY OR
FITNESS FOR THE PARTICULAR PURPOSE, AND OF ANY OTHER
OBLIGATION ON THE PART OF APEX.
Warranty return address:
Apex Embedded Systems
Attn: Customer Service. RMA#_________
116 Owen Road
Monona, WI 53716
49