1
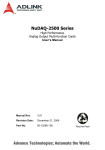
PCI-9527 24-Bit High Resolution Dynamic Signal Acquisition and Generation User’s Manual Manual Revision: 2.00 Revision Date: November 26, 2010 Part No: 50-11241-1000 Advance Technologies; Automate the World. PCI-9527 User’s Manual ADLINK Technology, Inc. Copyright 2010 Revision History ii Revision Release Date 2.00 2010/11/26 Description of Change(s) Document Created Initial Release ADLINK Technology Inc. Copyright 2010 PCI-9527 User’s Manual Preface Copyright 2010 ADLINK TECHNOLOGY INC. This document contains proprietary information protected by copyright. All rights are reserved. No part of this manual may be reproduced by any mechanical, electronic, or other means in any form without prior written permission of the manufacturer. Disclaimer The information in this document is subject to change without prior notice in order to improve reliability, design, and function and does not represent a commitment on the part of the manufacturer. In no event will the manufacturer be liable for direct, indirect, special, incidental, or consequential damages arising out of the use or inability to use the product or documentation, even if advised of the possibility of such damages. Environmental Responsibility ADLINK is committed to fulfill its social responsibility to global environmental preservation through compliance with the European Union's Restriction of Hazardous Substances (RoHS) directive and Waste Electrical and Electronic Equipment (WEEE) directive. Environmental protection is a top priority for ADLINK. We have enforced measures to ensure that our products, manufacturing processes, components, and raw materials have as little impact on the environment as possible. When products are at their end of life, our customers are encouraged to dispose of them in accordance with the product disposal and/or recovery programs prescribed by their nation or company. Trademarks PC, PS/2, and VGA are registered trademarks of International Business Machines Corp. Borland®, Borland® C, C++ Builder®, and Delphi® are registered trademarks of the Borland Software Corporation. LabVIEW™ is a trademark of National Instruments Corporation. Microsoft®, Visual Basic®, Visual C++®, Windows® Preface iii PCI-9527 User’s Manual ADLINK Technology Inc. Copyright 2010 98, Windows® NT, Windows® 2000, Windows® XP, and Windows® Vista® are registered trademarks of Microsoft® Corporation. PCI™, is a registered trademark of the Peripheral Component Interconnect Special Interest Group (PCI-SIG). Product names mentioned herein are used for identification purposes only and may be trademarks and/or registered trademarks of their respective companies. Conventions Take note of the following conventions used throughout this manual to make sure that users perform certain tasks and instructions properly. Additional information, aids, and tips that help users perform tasks. NOTE: iv CAUTION: Information to prevent minor physical injury, component damage, data loss, and/or program corruption when trying to complete a task. WARNING: Information to prevent serious physical injury, component damage, data loss, and/or program corruption when trying to complete a specific task. Preface ADLINK Technology Inc. Copyright 2010 PCI-9527 User’s Manual Contact us should you require any service or assistance. ADLINK Technology, Inc. Address: 9F, No.166 Jian Yi Road, Chungho City, Taipei County 235, Taiwan קᗼխࡉؑ৬ԫሁ 166 ᇆ 9 ᑔ Tel: +886-2-8226-5877 Fax: +886-2-8226-5717 Email: [email protected] Ampro ADLINK Technology, Inc. Address: 5215 Hellyer Avenue, #110, San Jose, CA 95138, USA Tel: +1-408-360-0200 Toll Free: +1-800-966-5200 (USA only) Fax: +1-408-360-0222 Email: [email protected] ADLINK Technology (China) Co., Ltd. Address: Ϟ⍋Ꮦ⌺ϰᮄऎᓴ∳催⾥ᡔುऎ㢇䏃 300 ো(201203) 300 Fang Chun Rd., Zhangjiang Hi-Tech Park, Pudong New Area, Shanghai, 201203 China Tel: +86-21-5132-8988 Fax: +86-21-5132-3588 Email: [email protected] ADLINK Technology Beijing Address: ࣫ҀᏖ⍋⎔ऎϞഄϰ䏃 1 োⲜ߯ࡼॺ E ᑻ 801 ᅸ(100085) Rm. 801, Power Creative E, No. 1, B/D Shang Di East Rd., Beijing, 100085 China Tel: +86-10-5885-8666 Fax: +86-10-5885-8625 Email: [email protected] ADLINK Technology Shenzhen Address: ⏅ഇᏖफቅऎ⾥ᡔುफऎ催ᮄफϗ䘧᭄ᄫᡔᴃು A1 ᷟ 2 ὐ C ऎ (518057) 2F, C Block, Bldg. A1, Cyber-Tech Zone, Gao Xin Ave. Sec. 7, High-Tech Industrial Park S., Shenzhen, 518054 China Tel: +86-755-2643-4858 Fax: +86-755-2664-6353 Email: [email protected] Preface v PCI-9527 User’s Manual ADLINK Technology Inc. Copyright 2010 ADLINK Technology (Europe) GmbH Address: Nord Carree 3, 40477 Duesseldorf, Germany Tel: +49-211-495-5552 Fax: +49-211-495-5557 Email: [email protected] ADLINK Technology, Inc. (French Liaison Office) Address: 15 rue Emile Baudot, 91300 Massy CEDEX, France Tel: +33 (0) 1 60 12 35 66 Fax: +33 (0) 1 60 12 35 66 Email: [email protected] ADLINK Technology Japan Corporation Address: 151-0072 ᧲੩ㇺᷦ⼱ᐈ䊱⼱㩷 1-1-2 ᦺᣣ↢ᐈ䊱⼱䊎䊦 8F Asahiseimei Hatagaya Bldg. 8F 1-1-2 Hatagaya, Shibuya-ku, Tokyo 151-0072, Japan Tel: +81-3-4455-3722 Fax: +81-3-5333-6040 Email: [email protected] ADLINK Technology, Inc. (Korean Liaison Office) Address: 昢殾柢 昢爎割 昢爎壟 1506-25 穢壊 B/D 2 猻 2F, Hando B/D, 1506-25, Seocho-Dong, Seocho-Gu, Seoul 137-070, Korea Tel: +82-2-2057-0565 Fax: +82-2-2057-0563 Email: [email protected] ADLINK Technology Singapore Pte. Ltd. Address: 84 Genting Lane #07-02A, Cityneon Design Centre, Singapore 349584 Tel: +65-6844-2261 Fax: +65-6844-2263 Email: [email protected] ADLINK Technology Singapore Pte. Ltd. (Indian Liaison Office) Address: No. 1357, "Anupama", Sri Aurobindo Marg, 9th Cross, JP Nagar Phase I, Bangalore - 560078, India Tel: +91-80-65605817 Fax: +91-80-22443548 Email: [email protected] vi Preface ADLINK Technology Inc. Copyright 2010 PCI-9527 User’s Manual Table of Contents 1 Introduction ........................................................................ 1 1.1 Features............................................................................... 2 1.2 Applications ......................................................................... 2 1.3 Specifications....................................................................... 3 1.4 1.3.1 Analog Input ............................................................... 3 1.3.2 Analog Output............................................................. 7 1.3.3 Triggers, Timebase..................................................... 9 1.3.4 General Specifications.............................................. 10 Software Support ............................................................... 11 1.4.1 Software Support...................................................... 11 1.4.2 Programming Library ................................................ 11 1.4.3 DSA-DASK ............................................................... 11 2 Getting Started ................................................................. 13 2.1 Installation Environment .................................................... 13 2.2 Package Contents ............................................................. 15 2.3 Device Layout and IO Connectors..................................... 16 2.4 Installing the Module.......................................................... 17 2.5 Signal Connection.............................................................. 18 2.5.1 BNC Connector Polarity ........................................... 18 2.5.2 Analog Input Connection .......................................... 18 2.5.3 Analog Output Connection ....................................... 19 3 Operation Theory ............................................................. 21 3.1 Functional Block Diagram.................................................. 21 3.2 Analog Input Channel ........................................................ 22 3.2.1 Analog Input Front-End Configuration ...................... 22 3.2.2 Input Range and Data Format .................................. 24 3.2.3 ADC and Analog Input Filter..................................... 25 3.2.4 FIFO and DMA Transfer For Analog Input ............... 26 Table of Contents vii PCI-9527 User’s Manual 3.3 3.4 3.5 ADLINK Technology Inc. Copyright 2010 Analog Output Channel...................................................... 28 3.3.1 Analog Output Front-End Configuration ................... 28 3.3.2 Output Range and Data Format ............................... 29 3.3.3 DAC and Analog Output Filter .................................. 29 3.3.4 FIFO and DMA Transfer For Analog Output............. 30 Trigger Source and Trigger Mode...................................... 31 3.4.1 Trigger Sources ........................................................ 31 3.4.2 Trigger Mode ............................................................ 33 ADC and DAC Timing Control ........................................... 35 3.5.1 Timebase Architecture.............................................. 35 3.5.2 DDS Timing VS ADC/DAC Relationship................... 35 3.5.3 Timing Constraint When AI and AO Enabled Simultaneously ..................................... 36 3.5.4 Filter Delay in ADC and DAC.................................... 37 4 Calibration ......................................................................... 39 viii 4.1 Calibration Constant .......................................................... 39 4.2 Auto-Calibration ................................................................. 40 4.3 Offset Error Compensation During AI Sampling Rate Change ....................................... 40 Table of Contents ADLINK Technology Inc. Copyright 2010 PCI-9527 User’s Manual List of Figures Figure 1-1: Figure 1-2: Figure 1-3: Figure 3-1: Figure 3-2: Figure 3-3: Figure 3-4: Figure 3-5: PCI-9527 Product Image ................................................. 1 Analog Input Channel Bandwidth, ±10 V Input Range .... 5 Magnitude Response of AC Couple of Input Channel ..... 6 Linked List of PCI Address DMA Descriptors ................ 27 Trigger Architecture of the PCI-9527 ............................. 31 Analog Trigger Conditions ............................................. 32 Post-trigger Acquisition / Waveform Generation............ 33 Delay Trigger Mode Acquisition / Waveform Generation.................................................... 34 Figure 3-6: PCI-9527 Timebase Architecture................................... 35 List of Figures xi PCI-9527 User’s Manual ADLINK Technology Inc. Copyright 2010 This page intentionally left blank. xii List of Figures ADLINK Technology Inc. Copyright 2010 PCI-9527 User’s Manual List of Tables Table Table Table Table Table Table Table Table Table Table Table Table Table Table Table Table Table Table Table Table Table Table Table Table Table Table Table Table Table Table 1-1: 1-2: 1-3: 1-4: 1-5: 1-6: 1-7: 1-8: 1-9: 1-10: 1-11: 1-12: 1-13: 1-14: 1-15: 1-16: 1-17: 1-18: 2-1: 2-2: 3-1: 3-2: 3-3: 3-4: 3-5: 3-6: 3-7: 3-8: 3-9: 4-1: List of Tables Channel Characteristics................................................... 3 Crosstalk.......................................................................... 4 Transfer Characteristics................................................... 4 Analog Input Channel Bandwidth .................................... 4 AC Coupling..................................................................... 5 Integrated Electronic Piezoelectric (IEPE)....................... 6 Channel Characteristics................................................... 7 AO DC Accuracy.............................................................. 7 Output Impedance ........................................................... 8 AO Dynamic Characteristics............................................ 8 Triggers............................................................................ 9 Analog Trigger ................................................................. 9 Digital Trigger .................................................................. 9 Timebase ......................................................................... 9 Bus and Physical Specifications .................................... 10 Environment Requirements ........................................... 10 Calibration...................................................................... 10 Power Consumption ...................................................... 10 Analog Input Connection ............................................... 18 Analog Output Connection............................................. 19 Input Configurations....................................................... 22 Input Range and Data Format ....................................... 24 ADC Sample Rates VS DSS Outpu Clock..................... 25 Output Configuration...................................................... 28 Digital Input Code and Analog Output Range................ 29 DAC (Digital-to-Analog Converter) ................................ 29 Timing Relationship of the ADC, DAC and DDS Clock . 35 ADC Filter Delay ............................................................ 37 DAC Filter Delay ............................................................ 37 Offset Compensation Time Required for Different Sampling Rates.......................................... 40 xiii PCI-9527 User’s Manual ADLINK Technology Inc. Copyright 2010 This page intentionally left blank. xiv List of Tables ADLINK Technology Inc. Copyright 2010 1 PCI-9527 User’s Manual Introduction The PCI-9527 is a high-performance, 2-CH analog input and 2-CH analog output dynamic signal acquisition board. This board is specifically designed for use in audio testing, acoustic measurement, and vibration analysis applications. The PCI-9527 features two 24-bit simultaneous sampling analog input channels. The 24-bit sigma-delta ADC provides a sampling rate up to 432 KS/s at high resolutions, making it idea for higher bandwidth dynamic signal measurements. The sampling rate can be adjusted by setting the onboard DDS clock source to an appropriate frequency. All channels are sampled simultaneously and accept an input range from ±40 V to ±0.316 V. The PCI-9527 analog input supports software selectable AC or DC coupling and 4 mA bias current for integrated electronic piezoelectric (IEPE) sensors. The PCI-9527 also has two channels of 24-bit resolution, high fidelity analog output. The outputs occur simultaneously at software programmable rates up to 216 KS/s. A software programmable output range of 0.1 V, 1 V, and 10 V is available on the output channels. Figure 1-1: PCI-9527 Product Image Introduction 1 PCI-9527 User’s Manual ADLINK Technology Inc. Copyright 2010 1.1 Features 24-Bit Sigma-Delta ADC and DAC 2-CH simultaneous sampling analog inputs 2-CH simultaneous updated analog outputs 432 KS/s maximum ADC sampling rate with software programmable rate 216 KS/s maximum DAC sampling rate with software programmable rate Programmable input range: ±40 V, ±10 V, ±3.16 V, ±1 V, ±0.316 V Programmable output range: ±0.1 V, ±1 V, ±10 V AC or DC input coupling, software selectable A trigger I/O connector for external digital trigger signal Support IEPE output on each analog input, software-configurable 1.2 Applications 2 Audio signal testing Acoustic measurements Environment noise testing Vibration test Machine conditioning monitoring Introduction ADLINK Technology Inc. Copyright 2010 PCI-9527 User’s Manual 1.3 Specifications 1.3.1 Analog Input Channel Characteristics Number of channels 2 Input configurations Differential or pseudodifferential Input coupling AC or DC, software selectable ADC resolution 24-bits ADC type Delta-sigma Sample rates (fs) 432KS/s maximum, 2KS/s to 432KS/s in 454.7uS/s increments, maximum FIFO buffer size Total 4096 samples shared for AI channels Data transfers Direct memory access (DMA) Input signal range ±40V ±10V ±3.16V ±1V ±0.316V Input Common Mode Range ±10V for both Differential and Pseudodifferential Configuration Overvoltage protection Differential input: ±40 Vpk Pseudo-Differential Positive terminal: ±40 Vpk Negative terminal: ±10 Vpk Input impedance Differential Configuration Between (+) and GND: 1MΩ Between (-) and GND: 1MΩ Pseudodifferential Configuration Between (+) and GND: 1MΩ Between (-) and GND: 50Ω Table 1-1: Channel Characteristics Introduction 3 PCI-9527 User’s Manual ADLINK Technology Inc. Copyright 2010 Crosstalk Crosstalk Adjacent channel < -110 dB Measured with +/-10V input Input signal is 18 Vpp @ 1KHz sine wave Table 1-2: Crosstalk Transfer Characteristics AI Offset Error AI Gain Error Input Range Offset (±mV) @ Tcal ± 5°C ±40 V 120 ±10 V 3 ±3.16 V 1.4 ±1 V 0.6 ±0.316 V 0.5 ±10 V ±0.5% max Table 1-3: Transfer Characteristics Analog Input Channel Bandwidth Input Range Bandwidth (-3dB) ±40 V 30 KHz ±10 V, ±3.16 V, ±1 V, ±0.316 V 130 KHz Table 1-4: Analog Input Channel Bandwidth 4 Introduction ADLINK Technology Inc. Copyright 2010 PCI-9527 User’s Manual 1 0 Magnitude (dB), Refer to 10Hz -1 -2 -3 -4 -5 -6 -7 -8 -9 -10 1K 10K 100K Frequency (Hz) Figure 1-2: Analog Input Channel Bandwidth, ±10 V Input Range AC Coupling -3 dB cutoff frequency 6.5 Hz -0.1 dB cutoff frequency 40 Hz Table 1-5: AC Coupling Introduction 5 PCI-9527 User’s Manual ADLINK Technology Inc. Copyright 2010 0 -1 -2 -3 -4 dB refer to 100Hz -5 -6 -7 -8 -9 -10 -11 -12 -13 -14 -15 -16 1 10 100 Input Frequency (Hz) Figure 1-3: Magnitude Response of AC Couple of Input Channel Integrated Electronic Piezoelectric (IEPE) Current 4 mA, each channel independently software selectable Compliance 24 V Table 1-6: Integrated Electronic Piezoelectric (IEPE) 6 Introduction ADLINK Technology Inc. Copyright 2010 1.3.2 PCI-9527 User’s Manual Analog Output Channel Characteristics Number of channels 2 Output configurations Differential or Pseudodifferential (50 to chassis ground), balance output, each channel independently software selectable Output coupling DC DAC resolution 24-bits DAC type Delta-sigma Update rates (fs) 1KS/s to 216 KS/s in 227.3 uS/s increments, maximum Minimum working load 600 Ω Short circuit protection Indefinite protection between positive and negative Onboard FIFO buffer size 2048 samples for each AO channel Data transfers Direct memory access (DMA) Output signal range ±10 V ±1 V ±0.1 V Table 1-7: Channel Characteristics AO DC Accuracy Output Range ±0.1 V AO Offset Error, ±mV AO Gain Error, ±% 1 0.5 ±1 V 1 0.4 ±10 V 1 0.4 Table 1-8: AO DC Accuracy Introduction 7 PCI-9527 User’s Manual ADLINK Technology Inc. Copyright 2010 Output Impedance Differential Pseudodifferential Configuration Configuration Between positive output and chassis ground 10 KΩ 10 KΩ Between negative output and chassis ground 10 KΩ 50 Ω Between positive and negative outputs 100 KΩ 100 KΩ Table 1-9: Output Impedance AO Dynamic Characteristics -3dB bandwidth, analog 110 KHz AO THD + N 100 Hz - 20 KHz, 200 KS/s ±0.1V -89 dB ±1 V -101 dB ±10V -101 dB Table 1-10: AO Dynamic Characteristics 8 Introduction ADLINK Technology Inc. Copyright 2010 1.3.3 PCI-9527 User’s Manual Triggers, Timebase Triggers Trigger source Software command, analog input, external digital trigger Trigger mode Post trigger, delay trigger Trigger function Start trigger Table 1-11: Triggers Analog Trigger Source AI0 - AI1 Level ± Full-scale, programmable Trigger conditions Positive or negative Trigger resolution 24-bit Table 1-12: Analog Trigger Digital Trigger Sources Front panel SMB connector Compatibility 5V TTL Trigger polarity Rising or falling edge Pulse width 25 ns minimum Table 1-13: Digital Trigger Timebase Frequency 80 MHz Internal Timebase Accuracy ±20 ppm, over operating temperature range Table 1-14: Timebase Introduction 9 PCI-9527 User’s Manual 1.3.4 ADLINK Technology Inc. Copyright 2010 General Specifications Bus and Physical Bus interface 32-bit / 33MHz PCI bus, support 3.3V and 5V PCI signaling Physical dimension PCI: Half-size PCI card 106.6 mm (H) X 174.6 mm (W) Table 1-15: Bus and Physical Specifications Environment Requirements Operating environment Temperature:0°C - 50°C Relative humidity: 5% - 95%, non-condensing Storage Environment Temperature: -20°C - +80°C Relative humidity: 5% - 95%, non-condensing Table 1-16: Environment Requirements Calibration Onboard reference +5V Temperature coefficient ≤ ±5 ppm/°C Self-Calibration On software command, the PCI-9527 corrects offset and gain error relative to internal high stability, high precision reference External Calibration Interval 1 year Warm-up time 15 minutes Table 1-17: Calibration Power Consumption Power Rail Standby Current (mA) Full Load (mA) +5V 720 1490 +12V 290 340 Table 1-18: Power Consumption 10 Introduction ADLINK Technology Inc. Copyright 2010 PCI-9527 User’s Manual 1.4 Software Support 1.4.1 Software Support ADLINK provides versatile software drivers and packages to suit various user approaches to building a system. Aside from program-ming libraries, such as DLLs, for most Windows-based systems, ADLINK also provides drivers for other application environment such as LabVIEW®. All software options are included in the ADLINK All-in-One CD. Commercial software drivers are protected with licensing codes. Without the code, you may install and run the demo version for trial/demonstration purposes only up to two hours. Contact your ADLINK dealers if you want to purchase the software license. 1.4.2 Programming Library For customers who want to write their own programs, ADLINK provides the DSA-DASK function library that is compatible with various operating systems. 1.4.3 DSA-DASK The DSA-DASK includes device drivers and DLL for Windows 98/ NT/2000/XP/Vista/Win7. DLL is binary compatible across Windows 98/ NT/2000/XP/Vista/Win. This means all applications developed with DSA-DASK are compatible with these Windows operating systems. The developing environment may be VB, VC++, Delphi, BC5, or any Windows programming language that allows calls to a DLL. The DSA-DASK user's and function reference manuals are in the ADLINK All-in-One CD. (\\Manual\Software Package\DSA-DASK). Introduction 11 PCI-9527 User’s Manual Supported Operating System Windows 7/ Vista/XP Linux Recommended Application Environments VB.NET/VC.NET/VB/VC++/BCB/Delphi Driver Support DAQPilot for Windows DAQPilot for LabVIEW DASK for Windows DASK/X for Linux Toolbox adapter for MATLAB Application Software 12 ADLINK Technology Inc. Copyright 2010 Dynamic Signal Assistant ADLINK’s Dynamic Signal Assistant is a ready-to-run software utility designed for dynamic signal acquisition modules, such as the PCI-9527. This software provides a windows-based configuration interface for setting parameters, in addition to a real-time visualized data display on the screen. An instrument-like user interface is also provided for basic waveform generation. The Dynamic Signal Assistant can also log data acquired from hardware modules. With the Dynamic Signal Assistant, signal acquisition and generation can be performed in just a few minutes without any programming effort. Introduction ADLINK Technology Inc. Copyright 2008 2 PCI-9527 User’s Manual Getting Started This chapter further describes the proper installation environment, installation procedures, its package contents and basic information users should be aware of. NOTE: Diagrams and images of equipment illustrated are used for reference only. Actual system configuration and specs may very. 2.1 Installation Environment Whenever unpacking and preparing to install any equipment described in this manual, please refer to the Important Safety Instructions chapter of this manual. Only install equipment in well lit areas on flat, sturdy surfaces with access to basic tools such as flat and cross head screwdrivers, preferably with magnetic heads as screws and standoffs are small and easily misplaced. Recommended Installation Tools Phillips (cross-head) screwdriver Flat-head screwdriver Anti-static Wrist Strap Anti-static mat ADLINK PCI-9527 DAQ cards are electro-static sensitive equipment that can be easily damaged by static electricity. The equipment must be handled on a grounded anti-static mat. The operator must wear an anti-static wristband, grounded at the same point as the anti-static mat. Getting Started 13 PCI-9527 User’s Manual ADLINK Technology Inc. Copyright 2008 Inspect the carton and packaging for damage. Shipping and handling could cause damage to the equipment inside. Make sure that the equipment and its associated components have no damage before installing. CAUTION: 14 The equipment must be protected from static discharge and physical shock. Never remove any of the socketed parts except at a static-free workstation. Use the antistatic bag shipped with the product to handle the equipment and wear a grounded wrist strap when servicing. Getting Started ADLINK Technology Inc. Copyright 2008 PCI-9527 User’s Manual 2.2 Package Contents Before continuing, check the package contents for any damage and check if the following items are included in the packaging: PCI-9524 Multi-function Data Acquisition Card ADLINK All-in-one Compact Disc Software Installation Guide PCI-9524 User’s Manual If any of these items are missing or damaged, contact the dealer from whom you purchased the product. Save the shipping materials and carton in case you want to ship or store the product in the future. WARNING: WARNING: DO NOT install or apply power to equipment that is dam-aged or if there is missing/incomplete equipment. Retain the shipping carton and packing materials for inspection. Please contact your ADLINK dealer/vendor immediately for assistance. Obtain authorization from your dealer before returning any product to ADLINK. Getting Started 15 PCI-9527 User’s Manual ADLINK Technology Inc. Copyright 2008 2.3 Device Layout and IO Connectors AI0 AI1 AO0 AO1 Ext.TRG 16 Getting Started ADLINK Technology Inc. Copyright 2008 PCI-9527 User’s Manual 2.4 Installing the Module To install the card: 1. Turn off the system/chassis and disconnect the power plug from the power source. 2. Remove the system/chassis cover. 3. Select the PCI slot that you intend to use, then remove the bracket opposite the slot, if any. 4. Align the card connectors (golden fingers) with the slot, then press the card firmly until the card is completely seated on the slot. 5. Secure the card to the chassis with a screw. 6. Replace the system/chassis cover. 7. Connect the power plug to a power source, then turn on the system/chassis. Getting Started 17 PCI-9527 User’s Manual ADLINK Technology Inc. Copyright 2008 2.5 Signal Connection 2.5.1 BNC Connector Polarity The following figure shows the polarity of the BNC connector: Positive (+) Negative (-) 2.5.2 Analog Input Connection The PCI-9527 input channels can be configured as pseudo-differential or differential. For ground-reference signal source, user should configure analog input as differential. For floating signal sources, the analog input should be configured as a pseudo-differential input in order to provide a reference. In pseudodifferential configuration, the (-) port of AI is connected to ground through a 50 Ω resistor. Signal Source Type AI Channel Configuration Floating Pseudo Differential Ground-Reference Differential Table 2-1: Analog Input Connection 18 Getting Started ADLINK Technology Inc. Copyright 2008 2.5.3 PCI-9527 User’s Manual Analog Output Connection If the DUT inputs are ground-referenced, the differential output mode can be used for the elimination of measuring errors which caused by ground loops. If the DUT inputs are in a floating system (ex. a floating earphone), setting to pseudo-differential output mode will provide a reference ground connected to the positive output of the BNC through a 50 Ω resistor. DUT Input Reference Type AO Channel Configuration Floating Pseudo Differential Ground-Reference Differential Table 2-2: Analog Output Connection Getting Started 19 PCI-9527 User’s Manual 20 ADLINK Technology Inc. Copyright 2008 Getting Started ADLINK Technology Inc. Copyright 2010 3 PCI-9527 User’s Manual Operation Theory This chapter contains information about the PCI-9527 operating concepts, including analog input, analog output, triggering and timing. 3.1 Functional Block Diagram AI Channel 0 Front End Circuit ADC Interface Offset/Gain Correction FP FIFO Calibration Mux and Reference Src AO Channel 0 Front End Circuit PCI Interface Timing Control and Trigger In DAC Interface Local FIFO Offset/Gain Correction PF FIFO PCI Bus AI Channel 1 Front End Circuit DDS AO Channel 1 Front End Circuit Operation Theory 21 PCI-9527 User’s Manual ADLINK Technology Inc. Copyright 2010 3.2 Analog Input Channel 3.2.1 Analog Input Front-End Configuration 10~24V @ 4mA (adjustable) IEPE x1 or x1/4 x1 x3.16 x10 x31.6 AI+ Calibration Source AI- ADC +2.5V Input Configuration, Differential or Pseudo Differential The differential input mode provides the anode and cathode inputs of the BNC connector that respond to signal voltage difference between them. If the signal source is ground-referenced, the differential input mode can be used for the common-mode noise rejection. If the signal source is a floating signal, setting to pseudo-differential input mode will provide a reference ground connected to the cathode input of the BNC through a 50ohm resistor. This will prevent the floating source from drifting over the input common-mode range. The recommended configurations for the signal sources are as followes. Signal Source Type Card Configuration Floating Pseudo Differential Ground-Reference Differential Table 3-1: Input Configurations 22 Operation Theory ADLINK Technology Inc. Copyright 2010 PCI-9527 User’s Manual Input Coupling, DC Coupling or AC Coupling The input coupling can be AC or DC. When you select DC coupling, the DC offset present in the input signal is pass to ADC. Use the DC coupling configuration if the signal source has a small amount of offset voltage or if the DC content of the signal is important. When you select AC coupling, the DC offset present in the input signal is removed. Use the AC coupling configuration if the DC content of the input signals that you want to reject. AC coupling enable a high pass R-C filter through the input signal path. The corner frequency (-3dB) is about 3Hz. Input for IEPE For applications that require sensors such as accelerometer or microphone, PCI-9527 provides an excitation current source. The common excitation current is usually between 4mA for these IEPE sensors. A DC voltage offset is generated because of the excitation current and sensor impedance. When enable the IEPE current sources, the PCI-9527 will set input configuration to AC coupling automatically. Operation Theory 23 PCI-9527 User’s Manual 3.2.2 ADLINK Technology Inc. Copyright 2010 Input Range and Data Format When using an A/D converter, users should first know about the properties of the signal to be measured. Users can decide which channel to use and how to connect the signals to the card. Please refer to section 2.5 for signal connections. The A/D acquisition is initiated by a trigger source; users must decide how to trigger the A/D conversion. The data acquisition will start once a trigger condition is matched. After the end of an A/D conversion, the A/D data is buffered in a Data FIFO. The A/D data can now be transferred into the PC's memory for further processing. The following table illustrates the idea transfer characteristics of various input ranges of the PCI-9527. The data format of the PCI9527 is 2’s complement. Description Bipolar Analog Input Range ±10V ±3.1622776V ±1V Digital Code Full-scale Range ±40V ±0.316227V Least significant bit 4.76uV 1.19uV 0.37uV 0.119uV 0.037uV FSR-1LSB 39.99999952V 9.99999881V 3.1622773V 0.999999881V 0.31622773V 7FFFFF Midscale +1LSB 4.76uV 1.19uV 0.37uV 0.119uV 0.037uV 000001 Midscale 0V 0V 0V 0V 0V 000000 Midscale –1LSB -4.76uV -1.19uV -0.37uV -0.119uV -0.037uV FFFFFF -FSR -40V -10V -3.1622776V -1V -0.31622776V 800000 Table 3-2: Input Range and Data Format 24 Operation Theory ADLINK Technology Inc. Copyright 2010 3.2.3 PCI-9527 User’s Manual ADC and Analog Input Filter ADC (Analog-to-Digital Converter) The ADCs on PCI-9527 are sigma-delta ADC which is very suitable for vibration, audio and acoustic measurement. The analog side of sigma-delta ADC is a 1-bit ADC. On digital side, it performs oversampling, noise shaping and digital filtering. For example, if desired sampling rate is 108KS/s, each ADC samples input signal at 6.912MS/s, 64 times the sampling rate. The 1-bit 6.912MS/s data streams from 1-bit ADC to its internal digital filter circuit to produce 24-bit data at 108KS/s. The noise shaping removes quantization noise from low frequency to high frequency. With the digital filter at the last stage, the digital filter improves the ADC resolution and removes high frequency quantization noise. The relationship between ADC sample rate and DDS output clock is as followed Sampling Rate DDS CLK 2 K - 54 KHz 54 K - 108 KHz 108 K-216 KHz 216 K - 432 KHz 512 K - 13.824 MHz 6.912 M-13.824 MHz 6.912 M-13.824 MHz 13.824 M - 27.648 MHz Table 3-3: ADC Sample Rates VS DSS Outpu Clock Filter Each channel has a two-pole low pass filters. The filters limit the bandwidth of the signal path and is useful for rejecting out of band noise. Operation Theory 25 PCI-9527 User’s Manual 3.2.4 ADLINK Technology Inc. Copyright 2010 FIFO and DMA Transfer For Analog Input FIFO There is only one FIFO implemented on PCI-9527 for analog input data storage. The FIFO depth is 4096 samples. The 4096 samples are shared for both AI channels. When user enables only one AI channel, the 4096-sample-FIFO is used for one channel data storage. When user enables two AI channels, the 4096-sample-FIFO shares for both channel. Bus-mastering DMA Data Transfer PCI bus-mastering DMA is essential for continuous data streaming, as it helps to achieve full potential PCI bus bandwidth, and also to improve bus efficiency. The bus-mastering controller controls the PCI bus when it becomes the master of which, and the host CPU is free of burden since data are directly transferred to the host memory without intervention. Once analog input operation begins, the DMA returns control of the program. During DMA transfer, the hardware temporarily stores acquired data in the onboard AD Data FIFO, and then transfers the data to a user-defined DMA buffer in the computer. By using a high-level programming library for high speed DMA data acquisition, users simply need to assign the sampling period and the number of conversions into their specified counters. After the AD trigger condition is met, the data will be transferred to the system memory by the bus-mastering DMA. In a multi-user or multi-tasking OS, such as Microsoft Windows, Linux, and so on, it is difficult to allocate a large continuous memory block. Therefore, the PCI controller provides DMA transfer with scatter-gather function to link non-continuous memory blocks into a linked list so users can transfer large amounts of data without being limited by memory limitations. In non-scatter-gather mode, the maximum DMA data transfer size is 2 MB double words (8 MB bytes); in scatter-gather mode, there is no limitation on DMA data transfer size except the physical storage capacity of your system. Users can also link descriptor nodes circularly to achieve a multibuffered DMA. Figure 4-6 illustrates a linked list that is comprised of three DMA descriptors. Each descriptor contains a PCI address, 26 Operation Theory ADLINK Technology Inc. Copyright 2010 PCI-9527 User’s Manual PCI dual address, a transfer size, and the pointer to the next descriptor. PCI address and PCI dual address support 64-bit addresses which can be mapped into more than 4 GB of address space. First PCI Address PCI Address PCI Address First Dual Address Dual Address Dual Address Transfer Size Transfer Size Transfer Size Next Descriptor Next Descriptor Next Descriptor PCI Bus Local Memory (FIFO) Figure 3-1: Linked List of PCI Address DMA Descriptors Operation Theory 27 PCI-9527 User’s Manual ADLINK Technology Inc. Copyright 2010 3.3 Analog Output Channel Attenuator x1 x0.1 x0.01 Differential Driver IV Converter XLR Switch AO GND AO CH0+ DAC CH0 AO CH0- / AOGND IV Converter CHASSIS GND Differential Driver AO CH1+/ AO CH0DAC CH1 3.3.1 AO CH1- / AOGND Analog Output Front-End Configuration Output Configuration - Differential, Pseudo Differential The differential output mode provides the anode and cathode outputs of the BNC connector that respond to the DAC outputs voltage difference between them. If the DUT inputs are groundreferenced, the differential output mode can be used for the elimination of measuring errors which caused by ground loops. If the DUT inputs are in a floating system (ex. a floating earphone), setting to pseudo-differential output mode will provide a reference ground connected to the cathode output of the BNC through a 50ohm resistor. This will prevent the floating system from drifting over its input common-mode range. The recommended configurations respect to the input reference types of DUT are as followed. DUT Input Reference Type Card Configuration Floating Pseudo Differential Ground-Reference Differential Table 3-4: Output Configuration 28 Operation Theory ADLINK Technology Inc. Copyright 2010 3.3.2 PCI-9527 User’s Manual Output Range and Data Format The following table illustrates the PCI-9527 idea transfer characteristics of various input codes versus output voltages. The data format of the PCI-9527 is two’s-complement. Description Digital Input Code Bipolar Analog Output Full-scale Range ±10V ±1V ±0.1V Least significant bit 1.19uV 0.119uV 0.012uV FSR-1LSB 7FFFFF 9.99999881V 0.999999881V 0.099999988V Midscale +1LSB 000001 1.19uV 0.119uV Midscale 000000 0V 0V 0V Midscale –1LSB FFFFFF -1.19uV -0.119uV -0.012uV -FSR 800000 -10V -1V -0.1V 0.012uV Table 3-5: Digital Input Code and Analog Output Range 3.3.3 DAC and Analog Output Filter DAC (Digital-to-Analog Converter) The DACs on PCI-9527 are two 24-bit delta-sigma DACs. It separates the sample rates into four regions between 1KS/s to 216KSps (table 3.3.1). Each region has different bandwidth of internal digital filter, this will optimize the DA dynamic performance over all sample rate region. For example, when setting at lower sample rate, the digital filter bandwidth is lower too. It improves SNR of output current and release the need for external analog low pass filter. The relationship between DAC sample rate and DDS output clock is as followed Update Rate DDS CLK 1K-27KHz 27K-54KHz 54K-108KHz 108K-216KHz 512K-13.824MHz 6.912M-13.824MHz 6.912M-13.824MHz 13.824M-27.648MHz Table 3-6: DAC (Digital-to-Analog Converter) Operation Theory 29 PCI-9527 User’s Manual ADLINK Technology Inc. Copyright 2010 Analog Front-End Filter Each channel has a 3-pole low pass filter. The cutoff frequency is set at 110 KHz to limit the bandwidth of the signal path. This will mostly reject out of band images and noise. 3.3.4 FIFO and DMA Transfer For Analog Output FIFO There are two FIFOs implemented on PCI-9527 for the analog output function. Each FIFO depth is 2048 samples. Bus-mastering DMA Data Transfer For analog output operation, the data will be transferred from host PC memory to onboard FIFO by DMA transfer. Please refer to section 3.2.4 for detail description. 30 Operation Theory ADLINK Technology Inc. Copyright 2010 PCI-9527 User’s Manual 3.4 Trigger Source and Trigger Mode This section describes information about triggering theory of operation. In PCI-9527, the operation of AI and AO share the same trigger source. Therefore, when user enables AI and AO operation simultaneously, the trigger signal is valid only when AI and AO are ready to receive trigger signal. For more detail in programming the PCI-9527, please refer to software operation manual. 3.4.1 Trigger Sources Digital Trigger Input AI CH0 Analog Trigger AI CH1 Analog Trigger Trigger Source Mux Software Trigger TRG Input SMB Connector Trigger Decision To Internal FPGA Circuit Figure 3-2: Trigger Architecture of the PCI-9527 Within the PCI-9527, a trigger is a signal that starts the acquisition of data. When configuring the triggers, you have to decide where the trigger comes from. PCI-9527 supports internal software trigger, external digital trigger, as well as analog trigger. Software Trigger The software trigger is generated by software command. The trigger asserts right after executing specified function calls to begin the operation. Operation Theory 31 PCI-9527 User’s Manual ADLINK Technology Inc. Copyright 2010 External Digital Trigger An external digital trigger occurs when a TTL rising edge or a falling edge is detected at the SMB connector on the front panel. As illustrated in Figure x-x, the trigger polarity can be selected by software. Note that the signal level of the external digital trigger signal should be TTL compatible, and the minimum pulse width is 25 ns. Analog Trigger User can configure the PCI-9527 analog trigger circuitry to monitor one of analog input channels from which you acquire data. Selecting an analog input channel as the analog trigger channel does not influence the input channel acquisition operation. The analog trigger circuit generates an internal digital trigger signal based on the condition between analog signal and the trigger level you defined. The trigger conditions for analog triggers is described as follows: Positive-slope trigger: The trigger event occurs when the analog input signal changes from a voltage that is lower than the specified trigger level to a voltage that is higher than the specified trigger level. Negative-slope trigger: The trigger event occurs when the analog input signal changes from a voltage that is higher than the specified trigger level to a voltage that is lower than the specified trigger level. Positive-Slope Trigger Event Occurs Negative-Slope Trigger Event Occurs Trigger Level Analog Signal Figure 3-3: Analog Trigger Conditions 32 Operation Theory ADLINK Technology Inc. Copyright 2010 3.4.2 PCI-9527 User’s Manual Trigger Mode There are two trigger modes working with trigger sources to initiate different data acquisition timing when a trigger event occurs. The following trigger mode descriptions are applied to analog input and analog output functions. Post trigger mode acquisition/generation Delay trigger mode acquisition/generation Post Trigger Mode If user configures the trigger mode as post trigger, following action begins right after the trigger conditions are met: The analog input channel acquires a programmed number of samples at a specified sampling rate. The analog output channel output pre-defined voltage at a specified output rate. Operation start Trigger Event Occurs Acquisition or waveform generation start Acquisition or waveform generation stop Time Trigger Analog Input N sampled data Analog Output Figure 3-4: Post-trigger Acquisition / Waveform Generation Operation Theory 33 PCI-9527 User’s Manual ADLINK Technology Inc. Copyright 2010 Delay Trigger Mode If user configures the trigger mode as delay trigger, user can specify a delay time from when the trigger event asserts to the beginning of the acquisition and waveform generation. The operation is illustrated below. The delay time is specified by a 32-bit counter value and the counter is clocking based on the PCI clock. So the maximum delay time is the period of PCI_CLK X (232 - 1) while the minimum delay is the period of PCI_CLK. Operation start Trigger Event Occurs Acquisition or waveform generation start Acquisition or waveform generation stop Delay Time Time Trigger Analog Input N sampled data Analog Output Figure 3-5: Delay Trigger Mode Acquisition / Waveform Generation 34 Operation Theory ADLINK Technology Inc. Copyright 2010 PCI-9527 User’s Manual 3.5 ADC and DAC Timing Control Timebase Architecture Onboard 125MHz Oscillator DDS 1-to-4 Clock Buffer 3.5.1 ½ Divider DAC CH0 ½ Divider DAC CH1 ADC CH0 Resolution equal to 125MHz/2^32 = 0.029Hz ADC CH1 Figure 3-6: PCI-9527 Timebase Architecture To drive the sigma-delta ADC and DAC, an onboard timebase clock is applied. The timebase clock frequency is much higher than the sample rate and is produced from a DDS chip. The output frequency of DDS chip is programmable with excellent resolution. 3.5.2 DDS Timing VS ADC/DAC Relationship Sampling Rate 2 K - 54 KHz 54 K - 108 KHz 27K-54KHz 108 K - 216 KHz 54K-108KHz 216 K - 432 KHz Update Rate 1K-27KHz 108K-216KHz DDS CLK 512K-13.824MHz 6.912M-13.824MHz 6.912M-13.824MHz 13.824M-27.648MHz Table 3-7: Timing Relationship of the ADC, DAC and DDS Clock Operation Theory 35 PCI-9527 User’s Manual ADLINK Technology Inc. Copyright 2010 3.5.3 Timing Constraint When AI and AO Enabled Simultaneously As users can see in the section 3.5.1, the ADC and DAC shares the same Timebase source, i.e. the output of DDS clock. When users enable the operation of ADC and DAC at the same time, there are constraints that should be kept in mind: 1. The sampling rate of ADC and the update rate of DAC are related. When you set the sampling rate of ADC to certain value before configure DAC, the update rate of DAC will be limited and fixed corresponding to the sample rate of ADC. When you set the update rate of DAC to certain value before configure ADC, the sampling rate of DAC will be limited and fixed corresponding to the update rate of DAC. Please refer to following table for detail. 2. Because the ADC and DAC share the same trigger source, users have to configure both AI and AO operation before trigger event occurs. On the other words, trigger event cannot occur before AI & AO configuration complete. 36 Operation Theory ADLINK Technology Inc. Copyright 2010 3.5.4 PCI-9527 User’s Manual Filter Delay in ADC and DAC The filter delay indicates the time required fro data to propagate through a converter. Both AI and AO channels have filter delay due to the filter circuitry and the architecture of the converter. Following tables show the filter delay in ADC and DAC. ADC Filter Delay Update Rate (kS/s) Filter Delay (Samples) 2K - 54KSps 12 54K-108KSps 7 108K-216KSps 5 216K-432KSps 5 Table 3-8: ADC Filter Delay DAC Filter Delay Update Rate (kS/s) Filter Delay (Samples) 2K - 54KSps 43.4 54K-108KSps 87.5 108K-216KSps 176.8 Table 3-9: DAC Filter Delay Operation Theory 37 PCI-9527 User’s Manual 38 ADLINK Technology Inc. Copyright 2010 Operation Theory ADLINK Technology Inc. Copyright 2010 4 PCI-9527 User’s Manual Calibration This chapter introduces the calibration process to minimize analog input measurement errors and analog output errors. 4.1 Calibration Constant The PCI-9527 is factory calibrated before shipment by writing the associated calibration constants to the onboard EEPROM. Every time the system boot up, the PCI-9527 driver will load these calibration constants that minimize the error in analog input path and analog output circuit. ADLINK provides a software API for calibrating the PCI-9527 whenever users want to calibrate the module. The onboard EEPROM provides three banks for calibration constant storage in PCI-9527. The bank 0, which is the default bank, records the factory calibrated constants. Bank 0 is written protection that prevents any abnormal auto-calibration process occurred in user’s environment. The banks 1 and 2, which are user-defined space, provided for user’s self-calibration constants. When user execute the auto-calibration process, the calibration constants will be recorded to bank 1 or 2 based on user assignment. When PCI-9527 boot up, the driver will access the calibration constants and set to hardware automatically. Without user’s assignment, the driver will load constants stored in bank 0. If user wants to load constants from bank 1 or 2, user can assign the bank 1 or 2 as the boot up bank through software. Once user re-assign the bank, driver will load the constants when user re-boot the system. This setting will be recorded to EEPROM and maintains no change until user modify it. Calibration 39 PCI-9527 User’s Manual ADLINK Technology Inc. Copyright 2010 4.2 Auto-Calibration Because errors in measurement and outputs will vary with time and temperature, it is recommended to re-calibration when the card is installed in the user’s environment. The auto-calibration can measure and minimize errors without external signal connections, reference voltages, or measurement devices. The PCI-9527 has an on-board calibration reference to ensure the accuracy of auto-calibration. The reference voltage is measured on the production line and recorded in the on-board EEPROM. Before begining the auto-calibration procedure, it is recommended to warm up the PCI-9527 for at least 20 minutes. Please remove cables before an auto-calibration procedure is initiated. 4.3 Offset Error Compensation During AI Sampling Rate Change To provide better measurement results, PCI-9527 has an internal offset error compensation mechanism whenever user changes the AI sampling rate. Following table shows the compensation time required when setting different sampling rate. For example, when changing the sampling rate from 432 KS/s to 2 KS/s, 6.2 sec is required for offset compensation. Next time when the sampling rate is set between 2 KS/s and 53.999 KS/s, it is not necessary to have 6.2 sec for the offset compensation. Only the sampling rate set to different ranges will cause a compensation time. Note that it is not necessary to add delay in you application. The PCI-9527 driver will automatically add the compensation time. Sampling Rate 2 KS/s 53.999 KS/s 54 KS/s 108 K/s 216 KS/s 107.999 KS/s 215.999 KS/s 432 KS/s Offset Compensation Time 6.2 sec 2.6 sec 1.3 sec 0.65 sec Table 4-1: Offset Compensation Time Required for Different Sampling Rates 40 Calibration ADLINK Technology Inc. Copyright 2008 5 PCI-9527 User’s Manual Calibration This chapter introduces the calibration process to minimize AD measurement errors and DA output errors. 5.1 Loading Calibration Constants The PCI-9524 is factory calibrated before shipment by writing the associated calibration constants of TrimDACs firmware to the onboard EEPROM. TrimDACs firmware is the algorithm in the FPGA. Loading calibration constants is the process of loading the values of TrimDACs firmware stored in the on-board EEPROM. ADKLINK provides a software utility for reading the calibration constants automatically if necessary. There is a dedicated space for storing calibration constants in the EEPROM. In addition to the default bank of factory calibration constants, there are three more user-utilization banks. That means users can load TrimDAC firmware values either from the original factory calibration or from a calibration that is subsequently performed. Because errors in measurements and outputs will vary with time and temperature, it is recommended to re-calibrate when the card is installed in the user's environment. The auto-calibration function used to minimize errors will be introduced in the next sub-section. Calibration 73 PCI-9527 User’s Manual ADLINK Technology Inc. Copyright 2008 5.2 Auto-calibration By using the auto-calibration feature of PCI-9524, the calibration software can measure and minimize measurement errors without external signal connections, reference voltages, or measurement devices. PCI-9524 has an on-board calibration reference to ensure the accuracy of auto-calibration. The reference voltage is measured on the production line through a digital potentiometer and compensated in the software. The calibration constant is memorized after this measurement. 5.3 Saving Calibration Constants Factory calibrated constants are permanently stored in a onboard EEPROM data bank and cannot be modified. When you re-calibrate the device, software stores new constants in a user-modifiable section of the EEPROM. To return a device to its initial factory calibration settings, software copies the factory calibrated constants to the user-modifiable section of the EEPROM. After an auto-calibration is completed, users can save the new calibration constants into the user-modifiable banks in the EEPROM. The date, temperature and calibration constants of the auto-calibration will be saved. Therefore users can store three sets of calibration constants according to three different environments and re-load the calibration constants later. NOTE: 74 1) Before auto-calibration starts, it is recommended to warm up the card for at least 25 minutes. 2) Please remove cables before an auto-calibration procedure is initiated because the DA outputs will change in the calibration process. Calibration ADLINK Technology Inc. Copyright 2010 PCI-9527 User’s Manual Important Safety Instructions For user safety, please read and follow all instructions, WARNINGS, CAUTIONS, and NOTES marked in this manual and on the associated equipment before handling/operating the equipment. Read these safety instructions carefully. Keep this user’s manual for future reference. Read the specifications section of this manual for detailed information on the operating environment of this equipment. When installing/mounting or uninstalling/removing equipment: Turn off power and unplug any power cords/cables. To avoid electrical shock and/or damage to equipment: Keep equipment away from water or liquid sources; Keep equipment away from high heat or high humidity; Keep equipment properly ventilated (do not block or cover ventilation openings); Make sure to use recommended voltage and power source settings; Always install and operate equipment near an easily accessible electrical socket-outlet; Secure the power cord (do not place any object on/over the power cord); Only install/attach and operate equipment on stable surfaces and/or recommended mountings; and, If the equipment will not be used for long periods of time, turn off and unplug the equipment from its power source. Important Safety Instructions 41 PCI-9527 User’s Manual Never attempt to fix the equipment. Equipment should only be serviced by qualified personnel. A Lithium-type battery may be provided for uninterrupted, backup or emergency power. CAUTION: 42 ADLINK Technology Inc. Copyright 2010 RISK OF EXPLOSION IF BATTERY IS REPLACED BY AN INCORECT TYPE. DISPOSE OF USED BATTERIES ACCORDING TO THEIR INSTRUCTIONS. Equipment must be serviced by authorized technicians when: The power cord or plug is damaged; Liquid has penetrated the equipment; It has been exposed to high humidity/moisture; It is not functioning or does not function according to the user’s manual; It has been dropped and/or damaged; and/or, It has an obvious sign of breakage. Important Safety Instructions