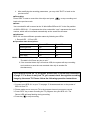
1
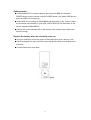
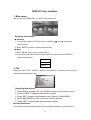
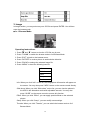
Dear Customers: Thanks for purchasing our HDD TV Recorder product. Before starting to use this product, please read this manual carefully so that you will know some tips to enjoy the fantastic functions this product brings to you and some security notices. Please keep this manual for future reference. Introduction Notices ..................................................................................................................2 Accessories ..........................................................................................................3 Appearance ..........................................................................................................4 Features................................................................................................................5 BPR-101 / Remote Control Keys and Operations .........................................6 BPR-101 Summary .............................................................................................9 Hard disk format ................................................................................................12 Import media files and other files....................................................................14 BPR-101 Setting................................................................................................16 BPR-101 User Interface ...................................................................................18 Specifications .....................................................................................................24 Tips and Trouble shootings..............................................................................25 1 Notices ■ Do not unclench the bundled adapter. Contact maintenance technicians if you want to have it repaired. ■ Avoid shock and damage to the device and keep your device away from any fluid. ■ Unplug the AC adapter if you are not using the device for safety issue. ■ Do not place the device close to any inflammable substances. ■ The battery for remote control is standard disposable CR2025 battery. When the battery runs out, please make sure that you replace the battery with the correct standard one and dispose the used battery with caution. ■ Please note that the device surface becoming hot during operation is normal and please do not cover anything over the device in operation. ■ Before unplugging power, you should stop playing first, and then press the BPR-101 keypad’s POWER button(not remote control’s POWER button) to turn off BPR-101’s power, in which the power LED will switch off. Do not unplug power when playing because such abnormal operation will harm the device. ■ The power LED will usually flash in the operation indicating that the device is still processing. Please wait until LED stops flashing for next operation order. ■ As a storage device, the device supports both FAT16/FAT32 and NTFS format. But as a HDD player, the device supports only FAT16/FAT32 format (rather than NTFS format) in the file systems in primary disk-partition (there should be no extended partitions). ■ The USB-OTG adapter is tailor-made. You can only plug USB-OTG adapter into our products. Please do not plug USB-OTG adapter into other devices, such as digital cameras. ■ Please always backup your data in HDD. We make no warranties with respect to data losses and HDD damage. ■ The product has been tested widely on other corresponding devices, such as the computer hardware and OS, HDD type, camera, card reader, media file format, and so on. But we do not assure that it is compatible with all kinds of hardware in all situations. 2 Accessories 1. Remote Control (with battery) 2. USB Cable 3. USB-OTG Adapter 4. AV Cable (two pieces) 5. AC Adapter 6. User manual CD 7. Quick Installation Guide Notice: If your TV does not have AV/ RCA jack, you have to prepare a SCART cable to connect BPR-101 to your TV. 3 Appearance Main Body Front Panel View 1. USB JACK 4. HDD/REC LED 2. OTG LED 5. POWER LED 3. ERR LED Back Panel View 1. AV-IN 2. Power Jack 4 3.AV- OUT Features ■ Just one touch to convert DV format. ■ Support superior video recording Provide a “high”, “medium”, and “low” Compression ratio. The users can modify various recording parameters to obtain superior video recording results. ■ Support special memory function that you can play the movie from the point you shut down in the previous time. So you can continue the film from previous shut down point. ■ Support USB2.0-OTG: --You can copy the media files from the USB device, such as digital camera, USB flash memory, MP3, and card reader, to your HDD directly. --You can quickly download and save multimedia files in HDD directly from and to your computer. ■ Support HDD protection: Intelligent power management for HDD. ■ The device is compliant with USB2.0 and USB1.1 and supports plug and play function with up to 480M bit /s transfer rate high speed. ■ You can preview detailed information, including file format, from the directory in HDD with graphic user interface. ■ Support multi languages external text subtitles (.SRT). ■ Support FAT16/FAT32 file systems (up to 4 multiple partitions of HDD). ■ Support audio files formats MP3 / WAV / AAC and the real-time mp3 lyrics with other detailed information, including the headline, author, baud rate, sampling rate, and etc. ■ Support video files formats: MPEG-1(VCD), MPEG-2 (DVD), MPEG-4. Support video file extension: mpg, mpeg, dat (for MPEG-1); vob (for MPEG-2) avi (for MPEG-4) ■ Support JPG images and motion JPG (15 / 30 fps). ■ Support special graphic effects, including mono, gray, reminiscence, dawn, negative, mirror and so on. Users can choose among those effects easily. ■ Support NTSC / PAL video output and interchangeable formats. ■ Support superior browsing functions: Slideshow with background music; zoom in / out, and circumrotate pictures. ■ Users could update the firmware expediently for the latest function at any time. 5 BPR-101 / Remote Control Keys and Operations 1. CLEAR: Hide or show the information of the screen. 2. L/R: Change the track to left or right. 3. P/N: Change the display signal mode to PAL or NTSC. 4. POWER: For BPR-101 keypad’s power button: Turn on/off main power of BPR-101. For remote control’s power button: While in power on state, enter or exit standby state. Notice: You can not use remote control to turn on/off main power 5. ZOOM: Zoom photos. 6. ROTATE: Rotate photos. 7. THUMB: Enter the photo 3x3 Browse Mode. 8. SLIDE: Enter Music/photo-slide-show mode. 9. REC: Record the movie, press this key can enter recording mode directly. 6 10. EQ: Enter the equalizer menu. 11. EFFECT: Enter the selection list of special effect. 12. INTERVAL: Select the interval time for slideshow, including music-slide-show. 13. MENU: Show function list of current status of user interface. 14. DIRECTION: Move cursor or move the photo in the Zoom mode. 15. EXIT: Stop the current playing program to back to previous browse directory or exit browse mode to show MAIN MENU. 16. BROWSER: Back to root directory 17. ENTER/PLAY: Confirm your selection. 18. VOLUME+: Increase volume (0-30). 19. INFO: Show or close a floating menu of file operation. 20. SUBTITLE: Select movie subtitle. 21. VOLUME-: Decease volume (0-30). 22. PREV: Switch to previous file or turn a page up. 23. PAUSE: Pause the current playing program or resume the paused program. 24. NEXT: Switch to next file or turn a page down. 25. MUTE: Mute or cancel mute. 26. FR: Play fast backward (1- 4). 27. STOP: Stop playing and back to the directory. 28. FF: Play fast forward (1- 4). 29. REPEAT: Select repeat mode. 30. COPY: Copy files when BPR-101 acts as an USB host. Notice: ■ When using the remote control, you should point the infrared emitter to the receiver on BPR-101’s front panel. The receiving angle is about ±30 degrees in the range of 5 meters. ■ Do not drop the remote control to ground or damp it. ■ Do not expose the remote control directly to intense sunlight. ■ Disconnect the device from power if you don’t need to use BPR-101 for a long time. 7 Getting started ■ Connected BPR-101 to power adapter, then press the BPR-101 keypad's POWER button (not the remote control's POWER button), the power LED will turn green and BPR-101 will boot up. ■ When BPR-101 is booting up, MAIN MENU will be shown on the screen. If there are more than one partition on your HDD, PARTITION LIST will be shown on the screen instead of MAIN MENU. ■ Please pull out the insulated film in the bottom of the remote control before the first time usage. Replace the battery when the electricity runs out ■ Use your forefinger to lock the groove of the battery-box cover, and pull it out. ■ Place the battery into the hole of the cover with positive side up according to the indication. ■ Put the battery-box cover back. 8 BPR-101 Summary 1. The Image Management When you choose “Image” in main menu of BPR-101, you are entering the image management section that provides following features. ■ Browse the files in the directory: You could browse all JPEG files in your HDD directory. ■ Preview photos: BPR-101 supports the 3x3 preview mode to display the photo. You could browse and choose the wanted photo easily by the cursor. ■ Show photos: BPR-101 shows the photos with the optimized size. You can also browse photos one by one easily by clicking PREVIOUS or NEXT button. ■ Rotate photos: BPR-101 supports photo rotation function. ■ Zoom photos: You can enlarge the photographs by 2 or 4 times in the zoom mode. Moreover, you can view the partial photo in details by moving the direction key in the zoom mode. ■ Show image information: You can view detailed image information, including the size, the time, and the shooting parameter of the photograph, in this section. ■ Support slideshow function: BPR-101 could display the photos in current storage base in the slideshow format with an adjustable interval. You could also browse the photos with the special effects, including monochrome, gray, reminiscence, dawn, negatives, mirror, and so on. 2. The Movie Management When you choose “Movie” in main menu of BPR-101, you are entering the movie management section that provides the following features. ■ Browse the file in the directory: You could browse and play all video files in your HDD directory. ■ Play movies: In the movie management section, you may choose the video file and press ENTER button to start the movie. You can also tune the volume and move the movie forward and backward during the play. ■ Show movie information: You can view the progress of the movie, such as total time and current time, and other information, including the movie name and volume during the play. 9 ■ Subtitle: You may play the movie with the subtitle. But please note that the name of the subtitle file must be matched to that of the video file. In this way, the subtitle file will be loaded automatically when the video file is played. 3. The Music Management When you choose “music” in main menu of BPR-101, you are entering the music management section that provides you to the following features: ■ Show music information: You can view the detailed music information, such as the progress and the total length of the music, during the play. ■ Show the lyrics of MP3: If the MP3 song has the lyrics, BPR-101 will show the lyrics synchronously. ■ Dynamic background: You could set the dynamic background for certain music format. When you play .wav and .mp3 music files, you can also view the selected photos (less than 6 MB) in the slideshow format simultaneously. But please note that .aac does not support such dynamic photographic background function. ■ Support repeat function: You can play music sequentially or keep playing one single song. ■ Show file information, such as headline, author, baud rate, adoption rate, and etc. ■ Support synchronous manifestation of the lyrics of MP3. ■ Support the MP3+ JPEG, WAV+ JPEG format. 4. The File Management When you choose ”File” in main menu of BPR-101, you are entering the file management section that provides you the following features. ■ Browse the file in the directory: You can browse all multi-media files in your HDD through the explorer and switch browsers between different catalogues. ■ Select the document: In the file-browsing page, you can browse and select the document easily. ■ Open the files: After selecting the files, you can press the ENTER button to open the file in specific photo/ movie/ music play mode. 5. Record When you choose “Record” in main menu of BPR-101, you will enter the recording 10 section that provides you the following features. ■ Preview: In the recording preview mode, you can preview the real-time video you plan to record on the connected audio/ video output devices, such as TV and other video display interface. ■ Recording: When you confirm the video clips you plan to record, you could record the video clips by pressing the REC button. Time of recording will be displayed during the recording. ■ Save: The recorded video clip will be saved as “RECxxx.AVI” under the “X”:\movie\REC\RECxxxx.AVI in the first partition of HDD in BPR-101. Please note that “xxx” is a serial number that increases automatically as the number of recording files increases. 6. The system settings ■ Support multi languages. Support NTSC / PAL video output and interchangeable formats. You could update the firmware expediently for the latest function at any time. ■ You can modify the following system settings based on your personal preference. ■ ■ Display System Language Multi languages TV standard NTSC/ PAL Scan mode Interlaced/ Progressive Show all file On/ Off Media Browse Mode MediaLib/ Directory Update Media Lib Set Defaults Format Hard Disk Update firmware Option Active BK On/ Off Play order Normal/ Repeat/ Repeat All None/ Classic/ Club/ Dance/ Full Base/ Base& Equalizer Treble/ Full Treble/ Large Hall/ Live/ Party/ Pop/ Reggae/ Rock/ Ska Slide Interval Clock Set date/ time Scheduler Set recording schedule 2~8 second 11 Hard disk format [Format your HDD] Notice:Please skip the format procedures if HDD is already formatted. On a PC (Windows 2000/XP) Use the Disk Management Utility ■ Connect BPR-101 to the computer as page 15 shown. ■ On windows desktop, right click on “My Computer” and choose “Manage”. ■ Select “Disk Management”. ■ Choose the hard drive you want to format and right click on the Disk or drive field for further commands. ■ Create a primary partition and format it. ■ Follow the on-screen Wizard instructions . Notice: Please format your BPR-101 as FAT16/FAT32 format. Your BPR-101 supports up to 4 separate partitions. On a Mac (OS X) Mac OS 9.2 and earlier versions do not support partitions on an external drive. To format and establish the partitions, you need to purchase additional 3rd party software and connect the drive to the internal IDE bus. Or you may upgrade your Mac to OS X while the drive initialization can be done in all Operating Systems. For Mac OS X, you may use the Disk Utility to format your HDD and create partitions on your external disk. 12 ■Select “Disk Utility” in the utilities folder. ■Choose your external drive and format it as MS-DOS File System. Notice: Format your BPR-101 under MS-DOS File System. Your BPR-101 supports a maximum of 4 separate partitions 13 Import media files and other files [BPR-101 acts as an USB host] You can connect USB device, such as Digital Camera, USB Flash memory, MP3, Card Reader, to BPR-101 and copy the media files from the connected USB device to your HDD directly. Connect BPR-101 to other USB devices, such as the digital camera. [Operation Steps] ■ Connect BPR-101 to the power supply. ■ Connect OTG to BPR-101. The OTG LED on the BPR-101 front panel will turn red. ■ Connect the USB device to the other end of the OTG via one USB cable. LED on the USB device will usually light up (Note that some USB devices must be turned on manually so that the devices can be detected by BPR-101.) ■ Press COPY button, wait a moment, and all files in the USB device will be copied to the folder created automatically in the first partition of your HDD in BPR-101. In the copy process, HDD LED will keep twinkling. When HDD LED stops twinkling, it means that the copy process is finished; ERR LED turning red indicates that the copy process fails; ERR LED turning green indicates that capacity of HDD is full. ■ When the copy process is finished, please remove the USB device and USB-OTG adapter. 14 [BPR-101 acts as an USB slave device] Connect BPR-101 to the computer. Power your BPR-101. There are three methods to power your BPR-101 as illustrated below. 1. Self-power: Connect BPR-101 to the power supply socket on the wall via AC adaptor. This method is suitable for all HDD regardless HDD capacity. But please make sure that the USB cable is not connected to the computer when the AC adapter is connected to the wall and to BPR-101. Otherwise, the power supply will come from USB cable rather than AC adaptor. 2. Bus-power: If the capacity of your HDD is less than 20 GB, we suggest you connect BPR-101 to the computer for bus-power via a single USB cable. 3. Double bus-power: If the capacity of your HDD is more than 20 GB but less than 40GB, we suggest you connect BPR-101 to the computer for power via dual USB plugs because single USB plug may not supply sufficient power. When BPR-101 is connected to the computer via USB cable, the computer will detect BPR-101 automatically and configure the HDD. After configuration, BPR-101 can be used as an external storage device. Install USB driver into your Operating System ■ Windows ME, Windows 2000, Windows XP: No driver installation is needed. ■ Windows 98: Please download USB driver for Windows 98 from Microsoft official website. Remove BPR-101 from your computer: Please right click the External Devices icon on the taskbar and follow the on-screen instructions to uninstall BPR-101. When being removed from computer, BPR-101 will enter standby mode and the power supply for HDD will be cut off at the same time. 15 BPR-101 Setting Application1- Playback: Connect BPR-101 to TV as shown. Notice: Please match AV cable’s three output terminals (with three different colors) to the corresponding input jack on you TV. Application2- Recording DV/DVD: Connect BPR-101 to TV and other video output equipment, such as DV/DVD as shown. 16 Application3- Recording TV programs directly: Connect the BPR-101 to TV as shown. Notice: Connect the AV-OUT of the TV(source program channel) to the AV-IN of BPR-101, and connect the AV-OUT of BPR-101 to the AV-IN of TV. Please make sure to turn your TV to the program channel you want to record first, then press the REC key on the keypad(or remote control), BPR-101 will start to record the program. 17 BPR-101 User Interface 1. Main menu After turning on the BPR-101, you will see the main menu. Operating Instructions: ■ Selection 1. You can select items in the main menu by pressing “◄” and “►” buttons on remote control. 2. Press “ENTER” button to confirm the selections. ■ Menu 1. Press “MENU” button on the remote control. 2. Press the up and down button to select items you want and press ENTER to confirm the selection. Display System Option 2. File When you select “FILE”, “IMAGE”, “MOVIE”, and “MUSIC” on the main menu, you will see the following browser menu. Operating Instructions: 1. Select files by pressing ‘UP’ and ‘DOWN’ buttons on the remote control. 2. Press ‘ENTER’ to open the selected file or folder. 3. Press ‘EXIT’ to back to the browser menu or back to MAIN MENU. 4. Press “BROWSER” to back to the root directory directly. 5. Press ‘LEFT’ to back to the upper directory directly. ■ Icons illustration: The following icons represent different file formats and catalogs for your reference. 18 3. Image In Image section, you may select any one JPG file and press ENTER. You will then enter the browse mode. ■ 1x 1 Browse Mode: Operating Instructions: 1. Press “◄” and “►” button to view the .JPG file one by one. 2. Press “THUMB” to switch the browse mode to 3x3 Browse Mode. 3. Press “EXIT” to back to the browser menu. 4. Press “ROTATE” to revolve picture in anticlockwise direction. 5. Press “ZOOM” to enlarge the selected image file. 6. Press “MENU” to have the following item list: Info Slide show Effect Setup Thumbs Info: When you click “Info” on the list, the image/photo information will appear on the screen. You may also press ”INFO” button on the remote control directly. Slide show: When you click “Slide show” on the list, you can view the photos in the HDD in the slideshow mode with adjustable intervals. You may also press “SLIDE” on the remote control to access this function. Effect: When you click “Effect”, you can apply special effects on the selected photos. Setup: When you click “Setup”, you can modify some settings. Thumbs: When you click “Thumbs”, you can switch the browse mode to 3x3 Browse Mode. 19 ■ 3x3 Browse Mode: You may press “THUMB” to enter 3x3 Browse Mode: Operating Instructions: 1. You may select the file you want by pressing “◄” and “►” button on remote control. 2. You may press THUMB to switch to 1x1 Browse Mode to view selected picture. 3. You may press MENU to back to the menu and then select “info” to view the detailed specific file information. ■ Zoom Mode: You may press “ZOOM” to enlarge the selected photo by 2 or 4 times: Operating Instructions: 1. Press “Up”, ”Down”, ”Left” and “Right” arrow buttons to view different part of the selected photo image. 2. Press “EXIT” to back to 1x1 Browse Mode from Zoom Mode. ■ Rotation Mode: Press“ROTATE"to rotate the picture by 90 degrees. 4. Movie Please select video file you want to play and press ENTER to play the selected movie. 20 Operating illustration: 1. Press “VOL+” and “VOL-“ buttons to adjust the volume. 2. Press “EXIT” to back to the browser menu. 3. Press “◄” and “►” button to play the previous or next video clips. 4. Press “◄◄” or “►►” to play fast backward or forward. 5. Press “SUBTI” to open or close the subtitle. 6. Press “CLEAR” to hide or display the controlled information. 7. Press “MENU” to display the following menu. 5. Music Please select audio file and press “ENTER” to play music. You can choose to play music with default background or with a dynamic background based on personal preferences. ■ Default Playback Background: Operating Instructions: 1. Press “VOL+” and ”VOL-“ button to adjust the volume. 2. Press “EXIT” to back to the browser menu. 3. Press “▌◄◄” or ”►►▌” to play previous or next piece of music. 4. Press “◄◄” or “►►” to play fast backward or forward. 5. Press “ ” to switch repeat patterns: none, repeat single, and repeat all. 6. Press “MENU” to tune the volume and modify other setting parameters. ■ Dynamic Playback Background: In dynamic playback background, you can view slideshows while playing the music. 21 Operating Instructions: 1. The operation is the same to the default playback background. 2. Press ”CLEAR” to hide the file information and leave the lyric only. 6. Record If you plan to record the video programs in DV or DVD player into BPR-101, please connect BPR-101 to DV/DVD player as the illustration shown in page 16. ■ Preview Video Clips: Operating Instructions: 1. Play the DV/DVD when the BPR-101 is connected. 2. Select "RECORD" on the main menu and then press "ENTER" to preview the video clips you want to record. 3. In the preview mode, you may press "MENU" to modify the recording parameters, including the recording timing, quality, brightness, contrast, saturation, and hue. Auto Stop Rec On/ Off Duration- Hour 0~10 Minute 0~59 Quality High/ Medium/ Low Brightness 0~32 Contrast 0~20 Saturation 0~20 Hue -5~5 Reset Reset Brightness, Contrast, Saturation, Hue to default * Please note that the data rate will vary with the quality you select. 22 4. After modifying the recording parameters, you may click "EXIT" to back to the preview mode. ■ Recording: Press “REC” to start to record the video clips and press “■" to stop recording and back to the preview mode. ■ Save: Your recorded file will be saved at the “X:\Movie\Rec\RExxxx.AVI” in the first partition of HDD in BPR-101. “X” represents the driver code while “xxxx” represents the serial number, which will be increased automatically as the saved files increase. ■ Indicators: BPR-101 can show different operation states by following two LEDs: 1. Record LED ■ 2. Error LED. Operation state descriptions: Record LED Error LED Record preview On Off Record Start &running Flash Off Record error Off Flash Other state Off Off Notice: 1. If the HDD is full during the recording, the screen will show: “The disk is full! Press any key to exit.” 2. If the recorded video clip is more than 2GB, the system will stop recording and continue to save the rest recorded video clip in another file simultaneously. If you plan to record the TV programs, please refer to connection illustration in page 17. For there is only one TV, you cannot check through the recording image by the same TV. Please follow the following operation instructions. Operating Instructions: 1. Connect your BPR-101 to your TV as page 17 illustrates and turn on the power of BPR-101 and TV. 2. Please make sure to turn your TV to the program channel you want to record. 3. Press “REC” key to start recording the TV programs into your BPR-101. The Record LED will keep flashing during recording. 4. Press key “■” to stop recording. 23 Specifications Power adapter INPUT: AC 100/240V 50/60Hz OUTPUT: DC 5V 2A Power consumption 6W (typical) Dimensions 137*77*25 mm TV standard NTSC, PAL Frequency response ±3dB (20Hz- 20Khz) Signal / Noise Ratio ≥85db Audio dynamic Range ≥87db Audio cross Talk ≥85db Audio output 2.0±0.2V (rms) Video output 1.0±.0.2P-,75Ω USB data transfer rate USB 2.0-OTG, MAX 480 Mbps Video file format supported MPEG-1(VCD), MPEG-2 (DVD), MPEG-4 Video file extension supported mpg, mpeg, dat (for MPEG-1) vob (for MPEG-2) avi (for MPEG-4) Audio file format supported WAV, MP3, AAC Image file format supported JPG HDD file system supported FAT16/FAT32 in primary partition Video recording framerate 25fps, 30fps Video recording resolution 640 x 480 Video recording codec MPEG-4 Video recording bitrate 350~600KB/s (VBR) 24 Tips and Trouble shootings Problem: Nothing is displayed on TV. Please check if BPR-101 is in standby status. If so, please press POWER button ■ to wake it up. Make sure that you select proper audio/ video input source for TV and please ■ check if you connect AV cable’s three terminals to your TV correctly. Problem: No sound. ■ BPR-101 is in mute mode. Please press MUTE button to resume the sound. ■ Please check if an external audio output, such as an external speaker, is turned on and in proper volume. ■ Please check if you connect AV cable’s three terminals to your TV correctly. ■ If you are playing MPEG-2 or VOB file, you need to use AUDIO button to select a proper audio stream. Problem: The remote control doesn’t work. Please point the remote control to BPR-101 directly within 5-meter range without ■ barricade between. Maybe you need to replace the battery in the remote control. ■ Problem: “No disc” is displayed on TV. ■ Please check if you install the HDD properly. ■ Please make sure that there are only primary partitions in HDD. Extend and logic partitions may not be recognized. Problem: I cannot see the files in my HDD through BPR-101 on TV. Please make sure that partitions of HDD are in FAT16/FAT32 format rather than ■ NTFS. BPR-101 doesn’t support NTFS format and therefore won’t show the content in such format on TV. Problem: Abnormal situations: I cannot play a file in supported format/ I cannot play fast forward/ there are mosaic images. ■ Maybe you need to defrag your HDD. ■ Please check all the files in you HDD are in good condition. If there is one bad file in your HDD, you cannot view and play the rest files. Problem: When I press “SLIDE” button, the system halts. ■ There are too many photos or music files in your HDD partition. It will take a long time to response and to start music-slideshow. Problem: When my BPR-101 is connected to computer, my computer cannot detect BPR-101 device. ■ In such situation, we recommend you connect your BPR-101 to the power 25 adaptor rather than the bus-power. Please note that you can only connect your BPR-101 to double USB plugs to get bus-power when your HDD capacity is below 40G. ■ If your operating system is Windows 98, please check if you install proper USB driver in your operating system. Problem: When BPR-101 acts as a host device, I cannot copy the files in the USB slave device into my HDD. ■ Please make sure that you didn’t press COPY button during copy process. If you press COPY button more than one time, you will stop copy process. If so, please press COPY again to start a new copy process. Problem: The USB slave device is not compliant with BPR-101. ■ Please note that the USB slave device must be in FAT16/FAT32 format to be compliant with BPR-101. Problem: I cannot preview the video clips. ■ Please check if you connect AV cable’s three terminals to your TV correctly. ■ Please check if you tune your TV to the correct channel for video preview. ■ Please check if the video output device works properly. Problem: Sudden interruptions during recording. ■ Please check if the connected device, such as DV/DVD player, is in stable power supply. ■ Please check if your HDD reaches full capacity. If so, please spare some free capacity and try again. Problem: I cannot play my recorded clips. ■ There might be sudden interruptions during recording. If so, the file is in incomplete structure and cannot be resumed. Please record the video clips again. ■ There is some bad track. If so, please repair the bad track and try again. ■ Please check if the file is in supported format. If not, please convert the file format by proper software and try again. 26