1
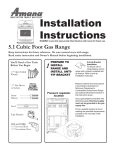
Installation Instructions ImportantSave for local electrical inspectors use. Natural Gas Downdraft Cooktop installation without an undercounter wall oven Keep instructions for future reference. Be sure manual stays with cooktop. Read entire instruction before beginning installation. Natural gas ONLY. Cooktop is designed to be installed over Amana wall ovens AOES3030 and AOCS3040. You'll Need a Few Things Before You Begin 1 PREPARE CUTOUT Review Minimum Clearances to Combustible Surfaces for final cooktop clearances and Ductwork Location section prior to preparing countertop. Wall oven cutout must be a minimum of 4 1/2 inches from the top of the countertop for a cooktop installation. When appropriate place is found meeting these requirements, measure cabinet area and prepare it according to the illustration below. 'XFW7DSH 2SHQ(QGHG :UHQFK 29 1/ 2" 1XW'ULYHU RU6RFNHWV 7 1/2 " 6FUHZ 'ULYHUV 21 1/ 2 " /HYHO PLQ 7DSH0HDVXUH 'ULOODQG'ULOO%LW IRUZRRGIORRU IRUFRQFUHWHIORRU PLQ PLQ PLQ 32072501 2 ATTACH DUCTWORK To install ductwork without a wall oven,refer to Installing Without a Wall Oven instructions. C L C L Duct Locations Cooktop can be vented vertically or horizontally. If vented horizontally vent air through left or rear wall. If vented vertically, inner edge of the vent must be a minimum of 3/4-inch away from the wall oven. Venting must be measured from centerline (CL) of ductwork to centerline (CL) of cooktop cutout. EDFNHGJH RIFRRNWRS FXWRXW Left exhaust QDWXUDOJDV DQGHOHFWULFDO VXSSO\ORFDWLRQ Rear exhaust Vent filler piece Blower housing front Duct Connection 4" 7 1/ 2" 6 7/ 16" Cooktop Front View 4" 1 7 / 2" Front 6 / 16" 7 Cooktop Side View Always vent outside. Do not vent into an attic or crawl space. Ducting cutout should be 3 1/2 " x 10 1/2 ". Blower exhaust faces towards rear wall from factory. Blower can be changed to exhaust to left. To vent out left side, remove vent filler piece and move to the rear of the blower. Refer to Duct Length Calculations for proper duct length. Connect blower exhaust to ducting with standard 3 1/4 x 10-inch duct. Do not install 2 elbow fittings next to each other. This creates unusual air patterns and can result in poor ventilation. Seal all joints in venting system with duct tape to avoid smoke or odor in home. Do not use laundry wall caps. Wall cap must have minimum of 28 square inches free air space. Use Amana wall cap model CC30 or equivalent. 3 CONNECT GAS SUPPLY Cooktop is designed for natural gas ONLY. ! WARNING To avoid risk of property damage or serious personal injury, never use a lighted match to test for gas leaks. Gas Connection Connect gas supply to regulator using hard pipe or flexible connector (check local codes). Pressure regulator supplied with this appliance has a 1/2 inch NPT female connection. A manual shutoff, not supplied with cooktop, must be installed in an accessible location outside of cooktop. Connector must be AGA/CGA design certified. Verify oven shutoff valve is in the ON position. Use supplied pressure regulator only. Do not overtighten gas fitting when attaching to pressure regulator. Overtightening may crack regulator. Support pressure regulator with wrench when installing gas fitting. Refer to Naitonal Fuel Gas Code or local codes for supply pipe size requirements to assure sufficient gas supply to unit. Testing for Gas Leaks After final gas connection is made, turn on manual gas valve and test all connections in gas supply piping and cooktop for gas leaks. Leak testing of the appliance shall be conducted according to the manufacturers instructions. 1. Place soap suds on connection. Bubbles appear if leak is present. 2. If bubbles appear, shut off gas supply valve. 3. Tighten joint if leak is at factory fitting. If leak is not at factory fitting, unscrew, apply more joint compound, and tighten to correct leak. 4. Retest connection for leak after tightening. Retest any connections that were disturbed. ! WARNING To avoid risk of property damage or personal injury, only use a new flexible connector that is AGA/CGA design certified. Do not use an old connector. Do not reuse a connector after moving appliance. 0DQXDO 6KXW2II 5HGXFLQJ(OERZ 9DOYH WRLQFK 8QLRQ 5HJXODWRU LQFK QLSSOH 5HJXODWRU typical hardpipe LQFK connection VWXE )OH[LEOH&RQQHFWRU typical flexible connection $GDSWRU 0DQXDO 6KXW2II 9DOYH IMPORTANT SAFETY INFORMATION ! WARNING To avoid serious burns or other personal injury caused by reaching over heated surface burner, avoid locating storage cabinets above surface burners. If cabinet storage is located above cooktop, install a range hood that projects horizontally a minimum of 5 inches beyond the cabinet bottom to reduce the risk. ! WARNING To avoid risk of electrical shock, personal injury, or death, make sure cooktop has been properly grounded and always disconnect it from main power supply before any servicing. To avoid property damage or personal injury, do not use LP/Propane gas to fuel this cooktop. Cooktop is not convertible to LP/Propane gas. ! WARNING To avoid the risk of serious burns or other personal injury, do not store items of interest to children above or behind cooktop. Children climbing on cooktop to reach items could be seriously injured. Minimum Clearances to Combustible Surfaces This cooktop can be installed as specified in the following diagram. The dimensions provided are to be measured from the cooktop itself, and not the installation cutout for the cooktop. A30-inches minimum clearance between the top of the cooking surface and the bottom of an unprotected wood or metal cabinet. OR A24-inches minimum clearance when bottom of wood or metal cabinet is protected by not less than 1/4-inch thick flame retardant millboard covered with not less than No.28 MSG sheet steel, 0.015 inch thick stainless steel, 0.024-inch thick aluminum, or 0.020 inch thick copper. B5 7/8-inches minimum distance between cooktop and wall, cabinet taller than 36 inches or a walkway. C2-inches minimum distance between cooktop and back wall or backguard. D1 1/2-inches minimum distance between cooktop and edge of countertop. EMinimum of 18-inches between top of countertop and bottom of an unprotected wood or metal cabinet. FMinimum of 30-inches of protected cabinets above the cooktop (refer to letter A). ) & $ ' ( % SAVE THESE INSTRUCTIONS Part No. 32072501 Printed in U.S.A. 07/01 Ó 2001 Amana Appliances Amana, Iowa 52204 Installation Requirements Before You Install Consider Description Location To eliminate the risk of burns or fire by reaching over heated surface units, cabinet storage space located above the surface units should be avoided. If cabinet storage is to be provided, the risk can be reduced by installing a range hood that projects horizontally a minimum of 5 inches beyond the bottom of the cabinets. Use dimensions shown in this manual to determine space needed for installation. Cooktop must not be installed or stored in an area where it will be exposed to water and/or weather. Specialty Countertop Materials Refer to manufacturer’s product information for instructions on handling specialty countertop materials such as tile or ceramic. Countertop must be level for proper cooktop installation. Electrical Requirements Electrical Supply Cooktop needs a dedicated 120 volt, 60 hertz, 3 prong receptacle protected by a 15 amp circuit breaker or time delay fuse. A qualified electrician should confirm the outlet is properly polarized and grounded. Wiring system and grounding must conform with the latest edition of the National Electric Code, ANSI/NFPA 70, or the Canadian Electrical Code, CSA C22.1. Installation must conform to all local, municipal and state building codes, and local utility regulations. Connect cooktop to power supply with MAXIMUM RATED VOLTAGE listed on the rating plate. Line voltage must not exceed rated voltage. Cooktop includes a 4-foot power cord attached to bottom of cooktop at back, right corner If a 2 prong outlet is encountered, cooktop owner must replace the outlet before using the range. Do not cut off the cord, use a plug adapter or extension cord, or remove grounding plug. Electrical supply should not converge on gas supply. Do not ground electrical supply to gas lines. Gas Requirements ! CAUTION To avoid property damage, maximum gas supply pressure must not exceed 14 WCP. Gas Supply Installation must conform with the latest edition of the National Fuel Gas Code, ANSI Z223.1 or CAN1-B149.1 or B149.2 for gas burning appliances and equipment. Installation must conform to all local, municipal and state building codes, and local utility regulations. In mobile housing, installation is to be in accordance with CSA standard Z241.1 gas equipped mobile housing. In manufactured (mobile) home installation must conform with the latest edition of Manufactured Home Construction and Safety Standard, Title 24 CFR, Part 3280. When that standard is not applicable, the Standard for Manufactured Home Installation, ANSI 225.1/NFPA 501-A, or local codes or the standard CAN/CSA-z240MH, “Mobile Homes” should be used. Gas Supply Pressure ! WARNING To avoid risk of property damage or serious personal injury, use NATURAL GAS only with this cooktop. Appliance and individual shutoff valve must be disconnected from the gas supply piping system during any pressure testing of that system at test pressures in excess of ½ psig (3.5kPa) (14” WCP). Appliance must be isolated from gas supply piping system by closing manual shutoff valve during any pressure testing of the gas supply piping system at test pressures equal to or less than ½ psig (3.5 kPa) (14” WCP). Gas supply pressure for checking regulator setting must be at least 1” WCP above manifold pressure shown on rating label. Pressure regulator supplied with cooktop must be used. Duct Length Calculations Ducting length is calculated in terms of straight metal duct. Fittings such as elbows or transition pieces should be limited to 50% of total duct length. Using too many fittings can cause air flow problems. Maximum allowable calculated duct length is 60 equivalent feet. Use Duct Length Piece Equivalents section provided below to calculate duct length. Do not use any duct other than metal. Flexible duct is not recommended because it can create a fire hazard. However, if it is used, one foot of flexible duct is equal to two feet of smooth metal duct. Exterior exhaust opening must be a minimum of 1 foot (12 inches) from an obstruction. 1 foot of 3¼ x 10 inch duct = 1 equivalent foot 5’ 3’ 1’ 1’ of Duct 1’ 90° Elbow 5' 3’ of Duct 3’ 90° Elbow 5' 10’ of Duct 10’ Total Feet 24' 5’ 10’ 1’ 1 foot of 6 inch pipe = 1 equivalent foot 6 inch to 3¼ x 10 inch transition = 1 equivalent foot 3¼ x 10 inch to 6 inch transition = 4½ equivalent feet 6 inch to 3¼ x 10 inch 90 degree transition = 9 equivalent feet 3¼ x 10 inch to 6 inch 90 degree transition = 5 equivalent feet 3¼ x 10 inch 90 degree elbow = 5 equivalent feet 6 inch 90 degree elbow = 5 equivalent feet 3¼ x 10 inch flat elbow 90° angle = 12 equivalent feet 3¼ x 10 inch wall cap (Unrestricted) = 0 equivalent feet 6 inch 45 degree elbow = 2½ equivalent feet 6 inch wall cap (Unrestricted) = 0 equivalent feet