1
Appendix 2
LEARNING A REFERENCE
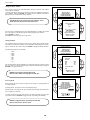
ADJUSTMENT MODE
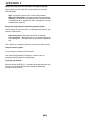
Select a path from below:
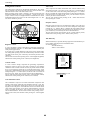
Adjust one Reference Source with perfect geometry. This source can have
either horizontal or vertical frequency. Remember that other sources will have
the same geometry as this Reference Source. This means that if a source has
4:3 aspect ratio, all sources will be adjusted with a 4:3 aspect ratio and the same
horizontal and vertical amplitudes.
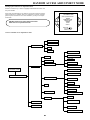
EYE-Q
GUIDED
RANDOM ACCESS
INSTALLATION
SERVICE
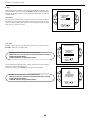
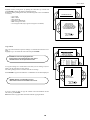
EYE-Q
Source
1
TOUCH UP
Select with
orAUTOCONVERGENCE
then <ENTER>.
QUICK AUTOPICTURE
<EXIT> to return
FULL AUTOPICTURE
EYE-Q SETUP
EYE-Q DIAGNOSTICS
Follow the steps below to select:
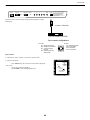
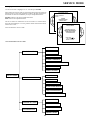
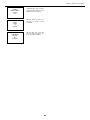
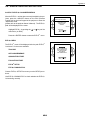
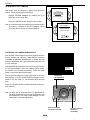
Enter in the Adjustment Mode and select EYE-QTM by pushing up or down
keys of the control disc. Now select SETUP using the up or down keys,
finally select LEARN REFERENCE.
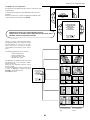
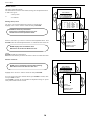
EYE-Q SETUP
Select with
or
then <ENTER>.
<EXIT> to returnFOCUS THE LENS
CENTER THE CAMERA
CONFIGURATION: rear/front
LEARN REFERENCE
TOUCH-UP OPTIONS:
Select with
or
then <ENTER>.
<EXIT> to return
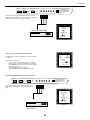
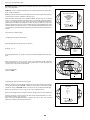
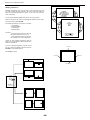
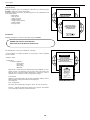
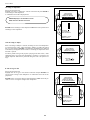
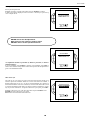
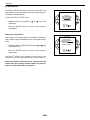
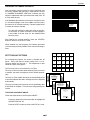
EYE-QTM will now project the Reference Source with horizontal green line inserted at the top region and a horizontal green line inserted at the bottom region of
the image.
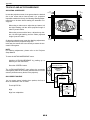
Pushing the up or down keys of the control disc adjust the horizontal green
line at the top until it matches the top edge of the Reference Source perfectly, then press <ENTER>.
Using the up or down keys of the control disc adjust the horizontal green
line at the bottom until it matches the bottom edge of the Reference Source
perfectly, then press <ENTER>.
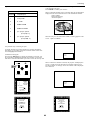
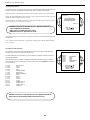
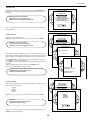
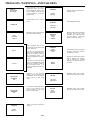
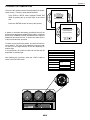
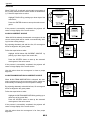
Now EYE-QTM projects the Reference Source with a vertical green line inserted
at the left and a vertical green line inserted at the right.
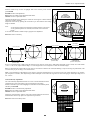
Top Green Line
Top Edge
REFERENCE SOURCE
Pushing the up or down keys of the control disc changes the position of the
vertical green lines simultaneously; they are being shifted symmetrically
inward and outward with respect to the scan of the projector.
Bottom Green Line
Bottom Edge
Use left or right keys of the control disc to change the phase of the Reference
Source. Use both (up or down) or (left or right) so that the green vertical lines
perfectly match the right-left edges of the reference image, then press
<ENTER> (this will initiate the learning procedure).
NOTE: If you had to use the left and right arrow keys to adjust the phase, this
means that the phase of the Reference Source was originally not adjusted correctly. Hence the Reference Source may now fall short of the physical screen.
To avoid this, re-adjust the Horizontal Raster Shift (in the Random Access
Adjustment mode, refer to Owner Manual) so that the Reference source falls on
the physical screen and repeat the Learn Reference selection.
Do not adjust the phase when repeating the Learn Reference procedure.
Pressing<EXIT> will interrupt the Learn Reference procedure if required.
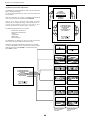
WHAT IS BEING MEASURED BY EYE-QTM
Using the borderlines define above, EYE-QTM knows exactly when the image
starts and stops with respect to time scale. EYE-QTM is now able to project lines
at the edges. Using the border lines left and right, EYE-QTM projects three vertical thick green lines at positions 5, 50 and 95%. Using the border lines top and
bottom, EYE-QTM projects three horizontal thick lines at positions 5, 50 and 95%.
EYE-QTM then calculates the intercepts of the three vertical and three horizontal
lines resulting in nine points. These nine points are the reference points for
other geometry sources and are stored into memory.
NOTE: “DELETE ALL BLOCKS” in the Service menu does not delete the Reference source parameters.
APX-9
Right Green Line
Right Edge
REFERENCE SOURCE
Left Edge
Left Green Line