1
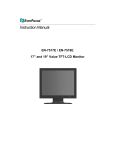
Instruction Manual
EN-7517C / EN-7519C
17” / 19” PREMIUM
TFT-LCD MONITOR
Please read this manual thoroughly before use, and keep it handy for future reference.
SAFETY INSTRUCTION …………………………………………………………………..
2~3
CAUTIONS ………………………………………………………………..........................
FCC RF INTERFERENCE STATEMENT ……………………………...........................
CONNECTING WITH EXTERNAL EQUIPMENT ……………………………………….
REMOTE FUNCTIONS …………………………………………………………………….
4
5
6
7
CONTROLS AND FUNCTIONS …………………………………………………………..
MOUNTING GUIDE ………………………………………………………………………..
D-SUB CONNECTOR PIN ASSIGNMENTS …………………………………………….
POWER MANAGEMENT ………………………………………………………………….
8 ~ 30
31
32
33
SPECIFICATIONS ………………………………………………………………………….
TROUBLE SHOOTING GUIDE …………………………………………………………...
34
35
INSTRUCTION MANUAL ……………………………………………………………………. 1
Important Safety Instruction
1. Read these instructions.
2. Keep these Instructions.
3. Heed all warnings.
4. Follow all instructions.
5. Do not use this apparatus near water.
6. Clean only with dry cloth.
7. Do not block any ventilation openings. Install in accordance with the manufacturer’s
instructions.
8. Do not install near any heat sources such as radiators, heat registers,stoves, or other
apparatus (including amplifiers) that produce heat.
9. Do not defeat the safety purpose of the polarized or grounding-type plug.
Apolarized plug has two blades with one wider than the other.
Agrounding type plug has two blades and a third grounding prong.
The wide blade or the third prong are provided for your safety.
If the provided plug does not fit into your outlet, consult an electrician for replacement of the
bsolete outlet.
10. Protect the power cord from being walked on or pinched particularly at plugs, convenience
receptacles and the point where they exit from the apparatus.
11. Only use attachment/accessories specified by the manufacturer.
12. Use only with the cart, stand, tripod, bracket or table specified by the manufacturer or sold with
the apparatus. When a cart is used, use caution when moving
the cart/apparatus combination to avoid injury from tip-over.
13. Unplug this apparatus during lightning storms or when unused
for long periods of time.
14. Refer all servicing to qualified service personnel. Servicing is required when the apparatus has
been damaged in any way, such as power-supply cord or plug is damaged, liquid has been
spilled or objects have fallen into the apparatus the apparatus has been exposed to rain or
moisture does not operate normally or has been dropped.
2 ……………………………………………………………………. INSTRUCTION MANUAL
- The apparatus shall not be exposed to dripping or splashing and that no objects filled with liquids,
such as vases, shall be placed no the apparatus.
- Minimum distances(e.g. 10cm) around the apparatus for sufficient ventilation.
“WARNING - To reduce the risk of fire or electric shock, do not expose the apparatus to rain or moisture.”
“The apparatus shall not be exposed to dripping or splashing and no objects filled with liquids,
such as vases, shall be placed on the apparatus.”
This symbol is intended to alert the user to the presence of uninsulated :
dangerous voltage with in the product’s enclosure that may be of sufficient
magnitude to constitute a risk of electric shock to persons.
This symbol is intended to alert the user to the presence of important operating
and maintenance(servicing) instructions in the literature accompanying the
appliance.
INSTRUCTION MANUAL ……………………………………………………………………. 3
CAUTION
The power supply cord is used as the main disconnect device, ensure that the socket-outlet is
located/installed near the equipment and is easily accessible.
ATTENTIONN
Le cordon d`alimentation est utillsé comme interrupteur général. La prise de courant doit être
située ou installée à proximité du matériel et être facile d`accès
NEVER REMOVE THE BACK COVER
Removal of the back cover should be carried out only by qualified personnel.
DO NOT USE IN HOSTILE ENVIRONMENTS
To prevent shock or fire hazard, do not expose the unit to rain or moisture.
This unit is designed to be used in the office or home. Do not subject the unit to vibrations,
dust of corrosive gases.
KEEP IN A WELL VENTILATED PLACE
Ventilation holes are provided on the cabinet to prevent the temperature from rising.
Do not cover the unit or place anything on the top of unit.
AVOID HEAT
Avoid placing the unit in direct sunshine or near a heating appliance.
TO ELIMINATE EYE FATIGUE
Do not use the unit against a bright back ground and where sunlight or other light sources will
shine directly on the monitor.
BE CAREFUL OF HEAVY OBJECT
Neither the monitor itself nor any other heavy object should rest on the power cord.
Damage to a power cord can cause fire or electrical shock.
4 ……………………………………………………………………. INSTRUCTION MANUAL
NOTE
This equipment has been tested and found to comply with the limits for a Class A digital device,
pursuant to Part 15 of the FCC Rules. These limits are designed to provide reasonable
protection against harmful interference in a residential installation.
This equipment generates, uses and can radiate radio frequency energy and, if not installed
and used in accordance with the instructions, may cause harmful interference to radio
communications. However, there is no guarantee that interference will not occur in a particular
installation.
If this equipment does cause harmful interference to radio or television reception which can be
determined by turning the equipment off and on, the user is encouraged to try to correct the
interference by one or more of the following measures.
- Reorient or relocate the receiving antenna.
- Increase the separation between the equipment and receiver.
- Connect the equipment into an outlet on a circuit different from that to which the receiver
is connected.
- Consult the dealer or an experienced radio, TV technician for help.
- Only shielded interface cable should be used.
Finally, any changes or modifications to the equipment by the user not expressly approved by
the grantee or manufacturer could void the users authority to operate such equipment.
DOC COMPLIANCE NOTICE
This digital apparatus does not exceed the Class A limits for radio noise emissions from digital
apparatus set out in the radio interference regulation of Canadian Department of
communications.
INSTRUCTION MANUAL ……………………………………………………………………. 5
A. BOTTOM PANEL CONTROL
1
2
3
45
6
7
8
1. HDMI IN
2. DVI IN
3. VGA(D-SUB) IN
4. PC STEREO IN
5. AUDIO OUT(Speaker)
6. COMPONENT Y,Pb,Pr & SOUND L,R IN
7. DC 12V IN
8. TRIGGER INPUT
B. SIDE PANEL CONTROL
1
1. VIDEO1(AV1) IN
2. VIDEO1(AV1) OUT
3. VIDEO2(AV2) IN
4. VIDEO2(AV2) OUT
5. S-VIDEO(Y/C) IN
6. S-VIDEO(Y/C) OUT
7. AV1 & S-VIDEO AUDIO IN
8. AV1 & S-VIDEO AUDIO OUT
2
3
4
5
6
7
8
9. AV2 AUDIO IN
10. AV2 AUDIO OUT
11. DC 12V ADAPTOR
11
9
10
6 ……………………………………………………………………. INSTRUCTION MANUAL
C. REMOTE CONTROLLER (Option)
1. POWER(
)
Turn the power ON or OFF. There will be a few seconds delay before the display appears.
2. SOURCE
Select pc or video(AV1/AV2/S-Video/Component/HDMI/DVI/PC) sources.
3. AUTO
Auto geometry adjustment in PC Source.
4. HOLD
Stop the Trigger & Auto switching functions.
5. MUTE
Mute the sound.
6. MENU
Activates and exits the On Screen Display.
7. EXIT
Exit the On Screen Display.
8. VOL(
)
Increases or decreases the level of audio volume.
9. UP/DOWN
Move to OSD menu.
10. SOURCE/SELECT
Accept your selection or displays the current mode.
11. INFO
Input mode information Display.
12. STILL
Stop the picture.
13. PIP (Picture In Picture)
Activate PIP mode.
14. P.INPUT
Change source of sub picture in PIP mode.
15. P.POS
Move the position of sub picture for PIP mode.
16. P.SIZE
Change the size of sub and main picture for PIP mode.
17. SWAP
Alternates between main and sub picture.
18. ARC (Aspect Ratio Control)
Select screen ratio.
19. APC (Auto Picture Control)
Select picture mode.
20. ACC (Auto Color Control)
Select Colour mode.
21. S.SET
Select Sound mode main input or sub input
22. PC
Select PC mode(PC, DVI & HDMI).
23. AV
Select AV mode.(AV1, AV2 & S-VIDEO).
24. COMP
Select COMPONENT mode.
INSTRUCTION MANUAL ……………………………………………………………………. 7
D. FRONT KEY CONTROL
1 / 2. VOL
Adjust the volume and menu settings.
3 / 4. ▲ / ▼
These buttons allow user to enter the sub-menu of the activated function.
The up(▲) button is HOLD function and stop the Trigger & Auto switching functions.
5. SOURCE/SELECT
Select PC or video.
Select On Screen Display menu.
6. MENU/EXIT
Activate and exit the On Screen Display.
7. POWER ON/OFF( / I )
Turns the power ON or OFF. There will be a few seconds delay before the display appears.
8. IR Sensor
Remote controller sensor.
9. POWER LED
The power LED lights with green when the power is turned ON.
The power is turned off by pressing the power switch again and the power LED goes Red.
8 ……………………………………………………………………. INSTRUCTION MANUAL
OSD MENU DESCRIPTION
A: CUSTOM MENU (Only Video Input)
1) Press the MENU button and then press the up(▲) or down(▼) button to select the Custom.
2) Press the up(▲) or down(▼) button to select the sub menu.
3) Press the left(◀) or right(▶) button to adjust the picture setting.
4) Press the MENU button to save.
Brightness: Increase or decrease the intensity of the image.
Contrast: Increase or decrease the intensity (lightness or dimness) of the image.
Color: Increase or decrease the colour of the picture.
Tint: Increase or decrease the tint of the picture.
Sharpness: Increase or decrease the sharpness of the picture.
A: CUSTOM MENU (For HDMI, DVI & PC Input)
1) Press the MENU button and then press the up(▲) or down(▼) button to select the Custom.
2) Press the up(▲) or down(▼) button to select the sub menu.
3) Press the left(◀) or right(▶) button to adjust the picture setting.
4) Press the MENU button to save.
INSTRUCTION MANUAL ……………………………………………………………………. 9
B. Picture / Sound Menu (Only Video Input)
1. Picture Mode
1) Press the MENU button and then press the up(▲) or down(▼) button to select the Picture / Sound.
2) Press the right(▶) or SOURCE/SELECT button.
3) Press the up(▲) or down(▼) button to select the Picture Mode.
4) Press the right(▶) or SOURCE/SELECT button.
5) Press the up(▲) or down(▼) button to select the Picture Mode option.
6) Press the MENU button to save
2. Color Tone
1) Press the up(▲) or down(▼) button to select the Color Tone.
2) Press the right(▶) or SOURCE/SELECT button.
3) Press the up(▲) or down(▼) button to select the Color Tone option.
4) Press the MENU button to save.
10 ……………………………………………………………………. INSTRUCTION MANUAL
3. Mute
1) Press the up(▲) or down(▼) button to select the Mute.
2) Press the right(▶) or SOURCE/SELECT button.
3) Press the up(▲) or down(▼) button to select the On or Off.
4) Press the MENU button to save.
4. Volume
1) Press the up(▲) or down(▼) button to select the Volume
2) Press the left(◀) or right(▶) button to adjust Volume setting.
3) Press the MENU button to save.
INSTRUCTION MANUAL ……………………………………………………………………. 11
5. Size
1) Press the up(▲) or down(▼) button to select the Size
2) Press the right(▶) or SOURCE/SELECT button.
3) Press the up(▲) or down(▼) button to select the Size option.
4) Press the MENU button to save.
6. NR
1) Press the up(▲) or down(▼) button to select the NR.
2) Press the right(▶) or SOURCE/SELECT button.
3) Press the up(▲) or down(▼) button to select the On or Off.
4) Press the MENU button to save.
12 ……………………………………………………………………. INSTRUCTION MANUAL
7. 3D Comb
1) Press the up(▲) or down(▼) button to select the 3D Comb.
2) Press the right(▶) or SOURCE/SELECT button.
3) Press the up(▲) or down(▼) button to select the On or Off.
4) Press the MENU button to save.
B. Picture / Sound Menu (For HDMI, DVI & PC Input)
1. Picture Mode
1) Press the MENU button and then press the up(▲) or down(▼) button to select the Picture/Sound.
2) Press the right(▶) or SOURCE/SELECT button.
3) Press the up(▲) or down(▼) button to select the Picture Mode.
4) Press the right(▶) or SOURCE/SELECT button.
5) Press the up(▲) or down(▼) button to select the Picture Mode option.
6) Press the MENU button to save.
INSTRUCTION MANUAL ……………………………………………………………………. 13
2-1. Color Tone
1) Press the up(▲) or down(▼) button to select the Color Tone.
2) Press the right(▶) or SOURCE/SELECT button.
3) Press the left(▶) or SOURCE/SELECT button again.
4) Press the up(▲) or down(▼) button to select the Color Tone option.
5) Press the MENU button to save.
14 ……………………………………………………………………. INSTRUCTION MANUAL
2-2. Color Tone (Custom)
1) Press the up(▲) or down(▼) button to select the Custom in the Color Tone.
2) Press the Menu button to save.
3) Press the up(▲) or down(▼) button to select the Red(R), Green(G) or Blue(B).
4) Press the left(◀) or right(▶) button to adjust color density.
5) Press the MENU button to save.
INSTRUCTION MANUAL ……………………………………………………………………. 15
3. Size
1) Press the up(▲) or down(▼) button to select the Size.
2) Press the right(▶) or SOURCE/SELECT button.
3) Press the up(▲) or down(▼) button to select the Size option.
4. PC control (Only PC Input)
1) Press the up(▲) or down(▼) button to select the PC.
2) Press the right(▶) or SOURCE/SELECT button.
3) Press the up(▲) or down(▼) button to select the PC sub menu.
4) Press the right(▶) or SOURCE/SELECT button.
5) Press the left(◀) or right(▶) button to adjust the PC setting.
6) Press the MENU button to save.
Auto Adjust: Auto geometry adjustment.
Phase: Adjust the number of horizontal picture elements.
H-Position: Move image horizontally on screen right or left.
V-Position: Move image vertically on screen up or down.
Frequency: Adjust the vertical noise of screen image.
16 ……………………………………………………………………. INSTRUCTION MANUAL
C. PIP MENU (Only Video Input)
1) Press the MENU button and then press the up(▲) or down(▼) button to select the PIP.
1. PIP
1) Press the right(▶) or SOURCE/SELECT button.
2) Press up(▲) or down(▼) button to select the On or Off.
3) Press the MENU button to save.
INSTRUCTION MANUAL ……………………………………………………………………. 17
2. Input Source
1) Press the up(▲) or down(▼) button to select the Input Source.
2) Press the right(▶) or SOURCE/SELECT button.
3) Press the up(▲) or down(▼) button to select the Source option.
4) Press the MENU button to save.
3. Size
1) Press the up(▲) or down(▼) button to select the Size.
2) Press the right(▶) or SOURCE/SELECT button.
3) Press the up(▲) or down(▼) button to select the Size option.
4) Press the MENU button to save.
18 ……………………………………………………………………. INSTRUCTION MANUAL
4. Position
1) Press the up(▲) or down(▼) button to select the Position.
2) Press the right(▶) or SOURCE/SELECT button.
3) Press the up(▲) or down(▼) button to select the Position option.
4) Press the MENU button to save.
5. Swap
1) Press the up(▲) or down(▼) button to select the Swap.
2) Press the right(▶) or SOURCE/SELECT button to swap the main image for the sub one.
INSTRUCTION MANUAL ……………………………………………………………………. 19
5. Sound Select
1) Press the up(▲) or down(▼) button to select the Sound Select.
2) Press the right(▶) or SOURCE/SELECT button.
3) Press the up(▲) or down(▼) button to select the Sound Select option.
4) Press the MENU button to save.
C. PIP MENU (For HDMI, DVI & PC Input)
1. Input Source
1) Press the up(▲) or down(▼) button to select the Input Source.
2) Press the right(▶) or SOURCE/SELECT button.
3) Press the up(▲) or down(▼) button to select the Input Source option.
4) Press the MENU button to save.
20 ……………………………………………………………………. INSTRUCTION MANUAL
D. SETUP MENU
1) Press the MENU button and then press the up(▲) or down(▼) button to select the Setup.
1. Reset
1) Press the right(▶) or SOURCE/SELECT button
2) Press the right(▶) or SOURCE/SELECT button again.
3) Press SOURCE/SELECT button to execute the reset.
Reset: All settings go to the factory initialization.
INSTRUCTION MANUAL ……………………………………………………………………. 21
2. Language
1) Press the up(▲) or down(▼) button to select the Language.
2) Press the right( ) or SOURCE/SELECT button.
3) Press the up(▲) or down(▼) button to select language.
4) Press the MENU button to save.
3. OSD Tone
1) Press the up(▲) or down(▼) button to select the OSD Tone.
2) Press the right( ) or SOURCE/SELECT button
3) Press the up(▲) or down(▼) button to select the OSD Tone option.
4) Press the MENU button to save.
22 ……………………………………………………………………. INSTRUCTION MANUAL
4. Blue Screen
1) Press the up(▲) or down(▼) button to select the Blue Screen.
2) Press the right( ) or SOURCE/SELECT button.
3) Press the up(▲) or down(▼) button to select the On or Off.
4) Press the MENU button to save.
5. Key Lock
1) Press the up(▲) or down(▼) button to select the Key Lock.
2) Press the right( ) or SOURCE/SELECT button
3) Press the up(▲) or down(▼) button to select the On or Off
4) Press the MENU button to save.
※ How to unlock
1) On the front key: Press the SOURCE/SELECT and MENU button at the same time over
3 seconds.
2) On the Remote Controller: The Remote Controller operates well because the Key Lock
function is only allowed for the front key of this product.
INSTRUCTION MANUAL ……………………………………………………………………. 23
6. Trigger
1) Press the up(▲) or down(▼) button to select the Trigger.
2) Press the right( ) or SOURCE/SELECT button.
6-1. Trigger Enable
1) Press the up(▲) or down(▼) button to select the Trigger Enable.
2) Press the right( ) or SOURCE/SELECT button.
3) Press the up(▲) or down(▼) button to select the On or Off.
4) Press the Menu button to save.
24 ……………………………………………………………………. INSTRUCTION MANUAL
6-2. Trigger Input
1) Press the up(▲) or down(▼) button to select the Trigger Input .
2) Press the right( ) or SOURCE/SELECT button.
3) Press the up(▲) or down(▼) button to select the Trigger Input option.
4) Press the Menu button to save.
6-3. Buzzer
1) Press the up(▲) or down(▼) button to select the Buzzer.
2) Press the right( ) or SOURCE/SELECT button.
3) Press the up(▲) or down(▼) button to select the On or Off.
4) Press the Menu button to save.
INSTRUCTION MANUAL ……………………………………………………………………. 25
6-4. Trigger Time
1) Press the up(▲) or down(▼) button to select the Trigger Time.
2) Press left( ) or right( ) button to adjust Trigger Time setting.
3) Press the MENU button to save.
6-5 Trigger Option
1) Press the up(▲) or down(▼) button to select the Trigger Option.
2) Press the right( ) or SOURCE/SELECT button.
3) Press the up(▲) or down(▼) button to select the Trigger Option setting.
4) Press the Menu button to save.
N/C (Normal Closed): When Trigger cable is opened, Trigger function is activated.
N/O (Normal Opened): When Trigger cable is closed, Trigger function is activated.
High: When Trigger signal is high(2~5[V]), Trigger function is activated.
Low: When Trigger signal is low(0~0.6[V]), Trigger function is activated.
26 ……………………………………………………………………. INSTRUCTION MANUAL
6-6. Display Type
1) Press the up(▲) or down(▼) button to select the Display Type.
2) Press the right( ) or SOURCE/SELECT button.
3) Press the up(▲) or down(▼) button to select the Display Type option.
4) Press the Menu button to save.
PIP & FULL :
If the type of image in the trigger input is different with we are watching, trigger image will be
displayed as a small screen at a corner which you selected in PIP menu.
Otherwise it will be displayed as a full screen.
FULL : Trigger image will be displayed as a full screen.
※ The Type of Image 1 : AV1, AV2 or S-Video.
The Type of Image 2 : Component, HDMI, DVI or PC.
INSTRUCTION MANUAL ……………………………………………………………………. 27
7. Auto switching
1) Press the up(▲) or down(▼) button to select the Auto switching.
2) Press the right( ) or SOURCE/SELECT button.
7-1. Auto switching On/Off
1) Press the right( ) or SOURCE/SELECT button.
3) Press the up(▲) or down(▼) button to select the On or Off .
4) Press the Menu button to save.
28 ……………………………………………………………………. INSTRUCTION MANUAL
7-2. Auto switching Inputs enabled
1) Press the up(▲)or down(▼) button to select the Inputs enabled.
2) Press the right( ) or SOURCE/SELECT button.
3) Press the up(▲) or down(▼) button to select the Input.
4) Press the right( ) or SOURCE/SELECT button.
1) Press the up(▲) or down(▼) button to select the On or Off.
2) Press the Menu button to save.
INSTRUCTION MANUAL ……………………………………………………………………. 29
7-3. Auto switching Time
1) Press the up(▲) or down(▼) button to select the Time.
2) Press the left( ) or right( ) button to adjust the Time setting.
3) Press the MENU button to save.
30 ……………………………………………………………………. INSTRUCTION MANUAL
Using the VESA standard wall mount design and the 100mm hole pattern on the back panel
to install the LCD monitor to the wall.
Wall-mount Installation (Option)
1. The Monitor fixing bracket to the monitor using the fixing screws provided.
2. The monitor fixing bracket assembled with monitor
INSTRUCTION MANUAL ……………………………………………………………………. 31
▶ PIN ASSIGNMENTS
Pin 1
RED VIDEO
9
2
GREEN VIDEO
10
SIGNAL CABLE DETECT
3
BLUE VIDEO
11
GROUND
4
GROUND
12
SDA(for DDC)
5
GROUND
13
H-SYNC.(or H+V SYNC.)
6
RED GROUND
14
V-SYNC.
7
GREEN GROUND
15
SCL(for DDC)
8
BLUE GROUND
▶ ACCESSORIES
1. Power cord
2. Power adaptor (Built-in)
3. User’s manual
4. PC cable
5. Trigger cable (Option)
6. Stereo cable (Option)
7. Remote controller (Option)
8. Batteries (Option)
9. Wall mount (Option)
10. Rack mount (Option)
32 ……………………………………………………………………. INSTRUCTION MANUAL
This monitor features a power management system to “power down” upon receipt of the VESA
DPMS(The display power management signaling) from a VESA DPMS video card.
The VESA DPMS-compliant video card performs this signaling system through not sending
horizontal, vertical, or sync signal.
This monitor enters an appropriate mode through identifying each of the three modes of the
signaling system.
POWER CONSUMPTION : < 50W
LED INDICATOR
The power management feature of the monitor is comprised of four stages: On(Green),
Standby, Suspend, Active off(Red on/off 1 sec) and Unsupported mode(Green).
MODE
LED COLOR
ON
GREEN
STANDBY
SUSPEND
ACTIV OFF
UNSUPPORTES
MODE
POWER OFF
RED ON/OFF
1 SEC
GREEN
RED
MONITOR OPERATION
Normal Operation
Screen blanks after preset idle time
And some electronic circuits or all
Circuitry in the monitor shut down.
Normal operation but the on screen
Display will show error massage
Not Operation
INSTRUCTION MANUAL ……………………………………………………………………. 33
17”
19”
17˝ Diagonal AM-TFT(Active-Matrix)
19˝ Diagonal AM-TFT(Active-Matrix)
Pixel pitch(mm) : 0.264(H) x 0.264(V)
Pixel pitch(mm) : 0.294(H) x 0.294(V)
BRIGHTNESS: 300cd/㎡(Typical)
BRIGHTNESS: 300cd/㎡(Typical)
CONTRAST RATIO: 1000:1(Typical)
CONTRAST RATIO: 800:1(Typical)
RESPONSE TIME: 5msec(Typical)
RESPONSE TIME: 5msec(Typical)
RESOLUTION
(H x V)
1280X1024 @60Hz
1280X1024 @60Hz
FREQUENCY
HORIZONTAL: 31 ~ 80KHz
VERTICAL: 56-75Hz
HORIZONTAL: 31~ 80KHz
VERTICAL: 56-75Hz
LCD- Type
VIDEO(2ch input 1.0Vp-p, 75Ω terminated, loop-through out)
S-VIDEO(1ch input (Y/C) , loop-through out)
COMPONENT(Y,Pb,Pr, Sound L/R)
DVI D(Digital Video Interface)
INPUT SIGNAL
HDMI(High Definition Multimedia Interface)
PC RGB
AV(composite) Sound in/Out
PC Stereo Sound
Audio Out
ACTIVE DISPLAY
AREA (W x H)
PACKING
DIMENSIONS
(W x H x D)
WEIGHT
337.9 mm x 270.3 mm (13.3’’ X 10.64’’)
376.32mm X 301mm (14.82’’ X 11.85’’)
477mm X 543mm X 205mm
477mm X 543mm X 205mm
(18.78’’ X 21.38’’ X 8.07’’)
(18.78’’ X 21.38’’ X 8.07’’)
Net Weight : 6.42Kg (14.15 lbs)
Net Weight : 7.17Kg (15.81 lbs)
ELECTRICAL
RATINGS
Gross Weight : 8.19Kg (18.06 lbs))
Gross Weight : 8.94Kg (19.71 lbs)
DC 12V/ 3.0A
DC 12V/ 3.5A
▶▶ NOTE :
Technical specifications are subject to change without notice.
34 ……………………………………………………………………. INSTRUCTION MANUAL
WEEE Symbols
Correct Disposal of This Product
(Waste Electrical & Electronic Equipment)
(Applicable in the European Union and other
European countries with separate collection systems)
This marking shown on the product or its literature,
indicates that it should not be disposed with other
household wastes at the end of its working life. To
prevent possible harm to the environment or human
health from uncontrolled waste disposal, please
separate this from other types of wastes and
recycle it responsibly to promote the sustainable
reuse of material resources. Household users should
contact either the retailer where they purchased this
product, or their local government office, for details of
where and how they can take this item for
environmentally safe recycling. Business users
should contact their supplier and check the terms
and conditions of the purchase contract. This product
should not be mixed with other commercial wastes
for disposal.
INSTRUCTION MANUAL ……………………………………………………………………. 35
Taiwan - Headquarter Office
China - Beijing Office
12F, No.79 Sec.1 Shin-Tai Wu Road,
Room 609,Technology Trade Building.
Hsi-Chi, Taipei, Taiwan
Shangdi Information Industry Base,
Tel: +886-2-26982334
Haidian District,Beijing China
Fax: +886-2-26982380
Tel: +86-10-62971096
Fax: +86-10-62971423
Europe - Germany Office
Japan Office
Albert-Einstein-Strasse 1,
1809 WBG Marive East 18F,
D-46446 Emmerich, Germany
2-6 Nakase, Mihama-ku,
Tel: +49-2822-9394-0
Chiba City 261-7118, Japan
Fax: +49-2822-939495
Tel: +81-43-212-8188
Fax: +81-43-297-0081
USA - California Office
USA - New York Office
1801 Highland Ave. Unit A
415 Oser Ave Unit S
Duarte, CA 91010 ,U.S.A
Hauppauge, NY 11788
Tel: +1-626-844-8888
Sales: +1-631-436-5070
Fax: +1-626-844-8838
Fax: +1-631-436-5027
Your EverFocus product is designed
and manufactured with high quality
materials and components which can
be recycled and reused.
This symbol means that electrical and
electronic equipment, at their end-oflife, should be disposed of separately
from your household waste.
Please, dispose of this equipment at
your
local
community
waste
collection/recycling centre.
In the European Union there are
separate collection systems for used
electrical and electronic product.
Please, help us to conserve the
environment we live in!
Ihr
EverFocus
Produkt
wurde
entwickelt und hergestellt mit qualitativ
hochwertigen
Materialien
und
Komponenten, die recycelt und wieder
verwendet werden können.
Dieses
Symbol
bedeutet,
dass
elektrische und elektronische Geräte
am Ende ihrer Nutzungsdauer vom
Hausmüll getrennt entsorgt werden
sollen.
Bitte entsorgen Sie dieses Gerät bei
Ihrer
örtlichen
kommunalen
Sammelstelle oder im Recycling Centre.
Helfen Sie uns bitte, die Umwelt zu
erhalten, in der wir leben!
P/N : L39ME0171 Rev.2