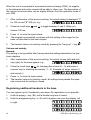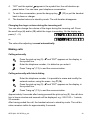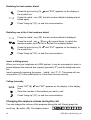
1
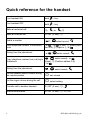
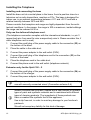
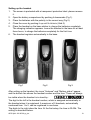
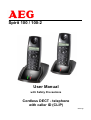
Spirit 100 / 100-2
User Manual
with Safety Precautions
Cordless DECT - telephone
with caller ID (CLIP)
05/06 gc
Quick reference for the handset
Turn handset ON
hold
Q – key
Turn handset OFF
hold
Q – key
Make an external call
n;
Make an internal call
R / INT (2 sec); n
Redial a number
V/P; C select record; H
Store telephone number to the phonebook
P/B ; P/B (2 sec); n (select position 0-9); n (input nr.); P/B
Dialing from the phonebook
P/B
H
;
; or
H
;n
C select record; H
S C
;
select record; P/B
Copy telephone number from call log to
(2sek); n (Position wählen 0-9);
phonebook
P/B
Dialing from the phonebook
S ; C select record; H
Set the speaker phone volume during
the communication
C
set volume
Set the ringer volume during the call
C
select setting
Transfer call to another handset
R / INT (2 sec); n ;
Internal consultation
R / INT (2 sec); n ; R / INT
2
Q
AEG Spirit 100 05.06 gc_de
TABLE OF CONTENTS
INSTALLATION.......................................................................5
Appliance overview...................................................................................... 5
Views ........................................................................................................... 6
Display-Icons ............................................................................................... 9
Contents of the package............................................................................ 10
Features..................................................................................................... 10
Safety precautions ....................................................................... 11
Installing the Telephone .............................................................. 12
Installing and connecting the base ............................................................ 12
Setting up the handset............................................................................... 13
SETTINGS ............................................................................ 14
Default settings (may be depending on your country's version) ................ 14
Returning the settings to their default values (RESET) ............................. 14
Handset Settings .......................................................................... 15
Starting the programming mode ................................................................ 15
Setting the ringer for external calls ............................................................ 15
Setting the ringer for internal calls ............................................................. 15
Setting date and time................................................................................. 16
Base settings ................................................................................ 17
Dialing mode.............................................................................................. 17
Flash time .................................................................................................. 17
Volume and melody ................................................................................... 18
Registering additional handsets to the base............................. 18
Keypad locking .......................................................................................... 19
MAKING CALLS .................................................................. 20
Answering a call ........................................................................... 20
Answering an external call......................................................................... 20
Answering an internal call.......................................................................... 20
Changing the ringer volume during the incoming call................................ 21
Making calls .................................................................................. 21
Calling externally ....................................................................................... 21
Calling externally with block dialing ........................................................... 21
Redialing the last number dialed ............................................................... 22
Redialing one of the 5 last numbers dialed................................................ 22
Insert a dialing pause................................................................................. 22
Calling internally ........................................................................................ 22
AEG Spirit 100 05.06 gc_de
3
Changing the earpiece volume during the call..........................22
Mute ...........................................................................................................23
Call duration ...............................................................................................23
PHONE BOOK ......................................................................24
New phonebook entry ................................................................................24
Editing phonebook entries..........................................................................24
Dialing from the phonebook .......................................................................25
Short dialing memory (direct access) ........................................26
Programming the short dialing memory (direct access) .............................26
Dialing from the short dialing memory........................................................26
CID LIST (caller list - CLIP) .................................................27
Generalities ................................................................................................27
Display at incoming call..............................................................................27
Dialing from the CID-list (CLIP) ..................................................................28
Erasing a number from the CID - list ..........................................................28
Copying a number from the CID – list to the phonebook............................28
External comfort functions ..........................................................29
Waiting call and toggling ............................................................................29
Consultation and toggling...........................................................................29
Conference call ..........................................................................................30
APPENDIX ............................................................................31
Technical Data ..............................................................................31
Troubleshooting ...........................................................................32
No display...................................................................................................32
The batteries are empty .............................................................................32
The handset does not find the base ...........................................................32
No dialing tone ...........................................................................................32
Dialing a number impossible ......................................................................33
Maintenance ..................................................................................33
Recycling.......................................................................................33
Warranty ........................................................................................34
Index ..............................................................................................35
CE-Declaration ..............................................................................36
Environmental Protection............................................................36
4
AEG Spirit 100 05.06 gc_de
INSTALLATION
Appliance overview
Handset
Display
Loudspeaker
15
Erase - and
mute - key
14
Redial / Pause
13
Scrolling key ∧:
open CID – list
raise volume
12
1
Programming key
/ phonebook
2
Line button
3
Scrolling key ∨ :
open CID-list
lower volume
4
Alphanumeric
keypad
5
Hang up - button 11
handset ON / OFF
back - key
R / INT - button
6
Hash key /
keypad locking
Microphone
7
Direct dialing
(memory M1)
9
Charging contacts
8
AEG Spirit 100 05.06 gc_de
10
5
Views
Bas
"Paging" - key
16
Charging contacts 17
Green LED
Blinks slowly when
the line is open;
blinks fast during
incoming call
18
Red LED
19
Indicates charging of
handset (if handset
put there)
Charger
Charging contacts 20
LED-indication
(charging check)
6
21
AEG Spirit 100 05.06 gc_de
Bottom of the base
Cable ducts for fixing
of the supply and
phone cords
Connection
22
for power supply unit
Connection
for phone cord
23
Bottom of the charger
Connection
24
for power supply unit
Legend
Handset
1.
LCD – Display with 1 icon-line and 1 line of 12 (7-)segment characters.
2.
Programming key for all settings and for opening the phonebook.
3.
Line key
4.
Scrolling key ∨ / open the CID - list; for scrolling through the phonebook
resp. the CID and redial – list; for lowering the ringer volume resp. the ear
piece volume.
H
(pick up); for realizing connections.
AEG Spirit 100 05.06 gc_de
7
5.
Alphanumeric keypad n for editing telephone numbers / phonebook records.
6.
R/INT – button; Flash - key; Key pressed long will prepare internal dialing
(only possible if at least 2 handsets are registered at the same base).
7.
Microphone.
8.
Charging contacts at the handset
9.
Direct call - key; creates an external connection and dials the number in the
first direct call - memory (S1).
10. Hash - key / button for locking and unlocking the keypad.
Q
11. End - key
(hang-up); for ending a connection; for switching ON and
OFF the handset; for exiting the programming mode.
12. Scrolling key ∧ / open the CID-list; for scrolling through the phonebook
resp. the CID and redial – list; for raising the ringer volume resp. the ear
piece volume.
13. Redial / Pause; opens the redial – list; inserts a dialing pause.
14. Erase – key / mute – key H; for erasing phone numbers, for switching the
microphone OFF and ON.
15. Loudspeaker
Base Spirit 100
16. "Paging" – button for searching or calling the handset(s).
17. Charging contacts at the base.
18. Green LED; line indication; the LED blinks slowly when the line is open;
blinks fast during incoming call.
19. Red LED; charging indication; Charging battery indication if handset is put
into base unit
Charger Spirit (extension)
20. Charging contacts at the charger.
21. Red LED; charging indication; Indicates battery charging if handset is put
into charger
Connections
22. Connection for the power supply (bottom side of the base).
23. Connection for telephone cord (TAE / bottom side of the base)).
24. Connection for the power supply (bottom side of the charger).
8
AEG Spirit 100 05.06 gc_de
Display-Icons
Icon
Description
a
Arrow, indicating the continuation of the telephone number, when it is
longer than 12 characters.
i
Indication when the telephone line is open.
EXT
External communication active.
INT
Internal connection active.
a
Conference call active.
v
New caller(s) recorded in the CID – list (caller list).
M
F
Caller list open, answered call is on display;
(Icon without receiver: non-answered call is on display).
VMWI – indicator (Voice Mail Waiting Indication). Only for certain
networks: Voice mail is waiting in your mailbox.
M
Mute is switched ON (microphone OFF).
B .
Phonebook – indicator / Pos.Nr. – and phone number are shown.
P
Programming mode has been switched ON.
s
The keypad of the handset is locked.
AEG Spirit 100 05.06 gc_de
9
Icon
Description
Battery - status:
%
&
$
1 segment: battery almost empty, please recharge,
2 segments: battery half empty,
3 segments: battery fully charged.
"Antenna": Indication of action radius / reception; indicates when the
handset has a connection with the base.
It blinks, when the handset leaves the action radius or when no connection has been found with the base.
b
Arrow, indicating the continuation of the telephone number, if longer
than 12 characters.
Contents of the package
• 1 base station with power supply
• 1 charger with power supply (only Spirit 100-2)
• 1 or 2 handsets (depending on the set)
• 2 - 4 rechargeable batteries AAA, 1,2V – 550 mAh (depending on the set)
• 1 telephone line-cord/plug depending on your country's version
• 1 user manual
Features
• DECT - telephone according to the GAP - standard
• Up to 5 handsets can be registered with one base station
• Phonebook with a maximum of 10 records (24 signs each)
• 3 short dial memories
• Caller ID (CLIP) with a maximum of 5 telephone numbers in the log
• Display with symbol line and 7-segment line of 12 characters
• Date and hour display, indication of new calls entered
• Volume of the ringer and the loudspeaker adjustable
• Ringer melodies for internal and external calls individually selectable
• Mute, pause, intercom, keypad lock, block dialing
• Re-dialing the last 10 numbers dialed
• Display of the call duration
• Alarm tones for action radius and charging status of the batteries
• Tone or pulse dialing
• Can be used behind a PABX, flash time setting 100 or 300 ms
• Transferring a call, toggling between calls, consultation, conference calls
• Up to 130 hours of autonomy in standby, up to 12 hours in communication
10
AEG Spirit 100 05.06 gc_de
Congratulations
Thanks for purchasing this DECT - telephone!
In order to be able using your phone in full comfort, we advise to read this manual completely, so you will be familiar with its possibilities.
Safety precautions
Do not place the set in the proximity of heat sources and don't expose
it to direct sunrays, excessive dust or vibrations.
Only use recommended rechargeable batteries!
Insert the rechargeable batteries ensuring correct polarity. Check
the inscriptions in the battery compartment.
Do not use any other type of battery or a non-rechargeable battery, as
this could damage health and cause personal injury.
Do not place the base station in a moist room, such as bathroom or
shower. The ideal temperature range is between +5° and +35° C and
the humidity between 25 % and 85 %.
Do not use the phone in environment subject to explosion hazard e.g.
auto paint booths.
Read these instructions carefully, and make sure that they accompany the appliance, when given to others.
The operation of medical appliances may be affected. Be aware of
the technical conditions within the particular environment (e.g. doctor's clinic).
Dispose of the battery and phone in accordance with environmental regulations!
AEG Spirit 100 05.06 gc_de
11
Installing the Telephone
Installing and connecting the base
Install the base unit at a central place in the home. Avoid a position close to a
television set or radio transmitters, monitors or PCs. The base is designed for
indoor use, in an ambient temperature between +5°C and +35°C and with a
relative humidity between 25% and 85%.
Please consider that reception and range are highly dependant from the architectural conditions. In free space, the range is 300 m maximum, inside buildings
the range can be reduced to 50 m.
Only use the delivered telephone cord.
(The telephone connection complies with the international standards, i.e. pin 3
respectively pin 4 are used for wire a respectively wire b. Please consider this, if
other telephone cord is used)
1.
Connect the small plug of the power supply cable to the connection (22) on
the bottom of the base.
2.
Place the cable in the cable duct.
3.
Connect the power adapter to the wall outlet (230V).
4.
Connect the small plug of the telephone cord to the connection (23) on the
bottom of the base.
5.
Place the telephone cord in the cable duct.
6.
Connect the phone cord to the wall outlet (telephone network).
Extension only for the Spirit 100 – 2
7.
Connect the small plug of the power supply cable to the connection (24) on
the bottom of the charger.
8.
Connect the power adapter to the wall outlet (230V).
When you purchase another line cord in a retail store, take care to buy
one with correctly connected wires! (Connection scheme 3-4)
Modern furniture has a surface, treated with a vast number of different
types of paint and synthetic materials and is maintained with different
types of cleaning products. The ingredients of these products can
harm or weaken the synthetic feet of the appliance.
Use a slip free mat, in order to avoid any damage to your furniture's
paintwork.
We will not accept any liability for this kind of damage.
12
AEG Spirit 100 05.06 gc_de
Setting up the handset
1.
The screen is protected with a transparent protection label: please remove
it.
2.
Open the battery compartment by pushing it downwards (Fig.1).
3.
Place the batteries with the polarity in the correct way (Fig.2).
4.
Close the cover by pushing it up until it clicks in (Abb.3).
5.
Place the handset on the base station to charge the batteries completely.
The charging indication appears. Leave the handset in the base for at least
three hours, to charge the batteries completely for the first time.
6.
The handset registers automatically to the base.
Fig.1
Fig.2
Fig.3
After setting up the handset, the icons "Antenna" and "Battery status" appear,
and the bottom line shows the handset number and the time. These will always
be visible when the handset is in stand-by:
-1-
00;00
The digit to the left is the handset number, which is assigned automatically to
the handset when it is registered. A maximum of 5 handsets, automatically
numbered from 1 to 5, can be registered to one base.
The digits to the right show the time. At the first setup, the time is 00:00h. The
setting is described below.
AEG Spirit 100 05.06 gc_de
13
SETTINGS
You can change the parameters for a number of settings as described below.
These parameters can be returned to their original values by a RESET.
Default settings (may be depending on your country's version)
The following parameters are preset in the factory:
Ringer volume at the base
3
Ringer melody at the base
2
PIN Code
0000
Dialing mode
1: MFV (tone dialing)
Flash - time
2: (300ms)
Ringer volume at the handset
3
Ear piece volume
3
Internal melody
1
External melody
3
Returning the settings to their default values (RESET)
Proceed as follows, to make a reset:
1.
Open the battery compartment and remove a battery.
2.
Hold the star - key "Á" and re-insert the battery. Make sure the polarity is
correct.
3.
Hold the star – key "Á", until the whole display fills with the digit "8".
888888888888
4.
Press the programming key P, you hear a short confirmation signal at the
handset. After approximately 5 seconds, the handset switches OFF, and
you hear a confirmation signal at the base.
5.
The handset switches back on automatically, and registers to the base.
All parameters are reset to the factory settings.
Also the CID – list, the redial – list, the phonebook and the direct dial memories
are emptied.
This user manual is made for your information. Its contents are no
part of the contract. All technical data refer only to the normal values. Described execution and options can be different, depending
on the local requirements of your country.
We reserve the right to technical modifications!
14
AEG Spirit 100 05.06 gc_de
Handset Settings
Starting the programming mode
Entering the programming mode is achieved by pressing the programming –
key P (hold it for 2 seconds). Each further time that the P – key is pressed,
the following settable parameter appears. All settings can be modified, one after
the other, by running through the complete cycle.
As soon as the requested value of a parameter has been reached, it is confirmed automatically by pressing the P – key.
Q
Pressing or holding the "hang-up" – key
in programming mode, makes the
handset leave the programming and jump back to the stand-by mode. When no
buttons are pressed during programming mode, the handset also returns to
stand-by mode after for 15 seconds.
Setting the ringer for external calls
1.
Display after the first setup:
or later, in stand-by mode, e.g.:
2.
-1-1-
00;00
18;35
In stand-by, hold the programming key P for 2 seconds. The symbol P
blinks, the display is emptied.
3.
Press P, the symbols P and f appear continuously and "EXT" blinks.
4.
The actual volume (left) and melody (right) for external calls appear; e.g.:
-35.
-1-
Press the scroll-keys S T for changing the volume (0 – 5) and press a
numeric key for choosing the melody (1 – 5). Example for ringer switched
off (melody 1):
-OFF-
-1-
6.
Press P to save the input values.
7.
The program automatically continues with the setting of the ringer for internal calls, as described in the next chapter.
8.
The handset returns to stand-by mode by pressing the "hang-up" – key
Q.
Setting the ringer for internal calls
Remark:
This setting is only possible after having made the setting described in the previous chapter.
AEG Spirit 100 05.06 gc_de
15
1.
After confirmation of the previous setting, the actual volume (left) and melody (right) for internal calls appear; e.g.:
2.
-3-
-5-
Press the scroll-keys S T for changing the volume (0 – 5) and press a
numeric key for choosing the melody (1 – 5). Example for volume 1 and
melody 4:
-1-
-4-
3.
Press P to save the input values.
4.
The program automatically continues with the setting of date and time, as
described in the next chapter.
5.
The handset returns to stand-by mode by pressing the "hang-up" – key
Q.
Setting date and time
Remark:
This setting is only possible after having made the setting described in the previous chapters.
You can input the actual time and date. Only if you do so, date and time will appear in the CID – list, indicating when a call entered. When the telephone operator transmits date and time, the actual values will be set by the first incoming
call.
1.
After confirmation of the previous setting, the actual date (left) and time
(right) appear on display and the first digit of the date blinks; e.g.:
15-05 18:35
2.
Press the scroll-keys S T to move the cursor to the left resp. right, for
choosing the position to overwrite. The numeric keys allow overwriting date
and time; e.g.:
15-05 18:48
3.
Press P to save the input values.
4.
The program automatically continues with the setting of the dialing mode,
as described in the next chapter.
5.
The handset returns to stand-by mode by pressing the "hang-up" – key
Q.
Remark:
If a handset is not registered to a base, the programming mode stops after the
setting of date and time, and the handset returns to stand-by. All further described settings are only possible with a handset, registered to a Spirit 100
base.
16
AEG Spirit 100 05.06 gc_de
Base settings
Dialing mode
Remark:
This setting is only possible after having made the setting described in the previous chapters.
Two dialing modes are available:
• Tone - presently the standard
• Pulse - only needed for old installations
1.
After confirmation of the previous setting, the actual setting is displayed, "1"
-2-
for tone dialing and "2" for pulse dialing; e.g.:
2.
Press the scroll-keys S and T to toggle between options. If you choose
tone dialing; e.g.:
-1-
3.
Press P to save the input values.
4.
The program automatically continues with the setting of the flash - time, as
described in the next chapter.
5.
The handset returns to stand-by mode by pressing the "hang-up" – key
Q.
Remark:
When you have chosen impulse dialing, because you use the phone with an old
telephone system, and you need tone dialing during one particular call (e.g.
Phone Banking), you can toggle the dialing mode during the call. Press the star
– key Á to do so. Tone dialing is only active during the actual call.
Flash time
Remark:
This setting is only possible after having made the setting described in the previous chapters.
The flash key "R" (10) can be set with two different flash-times (100/300 ms).
The flash-time to be used depends on the installation, on which your unit is
connected
• to the public telephone network, with comfort functions (usually 300 ms);
• to a PBX, with similar functions (usually 100 ms).
The comfort functions - waiting call, toggling, second call and conference
call - must be ordered and paid for with your local telephone network dealer.
Your dealer will also be able to tell you, which flash-time has to be used on his
installation.
AEG Spirit 100 05.06 gc_de
17
When the unit is connected to a personal branch exchange (PBX), its supplier,
or the delivered instruction manual will be able to inform you. The description of
the comfort functions below can be slightly different from the operation mode of
your PBX.
1.
After confirmation of the previous setting, the actual setting is displayed, "1"
for 100 ms and "2" 300 ms; e.g.:
2.
-2-
Press the scroll-keys S and T to toggle between 1 und 2. When you
choose 100 ms:
-1-
3.
Press P to save the input values.
4.
The program automatically continues with the setting of the ringer for the
base, as described in the next chapter.
5.
The handset returns to stand-by mode by pressing the "hang-up" – key
Q.
Volume and melody
Remark:
This setting is only possible after having made the setting described in the previous chapters.
1.
After confirmation of the previous setting, the actual volume (left) and melody (right) for the base appear; e.g.:
2.
-3-
-4-
Press the scroll-keys S T for changing the volume (0 – 5) and press a
numeric key for choosing the melody (1 – 5). Example for ringer volume 3
and melody 1:
-3-
-1-
3.
Press P to save the input values.
4.
The handset returns to stand-by mode, all settings have passed the separate review and the setting is closed.
Registering additional handsets to the base
You can register up to 5 handsets to one base. De-registration is not possible.
1.
Hold the paging – key (16), until a double long tone is heard.
2.
Hold the programming key P (2) until a hyphen runs over the display, left
to right:
18
AEG Spirit 100 05.06 gc_de
etcetera . . . . .
The symbols z and P blink while you hold the button.
3.
A short while after releasing the programming key, inputting the PIN – code
is requested:
P1-_
P1-oooo
4.
Enter the PIN-CODE:
Press the programming key P (2).
5.
The handset is registered, you hear a confirmation tone; the automatically
attributed handset number is displayed, as well as the time;
e.g.:
-2-
10:45
The handset can be registered to another DECT base (GAP compatible).
Please be reminded that it is not possible to de-register a handset.
Keypad locking
To avoid unwanted connections, you can lock the keypad. Activate the keypad
lock by holding the hash – key #, until the symbol "s" appears.
Only the following functions are possible with the locked keypad:
• You can answer incoming calls, the "pick-up" and the hash – key retain their
functionality.
• Paging - function (searching the handsets) remains functional.
• You can transfer communications to other handsets as usual.
If you press other keys, the display shows:
oooo
Deactivate the keypad lock by pressing the hash – key # when the display
shown above appears. The symbol "s" disappears. The keypad lock is deactivated and all the functions of the handset will be active again.
AEG Spirit 100 05.06 gc_de
19
MAKING CALLS
Answering a call
You can only have telephone conversations by means of the handset.
Answering an external call
External calls come from the public telephone network.
1.
All handsets, registered with the base station, start ringing. The green LED
on the base blinks quickly and hyphens appear on the display:
-----------2.
"EXT" and the symbol z blink. When your operator has activated the CLIP
– function, the telephone number appears on display, toggling every quarter of a second with date and time. If the number is not transmitted resp.
the caller has blocked the transmission (CLIR), the display remains empty.
3.
Press the pick-up key
charger.
4.
"EXT" and the symbol f stay on display. After approximately 8 seconds,
the call duration appears on the display.
5.
You can have your telephone conversation.
6.
To end the communication, press the hang-up - key
handset back to base or charger.
7.
The handset returns to stand-by mode. The call duration remains on display until 5 seconds after the call.
H
(3), or pick the handset up from the base or
Q
(11) or place the
Remark:
You may need to subscribe caller ID service with your local provider.
Answering an internal call
Internal calls come from other handsets, registered to the same base. They are
free of charge
1.
The handset rings.
2.
The number of the calling handset (1 - 5) appears on display. "INT" appears and blinks.
3.
Press the pick-up key
charger.
20
H
(3), or pick the handset up from the base or
AEG Spirit 100 05.06 gc_de
4.
"INT" and the symbol f appear in the symbol line; the call duration appears below. You can have your telephone conversation.
5.
To end the conversation, press the hang-up key
back to base or charger.
6.
The handset returns to stand-by mode. The call duration disappears.
Q
(11) or put the handset
Changing the ringer volume during the incoming call
You can also change the volume of the ringer during the incoming call. Press
the scroll keys (4) and/or (12) whilst the ringer is sounding. On the display appears (1 – 5):
-5-
or
-OFF-
The value after adjusting is saved automatically.
Making calls
Calling externally
H
Press the pick-up key (3). f and "EXT" appears on the display, in
the symbol line.
n
Enter the telephone number; it is dialed as you enter it.
Q
Press "hang-up" (11), to end the communication.
Calling externally with block dialing
n
Enter the telephone number. It is possible to erase and modify the
entered number, using the erase - key H (14).
H
Press the pick-up key (3). f and "EXT" appears on the display, in
the symbol line.
Q
Press "hang-up" (11), to end the communication.
Approximately 5 seconds after having pressed the pick-up key (3), the call duration in hours minutes and seconds will be displayed, e.g.: 00-01-20 = 1 minute,
20 seconds.
After having ended the call, the handset returns to stand-by mode. The call duration remains visible for approximately 5 seconds.
AEG Spirit 100 05.06 gc_de
21
Redialing the last number dialed
H
Press the pick-up key (3). f and "EXT" appears on the display in
the symbol line.
/ /P
Press the redial - key (13), the last number dialed is displayed and
dialed again.
Q
Press "hang-up" (11), to end the communication.
Redialing one of the 5 last numbers dialed
/ /P
Press the redial - key (13), the last number dialed is displayed.
ST
Press the scroll - key ∧ (12) or ∨ (4) several times, to select the
wanted number from the list of the last five numbers dialed.
H
Press the pick-up key (3). f and "EXT" appears on the display, in
the symbol line.
Q
Press "hang-up" (11), to end the communication.
Insert a dialing pause
When you use your telephone at a PBX system, it may be necessary to insert a
pause between the external line request (generally "0") and the telephone number.
Insert a pause by pressing the pause - / redial - key / /P. This pause will use
one position (P) in the redialing list or in the direct access memory.
Calling internally
INT/R
Press "INT" (6). f and "INT" appears on the display, in the display
line.
n
Enter the number of the handset you want to call.
Q
Press "hang-up" (11), to end the communication.
Changing the earpiece volume during the call
You can change the volume of the earpiece during the call. Simply press the
scroll key (4) and/or (12). The display shows:
22
-1AEG Spirit 100 05.06 gc_de
-5-
to
If the minimal, respectively maximal value is reached during the adjusting, you
hear a warning signal each time you press the scroll key.
The value after adjusting is saved automatically.
Mute
The microphone can be turned off temporarily. This allows you to talk to people
in your direct environment, without your telephone conversation partner hearing
to it.
You are on the phone, f and "EXT" appears on the display, in the
symbol line.
H
Press the erase - / mute key H (14), to switch OFF the microphone.
On the display, the mute symbol H appears.
H
Press the erase - / mute key again H, to switch the microphone ON
again.
The symbol H disappears, You can continue your conversation.
Call duration
When you telephone externally, approximately 10 seconds after having accepted the phone call, the call duration in HH-MM-SS is displayed. This display
remains visible for 5 minutes after the end of the communication.
During internal calls, the call duration is also displayed. It appears immediately
after opening the line, and disappears immediately after closing the line.
When a button is pressed during the call, the duration disappears. This doesn't
mean that the timer is reset but it continues and reappears on display when no
other keys are pressed for five seconds.
AEG Spirit 100 05.06 gc_de
23
PHONE BOOK
10 telephone numbers of 24 signs each can be saved in the phonebook, on positions, numbered from 0 to 9.
New phonebook entry
P/B
Press the programming key (2), B. appears in the symbol line. If
the phonebook is empty, the display shows
-----------If the phonebook already contains records, the first telephone number appears e.g.:
P/B
Hold the programming key (2), until P appears to the right of B. .
Now, the first free memory position appears;
e.g.:
n
2-0721626906
0-----------
Press "0" or the number of the memory position, in which you want
to enter a new telephone number. Press e.g. "5", then the display
will change to e.g.:
5-_
and the cursor on the third display position blinks.
n
P/B
Now, you can input the telephone number on the keypad (5).
Confirm your entry with the programming key (2). You hear a positive confirmation tone and the record will be saved.
The next free memory position appears on the display, if you want, you can
continue inputting further numbers. In case all the memory positions are occupied, "0" and the number stored in this position appear on the display.
For leaving the phonebook menu, press the hang-up key
Q (11).
Editing phonebook entries
P/B
24
Press the programming key (2), B. appears in the symbol line. The
first telephone number appears; e.g.:2-0721626906
The „2“ in the leftmost position gives the memory position. The
telephone number is displayed from the third display position.
AEG Spirit 100 05.06 gc_de
Remark:
When the saved number is longer than 9 positions, the right arrow b appears in
the icon line. By pressing the programming key P/B the rest of the digits is
2-210
displayed:
Now, the left arrow a appears, and the programming key P/B
back to the beginning of the telephone number.
brings you
P/B
Hold the programming key (2), until P appears to the right of B. ,
and the digit on the leftmost position starts blinking.
n
Select the memory position, where you want to edit the telephone
number. When you select "5", the display will show
e.g.:
5-0721787401
and the first digit of the telephone number, on the third display position blinks.
n
Now, you can insert digits or you can erase the digit with the erase
– button H (14).
P/B
Confirm your entry with the programming key (2). You hear a positive confirmation tone and the record will be saved.
S T
You can also use the scroll keys to run through the phonebook. For
editing a record however, you must input the memory position
number, for opening the editing mode.
Dialing from the phonebook
P/B
S T
Press the programming key (2), B. appears in the symbol line. The
first telephone number appears e.g.: 2-0721626906
Use the scroll keys to look up the desired telephone number.
H
Press the pick-up key (3). f and "EXT" appear on the display, in
the symbol line. The telephone number is dialed automatically.
Q
Press "hang-up" (11), to end the communication.
AEG Spirit 100 05.06 gc_de
25
Short dialing memory (direct access)
Programming the short dialing memory (direct access)
Three numbers can be saved in the short dialing memory. The short dialing
keys are the buttons from 1 to 3 on the handset. The programming is similar to
the programming of the phonebook:
P/B
Press the programming key (2), B. appears in the symbol line. If
the phonebook is empty, the display shows:
-----------If the phonebook already contains records, the first telephone number appears e.g.:
P/B
1 23
2-0721626906
Hold the programming key (2), until P appears to the right of B. ,
and the digit on the leftmost position starts blinking.
Press the number button, of the short dialing memory where you
want to enter a new telephone number. Press e.g. "2", then the
display will change to e.g.:
52-_
and the cursor in the fourth display position blinks.
n
P/B
Now, you can input the telephone number on the keypad (5).
Confirm your entry with the programming key (2). You hear a positive confirmation tone and the record will be saved.
The next free memory position appears on the display, if you want, you can
continue to input further numbers.
For leaving the phonebook menu, press the hang-up key
Q (11).
Dialing from the short dialing memory
1 23
Hold the direct access number you want to call, until f and "EXT"
appear on the display. Saved number will be dialed automatically.
H
Press the pick-up key (3). f and "EXT" appear on the display, in
the symbol line. The telephone number is dialed automatically.
Q
Press "hang-up" (11), to end the communication.
The number in short dialing memory number 1 1 can also be dialed by pressing the direct dialing key "M1" (9).
26
AEG Spirit 100 05.06 gc_de
CID LIST (caller list - CLIP)
Generalities
The CLIP – function offers the following possibilities:
1.
Identifying the caller before accepting a call;
2.
Registering the last 5 calls with the number of the caller in the CID list;
3.
Consulting the CID list, finding the last calls entered with the date and time
of the call and the telephone number of the caller;
4.
Scrolling through the CID list;
5.
Dialing a number from the CID list;
6.
Erasing a number from the CID list.
Remark:
You may need to subscribe caller ID service with your local provider.
When your operator has activated the CLIP – function, when a call
comes in, the telephone number appears on display, toggling every
quarter of a second with date and time. This will not be the case
when the number is not transmitted resp. when the caller has
blocked the transmission (CLIR).
Your set shows the number of the incoming call, as well as the day and the hour
of the call, if the telephone network provider has activated this feature and if the
caller did not hide his number (with the CLIR – function).
When the network operator also sends the date and time, the internal clock of
your set will be adjusted automatically when the first call enters. Many operators, however, only send the number. In order to have a correct registration of
the date and time that a call entered, you will have to adjust the clock as described.
Display at incoming call
If the number is not transmitted resp. the caller has blocked the transmission
(CLIR), the call is displayed with hyphens:
-----------If the telephone number is received, the first 12 digits of this number appear on
the display, toggling with the date and time, e.g.:
072162690602
AEG Spirit 100 05.06 gc_de
toggling with
25-05 15:14
27
The caller list can contain up to 5 entries. When new entries have been saved,
the icon z blinks.
Dialing from the CID-list (CLIP)
This function is only available when, you have ordered the transmission of the
caller ID, and when your operator has activated this function. Every call is saved
in the CID-list.
S T
Press one of the scroll keys. The first or the last memorized telephone number appears on the display.
S T
Use the scroll keys to look up the desired telephone number in the
CID-list.
H
Press the pick-up key (3). f and "EXT" appear on the display, in
the symbol line. The telephone number is dialed automatically.
Q
Press "hang-up" (11), to end the communication.
Erasing a number from the CID - list
S T
Press one of the scroll keys. The first or the last memorized telephone number appears on the display.
S T
Use the scroll keys to look up the telephone number that you want
to erase in the CID-list.
H
Press the erase key (14), you hear a positive confirmation tone.
The selected entry is erased and the next one appears.
Copying a number from the CID – list to the phonebook
S T
Press one of the scroll keys. The first or the last memorized telephone number appears on the display.
S T
Use the scroll keys to look up the desired telephone number in the
CID-list.
P/B
Hold the programming key (2), until P and B. appear in the icon
line. Now, the first free memory position appears;
e.g.:
1-----------
The position number blinks.
28
AEG Spirit 100 05.06 gc_de
n
Now press the position number of the memory position where you
want to save the number. It is possible to overwrite an already occupied position by selecting its position number. When you press
"5", and this position is still empty, the display will show:
5-_
The number is now transferred automatically to the selected memory position. The first digit of the telephone number blinks, you can
still edit the number (as described above), before you save it.
P/B
Confirm your entry with the programming key (2). You hear a positive confirmation tone and the record will be saved.
External comfort functions
The comfort functions: waiting call, toggling, second call and conference
call must be ordered and paid for with your local telephone network provider.
Your provider will be able to tell you which flash-time has to be used on his installation (please also read the chapter on "Flash time").
When the unit is connected to a personal branch exchange (PBX), its supplier,
or the delivered instruction manual will be able to inform you.
Waiting call and toggling
You have the necessary subscription at your telephone network provider and
during a telephone call, you hear a tone, i.e. a signal that indicates that another
user "knocks" (signal second call).
Use the R - key to put the actual conversation on hold. You hear the extra dialing tone. By pressing "2" you can answer the second call. When you want to
return to the first conversation partner, You press the R - key again and dial "2"
again. You are now connected to the first conversation partner, and the second
caller is put on hold. This action (called toggling) can be repeated as often as
you wish, until one of the parties hangs up.
Consultation and toggling
With the function consultation / toggling, you can talk to two different callers,
without one hearing what you discuss with the other. You can accept an incoming call or call another participant yourself. This function also creates the base
for a conference call with three people.
AEG Spirit 100 05.06 gc_de
29
You are having a telephone conversation with somebody and wishes to retrieve
information with another participant (internal or external). Therefore, you press
the "R" - key to park the first communication. You hear the extra dialing tone.
Dial the number of the other participant and have your conversation. When you
press the "R" - key again, you can park the second communication. Press 2,
and you return to the first conversation partner. Now you can toggle between
both conversation partners.
When you wish to end your call after the consultation, use the R - key and press
1. The connection with the second conversation partner is broken.
Conference call
This function allows you to talk with two conversation partners simultaneously;
each of the three parties is participating simultaneously, and hears both other
participants all the time. The connection between the three partners is built up
as described above.
Two connections need to be active, realized by toggling or by consultation.
When you now want to set up a conference call, again you must press the "R" key. The active conversation is parked and you hear an extra dialing tone. Now
press 3. The conference with 3 people is now activated.
When one of the conversation partners hangs up, the communication with the
other partner can continue.
When you hang -up yourself, the conference call is ended.
30
AEG Spirit 100 05.06 gc_de
APPENDIX
Technical Data
System
analogue DECT telephone
Power supply of the base
power adapter 230V/50Hz/55mA
U1: 6,5 V DC / 150mA
U2: 9 V AC / 150mA
Power supply of the charger
power adapter 230V/50Hz/40mA
U: 9 V
DC /150mA
(only for AEG Spirit 100-2)
Handset
each 2 rechargeable batteries
type AAA NiMH; 1,2 V/550 mAh
Battery life in stand-by
up to 150 hours
Battery life in communication
up to 12 hours
Room temperature:
+5°C to +35°C
Air humidity
25% to 85%
Temperature during storage
- 10°C to +50°C
Dialing mode
MFV (tone dialing)/ IWV (impulse dialing)
Function flash - key
Flash 100 ms und 300ms
Dimensions
Basis Spirit 100
each handset
Packing Spirit 100
95 x 145 x 50 mm
140 x 49 x 25 mm
250 x 200 x 70 mm
Weight Spirit 100
approx. 800 g packing included
Cable lengths
Telephone cord
Power supply cable
ca. 2,5m
ca. 2,5m
We reserve our right to technical modifications!
AEG Spirit 100 05.06 gc_de
31
Troubleshooting
No display
• Check if the batteries are correctly inserted.
• Put the handset into the base/charger cradle to charge the batteries.
• Remove the batteries from the handset, and place them back carefully.
The batteries are empty
• Check if the batteries are correctly inserted.
• Clean the charging contacts of handset and base.
• Charge the batteries.
The display shows a limited charge of the batteries and the handset gives a
warning signal:
• Charge the batteries of the handset.
• Replace the batteries when the autonomy becomes too short.
The handset does not find the base
• You are out of range; stand closer to the base.
• Check the power supply of the base.
• Register the handset as described in this manual.
• Remove the batteries from the handset, and place them back carefully.
• Pull the base's power supply plug, and plug it in again.
No dialing tone
• Check if the telephone cable is well connected to the base and to the wall
plug.
• Use the delivered cable.
• Adjust the volume of the handset to a higher level.
32
AEG Spirit 100 05.06 gc_de
Dialing a number impossible
• The chosen telephone number is blocked.
• The keypad is locked.
• Check, if the correct dialing mode has been set. Generally, tone dialing is
used for modern installations.
• Reset the settings of the handset back to the defaults.
Maintenance
Clean the base station and the handset with a moist cloth or with an antistatic
cloth.
Never use dry cloth! There is a danger of static charge!
Recycling
When your telephone is taken out of service, dispose of the batteries and of the
appliance in an environmentally friendly way! Bring it to an organized recycling
site.
AEG Spirit 100 05.06 gc_de
33
Warranty
Please check with your local dealer to know what kind of warranty this appliance carries, according to your country's laws and to the local practice.
The warranty period starts from the first acquisition of the appliance. In order to
prove the date of purchase, we advise you to keep the purchase receipt.
A repair on an appliance that has been sent back, unaccompanied by the purchase receipt, will always be charged. This will also be the case for badly
packed appliances.
During the warranty period, all deficiencies, caused by material or production
flaws, will be executed free of charge. The manufacturer reserves his right to
repair or replace, at his own discretion. Replaced appliances become the manufacturer's property. The length of the warranty period will never be prolonged by
possible reparation or in case of replacement. The original warranty period continues and takes a definitive end at the normal date, depending on the purchase
date and the original length of the warranty period. The manufacturer can never
be held responsible for any damage or costs, incidental, caused or indirectly
brought about by a defect. From warranty are also excluded the damages
caused by abnormal use, wear, interventions by third parties or violence.
The spare parts, subject to wear (batteries, rechargeable batteries, packing
etc.) are excluded from the warranty, as well as the possible deficiencies that
only slightly influence the meant use and the possibilities of the appliance.
During the warranty period you should bring your defective appliance back to
the sales point where you bought it, which will make sure that it is repaired or
replaced as soon as possible. It goes without saying that your sales point will
always be at you disposal, even after the warranty period. For all reparations,
which are not covered by the guarantee, the sales point will first make a proposition.
34
AEG Spirit 100 05.06 gc_de
Index
B
K
base · 7; 8; 9; 10; 11; 12; 14; 15; 17;
19; 20; 21; 22; 31; 32; 33; 34
battery · 8; 9; 10; 11; 14; 15
block dialing · 11; 22
keypad · 8; 10; 11; 20; 25; 27; 34
keypad lock · 11; 20
C
melody · 15; 16; 17; 19
mute · 8; 24
call duration · 11; 21; 22; 23; 24
caller list · 9; 28; 29
CID list · 28
CLIP · 1; 10; 21; 28; 29
CLIR · 21; 28
conference · 11; 18; 30; 31
conference call · 11; 18; 30; 31
consultation · 2; 11; 31
D
date · 17; 21; 28; 29; 35
defaults · 34
dialing · 8; 11; 15; 17; 18; 23; 27; 30;
31; 32; 33; 34
dialing mode · 17; 18; 34
direct dialing · 27
M
O
overview · 5
P
paging · 19
pause · 8; 11; 23
phonebook · 2; 7; 8; 15; 25; 26; 27; 29
PIN · 15; 20
R
recycling · 34
redial · 8; 15; 23
redialing · 23
ringer volume · 2; 8; 19; 22
E
S
external call · 2; 11; 16; 21
short dialing · 27
F
T
flash time · 11
H
technical data · 15
toggling · 11; 18; 21; 28; 29; 30; 31
transfer · 20
handset · 2; 8; 9; 10; 14; 15; 16; 17; 18;
19; 20; 21; 22; 23; 27; 32; 33; 34
V
I
installation · 18; 30
internal call · 2; 16; 17; 21; 24
AEG Spirit 100 05.06 gc_de
volume · 2; 8; 15; 16; 17; 19; 22; 24; 33
W
waiting call · 18; 30
warranty · 35
35
CE-Declaration
Your set is adapted to be used in the country where you bought is. It has homologation for connection to the public telephone network, only for using it in
private homes and shops. It can be connected to a normal plug and be used by
anyone. Every other use will be considered as inappropriate and not conform to
the prescriptions.
Any alteration or modification, not described in this manual, are not allowed.
Hereby, we, ITM Technology AG, state that this appliance corresponds with
the prescriptions and directives applicable, and with all the other arrests connected to the directive EC 1999/5/EG.
The original statement of conformity can be read on the internet, on the site:
www.aeg-itm.de
k
Environmental Protection
Discarded electric appliances are recyclable and should not be discarded in the
domestic waste! Depending on the environmental laws in your country it may be
compulsive to each owner of electric or electronic appliances to bring these appliances to a collection center. Please actively support us in conserving resources and protecting the environment by returning this appliance to the collection centers (if available).