1
BeoCom 2
Guide
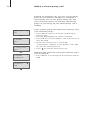
Before you start…
BeoCom 2
BeoCom 2
Getting started
Guide
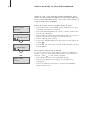
Get
started
Phonebook
Guide
Get started contains instructions in how to set
up the BeoCom 2 for use with a BeoLine
ISDN, BeoLine PSTN, or BeoCom 6000 base.
The Guide contains instructions in daily use of
BeoCom 2.
What are ISDN and PSTN?
ISDN and PSTN are two telephone line networks.
PSTN (Public Switched Telephone Network) is the
most common network. ISDN (Integrated Services
Digital Network) allows you to give separate
handsets their own telephone numbers, and gives
you access to a variety of services, such as Call
Forwarding. BeoCom 2 is compatible with both
PSTN and ISDN.
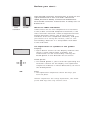
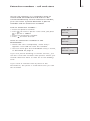
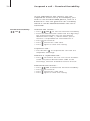
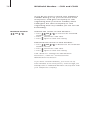
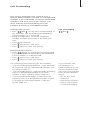
An explanation of symbols in the guides:
Display
> Up or down arrows on the display indicate that
there is more information available. This
information can be accessed by moving the
Track point in the direction of the arrow.
Track point
> The Track point is your cursor for operating the
functions shown on the display. The operation
sequences indicate in which direction(s) to move
the Track point.
OK
Keys
> The operation sequences show the keys you
have to press.
Where sequences are solely repetitions, the Track
point and keys are only shown once.
Contents
Daily use, 4
Find out how to make and answer calls,
adjust the handset volume, and turn the
microphone off.
The Phonebook, Redial and Caller ID lists, 6
Find out how to check incoming and
outgoing calls, store and edit names and
numbers for future calls, and make calls from
the lists.
Advanced operations, 15
Find out how to adjust the volume on your
Bang & Olufsen Audio, Video or Link system,
as well as how to call extension numbers.
System use with several handsets, 17
Find out how to call another handset,
forward external calls and make a three-party
call.
If you have a BeoLine ISDN base…, 21
Find out about ISDN services and functions
specific to the BeoLine ISDN base, such as
Multiple Subscriber Numbers (MSN).
Preference settings, 28
Find out how to adjust the ringer signal, set
the time and date, and choose a menu
language via the Setup and Advanced menus.
Index, 30
Find the specific subject you want to know
more about.
3
4
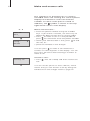
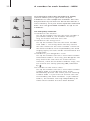
Make and answer calls
The
button on the BeoCom 2 is used to
start and end a call. During the call the phone
displays the duration of the call and the
number or name of the person called. In
addition, the
symbol is shown in the top
right-hand corner of the display.
0 -- 9
Enter no.:
6922_
Calling...
692288
Make and end calls…
> Enter the phone number using the number
keys. If you make a mistake, use the C key to
delete the digits one by one in reverse order.
> Press
to make a call. It is also possible to
press
first and then enter the phone number.
> When your conversation is over, press
to end
the call, or…
> place the handset in the charger.
You can press
to make a call whenever a
number or name appears in the display. You can
also press OK twice after entering a number to
make a call.
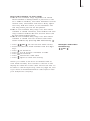
Incoming call
Answer a call…
> Press , wait for a beep and then answer the
call.
You can set the phone to auto offhook, which
means that you can answer a call by lifting the
handset from the charger. Refer to page 28.
5
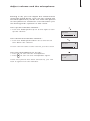
Adjust volume and the microphone
During a call, you can adjust the volume level
using the Track point. You can also switch off
the microphone if you do not wish the person
on the phone to overhear a conversation you
are having with a person in the room.
Turn up the handset volume…
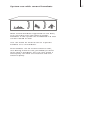
> Push the Track point up or to the right to turn
up the volume.
Turn down the handset volume…
> Push the Track point down or to the left to
turn down the volume.
Volume
Volume
A new call will start at the volume you last used.
Turn the microphone on or off…
> Press
to turn off the microphone.
> Press
to turn on the microphone again.
If the microphone has been turned off, you will
hear a signal from the handset.
Microphone
is off
6
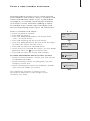
Store entries in the Phonebook
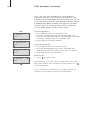
After a call, you will be asked whether you
want to store the number in the Phonebook,
if it is not already there. You can also enter a
name with the number.
Store entry?
692288
OK
ABCDEFGHIJ...
OK
B
abcdefghij...
OK
...
OK
Nigel Jones
Stored
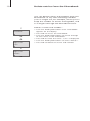
Store a name and number after a call…
> Once the call has ended, press OK to save the
number and enter a name.
> Use the Track point to select a letter from the
list on the display.
> Press OK to store the selected letter. The list of
letters will now change to small letters.
> Finish typing the name…
> Push the Track point to the left or the right to
select .
> Press OK to store the name and number in the
Phonebook.
Edit when entering a name…
In the list of letters, the gap in the list indicates a
space, such as the space between first and last
names, and
is the store symbol.
– Press OK to store the selected letter.
– Press C to delete the letter or symbol last
selected.
– You can cancel entering a name by holding
down the C key.
7
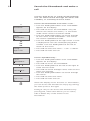
Enter a new number and name
The Phonebook allows you to store around
200 numbers and names. Store a number and
name immediately after a call, as described
on page 6, or start by entering the number
you wish to store and then adding a name.
A number may contain up to 48 digits and
the accompanying name up to 16 characters.
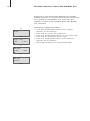
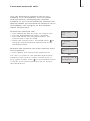
Enter a number and name…
> Enter the phone number.
> Press OK to store it.
> Push the Track point down to switch from
‘Call?’ to ‘Store entry?’
> Press OK to bring up the list of letters.
> Push the Track point to the left or to the right
to select the letters for the name.
> Press OK to store the selected letter.
> Once you have entered the name, use the Track
point to move to
on the letters line.
> Press OK to store the name and number.
To make Phonebook entries easier to find
– When entering couples’ names, put first names
in alphabetical order;
– When entering names of colleagues, put the
company name first;
– When entering the names of childrens’ friends,
start with the child’s first initial.
The maximum number of entries in the
Phonebook depends on the length of the
numbers you enter.
0 -- 9
Enter no.:
692_
OK
Store entry?
692288
OK
_
ABCDHIJ...
OK
O_
...opqrstuvwxy...
OK
...
8
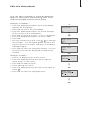
Search the Phonebook and make a
call
Use the Track point to search the Phonebook.
You can either search through all names and
numbers, or search by the first letter.
Phonebook
OK
Search:
ABDGMNPST...
...
OK
OK
Calling...
Nigel Jones
Search:
ABDGMNPST...
ABDGMNPST...
OK
Nigel Jones
OK
OK
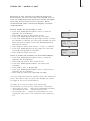
Search the Phonebook and make a call…
> Push the Track point down until ‘Phonebook’
appears on the display.
> Press OK to access the Phonebook. Only the
relevant first letters are shown, i.e. the letters
under which names have been stored.
> Push the Track point down to search through
all the names in the Phonebook – the names
are listed in alphabetical order.
> Push the Track point to the right when a name
is displayed to view the accompanying phone
number. Push the Track point to the left to
return to the name.
> Press OK to select the name – ‘Call?’ is shown.
> Press OK to make the call.
Search alphabetically…
> Push the Track point down until ‘Phonebook’
appears on the display.
> Press OK to access the Phonebook.
> Push the Track point to the left or the right to
select the first letter.
> Press OK to search through names with the first
letter you selected.
> Push the Track point down to search through
the names.
> Press OK to select the name.
> Press OK to make the call.
When the display shows the time or ‘Information’,
you can access the Phonebook simply by pushing
the Track point to the right.
During a call you can access the Phonebook by
pressing OK, which then allows you to search,
edit or delete any of the entries in the
Phonebook.
9
Edit the Phonebook
You can edit a number or name by deleting
digits or characters and entering new ones
with the keypad and the Track point.
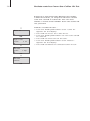
Change a number…
> Push the Track point down until ‘Phonebook’
appears on the display.
> Press OK to access the Phonebook.
> Push the Track point down to search through
all the names in the Phonebook.
> Press OK to select the name. ‘Call?’ is displayed.
> Push the Track point down to select ‘Edit?‘.
> Press OK.
> Use the number keys 0–9, and ,
to change
the number – use the Track point to move the
cursor within the number and press C to delete
individual digits.
> Press OK to store the changed number – the list
of letters will now be displayed instead of the
number.
Change a name…
> Press C to delete letters in the name.
> Push the Track point to the left or right to
select letters in the name.
> Press OK to add the letter.
> Finish editing the name.
> Push the Track point to the left or the right to
select .
> Press OK to store the changed name.
Phonebook
OK
OK
Nigel Jones
Call?
Nigel Jones
Edit?
OK
Enter no.:
692289
0 -- 9
or
C
...
OK
Nigel Jones
abcdefghij ...
OK
or
C
...
OK
10
Delete entries from the Phonebook
You can delete names and numbers from the
Phonebook at any time. Deleting numbers
you no longer use, for example, allows you to
keep the number of entries manageable, and
to navigate through the Phonebook faster.
Phonebook
OK
OK
Nigel Jones
Call?
Nigel Jones
Delete?
OK
Delete a name and number…
> Push the Track point down until ‘Phonebook’
appears on the display.
> Press OK to access the Phonebook.
> Push the Track point down to search through
all the names in the Phonebook.
> Press OK to select the name. ‘Call?’ is displayed.
> Push the Track point down to select ‘Delete?’.
> Press OK to delete the name and number.
11
Redial – make a call
The Redial function stores the phone numbers
you last called. In addition to the number, you
can also view the date and time of a call. If
you have entered a name in the Phonebook,
this is displayed instead of the number.
Check the Redial list and make a call…
> Push the Track point down until ‘Redial’
appears on the display.
> Press OK to access the Redial list.
> Push the Track point down to view your calls.
> Push the Track point to the right when a name
or number is displayed to view the time of the
call. Push the Track point to the left to return.
> Press OK to select the name - ‘Call?’ is shown.
> Push the Track point to the right to view the
accompanying phone number.
> Press OK to make the call.
If a Redial number is in the Phonebook…
> Push the Track point down until ‘Redial’
appears on the display.
> Press OK to access the Redial list.
> Push the Track point down to select a number.
> Press OK.’Call?’ is displayed.
> Push the Track point down until ‘Store entry?’
appears on the display.
> Press OK to store the selected number.
Store a Redial number in the Phonebook…
You can edit the Phonebook entry directly from
the Redial list.
> Push the Track point down to select the
number and press OK.’Call?’ is displayed.
> Push the Track point down until ‘Edit name?’ is
displayed and press OK. You can now edit as
described on page 9.
Redial
OK
Nigel Jones
9:45
2 Apr
692288
20:55
1 Apr
12
Delete entries from the Redial list
BeoCom 2 automatically deletes the oldest
Redial entries, as only the 24 most recent calls
are stored in the Redial list. You can also
delete a name and number from the Redial
list yourself.
Redial
OK
Nigel Jones
9:45
2 Apr
692288
20:55
1 Apr
OK
692288
Delete?
OK
Deleting a Redial number…
> Push the Track point down until ‘Redial’
appears on the display.
> Press OK to access the Redial list.
> Push the Track point down to view your calls.
> Press OK to select one of the calls.
> Push the Track point down until ‘Delete?’
appears on the display.
> Press OK to delete the selected number.
13
Caller ID – make a call
BeoCom 2 has a built-in Caller ID function
that allows you to see who has called you. In
case of repeated calls from the same number,
only the most recent call is shown. New,
unanswered calls cause the display to flash
‘Information’.
Check Caller ID and make a call…
> Push the Track point down until ‘Caller ID’
appears on the display.
> Press OK to access the Caller ID list.
> Push the Track point down to view calls.
> Push the Track point to the right when a name
or number is shown to view the number of new
calls from that caller. Push the Track point to
the left to return.
> Press OK to select the name – ‘Call?’ is shown.
> Push the Track point to the right to view the
accompanying phone number.
> Press OK to make the call.
Store a Caller ID number in the Phonebook…
> Push the Track point down until ‘Caller ID’
appears on the display.
> Press OK to access the Caller ID list.
> Push the Track point down to select the
number.
> Press OK.’Call?’ is displayed.
> Push the Track point down until ‘Store entry?’
appears on the display.
> Press OK to store the selected number.
You can edit Phonebook entries from the Caller ID
list in the same way as from the Redial list. Refer
to page 9 for more information.
If Caller ID is not possible, the following
information is sent out by the phone company:
– ‘Anonymous call’… calls from withheld numbers.
– ‘International call’… international calls.
– ‘Incoming call’… Caller ID information is not
supplied. The call is not stored in the Caller ID
list.
Caller ID
OK
Nigel Jones
17:26
3 Jul
692288
20:55
1 Apr
14
Delete entries from the Caller ID list
BeoCom 2 automatically deletes the oldest
Caller ID entries, as only the 24 most recent
calls are stored in Caller ID. You can also
delete a name and number from the Caller ID
list yourself.
Caller ID
OK
Nigel Jones
17:26
3 Jul
692288
20:55
1 Apr
OK
692288
Delete?
OK
Delete a Caller ID call…
> Push the Track point down until ‘Caller ID’
appears on the display.
> Press OK to access the Caller ID list.
> Push the Track point down to view calls stored
in Caller ID.
> Press OK to select one of the calls.
> Push the Track point down until ‘Delete?’
appears on the display.
> Press OK to delete the selected Caller ID call.
15
Extension numbers – call and store
If you call a person or a company with an
automated switchboard and want to be
connected directly to the extension number,
you can insert a pause between a phone
number and an extension number.
Call an extension number…
> Enter the phone number.
> Press
to insert a pause. Each time you press
a pause is added.
> Enter the extension number.
> Press
to make the call.
Store an extension number in the
Phonebook…
> When the call is completed, ‘Store entry?’
appears. Press OK to store the number.
> You can now give the Phonebook entry a name,
as described on page 6.
If you use phone banking or similar services, you
can also store the number with pauses where you
would otherwise have to wait for a new dialling
tone.
If you store a number with a pause in the
Phonebook, the pause is used each time you call
this number.
0 -- 9
Enter no.:
692288_
Enter no.:
692288-_
0 -- 9
Enter no:
692288-4419_
16
Audio Video Link volume control
You can adjust the volume of your
Bang & Olufsen audio and video products
directly from your phone handset. First select
which sound source, audio or video, you wish
to adjust. If you have a Bang & Olufsen
BeoLink® system installed, you can also adjust
the volume in a link room.
AV
Video
AV
Audio
Audio
Audio
Adjust the volume of an Audio, Video or Link
system…
> Press AV repeatedly to select the sound source
to be adjusted, ‘Audio’, ‘Video’, ‘Link Audio’ or
‘Link Video’. The sound source which you last
adjusted is shown as the first option on the
display.
> Push the Track point up or to the right to
increase the volume. Push the Track point to
the left or down to decrease the volume.
To be able to adjust sound with BeoCom 2, you
must be in the same room as the sound source,
regardless of whether it is in the main room or a
link room.
System use with several handsets
With several handsets registered to one base,
you can make your own phone system.
Handsets in the system are numbered 1–6 and
can be named as well.
You can make an internal call to a specific
handset or to all handsets.
The handsets can all receive external calls,
also during internal calls, provided you have
more than 2 handsets. You can also make a
three-party call with one internal and one
external party.
17
18
Call another handset
You can call one handset or all handsets
simultaneously. If you call all handsets, the
handset that responds first receives the call. If
you call one handset, the display shows which
handset has been called. The phone system
allows up to 2 internal calls and 1 external
call to take place at the same time.
INT
1: Kitchen
Call?
2: Living room
Call?
: All
*Call?
OK
1: Kitchen
0:20
Call a handset…
> Press INT to make an internal call.
> Use the Track point to search through the
internal listing of handsets. The handset number
is shown, along with any stored name.
> Press OK to call the handset.
Call all handsets…
> Press INT to make an internal call.
> Use the Track point to search through the
internal listing of handsets until ‘All’ is shown.
> Press OK to call all handsets.
End a call…
> Press
to end a call
Alternatively, you can call a handset by pressing
INT, followed by the number of the handset or
for all handsets.
If you misplace a handset, you may be able to
locate it by making a call to that handset.
19
Forward external calls
You can forward an external call to one
handset or to all handsets. You can speak
with the person answering the internal
handset, or you can forward the external call
directly. When you forward an external call to
all handsets, the call goes to the handset
which answers first.
Forward an external call…
> Press INT to be able to make an internal call.
> Use the Track point to select a handset.
> Press OK to call the selected handset. The
external call is now on hold.
> When the internal call is answered, press
to
hang up and forward the external call to the
selected handset.
Retrieve the external call if the internal call is
not answered…
> Press INT or C to retrieve the external call.
Nigel Jones
0:21
INT
1: Kitchen
Call?
2: Living room
Call?
OK
If a call is on hold on one handset and another
handset in the system is taken off the hook, a
busy signal sounds. Press
on the handset which
is off the hook and forward the call on hold as
described above.
2: Living room
Conference?
20
Make a three-party call
During an external call, you can call another
party on an internal handset to establish a
three-party call. If one party hangs up, the
call continues with you and the remaining
party. If you hang up, the three-party call is
ended.
Nigel Jones
0:21
INT
1: Kitchen
Call?
2: Living room
Call?
OK
1: Kitchen
Conference?
OK
Conference
2:36
Start a three-party call with one internal and
one external party…
> Press INT to make an internal call during an
external call.
> Use the Track point to select a handset.
> Press OK to call the handset. The external call is
now on hold.
> When the internal call is answered,
‘Conference?’ appears in the display. Press OK
to start the three-party call.
> Press
to end the three-party call.
Retrieve the external call if the internal call is
not answered…
> Press INT or C to change to the external call on
hold.
Set up handsets for ISDN services
To set up your phone to meet your needs,
consider how you want to make use of the
individual handsets, and subscribe to the
supplementary services you find most useful.
– BeoLine ISDN supports the most common ISDN
Digital Select Services. To use these services, you
must first subscribe to the Multiple Subscriber
Numbering (MSN) service. MSN allows you to give
your handsets their own telephone numbers.
Refer to page 22–23 for further information.
– You can temporarily suspend an active call if
you wish to continue the call on another ISDN
handset, such as BeoCom 3. Refer to page 24.
– If, for example, you have a telefax in your phone
system and do not wish unanswered calls to
MSN numbers to ring on the telefax line, you can
exclude these calls. Refer to page 25.
– If you want to conceal your telephone number
during a call, you must have a subscription to
Withheld Number. Refer to page 26.
– If you have a subscription to Call Forwarding, you
can forward external calls to another telephone
number. Refer to page 27.
If you have a BeoCom 6000 phone system and
you want to transfer your common Phonebook to
a BeoLine ISDN base, please contact your Bang &
Olufsen retailer for assistance.
21
22
A number for each handset – MSN
The Multiple Subscriber Numbering (MSN)
service allows you to give each of your
handsets its own telephone number. This can
be practical if you want to know for whom a
call is meant, or if you want separate itemised
bills. You can give MSN numbers to up to six
handsets.
An everyday situation
A handset in the kitchen…
Set up the handset to have the main number. If
you choose code 0, the handset will always
ring, no matter who the call is for.
A handset in the living room…
Set up the handset to have the main number
with code 1. The living room will only receive
the calls meant for the main number. If none of
the other handsets have responded by the third
ringing signal, the calls will be transferred to the
living room.
A handset in your daughter’s room
Set up the handset to have a new MSN number
and choose code 2. That way your daughter will
only receive the calls that are meant for her.
However, if one of the other handsets rings, she
can answer this call by pressing INT, followed
by .
The handset in the home office…
Set up the handset to have a new MSN number.
Choose code 2 if you do not want to be
disturbed by private calls while you are working.
Choose code 1 if you want to answer calls not
answered by the other handsets. If you choose
code 0, the handset will ring independently of
which MSN number that has been dialled.
23
Give each handset its own code
Code 0: The handset rings regardless of which
MSN number is being called. If you have a call
on a code 0 handset, the other handsets cannot
receive calls, and callers will hear a busy signal.
You may find this useful, as the handsets will
not ring while you are on the phone.
Code 1: The handset only rings if its own MSN
number is called. However, the handset will also
ring if other handsets do not answer their calls
by the third ringing signal.
Code 2: The handset only rings if its own MSN
number is called. You can retrieve calls from
other handsets by pressing INT followed by .
> Press
441 to activate the MSN service.
> Enter the relevant MSN number with the digit
keys.
> Press
to continue.
> Press 0, 1 or 2 to give a handset a code.
> Press
to continue.
> Press
and await a dial tone.
> Press
again to store the setting.
When you make a call from a handset with its
own MSN number, this number is shown in the
display as Caller ID at the other end of the line. To
be able to call anonymously, refer to page 26, also
if you have a Withheld Number subscription with
your telephone company.
Multiple Subscriber
Numbering
441
24
Suspend a call – Terminal Portability
If you subscribe to this service, you can
suspend an active call if, for example, you
wish to use another ISDN phone, such as a
BeoCom 3. You can give the call a code by
which it can be identified when the call is
retrieved.
Terminal Portability
792
Activate the service…
> Press
792 to activate Terminal Portability.
> Enter the identification code with the digit keys.
We recommend that you use the default
identification code, 1, which allows you to
retrieve a suspended call with BeoCom 3.
> Press
to continue.
> Press
and await a dial tone.
> Press
again to store the setting.
Suspend a call…
> Press R then
to suspend the call with the
telephone exchange.
Retrieve a suspended call…
> Press
to retrieve the call. The active handset
sends the preset identification code to the
exchange, and can therefore retrieve the call.
Deactivate the service…
> Press
792 to deactivate Terminal Portability.
> Press
to continue.
> Press
and await a dial tone.
> Press
again to store the setting.
25
Exclude an MSN number
If, for example, you have a telefax or handset
in your home office and do not wish to be
disturbed by unanswered calls to other
handsets in your phone system, you can
prevent calls to MSN numbers from ringing in
the home office. Of course, handsets set to
receive calls to these MSN numbers will still
ring.
Activate the service…
> Press
451 to be able to exclude calls to an
MSN number. To exclude calls to a second MSN
number, enter code 452 instead of 451.
> Using the digit keys, enter the MSN number to
be excluded.
> Press
to continue.
> Press
and await a dial tone.
> Press
again to store the setting.
You can activate the service using any handset in
your phone system.
Exclude an MSN
number
451
26
Withheld Number – CLIR and COLR
If you do not want to reveal your telephone
number during a call, you can choose to be
anonymous. CLIR gives anonymity to calls
originating from your main number, while
COLR gives the same anonymity to calls
originating from any number you use for Call
Forwarding.
Withheld Number
444 1
Activate the service in each handset…
> Press
444 1 to activate the Withheld
Number service.
> Press
and await a dial tone.
> Press
again to store the setting.
Deactivate the service in each handset…
> Press
444 0 to deactivate the Withheld
Number service.
> Press
and await a dial tone.
> Press
again to store the setting.
CLIR stands for ‘Calling Line Identification
Restriction’, COLR for ‘Connected Line
Identification Restriction’.
If you have several handsets, you must set up
each handset to be anonymous, even though you
already have a Withheld Number subscription with
your telephone company.
27
Call Forwarding
This service forwards calls coming in to a
specific MSN number onward to a designated
number. If you subscribe to several extra MSN
numbers and wish to use this service, you
must activate Call Forwarding on each
handset that has its own MSN number.
Activate the service…
> Press
811 to activate Call Forwarding. In
this example, Call Forwarding Unconditional
(service code 811) is activated.
> Using the digit keys, enter the telephone
number to which you want to forward your
calls.
> Press
to continue.
> Press
and await a dial tone.
> Press
again to store the setting.
Call Forwarding
811
Deactivate the service…
> Press
811 to deactivate Call Forwarding.
In this example, Call Forwarding Unconditional
(service code 811) is deactivated.
> Press
and await a dial tone.
> Press
again to store the setting.
The following subscription types are available:
– ‘Call Forwarding Unconditional’ (CFU) forwards
all incoming calls to a designated number. CFU
has service code 811.
– ‘Call Forwarding Busy’ (CFB) forwards incoming
calls to a designated number if the MSN
number is busy. CFB has service code 812.
– ‘Call Forwarding No Reply’ (CFNR) forwards
incoming calls to a designated number if there
is no reply on the MSN number. CFNR has
service code 813.
If you activate Call
Forwarding on a
handset that does not
have an MSN number,
calls will be forwarded
from all the handsets
which:
– are on the same
ISDN line;
– have MSN numbers;
– have a subscription
to Call Forwarding.
28
Two calls at the same time
If a second party calls during a conversation,
you hear a beep in your handset, and
handsets set up to react on the specific
number ring.
Reject an incoming call during a call…
> Press R then 0.
End a call and switch to an incoming call…
> Press R then 1.
> To end the one remaining call, press .
Receive an incoming call and place the fi rst
call on hold…
> Press R then 2.
Switch between an active call and a call on
hold…
> Press R then 2.
End a call and switch to a call on hold…
> Press R then 1.
> To end the one remaining call, press .
29
30
Settings
These menus contain several options which
allow you to connect, disconnect or adjust
BeoCom 2 functions.
Setup menu
OK
Ringer level:
Time & date:
13:45
3 Apr
Display News:
On
Auto offhook:
On
Advanced
menu
OK
OK
Select your settings…
> Push the Track point down until ‘Setup menu’
appears on the display.
> Press OK to select the menu.
> Push the Track point down to select the
settings menu required. For advanced settings,
select ‘Advanced menu’.
> Press OK to make a selection.
> Use the Track point to change settings, or to
switch features on or off - push it either to the
left or to the right, up or down.
> Press OK to store the setting.
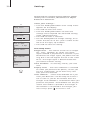
The Setup menu
Ringer level… The volume can be set to ‘Ringer
off’, ‘Low’, ‘Medium’ or ‘Loud’. The ringer
signal selected is played after a moment. If you
disconnect the ringer signal, the phone will not
ring, but it will still register the call in the Caller
ID list. The ringer signal is disconnected until
you choose another setting.
Time and date…Set the day, month, year and
time.
Display news… The news indication is switched
on when you purchase the phone, so that you
can use ‘Information’ to see how many new
calls you have received.
Auto offhook… Switch Auto offhook on if you
want your BeoCom 2 to be ready to answer a
call as soon as you lift the handset from the
charger. Auto offhook is switched off when you
purchase the phone. Auto offhook can only be
used if the handset is placed in the charger. If
the handset is not placed in the charger, you
must always press
to answer a call.
31
The Advanced menu
Handset… Give the handset a new name and
register it to an open base. You can also cancel
the registration of other handsets to the base.
Base… Cancel registration of a handset in the
system or change the PIN code for the base.
Language… You can select the language of the
display texts.
Switchboard… Set BeoCom 2 for use with a
switchboard. Options are YES and NO. If you
choose YES, use the number keys to enter a
prefix code and push the Track point to select
a pause length. You can select a pause length
between 0 and 12 seconds, or select ‘Wait’.
32
Index
The index is sorted alphabetically
by topic. Relevant chapter
references and their page
numbers are listed under each
topic. Page numbers of chapters
located in ‘Get started’ are
prefaced by the abbreviation ‘GS’.
Page numbers without a preface
refer to chapters in the Guide.
Base
Base menu options, 31
BeoCom 6000, GS p. 7
Cancel registration of a handset, 31
Change the base PIN code, 31
Handset menu options, 31
Open a base for registration,
GS p. 7
PARK numbers, GS p. 8
Register the handset to a base,
GS p. 8
Battery
Battery status, GS p. 10
Charging the handset battery,
GS p. 10
BeoLine
ISDN base…, GS p. 7
PSTN base…, GS p. 7
What are ISDN and PSTN?, GS p. 2
BeoLink
Adjust volume level on audio/
video products, 16
Caller ID
Store Caller ID numbers, 13
Use Caller ID, 13
Calls
Call and store extension numbers
in the Phonebook, 15
Call another handset, 18
Call from the Caller ID list, 13
Call from the Redial list, 11
Change a number before dialling, 4
Forward external calls, 19
Forward external calls
(ISDN service), 27
Make and answer calls, 4
Search the Phonebook and make
a call, 8
Store a number after a call, 6
Three-party call, 20
Two calls at the same time, 28
Charging
Battery status, GS p. 10
Charging the handset battery,
GS p. 10
CLIR and COLR
Withheld Number, 26
Conference Calls
Three-party call, 20
Contact
Contact Bang & Olufsen Telecom,
GS p. 12
Delete
Caller ID call, 14
Name or number in the
Phonebook, 10
Redial number, 12
Displays and menus
Advanced menu options, 31
Display news, 30
Display overview, GS p. 6
Navigate in the menu system,
GS p. 5
Setup menu options, 30
Edit
Edit the Phonebook, 9
Extension numbers
Call and store extension numbers
in the Phonebook, 15
Forward calls
Forward external calls, 19
Forward external calls (ISDN
service), 27
33
Handset
Adjust the ringing signal, 30
Auto offhook, 30
Call another handset, 18
Handset keypad, GS p. 4
Indicator light, GS p. 4
Name the handset, 31
Switch on or off, GS p. 4
Volume and the microphone, 5
Indicator lights
BeoCom 6000 base, GS p. 7
BeoLine ISDN base, GS p. 7
Handset, GS p. 4
ISDN
What are ISDN and PSTN?, GS p. 3
Search the Phonebook and make
a call, 8
Store a number after a call, 6
Store Caller ID numbers, 13
Store Redial numbers, 11
PIN code
Change the base PIN code, 31
Placement
Placement and surroundings,
GS p. 11
PSTN
PSTN base, GS p. 7
What are ISDN and PSTN?,
GS p. 2
ISDN Services
A telephone number for each
handset – MSN, 22
Avoid interruptions – exclude a
handset, 25
Call Forwarding, 27
Suspend an active call – Terminal
Portability, 24
Two calls at the same time, 28
Withheld Number – CLIR and
COLR, 26
Redial
Store Redial numbers, 11
Use Redial, 11
Keypad
Handset keypad, GS p. 4
Ringing signal
Adjust the ringing signal, 30
Maintenance
Cleaning, GS p. 11
Technical data, GS p. 11
Services
Caller ID, 13
Microphone
Switch the microphone on or off, 5
MSN
A telephone number for each
handset, 22
Avoid interruptions – exclude a
handset, 25
Phonebook
Call and store extension numbers,
15
Delete a name or number, 10
Edit a name or number, 9
Enter a new name and number, 7
Registration
Cancel registration of a handset, 31
First-time registration of the
handset, GS p. 8
Open a base for registration,
GS p. 7
PARK numbers, GS p. 8
Settings
Adjust volume on audio/video
products, 16
Auto offhook, 30
Display news, 30
Language, 31
Setup and Advanced
menus, 30–31
Time and date, GS p. 9
Volume and the microphone, 5
Switchboard
Call and store extension numbers
in the Phonebook, 15
34
Technical data
BeoCom 2 specifications, GS p. 11
Terminal Portability
Suspend an active call, 24
Volume
Adjust volume level on audio/
video products, 16
Volume and the microphone, 5
3507278
0209
Printed in Denmark by Bogtrykkergården a-s, Struer