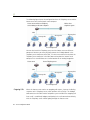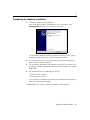
1
Vocera Configuration Guide
Version 3.1
Copyright © 2002-2005 Vocera Communications, Inc. All rights reserved.
Protected by US Patent Numbers D486,806; D486,807; 6,892,083; 6,901,255;
and EEC Patent Number ED 7513.
Vocera® is a registered trademark of Vocera Communications, Inc.
This software is licensed, not sold, by Vocera Communications, Inc. (“Vocera”).
The reference text of the license governing this software can be found at
www.vocera.com/legal. The version legally binding on you (which includes
limitations of warranty, limitations of remedy and liability, and other provisions) is
as agreed between Vocera and the reseller from whom your system was
acquired and is available from that reseller.
Certain portions of Vocera’s product are derived from software licensed by the
third parties as described in the Third-Party Software Agreements section of the
Vocera User Guide.
Java and all Java-based marks are trademarks or registered trademarks of Sun
Microsystems, Inc. in the United States and other countries.
Microsoft® Windows®, Windows® 2000 Server, Windows Server™ 2003,
Windows® XP, Microsoft® Internet Explorer, and Microsoft® Excel are
trademarks or registered trademarks of Microsoft Corporation in the United
States and other countries.
All other trademarks, service marks, registered trademarks, or registered service
marks are the property of their respective owner/s. All other brands and/or
product names are the trademarks (or registered trademarks) and property of
their respective owner/s.
Vocera Communications, Inc.
www.vocera.com
tel :: +1 408 790 4100
fax :: +1 408 790 4101
Part No :: 930-01415 Rev A, 30-June-2005
ii ··· Vocera Configuration Guide
What’s New?
Version 3.1 provides significant enhancements to the previous version of Vocera.
The following topics summarize the changes related to installing and configuring
Vocera. See the Release Notes for a complete list of changes for this version.
• New Features
• New Behavior Affecting Badge Users
New Features
This section outlines major new features in Vocera version 3.1.
Reorganized
documentation
Material from the version 3.0 Vocera Installation Guide and Vocera
Administration Guide has been reorganized for this version:
• Vocera Configuration Guide presents conceptual information to help you
install, configure, and administer Vocera.
• Vocera Administration Console Reference is a task-based reference to the
features and functions of the Administration Console. Appendixes present
additional reference material.
Enhanced
support for
locales
Vocera version 3.1 adds support for the United Kingdom. See Working With
Locales on page 235. New features include:
• Voice dialing 11-digit home and business phone numbers that begin with 0
• Voice dialing 10-digit home and business phone numbers for the Bolton
(01204XXXXX) and Brampton (016977XXXX) area codes
• Voice dialing three- and six-digit service numbers of the form 1xx, 1xxxxx,
and 999
• Support for "double", "triple", "treble", and "naught" speaking patterns
What’s New? ··· iii
Time zones for
sites
When a site and the Vocera server are in different time zones, you can use the
Administration Console to specify a time zone for the site. See Working with
Sites on page 203.
Support for
IGMP
Support for the Internet Group Management Protocol (IGMP) enables Vocera
broadcast and push-to-talk features to function across multiple IP subnets. Use
the Badge Properties Editor to specify whether to use IGMP. See Configuring
the Wireless Infrastructure on page 28 and Setting Advanced Properties
on page 72.
New Behavior Affecting Badge Users
Vocera 3.1 includes changes introduced in version 3.0. Communicate the
following behavior change to all users when you upgrade from a Vocera version
earlier than 3.0:
• The “Get me an outside line” command is obsolete
A user can no longer say “Get me an outside line” as an alternate form of
the “Dial an outside number” command. This alternate has been removed
because it interferes with the “Get me John Smith” command.
• The badge now handles urgent messages the same way as urgent calls: it
plays an urgent message immediately, interrupting a call or command if
necessary.
• The new inner circle feature improves speech recognition by preferring a
small set of names that a user is most likely to contact in a voice command.
By default, Vocera populates a user’s inner circle when a name uttered in a
voice command is recognized by Vocera and confirmed by the user.
The inner circle typically requires no intervention. However, if a user
inadvertently confirms a wrong name, that name becomes part of the user’s
inner circle. In this situation, Vocera may systematically misidentify a similar
name in that user’s voice commands, because Vocera strongly prefers the
inner circle entry over other possibilities.
For example, if Bill Harris is accidentally added to a user’s inner circle, Vocera
may always prefer that name when the user tries to contact Bill Marris. If a
user reports such systematic misidentification, make sure that the user’s
inner circle does not contain an unwanted entry.
iv ··· Vocera Configuration Guide
Also, inform users about the following speech recognition enhancements:
• Speak or Spell
The Speak Or Spell feature allows a user to contact users, groups, or address
book entries by either speaking or spelling a name in a voice command.
When two names sound similar—even when the unwanted name is in the
inner circle—spelling usually identifies the intended name. Spellings are so
effective that they may work even when they are slightly incorrect. Make
sure users speak with an even pace and say each letter distinctly.
• Learned commands
A user can train the Genie to recognize the way he or she says certain
commands.
All users benefit from these features; however, users with accents and ongoing
speech recognition problems may experience the most noticeable improvement.
See the Vocera User Guide for additional information about the “Get Me”
command, Speak or Spell, and learned commands.
What’s New? ··· v
vi ··· Vocera Configuration Guide
Contents
What’s New? . . . . . . . . . . . . . . . . . . . . . . . . . . . . . . . . . . . . . . . . . . . . . . iii
New Features . . . . . . . . . . . . . . . . . . . . . . . . . . . . . . . . . . . . . . . . . . . . . .
Reorganized documentation . . . . . . . . . . . . . . . . . . . . . . . . . . . . . . .
Enhanced support for locales . . . . . . . . . . . . . . . . . . . . . . . . . . . . . . .
Time zones for sites . . . . . . . . . . . . . . . . . . . . . . . . . . . . . . . . . . . . . .
Support for IGMP. . . . . . . . . . . . . . . . . . . . . . . . . . . . . . . . . . . . . . . .
New Behavior Affecting Badge Users . . . . . . . . . . . . . . . . . . . . . . . . . . . .
iii
iii
iii
iv
iv
iv
Introduction. . . . . . . . . . . . . . . . . . . . . . . . . . . . . . . . . . . . . . . . . . . . . . . 15
About the Vocera System Software . . . . . . . . . . . . . . . . . . . . . . . . . . . .
Main Components . . . . . . . . . . . . . . . . . . . . . . . . . . . . . . . . . . . . . .
Software Utilities . . . . . . . . . . . . . . . . . . . . . . . . . . . . . . . . . . . . . . .
Specialized Modules. . . . . . . . . . . . . . . . . . . . . . . . . . . . . . . . . . . . .
Optional Software Components . . . . . . . . . . . . . . . . . . . . . . . . . . . .
About This Guide . . . . . . . . . . . . . . . . . . . . . . . . . . . . . . . . . . . . . . . . . .
16
16
16
17
18
19
Installation and Setup . . . . . . . . . . . . . . . . . . . . . . . . . . . . . . . . . . . . . . 21
Before You Install Vocera Software . . . . . . . . . . . . . . . . . . . . . . . . . . . 23
System Requirements . . . . . . . . . . . . . . . . . . . . . . . . . . . . . . . . . . . . . . .
Vocera Server Requirements. . . . . . . . . . . . . . . . . . . . . . . . . . . . . . .
Telephony Server Requirements . . . . . . . . . . . . . . . . . . . . . . . . . . . .
Administration and User Console Requirements . . . . . . . . . . . . . . . .
Configuration Hardware Requirements . . . . . . . . . . . . . . . . . . . . . .
Multi-Site Requirements . . . . . . . . . . . . . . . . . . . . . . . . . . . . . . . . . .
Configuring the Wireless Infrastructure. . . . . . . . . . . . . . . . . . . . . . . . . .
Setting Up the Server Computer . . . . . . . . . . . . . . . . . . . . . . . . . . . . . . .
Disabling IIS . . . . . . . . . . . . . . . . . . . . . . . . . . . . . . . . . . . . . . . . . . .
Setting Up Dr. Watson . . . . . . . . . . . . . . . . . . . . . . . . . . . . . . . . . . .
Configuring Windows Update . . . . . . . . . . . . . . . . . . . . . . . . . . . . .
23
24
25
26
27
27
28
29
29
30
31
Contents ··· vii
Upgrading from a Previous Version . . . . . . . . . . . . . . . . . . . . . . . . . . . 33
Upgrading Vocera Software . . . . . . . . . . . . . . . . . . . . . . . . . . . . . . . . . .
Backing up Vocera Data . . . . . . . . . . . . . . . . . . . . . . . . . . . . . . . . . . . . .
Removing Vocera Software. . . . . . . . . . . . . . . . . . . . . . . . . . . . . . . . . . .
Upgrading Properties Files . . . . . . . . . . . . . . . . . . . . . . . . . . . . . . . . . . .
34
35
35
37
Running the Vocera Installation Program . . . . . . . . . . . . . . . . . . . . . . 39
Fault Tolerant Configurations . . . . . . . . . . . . . . . . . . . . . . . . . . . . . . . . 41
About Fault Tolerant Environments. . . . . . . . . . . . . . . . . . . . . . . . . . . . .
Prerequisites for a Cluster . . . . . . . . . . . . . . . . . . . . . . . . . . . . . . . . . . . .
Using the Microsoft Cluster Service. . . . . . . . . . . . . . . . . . . . . . . . . . . . .
Setting Up a Fault Tolerant Vocera Environment . . . . . . . . . . . . . . . . . . .
Setting Up the Primary Server. . . . . . . . . . . . . . . . . . . . . . . . . . . . . .
Setting Up the Secondary Server . . . . . . . . . . . . . . . . . . . . . . . . . . .
Starting the Primary and Secondary Servers . . . . . . . . . . . . . . . . . . .
Creating Cluster Resources. . . . . . . . . . . . . . . . . . . . . . . . . . . . . . . .
Testing the Cluster . . . . . . . . . . . . . . . . . . . . . . . . . . . . . . . . . . . . . .
Making the Cluster Available . . . . . . . . . . . . . . . . . . . . . . . . . . . . . .
Maintaining a Fault Tolerant Vocera Environment . . . . . . . . . . . . . . . . . .
Uninstalling the Vocera Cluster. . . . . . . . . . . . . . . . . . . . . . . . . . . . . . . .
41
43
44
45
45
47
48
48
51
52
52
52
Badges . . . . . . . . . . . . . . . . . . . . . . . . . . . . . . . . . . . . . . . . . . . . . . . . . . . 55
Setting Up the Configuration Computer . . . . . . . . . . . . . . . . . . . . . . . 57
Installing the Badge Utilities . . . . . . . . . . . . . . . . . . . . . . . . . . . . . . . . . .
Removing an Earlier Version of the Badge Utilities . . . . . . . . . . . . . .
Running the Badge Utilities Installation Program. . . . . . . . . . . . . . . .
Specifying TCP/IP Properties . . . . . . . . . . . . . . . . . . . . . . . . . . . . . . . . . .
Setting Up an Isolated Access Point . . . . . . . . . . . . . . . . . . . . . . . . . . . .
58
58
59
59
60
Configuring New Badges . . . . . . . . . . . . . . . . . . . . . . . . . . . . . . . . . . . . 63
Creating a Property File to Download . . . . . . . . . . . . . . . . . . . . . . . . . . .
Using the Badge Properties Editor . . . . . . . . . . . . . . . . . . . . . . . . . .
Setting General Properties . . . . . . . . . . . . . . . . . . . . . . . . . . . . . . . .
Setting Security Properties . . . . . . . . . . . . . . . . . . . . . . . . . . . . . . . .
Setting TCP/IP Properties . . . . . . . . . . . . . . . . . . . . . . . . . . . . . . . . .
Setting Advanced Properties. . . . . . . . . . . . . . . . . . . . . . . . . . . . . . .
Configuring a Test Badge . . . . . . . . . . . . . . . . . . . . . . . . . . . . . . . . . . . .
Configuring the Remaining Badges. . . . . . . . . . . . . . . . . . . . . . . . . . . . .
Configuring Badges with Static IP Addresses. . . . . . . . . . . . . . . . . . . . . .
viii ··· Vocera Configuration Guide
64
64
65
66
70
72
74
76
77
Managing Badge Properties . . . . . . . . . . . . . . . . . . . . . . . . . . . . . . . . . 79
Updating Badge Properties and Firmware . . . . . . . . . . . . . . . . . . . . . . . .
Updating Badge Firmware . . . . . . . . . . . . . . . . . . . . . . . . . . . . . . . .
Updating Badge Properties. . . . . . . . . . . . . . . . . . . . . . . . . . . . . . . .
Restoring Factory Settings. . . . . . . . . . . . . . . . . . . . . . . . . . . . . . . . . . . .
About the InstallDone Property . . . . . . . . . . . . . . . . . . . . . . . . . . . .
How to Restore Factory Settings. . . . . . . . . . . . . . . . . . . . . . . . . . . .
Setting System Defaults for Badges. . . . . . . . . . . . . . . . . . . . . . . . . . . . .
80
80
80
81
81
82
82
Troubleshooting Badge Configuration . . . . . . . . . . . . . . . . . . . . . . . . . 83
Troubleshooting the Initial Badge Configuration . . . . . . . . . . . . . . . . . . .
Troubleshooting the Badge Property Settings . . . . . . . . . . . . . . . . . . . . .
Using the Badge Configuration Menu. . . . . . . . . . . . . . . . . . . . . . . . . . .
Displaying the Badge Configuration Menu . . . . . . . . . . . . . . . . . . . .
Navigating in the Badge Configuration Menu. . . . . . . . . . . . . . . . . .
Monitoring Badge Activity . . . . . . . . . . . . . . . . . . . . . . . . . . . . . . . . . . .
84
85
86
86
88
89
Telephony . . . . . . . . . . . . . . . . . . . . . . . . . . . . . . . . . . . . . . . . . . . . . . . . 91
Telephony Integration Overview . . . . . . . . . . . . . . . . . . . . . . . . . . . . . 93
About Vocera Telephony . . . . . . . . . . . . . . . . . . . . . . . . . . . . . . . . . . . . 93
Outgoing Calls . . . . . . . . . . . . . . . . . . . . . . . . . . . . . . . . . . . . . . . . . 94
Incoming Calls . . . . . . . . . . . . . . . . . . . . . . . . . . . . . . . . . . . . . . . . . 95
Hardware for the Analog Integration . . . . . . . . . . . . . . . . . . . . . . . . . . . 96
Analog Telephony Boards. . . . . . . . . . . . . . . . . . . . . . . . . . . . . . . . . 96
Analog Telephony Cables. . . . . . . . . . . . . . . . . . . . . . . . . . . . . . . . . 96
Hardware for the Digital Integration . . . . . . . . . . . . . . . . . . . . . . . . . . . . 98
Digital Telephony Boards . . . . . . . . . . . . . . . . . . . . . . . . . . . . . . . . . 98
Digital Telephony Cables . . . . . . . . . . . . . . . . . . . . . . . . . . . . . . . . . 99
Steps for Telephony Integration . . . . . . . . . . . . . . . . . . . . . . . . . . . . . . 100
Advance Preparation for Telephony . . . . . . . . . . . . . . . . . . . . . . . . . . . 100
Investigating the Installation Site . . . . . . . . . . . . . . . . . . . . . . . . . . 101
Procuring Equipment . . . . . . . . . . . . . . . . . . . . . . . . . . . . . . . . . . . 101
Configuring the PBX . . . . . . . . . . . . . . . . . . . . . . . . . . . . . . . . . . . 101
Installing the Telephony Software . . . . . . . . . . . . . . . . . . . . . . . . . . . 105
Upgrading Vocera Telephony . . . . . . . . . . . . . . . . . . . . . . . . . . . . . . . . 106
Removing the Vocera Telephony Server . . . . . . . . . . . . . . . . . . . . . 107
Running the Telephony Installation Program . . . . . . . . . . . . . . . . . . . . . 108
Contents ··· ix
Installing the Telephony Hardware. . . . . . . . . . . . . . . . . . . . . . . . . . . 111
Installing the Dialogic Boards . . . . . . . . . . . . . . . . . . . . . . . . . . . . . . . .
Connecting Telephony Cables . . . . . . . . . . . . . . . . . . . . . . . . . . . . . . .
Connecting Cables for an Analog Integration. . . . . . . . . . . . . . . . .
Connecting Cables for a Digital Integration . . . . . . . . . . . . . . . . . .
Completing the Telephony Installation . . . . . . . . . . . . . . . . . . . . . . . . .
111
113
114
114
115
Managing Vocera Telephony . . . . . . . . . . . . . . . . . . . . . . . . . . . . . . . . 117
Working with Phone Numbers . . . . . . . . . . . . . . . . . . . . . . . . . . . . . . . 118
Configuring Access Codes . . . . . . . . . . . . . . . . . . . . . . . . . . . . . . . . . . 119
Exceptions to Access Codes . . . . . . . . . . . . . . . . . . . . . . . . . . . . . . 119
Adding Access Code Exceptions . . . . . . . . . . . . . . . . . . . . . . . . . . . 119
Configuring Toll Info . . . . . . . . . . . . . . . . . . . . . . . . . . . . . . . . . . . . . . 120
Configuring Telephony PINs . . . . . . . . . . . . . . . . . . . . . . . . . . . . . . . . . 121
Specifying Telephony PIN Information for a Site . . . . . . . . . . . . . . . 122
Additional Setup. . . . . . . . . . . . . . . . . . . . . . . . . . . . . . . . . . . . . . . . . . 122
Configuring the Hunt Group or DID Number . . . . . . . . . . . . . . . . . 122
Additional Telephony Configuration Tasks in the Administration Console
123
Additional Telephony Configuration Tasks in the User Console. . . . 123
Telephony in a Multi-Site Environment . . . . . . . . . . . . . . . . . . . . . . . . . 124
Selecting a Site to Configure . . . . . . . . . . . . . . . . . . . . . . . . . . . . . 124
Stopping and Starting the Telephony Server . . . . . . . . . . . . . . . . . . . . . 124
Shutting Down the Telephony Server . . . . . . . . . . . . . . . . . . . . . . . . . . 125
Shutting Down Telephony when the Control Panel is hidden . . . . . 126
Changing the Vocera Server IP Address . . . . . . . . . . . . . . . . . . . . . . . . 126
Preventing Access to the Telephony Control Panel . . . . . . . . . . . . . . . . 127
Logging Off and Blocking Access . . . . . . . . . . . . . . . . . . . . . . . . . . 127
Hiding the Telephony Control Panel . . . . . . . . . . . . . . . . . . . . . . . . 127
Troubleshooting Telephony . . . . . . . . . . . . . . . . . . . . . . . . . . . . . . . . . 129
Creating a Tone Set File . . . . . . . . . . . . . . . . . . . . . . . . . . . . . . . . . . . . 129
Separating the Telephony and Vocera Servers. . . . . . . . . . . . . . . . . . . . 132
Enabling ISDN Debugging Features. . . . . . . . . . . . . . . . . . . . . . . . . . . . 134
Working with Pagers . . . . . . . . . . . . . . . . . . . . . . . . . . . . . . . . . . . . . . 135
About Pager Information in the Administration Console . . . . . . . . . . . .
Pagers and Subscriber IDs. . . . . . . . . . . . . . . . . . . . . . . . . . . . . . . .
Forwarding Calls to a Pager . . . . . . . . . . . . . . . . . . . . . . . . . . . . . .
Customizing Pager Strings in the Properties File . . . . . . . . . . . . . . . . . .
x ··· Vocera Configuration Guide
136
136
137
139
Users and Groups . . . . . . . . . . . . . . . . . . . . . . . . . . . . . . . . . . . . . . . . . 143
Setting Up Users and Groups . . . . . . . . . . . . . . . . . . . . . . . . . . . . . . . . 145
Setting Up Profiles . . . . . . . . . . . . . . . . . . . . . . . . . . . . . . . . . . . . . . . .
Collecting Site Data . . . . . . . . . . . . . . . . . . . . . . . . . . . . . . . . . . . .
Collecting User Name Data . . . . . . . . . . . . . . . . . . . . . . . . . . . . . .
Collecting Group Data . . . . . . . . . . . . . . . . . . . . . . . . . . . . . . . . . .
Setting Up Users and Groups . . . . . . . . . . . . . . . . . . . . . . . . . . . . .
Completing the Configuration . . . . . . . . . . . . . . . . . . . . . . . . . . . . . . .
Testing the Configuration. . . . . . . . . . . . . . . . . . . . . . . . . . . . . . . . . . .
145
146
146
147
148
149
152
Managing User Profiles . . . . . . . . . . . . . . . . . . . . . . . . . . . . . . . . . . . . 155
Before You Add Users . . . . . . . . . . . . . . . . . . . . . . . . . . . . . . . . . . . . .
Enabling Login/Logout Voice Commands . . . . . . . . . . . . . . . . . . . . . . .
Recording Name Prompts for a User . . . . . . . . . . . . . . . . . . . . . . . . . . .
About Users and Telephone Numbers. . . . . . . . . . . . . . . . . . . . . . . . . .
Managing the Inner Circle . . . . . . . . . . . . . . . . . . . . . . . . . . . . . . . . . .
Enabling the Inner Circle . . . . . . . . . . . . . . . . . . . . . . . . . . . . . . . .
Adding Members to the Inner Circle. . . . . . . . . . . . . . . . . . . . . . . .
Removing Members from the Inner Circle . . . . . . . . . . . . . . . . . . .
Allowing Users to Register Themselves . . . . . . . . . . . . . . . . . . . . . . . . .
Removing User Profiles . . . . . . . . . . . . . . . . . . . . . . . . . . . . . . . . . . . . .
156
157
158
159
160
160
161
161
162
162
Working with Groups . . . . . . . . . . . . . . . . . . . . . . . . . . . . . . . . . . . . . . 163
About Group Properties and Permissions . . . . . . . . . . . . . . . . . . . . . . .
About Groups and Sites . . . . . . . . . . . . . . . . . . . . . . . . . . . . . . . . . . . .
Group Managers . . . . . . . . . . . . . . . . . . . . . . . . . . . . . . . . . . . . . . . . .
About the Built-In “Everyone” Group . . . . . . . . . . . . . . . . . . . . . . . . . .
The “Everyone Everywhere” Group . . . . . . . . . . . . . . . . . . . . . . . .
About the “Panic” Group. . . . . . . . . . . . . . . . . . . . . . . . . . . . . . . . . . .
About the “Operator” Group . . . . . . . . . . . . . . . . . . . . . . . . . . . . . . . .
Recording a Name for a Group . . . . . . . . . . . . . . . . . . . . . . . . . . . . . . .
About Groups and Departments. . . . . . . . . . . . . . . . . . . . . . . . . . . . . .
Department Membership . . . . . . . . . . . . . . . . . . . . . . . . . . . . . . . .
Departments and Accounting. . . . . . . . . . . . . . . . . . . . . . . . . . . . .
Departments and the Inner Circle. . . . . . . . . . . . . . . . . . . . . . . . . .
Departments and Voice Commands . . . . . . . . . . . . . . . . . . . . . . . .
About Call Forwarding . . . . . . . . . . . . . . . . . . . . . . . . . . . . . . . . . . . . .
About Instant Conferences . . . . . . . . . . . . . . . . . . . . . . . . . . . . . . . . . .
164
165
165
166
166
167
167
167
168
168
169
169
170
170
171
Contents ··· xi
Working with Permissions . . . . . . . . . . . . . . . . . . . . . . . . . . . . . . . . . . 173
Accumulating Permissions . . . . . . . . . . . . . . . . . . . . . . . . . . . . . . . . . .
Default Permissions . . . . . . . . . . . . . . . . . . . . . . . . . . . . . . . . . . . . . . .
Permissions for the “Everyone” Group . . . . . . . . . . . . . . . . . . . . . .
Revoking Permissions . . . . . . . . . . . . . . . . . . . . . . . . . . . . . . . . . . . . . .
Permissions for Administrators . . . . . . . . . . . . . . . . . . . . . . . . . . . . . . .
174
174
175
175
176
Using the Address Book . . . . . . . . . . . . . . . . . . . . . . . . . . . . . . . . . . . . 177
Using Voice Commands with Address Book Entries. . . . . . . . . . . . . . . .
Recording a Name for an Address Book Entry . . . . . . . . . . . . . . . . . . . .
The Address Book for the Global Site . . . . . . . . . . . . . . . . . . . . . . . . . .
Sample Address Book Entries . . . . . . . . . . . . . . . . . . . . . . . . . . . . . . . .
Calling Home . . . . . . . . . . . . . . . . . . . . . . . . . . . . . . . . . . . . . . . . .
Night-Bell Pickup . . . . . . . . . . . . . . . . . . . . . . . . . . . . . . . . . . . . . .
178
178
178
179
179
180
User Console Overview. . . . . . . . . . . . . . . . . . . . . . . . . . . . . . . . . . . . . 181
Logging In to the User Console. . . . . . . . . . . . . . . . . . . . . . . . . . . . . . . 181
Granting Access to the User Console . . . . . . . . . . . . . . . . . . . . . . . . . . 182
Speech Recognition . . . . . . . . . . . . . . . . . . . . . . . . . . . . . . . . . . . . . . . 183
Voiceprint Authentication . . . . . . . . . . . . . . . . . . . . . . . . . . . . . . . . . . 185
Voiceprint Commands . . . . . . . . . . . . . . . . . . . . . . . . . . . . . . . . . . . . . 186
Recommendations for Using Voiceprints. . . . . . . . . . . . . . . . . . . . . . . . 186
Troubleshooting Voiceprints . . . . . . . . . . . . . . . . . . . . . . . . . . . . . . . . . 187
Troubleshooting Speech Recognition . . . . . . . . . . . . . . . . . . . . . . . . . 189
Using Departments to Improve Speech Recognition . . . . . . . . . . . . . . .
Using Speech Recognition Pages. . . . . . . . . . . . . . . . . . . . . . . . . . . . . .
Alternative Spoken Names . . . . . . . . . . . . . . . . . . . . . . . . . . . . . . .
Identifying Phrase. . . . . . . . . . . . . . . . . . . . . . . . . . . . . . . . . . . . . .
Recording Utterances . . . . . . . . . . . . . . . . . . . . . . . . . . . . . . . . . . . . . .
Recording Badge User Utterances. . . . . . . . . . . . . . . . . . . . . . . . . .
Recording Login Utterances . . . . . . . . . . . . . . . . . . . . . . . . . . . . . .
Recording Telephone System Utterances . . . . . . . . . . . . . . . . . . . .
Specifying Fixed-length Numbers . . . . . . . . . . . . . . . . . . . . . . . . . . . . .
Speech Recognition Tips for Badge Users . . . . . . . . . . . . . . . . . . . . . . .
xii ··· Vocera Configuration Guide
189
190
190
191
191
193
196
196
198
199
Sites and Locations. . . . . . . . . . . . . . . . . . . . . . . . . . . . . . . . . . . . . . . . 201
Working with Sites . . . . . . . . . . . . . . . . . . . . . . . . . . . . . . . . . . . . . . . . 203
Site Terminology. . . . . . . . . . . . . . . . . . . . . . . . . . . . . . . . . . . . . . . . . .
About the Home Site . . . . . . . . . . . . . . . . . . . . . . . . . . . . . . . . . . .
About the Current Site. . . . . . . . . . . . . . . . . . . . . . . . . . . . . . . . . .
About the Global Site. . . . . . . . . . . . . . . . . . . . . . . . . . . . . . . . . . .
Using Site Filters . . . . . . . . . . . . . . . . . . . . . . . . . . . . . . . . . . . . . . . . . .
Transferring Site Data . . . . . . . . . . . . . . . . . . . . . . . . . . . . . . . . . . . . . .
Recording a Name for a Site . . . . . . . . . . . . . . . . . . . . . . . . . . . . . . . . .
204
204
205
205
206
206
206
Working with Locations . . . . . . . . . . . . . . . . . . . . . . . . . . . . . . . . . . . . 209
Defining Locations . . . . . . . . . . . . . . . . . . . . . . . . . . . . . . . . . . . . . . . . 210
Recording a Location Name . . . . . . . . . . . . . . . . . . . . . . . . . . . . . . . . . 211
Server Administration . . . . . . . . . . . . . . . . . . . . . . . . . . . . . . . . . . . . . 213
Using the Vocera Control Panel. . . . . . . . . . . . . . . . . . . . . . . . . . . . . . 215
Stopping and Restarting the Vocera Server . . . . . . . . . . . . . . . . . . . . . .
Shutting Down Vocera . . . . . . . . . . . . . . . . . . . . . . . . . . . . . . . . . . . . .
Shutting Down Vocera when the Control Panel is hidden. . . . . . . .
Controlling the Display of Events . . . . . . . . . . . . . . . . . . . . . . . . . . . . .
Preventing Access to the Vocera Server Control Panel. . . . . . . . . . . . . .
Logging Off and Blocking Access . . . . . . . . . . . . . . . . . . . . . . . . . .
Hiding the Vocera Server Control Panel . . . . . . . . . . . . . . . . . . . . .
215
216
216
217
217
217
218
About the Administration Console . . . . . . . . . . . . . . . . . . . . . . . . . . . 219
System Settings . . . . . . . . . . . . . . . . . . . . . . . . . . . . . . . . . . . . . . . . . . 221
Maintaining the Server . . . . . . . . . . . . . . . . . . . . . . . . . . . . . . . . . . . . 223
Backing Up and Restoring Data . . . . . . . . . . . . . . . . . . . . . . . . . . . . . .
Importing Data . . . . . . . . . . . . . . . . . . . . . . . . . . . . . . . . . . . . . . . . . . .
About the Templates . . . . . . . . . . . . . . . . . . . . . . . . . . . . . . . . . . .
Validating and Importing Data . . . . . . . . . . . . . . . . . . . . . . . . . . . .
Exporting Data . . . . . . . . . . . . . . . . . . . . . . . . . . . . . . . . . . . . . . . . . . .
Updating the Vocera Database . . . . . . . . . . . . . . . . . . . . . . . . . . . . . . .
Modifying and Deleting User Data with CSV Files . . . . . . . . . . . . . .
Emptying the Vocera Database. . . . . . . . . . . . . . . . . . . . . . . . . . . .
Working with Server Log Files. . . . . . . . . . . . . . . . . . . . . . . . . . . . . . . .
Stopping and Starting the Vocera Server. . . . . . . . . . . . . . . . . . . . . . . .
223
224
225
226
227
227
227
228
229
230
Contents ··· xiii
Email Setup . . . . . . . . . . . . . . . . . . . . . . . . . . . . . . . . . . . . . . . . . . . . . . 231
Working With Locales . . . . . . . . . . . . . . . . . . . . . . . . . . . . . . . . . . . . . . 235
Genie Personas. . . . . . . . . . . . . . . . . . . . . . . . . . . . . . . . . . . . . . . . . . .
Language Packs . . . . . . . . . . . . . . . . . . . . . . . . . . . . . . . . . . . . . . . . . .
Grammars . . . . . . . . . . . . . . . . . . . . . . . . . . . . . . . . . . . . . . . . . . . . . .
Dialing Plan . . . . . . . . . . . . . . . . . . . . . . . . . . . . . . . . . . . . . . . . . . . . .
235
236
236
237
Appendixes . . . . . . . . . . . . . . . . . . . . . . . . . . . . . . . . . . . . . . . . . . . . . . 239
Installation Details . . . . . . . . . . . . . . . . . . . . . . . . . . . . . . . . . . . . . . . . 241
Third-Party Software. . . . . . . . . . . . . . . . . . . . . . . . . . . . . . . . . . . . . . .
Vocera Server Directory Structure . . . . . . . . . . . . . . . . . . . . . . . . . . . . .
IP Port Usage . . . . . . . . . . . . . . . . . . . . . . . . . . . . . . . . . . . . . . . . . . . .
Environment Variables . . . . . . . . . . . . . . . . . . . . . . . . . . . . . . . . . . . . .
241
242
243
244
Voice Command Reference . . . . . . . . . . . . . . . . . . . . . . . . . . . . . . . . . 249
Log In As Another User. . . . . . . . . . . . . . . . . . . . . . . . . . . . . . . . . . . . . 249
Access Point Location Administration . . . . . . . . . . . . . . . . . . . . . . . . . . 250
Voiceprint Administration . . . . . . . . . . . . . . . . . . . . . . . . . . . . . . . . . . . 250
xiv ··· Vocera Configuration Guide
Introduction
The Vocera Communications System enables people to communicate instantly
over a wireless network. Vocera users speak into a small, lightweight wireless
device, the Vocera badge, to connect and communicate with each other. For an
end user, communication is as easy as pushing a button on the badge and
saying, “Call Jodie Lee.”
Vocera features include:
• Calling by user name, job function, group, or location
• Call blocking, call screening, and Do Not Disturb modes
• Conference calling
• Broadcasting messages to groups
• Sending email messages to and from the badge
• Using the badge to place or receive phone calls
Setting up a Vocera system entails more than simply handing out badges,
however. You must install server software, download firmware and
configuration information to the badges, and initialize the Vocera database with
the names of users and groups. If the Telephony Integration option is required,
you must also install telephony software and hardware, connect the hardware to
the PBX, and configure the software and hardware appropriately.
This introduction presents the following topics:
• About the Vocera System Software on page 16 describes the
components of the Vocera System Software.
• About This Guide on page 19 describes the sections in this guide.
Introduction ··· 15
About the Vocera System Software
The Vocera system software runs on the Windows Server 2003, Windows XP
Professional, or Windows 2000 Server operating systems. Vocera system
software includes:
• Main Components
• Software Utilities
• Specialized Modules
• Optional Software Components
Main
Components
• Vocera Server Program—provides the central system functionality, and
calls on the other components for specific services.
• Embedded MySQLTM Database—stores user profiles (which contain
personal information and badge settings), group and location information,
and system settings.
• NuanceTM Speech Recognition, Verifier, and VocalizerTM Software—
provides the speech recognition, voiceprint authentication, and text-tospeech engines used by the Vocera voice interface.
• Apache / Tomcat Web Server—hosts the browser-based Administration
Console and User Console applications.
Software
Utilities
The Vocera system software includes the following utilities:
• Badge Properties Editor—lets you set values for badge properties so the
Vocera badges can connect to the wireless network. See Using the Badge
Properties Editor on page 64.
• Badge Configuration Utility—downloads the properties you set with the
Badge Properties Editor, as well as any firmware upgrades, to your badges.
See Configuring a Test Badge on page 74.
The vconfig utility—lets you interactively set individual properties and
download individual firmware components to a badge. An online help
system on the Vocera server computer shows explains how to use the
vconfig utility. Open the help system by navigating to
\vocera\config\help\vconfig\index.htm in your browser.
16 ··· Vocera Configuration Guide
Specialized
Modules
The Vocera System Software includes the following specialized modules:
• The Vocera launcher is a Windows service that starts automatically when
the computer boots. The launcher starts the Vocera server and the
associated services it requires, such as the MySQL, Nuance, and Apache/
Tomcat components, as well as the optional Vocera Telephony Solution
Software, if installed.
If the computer running the Vocera server crashes for any reason, the
launcher runs automatically again, starting Vocera and its related services. If
the Vocera server software crashes, the Vocera Control Panel—which
continues to run—restarts the Vocera server automatically.
• Administration Console, a browser-based application, provides the
interface to the Vocera server software. See About the Administration
Console on page 219 for an overview. For detailed task-based instructions,
see the Vocera Administration Console Reference or the Administration
Console’s online help.
• Report Generator, available from the Reports screen in the Administration
Console, creates lists of registered users, groups, and address book entries.
The reports are generated in an HTML format suitable for printing.
You can choose from the following report types:
Report type
Description
User Summary
Lists all registered users, and includes Alternate Spoken
Names and Desk Phone fields for each user.
Group Detail
Lists all groups, and enumerates the members of each.
Group Nesting
Lists all groups, and shows the containment of groups inside
other groups.
Address Book
Lists the names, alternative spoken names, and phone
numbers of every entry in your address book.
Sites
Lists the groups and locations for each site on the system.
Vocera also offers an optional Report server and Report Console, which
enable you to generate detailed reports from data logs created by the
Vocera server as users interact with the system.
• User Console, also a browser-based application, allows individual users to
set their own badge preferences and maintain their own contact
information. See User Console Overview on page 181 for information
about logging in and granting access. See the Vocera User Console Guide
for detailed information.
Introduction ··· 17
• Call Manager handles call setup and termination and continually monitors
badge and system status.
• Connection Manager controls connections between badges and access
points.
• NuanceTM speech recognition and text-to-speech software provides the
underlying speech recognition engine used by the Vocera voice interface.
• Command Interpreter deciphers and executes voice commands.
• Embedded SQL database stores user profiles (which contain personal
information and badge settings), group and location information, and
system settings.
Optional
Software
Components
Vocera also offers the following optional software components:
• Vocera Telephony Server provides connectivity to the public telephone
system through an internal telephone system such as a PBX. See Telephony
on page 91.
• Optional Telephony Solution Software integrates the Vocera server with
your telephone system, allowing badges and telephones to communicate
seamlessly. (Specialized hardware is also required for Telephony integration.)
See Telephony Integration Overview on page 93.
• Optional Report Server Software uses log files generated by the Vocera
server to create an extensive set of reports. Some reports can help you spot
usage trends, keep track of badges, and monitor call volume. Other reports
help you diagnose end-user and network issues related to the Vocera
system.
• Vocera Messaging Interface enables two-way messaging between the
Vocera Communications System and third-party applications, such as nurse
call systems, patient monitoring systems, supply management systems, point
of sale and other store management applications, network management
software, HVAC, industrial alarms and other enterprise applications. The VMI
supersedes the nurse call interface offered with earlier versions of Vocera.
18 ··· Vocera Configuration Guide
About This Guide
This guide presents conceptual information to help you install, configure, and
administer a Vocera system. When this guide refers to a particular screen, page,
or task you can perform in the Administration Console, you can consult the
Vocera Administration Console Reference for details. Information from the
Vocera Administration Console Reference is also available from the
Administration Console itself, in the form of context-sensitive online help.
The information is in this guide is organized into the following parts:
• Installation and Setup describes how to install the Vocera System Software
and perform some basic setup tasks.
• Badges describes how to configure new badges, update existing badges,
and troubleshoot your badge configuration.
• Telephony describes how to configure optional telephony support and
integrate it with your Vocera server.
• Users and Groups describes how to work with users and groups.
• Speech Recognition describes how to manage features and settings that
control speech recognition.
• Sites and Locations describes how to manage sites and locations.
• Server Administration describes how to manage features and settings that
affect the Vocera server as a whole.
Introduction ··· 19
20 ··· Vocera Configuration Guide
Installation and Setup
The following topics explain how to install the Vocera System Software and
perform basic setup tasks:
• Before You Install Vocera Software on page 23
Lists system requirements, and describes tasks and procedures to perform
before you install Vocera software.
• Upgrading from a Previous Version on page 33
Explains how to migrate to the latest version of Vocera.
• Running the Vocera Installation Program on page 39
Describes how to install the Vocera server and the related servers that it
requires.
• Fault Tolerant Configurations on page 41
Explains how to set up a cluster to support Vocera in the event of hardware
or software failure.
Installation and Setup ··· 21
22 ··· Vocera Configuration Guide
Before You Install Vocera Software
This chapter describes system requirements and tasks to complete before you
install the Vocera System Software. It includes the following topics:
• System Requirements on page 23 lists the minimum requirements for a
computer to run Vocera.
• Configuring the Wireless Infrastructure on page 28 explains how to set
up your network to make sure it works smoothly with Vocera.
• Setting Up the Server Computer on page 29 describes how to configure
a computer to be Vocera server.
If you are upgrading from an earlier version of Vocera, read Upgrading from a
Previous Version on page 33 before you install the Version 3.1 software.
System Requirements
Use a dedicated computer to run the Vocera System Software—it should not run
any other applications. If the computer has previously run other applications, you
should re-install the operating system and its appropriate service packs to ensure
you install into a clean environment.
Vocera system requirements are grouped into the following categories:
• Vocera Server Requirements on page 24
• Telephony Server Requirements on page 25
• Administration and User Console Requirements on page 26
• Configuration Hardware Requirements on page 27
• Multi-Site Requirements on page 27
Before You Install Vocera Software ··· 23
Vocera Server
Requirements
The Vocera System Software has the following minimum requirements:
Component
Requirement
Operating System
Windows Server 2003 Standard and Enterprise editions,
Windows XP Professional edition, or Windows 2000
Server (service pack 4 or later).
Disable IIS because it can interfere with one of the other
services used by Vocera. See Disabling IIS on page 33.
Processor Speed
2.4 GHz Pentium 4.
For installations with more than 100 badges, a dualprocessor computer is recommended.
Hard Disk Capacity
20 GB.
Hard disk requirements differ based on requirements for
storing voice messages and other variables. A one-minute
voice message typically requires 1 MB of space. Larger
drives are recommended for larger user bases.
The install program also requires 1 GB of temporary space
on the Windows system drive.
Internal Memory
1 GB.
For installations with more than 100 badges, 2 GB
internal memory is recommended.
Video card
256 colors or greater.
If you are using one Vocera server to support multiple sites, see Multi-Site
Requirements on page 27 for additional requirements.
24 ··· Vocera Configuration Guide
Telephony
Server
Requirements
The Vocera Telephony Solution Software option has the following minimum
requirements:
Component
Computer
Requirement
Either of the following:
• The same physical computer that the Vocera server is
installed on.
• A different computer with the same minimum
requirements as the Vocera server computer.
Slots
Boards
One PCI or PCI-X slot for each Dialogic board.
One of the following boards for an analog integration:
• Intel® Dialogic® D/120JCT-LSU board.
• Intel® Dialogic® D/41JCT-LS board.
• Intel® Dialogic® D/120JCT-LSU-EU2 board.
• Intel® Dialogic® D/41JCT-LS-EURO board.
One of the following boards for a digital integration:
• Intel® Dialogic® D/240JCT-T1 board.
• Intel® Dialogic® D/480JCT-2T1 board
• Intel® Dialogic® D/480JCT-1T1 board.
• Intel® Dialogic® D/600JCT-1E1 board.
The boards and the Telephony server computer must be
compatible with each other. See Analog Telephony
Boards on page 96 and Digital Telephony Boards on
page 98 for detailed information about choosing the
boards.
Cables
Phone lines and cabling to connect the PBX and the
Telephony server.
See Analog Telephony Cables on page 96 and Digital
Telephony Cables on page 99 for detailed information
about choosing the cables.
PBX-specific station cards
These cards are required only if the PBX does not have an
adequate number of station ports already available. See
Procuring Equipment on page 100.
If you are using one Vocera server to support multiple sites, see Multi-Site
Requirements on page 27 for additional requirements.
Before You Install Vocera Software ··· 25
Administration
and User
Console
Requirements
A computer used to access the Administration Console or the User Console has
the following minimum requirements:
Component
Requirement
Browser
Internet Explorer version 5.5 or later.
Video card
256 colors or greater.
Configure the Internet Explorer security level to Medium-low or lower.
Otherwise, Internet Explorer prevents the scripts used by the consoles from
executing completely. You can configure security settings through
Tools >Internet Options >Security in Internet Explorer. See your Internet
Explorer documentation for complete information.
Vocera consoles display information in pop-up windows, so disable pop-up
blocking in Internet Explorer (that is, configure the browser to allow pop-up
windows). On Windows XP or Windows Server 2003, choose Tools > Pop-up
Blocker > Turn off Pop-up Blocker. Pop-up blocking is not a standard feature
of Windows 2000. If you are using a third-party tool to block pop-ups, refer to
the tool’s documentation.
On computers running Windows XP or Windows Server 2003, pop-up windows
may include scroll bars. To remove the scroll bars, choose
Tools > Internet Options > Security, then click Custom Level... to display the
Security Settings dialog box. Enable Allow script-initiated windows
without size or position constraints.
Requirements for Remote Access
A computer that uses the Administration Console or the User Console to work
with a Vocera server running on another computer must meet the minimum
requirements listed in Administration and User Console Requirements on
page 26. In addition, Internet Explorer uses a Java plug-in (the Java Virtual
Machine, or JVM) to display certain console features.
For best results running the Administration Console or the User Console from a
remote computer, use the JVM provided by Sun Microsystems in their Java
Runtime Environment (JRE) version 1.4.2, available from www.java.com. Other
JVMs might not be able to display all console features.
Important: Do not install another JVM on a computer running the Vocera
server. The required plug-in is installed when you install the Vocera server.
26 ··· Vocera Configuration Guide
Configuration
Hardware
Requirements
The configuration hardware is the computer and other equipment that
configures the Vocera badges. The configuration hardware is not a permanent
part of the Vocera installation—it is necessary only to perform the initial badge
configuration. See Configuring New Badges on page 63.
Vocera requires the following temporary configuration hardware for the badges:
Component
Requirement
Configuration Computer
Any notebook or desktop computer running Windows
2000 or Windows XP and containing an Ethernet
network card. Windows 2000 Server and Windows
Server 2003 are also supported, but not required.
See Setting Up the Configuration Computer on
page 57.
Multi-Site
Requirements
Access Point
An isolated access point that is not connected to the
installation site’s network. See Setting Up an
Isolated Access Point on page 60.
Cable
An Ethernet crossover cable to connect the
configuration computer and the access point. See
Setting Up an Isolated Access Point on page 60.
If you are deploying Vocera across multiple sites, your WAN must connect the
individual physical sites to one another and to the Vocera server. Your WAN must
satisfy the bandwidth and requirements of badge-to-badge and badge-to-server
communication across the entire installation.
If each site has its own PBX, you must install a Telephony server at each site. You
do not need to install the Vocera server at each site.
If your deployment uses the broadcast feature or chat feature across multiple
sites, those sites must all reside on a single subnet.
Before You Install Vocera Software ··· 27
Configuring the Wireless Infrastructure
Your wireless infrastructure may require minor configuration to accommodate
the Vocera badges. The rest of this section shows you how to set up your
network to make sure it works smoothly with Vocera.
To configure your infrastructure for Vocera:
1. To enable broadcast and push-to-talk functions across multiple IP subnets,
complete the following tasks:
• Make sure that your switch or router supports Internet Group
Management Protocol (IGMP).
• Use the Badge properties Editor to enable IGMP broadcasts. See Setting
Advanced Properties on page 72.
Note: Vocera does not support the Cisco Group Management Protocol
(CGMP), Cisco’s proprietary implementation of IGMP.
2. If you are not using IGMP, place all your badges on the same subnet (VLAN).
If you are using IGMP, skip this step.
3. If you are not using IGMP, disable IGMP snooping for the switches and
routers on the badge subnet, unless another application or service requires
it. IGMP snooping might prevent Vocera multicast traffic from passing
through the switches and routers. Consequently, a broadcast or an instant
conference might not reach all intended recipients. If another application or
service on your network requires IGMP snooping, contact Vocera technical
support.
If you are using IGMP, skip this step.
4. Set the DTIM value of access points on the badge subnet to 1.
An access point broadcasts a beacon that tells wireless devices how to
associate with it. The access point transmits this beacon at an interval that is
typically set to 100 milliseconds.
An information element in the beacon tells the badge what the DTIM
interval is. When the DTIM interval expires, the badge comes out of powersave mode to receive a possible broadcast or multicast transmission.
This DTIM interval can be configured, and different manufacturers use
different default settings. Vocera requires multicast traffic to be delivered
within 100 milliseconds. Set the access point DTIM interval to 1 to ensure
that a badge receives multicast traffic properly and plays audio that does not
sound choppy.
28 ··· Vocera Configuration Guide
5. If a Vocera server supports multiple sites, the badge subnet at each site must
have the following common characteristics:
• The access points on the badge subnet for each site must use the same
SSID value.
• Security requirements on the badge subnet for each site must be the
same.
When you configure badges, you specify a set of properties, such as the
SSID and security settings, that let the badges connect to your network.
These properties must be common to all badges so the Vocera server or the
Badge Configuration Utility can then download them to the badges without
manual intervention.
These common values also ensure that a badge user from one site can roam
to another site and seamlessly connect to its badge subnet.
Setting Up the Server Computer
Before you install Vocera software, make sure the server computer itself is
configured properly:
• Disable Internet Information Server (IIS), the default web server for Windows
Server 2003 and Windows 2000 Server. See Disabling IIS on page 29.
• Disable Visual Notifications in the Dr. Watson error handler. See Setting Up
Dr. Watson on page 30.
• Make sure the Windows Update software does not apply updates
automatically. See Configuring Windows Update on page 31.
Disabling IIS
By default, Windows Server 2003 and Windows 2000 Server install and enable
the Internet Information Server (IIS). Because IIS interferes with one of the other
services Vocera uses, you should disable it.
To disable IIS:
1. From the Windows Start menu, select Settings > Control Panel >
Administrative Tools > Services.
The Services dialog box appears, displaying the list of installed Windows
services.
2. Double-click the IIS Admin Service service.
The IIS Admin Service Properties dialog box appears. By default, the General
pane is visible.
3. Set the value of the Startup Type field to Disabled.
Before You Install Vocera Software ··· 29
4. Click the Dependencies tab.
The lower section of the Dependencies pane displays the list of services that
depend upon the IIS Admin Service. For example, these services typically
include:
• Simple Mail Transport Protocol (SMTP)
• World Wide Web Publishing Service
5. Make a note of these services, then click OK.
The IIS Admin Service Properties dialog box closes, saving your changes.
6. Make the same Startup Type change to all the services that depend upon
the IIS Admin Service.
7. Restart the computer for the new settings to take effect.
Setting Up Dr.
Watson
If a fatal error causes one of the processes used by Vocera to fail, Vocera
attempts to restart the process and bring the Vocera or Telephony server back
online automatically. In some situations, however, the Windows Dr. Watson
utility can prevent Vocera from restarting a process.
Windows Server 2003 and Windows 2000 Server typically use Dr. Watson as a
fatal error handler. If the Visual Notification option in Dr. Watson is turned on
(the default), this utility displays a Program Error dialog box when a fatal error
occurs.
Windows does not completely abandon a failed process until you close the
Program Error dialog box. Consequently, the Program Error dialog box can
prevent Vocera from restarting a Nuance process on the Vocera server computer
or a Dialogic process on the Telephony server computer.
For example, if the Nuance recclient process binds to a listening port and then
fails for some reason, Dr. Watson displays the Program Error dialog box. If the
dialog box is still open when Vocera attempts to restart recclient, the port is still
busy, and the restart fails.
To prevent this situation from occurring, turn off the Visual Notification option
in Dr. Watson.
30 ··· Vocera Configuration Guide
To turn off Visual Notification:
1. Choose Start > Run from the Windows task bar on the Vocera server
computer.
The Run dialog box appears.
2. Enter drwtsn32 and click OK.
The Dr. Watson for Windows dialog box appears.
3. Uncheck Visual Notification, then click OK.
Dr. Watson closes, and Visual Notification is turned off.
4. If the Telephony server is installed on a different computer, repeat this
process for the Telephony server.
Configuring
Windows
Update
Many server computers use the Windows Update software to keep their
operating systems, software, and hardware up to date. If Windows Update is set
to apply updates automatically, it may reboot your server as part of the update
process. This forced system reboot may result in a Java exception, because
Windows Update did not shut down all the server processes properly.
If your server computer uses the Windows Update software to keep its
components up to date, make sure it does not apply these updates
automatically. You can configure Windows Update to download any updates
automatically, but apply the updates yourself after you shut down Vocera and its
related services properly.
Before You Install Vocera Software ··· 31
32 ··· Vocera Configuration Guide
Upgrading from a Previous Version
The path for upgrading to Vocera Version 3.1 depends on your current Vocera
version and the locale of your installation.
Locale
Vocera Version
Notes
US
2.1.1 or later
Data and settings are converted to the 3.1 format,
and badge firmware is automatically updated.
Upgrade to version 2.1.1 before moving to Vocera
3.1. Upgrading from earlier versions may cause
unexpected results.
AU or NZ
2.2 or later
Upgrade to version 2.2 or 3.0 with the latest
Service Pack before moving to Vocera 3.1.
Upgrading from earlier versions may cause
unexpected results.
This chapter presents the following topics:
• Upgrading Vocera Software on page 34 outlines the steps in the upgrade
process.
• Backing up Vocera Data on page 35 describes how to preserve existing
data.
• Removing Vocera Software on page 35 describes how to remove
obsolete files from the server.
Upgrading from a Previous Version ··· 33
Upgrading Vocera Software
This section summarizes the steps for upgrading from an earlier version of
Vocera.
To upgrade Vocera software:
1. Use the backup utility in your current Vocera installation to backup your
data. The Vocera installation program does not remove this backup file or
the \vocera\backup directory where it resides.
See Backing up Vocera Data on page 35.
2. If the Telephony server software is installed on the same computer as the
Vocera server software, remove the Telephony server software first.
See Removing the Vocera Telephony Server on page 106.
3. Remove the Vocera server.
See Removing Vocera Software on page 35.
Important: The installation program does not remove all the files or
subdirectories in the \vocera directory—those that remain contain data that
will be used after you upgrade. Do not delete these files or subdirectories.
4. If the Badge Utilities are installed on a stand-alone computer, upgrade them
also. See Removing an Earlier Version of the Badge Utilities on
page 58.
5. Install the new Vocera software.
Install into the existing \vocera directory. See Running the Installation
Program on page 35.
When you reboot your computer at the end of the installation, the Vocera
server launches and automatically restores your data.
If you also need to install the Telephony server, see Installing the Telephony
Software on page 105.
If you changed data in the properties file for the Vocera server
(vocera\server\properties.txt) or the Telephony server
(vocera\dialogic\telproperties.txt), merge the changes into the
corresponding file in your new installation. See Upgrading Properties Files on
page 37.
34 ··· Vocera Configuration Guide
Backing up Vocera Data
Use the Vocera backup utility to backup existing data. After an upgrade, the
Vocera server restores backed up data the first time you launch it.
To back up Vocera data:
1. Launch the Administration Console.
2. Click the Maintenance button in the navigation bar to display the set of
Maintenance tabs. By default, the Backup tab is already selected.
3. Click the Backup button.
Vocera backs up your configuration data to a file in the \vocera\backup
directory of the server computer and displays a dialog box to show you the
progress. When the backup is finished, Vocera displays the progress as
100%.
4. Click OK to close the dialog box and return to the Administration Console.
Removing Vocera Software
When you upgrade Vocera, the installation program removes most of the files
and subdirectories in the \vocera directory. However, the log files in the
\apache\Apache2\logs and the \tomcat\logs directories are not removed.
You do not have to remove them, because Vocera installs the new Apache server
into that directory structure if it exists.
Important: Do not remove the remaining files or subdirectories from the
\vocera directory.
Back up your data before removing Vocera. If the Telephony server is on the
same computer as the Vocera server, remove the Telephony server first. See
Backing up Vocera Data on page 35 and Removing the Vocera Telephony
Server on page 106.
Upgrading from a Previous Version ··· 35
To remove Vocera software:
1. If the Vocera server is running, shut it down.
See Shutting Down Vocera on page 216.
2. From the Windows Start menu, choose Settings > Control Panel.
The Windows Control Panel appears.
3. Double-click Add/Remove Programs.
The Add/Remove Programs utility displays a window.
4. Select Vocera Server and then click Remove.
A dialog box asks you to confirm that you want to remove the program.
5. Click Yes.
The utility removes the Vocera software, then prompts you to reboot your
computer.
6. Reboot your computer.
The backup file remains in the \vocera\backup directory. Other directories
and files may also remain in the \vocera directory—do not remove them.
36 ··· Vocera Configuration Guide
Upgrading Properties Files
The files vocera\server\properties.txt and
vocera\dialogic\telproperties.txt define properties for the Vocera server and
the Telephony server, respectively. These files provide default values that are
appropriate for most installations, and if you have not changed the default
values, you do not need to perform this task. In some situations, though, you
may need to edit one or both of these files to specify specialized behavior. This
topic describes how to preserve those changes when you upgrade Vocera.
To upgrade properties files:
1. Find the backup properties file(s).
When you upgrade Vocera, the installation program backs up
properties.txt (and telproperties.txt, if the Telephony server is installed) in
vocera\server\properties-date.txt (and vocera\dialogic\telpropertiesdate.txt, if appropriate), where date is the date of the backup.
Example: vocera\server\properties-2005-07-07-114221.txt
2. Find the new properties file(s).
By default, the installation program creates vocera\server\properties.txt
(and vocera\dialogic\telproperties.txt, if appropriate).
3. Merge the changed data from the backup file(s) into the new file(s).
Several text editors—especially programs designed for editing source code—
provide a merge feature. You can also copy and paste the data by hand.
4. Save the file(s) and restart the server(s).
Upgrading from a Previous Version ··· 37
38 ··· Vocera Configuration Guide
Running the Vocera Installation Program
Before you run the Vocera installation program, perform the tasks described in
Before You Install Vocera Software on page 23.
The Vocera installation program requires the information listed in the following
table. When you install Vocera in a clustered environment, the installation
program requires additional information. See Fault Tolerant Configurations
on page 41 for details.
Required information
Description
Vocera license key.
The Vocera version 3.1 license structure has
changed to support new locales.
Also, versions of Vocera earlier than 3.0 required
separate license keys for Nuance, Vocalizer, and
the Vocera server. If you are upgrading from
Vocera 2.x, the installation program displays
your existing Vocera server license key. You must
enter the single universal license key for this
version of Vocera.
The installation program sets the system
environment variable VOCERA_LICENSE to the
value you enter for the license key. After you
install Vocera, you can set or change this variable
directly from the System settings of the
Windows Control Panel. Restart the computer to
make the new setting take effect.
Destination drive.
Specify the drive where you want to install the
Vocera server.
Running the Vocera Installation Program ··· 39
Required information
Description
The country for which you are
installing the Vocera server.
Choose a country from the list. The dial plan,
grammars, language packs and Genie personas
are loaded based on this setting.
If you choose a country that requires files from
the International Language Pack disk, the
installation program will prompt you to insert
the disk at the appropriate time.
Are you configuring this
installation for single or multiple
network interface cards (NICs)?
If you configure for multiple NICs, provide the IP
address of the NIC you want Vocera to bind to.
Do you plan to install the Vocera
Telephony Server on the same
computer as the Vocera Server?
The Vocera installation program will ask whether
you plan to install the Vocera Telephony Server
on the same computer as the Vocera Server.
If you answer Yes, you will be prompted to install
the Vocera Telephony Server.
Otherwise, when the Vocera installation
program completes the installation, it prompts
you to restart the computer.
To install the Vocera server software:
1. Log in to the Vocera server computer with administrator privileges.
2. Insert the Vocera Server CD in the CD-ROM drive.
The main installation screen appears automatically.
If this screen does not appear, choose Run from the Windows Start menu,
navigate to vocera.hta at the root of the installation CD, then click OK to
run this file and display the main installation screen.
3. Click Install Vocera Software.
The installation program starts. Follow prompts and enter information as
required.
4. When the installation is complete, restart the computer.
The Vocera server launches and displays the Vocera Control Panel. If you are
upgrading Vocera, the Vocera Control Panel indicates that the existing data
is being restored. See Using the Vocera Control Panel on page 215 for
information about controlling the Vocera server.
40 ··· Vocera Configuration Guide
Fault Tolerant Configurations
The following topics explain how to configure a fault tolerant environment and
install Vocera software into it.
• About Fault Tolerant Environments on page 41
• Prerequisites for a Cluster on page 43
• Using the Microsoft Cluster Service on page 44
• Setting Up a Fault Tolerant Vocera Environment on page 45
• Maintaining a Fault Tolerant Vocera Environment on page 52
• Uninstalling the Vocera Cluster on page 52
About Fault Tolerant Environments
Some environments require redundancy to support critical applications in the
event of hardware or software failure. In such environments, a critical application
is installed on two computers. The computer running the application is called the
active node, and the other computer is called the passive node. This redundant
combination of active and passive nodes is called a cluster. The computers in a
cluster are also called primary and secondary servers.
Vocera uses the Microsoft Cluster Service that is available in Windows Server
2003 and Windows 2000 Advanced Server to provide fault tolerance if hardware
or any Vocera-related service fails on the active node. The Vocera server runs on
the cluster’s active node, but the passive node can take over and run the
application if the active node fails. The situation where the passive node takes
control from the active node is called a failover.
Every cluster requires one resource designated as the quorum resource. The
quorum provides node-independent storage for configuration and state data.
When you create a cluster for the Vocera server, you must provide another
shared data store to keep the Vocera data separate from the quorum drive.
Fault Tolerant Configurations ··· 41
The Vocera data must reside on a data store that both Vocera servers can access.
This shared data store is typically a RAID (Redundant Array of Independent
Disks), but it could also be a SAN (storage area network) or another
configuration that provides data redundancy. The active node has sole access to
this shared data store. It the active node fails, the passive node becomes active
and gains sole access to the shared data store.
Vocera Telephony Solution Software, if installed, must run on a server that is
separate from the Vocera cluster so telephony support can continue if the Vocera
server fails over. Failover for the Telephony server itself is not supported. Because
the computer running the Telephony server contains a board that is physically
connected to the PBX, failover for the Telephony server requires switching
control of the physical PBX connections to a different server. Vocera will support
Telephony server failover in a future release.
The following figure shows the relationship between the different devices that
provide fault tolerance for Vocera:
42 ··· Vocera Configuration Guide
Prerequisites for a Cluster
Vocera fault tolerance support requires that you set up a two-node cluster using
the Microsoft Cluster Service, a feature of the Windows Server 2003 and
Windows 2000 Advanced Server operating systems. The Cluster Service may be
implemented differently on different platforms. Refer to documentation from
your hardware and operating system vendors for complete information.
After setting up the cluster, perform the following Vocera-specific tasks:
• Set up a shared drive to maintain Vocera data. This drive must be separate
from the quorum drive.
• Create a cluster group named Vocera.
• In the Vocera cluster group, create and bring online a resource named
Vocera Data Drive to represent the shared drive. When you create this
resource, set the following properties:
• Resource type is either Physical Disk or a vendor-specific equivalent (for
example, IBM ServeRAID Logical Disk)
• Make both nodes possible owners
• No dependencies
• Specify the drive ID
• Also in the Vocera cluster group, create and bring online an IP Address
resource named Vocera Cluster IP to store the cluster’s virtual IP address.
When you create this resource, set the following properties:
• Make both nodes possible owners
• No dependencies
• IP address and subnet mask
• Network type is Cluster Public Lan
• Do not enable NetBIOS for this address
Fault Tolerant Configurations ··· 43
Using the Microsoft Cluster Service
The Cluster Administrator is a Windows Control Panel utility that lets you
configure and maintain your cluster. This section assumes that you have a
working knowledge of the Cluster Administrator and Microsoft clustering
technology. For your convenience, the following procedure summarizes a few
features of the Microsoft Cluster Administrator from the point of view of a
person verifying a cluster’s configuration.
To use the Microsoft Cluster Administrator:
1. Launch the Microsoft Cluster Administrator. From the Windows Start menu,
choose Settings > Control Panel > Administrative Tools > Cluster
Administrator.
The Cluster Administrator appears.
2. In the Groups tree in the left pane, click Vocera.
3. To check the virtual IP address of the Vocera cluster, right-click the Vocera
Cluster IP icon in the right pane and choose Properties to display the
Cluster IP Address Properties dialog box, then click the Parameters tab.
The virtual IP address of the cluster appears in the Address field.
When you are finished, click Cancel to close the dialog box.
4. To check the mapped letter assigned to the shared data drive, right-click the
Vocera Data Drive icon in the right pane and choose Properties to display
the Vocera Data Drive Properties dialog box, then click the Parameters tab.
The map assignment appears in the Disk field.
When you are finished, click Cancel to close the dialog box.
5. To assign control of the shared data drive to a different computer, right-click
Vocera in the left pane and choose Move Group.
The Owner column in the right pane displays the name of the computer
that now controls the shared data drive.
44 ··· Vocera Configuration Guide
Setting Up a Fault Tolerant Vocera Environment
If you have a basic familiarity with the Microsoft Cluster Administrator, you are
ready to set up a cluster of Vocera servers.
To set up a fault tolerant Vocera environment:
1. Set up a cluster with two computers that are capable of running the Vocera
server and separate shared data store.
Follow the instructions provided by the Microsoft Cluster Service and your
hardware vendor.
2. Shut down both computers.
3. Install the Vocera server on the primary computer.
See Setting Up the Primary Server on page 45.
4. Install the Vocera server on the secondary computer.
See Setting Up the Secondary Server on page 47.
5. Configure the cluster resources.
See Creating Cluster Resources on page 48.
6. Check your work to make sure the cluster is set up correctly.
See Testing the Cluster on page 51.
7. Bring the cluster online for general availability.
See Making the Cluster Available on page 52.
Setting Up the
Primary Server
Vocera uses the same installation program for a stand-alone server and a server
that is part of a cluster. The installation program checks the registry of the server
to see if you are installing on a clustered computer. If you are installing on a
server that is part of a cluster, the installation program automatically displays an
additional dialog box asking for basic information about the cluster.
Note: The installation program requires 5GB of free space on the destination
drive of a server that is part of a cluster.
Fault Tolerant Configurations ··· 45
To set up the primary server:
1. Make sure the computer you want to use as the primary Vocera server has
control of the shared data drive.
Use the Microsoft Cluster Administrator to view the owner of the cluster
group and to assign the data drive to the primary server computer, if
necessary. See Using the Microsoft Cluster Service on page 44.
2. Install the Vocera software as described in Running the Installation
Program on page 35. Do not select the options to install the Telephony
server or configure multiple NICs.
3. After you complete the Configuration Information screen and click Next,
the installation program displays the Cluster Configuration screen.
4. In the This machine is: field, specify First Node.
5. Enter the IP address of the Vocera cluster in the Vocera Cluster IP field.
If necessary, use the Microsoft Cluster Administrator to check the virtual IP
address. See Using the Microsoft Cluster Service on page 44.
6. Specify the map letter of the shared data drive in the Shared Data Drive
field.
If necessary, use the Microsoft Cluster Administrator to check the map letter
of the drive. See Using the Microsoft Cluster Service on page 44.
7. Click Next.
The Ready to Install the Application screen appears. Continue installing the
Vocera software as described in Running the Installation Program on
page 35.
8. When prompted, choose No, I will restart my computer later, then click
Finish to close the installation program.
9. Shut down the computer.
46 ··· Vocera Configuration Guide
Setting Up the
Secondary
Server
After you install Vocera on the primary server, you can set up the secondary
server.
Note: The installation program requires 5GB of free space on the destination
drive of a server that is part of a cluster.
To set up the secondary server:
1. Turn on the computer you want to use as the secondary Vocera server, and
make sure it has control of the shared data drive.
Use the Microsoft Cluster Administrator to see which computer owns the
data drive. See Using the Microsoft Cluster Service on page 44.
2. Install the Vocera software as described in Running the Installation
Program on page 35. Do not select the options to install the Telephony
server or configure multiple NICs.
3. After you complete the Configuration Information screen and click Next,
the installation program displays the Cluster Configuration screen.
4. In the This machine is: field, specify Second Node.
5. Enter the IP address of the Vocera cluster in the Vocera Cluster IP field.
If necessary, use the Microsoft Cluster Administrator to check the virtual IP
address. See Using the Microsoft Cluster Service on page 44.
6. Specify the map letter of the shared data drive in the Shared Data Drive
field.
If necessary, use the Microsoft Cluster Administrator to check the map letter
of the drive. See Using the Microsoft Cluster Service on page 44.
7. Click Next.
The Ready to Install the Application screen appears. Continue installing the
Vocera software as described in Running the Installation Program on
page 35.
8. When prompted, choose No, I will restart my computer later, then click
Finish to close the installation program.
9. Shut down the computer.
Fault Tolerant Configurations ··· 47
Starting the
Primary and
Secondary
Servers
After setting up the primary and secondary servers, start them in the following
order:
1. Turn on the primary server.
2. The Vocera server starts. Wait for the Vocera Control Panel to appear.
3. Turn on the secondary server. The Vocera Launcher should not start.
Creating
Cluster
Resources
After installing the Vocera software and restarting both servers, use the
Windows Cluster Administrator to create resources for the various services used
by the Vocera cluster group.
After you create these resources, the Windows Cluster Service monitors the
services. If any of the services is interrupted, the Windows Cluster Service fails
over the entire Vocera system to the secondary computer.
You do not have to create cluster resources separately for each computer in the
cluster; you create the resources once for the entire Vocera cluster group. The
Windows Cluster Administrator provides a wizard to help you create the
resources.
Creating the Tomcat Resource
Use the New Resource wizard to create a cluster resource for the Tomcat service.
Because the services used by Vocera have interdependencies, create the Tomcat
resource first. After you set up the Tomcat resource, use the wizard to set up
resources for the additional services you need to manage, as described in
Creating the Additional Resources on page 50.
48 ··· Vocera Configuration Guide
To create the Tomcat resource:
1. Open the Windows Cluster Administrator as described in Using the
Microsoft Cluster Service on page 44.
2. From the File menu, choose New > Resource to display the New Resource
dialog box.
3. Complete the New Resource dialog box as follows, then click Next.
Field
Description
Name
Enter a name such as tomcat to help you identify
the service you want to monitor. You do not have to
use the resource name from the Services control
panel.
Description
Enter a description (for example, Tomcat service) to
help you identify the service you want to monitor.
Resource type
Choose Generic Service from the drop-down list.
Group
Choose Vocera from the drop-down list.
Run this resource in a
separate resource
monitor
Uncheck this field.
The Possible Owners dialog box appears.
4. By default, both computers in your cluster appear in the Possible owners
column. Click Next to accept the default.
The Dependencies dialog box appears.
5. By default, all resources appear in the Available resources column. The
Tomcat service has no dependencies. Click Next to accept the default.
The Generic Service Parameters dialog box appears.
6. Complete this dialog box as follows, then click Next.
Field
Description
Service name
Enter the exact name of the service as it appears in
the Services control panel. For the Tomcat service,
enter the value tomcat.
Start parameters
Leave this field blank.
The Registry Replication dialog box appears.
Fault Tolerant Configurations ··· 49
7. By default, the Root Registry Key column is empty. Click Finish to accept
the default.
A dialog box appears, telling you that the resource was created.
8. Click OK to close the dialog box.
The Cluster Administrator takes the Cluster Group offline and creates an
icon for the resource under the Cluster Group.
Creating the Additional Resources
After you set up the Tomcat resource, use the New Resource wizard to create
resources for the remaining Vocera services. Create these resources in the Vocera
cluster group, as you did with the Tomcat service. The new resources use the
same values as the Tomcat resource, except for the Resource dependencies
and Service name values.
To set up resources for the remaining services
1. Create resources for the remaining services in the following order:
• Apache2
• MySQL
• Nuance Watcher Daemon
• Vocera Launcher
Follow the steps in Creating the Tomcat Resource on page 48 until the
Dependencies dialog box appears.
2. Complete the Dependencies dialog box as follows, then click Next:
When you create this resource:
Set up these resource dependencies:
Apache2
• Tomcat
MySQL
• Vocera Data Drive (shared drive)
• Vocera Cluster IP address
Nuance Watcher Daemon
• No dependencies
Vocera Launcher
• MySQL
• Nuance Watcher Daemon
The Generic Service Parameters dialog box appears.
50 ··· Vocera Configuration Guide
3. Complete the Generic Service Parameters dialog box as follows, then click
Next:
When you create this resource:
Specify this value for the Service name:
Apache2
apache2
MySQL
mysql
Nuance Watcher Daemon
nuance watcher daemon
Vocera Launcher
vmanager
4. Continue with the steps in Creating the Tomcat Resource on page 48
until you complete the wizard for each service.
Testing the
Cluster
If you have followed the steps in Setting Up a Fault Tolerant Vocera
Environment on page 45, your cluster should now be in the following state:
• The primary server is the active node. It owns the data drive. The Vocerarelated services are not running.
• The secondary server is the passive node. It does not own the data drive. The
Vocera-related services are not running.
You are now ready to test your Vocera cluster.
To test the cluster:
1. On the active node, right-click the Vocera group in the Cluster
Administrator and choose Bring Online.
2. Simulate a failure by moving the cluster group from the active node to the
passive node. See Using the Microsoft Cluster Service on page 44.
If your cluster is set up correctly, the following events occur:
• Control of the shared data drive fails over to the secondary server.
• Vocera shuts down on the primary server, and all Vocera-related services
stop running.
• The secondary server becomes the active node. It starts the Vocera
Launcher service, the Vocera server starts running, and the Vocera Control
Panel appears.
Fault Tolerant Configurations ··· 51
Making the
Cluster
Available
After you have successfully tested the cluster, restore it to the state it was in
before testing. After you restore the cluster to its default state, it is available for
general use, and you can continue with the system deployment.
To make the cluster available:
1. Use the Microsoft Cluster Administrator to move the cluster group to the
primary server, as described in Using the Microsoft Cluster Service on
page 44.
2. The following events occur:
• Control of the shared data drive fails over to the primary computer, which
becomes the active node.
• Vocera shuts down on the secondary server, and all Vocera-related services
stop running.
• The active node starts the Vocera Launcher service, the Vocera server starts
running, and the Vocera Control Panel appears.
Maintaining a Fault Tolerant Vocera Environment
Because a cluster is a relatively complex configuration, regular maintenance is
required to ensure successful failover. Keep the following files and directories
synchronized on both nodes:
• vocera\server\properties.txt file. Templates in this file configure the
Vocera server and define the dialing patterns Vocera uses to call inside and
outside pager numbers. These templates also determine the way any
callback information is formatted on the pager’s display.
• vocera\config\badge.properties file. This file is not created when you
install the server—it is created by the Badge Properties Editor.
• vocera\backup directory. This directory stores system data, including
preferences, defaults, messages, and voice prints.
Periodically, a system administrator should copy these files (either by hand or
using a script or other utility to automate the process) and directories from the
active node to the passive node.
Uninstalling the Vocera Cluster
The Vocera uninstall program does not remove the data tree from a shared
cluster drive. It leaves the data tree on the drive so a Vocera installation on
another computer in the cluster can continue to access it.
52 ··· Vocera Configuration Guide
To uninstall Vocera in a clustered environment:
1. If you are planning to reinstall or upgrade Vocera, create a system back up as
described in Backing Up and Restoring Data on page 223.
2. Shut down the passive node.
3. On the active node, use the Cluster Administrator to take Vocera-related
services offline in the following order:
1. Nuance (also takes the Vocera Launcher service offline)
2. Apache2
3. Tomcat
4. MySQL
5. Vocera Cluster IP
Right-click each service and choose Take Offline.
4. Delete the offline services in the following order:
1. Nuance (also deletes the Vocera Launcher service)
2. Apache2
3. Tomcat
4. MySQL
5. Vocera Cluster IP
Right-click each service and choose Delete.
5. Remove Vocera from the active node.
Follow the instructions for your operating system. Do not restart the
computer.
6. Remove Vocera from the passive node.
Follow the instructions for your operating system. Do not restart the
computer.
7. (Optional). If you do not plan to reinstall or upgrade Vocera, delete the
vocera directory from the shared data drive.
Fault Tolerant Configurations ··· 53
54 ··· Vocera Configuration Guide
Badges
The following topics explain how to configure new badges, update existing
badges, and troubleshoot your badge configuration:
• Setting Up the Configuration Computer on page 57
Describes how to set up a computer and connect it to an access point so you
can download configuration settings to new badges.
• Configuring New Badges on page 63
Describes how to run the Badge Properties Editor to specify badge
properties and run the Badge Configuration Utility to download the
properties to new badges.
• Managing Badge Properties on page 79
Explains how to manage properties on badges that have already been
configured.
• Troubleshooting Badge Configuration on page 83
Describes problems that can occur during badge configuration and explains
how to resolve them.
Badges ··· 55
56 ··· Vocera Configuration Guide
Setting Up the Configuration Computer
The configuration computer is a machine you use to configure Vocera badges. It
should be a stand-alone computer that is not connected to your site's network.
Here is the procedure for setting up the configuration computer:
1. Install the Badge Utilities on the configuration computer. The Badge Utilities
let you specify badge properties in a text file, then download the properties
to your badges.
See Installing the Badge Utilities on page 58.
2. Assign a specific IP address (10.0.0.1) and subnet mask (255.0.0.0) to the
configuration computer. When you boot a new badge, it looks for a
computer with these properties that is running the Badge Configuration
Utility.
See Specifying TCP/IP Properties on page 59.
3. Cable the configuration computer directly to an access point that is set up
without security requirements. Any access point security will prevent
unconfigured badges from connecting.
See Setting Up an Isolated Access Point on page 60.
Any notebook or desktop computer running Windows 2000 or Windows XP and
containing an Ethernet network card is typically sufficient for use as the
configuration computer. Windows Server 2003 and Windows 2000 Server are
also supported, but not required.
Setting Up the Configuration Computer ··· 57
Installing the Badge Utilities
Vocera does not support more than one version of the Badge Utilities on a
configuration computer. The Badge Utilities version and Vocera server version
must be the same.
If the Badge Utilities from a previous version of Vocera are installed on the
configuration computer, remove them before installing the current Badge
Utilities. See Removing an Earlier Version of the Badge Utilities.
If the Badge Utilities are not already installed on the configuration computer,
install them as described in Running the Badge Utilities Installation
Program.
Removing an
Earlier Version
of the Badge
Utilities
If the Badge Utilities from a previous version of Vocera are installed on your
configuration computer, remove them before installing the current badge
utilities. By default, the Badge Utilities are installed into the \vocera\config
directory at the root of a drive that you specify.
To remove an earlier version of the Badge Utilities:
1. From the Windows Start menu, choose Settings > Control Panel.
The Windows Control Panel appears.
2. Double-click Add/Remove Programs.
The Add/Remove Programs window appears.
3. Select Vocera Utilities V.x (where V.x represents the version to remove, for
example, 2.2) and click Remove.
A dialog box asks you to confirm that you want to remove the program.
4. Click Yes.
A dialog box asks you to wait while the Badge Utilities are removed. It closes
when the operation is complete.
58 ··· Vocera Configuration Guide
Running the
Badge Utilities
Installation
Program
The Badge Utilities installation program requires the following information:
Field
Description
Installation Drive
A letter that identifies the drive
where you want to install the
Badge Utilities. For example, C.
To run the Badge Utilities installation program:
1. Log in to the Vocera server computer with administrator privileges.
2. Insert the Vocera Server CD in the CD-ROM drive.
The main installation screen appears automatically.
If this screen does not appear, choose Run from the Windows Start menu,
navigate to vocera.hta at the root of the installation CD, then click OK to
run this file and display the main installation screen.
3. Click Install Vocera Utilities to start the installation program.
4. Follow the program’s prompts to install the utilities.
Specifying TCP/IP Properties
You need to specify certain TCP/IP properties in the configuration computer to
allow a new badge to connect to it properly.
To specify TCP/IP properties:
In Windows, use the Network Connections control panel to specify the following
TCP/IP properties for the network card in your configuration computer:
• Set the IP address to 10.0.0.1
When you boot a new badge, it automatically looks for a computer with this
address that is running the Badge Configuration Utility.
• Set the Subnet mask to 255.0.0.0
The exact procedure for setting your TCP/IP properties depends upon the version
of the operating system. Refer to your Windows documentation for complete
information.
Setting Up the Configuration Computer ··· 59
Setting Up an Isolated Access Point
To set up a badge, connect the configuration computer to an isolated access
point—one that is not connected to the site’s network. The access point must be
isolated from the rest of the network so you can set it up with a different SSID,
and without compromising the site’s security.
This isolated access point allows a badge to connect to the configuration
computer using default factory settings. This access point is a temporary set up
that you use only to configure badges. Configured badges can connect to your
wireless LAN by using your existing SSID and security system.
To set up an isolated access point:
1. Attach an Ethernet crossover cable to the network port on the configuration
computer.
2. Connect the other end of the cable to the Ethernet port on the access point.
3. If necessary, install configuration software for the access point on the
configuration computer.
Many access points require only a browser for configuration.
4. Using the access point configuration utility, make sure your access point is
set up as follows:
• Allow open authentication (typically the default)
• Turn off all security (typically the default)
• Assign the SSID value as vocera (using all lower-case letters)
• Allow a broadcast SSID to associate (typically the default)
• Configure as an access point in infrastructure mode (typically the default)
The exact procedure for setting up your access point depends upon the
hardware manufacturer. Refer to your access point documentation for
complete information.
When Vocera badges come from the factory, their SSID property is set either
to vocera or to <no value>. If you configure your access point as described
above, both types of badges can connect to it.
60 ··· Vocera Configuration Guide
When you are finished, your badge configuration hardware should be set up as
follows:
Ethernet Crossover Cable
Configuration Computer:
Isolated Access Point:
• IP address = 10.0.0.1
• Subnet mask = 255.0.0.0
• Open authentication
• No security
• Set SSID to vocera (lower case)
• Accept broadcast SSID
• 802.11 infrastructure mode
Setting Up the Configuration Computer ··· 61
62 ··· Vocera Configuration Guide
Configuring New Badges
To an end user, a badge is a convenient communication device. To your wireless
network, however, a badge is an internet appliance—it requires minor
configuration before it can communicate with your network, as any IP device
does. For example, when you configure a badge, you must either assign it a fixed
IP address or specify that a DHCP server will assign an IP address dynamically.
This IP address is a badge property. Similarly, you must specify other properties
for your badge, such as the SSID your wireless network uses, and any security
settings your network may require.
Because a badge has no keyboard, you must first set up a computer called a
configuration computer. See Setting Up the Configuration Computer on
page 57 for details. Then, use utilities on the configuration computer to create a
properties file and download it to a badge. Here is a summary of the procedure:
1. Use the Badge Properties Editor on the configuration computer to specify
the badge properties required by your site. See Creating a Property File to
Download on page 64.
2. Use the Badge Configuration Utility on the configuration computer to
download properties to one badge, then test that badge. See Configuring
a Test Badge on page 74.
3. Configure the remaining badges. See Configuring the Remaining Badges
on page 76.
Note: This chapter assumes you are using a DHCP server to assign IP addresses
to the badges. If your badges require static IP addresses, see Configuring
Badges with Static IP Addresses on page 77.
Configuring New Badges ··· 63
Creating a Property File to Download
Badge properties tell a badge how to communicate on the wireless network
deployed at your specific site. Use the Badge Properties Editor to create a file
specifying the property values your site requires, and then use the Badge
Configuration Utility or the Vocera server to download these properties to all
your badges.
Using the
Badge
Properties
Editor
The Badge Properties Editor is installed in the \vocera\config directory on the
configuration computer, and on the Vocera server computer. If you are
performing the initial badge configuration, run the Badge Properties Editor on
the configuration computer.
To use the Badge Properties Editor:
1. From the Windows Start menu, choose Programs > Vocera > Badge
Utilities > Badge Properties Editor.
The Badge Properties Editor appears.
2. Set property values as described in the following topics:
• Setting General Properties describes the minimal set of properties you
need to set for any badge in use at your site.
• Setting Security Properties describes how to make badges work with
the security features implemented on your wireless network.
• Setting TCP/IP Properties describes the IP settings that a badge can use.
• Setting Advanced Properties describes a small set of values that are
rarely used.
3. Apply new settings.
The Badge Properties Editor creates a text file called badge.properties in
\vocera\config. Use the Badge Properties Editor to create and modify this
file, rather than editing it by hand. Some values in badge.properties are
encrypted, and different values are overwritten each time the Vocera server
downloads the values in the badge.properties file.
Both the Vocera server and the Badge Configuration Utility read from the
badge.properties file, so if either is running when changes are made, you
must restart it to make changes take effect.
64 ··· Vocera Configuration Guide
Setting General
Properties
The general properties comprise the minimal set of properties needed by any
badge at your site. You must set values for all the general properties. Depending
on the configuration of your site, you may have to set other properties as well.
Property
Description
SSID
Use the SSID field to specify the SSID of the wireless network or
subnet the Vocera badges will use. This is a required field.
This value is case sensitive, and can be up to 32 characters in
length. You can use initial or embedded spaces in the SSID value;
trailing spaces cause an error message when the value is saved.
If one Vocera server supports multiple sites, each site must allow
badges to connect to the network with the same SSID value. All
badges must have the same SSID value so the Vocera server can
automatically update them when necessary.
Vocera Server IP
Address
Use the Vocera Server IP Address field to specify the IP address
of the computer which is running the Vocera server. This is a
required field.
You can use either dotted notation (such as 192.168.3.7) or a
DNS name (such as vocera.company.com) to specify this value. If
you enter a DNS name here, you must specify the address in
dotted notation in the TCP/IP properties panel.
Hide Boot
Menus
Check the Hide Boot Menus field to prevent a user from
displaying the configuration menus on a user’s badge.
The badge configuration menus provide access to powerful
utilities for maintenance and troubleshooting. Use these utilities
only when you are working with Vocera Technical Support.
The first time you configure a badge for a site, you may want to
leave this property unchecked. After you download properties to
your first badge and confirm that it works correctly, you can check
this property and download the properties again.
To set general properties:
1. If the Badge Properties Editor is not already running, start it as described in
Using the Badge Properties Editor on page 64.
2. Choose the General tab.
3. Enter property values required for your site.
4. Save these values in either of the following ways:
• Click Apply to save these values without closing the Badge Properties
Editor.
• Click OK to save these values and close the Badge Properties Editor.
Configuring New Badges ··· 65
Setting Security
Properties
Set badge security properties only if your wireless network requires
authentication for access or implements some form of data encryption.
Otherwise, badge security properties are not required.
For information about Vocera’s support for authentication and encryption, see
the following topics:
• About Authentication and Encryption.
• About WPA
• About WEP Keys
If one Vocera server supports multiple sites, each site must allow badges to
connect to the network with the same security properties. All badges must have
the same security properties so the Vocera server can automatically update the
badges when necessary.
Property
Description
Authentication
In the Authentication field, specify whether your wireless
network requires authentication for access:
• Specify Open if your wireless network does not require
authentication.
• If your wireless network requires authentication, specify the
corresponding protocol.
User Name,
Password
If your network uses LEAP or WPA-PEAP authentication, enter
appropriate values in the User Name and Password fields.
Otherwise, skip these fields.
Each badge on a Vocera server must use the same user name
and password for LEAP or WPA-PEAP authentication. The user
name format depends on requirements set by the RADIUS
authentication server. For example, when using LEAP with
Cisco ACS and Windows Active Directory, enter domain\userid
in the User Name field, where domain is a Windows domain
name and userid identifies the user. Other RADIUS servers may
require the user name only.
The password value is case sensitive. You can use initial or
embedded spaces in either of these values; trailing spaces
cause an error message when the values are saved.
PreShared Key
66 ··· Vocera Configuration Guide
If your network uses WPA-PSK authentication, specify a value
in the PreShared Key field. Otherwise, skip this field.
Property
Description
Encryption
In the Encryption field, choose a value from the drop-down
list to specify the type of data encryption your wireless network
requires. The list includes different values depending on the
value in the Authentication field. If necessary, check access
point settings to see which type of encryption to use.
The following lists shows supported authentication protocols
and corresponding encryption types
• Open: None, WEP64, WEP128
• LEAP: TKIP-Cisco, WEP64, WEP128
• WPA-PEAP: TKIP-WPA
• WPA-PSK: TKIP-WPA
Transmit With Key
If you specified either Open or LEAP authentication, specify a
value for the Encryption Key fields as follows:
• If you are using Open authentication with either WEP64 or
WEP128 encryption, use hexadecimal characters to enter
the keys that the access point is using in each of the four
Encryption Key positions. Both the position and the value
must be the same as those used by the access point.
• If you are using LEAP authentication, do not specify any
values in the Encryption Key fields. The authentication
server will provide the data necessary for the badge to
generate the key.
Encryption Key
If you specified either Open or LEAP authentication, specify a
value for the Encryption Key fields as follows:
• If you are using Open authentication with either WEP64 or
WEP128 encryption, use hexadecimal characters to enter
the keys that the access point is using in each of the four
Encryption Key positions. Both the position and the value
must be the same as those used by the access point.
• If you are using LEAP authentication, do not specify any
values in the Encryption Key fields. The authentication
server will provide the data necessary for the badge to
generate the key.
Configuring New Badges ··· 67
To set security properties:
1. If the Badge Properties Editor is not already running, start it as described in
Using the Badge Properties Editor on page 64.
2. Choose the Security tab.
3. Enter property values required for your site.
4. Save these values in either of the following ways:
• Click Apply to save these values without closing the Badge Properties
Editor.
• Click OK to save these values and close the Badge Properties Editor.
About Authentication and Encryption
Authentication is a process that verifies the identity of a user on your wireless
network. If your WLAN requires authentication, users must submit credentials—
such as a user name and password—to establish an identity.
Vocera supports the following authentication protocols:
• Open authentication, an 802.11 standard that allows devices to connect to a
wireless network without authentication
• Cisco LEAP (Lightweight Extensible Authentication Protocol)
If your site uses LEAP security, a Vocera badge must submit a user name and
password to an authentication server when it accesses your wireless
network. The authentication server checks these credentials, and if the user
is authenticated, it allows the badge to access the network.
• WPA-PEAP (Wi-Fi Protected Access Protected Extensible Authentication
Protocol)
PEAP is a two-part protocol. In the first part, an authentication server and a
client set up an encrypted TLS tunnel. In the second part, authentication
occurs in the tunnel. PEAP allows you to choose among several
authentication techniques. Vocera supports the MS-CHAP (Microsoft
Challenge Handshake Authentication Protocol) version 2 standard, which
provides mutual authentication via user names and passwords.
• WPA-PSK (Wi-Fi Protected Access Pre-Shared Key)
PSK is a technique for verifying identity that is an alternative to PEAP. PSK
offers some of the benefits of TKIP without the overhead of an
authentication server. Vocera supports PSK as defined by WPA. See About
WPA for more information.
68 ··· Vocera Configuration Guide
Encryption is a technique that systematically scrambles data to make it
unreadable in case it is intercepted. Vocera supports the following forms of
encryption:
• WEP (Wired Equivalent Privacy) encryption is the basic level of 802.11
security. WEP uses 64-bit or 128-bit keys (sometimes called 40-bit or 104-bit
keys, respectively) to encrypt and decrypt data. WEP encryption uses a single
key that does not change. If Vocera badges and your site’s access points use
the same WEP key, they can communicate with each other.
• TKIP (Temporal Key Integrity Protocol) encryption uses dynamic keys that
change as the system is used. Vocera supports the following TKIP versions:
• TKIP-Cisco is Cisco’s proprietary implementation of TKIP. It is available for
systems that use the LEAP authentication protocol. Cisco refers to this
same security implementation as Cisco TKIP in Cisco VxWorks and as CKIP
in Cisco IOS.
• TKIP-WPA is available for systems that use the WPA-PEAP or WPA-PSK
authentication protocols.
About WPA
Wi-Fi Protected Access (WPA) is a set of standards and protocols designed to
make wireless networks secure. WPA was developed by the Wi-Fi Alliance, an
organization formed to certify interoperability of wireless networking products
based on the IEEE 802.11 specification.
Vocera supports the following WPA features:
• PEAP (Protected Extensible Authentication Protocol) is a two-part process.
1. An authentication server and a Vocera badge set up an encrypted
Transport Level Security (TLS) channel. The badge accepts a
certificate from the authentication server, but does not validate it
because of the processing overhead required.
2. Authentication occurs via the encrypted channel. Vocera supports
the Microsoft Challenge-Handshake Authentication Protocol
version 2 (MS-CHAP v2) standard, which provides mutual
authentication via user names and passwords.
• TKIP (Temporal Key Integrity Protocol) encryption uses dynamic keys that
change as the system is used.
• PSK (Pre-Shared Key), a technique for verifying identity that is an alternative
to PEAP. PSK offers some of the benefits of TKIP without the overhead of an
authentication server. Vocera supports PSK as defined by WPA.
Configuring New Badges ··· 69
• MIC (Message Integrity Check), a checksum calculated by both the client
and the server to confirm that the content of a packet has not been
changed.
About WEP Keys
When you provide Vocera security with WEP encryption, your access points and
badges transmit data using hexadecimal keys. WEP uses 64-bit or 128-bit keys
(sometimes called 40-bit or 104-bit keys, respectively) to encrypt and decrypt
data. Each device transmits and receives using a hexadecimal key in one of four
possible positions. The position used to transmit and receive is not necessarily
the same.
To successfully transmit data, the position and value of the key used to transmit
must match the position and value of the key in the receiving device. The
position that the access point uses to transmit is not necessarily the same as the
position that the badge uses to transmit. However, the value that the access
point uses to transmit must match the value you supply for the corresponding
position of the badge.
For example, if an access point uses its first encryption key to transmit data, you
must configure the badges to use that same hexadecimal value in the first
position. Similarly, if the badges use their third WEP key to transmit data, the
third WEP key stored in the access point must have a matching encryption key
value.
You do not have to specify values for each of the four WEP keys, only the keys
that the access point and badge actually use to transmit data. However, the best
practice is to make sure that the values of the keys in all four positions match.
That way, if a security administrator changes the position that the access point
uses to transmit, the badges will continue to work.
Setting TCP/IP
Properties
The TCP/IP properties specify whether badges are assigned IP addresses
dynamically by a DHCP server, or whether each badge has a static IP address.
Use a DHCP server to assign IP addresses to the badges whenever possible. Static
IP addresses are feasible only for small evaluation systems. Because using a static
70 ··· Vocera Configuration Guide
IP address for each badge requires manual configuration, it is a slow and errorprone process for large numbers of badges.
Property
Description
Use DHCP Settings
Choose Use DHCP Settings if your site uses a DHCP server to
provide IP addresses dynamically.
Most sites use a DHCP server for IP addresses. This choice is
the default.
Use Static Settings
Choose Use Static Settings if you want to specify specific
static IP addresses.
Use static IP addresses for small evaluation systems only.
Subnet
Use the Subnet Mask field to specify which bits in the IP
address correspond to the subnet.
Default Gateway
If your LAN uses a gateway to connect to other networks,
enter its dotted notation address in the Default Gateway
field. This value is necessary only if the Vocera Server resides
on a different subnet than the badges.
Preferred DNS
Use the Preferred DNS field to enter the IP address of the
DNS server that your site uses to resolve DNS queries, if the
value of the Vocera Server IP Address field in the General
properties page is specified as a DNS name.
Alternate DNS
Use the Alternate DNS field to enter the IP address of the
secondary DNS server, if the value of the Vocera Server IP
Address field in the General properties page is specified as a
DNS name. The secondary DNS server is used if the primary
DNS server is not available.
To set TCP/IP properties:
1. If the Badge Properties Editor is not already running, start it as described in
Using the Badge Properties Editor on page 64.
2. Choose the TCP/IP tab.
3. Enter property values required for your site.
4. Save these values in either of the following ways:
• Click Apply to save these values without closing the Badge Properties
Editor.
• Click OK to save these values and close the Badge Properties Editor.
Configuring New Badges ··· 71
Setting
Advanced
Properties
The advanced properties are used only in special situations.
Property
Description
Subnet Roaming
Check Subnet Roaming only if the access points on
your wireless LAN are divided into multiple subnets, and
if you want to allow users to roam across subnet
boundaries. The subnet where the Vocera server is
located is not relevant to this property.
If you allow subnet roaming, you use a DHCP server to
supply your IP addresses. See Setting TCP/IP Properties
for information about configuring Vocera with a DHCP
server.
If all access points on your wireless LAN are on the same
subnet, leave Subnet Roaming disabled to minimize
DHCP traffic and to reduce the chance of a momentary
loss of audio when roaming between access points.
Short Preamble
(802.11 Frame)
Use the Short Preamble (802.11 Frame) field to specify
whether you want badges to use short or long preamble.
Short preambles use slightly less bandwidth; however,
some access points do not support short preambles.
By default, the Vocera badge uses a long preamble.
Check Short Preamble only if you must optimize
bandwidth, and if you are certain that your access points
support this feature.
Scan Default Channels
Use the Scan Default Channels field to specify whether
the badge scans all channels or only the specified default
channels. When this field is checked, the badge scans for
access points set to channel 1, 6, or 11. Therefore, make
sure each access point is set to one of these channels
before you check this field. Because these channels
represent frequencies that are not likely to overlap, the
result is faster scans when roaming across access points.
Broadcast Uses IGMP
Use the Broadcast Uses IGMP field to specify whether
you want badges to use Internet Group Management
Protocol. If your want broadcast and push-to-talk
commands to function across multiple IP subnets, IGMP
must be supported in the switch or router, and this
property must be enabled (checked).
72 ··· Vocera Configuration Guide
Property
Description
Roaming Policy
The Roaming Policy property specifies how quickly a
badge searches for an access point when signal quality
drops. Higher values cause a badge to search sooner, and
may correct problems with choppy audio. However, a
badge cannot send or receive audio packets while
searching for an access point, so communication may be
interrupted. Lower values allow a badge to tolerate lower
signal quality before searching. The optimal threshold
value varies from one 802.11 network to another,
depending on how the network is configured. The
default value is 2.
To set advanced properties:
1. If the Badge Properties Editor is not already running, start it as described in
Using the Badge Properties Editor on page 64.
2. Choose the Advanced tab.
3. Enter property values required for your site.
4. Save these values in either of the following ways:
• Click Apply to save these values without closing the Badge Properties
Editor.
• Click OK to save these values and close the Badge Properties Editor.
Configuring New Badges ··· 73
Configuring a Test Badge
After you have used the Badge Properties Editor to specify properties for new
badges, configure one badge and test it. Vocera provides a Badge Configuration
Utility that you can use to download properties and firmware from the
configuration computer to new badges. Use the Badge Configuration Utility to
configure the test badge.
To configure a test badge:
1. Make sure the production Vocera server is running and the badge is within
range of the wireless network it is trying to connect to.
After the badge downloads its property and firmware, it will reboot and
attempt to connect to the production Vocera server.
Important: If a badge.properties file exists on the Vocera server computer,
the server will download those properties to the badge as soon as it
connects. Remove the badge.properties file from the Vocera server, or
make sure that it is identical to the one on the configuration computer.
2. From the Windows Start menu on the configuration computer, choose
Programs > Vocera > Badge Utilities > Badge Configuration Utility.
The Badge Configuration Utility opens in a command window, displaying a
list of firmware components and properties that the utility will download.
3. Attach a charged battery to a new badge (a badge that has never been
configured).
A new badge automatically looks for the configuration computer (because
the IP address of the configuration computer is set to 10.0.0.1) and
connects to it. The Badge Configuration Utility displays the start session
message, then it automatically starts downloading firmware and properties
to the badge.
The Badge Configuration Utility continues to display messages as it
downloads the firmware and properties. When the download is complete, it
displays the message end session and appends the MAC address of the
badge to the macaddr.txt file in the \vocera\config directory.
Next, the badge reboots and tries to connect to the production Vocera
server (using the SSID, IP settings, and security properties that were
downloaded to it).
74 ··· Vocera Configuration Guide
4. Look at the LCD screen of the badge:
• The message “Logged Out” indicates that the badge is configured
properly and has connected to the Vocera server.
Continue with Configuring the Remaining Badges on page 76.
• If the badge does not display “Logged Out” within 30 seconds to one
minute, the badge is not configured properly and did not connect to the
Vocera server.
Continue with Troubleshooting Badge Configuration on page 83.
5. Close the Badge Configuration Utility.
On the configuration computer, hold down the Ctrl key and press C. When
you see the Terminate batch job (Y/N)? prompt, press Y.
The Badge Configuration Utility session ends, and the command window
closes.
6. If you did not check the Hide Boot Menus property in the Badge Properties
Editor, do this now and download the badge properties again. See Setting
General Properties on page 65.
Configuring New Badges ··· 75
Configuring the Remaining Badges
After you have successfully configured and tested one badge, configure the
remaining badges for your site. The procedure for configuring these badges is
essentially the same as the procedure described in Configuring a Test Badge
on page 74; the difference is, you configure more than one badge.
To configure the remaining badges:
1. If the Badge Configuration Utility is not already open, choose Programs >
Vocera > Badge Utilities > Badge Configuration Utility from the
Windows Start menu.
The Badge Configuration Utility opens in a command window.
2. Attach a charged battery to a new badge.
The following events occur:
• The badge connects to the configuration computer.
• The Badge Configuration Utility downloads firmware and properties to the
badge.
• The Badge Configuration Utility appends the MAC address of the badge
to the end of the macaddr.txt file.
• The badge reboots and tries to connect to the production Vocera server.
3. Make sure the production Vocera server is running and the badge is within
range of the wireless network it is trying to connect to.
When the badge displays “Logged Out”, configuration is complete.
4. Continue configuring the remaining badges.
5. When you are finished, close the Badge Configuration Utility.
On the configuration computer, hold down the Ctrl key and press C. When
you see the Terminate batch job (Y/N)? prompt, press Y.
The Badge Configuration Utility command window closes.
6. Copy the badge.properties file that the Badge Properties Editor created
from the \vocera\config directory on the configuration computer to the
\vocera\config directory on the production Vocera server.
If you need to change badge properties later, the Vocera server uses this file
to update the badges automatically. Copy this file to the Vocera server after
you complete the initial badge configuration so you can find out what
property values the badges are already using.
76 ··· Vocera Configuration Guide
Configuring Badges with Static IP Addresses
You cannot use the Badge Properties Editor to assign static IP addresses, because
each static address must be unique. Therefore, each badge that uses a static IP
address must be configured manually. Because this is a slow and potentially
error-prone process, use a DHCP server to assign IP addresses to badges
whenever possible.
Use static IP addresses only in the following situations:
• You are setting up a small evaluation system.
• Static IP addresses are mandatory at your site.
To configure badges with static IP addresses:
1. Set up the configuration computer.
See Setting Up the Configuration Computer on page 57.
2. Set up the isolated access point.
See Setting Up an Isolated Access Point on page 60.
3. Use the Badge Properties Editor to specify the badge properties required by
your site, as described in Creating a Property File to Download on
page 64.
a.
On the General, Security, and Advanced tabs of the Badge Properties
Editor, follow the instructions in Setting General Properties on
page 65, Setting Security Properties on page 66, and Setting
Advanced Properties on page 72.
b. On the TCP/IP tab of the Badge Properties Editor, check Use Static
Settings, then enter values for the following fields as described in
Setting TCP/IP Properties on page 70:
• Subnet Mask
• Default Gateway
• Preferred DNS
• Alternate DNS
c.
Click OK to save these values and close the Badge Properties Editor.
Configuring New Badges ··· 77
4. Use the Badge Configuration Utility to download these shared properties to
all the badges.
See Configuring a Test Badge on page 74.
5. Use the vconfig utility to set the value of each badge’s BadgeIPAddr
property to the badge’s static IP address. Use standard dotted notation (for
example, 192.168.3.7) to specify this value.
Important: You must use vconfig to set this property manually on each
badge.
An online help system on the Vocera server computer shows explains how to
use the vconfig utility. Open the help system by navigating to
\vocera\config\help\vconfig\index.htm in your browser.
78 ··· Vocera Configuration Guide
Managing Badge Properties
This chapter explains how to manage properties on badges that have already
been configured. See Configuring New Badges on page 63 for information
about setting badge properties for the first time.
Conceptually, badge properties fall into two categories:
• Configuration properties are set on each badge. Because a badge does not
have a keyboard, you use a utility on the configuration computer to create a
properties file. Then you download the properties, as well as the current
firmware, from the configuration computer to each badge your site will use.
• System default properties are set on the Vocera server. You set these
properties in the Administration Console, and you can allow users to
override these default settings in the User Console.
This chapter presents the following topics:
• Updating Badge Properties and Firmware on page 80 describes how to
change badge properties after the badge has been configured.
• Restoring Factory Settings on page 81 describes how to reset
configuration properties to the factory default settings.
• Setting System Defaults for Badges on page 82 describes how you can
use the Administration Console to set properties that apply to all deployed
badges.
Managing Badge Properties ··· 79
Updating Badge Properties and Firmware
Utilities for configuring badges are automatically installed on the Vocera server
computer. Therefore, when badges can communicate with the Vocera server,
the server can update badge property values and firmware as needed. You do
not need to maintain the configuration computer and isolated access point after
the initial configuration unless you plan to order or configure more new badges.
This section presents the following topics:
• Updating Badge Firmware
• Updating Badge Properties
Updating
Badge
Firmware
When a badge connects to the Vocera server, the server compares the badge’s
firmware version with files the \vocera\config\fci directory. If the versions are
not identical, the server downloads firmware from the fci directory to the badge.
The server downloads firmware even if a badge has a more recent version of the
firmware than the server. If you receive a firmware upgrade from Vocera, install
it on the Vocera server as described in the firmware service pack.
When the server downloads badge firmware, the badge says, “I’m updating the
software in your badge. It may take a few minutes.” When the download
finishes, the badge says, “Update complete.”
Note: After updating badge firmware to this version, you cannot downgrade
the firmware below Vocera System Software version 2.2 Service Pack 5.
Updating
Badge
Properties
The Vocera server maintains a list of properties and values in the
badge.properties file located in the \vocera\config directory. This file is not
created when you install the server—it is created by the Badge Properties Editor.
Be sure to copy this file from the configuration computer to the Vocera server at
the end of the initial configuration, as described in Configuring the Remaining
Badges on page 76.
The Vocera server reads this file into memory when it boots. If badge property
values don’t match the in-memory values, the server automatically downloads its
own copy of badge.properties to the badges.
If you edit the version of badge.properties that resides on the server, its values
are not read into memory again until you restart the server. At that time, the
server automatically downloads the new properties to badges that connect to it.
80 ··· Vocera Configuration Guide
To update badge properties:
1. Use the Badge Properties Editor to update the badge.properties file in the
\vocera\config directory on the computer running the Vocera server.
See Creating a Property File to Download on page 64.
2. Use the Vocera Control Panel to restart the server, as described in Using the
Vocera Control Panel on page 215.
The Vocera server checks the property values on each badge it is connected
to and then downloads new properties to each badge. If a badge is offline,
the server downloads the property values as soon as the badge boots and
connects to the server.
The badge notifies the user by saying, “I am updating the software in your
badge. This may take a few minutes”. When the download finishes, the badge
notifies the user by saying, “Update complete.”
Restoring Factory Settings
When you use the Badge Configuration Utility, you download property values to
the firmware of a badge. If one or more of these values are incorrect, you can
restore all the factory default settings and configure the badge again.
Because the Badge Properties Editor reloads your working settings each time you
run it, you can review the settings that the badge was using, change the
incorrect values, and download these properties to the badge again.
The following topics explain how to restore a badge’s factory default settings.
• About the InstallDone Property
• How to Restore Factory Settings
About the
InstallDone
Property
InstallDone is a hidden property that the Badge Configuration Utility uses. You
cannot set the value of the InstallDone property in the Badge Properties Editor.
By default, InstallDone is set to FALSE in a new badge that you receive from
the factory. The Badge Configuration Utility sets this property to TRUE when it
successfully downloads badge firmware and properties.
If InstallDone is FALSE, a badge automatically looks for the configuration
computer (the IP address 10.0.0.1) when it powers up. If InstallDone is TRUE,
the badge boots normally and connects to the Vocera server. When you restore
factory settings, you also set InstallDone to FALSE, which lets you use the
Badge Configuration Utility a second time.
Managing Badge Properties ··· 81
How to Restore
Factory Settings
Before you can reuse the Badge Configuration Utility on a badge, you must
restore the badge’s factory default settings.
To restore the factory settings:
1. Display the badge configuration menus.
See Using the Badge Configuration Menu on page 86.
2. Scroll down to display the RESET DFLTS menu item.
3. Select RESET DFLTS.
Any existing badge property values are erased, and the factory default
values are restored. The badge reboots and tries to connect to the
configuration computer at the IP address 10.0.0.1.
Note: If the Badge Configuration Utility is running, the badge automatically
downloads the current property values when it reboots. If you are not ready
to download properties, make sure you exit the Badge Configuration Utility
before choosing RESET DFLTS.
4. When you see the Vocera splash screen, remove the battery from the badge.
Setting System Defaults for Badges
Defaults are Vocera system settings that apply to badges at all sites, such as the
greeting used by the Genie or the ring tone used to announce a call. An override
setting for each default determines whether users can customize the setting you
specify, or whether the system default takes precedence over a user preference.
You can use the Defaults screen in the Administration Console to change a
default setting at any time. Changes update the server as soon as you save
them, but they do not affect existing users unless you set Override User
Settings to Yes.
The overrides let you establish baseline system settings at any time. For example,
to turn off the alert tones that announce a text message, you would deselect the
Text Message Alert property on the Notifications page and set Override User
Settings for that property to Yes. This change would affect all new and existing
users.
If you later want to allow users to customize this property, set Override User
Settings for the Text Message Alert property to No. The alert tones for all
users remain turned off until they manually enable them again.
82 ··· Vocera Configuration Guide
Troubleshooting Badge Configuration
The following topics will help you diagnose and resolve badge configuration
problems:
• Troubleshooting the Initial Badge Configuration on page 84.
If a badge is not communicating properly after its initial configuration, this
topic helps you determine where the problem is occurring.
• Troubleshooting the Badge Property Settings on page 85.
If the communication problem is internal to the badge, this topic shows you
how to change badge property settings.
• Using the Badge Configuration Menu on page 86.
The badge configuration menu lets you access a set of diagnostic and
configuration tools that are built into the badge.
• Monitoring Badge Activity on page 89.
The Administration Console includes a Badge Status Monitor that displays
information about how badges are being used. This information can help
you identify and solve problems.
Troubleshooting Badge Configuration ··· 83
Troubleshooting the Initial Badge Configuration
If you complete the steps described in Configuring a Test Badge on page 74
and the LCD of the test badge does not display the “Logged out” message, you
need to troubleshoot it. The badge may not be configured properly, or there
may be a problem with some of the other hardware and software you are using.
When the badge does not successfully connect to the production Vocera server
at the end of its configuration cycle, one or more of the following problems may
have occurred:
• The production Vocera server is not running
• The badge is not within range of an access point used by the production
server
• The badge properties are not set correctly
The LCD screen of the badge displays a message that helps you diagnose the
problem:
Badge Message
Typical Problems and Solutions
Searching for
access points
The badge cannot connect to an access point on the wireless
LAN used by the production server, possibly because:
• The badge is not within range of an access point.
If you configured the test badge in a remote area, make
sure you are within range of the wireless network, then
remove the battery from the badge and insert it again.
• The SSID setting of the badge is incorrect.
See Troubleshooting the Badge Property Settings on
page 85.
• The security settings of the badge are incorrect.
See Troubleshooting the Badge Property Settings on
page 85.
Requesting IP
address
The badge cannot receive an IP address from a DHCP server,
possibly because:
• The security settings of the badge are incorrect.
See Troubleshooting the Badge Property Settings on
page 85.
• The DHCP server is not active or cannot be reached from the
badge.
• The badge is associated with an access point that is not on
the production network.
84 ··· Vocera Configuration Guide
Badge Message
Typical Problems and Solutions
Searching for server
The badge is connecting to an access point properly, but it
cannot connect to the Vocera server, possibly because:
• The Vocera server is not running.
Make sure the Vocera server is running, then remove the
battery from the badge and insert it again.
• The subnet that the badges are on cannot reach the subnet
that the Vocera server is on. This situation can occur if you
have set up an isolated subnet for the badges.
Make sure the switch and router settings allow the badge
subnet access to the server subnet, then remove the battery
from the badge and insert it again.
• The IP address of the Vocera server that you specified for the
badge is incorrect.
See Troubleshooting the Badge Property Settings on
page 85.
Troubleshooting the Badge Property Settings
Troubleshooting the badge property settings is an iterative process. If you did
not successfully configure a badge the first time, you can reset the factory
defaults and configure the badge again. You can repeat this process as many
times as necessary.
To troubleshoot badge properties:
1. Display the badge configuration menus.
See Displaying the Badge Configuration Menu on page 86.
2. Reset all the badge properties to the factory default settings.
Restoring Factory Settings on page 81.
3. Launch the Badge Properties Editor again.
When you launch the Badge Properties Editor after the initial configuration,
it reloads your working settings from the badge.properties file. See
Creating a Property File to Download on page 64 for information about
launching the Badge Properties Editor.
Troubleshooting Badge Configuration ··· 85
4. Use the Badge Properties Editor to change the incorrect property values.
Refer to the table in Troubleshooting the Initial Badge Configuration on
page 84 for hints about what property values are incorrect. Then change the
values as described in Creating a Property File to Download on page 64.
5. Configure the badge by running the Badge Configuration Utility again.
See Configuring a Test Badge on page 74.
Using the Badge Configuration Menu
The badge configuration menu lets you access a set of diagnostic and
configuration tools that are built into the badge. These tools are powerful—
they are intended only for use when troubleshooting badge configuration.
The following topics describe how to use the badge configuration menus:
• Displaying the Badge Configuration Menu
• Navigating in the Badge Configuration Menu
Displaying the
Badge
Configuration
Menu
Because badge users should not have access to the badge tools, you should
make sure that the configuration menus are hidden before distributing badges
to users. The Hide Configuration Menus property determines whether the
badge configuration menus are hidden, or if they can be easily accessed through
the Hold/DND button. See Setting General Properties on page 65.
To display badge menus when Hide Configuration Menus is set to TRUE:
1. Remove the battery from the badge, then insert it again.
The LCD screen displays the name Vocera.
86 ··· Vocera Configuration Guide
2. Within three seconds, use the following special sequence of button presses
to display the badge configuration menus:
DND Select Select Call Call Select Select Select Call
This sequence consists of pressing the Hold/DND button (the triangular
button on top of the badge), the Select button (the middle button on the
side of the badge), and the Call button (the big button on the front of the
badge). See Navigating in the Badge Configuration Menu on page 88
for an illustration showing the button locations.
The LCD screen of the badge displays the following top-level configuration
menu:
To display badge menus when Hide Configuration Menus is set to FALSE:
1. Remove the battery from the badge, then insert it again.
The LCD screen displays the name Vocera.
Troubleshooting Badge Configuration ··· 87
2. Within three seconds, press the Hold/DND button (the triangular button on
top of the badge). See Navigating in the Badge Configuration Menu on
page 88 for an illustration showing the button locations.
The LCD screen of the badge displays the following top-level configuration
menu items:
Navigating in
the Badge
Configuration
Menu
Because the LCD screen of the badge is small, all the menu items are not visible
at the same time. You can scroll to display more menu items at the same level,
or you can select a menu item to view a nested set of items related to the upperlevel menu choice.
Use the following buttons to navigate in the badge menus:
• The Scroll Up button (the top button on the side of the badge)
Press this button to scroll up through menu items.
• The Scroll Down button (the bottom button on the side of the badge)
Press this button to scroll down through menu items.
• The Select button (the middle button on the side of the badge)
Press this button to select a menu item. Depending on the selection you
make, any of the following things can happen:
• A lower-level set of menu items appears.
• An action occurs (such as connecting to the vconfig utility).
• A value is set (such as TRUE or FALSE).
• The Call button (the big button on the front of the badge)
Press this button to navigate to an upper-level set of menu items. If you are
already in the top-level set of menus, pressing the Call button does not
navigate further.
88 ··· Vocera Configuration Guide
The following illustration shows the location of the buttons on the badge:
Monitoring Badge Activity
The Administration Console includes a Badge Status Monitor displays
information about how badges are being used. This information can help you
identify and solve problems. The Badge Status Monitor shows who is logged in,
what IP address is currently assigned to each badge, what activity the badge is
currently engaged in, whether the badge is in Do Not Disturb or Hold mode, and
the current location and site of each user. The Vocera server updates the Badge
Status Monitor at a specified interval.
Troubleshooting Badge Configuration ··· 89
90 ··· Vocera Configuration Guide
Telephony
The following topics describe how to configure Vocera telephony and integrate
it with your Vocera server:
• Telephony Integration Overview on page 93
Describes the features provided by telephony integration, explains how the
telephony components communicate with each other, and summarizes the
installation procedure. It also provides checklists for telephony installation,
including site requirements, equipment, and configuring the PBX.
• Installing the Telephony Software on page 105
Explains how to install or upgrade the Vocera Telephony Server software.
• Installing the Telephony Hardware on page 111
Explains how to install boards and cables in the Telephony server computer.
• Managing Vocera Telephony on page 117
Explains how to use the Administration Console to enter information the
system needs to handle various kinds of calls. It also describes how to use
the Telephony Control Panel to control the Telephony server.
• Troubleshooting Telephony on page 129
Describes problems that can arise in a telephony integration and shows you
how to troubleshoot them.
• Working with Pagers on page 135
If your site has the telephony integration option, badge users can issue voice
commands to send numeric pages to anyone with a pager.
Telephony ··· 91
92 ··· Vocera Configuration Guide
Telephony Integration Overview
The following topics present concepts to understand and tasks to perform
before you install and configure Vocera Telephony hardware and software.
• About Vocera Telephony on page 93 describes the major components,
features, and benefits of a Vocera telephony integration.
• Hardware for the Analog Integration on page 96 describes the boards
and cables required for an analog telephony integration.
• Hardware for the Digital Integration on page 98 describes the boards
and cables required for a digital telephony integration.
• Hardware for the Analog Integration on page 96 summarizes the
installation and configuration process.
• Advance Preparation for Telephony on page 100 outlines tasks to
perform for a smooth telephony integration.
About Vocera Telephony
The Vocera telephony integration includes the following major components:
• The Vocera Telephony Server, the software supporting the telephony
integration. You can install the Telephony server on either the same
computer as the Vocera server, or on a different computer.
• One or more Intel® Dialogic® Boards, the hardware supporting the telephony
integration. You install these boards in the computer running the Vocera
Telephony Server. The drivers for these boards are installed when you install
the Telephony server.
• The company PBX (or switch, or other telephone system). The PBX provides a
group of lines that connect to the public telephone network. You connect
the Dialogic boards to the PBX through specially-prepared cables that patch
to analog or digital station ports on the PBX.
Telephony Integration Overview ··· 93
The following figure shows the configuration when the Telephony server and the
Vocera server are installed north same computer:
Vocera server and Vocera Telephony
server running on the same computer
PBX or other
telephone system
LAN
Access point
Access point
Access point
Vocera badge users
You can also install the Telephony server and the Vocera server on different
computers. Because you must physically connect the Dialogic boards in the
Telephony server computer to the PBX, it is often most convenient to place the
Telephony server computer in the PBX room and to place the Vocera server
computer in a network closet or a similar location for an analog integration.
Vocera server
Vocera Telephony server
LAN
PBX
Access point
Access point
Access point
Vocera badge users
Outgoing Calls
When the Vocera server receives an outgoing call request, it passes the dialing
sequence to the Telephony server, which performs the call setup. The Dialogic
card connects to the PBX or other telephone system and dials the outgoing call.
Once a call is established, badges participating in the call communicate directly
with the Telephony server without going through the Vocera server.
94 ··· Vocera Configuration Guide
Incoming Calls
The Dialogic cards answer incoming calls under the control of the Telephony
server, which routes the calls to the Vocera server. On the Vocera server, the
Genie prompts the caller for the name of a user or group. The Vocera Server
then attempts to route the call to the appropriate badge:
• If the badge user is available, the badge communicates with the telephone
through the Telephony server, without going through the Vocera server.
• If the badge user is not available, the Vocera server checks the forwarding
option for the user or group and processes the call accordingly.
If a call cannot be forwarded, the Genie invites the caller to leave a message.
The Vocera Telephony Solution Software provides seamless calling between
Vocera badges and telephones, expanding the reach of the Vocera system to
people outside the wireless network. When you integrate the Vocera server with
the corporate telephone system:
• Telephone callers outside the Vocera system can place calls to users’ badges.
The Vocera Genie answers calls and prompts the callers to speak the name
of the person or group they want to reach. If no one answers, the caller can
leave a message or try someone else.
• Users can call telephones from their badges.
Voice commands let users call internal extensions, local phone numbers, and
long-distance numbers. You control which groups of users have permissions
to make each type of call in the Administration Console.
• Users can forward incoming badge calls to an extension, an outside
telephone number, or a voicemail box.
Callers can reach badge users who are at home, traveling, or
telecommuting. Voice commands let users specify where and when to
forward calls. See the Vocera User Guide for a description of voice
commands for forwarding.
• Unanswered calls to a group can be forwarded to a telephone.
The system administrator or a group manager can configure groups to make
Vocera forward their calls to special numbers, such as the switchboard
operator or the telephone number of an individual group member. For
example, if all members of the “Tech Support” group are busy or offnetwork, Vocera can forward a call to the cell phone or contact number of
the group member who is “on call.”
Telephony Integration Overview ··· 95
• Users can place phone calls through their badges by speaking the names of
people or places, instead of their phone numbers.
The address book lets you define the names and contact phone numbers for
people and places who are not in the Vocera system. These names are then
available to all users on the system. For example, outside assistance is
immediately available to a badge user who says, “Call Poison Control”.
Individual users can also set up personal outside buddies, and place phone
calls to them by name.
• Users can transfer calls from their badges to telephone extensions.
Users who receive calls on their badges can optionally transfer them to
telephone extensions with a simple voice command. For example, if more
privacy is required, users can transfer a call to a telephone extension in a
more private location.
• Users can send and receive pages.
Users can send pages to other badge users. Users with the proper
permissions can use voice commands to control whether they want to
receive pages at any time.
Hardware for the Analog Integration
The hardware you need to integrate Vocera with your PBX differs according to
whether you perform an analog or a digital integration. This section describes
the hardware you need to perform an analog integration.
Analog
Telephony
Boards
You can use only the following telephony boards to perform an analog
integration of your PBX and Vocera:
• Intel® Dialogic® D/120JCT-LSU 12-port board.
• Intel® Dialogic® D/41JCT-LS 4-port board.
• Intel® Dialogic® D/120JCT-LSU-EU2 12-port analog Euro board.
• Intel® Dialogic® D/41JCT-LS-EURO 4-port analog Euro board.
These boards are in the PCI long form factor, and single slot width. Make sure
the Telephony server computer has the appropriate number and type of slots.
Analog
Telephony
Cables
This section describes the cables required to use all 12 ports of an Intel Dialogic
D/120JCT-LSU analog telephony board. A four-port board requires proportionally
fewer cables.
96 ··· Vocera Configuration Guide
Each Dialogic card provides six RJ11 jacks with RJ-14 pin-outs. Because each jack
provides two station lines, each DIalogic card can support a total of 12 station
lines.
To connect the Dialogic card to the PBX, you need to do either of the following:
• Procure line splitters and telephone cables.
Procure six line splitters and 12 telephone cables for each Dialogic card
(fewer if you are not using every line on the card)
• Manually prepare CAT 5 cables with crimped ends.
Procure three CAT 5 cables and 18 RJ11 jacks for each Dialogic card (fewer if
you are not using every line on the card)
If you use line splitters, they need to do the following:
• Split a two-line RJ11 jack (with an RJ-14 pin-out) into two separate one-line
RJ11 jacks (with RJ11 pin-outs).
• Provide a short “pig-tail” so multiple splitters can fit next to each other in
the Dialogic card.
For example, you can use the Omnicron Electronics MTJ-S2 splitter, or any
comparable RJ11 line one/line two splitter, as shown in the following illustration:
If you manually prepare the cables, you can find the exact RJ-14 pin-out
configuration in the Dialogic documentation that comes with the card. You need
to provide two jacks on the Dialogic end of the CAT 5 cable, and four jacks on
the PBX end of the cable.
Telephony Integration Overview ··· 97
The following illustration summarizes the pin configuration of the jacks. You
need to use the inner pair of wires in each jack for the first line and the outer
pair of wires in each jack for the second line.
On the PBX side, you may connect your cables directly to the analog station card
or to an RJ11 patch panel that is connected to the analog station card.
Hardware for the Digital Integration
The hardware you need to integrate Vocera with your PBX differs according to
whether you perform an analog or a digital integration. This section describes
the hardware you need to perform a digital integration.
Digital
Telephony
Boards
You can use only the following telephony boards to perform a digital integration
of your PBX and Vocera:
• Intel® Dialogic® D/240JCT-T1 board
• Intel® Dialogic® D/480JCT-2T1 board.
• Intel® Dialogic® D/480JCT-1T1 board.
• Intel® Dialogic® D/600JCT-1E1 board.
98 ··· Vocera Configuration Guide
Use the following table to determine which telephony board to procure for your
system:
If your PBX protocol is:
And you want
up to this many
DS0 channels:
Procure this telephony board:
Wink Start
24
D/240JCT-T1
Wink Start
48
D/480JCT-2T1
ISDN-PRI
23
D/480JCT-1T1
ISDN-PRI
30
D/600JCT-1E1
The telephony board and the Telephony server computer must be compatible:
• Most newer boards have a universal dual-keyed connector that fits into slots
in newer servers. Older boards may have a single-keyed connector that is not
compatible with new slots, because the key is at the wrong end of the
board.
• All boards are in the PCI long form factor—they are 12.3 inches long
without the edge retainer, 3.87 inches high excluding the edge connector,
and .79 inches wide. They are not compatible with smaller form factors.
Digital
Telephony
Cables
Connect the T1 board in the PBX to the Dialogic card in the Telephony server.
The cable must have an RJ48C plug on the Dialogic end. Looking into the
connector, the pin configuration of the RJ48C plug is as follows:
• Pins 1 and 2: Receive from PBX
• Pins 4 and 5: Transmit to PBX
• Other pins: Unused
At the PBX end, the type of connector and cabling requirements for individual
switches may vary. Work with the IT manager responsible for the telephone
system to procure the specific type of cable the PBX requires.
Telephony Integration Overview ··· 99
Steps for Telephony Integration
Following is a summary of the steps for telephony integration:
1. Complete the advance preparation checklists.
Procure boards, connectors, and cables; then configure the PBX. You cannot
continue with the integration until you have completed these tasks. See
Advance Preparation for Telephony on page 99.
2. Install the Vocera server.
See Running the Vocera Installation Program on page 39.
3. Install the Vocera Telephony Solution Software.
See Installing the Telephony Software on page 105.
4. Install the Dialogic boards.
See Installing the Dialogic Boards on page 111.
5. Connect the PBX to the Dialogic boards.
See Connecting Telephony Cables on page 113.
6. Use the Administration Console to configure the Vocera server to support
the telephony integration.
See Managing Vocera Telephony on page 117.
7. Test the installation.
See Completing the Telephony Installation on page 115.
Advance Preparation for Telephony
Preparation is the key to a successful telephony integration. This preparation
includes the following tasks:
• Investigating the Installation Site
• Procuring Equipment
• Configuring the PBX
Complete the tasks described in this chapter before beginning the integration.
Note: You typically need to work with the IT or PBX administrator responsible for
the installation site.
100 ··· Vocera Configuration Guide
Investigating
the Installation
Site
Because the Telephony server needs to be in proximity to the PBX for an analog
integration, you need to understand the physical layout of the installation site
before you begin. Complete the following tasks to understand the installation
site requirements for an analog integration:
1. Find out if the computer hosting the Vocera server will be located in
proximity to the PBX.
The IT administrator may want to place the Vocera server computer in a
network closet or another location that is not physically close to the PBX. In
this situation, you need to host the Telephony server on a separate
computer, because the Dialogic cards must physically connect to the PBX.
Ideally, an RJ11 patch panel should be set up next to the computer.
2. Make sure a network drop is available in the PBX room, because the
Telephony server computer requires an IP connection to the LAN.
Procuring
Equipment
Complete the following tasks to make sure you have the equipment necessary
for the integration:
1. If you are not going to install the Telephony server on the same computer as
the Vocera server, procure a computer for the Telephony server. See
Investigating the Installation Site on page 101.
2. Consult with the IT administrator to make sure that the desired number and
type (either analog or digital) of station ports are available on the PBX.
If the ports are not available, you will probably need to procure a new PBXspecific card and install it in the PBX.
3. Procure the required number of Dialogic boards, described in Analog
Telephony Boards on page 96 and Digital Telephony Boards on
page 98.
If possible, try to have a back-up board available. Telephony boards are
complex, and they are sometimes defective. In some situations, only certain
ports may be bad.
4. Prepare or procure the cables and adapters that you need to connect the
Dialogic cards and the PBX. See Analog Telephony Cables on page 96 and
Digital Telephony Cables on page 99.
Configuring the
PBX
Before installing any hardware or software, you need to configure the PBX to
support the Vocera system. If you are performing an analog integration, you
should also test the PBX configuration. Testing the PBX configuration before
integrating Vocera helps to isolate problems that may arise later.
Telephony Integration Overview ··· 101
The configuration tasks differ according to whether you are performing an
analog or a digital integration, as described in the following topics:
• Configuring the PBX for an Analog Integration
• Configuring the PBX for a Digital Integration
After completing the tasks in this section, you can continue with the next step in
the telephony integration, as described in Hardware for the Analog
Integration on page 96.
Configuring the PBX for an Analog Integration
In analog telephony, a hunt group is a cluster of lines that have individual
extensions. The hunt group number is a separate extension you assign to the
cluster. People can then call the hunt group number and have their call routed to
an individual extension.
To configure the PBX for an analog integration:
1. Work with the IT or PBX administrator to configure the PBX to provide a
hunt group with an extension for each line in your telephony license. Callers
can dial the hunt group number to connect to any user with a Vocera
badge.
Configure the hunt group to use the “first available line” search method.
The hunt group should roll over from one line to another in a sequential
fashion when lines are busy, always starting with the first line in the group.
Record the list of extensions in the group for customer reference and
troubleshooting.
2. Set up a DID (Direct Inward Dialing) number for the first extension in the
hunt group.
3. Configure each extension in the hunt group to drop loop current to notify
the Telephony server when a disconnect at the remote end occurs.
Important: Unless you configure each extension to drop loop current upon
remote hang-up, the Dialogic card will not know that the party on the far
end has ended the call, and erratic behavior will result. The method of
configuring loop current drop is PBX vendor-specific. If the PBX at the
installation site does not support loop current drop, see Creating a Tone
Set File on page 129.
4. Prior to connecting to the Dialogic card, use a telephone to test each station
port in the PBX. Check both incoming and outgoing calls, and make sure the
hunt group works properly.
102 ··· Vocera Configuration Guide
Configuring the PBX for a Digital Integration
You must configure the software for your PBX to allow its T1 card to
communicate with the Telephony server. When you perform this task, provide a
Direct Inward Dialing (DID) number to allow individuals to call into the Vocera
system. This DID number provides functionality that is similar to an analog hunt
group.
The lines within the T1 trunk used by Vocera do not have individual extensions,
as they do in an analog integration. In a digital integration, you assign an access
code to the trunk itself, and the PBX uses that code to access the first available
channel in the trunk. Depending on the switch, this configuration may be called
a trunk steering code, a coordinated dialing plan, a uniform dialing plan, or a
phantom extension.
The specific steps necessary for configuring your PBX vary with the type of
switch in use at your site. This section provides an overview of the PBX
configuration necessary for a digital integration.
To configure the PBX for a digital integration:
1. Work with the PBX administrator to install a T1 card in the PBX and to
configure it with the switch software.
2. Work with the PBX administrator to assign a Vocera access code to the
trunk, and to associate a DID (Direct Inward Dialing number for the Vocera
trunk.
3. Configure the T1 card in the PBX so it provides the master clock for the
Dialogic board.
A 1.544 Mhz clock synchronizes the PBX and the Dialogic card. The T1 card
in the PBX must be the master clock source.
Unless you have T1 digital test equipment, you cannot test the PBX setup until
you install the Dialogic board and connect it to the T1 board in the PBX. See
Connecting Cables for a Digital Integration on page 114.
Telephony Integration Overview ··· 103
104 ··· Vocera Configuration Guide
Installing the Telephony Software
Complete the following tasks before you run the Telephony installation
program:
• Make sure that the Telephony server computer meets the minimum
hardware and software requirements listed in System Requirements on
page 11.
• Complete the tasks outlined in Advance Preparation for Telephony on
page 99.
• Install the Vocera server before you install the Telephony server. See Setting
Up Vocera on page 31.
• If you are upgrading from an earlier version of Vocera Telephony, verify your
upgrade path and remove the Telephony software as described in
Upgrading Vocera Telephony on page 106
• If your Vocera deployment supports multiple sites, and you are setting up
separate Telephony servers for one or more of those sites, configure the sites
in the Administration Console before installing the Telephony servers. See
Working with Sites on page 203 and Telephony in a Multi-Site
Environment on page 124.
Installing the Telephony Software ··· 105
Upgrading Vocera Telephony
The path for upgrading to Vocera Version 3.1 Telephony depends on the locale
of your installation.
Locale
Vocera Version
Notes
US
2.1.1 or later
Data and settings are converted to the 3.1 format,
and badge firmware is automatically updated.
Upgrade to version 2.1.1 before moving to Vocera
3.1 Telephony. Upgrading from earlier versions
may cause unexpected results.
AU or NZ
2.2 or later
Upgrade to version 2.2 or 3.0 with the latest
Service Pack before moving to Vocera 3.1
Telephony. Upgrading from earlier versions may
cause unexpected results.
When you upgrade Vocera Telephony, the installation program removes the
following files and directories:
• \Dialogic
The installation program removes most of the files and subdirectories under
\Dialogic. The log files in the \Dialogic\BIN and \Dialogic\CFG
subdirectories are not removed. You do no have to remove them, because
the Vocera 3.1 Telephony server installs into that directory structure if it
exists.
• \vocera\dialogic
The installation program removes everything under \vocera\dialogic except
a tone settings (.tsf) file, if one exists.
• \vocera\server
If the Vocera server is also installed on this computer, the installation
program removes telephony-specific files. Otherwise, the installation
program removes all files and the directory tree itself.
106 ··· Vocera Configuration Guide
Removing the
Vocera
Telephony
Server
If you are running the Vocera server and the Telephony server on the same
computer, remove the Telephony server before you remove the Vocera server.
To remove the Vocera Telephony server:
1. If the Telephony server is running, shut it down.
See Shutting Down the Telephony Server on page 118.
2. From the Windows Start menu, choose Settings > Control Panel.
The Windows Control Panel appears.
3. Double-click Add/Remove Programs.
The Add/Remove Programs utility displays a window.
4. Select Vocera Telephony Server and click Remove.
A dialog box asks you to confirm that you want to remove the program.
5. Click Yes.
Several windows open to display messages as programs are halted and
software is removed. The process may take several minutes.
6. Restart your computer.
Because you have just uninstalled the telephony software, Windows might
display a dialog box like the one shown in the following figure. Click Cancel
to close the dialog box. The Vocera Telephony Installation program will
install the appropriate software for you.
Installing the Telephony Software ··· 107
Running the Telephony Installation Program
The installation program requires the following information:
Field
Description
Install to Drive
Specify the drive that you want the telephony server installed
on. If you are installing the Telephony server on the same
computer as the Vocera server, you cannot change this setting.
Country
Specify the country in which the Telephony server will be used.
If you are installing the Telephony server on the same computer
as the Vocera server, you cannot change this setting.
Vocera Server
IP Address
Specify the IP address of the Vocera server in one of the
following ways:
• If the Telephony server is installed on the same computer as
the Vocera server, and you specified an IP address for the
Vocera server when you installed it, enter that value.
• If the Telephony server is installed on the same computer as
the Vocera server, and you did not specify an IP address for
the Vocera server when you installed it (you left the field
blank), the Vocera Server IP Address field defaults to
127.0.0.1. You can accept this value without changing it.
• If the Telephony server is installed on a different computer
than the Vocera server, enter the IP address of the Vocera
server computer in dot notation.
Do not use the computer name. If the Vocera server computer
has multiple network interface cards, make sure you enter the
IP address of the interface that receives Vocera traffic.
Make sure you enter the IP address correctly, because the
Installation program cannot validate it.
Site
If the Vocera server supports multiple sites, specify the name of
the site the Telephony server supports as follows:
• To associate the Telephony server with one physical site,
enter the name of the site.
The installation program sets the value of the VOCERA_SITE
environment variable to the name of the site.
• To associate the Telephony server with multiple sites, leave
this field blank.
The installation program sets the value of the VOCERA_SITE
environment variable to Global.
If the Vocera server does not support multiple sites, you can
leave this field blank. See the Vocera Administration Guide for
more information about sites.
108 ··· Vocera Configuration Guide
Field
Description
Telephony
Server IP
Address
Specify a value in either of the following ways:
• If your computer has dual Network Interface Cards (NICs)
that are not using a virtual IP address, enter the physical IP
address of the card you want the Telephony server to bind
to.
You must specify this value in dot notation. Make sure you
enter the IP address correctly, because the Installation
program does not validate it.
• If your computer has a single Network Interface Card, or if it
has dual NICs with a virtual IP address, leave this field blank.
If you are installing the Telephony server on a computer where
the Vocera server is already installed, you do not need to enter
a value in this field.
During the installation, Windows might display a dialog box like the one
shown in the following figure. Click Cancel to close the dialog box. The
Vocera Telephony Installation program will install the appropriate software
for you.
Installing the Telephony Software ··· 109
During installation on a computer running Windows Server 2003, Windows
might display a dialog box like the one shown in the following figure. Click
Yes to allow the installation program to install the driver for your telephony
board.
To install the Vocera Telephony Solution Software:
1. Log in to the Telephony server computer with administrator rights.
2. If the Vocera server is running, shut it down.
3. Insert the Vocera Telephony Server CD in the CD-ROM drive.
If the installation program does not run automatically, choose Run from the
Windows Start menu, browse to VTSInstall.exe in the setup directory of
the CD, then click OK to run the installation program.
Note: The installation program does not create a log file when you run it
manually from the Windows Run dialog box.
When the preparation is finished (it may take several minutes), the
installation wizard displays a Welcome screen.
4. Follow the wizard’s prompts and enter information as required.
The installation process can take several minutes. The installation program
displays screens and messages indicating the installation progress.
5. When the installation is finished, restart the Telephony server computer.
The Telephony server launches automatically when the computer reboots,
and the Telephony Server Control Panel appears. See Using the Telephony
Control Panel on page 117 for information about controlling the Telephony
server.
110 ··· Vocera Configuration Guide
Installing the Telephony Hardware
The following topics show you how to configure the Dialogic boards, install
them, and connect them to the PBX:
• Installing the Dialogic Boards on page 111
• Connecting Telephony Cables on page 113
• Completing the Telephony Installation on page 115
Important: Before you begin installing the hardware, make sure you are
following the overall telephony integration procedure described in Hardware
for the Analog Integration on page 96.
Installing the Dialogic Boards
The manufacturer’s installation instructions for the Dialogic boards contain steps
that are not applicable to the Vocera telephony integration, such as
autoconfiguration for IRQ and memory addresses and determining precedence
in mixed PCI/ISA systems. Ignore those instructions and use the following
procedure to install the boards for use with the Vocera Telephony server.
To install the Dialogic Boards:
1. Read the compliance and warranty statements included with the Dialogic
boards.
2. Follow the manufacturer’s precautions, which are described in the section
called “Protect the Boards from Damage” in the manufacturer’s installation
instructions.
These instructions require you to wear a grounded wrist strap and work at a
static-guarded workstation to protect the board from damage during
installation. Failure to follow the instructions may void the warranty on the
board.
3. Turn off all power to the computer and unplug the power cord.
4. Open the computer’s cover.
Installing the Telephony Hardware ··· 111
5. Remove the cover plate on each PCI expansion slot you are going to use.
You may need to remove a screw or plastic retention bracket before you can
remove the cover plate. See the documentation included with your
computer for instructions.
6. Use the SW100 rotary switch on the first board to set its board ID to 1.
The default switch setting is 0. For the Vocera telephony integration, you
must set the switch on the first board to 1.
7. If you need additional boards for analog telephony, set the switch on the
second board to 2, set the switch on the third board to 3, and so forth.
Use a permanent marker to write the switch setting on the rear bracket of
each board so it is easier to connect the telephone lines correctly.
112 ··· Vocera Configuration Guide
8. Insert the connector on the board into the PCI bus slot and press down
gently until the board is seated.
Repeat this step for all additional boards.
9. Replace the screws or retention brackets you removed previously.
10. Close the computer cover.
You are now ready to connect the telephone lines to the boards.
Important: If you install the boards at a remote location and then transport the
computer to the site, re-seat the boards after the computer arrives. Because the
Dialogic boards are larger than most PCI boards, they are easily unseated during
transport.
Connecting Telephony Cables
The procedures in this section refer to each Dialogic board by its hardware
switch setting (see Installing the Dialogic Boards on page 111). For example,
the first Dialogic board is the board that has its rotary switch set to 1.
The cabling procedures differ slightly for an analog integration and a digital
integration.
Installing the Telephony Hardware ··· 113
Connecting
Cables for an
Analog
Integration
To connect cables for an analog integration:
1. Use the cables you prepared as described in Analog Telephony Cables on
page 96 in either of the following ways:
• Insert the telephone cables into the line splitters, and insert the line
splitters into the appropriate jacks on the first Dialogic board.
• Insert the RJ11 plugs that you crimped on to the CAT 5 cable into the
appropriate jacks on the Dialogic card.
The board bracket displays the numbers 1 and 6 next to the jacks at either
end of the bracket, indicating the first and last jacks on the board. Connect
the cables to the Dialogic board starting with jack 1.
Fill the jacks in each board consecutively. Make sure board 1 is completely
filled before you cable board 2, and so on. You do not need to fill all the
jacks in the final board.
2. Connect the other ends of the cables to the appropriate ports of the analog
cards in the PBX. If you use a patch panel (recommended), connect the
cables to the patch panel, and then run patch cords from the panel to the
PBX.
Connect the plug corresponding to the first Dialogic port (the inner pair of
the first RJ-14 jack on the Dialogic card) to the PBX port representing the
first extension in the hunt group. Connect the plug corresponding to the
second Dialogic port (the outer pair of the first RJ-14 jack) to the PBX port
representing the second extension, and so on.
Connecting
Cables for a
Digital
Integration
To connect the cables for a digital integration:
1. Connect one end of the cable to the PBX T1 board and the other end to the
RJ48C jack on the Dialogic board. See Digital Telephony Cables on
page 99.
2. Examine the LEDs on the plate in the back of the Dialogic board. A green
status LED lights up to indicate a successful connection. Yellow or red LEDs
light up to indicate a problem. Consult your board documentation for more
information.
114 ··· Vocera Configuration Guide
Completing the Telephony Installation
1. Turn on the Telephony server computer.
If the Found New Hardware wizard appears, use it to navigate to the
\dialogic\DRVR directory where the drivers are stored.
The Found New Hardware wizard usually does not appear if you install the
telephony software before you install the telephony hardware.
2. Use the Telephony screen in the Administration Console to configure the
Vocera server to support telephony.
3. Test each port by placing calls from a phone to each of the extensions in the
hunt group (analog integration) or DID number for the Vocera trunk (digital
integration).
4. Use a badge to place the following types of calls:
• Calls to internal extensions
• Calls to external numbers
See the Vocera User Guide for descriptions of the badge commands that let
place calls and control forwarding.
Congratulations! The Vocera telephony integration is now complete.
Installing the Telephony Hardware ··· 115
116 ··· Vocera Configuration Guide
Managing Vocera Telephony
This chapter describes how to configure telephony settings, and how to control
the Telephony server.
You configure Telephony server settings through the Administration Console’s
Telephony screen. You also use the Administration Console to configure other
data and settings related to your telephony integration. For example, user
profiles can include phone numbers and pager numbers, group profiles can
specify phone numbers and telephony permissions, and address book entries can
include phone numbers and pager number.
The following topics will help you use the Administration Console to configure
Vocera telephony:
• Working with Phone Numbers on page 118
• Configuring Access Codes on page 119
• Configuring Toll Info on page 120
• Configuring Telephony PINs on page 121
• Additional Setup on page 122
• Telephony in a Multi-Site Environment on page 124
The Telephony Control Panel displays status messages that the Telephony server
generates, and lets you control the Telephony server.
The following topics explain how to use the Telephony Control Panel:
• Stopping and Starting the Telephony Server
• Shutting Down the Telephony Server
• Changing the Vocera Server IP Address
• Preventing Access to the Telephony Control Panel
Managing Vocera Telephony ··· 117
Working with Phone Numbers
When a user issues a voice command to dial a telephone number, or when
Vocera forwards a badge call to a telephone or to voicemail, the Vocera server
sends a sequence of digits to the Telephony server. In addition to the phone
number itself, the sequence can contain access codes needed to obtain an
outside line, to authorize a long distance call, or to access company voicemail.
You can enter phone numbers, extensions, and access codes in various places in
the Administration Console. For example, when you add a user to the Vocera
system, you can specify the user’s desk extension, cell phone number, pager
number, and home phone number. Users can also enter or update this
information in the User Console.
A field that requires a phone number, an extension, or an access code may
contain any of the following characters:
• Digits. 1234567890
• Special dialing characters. A special dialing character is a non-numeric
character that you can enter in an Administration Console field that requires
an access code, phone number, or extension. For example, you can use an
asterisk ( * ) to simulate pressing the star key on a touch-tone phone, or
enter an X at the beginning of a number to tell Vocera to treat that number
as an extension.
• Special dialing macros. A dialing macro represents a dialing sequence. In
data entry fields where you cannot enter a specific number—because the
number varies with the user who accesses the feature—you can enter a
dialing macro. Vocera replaces that dialing macro with the actual number on
demand.
Dialing macros are especially useful when editing Company Voicemail
Access Codes and Address book entries. For example, the Company
Voicemail Access Code field specifies the dialing sequence that Vocera uses
to forward an incoming call to company voicemail. As part of the dialing
sequence, you typically need to specify a desk phone extension to identify
the voicemail box you want to access. You cannot enter a specific desk
extension in this field, because the number will vary depending on which
user is forwarding calls. Instead, you use the %D macro as part of the
dialing sequence. Vocera replaces that macro with the actual desk extension
of the user who is forwarding calls. See Vocera Administration Console
Reference for a complete list of dialing macros.
• PIN template macros. Each PBX has different rules for adding a PIN to a
dialing sequence. Some require the phone number followed by the PIN.
Some require the PIN before the phone number. Some require an access
118 ··· Vocera Configuration Guide
code for an outside line, or a feature code to indicate that a number is a PIN.
Some require a separator character between the PIN and the number. A
telephony PIN template can use macros to specify and format the
information in a PIN. See Vocera Administration Console Reference for a
complete list of PIN macros.
Vocera ignores any other character that you enter in these fields. For example,
you can enter (408) 790-4100, to make a number more readable, instead of
4087904100. Vocera ignores the extra spaces, dashes, and parentheses when
the number is actually dialed.
Configuring Access Codes
An access code is a sequence of digits that the system must prepend to a
telephone number in order to dial it. The access codes in use at your site are
determined by they way your PBX is set up. When you configure Vocera, you
need to identify these access codes so the Telephony server can communicate
properly with the PBX. Use the Access Codes page of the Telephony screen in the
Administration Console to configure access codes.
Your PBX may use many different access codes. For example, it may require
different access codes to get an outside line for local calls, to get an outside line
for toll calls, and to access your company’s voicemail system.
Exceptions to
Access Codes
By default, Vocera assumes that any number within your local area code requires
the Default Local Access Code and that any other number requires the Default
Long-Distance Access Code. You use the list on the Access Codes page to
specify exceptions to this rule.
For example, if your location has a toll-free area code in addition to your local
area code, you may need to dial it with the Default Local Access Code instead of
the Default Long-Distance Access Code. You can specify exceptions such as this,
or any other exception, in the Access Codes page.
Adding Access
Code
Exceptions
By default, Vocera uses the following rules to determine what access code to use
with a telephone number:
• Any number within your local area code requires the Default Local Access
Code.
• Any number that begins with a Q, begins with an X, or has fewer than seven
digits does not require an access code. Vocera treats numbers with fewer
than seven digits as extensions.
• Any other number requires the Default Long-Distance Access Code.
Managing Vocera Telephony ··· 119
If your organization uses any phone numbers that violate these rules, you must
add entries that provide the access codes they require in the exception list. For
example, you need to create an exception if an area code in addition to your
local area code requires the Default Local Access Code instead of the Default
Long-Distance Access Code.
Use the Add Access Code Exception dialog box to add an entry to the list of
exceptions on the Access Codes page. The Add Access Code Exception dialog
box appears when you click the Add button on the Access Codes page.
Configuring Toll Info
By default, Vocera assumes that any number within your local area code is a tollfree number, and any number outside your local area code is a toll number. You
can, however, specify exceptions to this rule as needed. For example, many
locations have an additional area code that is a toll-free calling area, or an
exchange within the local area code that is a toll area. In Australia, for example,
the area code 04 is reserved for mobile phone numbers, and calls to mobile
phones are toll-free.
The distinction between toll-free and toll numbers can be important, because
Vocera requires separate permissions for making toll calls, forwarding calls to toll
numbers, making toll-free calls, and forwarding calls to toll-free numbers.
To specify whether specific area codes and ranges of phone numbers are tollfree, use the Toll Info page of the Telephony screen in the Administration
Console.
To configure Toll Info:
1. Click Telephony in the Administration Console’s navigation bar.
The tabs for the telephony pages appear. By default, the Basic Info page is
visible.
2. Click the Toll Info tab.
The Toll Info page appears.
3. Make sure the Select Site field displays the name of the site you want to
configure.
If you specified a site on another Telephony page and have not yet left the
Telephony section, the Select Site field preserves your previous choice.
The list on the Toll Info page displays the telephone numbers that are exceptions
to the toll-free rule—that is, all numbers within the local area code are toll-free
120 ··· Vocera Configuration Guide
numbers, and all numbers outside the local area code are toll numbers, unless
they appear in the list of exceptions on the Toll Info page.
Configuring Telephony PINs
A telephony PIN (Personal Identification Number) allows an organization to
authorize telephone usage and to distribute telephone costs among different
users, departments, or sites. Some organizations use the term FAC (Forced
Authorization Code or Forced Access Code) to describe this feature.
For example, a company might require employees to enter a PIN along with a
phone number to make a long distance or toll call. Vocera’s telephony PIN
feature automatically adds a PIN to the dialing sequence when a user places a
call that requires one. In addition to long distance and toll calls, a PIN is also used
for long distance forwarding, transferring, and paging.
Note: A user cannot make toll calls — and telephony PINs have no effect —
unless he or she belongs to a group that allows toll calls.
Use the PIN page of the Telephony screen in the Administration Console to
configure PINs.
Telephony PINs can be assigned at one or more of the following levels, listed in
descending order of precedence:
1. User profile. If a user's profile specifies a telephony PIN, it is used each time
the user places a call that requires a PIN.
2. Department group. If a telephony PIN is not specified in the user’s profile,
but the user belongs to department group to which a PIN has been
assigned, then that PIN is used.
When a user belongs to more than one department that has a telephony PIN
assigned, a PIN is chosen at random from among those departments. Thus,
costs are shared evenly among the user’s various departments. To override
this behavior, specify a PIN in the user’s profile; for example, you could enter
the PIN of the department to which the user’s long-distance calls are billed.
3. Site. If a telephony PIN is not specified in the user’s profile and the user does
not belong to a department group that has a PIN, then the PIN specified for
the user’s site is used.
If there is no user PIN, no department PIN, and no site PIN, then no telephony PIN
is used.
Managing Vocera Telephony ··· 121
Specifying
Telephony PIN
Information for
a Site
In a deployment that uses PINs, the dialing sequence for a toll call must include a
PIN and a phone number to dial. More information (such as an access code or a
feature code) may be needed, depending on the PBX or organizational
requirements.
Use the PIN page in the Telephony screen to specify the following information
for a site:
• PIN for Long Distance Calls. This optional value defines a telephony PIN
for a site. If a telephony PIN is not specified in the user’s profile and the user
does not belong to a department group that has a PIN, then the PIN
specified for the user’s site is used.
The site-level telephony PIN is used for long distance numbers specified in
address book entries, as well. It is also used for group forwarding numbers,
unless the group is department group with a PIN number specified, in which
case the department group PIN is used.
PIN template. When a dialing sequence includes a PIN, this value defines the
format that the Vocera system uses to send it to the PBX. Every site that has its
own PBX can define a PIN and a PIN template. Sites that share a PBX use the PIN
and PIN template defined for the Global site. Similarly, if you do not have a
multi-site environment, choose the Global site.
Additional Setup
The Telephony pages in the Administration Console provide the basic
information that enables Vocera and the PBX to communicate with each other.
However, for users to take full advantage of the telephony integration, you must
also perform the following tasks:
• Configuring the Hunt Group or DID Number
• Additional Telephony Configuration Tasks in the Administration
Console
• Additional Telephony Configuration Tasks in the User Console
Configuring the
Hunt Group or
DID Number
You need to configure a telephone number that people can call to access the
Vocera system. In an analog integration, this number is called the hunt group
number. In a digital integration, a Direct Inward Dialing (DID) number serves the
same purpose. When a caller dials the number, the Genie says, “Good morning.
Say the full name of the person or group you want to reach or enter an
extension.”
122 ··· Vocera Configuration Guide
You configure a hunt group or DID number for Vocera when you install the
telephony integration option. Callers can then connect to a badge in any of the
following ways:
• Speak the name of a person to connect to that user’s badge.
• Enter a desk extension to connect to that user’s badge.
• Speak the name of a group to connect to the badge of the first available
group member.
• Enter the group’s telephone extension to connect to the badge of the first
available group member.
• Enter the number 555 to receive an additional Genie prompt that allows
them to send a voice message to a badge.
• Enter the number 0 (for Operator) to connect to the badge of the first
available member of the Operator group, if one exists.
• Enter the sequence *66 followed by a group's telephone extension to make
an urgent broadcast to the badges of all members of a group.
Additional
Telephony
Configuration
Tasks in the
Administration
Console
Use the Administration Console to set up permissions and phone numbers as
follows:
• Specify which groups have calling and forwarding permissions.
• Specify the desk phone extension, home phone number, and cell phone
number of badge users.
• See Working with Pagers on page 135 for details about configuring
Vocera to work with pagers.
• Specify the telephone extension and forwarding information for groups.
• Create address book entries that all users can share.
Additional
Telephony
Configuration
Tasks in the
User Console
Users can create or modify their own phone numbers in the User Console as
follows:
• Specify their desk phone extension, home phone number, cell phone
number, and pager number.
• Specify a telephone number for forwarding badge calls.
• Specify telephone numbers to contact outside buddies.
• Specify the telephone extension and forwarding information for groups that
they manage.
See the Vocera User Console Guide for complete information.
Managing Vocera Telephony ··· 123
Telephony in a Multi-Site Environment
When your Vocera deployment supports multiple sites, you can accommodate
any of the following telephony environments:
• An environment where each site has its own PBX.
• An environment where all sites share the same PBX.
• A mixed environment where some sites have their own PBX, and sites that
do not have their own PBX share one.
Because each PBX can either come from a different vendor or be set up
differently, you must configure separate telephony settings for each PBX you are
using. You must install a Telephony server for each PBX you have in use.
As each Telephony server boots, it associates itself with the Vocera server. The
VOCERA_SITE environment variable is set when you install each Telephony
server. This variable tells the Vocera server which site a Telephony server is
associated with. If this environment variable is not set, the Telephony server is
associated with the Global site.
Selecting a Site
to Configure
The Select Site field on the Telephony pages lets you choose a site to configure:
• If each site in your deployment uses a separate PBX, enable and configure
telephony for each individual site. Disable telephony for the Global site,
unless it also has its own PBX.
• If all sites in your deployment share the same PBX, enable and configure
telephony for the Global site only.
• If your deployment is a mixed environment, enable and configure telephony
for each site that has its own PBX, enable and configure telephony for the
Global site, and disable telephony for each site that shares a PBX.
In a mixed environment, the sites that do not have their own PBX share a
PBX. The telephony settings for the Global site allow Vocera to connect to
this shared PBX.
When you disable telephony for the sites that do not have their own PBX,
you are telling Vocera that these sites will use the telephony settings of the
Global site.
Stopping and Starting the Telephony Server
Like the main Vocera server, the Telephony server starts automatically when the
computer boots. When the Telephony server starts running, the following
windows appear on the desktop:
• A command window called \vocera\server\Telephony.exe
124 ··· Vocera Configuration Guide
• The Telephony Control Panel
Important: Do not close the command window or control panel. Closing these
applications will shut down the server. You can block access to the control panel
or hide it as described in Preventing Access to the Telephony Control Panel.
In certain situations, you may need to stop and restart the Telephony server. You
may want to restart the server when only a few people are using the system.
When you stop the server, users will not be able to communicate with the
telephone system until you start it again. The server stops and starts fairly
quickly, so if few people are using the system, there will be very little
interruption.
Use the following procedure to stop and start the Telephony server only. See
Shutting Down the Telephony Server on page 125 for information about
shutting down the Telephony server, the Telephony Control Panel, and the
command window that it uses.
To stop and start the Telephony server:
1. Choose Stop from the Run menu in the Telephony Control Panel, or hold
down the Alt key and press Q.
The Control Panel displays the message Stopping telephony server to
indicate that the server has stopped.
2. Choose Start from the Run menu in the Telephony Control Panel, or hold
down the Alt key and press S.
The Control Panel displays the message Vocera Telephony Server 3.1
followed by the build number to indicate that the server has started.
Shutting Down the Telephony Server
When you shut down the Telephony server, you stop the server, close the
command window, and close the Control Panel.
To shut down the Telephony Server:
1. Choose Exit from the Run menu in the Telephony Control Panel, or hold
down the Alt key and press X.
The Control Panel displays a dialog box, asking you to confirm that you want
to shut down the Telephony server.
2. Click OK.
The dialog box closes. The Telephony server stops, the Control Panel closes,
and the command window closes.
Managing Vocera Telephony ··· 125
Shutting Down
Telephony
when the
Control Panel is
hidden
You can still shut down the Telephony server when the Control Panel is hidden.
Use the Windows Services dialog box to stop the Vocera Telephony service. (If
the Vocera server command window is hidden, you can shut it down in the same
manner.)
To shut down the Telephony server when the Control Panel is hidden:
1. From the Windows Start menu, select Settings/Control Panel/
Administrative Tools/Services.
The Services dialog box appears, displaying the list of installed Windows
services.
2. Right-click the Vocera Telephony service and select Stop.
The Vocera Telephony service stops, shutting down Vocera and its related
services.
Changing the Vocera Server IP Address
The Telephony server needs to know the IP address of the Vocera server. You
enter this IP address when you install the Telephony server software; however,
you can use the Telephony Control panel to change the address for the current
session. The IP address returns to the value you entered in the installation
program if you reboot the Telephony server.
To change the IP address of the Vocera server:
1. Choose IP Address from the Server menu.
The IP Address dialog box appears.
2. Use the Server IP Address field to provide the address of the Vocera server
in either of the following ways:
• Enter the numeric IP address using dot notation. For example:
192.186.15.10
• Enter the computer name (not the full domain name). For example:
vserver
3. Click OK.
The dialog box closes, and the Telephony server begins using the new IP
address immediately. The new IP address persists until you reboot the
Telephony server.
126 ··· Vocera Configuration Guide
Preventing Access to the Telephony Control Panel
After the Telephony server is up and running, you may want to prevent the
Telephony Control Panel from appearing on screen. For example, you may want
to block access to the Control Panel to prevent people from inadvertently
disrupting service by interacting with them.
Note: If the Vocera server is installed on the same computer as the Telephony
server, you can hide its command window in the same manner. See Preventing
Access to the Vocera Server Control Panel on page 217.
Logging Off
and Blocking
Access
You can log off the computer that is running the Telephony server to prevent
access to the Telephony Control Panel.
To log off and block access to the Telephony Control Panel:
1. From the Windows Start menu, select Log Off.
A confirmation dialog box appears.
2. Click Yes.
Windows logs you off and blocks access to the Telephony Control Panel. The
Log on to Windows dialog box appears.
3. To log in again, enter your User name and Password in the Log on to
Windows dialog box, and then click OK.
Hiding the
Telephony
Control Panel
Vocera Telephony is the Windows service that starts the Telephony server. By
default, the Vocera Telephony service allows the Telephony Control Panel and its
command window to appear on screen. You can disable the Allow service to
interact with desktop property in the Windows Services dialog box, which
hides the Telephony Control Panel and its command window. When this
property is disabled, the Telephony server runs quietly in the background without
displaying any windows.
To hide the Telephony Control Panel and its command window:
1. From the Windows Start menu, select Settings > Control Panel >
Administrative Tools > Services.
The Services dialog box appears, displaying the list of installed Windows
services.
2. Right-click the Vocera Telephony service and select Properties.
The Vocera Telephony Properties dialog box appears. By default, the General
pane is visible.
3. Click the Log On tab.
Managing Vocera Telephony ··· 127
The Log On pane of the Vocera Telephony Properties dialog box appears.
4. Uncheck the box labelled Allow service to interact with desktop.
5. Click OK.
The Vocera Telephony Properties dialog box closes, saving your changes.
6. Restart the computer for the new settings to take effect.
When the computer boots, the Telephony server starts, but the Telephony
Control Panel and its command window remain hidden.
128 ··· Vocera Configuration Guide
Troubleshooting Telephony
The following topics can help you solve problems that can occur during the
telephony integration:
• Creating a Tone Set File on page 129
• Separating the Telephony and Vocera Servers on page 132
• Enabling ISDN Debugging Features on page 134
Creating a Tone Set File
In an analog telephony integration, the PBX must generate a loop current drop
to notify the Dialogic board when a far-end disconnect occurs. Otherwise, the
board does not know when to hang up, and the LCD of the badge continues to
blink Phone after the telephone disconnects.
If you cannot configure your PBX to generate a loop current drop, use the
PBXpert/32 utility to learn the tone definitions your PBX uses for call signaling. In
most cases, the PBX generates a fast busy, a modified fast busy, or a dial tone to
signal a far-end disconnect. PBXpert/32 saves the tone definitions in a file that
the Telephony server can use to detect far-end disconnects.
Troubleshooting Telephony ··· 129
To create a tone set file:
1. Make sure the Dialogic board and the Vocera Telephony server are fully
installed and cabled to the PBX.
2. Make sure the Dialogic board is initialized in either of the following ways:
• If the Telephony server is running, the board is already initialized. Stop the
Telephony server so it does not interfere with PBXpert. See Stopping and
Starting the Telephony Server on page 117.
• If the Telephony server is not running, choose Programs > Vocera >
Telephony > Dialogic Configuration Manager from the Start menu.
The Dialogic Configuration Manager appears.
Click the green Start Service button to start the Dialogic system service,
then close the Dialogic Configuration Manager.
3. From the Start menu, choose Programs > Vocera > Telephony >
PBXpert.
The PBXpert wizard appears.
4. Click Next.
The PBX Information screen appears.
5. Complete the PBX Information screen as follows, then click Next.
Field
Description
Manufacturer
Enter the name of the PBX manufacturer.
Model
Enter the model of the PBX.
File Name
Click Browse and navigate to the \vocera\dialogic folder,
then enter the file name pbx.tsf.
By default, PBXpert uses a combination of the manufacturer
and model as a file name. You must change the default value
to pbx.tsf, which is the file name the Telephony server uses.
You must save this file in the \vocera\dialogic directory so the
Telephony server can find it.
The TAPI information screen appears.
6. Select none in the list on the TAPI Information screen (the default), then
click Next.
The Select a Board screen appears.
130 ··· Vocera Configuration Guide
7. Make sure that the Board # field displays the following, then click Next.
#:1, Type: SPAN, Channels:4
The Select the Calling Resource screen appears.
8. Complete the Select the Calling Resource screen as follows, then click Next.
Field
Description
Select the Channel
Enter 1.
Phone Number
Enter the phone number that the PBX assigns to
the first Dialogic port. This is Line A.
The Select the Called Resource screen appears.
9. Complete the Select the Called Resource screen as follows, then click Next.
Field
Description
Select the Channel
Enter 2.
Phone Number
Enter the phone number that the PBX assigns to
the second Dialogic port. This is Line B.
The Settings Confirmation screen appears.
10. Review the information summary, make sure the Run Wizard Auto-Test
check box is checked, then click Next.
The Learning Tones screen appears, and PBXpert starts running the Auto
Line Test.
11. After the six tests (3 for each line) complete successfully, click OK to close
the Auto Line Test dialog box, then click Next in the wizard.
PBXpert begins learning the tone definitions your PBX uses for five signaling
tones: dial tone, ringback, busy, reorder, and disconnect.
12. Make sure PBXpert displays a green dot next to each tone in the Tone
column to indicate that it successfully learned the tones, then click Keep
Data.
The Verifying the Learn dialog box appears.
13. Click Next to verify the learned tones.
PBXpert displays a dialog box and begins verifying the tones.
Troubleshooting Telephony ··· 131
14. After the verification completes, click OK to close the dialog box.
The Summary of Results screen appears.
15. Click Finish to close the wizard.
The tone summary sheet displays definitions for all of the tones.
16. Close the PBXpert window.
17. Run the Telephony server.
The Telephony server loads the pbx.tsf file automatically.
18. Test a badge-to-telephone call and make sure the Dialogic board hangs up
properly after a far-end disconnect:
• If the board hangs up properly, the LCD of the badge displays the user
name.
• If the board does not hang up, the LCD of the badge continues to display
Phone after the far-end disconnect.
Separating the Telephony and Vocera Servers
If you install the Vocera server and the Telephony server on the same computer,
you can later move the Telephony server to a different computer. For example,
you may want to move the Telephony server to improve performance as the size
and use of your installation grows.
This section shows you how to separate the Telephony and Vocera servers after
they have been installed on the same computer. In this section, the phrase “new
computer” refers to the new Telephony server you are setting up and “old
computer” refers to the existing computer that has both servers installed on it.
132 ··· Vocera Configuration Guide
To move the Telephony server to a separate computer:
1. Install the Telephony software on a new computer.
Follow the steps in Running the Telephony Installation Program on
page 108 until the Configuration Information screen appears.
2. Specify the following values, then click Next.
Field
Description
Vocera Server
IP Address
Enter the IP address of the Vocera server computer in dot
notation.
Do not use the computer name. If the Vocera server computer
has multiple network interface cards, make sure you enter the
IP address of the interface that receives Vocera traffic.
Make sure you enter the IP address correctly, because the
Installation program does not validate it.
Site
If the Vocera server supports multiple sites, specify the name of
the site the Telephony server supports as follows:
• To associate the Telephony server with a single physical site,
enter the name of the site.
The installation program sets the value of the VOCERA_SITE
environment variable to the name of the site.
• To associate the Telephony server with multiple sites, leave
this field blank.
The installation program does not initialize the
VOCERA_SITE environment variable.
If the Vocera server does not support multiple sites, leave this
field blank. See the Vocera Administration Guide for more
information about sites.
Telephony
Server IP
Address
Specify a value in either of the following ways:
• If your computer has dual Network Interface Cards (NICs)
that are not using a virtual IP address, enter the physical IP
address of the card you want the Telephony server to bind
to.
You must specify this value in dot notation. Make sure you
enter the IP address correctly, because the Installation
program does not validate it.
• If your computer has a single Network Interface Card, or if it
has dual NICs with a virtual IP address, leave this field blank.
Troubleshooting Telephony ··· 133
3. Continue to the end of the Installation program and restart the new
computer when prompted.
The Telephony server launches automatically when the computer reboots,
and the Telephony Server Control Panel appears. The installation program
automatically installs the drivers for the Dialogic cards.
4. Use the Telephony Server Control Panel to exit the Telephony server on the
new computer.
5. Shut down the new computer, then install a Dialogic card in it. Make sure
the Dialogic card is identical to the card in the old computer.
See Installing the Telephony Hardware on page 111.
6. On the old computer, use the Telephony Control Panel to exit the Telephony
server.
7. Move the PBX cables from the Dialogic card on the old computer to the
Dialogic card on the new computer.
8. On the old computer, open the \vocera\server\vm_config.txt file in a text
editor.
9. Use # marks to comment out the following section in this file:
PROCESS.4 = TELEPHONY
TELEPHONY.STARTCMD = net start vTelephony
TELEPHONY.SHUTCMD = net stop vTelephony
10. Change PROCESS.5 to PROCESS.4, then save and close this file.
11. Start the new computer.
The Telephony server launches automatically.
12. Place some calls to make sure the Vocera server, Telephony server, and PBX
are communicating properly.
Enabling ISDN Debugging Features
You can enable ISDN debugging features from the Basic Information page of the
Telephony screen in the Administration Console. In general, though, you should
not enable ISDN debugging features unless instructed to do so by Vocera
support engineers. For example, you can enable D-channel tracing for a specified
number of calls. The trace data can help Vocera support engineers troubleshoot
telephony problems.
134 ··· Vocera Configuration Guide
Working with Pagers
If your site has the telephony integration option, badge users can issue voice
commands to send numeric pages to anyone with a pager. For example, a badge
user can speak the command “Page Dr. Shostak” to send a numeric page to
someone who is either another user or an address book entry.
Settings in the Administration Console define how badge users send and
respond to pages.
Vocera provides additional voice commands for users to send numeric pages to
arbitrary inside and outside pager numbers.
• An inside pager is used with a service that allows employees to send each
other numeric pages internally. These pages typically go through the
company’s PBX, preventing outside users from sending pages. The numbers
employees use to send an inside page are often fewer than seven digits.
• An outside pager is used with a service that allows employees to send
numeric pages to full-length phone numbers.
Templates in the Vocera server’s vocera\server\properties.txt file define the
dialing patterns Vocera uses to call inside and outside pager numbers. These
templates also determine the way any callback information is formatted on the
pager’s display.
The following topics describe how to configure Vocera to work with pagers:
• About Pager Information in the Administration Console on page 136
• Customizing Pager Strings in the Properties File on page 139
Working with Pagers ··· 135
About Pager Information in the Administration Console
When a user issues one of the “Page” commands, Vocera by default dials the
pager number, pauses briefly, and then passes the pager the Vocera hunt group
number (in an analog telephony integration) or the DID number (in a digital
telephony integration) and the desk extension of the user who called. By default,
the pager displays the hunt group or DID number and the desk extension.
The recipient of a page returns the call by dialing the hunt group or DID number
and then entering the badge user’s desk extension at the Genie prompt. Vocera
then routes the recipient’s call to the user’s badge. The call is routed to the
badge, not the desk extension, because the callback went through the
Telephony server.
To allow this interaction to take place, you must enter the following numbers in
the Administration Console:
• Specify a desk phone number and a pager number in the user’s profile.
The pager number allows the user to receive a numeric page (the user must
have a pager). The desk phone number allows the user to receive a callback
on the badge from the recipient of the page.
• Specify a pager number in address book entries.
Note: In some environments, such as hospitals, many users may not have a
personal desk phone. In these environments, you can assign a unique number to
each user in the Desk Phone or Extension field in the user profile to allow the
pager-to-badge interaction to work correctly.
Users must have either the Have Toll-Free Pager Number or the Have Toll Pager
Number permission to receive numeric pages. Users who have permission to
receive numeric pages can use the following voice commands to specify whether
they want to receive pages:
• Enable pages
• Disable pages
Users do not require explicit permission to send pages to other users. A user can
send a page to any other user who has a pager number defined.
Pagers and
Subscriber IDs
Some paging services provide subscriber IDs to distinguish among different
individuals. In this situation, subscribers typically share a single phone number
issued by the paging service, and individual users are identified by their unique
subscriber IDs.
136 ··· Vocera Configuration Guide
For example, to send a numeric page to a person who uses this system you could
call a phone number such as 1-800-555-1111, listen to a message prompting
you to provide a subscriber ID, and then enter an ID such as 4545. Some services
also require you to enter a special character such as the pound symbol (#, also
called a hash symbol) to indicate the end of the ID.
When you specify the pager phone number for users or address book entries
that have such a paging service, you must enter both the phone number of the
paging service and the subscriber ID in the Pager field of the Administration
Console. Use a semicolon to separate the toll-free number from the subscriber
ID, and provide a special character to terminate the subscriber ID, if required.
(The semicolon causes Vocera to pause until the pager is ready to receive the
numbers to display.)
For example, if the number of the paging service is (800) 555-1111, the
subscriber ID of the recipient is 4545, and the paging service requires a pound
(hash) symbol to terminate the subscriber ID, enter the following value in the
Pager field:
(800) 555-1111 ; 4545 #
When a badge user issues the Page command, Vocera dials the pager number,
waits until the connection is established, and then passes the service the
subscriber ID of the person being paged followed by the pound (hash) symbol to
indicate the end of the PIN. At the end of this sequence, Vocera automatically
passes the pager the hunt group or DID number and the desk extension of the
user who called. The pager displays the hunt group or DID number and the desk
extension.
The pager’s owner returns the call by dialing the hunt group or DID number and
then entering the badge user’s desk extension at the Genie prompt. Vocera then
connects the return call to the user’s badge—not to the desk phone.
Forwarding
Calls to a Pager
Vocera does not allow users or groups to forward calls directly to a pager,
because callers do not typically expect that behavior. Sending a page usually
implies a sense of urgency or importance, and callers would be surprised if
Vocera automatically forwarded a less critical call to a pager without opportunity
for intervention.
However, some sites may have specific situations that warrant forwarding calls to
a pager. For example, suppose you have a “Doctor on call” group that frequently
needs calls forwarded to a pager. In this situation, you can set up an address
book entry for the pager itself, and then forward the group’s calls to this address
book entry.
Working with Pagers ··· 137
You cannot simply enter a phone number in the Pager field of an address book
entry to achieve this effect. Supplying a value in the Pager field allows a user to
issue the “Send a Page” voice command—it does not permit forwarding.
Instead, use built-in dialing macros to create an address book entry that permits
indirect forwarding. Set the group properties to forward calls to this address
book entry; when the recipient returns the call, it is connected directly to the
original caller’s badge.
Note: Use the technique in this section only if a group or a user at your site
needs to forward a call to a pager. To allow ordinary badge-to-pager
interactions, enter a pager number directly in the user profile and in the address
book entry.
For example, if the pager’s number is (408) 555-1313, and it is a toll call, enter
the following value in the address book entry’s Phone field (assuming the access
code for an outside line is 9 and the access code for long distance is 1):
Q 9, 1-(408) 555-1313 ; %V %D #
In this example, Q indicates that the value in this field is a literal, %V is the
Vocera hunt group or DID dialing macro, %D is the desk phone dialing macro,
and # is required by the pager to end the sequence. Do not use a comma when
you are connecting to a PBX via a digital connection, such as Wink Start or ISDN
trunk. The comma character is not recognized in such cases, and it may prevent
a connection if it occurs after the access code.
Vocera interprets the %V dialing macro in this example as the value you
provided in the Vocera Hunt Group Number field on the Basic Info page of the
Telephony tab. (Although the term “hunt group” generally refers to an analog
telephony integration, you can also enter a DID number for a digital integration
in this field.) Vocera interprets the %D dialing macro as the value you provided
in the Desk Phone or Extension field on the User Information page of the Add
User dialog box when you set up the user. A user can also enter or edit this value
in the User Console.
When the Doctor on Call group forwards a call to this address book entry,
Vocera dials the pager number, pauses briefly, and then passes the pager the
hunt group or DID number and the desk extension of the user who called. The
pager displays the number and the desk extension. If the caller does not have a
desk extension, the pager displays only the number.
The pager’s owner returns the call by dialing the number and then entering the
badge user’s desk extension at the Genie prompt. Vocera then connects the
return call to the user’s badge.
138 ··· Vocera Configuration Guide
Customizing Pager Strings in the Properties File
Properties in \vocera\server\properties.txt allow administrators to configure
the strings that the Vocera server uses to dial pagers and the strings that the
pagers display. For example, some environments require trunk access codes to
enable a call to an inside pager; other environments may want the pager to
display only the extension of the Vocera hunt group or DID number, not the full
dialing string. You edit these templates to allow Vocera to support the paging
requirements of your environment. In a multi-site installation, these properties
apply to all sites.
The following properties format the values passed to pagers.
Property
Description
TelOutsidePageSetUp
Formats the string passed to a pager outside the
Vocera system.
The default value of this property is %N;%V%D.
%N refers to the pager number Vocera will call,
based on one of the following values:
• An outside number specified in the voice
command, “Dial a pager number.”
• The value entered in the Pager Number field
of an address book entry
• The value specified in Pager Number field of a
user profile, if the number is not preceded by
an X.
%V refers to the Vocera hunt group number
(analog integration) or DID number (digital
integration).
%D refers to the user’s desk phone number.
Administrators will not typically need to modify
this default value.
Working with Pagers ··· 139
Property
Description
TelInsidePageSetUp
Formats the string passed to a pager inside the
Vocera system.
The default value of this property is %N;%V%D.
%N refers to the pager number Vocera will call,
based on one of the following values:
• A number specified in a voice command such
as, “Page number 4321.”
• The value entered in the Pager Number field
of an address book entry
• The value specified in Pager Number field of a
the user profile, if the number is 1 to 6 digits
long, or 7 digits long and preceded by an X.
%V refers to the Vocera hunt group or DID
number.
%D refers to the user’s desk phone number.
Administrators may want to modify the default
value. Imagine the following scenario:
• An organization’s telephony system requires a
user to dial 64 to get to the trunk.
• Users want pagers to display only the 4-digit
extension of the Vocera hunt number, not the
full ten-digit number. For example, if the
Vocera hunt number is 408-790-4170, the
pager should display 4170.
• The paging system uses an asterisk to indicate
a call-back number.
In this situation, an administrator would provide
the following value for this property:
64%N;4170*%D
TelOutsidePageSetUpForDialIn
Formats the string passed to an outside pager by
a person calling into the Vocera hunt group or
DID number.
The default value is %N;%X.
%N refers to the pager number Vocera will call
(the value entered in the Pager Number field of
the user profile or address book entry).
%X refers to the call-back number the user
enters when prompted by the Genie.
Administrators will not typically need to modify
this default.
140 ··· Vocera Configuration Guide
Property
Description
TelInsidePageSetUpForDialIn
Formats the string passed to an inside pager
when a person calls into the Vocera hunt group
or DID number.
The default value is %N;%X.
%N refers to the pager number Vocera will call
(the value entered in the Pager Number field of
the user profile or address book entry).
%X refers to the call-back number the user
enters when prompted by the Genie.
Administrators will not typically need to modify
this default value.
The following figures show how these properties can be used.
The first figure shows the flow of events that occur when a badge user pages
someone whose pager number is outside the Vocera system. This example uses
the default value of the TelOutsidePageSetUp property.
Working with Pagers ··· 141
The next figure shows the flow of events that occur when a badge user pages
someone whose pager number is inside the Vocera system. In this example, the
value of TelInsidePageSetUp has been changed to meet the following criteria:
• The organization’s telephony system requires a user to dial 64 to get to the
trunk.
• Users want pagers to display only the 4-digit extension of the Vocera hunt
number, not the full ten-digit number. For example, if the Vocera hunt
number is 408-790-4170, the pager should display 4170.
• The paging system uses an asterisk to indicate a call-back number.
142 ··· Vocera Configuration Guide
Users and Groups
The following topics describe how to work with users and groups:
• Setting Up Users and Groups on page 145
Describes how to set up users and groups in the Vocera database after you
install the Vocera server.
• Managing User Profiles on page 155
Describes user profiles. In addition to a user’s name and contact information,
the profile stores preferences, such as which Genie persona will prompt the
user and whether warning tones will be played when the badge is out of
range of the wireless network,.
• Working with Groups on page 163
Describes what you can do with groups. In Vocera, groups are more than
just collections of users—they are powerful, flexible sets that provide
different features to different members of your organization.
• Working with Permissions on page 173
Describes how permissions control the ability of users to issue certain
commands or to perform specific operations.
• Using the Address Book on page 177
Describes the Vocera address book, a convenient way for badge users to
contact places and people who are not badge users. For example, if people
in your organization frequently need to contact local businesses, you can
enter the business names and nicknames in the address book.
• User Console Overview on page 181
Gives an overview of the User Console, a browser-based application that
allows users to customize their personal information and some of the
settings in their user profiles.
Users and Groups ··· 143
144 ··· Vocera Configuration Guide
Setting Up Users and Groups
After you install Vocera software and configure badges, you must set up profiles
for users, groups, and (optionally) sites in the Vocera database. Depending on
how you set them up, these profiles can either limit or enhance Vocera’s
flexibility.
The following topics describe how to use the Administration Console and other
tools to manage profiles for users, groups, and sites:
• Setting Up Profiles
• Completing the Configuration
• Testing the Configuration
Setting Up Profiles
Vocera supports the following profile types:
• A user profile determines who can log in and use a badge
• A group profile provides a way for users to communicate based on roles,
allows you to direct call traffic based on roles, and specifies a set of rolebased permissions
• A site profile associates users and groups with specific physical locations.
Although you can use the Administration Console to enter profile data into
Vocera, it is faster and easier to load data directly from comma separated value
(CSV) files when you configure the database. Backup the database before you
import each CSV file so you can restore the database easily if the CSV file
introduces errors. You can then fix errors in the CSV file and import again.
Setting up profiles involves the following tasks:
• Collecting Site Data
• Collecting User Name Data
• Collecting Group Data
Setting Up Users and Groups ··· 145
Collecting Site
Data
If you are deploying a single Vocera server to support multiple sites, your site
configuration is very important. Each site that you define contains its own users,
groups, locations, and address book entries.
You can set up all your users and groups in the Global site, then transfer them to
individual sites later when you define them. It may be more convenient,
however, to define your sites in advance and assign users and groups to their
appropriate home sites.
Note: Do not configure site settings if your installation has only one physical
location—by default, data is associated with the Global site. Similarly, do not
configure site settings if you have a multi-server deployment. See Working with
Sites on page 203 for more information about sites.
Collecting User
Name Data
The speech recognition component of the Vocera system requires that users be
addressed by their first and last names in commands to the Genie. The
recognition engine works by matching the spoken name utterances to the first
and last name entries that are registered in the Vocera database. It is therefore
essential that the user data you load into the database accurately reflect these
first and last names.
A person’s formal name may differ from that person’s spoken name, which is the
name other users say to refer to that person in practice. For example, people
often go by their middle names in place of their first names. Be wary of formal
name lists printed directly from employee databases. Name lists obtained in this
way should be checked by an employee supervisor, for example. When loading
the Vocera database, use the spoken first and last names rather than the formal
ones.
If a user goes by more than one name, specify one or more Alternate Spoken
Names for that user. Alternate Spoken Names can also be useful when the
pronunciation of the first or last name is uncommon or of non-English origin. For
example, a user named John Vignes who pronounces his name in the French
way will require an Alternate Spoken Name along the lines of John Veenya.
If two users have the same or very similar first and last names, provide a way to
distinguish between them. For example, you could make these users members of
different department groups or specify an Identifying Phrase for each of them. If
you specify the department, a caller can contact a badge user by saying a
combination of the user’s name and department, such as “Call John in Tech
Support” or “Call John Smith in Tech Support”.
Department groups are more powerful and versatile than identifying phrases.
Departments are especially useful when a caller knows the first name and
department, but not the last name, of other people in the organization.
146 ··· Vocera Configuration Guide
Name conflicts can also arise when users have different names with identical or
very similar pronunciations (“Gene Doe” and “Jeanne Dough,” or “Tom
McNamara” and “Tom MacNamara,” for example). The voice recognition
engine will not be able to distinguish between these names when the users try
to log in. Often, only one form of the name will be recognized. For example, if
Jeanne Dough tries to log in, she may find that the system always recognizes her
as “Gene Doe.” In such cases, a nickname or a variation on either the first or last
name must be registered.
Important: Communicate nicknames or variations to all users of the system.
Collecting
Group Data
Groups are more than just collections of users—they are powerful, flexible sets
that provide many different features:
• To the administrator, groups provide a streamlined method of administering
user permissions based on their roles.
• To the badge user, groups provide a way to communicate with other users
based on their roles.
• To the organization itself, groups provide a way to direct and forward call
traffic based on user roles.
When you collect group data, think about the various functions that groups
serve so you can set them up appropriately. Working with Groups on
page 163 for complete information.
Create two separate lists for groups:
• A list of the group names
• A list of the users who are members in each group
Setting Up Users and Groups ··· 147
Setting Up
Users and
Groups
Setting up Vocera users and groups involves research at the customer site,
interviews with users and managers, and data entry in the Administration
Console. This section summarizes the procedure.
To set up users and groups:
1. Work with users or managers to make a list of the department names that
are most commonly used. Record the names that are actually spoken, not
the official names (for example, “Tech Support” instead of “Technical
Support”). This list will help you determine the groups that you need and
help you name them appropriately.
See Working with Groups on page 163.
2. Collect the user name data.
Collect official names, spoken names, nicknames, phone numbers, and
other information that you need to populate the database.
See Collecting User Name Data on page 146 and Managing User
Profiles on page 155
3. Collect the group data.
Create two separate lists for groups: a list of group names and a list of the
members of each group. See Collecting Group Data on page 147 and the
“Working with Groups” chapter.
4. Enter the user, group, and group member data into the following
spreadsheet templates, then save them in CSV format:
• users-template.xls
• groups-template.xls
• members-template.xls
See the Importing Data on page 224.
5. Load the data from the spreadsheets into Vocera.
See the Importing Data on page 224.
148 ··· Vocera Configuration Guide
Completing the Configuration
After you set up users and groups, a few configuration tasks remain:
• Specify permissions
Permissions define whether users can issue certain commands or to perform
specific operations. You assign Vocera permissions to groups of users—you
do not assign permissions to individuals, and you do not override
permissions on an individual basis.
• Specify settings that apply to the entire Vocera system
• Define locations and assign them to access points
• Configure email settings
• Schedule automatic backups
• Record name prompts for the groups and locations
Use the badge to record name prompts for groups and locations. Perform the
other configuration tasks in the Administration Console.
To complete the group configuration:
1. Log in to the Administration Console.
The default user ID/password is Administrator/admin.
2. Configure the default permissions that all users will have:
• If you are supporting multiple sites, assign permissions to the Everyone
Everywhere group.
• If you are not supporting multiple sites, assign permissions to the
Everyone group for the Global site.
See Default Permissions on page 174 for more information.
3. Assign permissions to the groups you have created.
Users accumulate permissions from every group they belong to. If necessary,
you can also use membership in groups to revoke specific permissions.
See Accumulating Permissions on page 174 for more information.
4. Specify global settings for the Vocera system.
See System Settings on page 221 for more information.
Setting Up Users and Groups ··· 149
5. Define location names and neighbors in either of the following ways:
• Specify the names directly in the Administration Console.
See Working with Locations on page 209 for more information.
• Enter the names in a spreadsheet, then import Vocera data in a CSV file.
See Importing Data on page 224 for more information.
The location names you choose should be meaningful to users who use the
“Locate” command on the badge.
6. Take a walking tour to assign access points to the locations.
See Working with Locations on page 209 for more information.
7. Configure SMTP settings for incoming and outgoing email.
See Email Setup on page 231 for more information.
8. Schedule automatic system backups to occur at designated times and days,
and a maximum number of backup files to maintain.
See Backing Up and Restoring Data on page 223 for more information.
150 ··· Vocera Configuration Guide
To record names for sites, groups, and locations:
1. Log in to the Administration Console.
The default user ID/password is Administrator/admin.
2. Click the Users button on the navigation bar.
The Add, Edit, and Delete Users page appears and displays a list of users.
3. Press the Call button on a badge. When the Genie greets you and asks you
to say your first and last name, log in as any user.
4. Click Sites in the Administration Console navigation bar.
The Sites page displays a list of sites.
5. Using the list of sites as a reference, record a name prompt for each site with
the badge.
6. Click Groups in the Administration Console navigation bar.
The Groups page displays a list of groups.
7. Using the list of groups as a reference, record a name prompt for each group
with the badge.
For example, press the Call button on the badge and say “Record name for
Technical Support.”
8. Click Locations in the Administration Console navigation bar.
The Locations page displays a list of locations.
9. Using the list of locations as a reference, record a name prompt for each
location with the badge.
For example, press the Call button on the badge and say “Record name for
Front Lobby.”
Setting Up Users and Groups ··· 151
Testing the Configuration
After you complete the system configuration, use the badge to test the
configuration:
• Check user and group name recognition
• Send messages for users and groups
• Back up the complete system configuration
To test the configuration:
1. Log in to the Administration Console.
The default user ID/password is Administrator/admin.
2. Click the Users button on the navigation bar.
The Add, Edit, and Delete Users page appears and displays a list of users.
3. Press the Call button on a badge. When the Genie greets you and asks you
to say your first and last name, log in as any user.
4. Perform the following tasks for each user to check the system’s name
recognition:
• Issue a command from the badge that names that user.
For example, say “Call John Smith.”
• Issue a command from the badge for each alternative spoken names.
For example, say “Play Messages from Johnny Smith”.
• Issue a command from the badge that names the user and the
department.
For example, say “Call Lin in Tech Support”.
• Test the identifying phrase, if you have defined one.
For example, say “Call John Smith on the third floor”.
Make a list of the names that the system fails to recognize, or confuses with
some other name.
5. Click the Groups button on the navigation bar to see the list of groups.
The Add, Edit, and Delete Groups page appears and displays a list of groups.
152 ··· Vocera Configuration Guide
6. Use the badge to check the system’s name recognition for each group, as
follows:
• Test the group name
• Test the group member name-singular
• Test the group member name-plural
• Test the alternative group name
Make a list of the names that the system fails to recognize, or confuses with
some other name.
7. If the system failed to identify any user or group names, use the
Administration Console to make sure the name is spelled correctly.
• If the name is not a common English name or seems difficult to
pronounce, try adding a phonetic spelling as a variant. For example, you
might spell Bauer as “Bower”. The variant should be added as an
alternate spoken name.
• If the name is consistently interpreted as another name in the database, it
may be that the two names are too close for the recognition engine to
differentiate between them reliably.
To see if this is the problem, temporarily alter the second name through
the Users page of the Administration Console so it does not conflict, and
then try the problem name again. If the problem name is now recognized
consistently, the names were too close for the speech recognition engine.
Otherwise, the system is just having difficulty with your pronunciation of
the name.
• If the names are too close, differentiate them by requiring that one of the
users be called by the first name and department, first name and last
initial, by a nickname, or an identifying phrase. Communicate any such
changes to all users.
• If the system is having trouble with the pronunciation, and supplying a
phonetic spelling as an alternate spoken name does not help, it may mean
that a custom dictionary entry is required. Contact Vocera Customer
Support ([email protected]).
8. If necessary, use the badge to check the system’s name recognition for each
site. For example, say “Call Maya Shui in Santa Cruz.”
Setting Up Users and Groups ··· 153
To send messages to users and groups:
1. Log in to the Administration Console.
The default user ID/password is Administrator/admin.
2. Click the Users button on the navigation bar.
The Add, Edit, and Delete Users page appears and displays a list of users.
3. Press the Call button on a badge. When the Genie greets you and asks you
to say your first and last name, log in as any user.
4. Use the badge to send a message to individual users.
For example, say “Send a message to Randy Cochran”.
5. Log in as the message recipient and make sure the message was recorded
properly.
For example, log in as the recipient and say, “Play messages”.
6. Use the badge to send a message to a group.
For example, say “Send a message to Tech Support”.
7. Log in as a group member and make sure the message was recorded
properly.
For example, log in as a group member and say, “Play messages”.
To back up the system configuration:
1. Log in to the Administration Console.
The default user ID/password is Administrator/admin.
2. Click the Maintenance button on the navigation bar.
The Backup page appears.
3. Click the Backup button.
Vocera displays a dialog box indicating that your data is being backed up,
then prompts you when the back up is complete.
4. Click OK to close the dialog box.
See Maintaining the Server on page 223 for complete information.
154 ··· Vocera Configuration Guide
Managing User Profiles
Adding new users to the system and updating information for existing users are
two primary tasks of a Vocera system administrator. When you add a user (or
when a user self-registers), the Vocera system creates a profile for that user in
the Vocera server database.
You can use any of the following methods to add user profiles to the Vocera
system:
• To manage one user profile at a time, work with the Users page in the
Administrations Console.
• To save time when adding a large number of users, import them directly
from a CSV (comma separated value) file to the Vocera database.
• To allow users to add themselves via the User Console, see Allowing Users
to Register Themselves on page 162.
After a user has had some time to work with the badge, you may need to edit
the user’s profile to add features that may be useful or remove features that the
user does not want. In addition to a user’s name and contact information, the
profile stores user preferences, such as which Genie persona will prompt the
user, whether warning tones are played when the badge has a low battery, or
when the user has a new voice or text message.
The following topics describe how to manage user profiles:
• Before You Add Users on page 156
• Enabling Login/Logout Voice Commands on page 157
• Recording Name Prompts for a User on page 158
• About Users and Telephone Numbers on page 159
• Managing the Inner Circle on page 160
• Allowing Users to Register Themselves on page 162
• Removing User Profiles on page 162
Managing User Profiles ··· 155
Before You Add Users
Complete the following tasks before you add users to the system:
1. If necessary, create individual sites so you can select them when you create
each new user.
Create individual sites only if you one Vocera server supports users at
multiple physical locations. Otherwise, leave the Site field blank and Vocera
will assign the user to the Global site automatically.
2. Create departments and other groups so you can select them when you
create each new user.
3. Develop a systematic method for assigning a unique login name to each
user. Users enter their own login names to access the User Console, and
they enter the login names of other users to send an email message from a
mail client to a badge.
When you enter names into the system, use the character set of the locale.
For example, Celine would not be pronounced the same way in French as
Céline. It may therefore be necessary to add alternate spoken names (for
example, "Sailine") or new dictionary entries.
One possible strategy for assigning login names is to make them the same
as existing email addresses, but without the domain reference. For example,
if a user’s email address is [email protected], the login name
could be zrohina.
Another possibility is to combine the initial of the first name and the full last
name of a user to create a login name. For example, if a user’s name is zami
rohina, the login name could be zrohina.
You can use any combination of alphanumeric values to create a login
name. Pure alphabetic values are typically easier for users to remember.
However, in certain situations, you may need to use numeric or
alphanumeric values for login names.
For example, Vocera uses the login name as a PIN to uniquely identify users
to a nurse call management system. if you are integrating Vocera with a
nurse call management system that requires numeric or alphanumeric PINs,
you can provide these values as user login names.
156 ··· Vocera Configuration Guide
Enabling Login/Logout Voice Commands
Voice commands for logging in and out from a badge are enabled and disabled
via the Preferences page of the System screen in the Administration Console.
The commands work like this:
• If no one is currently logged in from a particular badge, the badge LCD
displays “Logged Out.” When a user presses the Call button on that badge,
the Genie prompts the user with a greeting, such as “Good morning. Please
say your first and last names.”
The system logs the user in when the user responds with a name the Genie
recognizes. The badge LCD displays the user’s name, and the user's profile is
updated to reflect the Badge ID for that badge.
If voiceprints are enabled, the Genie may ask a user logging in to repeat the
first and last name or to recite a series of digits as part of the authentication
process. If the user’s voice is not recognized, the login will be rejected.
• If a user is already logged in to a badge, the badge LCD displays that user’s
name. The user or anyone else can press the Call button and say, “Log out”
to log out the current user. The badge LCD displays “Logged Out.”
If users share badges, you should enable Login/Logout Voice Commands.
If each user is permanently assigned a badge, you may wish to disable Login/
Logout Voice Commands. In this case, you must manually set the Badge ID for
each user in the Edit User dialog box on the Users page of the Administration
Console.
Managing User Profiles ··· 157
Recording Name Prompts for a User
If you record a name for a user, the recorded name is played when the Genie
needs to say the user’s name; for example, when the user logs in, when the
Genie confirms a call to the user, and when a call is announced.
If a user does not have a recorded name, the Vocera server uses its text-tospeech software to announce the user’s name. Your system can process only a
certain number of text-to-speech operations at one time. To ensure that users do
not experience delays, you may want to record users’ names as you add the
individuals to the system. You can then encourage the new users to record their
names in their own voices when it is convenient for them.
To record a name prompt for a user:
1. Log in with a badge.
2. Press the Call button, wait for the Genie to answer, and then say, “Record a
name for user’s name.” (For example, “Record a name for Mary Hill.”)
The Genie will prompt you to record variations of the user’s proper name.
Note: If multiple sites, users, groups, locations, and address book entries have
the same name or alternate spoken name, you can record a name prompt for
only one of them.
158 ··· Vocera Configuration Guide
About Users and Telephone Numbers
If your site has the telephony integration option enabled, entering telephone
numbers for users provides a wide range of connectivity between the badge, onand off-site telephones, and pagers.
You can provide any of the following telephone numbers when you add users to
the Vocera system:
Telephone Number
Description
Desk phone or
extension
Allows a user to forward or transfer calls from a badge to a
desk phone.
In addition, outside callers can connect to a user’s badge by
entering the user’s desk extension at the Vocera Genie
prompt, instead of saying the user’s name.
Finally, this number also allows a user who pages anyone
from a badge to receive the return phone call on the badge.
Cell phone
Allows a user to forward calls from a badge to a mobile
phone.
Home phone
Allows a user to forward calls from a badge to a home phone.
It also allows a user to take advantage of the “Call My
House” address book entry.
Pager
Allows a user to receive calls on a pager from other badge
users who issue the “Page” voice command.
If you do not enter values for these numbers, the Genie informs users who try to
access these features that the number is not available.
You must set permissions to allow users to forward calls to telephones and to
allow users to have toll or toll-free pager numbers.
Managing User Profiles ··· 159
Managing the Inner Circle
In Vocera, the inner circle refers to a small set of names that an individual user is
most likely to contact. The inner circle improves speech recognition because
users are statistically more likely to contact that small set of names than they are
to contact names outside that set. Each user has his or her own inner circle that
may include the names of other users, groups, and address book entries.
For example, the Genie may have trouble distinguishing between the
phonetically similar commands “Call Phil Rains” and “Call Phil Ray.” If Phil Rains
is in the inner circle of a user who issues this Call command, the Genie gives
preference to the “Call Phil Rains” interpretation. Similarly, if Phil Ray is in the
inner circle of another user, the Genie gives preference to the “Call Phil Ray”
interpretation for that user.
Users can continue to contact parties outside their inner circle. When users want
to contact someone outside their inner circle whose name is phonetically similar
to someone in their inner circle, they can spell the name, use a department to
qualify it, or use an alternate spoken name.
For example, if a user wants to contact Levon Crowder, but the phonetically
similar name Lee von Krauder is in the inner circle, the user can give preference
to the intended interpretation by spelling the name (Call C-R-O-W-D-E-R) or
referencing a department (Call Levon Crowder in Pediatrics) in the command.
The following topics describe how to manage the inner circle:
• Enabling the Inner Circle
• Adding Members to the Inner Circle
• Removing Members from the Inner Circle
Enabling the
Inner Circle
Vocera enables the inner circle functionality by default. You can change this
system preference in the Inner Circle section of the Preferences page of the
System screen in the Administration Console. Additional settings in that section
specify whether to include department members automatically and whether to
maintain inner circle membership through automatic adaptation.
160 ··· Vocera Configuration Guide
Adding
Members to the
Inner Circle
Each user’s buddies (private address book entries that a user can reference in
voice commands) are always included in the user’s inner circle. In addition, you
can use any combination of the following techniques to add members to a user’s
inner circle:
• Automatic adaptation
A system preference specifies whether to include a name in the inner circle
when the name is recognized in a voice command. For example, if a user
issues the command “Call Amy Wong,” and Amy Wong is not already in the
Inner Circle, the Genie prompts the use to confirm the name, then adds it to
the Inner Circle. If Amy Wong is already a member of that user’s inner circle,
the Genie connects the call immediately without prompting.
• Department configuration
A system preference specifies whether to include the names of a user’s
fellow department members in that user’s inner circle data. For example, if a
user is in the Tech Support department, you can specify to automatically
include all members of Tech Support in that user’s inner circle.
• Explicit configuration
You can use the Administration Console to add the names of users, groups,
and address book entries to any user’s inner circle explicitly. Users can also
maintain membership through the User Console.
Removing
Members from
the Inner Circle
You cannot remove a user’s buddies from the inner circle. You can remove any
other members as follows:
• Enable aging to clean up inner circle members that have been added
through automatic adaptation when they have not been mentioned in a
voice command recently. You can specify the number of days that elapse
before aging occurs and the time of day when aging removes the members.
You can also use the Administration Console to remove members that were
added through automatic adaptation.
• Turn off the system preference to remove all department members. You
cannot remove department members individually.
• Use the Administration Console to remove members that were explicitly
added. Users can also add and remove members through the User Console.
Managing User Profiles ··· 161
Allowing Users to Register Themselves
When you check Self Registration in the Preferences page of the System tab
north Administration Console, people can use the User Console to add
themselves to the Vocera system. Each person who registers is given one of the
available user licenses.
To allow users to register themselves:
1. Specify permissions for the “Everyone” group and the defaults that you
want to assign to all users. After users register, they can change their
announcement settings and other options.
2. Enable Self Registration on the Preferences page. To do this, click System in
the navigation bar, click the Preferences tab, and then check Self
Registration.
3. Assign the login names yourself. To make login names more predictable, it is
best to give users the login names you want them to have, rather than allow
them to create login names themselves.
4. Give new badge users the User Console URL, and tell them to click the
Register button.
The User Console URL is http://vocera_machine_name/console/index.jsp,
where vocera_machine_name is the name or IP address of the Vocera server.
5. Tell users that all names they enter in the User Console must begin with a
letter, and the names may also contain spaces, apostrophes, and hyphens.
No other characters, such as numbers, are allowed. If they want to include a
number, they must spell it (two instead of 2, for example).
Removing User Profiles
A Vocera system may be licensed for a certain number of users. For this reason,
when individuals no longer work for your company or institution, it is important
to delete their profiles from the system. Use the Users page of the
Administration Console to remove user profiles, as described in the Vocera
Administration Console Reference and the Administration Console’s online help.
162 ··· Vocera Configuration Guide
Working with Groups
Vocera groups organize users into roles such as Floor Manager, Cashier, Nurse,
Cardiologist, Executive, and so forth. Groups provide different features to
different members of an organization:
• To the administrator, groups provide a streamlined way to manage user
permissions based on their roles.
• To the badge user, groups provide a way to communicate with users based
on their roles.
• To the organization itself, groups provide a way to direct and forward call
traffic based on user roles.
Group membership can change over time, and in some environments it can
change frequently. A user can be a member of multiple groups at the same time.
You can add or remove group members either with voice commands or through
the Administration Console. Users can remove themselves from groups, and if
you enable the proper permission, they can add themselves or other users to
groups.
The following topics will help you work with Vocera groups:
• About Group Properties and Permissions on page 164
• About Groups and Sites on page 165
• Group Managers on page 165
• About the Built-In “Everyone” Group on page 166
• About the “Panic” Group on page 167
• About the “Operator” Group on page 167
• Recording a Name for a Group on page 167
• About Groups and Departments on page 168
• About Call Forwarding on page 170
• About Instant Conferences on page 171
Working with Groups ··· 163
About Group Properties and Permissions
When you create or modify a group, you specify values for properties that
control the way the group behaves and the way users interact with it. Groups
provide a way to leave messages for many users at once (“Send a message to
Nurses Assistants”), or to call someone who fits a specific role (“Call a sales
person”), belongs to a certain department (“Call Accounts Receivable”), or has
some other skill or authority that the caller requires (“Call a manager”).
The following list summarizes the properties available in Vocera groups:
• Identification properties specify the group name and contact information.
• Speech recognition properties specify the names that users can speak to call
a group, and the names that the Genie can use to prompt users.
• Scheduling properties specify how calls are routed to members when users
call a group.
• Department properties determine whether a group is used as a department,
and optionally specify a telephony PIN or Cost Center ID for accounting
purposes.
• Membership properties define the set of users who are members in a group
and the order in which Vocera routes calls to them, if you specify the round
robin scheduling option.
• Forwarding properties determine the flow of calls from one group to
another, potentially through your entire organization.
• Permissions determine the ability of users to issue certain commands or
perform specific operations.
• Conference properties determine which users are in an instant “push-totalk” conference that simulates the behavior of a walkie-talkie.
In some situations, it is useful to include a group as a member of another group.
For example, in a health care environment, you may want the Nurse group to
include the Head Nurse and Charge Nurse groups. In this example, Head Nurse
and Charge Nurse are nested groups.
The permissions that you specify for a group flow down to the members of any
nested groups. For example, if the Communications group is nested within the
Marketing group, the members of Communications receive the permissions that
you specify for Marketing, unless you revoke a specific permission for
Communications.
While it is often beneficial to nest groups to establish permissions and call flows,
it is usually better to avoid nesting groups that are used as departments.
164 ··· Vocera Configuration Guide
About Groups and Sites
Groups are associated with a home site, which represents the home site where
the users in the group typically work. For example, cardiologists who work at the
Society Hill site could belong to a group called Cardiologists whose home site
was also Society Hill.
Members of a group do not have to belong to the same site, however. For
example, you could create an Anesthesiology group with members from the
Society Hill site, the West Philadelphia site, and the Old City site. In this situation,
you typically assign the Cardiology group to the Global site to indicate that its
members span multiple sites.
If you are not working in a multi-site deployment, you can associate all your
groups with the Global site.
Group Managers
Every group that you create can be managed by members of a different group.
For example, a member of the Charge Nurse group may need to manage the
Code Blue group in a hospital, or a member of the Head Cashier group may
need to manage the Cashier group in a retail store.
Members of a group with management capabilities can perform any of the
following tasks through the Groups page of the User Console:
• Add members to the managed group
• Remove members from the managed group
• Change the scheduling options of the managed group
• Change the forwarding options of the managed group
• Specify a group whose members can add themselves to the managed group
Refer to the Vocera User Console Guide for more information.
Members of a group with management capabilities can also use voice
commands to add and remove members from the managed group. For example,
a member of the Head Nurse group that manages the Code Blue group could
say “Add Lin Ma to Code Blue.” Refer to the Vocera User Guide for more
information.
Members of a group with management capabilities do not have administration
permission. Only a system administrator can create a group, delete it, or assign
permissions to it.
Working with Groups ··· 165
About the Built-In “Everyone” Group
Vocera automatically creates and maintains a special group called Everyone for
each of your sites:
• If you have a single-site deployment, Vocera maintains the Everyone group
for the Global site.
• If you have a multi-site deployment, Vocera maintains a separate Everyone
group for each physical site as well as an Everyone group for the Global site.
Whenever you add a new site to the system, Vocera automatically creates an
Everyone group for that site. When you create or delete a user, Vocera adds or
removes that user from the appropriate Everyone group automatically. By
default, the Groups tab in the Administration Console displays an Everyone
group for each of your sites.
You cannot delete an Everyone group, add members to it, remove members
from it, or change the site it is associated with—only Vocera maintains these
features. You can, however, specify all the other properties for an Everyone
group, such as its call forwarding properties, its scheduling, and its permissions.
An Everyone group is a special group—the Vocera administrator creates and
deletes all other groups through the Administration Console.
The order of names in a group affects the group scheduling properties, which
determine how calls are routed. Because Vocera automatically adds new users to
the end of the Everyone group, you may want to manually rearrange this order
to optimize scheduling.
The Everyone group determines the default set of permissions for the users at
its site.
The “Everyone
Everywhere”
Group
Vocera also creates an Everyone Everywhere group when you complete your
installation or upgrade. Each Everyone group is a member of Everyone
Everywhere.
Like an Everyone group, Vocera automatically maintains membership in
Everyone Everywhere, but you can specify all other properties for it. Unlike
the Everyone group, there is only one Everyone Everywhere group, and it is
associated with the Global site.
The Everyone Everywhere group determines the default set of permissions for
users across all sites.
166 ··· Vocera Configuration Guide
About the “Panic” Group
You can optionally create a group named Panic and populate it with members—
either groups or users—who can always respond quickly in an emergency.
If a Panic group exists, a user can initiate an urgent broadcast to by clicking the
Call button twice. Everyone in the Panic group hears the caller immediately—no
speech recognition or Genie interactions are necessary.
About the “Operator” Group
You can optionally create a group named Operator and populate it with
members—either groups or users—who are always available, such as store
operators or the front desk.
Vocera provides quick access to an Operator group for callers who dial the
Vocera hunt group or DID number. If a caller enters 0 (for Operator) when
prompted by the Genie, Vocera directs the call to the Operator group. If you
specify a forwarding number for the Operator group, you can redirect the call if
no group member is available. For example, you can forward calls to the 0
extension on your PBX.
Recording a Name for a Group
When the Genie interacts with users, it often speaks the name of a group. For
example, the Genie speaks the name of a group or the singular member name
when it prompts users who call the group to leave a message for group
members. The Genie can synthesize name prompts for a group. However, if you
record name prompts yourself, the Genie can use them to provide more natural
sounding speech and to avoid mispronunciations.
Note: If multiple sites, users, groups, locations, and address book entries have
the same name or alternate spoken name, you can record a name prompt for
only one of them.
To record a name for a group:
1. Log in with a badge as a user with system administration privileges or as a
member of a group with management permission for this group. See
Permissions for Administrators on page 176 and Group Managers on
page 165 for details.
2. Press the Call button, wait for the Genie to answer, and then say, “Record a
name for group name.” (For example, “Record a name for Nursing.”)
The Genie will prompt you to record variations of the group name.
Working with Groups ··· 167
About Groups and Departments
A department group, also called a department, is a group that corresponds to a
department within the organization using the Vocera system. By designating a
group as a department, you provide accounting features and speech recognition
enhancements that are not available to other Vocera groups.
For example, suppose the Midtown Medical Center has units such as Radiology
and Pediatrics. If your Vocera configuration has corresponding groups, it makes
sense to designate those groups as departments. Users at Midtown Medical
Center can then take advantage of the extended accounting and speech
recognition features of these Vocera departments.
To help you identify a department group, Vocera displays an asterisk (*) next to
its name throughout the Administration Console.
Department
Membership
In Vocera, department membership determines the following features:
• Inner circle membership.
• How users can be referenced in voice commands.
• PINs for telephony access.
• The cost center ID.
• The data set used by many of the reports created by the optional Vocera
Report Server.
In general, departments provide the greatest benefit when you:
• Do not nest department groups.
Vocera treats nested departments systematically, as explained below, but
users who do not understand that system may perceive unexpected results.
For example, users may be uncertain about which Vocera department they
are in, who is in their inner circle, and which sets of people should show up
in various reports created by the Vocera Report Server.
• Create relatively small departments.
By default, department membership helps determine inner circle
membership that is used for speech recognition. The inner circle is most
useful when it is small.
Size is a relative concept, however. For example, if 100 members are in a
user’s inner circle, and the database contains only 500 users, the inner circle
will not be very effective. However, an inner circle of that size could be very
effective with a 5000-user database.
168 ··· Vocera Configuration Guide
If you do need to create nested departments, Vocera determines department
membership as follows:
• Immediate members of a department group are always members of that
department.
• When a department group contains other groups, the members of the
nested groups are members of the nearest department above them, unless
the nested group itself is a department.
For example, suppose Pediatrics is a department group that contains the
Pediatric Nurses group, and suppose Maddie Hall is an immediate member of
Pediatric Nurses.
• If Pediatric Nurses is also a department group, Maddie is a member of the
Pediatric Nurses department, but not the Pediatrics department.
• If Pediatric Nurses is not a department group, Maddie is a member of the
Pediatrics department.
Make sure you consider any unintentional side-effects if you create nested
department groups.
Departments
and Accounting
Implementing Vocera departments optionally allows an organization to
distribute system usage and telephony costs among different divisions:
• A telephony PIN authorizes members of a Vocera department to make
phone calls and allows an organization to charge departments for those
calls.
• A Cost Center ID enables Vocera to track system usage by department and
potentially allows an organization to charge its departments for relative
usage.
Departments
and the Inner
Circle
In Vocera, the inner circle refers to a small set of names that an individual user is
most likely to contact. Vocera automatically favors members of a user’s inner
circle when the Genie is unsure of a name referenced in a voice command. The
inner circle improves speech recognition because users are statistically more likely
to contact that small set of names than they are to contact names outside that
set. Each user has his or her own inner circle.
You can optionally configure the Vocera server to include department members
in each user’s inner circle automatically.
Working with Groups ··· 169
Departments
and Voice
Commands
Departments are a convenient way to let badge users contact each other with
voice commands. When a caller specifies a department in a voice command,
Vocera can:
• Differentiate among users with the same first and last names.
For example, if your organization has two individuals named John Smith, a
user can issue the voice command “Call John Smith in Tech Support.”
• Identify a badge user when the caller knows the first name and department,
but not the last name, of other people in the organization.
For example, a caller can issue the voice command “Call John in Tech
Support.”
In addition to departments, you can also use identifying phrases to differentiate
among users. However, departments are usually easier to set up than identifying
names, and more natural for users to work with.
About Call Forwarding
The groups you set up determine the call forwarding that is possible within your
organization. When you create or modify a group, you can specify any of the
following call forwarding options:
• No forwarding
• Forward to another badge, group, or address book entry
• Forward to another number
The forwarding option you choose determines the action Vocera takes when no
member of a group is available to receive a call.
For example, suppose a call—either an internal call from a badge, or an external
call, when telephony is enabled—is directed to the Plumbing group in a retail
store. If no one in the Plumbing group is available, you may want to forward the
call to the Hardware group. Similarly, if no one in Hardware is available, you may
want to forward the call to a general group that is always available, such as
Customer Support.
Do not confuse the call forwarding options you can specify for a group with the
call forwarding options an individual user can specify. Call forwarding for a
group determines the call flow through an entire organization; call forwarding
for an individual user is more of a courtesy or convenience.
170 ··· Vocera Configuration Guide
Call forwarding for a group occurs only when a call is directed to a group (“Call
Plumbing”), not to one of its members (“Call Roberta Verdi”). If Roberta Verdi is
a member of Plumbing, calls that are placed directly to her are not forwarded to
Hardware—her own calls are forwarded according to the options she specifies
through voice commands or the User Console. Similarly, when a call is placed to
a group, the group properties determine where the call is forwarded, and the
forwarding options specified by individual users are ignored.
You can indirectly configure Vocera to forward a group’s calls to a pager. For
example, you may have a “Doctor on call” group that frequently needs calls
forwarded to a pager. In this situation, create an address book entry for the
pager, and forward the groups calls to the address book entry.
About Instant Conferences
The conference feature provides badges with “push-to-talk” communication
that simulates the behavior of a walkie-talkie. Users in a conference can instantly
communicate with others in the same conference by pressing and holding the
Call button—they don’t have to wait for speech recognition or Genie
interactions.
The Vocera System Software supports a practically unlimited number of
conferences. Many conferences can be active at the same time, with different
users in each one. Users within the same conference can interact with one
another.
Every group has a conference associated with it. For example, if your site has
groups called Managers and Cashiers, users automatically have access to
conferences with those names. Although users can be in multiple groups
simultaneously, each user can be in only one conference at any time.
Users do not need to be group members to use a conference; however, they
need the Conference permission to enter or leave a conference. Users can issue
voice commands or access the User Console to enter or leave conferences. You
can use the Administration Console to assign users to conferences. Group
managers can also maintain the user list for the conferences associated with
their groups.
Working with Groups ··· 171
172 ··· Vocera Configuration Guide
Working with Permissions
Permissions control the ability of users to issue certain commands or to perform
specific operations. For example, you can allow certain users to make toll calls,
but prevent other users from doing so.
For ease of use and flexibility, you assign Vocera permissions to groups of users—
you do not assign permissions to individuals, and you do not override
permissions on an individual basis. When you add or edit a group, the
Permissions page in the Groups screen of the Administration Console lets you
manage the permissions that you grant or deny to the members of that group.
Because you specify permissions at the group level, you can associate a
permission with a role, rather than an individual user. For example, suppose you
want the floor manager who is working at any given time to have the Record
Name Prompts for Another User permission. You can create a group called
Manager On Duty and grant the group that permission. Then the current floor
manager will always have the Record Name Prompts for Another User
permission, regardless of who that user is.
For a complete description of each permission, see “Permissions Reference” in
the Administration Console’s online help or in the Vocera Administration
Console Reference.
This chapter presents the following topics:
• Accumulating Permissions on page 174
• Default Permissions on page 174
• Revoking Permissions on page 175
• Permissions for Administrators on page 176
Working with Permissions ··· 173
Accumulating Permissions
The complete set of permissions available to any single user is the total list of
permissions granted to all the groups of which he or she is a member. For
example, suppose the Staff group grants the Call Internal Numbers and the Call
Toll-Free Numbers permissions and the Manager group grants the Call Toll
Numbers permission. If a user is a member of both Staff and Manager, that user
has the Call Internal Numbers, Call Toll-Free Numbers, and Call Toll Numbers
permissions.
Permission
Staff
Call Internal Numbers
Yes
Yes
Call Toll-Free Numbers
Yes
Yes
Call Toll Numbers
Manager
Yes
Staff & Manager
Yes
Changes to permissions take effect immediately. For example, if you edit the
Manager group to grant the Have VIP Status permission, everyone in the
Manager group immediately gains that permission. You do not need to apply the
permission or require users to log in again.
Default Permissions
Because the Everyone Everywhere group includes every user on the system,
this group establishes the default permissions for all your Vocera users. For
example, suppose you want to grant every user across all sites certain basic
permissions, such as Call Internal Numbers and Call Toll-Free Numbers. You can
specify these permissions in the Everyone Everywhere group, then grant
additional permissions by providing membership in additional groups.
Similarly, an Everyone group establishes a set of default permissions for the
specific site it is associated with. For example, suppose you want to grant all sites
the Call Internal Numbers and Call Toll-Free Numbers permissions, but grant only
the North Beach site the Call Toll Numbers permission. Grant Everyone
Everywhere the Call Internal Numbers and Call Toll-Free Numbers permissions,
then grant the North Beach Everyone group the Call Toll Numbers permission.
If your Vocera deployment does not implement multiple sites, you can ignore the
Everyone Everywhere group and set default permissions in the Global
Everyone group.
174 ··· Vocera Configuration Guide
Permissions for
the “Everyone”
Group
When you first install or upgrade Vocera, you have only a single Everyone
group—the one associated with the Global site. The permissions you assign to
this Global Everyone group act as a template and provide an initial set of
permissions for successive site-specific Everyone groups.
For example, suppose the Global Everyone group has the Record your
Voiceprint and Erase your Voiceprint permissions. When you create the North
Beach site, Vocera automatically creates an Everyone group for North Beach
and gives it the Record your Voiceprint and Erase your Voiceprint permissions.
You can change the initial set of permissions that new Everyone groups acquire
to enforce different policies at different sites. The permissions of the Global
Everyone group act only as a convenient template, providing an initial set of
permissions for the site-specific Everyone groups that follow.
Do not confuse the permissions template provided by the Global Everyone
group with the permissions users inherit from the Everyone group for their site.
Users do not inherit permissions from the Global Everyone group; they inherit
permissions from their site-specific Everyone groups.
See About the Built-In “Everyone” Group on page 166 for more information.
Revoking Permissions
The Revoke button cancels a permission that a user would otherwise have by
virtue of membership in another group. You can revoke a permission to ensure
that a group of users does not have a specific permission, even if membership in
another group grants that permission.
For example, if your site issues courtesy badges to visitors, you can use Revoke
to make sure that visitors do not have certain Vocera permissions. Suppose the
Everyone group grants the Call Toll Numbers permission. Because Vocera
automatically adds all users to the Everyone group, visitors are also granted that
permission automatically.
To disable this permission for visitors, you can create the Guest group, then
revoke the permission for Call Toll Numbers in it. When you add all visitors with
courtesy badges to the Guest group, they will have all the permissions granted
by membership in Everybody except Call Toll Numbers, which is revoked by
membership in Guest.
Working with Permissions ··· 175
Permissions for Administrators
The Vocera server has a built-in administrative password, as described in
Passwords on page 221. In addition to using this password, you can assign the
Perform System Administration permission to one or more groups of users.
When you grant a group permission to administer the Vocera system, its
members are:
• Given full administrative privileges in the Administration Console
• Automatically granted every other Vocera permission
Members of a group with the Perform System Administration permission can log
in to the Administration Console using their Vocera login name and password,
instead of using the default Administrator account.
The Perform System Administration permission overrides any permissions
revoked by membership in other groups, unless the Perform Server
Administration permission is revoked itself. For example, if a change to corporate
policy prohibits toll calls, you can revoke Call Toll Numbers in the Everybody
group. However, the Perform Server Administration permission overrides this
setting, and enables administrators to make toll calls.
176 ··· Vocera Configuration Guide
Using the Address Book
The address book is a convenient way for badge users to contact places and
people who are not badge users. For example, if people in your organization
frequently need to contact local businesses, you can enter the business names
and nicknames in the address book. Then, getting a price quotation from
Northwestern Hardware can be as simple as using the badge to say “Call
Northwestern.”
The distinction between whether a name is maintained in the address book or in
the directory is usually transparent to badge users. In either situation, badge
users can simply say “Call Michelle Spangler” to reach the person to whom they
want to speak.
Address book entries are available to anyone who has access to the Vocera
system; they do not require permissions. For example, a user does not need the
Call Toll Numbers permission to call an address book entry that you define with
a toll phone number.
Incoming phone calls from outside the Vocera system that reach the Genie
prompt (“Please say the name of the group or person you want to reach”) can
ask for an address book entry also.
Using the Address Book ··· 177
Using Voice Commands with Address Book Entries
Badge users can issue the following voice commands with address book entries:
• Call
• Conference
• Forward
• Invite
• Learn
• Send Email
• Send a Page
• Transfer
• Unlearn
Recording a Name for an Address Book Entry
The Genie speaks the name of address book entries when interacting with users.
For example, the Genie speaks the name of a person or place in the address
book when confirming a call that a user makes to an address book entry.
The Genie can synthesize name prompts for an address book entry. However, if
you record name prompts yourself, the Genie can use them to provide more
natural sounding speech and to avoid mispronunciations.
To record a name for an address book entry:
1. Log in with a badge as a user with system administration privileges. See
Permissions for Administrators on page 176 for details.
2. Press the Call button, wait for the Genie to answer, and then say, “Record a
name for person or place name.” (For example, “Record a name for Poison
Control.”)
The Genie will prompt you to record the name.
Note: If multiple sites, users, groups, locations, and address book entries have
the same name or alternate spoken name, you can record a name prompt for
only one of them.
The Address Book for the Global Site
If you have multiple sites, you can use the address book associated with the
Global site to store contact information for people and places that users from all
sites need to access.
178 ··· Vocera Configuration Guide
The address book associated with the Global site is equally accessible to all users,
regardless of the physical site they are working at. That is, if an entry is in the
global address book, users at any site can access it by name only—they do not
have to specify the site name.
For example, suppose all the sites in your organization frequently place orders
from a wholesaler outside the company. Because the wholesaler is not within the
Vocera system, you should place its contact information in an address book; in
addition, because users at any site may need to call the wholesaler, its
information belongs in the address book for the Global site.
In this situation, any user can call the wholesaler by saying “Call Spangler
Supplies”. If Spangler Supplies were associated with a site-specific address book
such as San Jose, users outside San Jose would have to say, “Call Spangler
Supplies in San Jose”.
See About the Global Site on page 205.
Sample Address Book Entries
Dialing macros let you create certain address book entries that are not possible
otherwise. This section shows you how to use the address book to take
advantage of these dialing macros. It also provides examples of some other
address book entries that you may want to implement.
Calling Home
You can use the built-in dialing macros to create a single address book entry that
any badge user can access to call home.
Vocera interprets the %H dialing macro in this example as the value you
provided in the Home Phone field on the User Information page of the Add
User dialog box. A user can also enter or change the Home Phone value in the
User Console.
To create an address book entry for home:
1. Click the Address Book tab in the navigation bar.
The Add, Edit, and Delete Entries page appears.
2. Click the Add New Entry button.
The Add New Entry dialog box appears.
3. Check Place in the Entry Type section.
4. Enter a name such as My House in the Name field. Make sure you use at
least two words in the name for optimal speech recognition.
Using the Address Book ··· 179
Do not use the name “My Home” for this address book entry. Badge users
can issue the command “Forward calls to my home phone” to forward calls
when they are off-site. If users instead accidentally forward calls to the
address book entry called “My Home”, other badge users who call them will
experience unexpected results. Users should not forward calls to an address
book entry that evaluates to the %H macro.
5. Enter %H in the Phone field.
6. Click Save to close the dialog box and save the entry.
When a user issues the voice command “Call My House,” Vocera automatically
dials the specific user’s home phone number.
Night-Bell
Pickup
If your PBX uses a special code for after-hours pickup, create an address book
entry for a place—for example, call it Night Bell or After Hours—and enter the
code in the Phone field. See Working with Phone Numbers on page 118 for
information about the characters you can enter in the Phone field.
180 ··· Vocera Configuration Guide
User Console Overview
The User Console is a browser-based application that enables users to display
and edit profile information and settings stored on the Vocera server. The User
Console provides additional capabilities, such as the ability to create buddies,
forward calls, send text messages to badge users, and manage groups. Users can
log in to the User Console from any computer that meets the criteria specified in
Administration and User Console Requirements on page 26.
This chapter presents the following topics:
• Logging In to the User Console
• Granting Access to the User Console
To learn more about the User Console, see the Vocera User Console Guide. You
can also log in to the User Console and click the
button on any page.
Logging In to the User Console
As the system administrator, you can log in to the User Console as any user on
the system and change the settings for that user.
To log in to the User Console:
1. Open an Internet Explorer browser window.
2. Enter the following URL to open the User Console:
http://vocera_machine_name/console/index.jsp
where vocera_machine_name is the name or IP address of the Vocera
server. When you log in from the Vocera server computer,
vocera_machine_name is localhost.
3. In the Login Name field, enter the login name of the user whose settings you
want to change.
4. In the Password field, enter the Administrator Password.
User Console Overview ··· 181
5. Click Log In. The User Console displays the Personal Information page of
the user whose login name you used.
Granting Access to the User Console
To allow a user to access the User Console:
1. Give the user the login name and password that you entered in the user’s
profile. As an alternative, you can enable Self Registration (see Allowing
Users to Register Themselves on page 162), which allows users to enter
this information themselves.
2. Tell the user to open an Internet Explorer browser window and enter the
User Console URL:
http://vocera_machine_name/console/index.jsp
where vocera_machine_name is the name or IP address of the Vocera
server. When you log in from the Vocera server computer,
vocera_machine_name is localhost.
182 ··· Vocera Configuration Guide
Speech Recognition
The following topics describe Vocera features and settings that control speech
recognition:
• Voiceprint Authentication on page 185
Describes how to use voiceprint authentication as implemented by Vocera.
Voiceprint authentication verifies the identity of a badge user by the sound
of his or her voice.
• Troubleshooting Speech Recognition on page 189
Describes techniques that administrators can use to resolve speech
recognition problems.
Speech Recognition ··· 183
184 ··· Vocera Configuration Guide
Voiceprint Authentication
Voiceprint authentication verifies the identity of a badge user by the sound of his
or her voice. A voiceprint is analogous to a fingerprint in that it captures
biometric properties that distinguish one person from another. Voiceprints
encapsulate the physical characteristics of a person's vocal tract, as well as
certain characteristics of the person’s manner of speaking.
Vocera's use of voiceprints prevents a person from logging in under another
person's name. Potential imposters are thereby prevented from accessing
someone else's voice and text messages, or from issuing commands for which
they are not authorized. In addition, the system can be configured to
authenticate a user's voice when a “Play Messages” command is issued. This
check prevents an unauthorized user from playing voice messages on a badge
that was inadvertently left logged in by another user.
To set up voiceprint authentication, enter settings on two screens in the
Administration Console:
• Use the System screen to enable voiceprint authentication.
• Use the Groups screen to grant voiceprint-related permissions.
Voiceprint authentication requires that users first record their voiceprints in a
simple training session. A user can initiate a training session by issuing the
“Record Voiceprint” command. Alternatively, an administrator can configure the
system to initiate the session the next time a user logs in.
When a user has been enabled for authentication and has recorded a voiceprint,
the system challenges that user to recite some digits each time he or she logs in.
The system compares the user's voice with the recorded voiceprint. If the
comparison succeeds, the login is permitted; if it fails, the login is denied. The
digits are chosen randomly on each login session to thwart attacks in which an
imposter makes a clandestine recording of a user’s voice.
This chapter presents the following topics:
• Voiceprint Commands on page 186
Voiceprint Authentication ··· 185
• Recommendations for Using Voiceprints on page 186
• Troubleshooting Voiceprints on page 187
Voiceprint Commands
The following voice commands are employed in conjunction with voiceprint
authentication. For a more detailed description of their use, see the User's
Guide:
• Record Voiceprint
• Erase Voiceprint
• Erase Voiceprint Of <User Name>
These commands are all conditioned upon enabling of the voiceprint mechanism
as described above, as well as the corresponding permissions.
Note: If users have already recorded a voiceprint, they cannot re-record the
voiceprint unless they also have the Erase Your Voiceprint permission.
Recommendations for Using Voiceprints
Leave voiceprints disabled until your users have gained familiarity with the rest of
the system. At that point, you can activate authentication from the User
Registration page of the System screen in the Administration Console.
If the users who require authentication fall into existing groups—for example,
the Doctors group and the Nurses group—you can set the necessary voiceprint
permissions as properties of Doctors and Nurses. If existing groups also include
users who do not require authentication, you may want to set up a special group
that includes only users who require authentication.
Important: Users must record voiceprints in a quiet environment.
Authentication accuracy degrades for voiceprints recorded in the presence of
noise.
Because authentication entails a certain degree of user inconvenience, you
should enable authentication only for those users who need it.
• If authentication is needed for only a few people in the organization, it is
best to leave Auto-Record Voiceprints disabled and instruct those few
people to record their voiceprints explicitly using the Record Voiceprint
command.
• If, on the other hand, everyone will need to be authenticated, it may be
better to turn on Auto-Record to force users to record a voiceprint at the
time of their next login. The disadvantage of Auto-Record is that it may
prove distracting if it intrudes at an inopportune time.
186 ··· Vocera Configuration Guide
As an added security measure, you can prevent users from erasing or rerecording their voiceprints. To do so, revoke the Erase Your Voiceprint permission
in groups that have authentication permissions. This action prevents an imposter
from picking up a logged-in badge and erasing or re-recording the voiceprint of
the user the badge is logged in as. An administrator with the Erase Voiceprint of
Another User permission can still erase voiceprints.
Important: After users have recorded their voiceprints, they should try logging
in and out several times to ensure that they can be properly authenticated.
Troubleshooting Voiceprints
Voiceprint authentication is generally less tolerant of noisy environments and
improper placement of the badge relative to the mouth than is command
recognition. The following are some suggestions that are known to improve
authentication accuracy. These suggestions apply both to recording a voiceprint
and to logging in:
• Avoid noisy environments
• Speak distinctly and somewhat more loudly than usual when reciting the
digits
• Do not hold the badge up to the mouth while speaking
• Do not walk while speaking
• If a headset is to be used for logging in, it must also be used for voiceprint
recording
Users should record their voiceprints in the same room as the one in which they
log in, and should try to speak using the same rhythm in both cases.
If a user is having trouble logging in, the problem is often that the voiceprint was
not recorded properly, or simply did not “take.” In such cases, erase the
voiceprint (allowing the user to log in) and have that user re-record it.
Occasionally, someone will be able to log in immediately after recording, but
may have trouble doing so at a later time (when his or her voice has changed
slightly). Once again, re-recording the voiceprint is recommended in these cases.
Voiceprints are not foolproof. It is normal for users to have to attempt to log in
more than once on occasion. Similarly, if two users sound very much like, one
may be able to impersonate the other.
Voiceprint Authentication ··· 187
188 ··· Vocera Configuration Guide
Troubleshooting Speech Recognition
This section describes techniques for resolving speech recognition problems.
• Using Departments to Improve Speech Recognition on page 189
• Using Speech Recognition Pages on page 190
• Recording Utterances on page 191.
• Specifying Fixed-length Numbers on page 198
• Speech Recognition Tips for Badge Users on page 199
Using Departments to Improve Speech Recognition
A department group, also called a department, is a group that corresponds to a
department within the organization using the Vocera system. Departments are a
convenient way to let badge users contact each other with voice commands.
When a caller specifies a department in a voice command, Vocera can:
• Differentiate among users with the same first and last names.
For example, if your organization has two individuals named John Smith, a
user can issue the voice command “Call John Smith in Tech Support.”
• Identify a badge user when the caller knows the first name and department,
but not the last name, of other people in the organization.
For example, a caller can issue the voice command “Call John in Tech
Support.”
You can optionally configure the Vocera server to include department members
in each user’s inner circle automatically. The inner circle improves speech
recognition because users are statistically more likely to contact that small set of
names than they are to contact names outside that set. Each user has his or her
own inner circle.
See About Groups and Departments on page 168 for more information
Troubleshooting Speech Recognition ··· 189
Using Speech Recognition Pages
When a user asks the Genie to contact a person or place in the address book
(“Call Poison Control”), the speech recognition software in Vocera tries to match
the spoken name to a name in a user profile or an address book entry. People
may not always use the name that you entered, however, or they may
pronounce it in a way that the Vocera system does not recognize. For example,
you may identify an address book entry as “Easton Medical Clinic,” but users
may refer to it as “The medical clinic.”
Several pages in the Administration Console provide fields where you can enter
data that can help you prevent speech recognition problems in these situations.
For example, when you add or edit a user profile or an address book entry, you
can enter data in the Alternative Spoken Names and Identifying Phrase
fields.
Alternative
Spoken Names
Use the Alternative Spoken Names field to provide alternative spoken names,
phonetic spellings, or additional identifying information so the speech
recognition software can recognize variations of a name:
• If users refer to a person or place in various ways, enter each variation in a
different field.
For example, enter Bob Jones and Rob Jones in addition to Robert Jones.
Similarly, enter a nickname that the person or place is known by, such as
Skip Jones.
The names you provide must begin with a letter. They may contain spaces,
apostrophes, and hyphens, but no other characters are allowed. If you want
to include a number, you must spell it (two instead of 2, for example).
• If people use an acronym or initials to refer to an address book entry, provide
them as a series of letters separated by spaces.
For example, if users refer to Easton Medical Clinic as EMC, enter E M C.
Similarly, enter A C Hoyle for A.C. Hoyle.
• If a name has an unusual or confusing pronunciation, enter a name that is
spelled as it is pronounced.
For example, if the system does not recognize the name Jodie Dougherty,
you could enter Jodie Dockerty.
• If users refer to a person by his or her title, provide the full spelling of the
title.
For example, enter Doctor Shostak instead of Dr. Shostak.
190 ··· Vocera Configuration Guide
Identifying
Phrase
Use the Identifying Phrase field to enter a description that distinguishes a
person or place from another with the same name.
For example, if there are two users named Mary Hill on the system, but one is on
the third floor and the other is on the first floor, you might enter Mary Hill in the
Main Cafeteria as the Identifying Phrase for one user and Mary Hill in the North
Wing Cafeteria for the other.
As a result, when callers asks for Mary Hill, the Genie prompts them, “Do you
mean Mary Hill in the Main Cafeteria?” If the caller says “no,” the Genie then
prompts, “Do you mean Mary Hill in the North Wing Cafeteria?”
Vocera can also use departments to differentiate among users with the same
names. Departments are usually easier to set up and use than identifying
phrases, but are applicable only if the users belong to different departments.
Recording Utterances
Vocera lets you selectively record the spoken utterances of individuals when they
interact with the Genie. You can use these recorded utterances to help identify
and resolve speech recognition problems.
Vocera lets you record utterances during the following Genie interactions:
• Interactions that logged-in users have with the Genie.
See Recording Badge User Utterances on page 193.
• Interactions that users have with the Genie while trying to log in.
See Recording Login Utterances on page 196.
• Interactions that telephone callers have with the hunt-group Genie.
Recording Telephone System Utterances on page 196.
Important: Vocera records only the utterances individuals make while
interacting with the Genie, not the utterances they make during personal
interactions with other individuals.
Vocera creates a directory named \call-log at the root of the drive where the
Vocera server is installed, creates subdirectories for the year, month, and day,
then records utterances in subdirectories under this structure. Each subdirectory
under the day represents a single Genie session.
Troubleshooting Speech Recognition ··· 191
The directory path looks similar to the following:
\call-log\2004\06June\09\10-39-22-vserver-2-1983-Barb_Miller
This sample directory path contains the following information to help you
identify the call:
Directory Path
Fragment
Description
\call-log
The main directory for utterances at the root of the Vocera
drive.
\2004
The subdirectory for the year.
\06June
The subdirectory for the month, as follows:
• The month in numeric format
• The name of the month
\09
\10-39-22
The subdirectory for the day.
The time of the Genie session, as follows:
• The hour, in 24-hour format
• The minute
• The second
vserver
The host name of the Vocera server.
2-1983
Speech port information for internal Vocera purposes.
Barb_Miller
Information to identify the individual, as follows:
• If the Genie interaction is with a user who is logged in, you
see the first and last names of the user from the user profile
you created in the Administration Console.
• If the Genie interaction is with an individual who is trying to
log in, you see nothing here.
• If the Genie interaction is with a person outside the Vocera
system who dialled the hunt group or DID number, you see
the word PHONE.
Each Genie session subdirectory contains .WAV files for the user utterances and
a log file. The log file contains information that Vocera can use to troubleshoot
problems. However, the .WAV files frequently reveal information you can use to
troubleshoot speech recognition problems.
192 ··· Vocera Configuration Guide
Note: Recording utterances can potentially create a very large subdirectory
structure on the Vocera server. Vocera will continue recording until you stop it or
until one gigabyte of free space remains on the drive (the default threshold set
as the value of TestFreeDiskRecordUtterances in
\vocera\server\properties.txt). Use utterance recording selectively.
Recording
Badge User
Utterances
When users are in a group that has the Record Utterances permission, Vocera
records all the utterances they make during Genie interactions and saves them as
audio files in the .WAV format. You can then listen to the .WAV files to
determine the problems specific users have, such as speaking the wrong forms
of commands, mispronouncing user and group names, holding the badge while
speaking, and so on.
You should record the utterances only of the specific individuals who are having
voice recognition problems, not all the users in an existing group. Create a
special group that is only used for troubleshooting voice recognition issues and
assign it the Record Utterances permission. You can then add users who have
voice recognition problems to this group. After you solve the problems these
users have, remove them from the group so you don’t continue to record them.
For example, you can create a group called Voice Recognition and assign it the
Record Utterances permission. When users report voice recognition problems,
add them to the Voice Recognition group. Whenever users in the Voice
Recognition group issue a command or respond to a Genie prompt, Vocera
records their spoken utterances.
Here are some problems you can typically resolve by listening to the .WAV files in
the Genie utterance subdirectories:
Symptom
Possible Cause
Solution
You hear puffing,
breathing, or distorted
sounds while user is
speaking.
The badge is too close to
the user’s mouth,
possibly because the
user is holding it instead
of wearing it.
Make sure the user wears the
badge with an attachment
that keeps it 6-8 inches from
the chin.
You hear muffled
sounding speech.
The user is holding the
badge and covering the
microphone.
Make sure the user wears the
badge with an attachment
that keeps it 6-8 inches from
the chin.
You hear distant
sounding speech.
The badge is too far
away from the user’s
mouth.
Make sure the user wears the
badge with an attachment
that keeps it 6-8 inches from
the chin.
Troubleshooting Speech Recognition ··· 193
Symptom
Possible Cause
Solution
You hear incorrect forms
of commands or
keywords that Vocera
does not recognize.
The user does not
remember the exact
form of the command.
Retrain the user with the
correct commands.
You hear incorrect user
and group names.
The user does not
remember or know the
exact name of the
person he or she is
calling.
Show the user how to call
other users with the first
name and department.
You hear
mispronounced user and
group names.
The user cannot say the
exact name of the user
or group accurately, or
the user has an accent
that Vocera cannot
understand.
Show the user how to train
the Genie to recognize his or
her own voice. See the
section called “Training the
Genie” in the Vocera User
Guide.
You hear very rapid
speech or unusual
pauses in the utterances.
The user has forgotten
introductory badge
training or has not
received it.
Retrain the user. Remind the
user to speak clearly and with
an even cadence for optimal
speech recognition.
You hear clipped words
at the beginning of a
command or reply.
The user starts issuing a
command or replying
before the Genie is
finished speaking.
Retrain the user. Remind the
user to wait for the Genie to
finish speaking before
replying.
Distribute supplementary
learning material, such as the
Vocera User Guide, the
Vocera Quick Reference
Guide, or the Vocera
Command Poster.
See About Groups and
Departments on page 168
for information about
creating departments. See
the section called “Calling
with Department Names” in
the Vocera User Guide.
When the Genie is speaking,
the badge is transmitting. If
the user interrupts the Genie,
the badge is not yet ready to
receive, and the beginning of
the user utterance is clipped.
194 ··· Vocera Configuration Guide
Symptom
Possible Cause
Solution
You hear talking after
the command or reply is
finished.
The user is not pausing
at the end of a
command or reply, but is
possibly trying to speak
before the badge
connection has been
established, or speaking
to someone in a
conversation unrelated
to the badge command.
Retrain the user. Remind the
user to pause briefly after
issuing a command or reply.
Network problems.
Make sure the access point
coverage is adequate for
voice in the location where
the problem occurred.
You hear dropouts or
choppy sounding voice.
The Genie uses a pause at the
end of a command or reply as
a cue that the command is
complete. Continuing to
speak effectively creates a
lengthy command that the
Genie cannot interpret.
Make sure the DTIM value of
access points on the badge
subnet is set to 1. See the
section called “Configuring
the Wireless Infrastructure”
in the Vocera Installation
Guide.
Troubleshooting Speech Recognition ··· 195
Recording
Login
Utterances
Before users log in, they don’t have Vocera permissions. Consequently, you
cannot use the Record Utterances permission to capture speech recognition
problems that occur during login interactions.
To troubleshoot these login problems, you can optionally record all the
utterances users make when they interact with the Genie’s login prompts.
Vocera records these utterances in the subdirectory structure described in
Recording Utterances on page 191.
To record login utterances:
1. Open the \vocera\server\properties.txt file in a text editor.
2. Search for the following property:
TestRecordLoginUtterances
3. Set the value of the property to True.
4. Restart the Vocera server.
You must restart the Vocera server before changes you make in the
properties.txt file take effect.
You can resolve many login problems by listening to the .WAV files in the Genie
utterance subdirectories. These problems are the same as the problems that
appear for logged in users. See the table in Recording Badge User Utterances
on page 193 for information on how to troubleshoot these problems.
Make sure you record utterances only while you are trying to troubleshoot login
issues; otherwise, the subdirectory structure of recorded utterances will grow
extremely large. Set the value of TestRecordLoginUtterances back to false as
soon as you are done troubleshooting.
Recording
Telephone
System
Utterances
Telephone callers outside the Vocera system can place calls to user’s badges by
dialing the Vocera hunt group number (in an analog telephony integration) or
DID number (in a digital telephony integration). These callers hear the Genie
prompt, “Say the full name of the person or group you want to reach or enter
an extension.”
To troubleshoot problems with the telephony interface, you can optionally record
all the utterances phone callers make when they interact with the Genie at the
hunt group or DID number. Vocera records these utterances in the subdirectory
structure described in Recording Utterances on page 191.
196 ··· Vocera Configuration Guide
To record phone system utterances:
1. Open the \vocera\server\properties.txt file in a text editor.
2. Search for the following property:
TestRecordPhoneUtterances
3. Set the value of the property to True.
4. Restart the Vocera server to make changes in properties.txt take effect.
Here are some problems specific to telephony that you can typically resolve by
listening to the .WAV files in the Genie utterance subdirectories:
Symptom
Possible Cause
Solution
You hear dropouts in the
utterances.
Network problems
between the Telephony
server and the Vocera
server, if they are
running on separate
computers.
Work with the IT
administrator to confirm the
network connection is
functioning properly.
You hear static or
distortion.
The trunk line coming
into the PBX from
outside has problems.
If you hear static or distortion
on all calls coming into the
PBX from outside —not just
calls into the hunt group or
DID number—you may be
experiencing problems in the
trunk line. Notify the PBX
administrator of the situation.
You hear distant
sounding speech.
A speaker phone is too
far away from the caller
or a cell phone is
breaking up.
If you notice low levels on
only some outside calls, the
phones placing these calls
may be at fault. If specific
callers regularly have these
problems, suggest that they
call in from a different phone.
An inadequate volume
level is set in the PBX.
If you notice low levels on all
outside calls, the PBX volume
may be at fault. Compare
volume of telephone
utterances to badge user
utterances. If telephone
utterances are distinctly
quieter, the PBX volume level
may be too low.
Troubleshooting Speech Recognition ··· 197
Problems that appear in badge user utterances also appear in telephone system
utterances. For example, you may hear clipped speech from an individual talking
before the Genie is finished speaking.
Because individuals who call the hunt group or DID number are typically outside
the Vocera system, the training that solves these problems may not be possible.
If you can identify specific callers who regularly have these problems, suggest the
solutions described in Recording Badge User Utterances on page 193.
Make sure you record utterances only while you are trying to troubleshoot
telephony issues; otherwise, the subdirectory structure of recorded utterances
will grow extremely large. Set the value of TestRecordPhoneUtterances back
to false as soon as you are done troubleshooting.
Specifying Fixed-length Numbers
Speech recognition problems can occur when people use the badge to send and
respond to pages from inside and outside lines. The following properties specify
the number of digits in fixed-length phone extensions and pager numbers.
Fixed-length numbers can improve speech recognition, because they eliminate
from the grammar all possibilities that are not of the specified length.
Property
Description
TelExtensionLength
Specifies the number of digits in an extension.
The default value is 0, which means that a
variable length is accepted. A value of 1 through
7 specifies an extension of the given length.
TelPagerNumberLength
Specifies the number of digits in an internal
pager system number.
The default value is 0, which means that a
variable length is accepted. A value of 1 through
7 specifies a pager number of the given length.
It can be used in conjunction with the Page
Number voice command (for example, “Page
number 1234”).
198 ··· Vocera Configuration Guide
Speech Recognition Tips for Badge Users
Here are some things a badge user can do to improve speech recognition:
• Make sure the badge is close enough to your mouth.
The microphone at the top of the badge must be directed toward your
mouth, and it should be no closer than 6 inches and no farther than 8
inches (15 to 20 cm) away from your mouth.
• Wait for the Genie to finish speaking before giving a command or
responding to a prompt.
If you press the Call button and begin speaking immediately, your command
may not be recognized. You must wait for the Genie to greet you before you
give a command. (The Genie will say “Vocera” or will play a tone, or both,
depending on your badge settings.)
Sometimes, when the Genie gives a prompt that requires a “yes” or “no”
answer (for example, “Should I save that message?”), the Genie will not
“hear” you if you answer too quickly. Try waiting a moment before
answering. You can also press the Call button to answer “yes,” or press the
Hold/DND button to answer “no.”
• Speak a valid command in the proper format.
The Genie recognizes specific commands, and these must be in the format
verb-noun. Say the command first, and then give the details. Here are a few
examples:
“Call Jim Olsen.”
“Record a greeting.”
“Block all calls”
“Play old messages.”
• Train the Genie.
If you think the Genie doesn’t recognize a name or a command because of
the way you pronounce it, you can train the Genie to understand you.
To train the Genie, press the Call button, wait for the Genie to answer, and
then say “Learn name” or “Learn command.” You can also say “Learn
group name” or “Learn location name” to train the Genie for other names.
For detailed instructions, see “Training the Genie” in the Vocera User Guide.
• Use the Speak or Spell feature.
In addition to speaking the full name, you can spell either the first name, the
last name, or both names to contact users, groups, or address book entries.
Troubleshooting Speech Recognition ··· 199
For example, you can use any of the following commands to place a call to
the user or address book entry Jesse Hart:
• Call Jesse Hart
• Call J-E-S-S-E
• Call H-A-R-T
• Call J-E-S-S-E-H-A-R-T
200 ··· Vocera Configuration Guide
Sites and Locations
The following topics describe features and settings for working with sites and
locations:
• Working with Sites on page 203
Describes how to use sites. In Vocera, a site is a distinct physical location that
shares a centralized Vocera server with one or more other physical locations.
• Working with Locations on page 209
• Describes how to use locations, names of places to which you assign one or
more access points.
Sites and Locations ··· 201
202 ··· Vocera Configuration Guide
Working with Sites
In Vocera, a site is a distinct physical location that shares a centralized Vocera
server with one or more other physical locations. Site profiles associate users and
groups with specific physical locations.
For example, suppose your organization wants to provide badges to users in
three physical locations: New York, Philadelphia, and Washington. You can
support these users with either of the following deployments:
• A multi-site deployment, with one Vocera server and individual New York,
Philadelphia, and Washington sites.
• A multi-server deployment, with a separate Vocera server for each physical
location.
Use the Sites screen in the Administration Console to define and manage site
settings. When a site and the Vocera server are in different time zones, you can
use the Administration Console to specify a time zone for the site.
Note: Do not configure site settings if your installation has only one physical
location—by default, all Vocera data is associated with a special site named
Global. Similarly, do not configure site settings if you have a multi-server
deployment.
If you are deploying one Vocera server to support multiple sites, site
configuration is very important. Each site that you define contains its own users,
groups, locations, and address book entries. You can set up all your users and
groups in the Global site, then transfer them to individual sites later when you
define them. It may be more convenient, however, to define your sites in
advance and assign users and groups to their appropriate home sites.
A multi-site deployment provides seamless badge connectivity across multiple
physical locations—users can communicate with other users, groups, and
address book entries at their local site as well as at any other site. If users roam
from site to site, the Vocera server knows which site they are visiting and can
direct calls to their badges at that site.
Working with Sites ··· 203
Groups, locations, and address book entries at different sites can have the same
name. For example, each site can have its own “Code Blue” group, its own
“Cafeteria” location, and its own “The Local Pharmacy” address book entry.
If you do not want to associate a user, group, or address book entry with a
specific site, you can assign it to the Global site—a virtual site that does not
represent any physical location. For example, you can set up a Global
Administrators group with members from each of the individual physical sites.
Site Terminology
Vocera uses the following terminology to refer to the sites at your installation:
• The home site is the usual physical site of a user, group, location, or address
book entry. See About the Home Site on page 204.
• The current site identifies the physical site where a user is currently located.
See About the Current Site on page 205.
• The Global site is a virtual site that does not correspond to any physical site.
You can assign users, groups, locations, or address book entries to the
Global site if you do not want to associate them with a physical site. See
About the Global Site on page 205.
The current site may influence the way a user logs in or interacts with voice
commands. See the “Communicating with Multiple Sites” chapter in the Vocera
User Guide.
About the
Home Site
Every user, group, location, and address book entry has a home site associated
with it. The home site represents a slightly different notion for each of these
entities:
For this entity...
The home site represents...
User
The physical site where he or she typically works.
Group
The physical site where its members typically work. The
members of a group may be from different home sites;
however, the group itself is still associated with a home site.
Location
The physical site where its access point is installed.
Address book entry
The physical site of the users who typically call it.
204 ··· Vocera Configuration Guide
You can optionally specify a home site when you create one of these entities. If
you do not explicitly specify a home site, Vocera assigns one as described in
Using Site Filters on page 206. The home site of each user, group, location,
and address book entry appears in lists throughout the Administration Console
to help you identify the entity.
About the
Current Site
Because users can roam from one physical location to another, their current site
may be different from their home site. The current site of a user is the physical
site where he or she is located at any given time. The current site of a location,
group, or access point is always the same as its home site.
In most situations, a user’s current site and home site are identical. A user’s
current site changes only when the user visits another physical site. You can
examine the current site of all users logged into the Vocera server by viewing the
Badge Status Monitor page, as described in Monitoring Badge Activity on
page 91.
About the
Global Site
Every installation of the Vocera server has at least one site—the Global site.
Vocera automatically creates the Global site. You cannot create or delete the
Global site manually; however, you can perform any other maintenance to it. For
example, you can transfer users to and from the Global site, delete groups in the
Global site, and so forth.
You can use the Global site in either of the following situations:
• If you do not implement multiple sites, Vocera automatically associates all
your entities with the Global site.
• if you do implement multiple sites, but you do not assign certain users,
groups, locations, or address book entries to a specific home site, Vocera
automatically assigns them to the Global site.
When you upgrade from a version of Vocera that did not include site support, or
when you load data with a .CSV file that does not specify site information,
Vocera automatically assigns all your entities to the Global site.
If you are not going to implement multiple sites, leave all your data assigned to
the Global site. If you are going to implement multiple sites, you can transfer
data from the Global site to one or more individual sites. See Transferring Site
Data on page 206.
Important: By default, every access point on your network is associated with
the Global site. If your deployment implements multiple sites, you must assign a
location name to each access point and associate each of these locations with a
site. Otherwise, the Vocera server always thinks that the Global site is your
current site.
Working with Sites ··· 205
Using Site Filters
Most pages in the Administration Console have a Site Filter field you can use to
specify whether to display the data for all sites or for one specific site. The value
that you specify in the Site Filter persists until you change it or log out of the
Administration Console.
The Site Filter determines the default site that a user, group, location, or
address book entry is assigned to during data entry. However, you can change
this default value during data entry.
Transferring Site Data
You can transfer any combination of users, groups, locations, and address book
entries from one site to another. For example, if your organization has closed its
New York office and is relocating some employees to the Philadelphia office, you
can transfer those users from the New York site to the Philadelphia site.
Similarly, if you have been working with a single site installation of Vocera and
are now expanding to support multiple sites, you can transfer your existing
users, groups, locations, and address book entries from the default Global site to
one of the new sites you are creating.
Vocera prevents you from transferring a group or location in the source site that
already has the same name as a group or location in the destination site. Vocera
transfers all the other entities you specified and then indicates that errors
occurred, as described later in this section.
The home site of a group and the home sites of its members are not necessarily
the same. Consequently, transferring a group to a different site does not
automatically transfer its members.
Note: When you transfer users to a new site, the Badge Status Monitor
immediately displays their new site in the Current Site column, even if the users
are still physically located at the original site. When the users reboot their
badges, the Badge Status Monitor displays their new current site.
Recording a Name for a Site
When the Genie interacts with users, it often speaks the name of a site. The
Genie can synthesize the necessary name prompts. However, if you record name
prompts yourself, the Genie can use them to provide more natural-sounding
speech and to avoid mispronunciations.
206 ··· Vocera Configuration Guide
To record a name for a site:
1. Log in with a badge as a user with system administration privileges. See
Permissions for Administrators on page 176 for details.
2. Press the Call button, wait for the Genie to answer, and then say, “Record a
name for site name.” (For example, “Record a name for Manhattan.”)
The Genie will prompt you to record the site name prompt.
Note: If multiple sites, users, groups, locations, and address book entries have
the same name or alternate spoken name, you can record a name prompt for
only one of them.
Working with Sites ··· 207
208 ··· Vocera Configuration Guide
Working with Locations
Locations are names of places to which you assign one or more access points.
When a badge connects to an access point, the Vocera server is able to report
the corresponding location. The location names also appear in the Badge Status
Monitor, replacing the MAC address of the access point.
The Locate, Where Is?, and Where Am I? voice commands allow users to find
the physical location of a particular user or member of a group. If you configure
locations for your system, the Genie can respond with information about a
user’s whereabouts (“Roswell Adams is near the First Floor Cafeteria,” for
example). If you do not configure locations, the Genie will answer with the MAC
address of the access point instead, which is not useful to most badge users
(“Lucy Crysek is near access point zero zero four zero nine six four five B D four
E,” for example).
Important: By default, every access point on your network is associated with
the Global site. If your deployment implements multiple sites, assign a location
name to each access point and associate each of these locations with a site.
Otherwise, the Vocera server always thinks that the Global site is your current
site.
To configure locations, it is important that you:
• Use a map of your facility to define the physical boundaries of your
locations, and note which access points fall within the boundaries of each.
• Enter location names in the Locations page of the Administration Console,
and choose neighbors for each location.
• Assign one of the preconfigured locations to each access point. You can do
this in the Administration Console, but the easiest way to assign locations is
to do a Walking Tour using the badge.
Working with Locations ··· 209
After you create locations, you can define adjacent or nearby locations as
Neighbors. When a user issues a command to locate the nearest group member,
the Vocera server searches only the current location of the requester, plus the
locations you have defined as neighbors. Thus, the system uses neighbors to
determine who is nearest to a particular location.
However, the badge, like other wireless devices, does not always associate with
the access point that is physically closest. Depending upon building construction,
a badge can associate with an access point situated on a different floor. The
badge can only offer approximate user locations; consequently, general location
names may be more useful than specific ones.
Defining Locations
To define locations, use the Locations page in the Administration Console.
Before you begin, obtain a map of the facility and note where the access points
are installed. (This may already have been done as part of the site survey
performed before the Vocera system was installed.)
Based on the physical layout and access point coverage, you can draw
boundaries and assign location names to different areas of the facility. You can
then refer to this map when configuring locations in the Administration Console.
Location information will be most accurate if you draw the boundaries around
sizeable, contiguous areas. Vocera badges, like most wireless devices, remain
connected to a particular access point as long as the signal is acceptable, even if
the user moves closer to a different access point. As a result, a user who crosses
the boundary of one location may still be connected to an access point that is
located in an adjacent location. If you choose well-defined locations, such a
wing of a large building or a floor of a smaller building, you minimize the effects
of the signal retention.
After you create the location map, you can add locations and choose their
neighbors in the Vocera Administration Console. Then you can record a name
prompt for each location. (See Recording a Location Name on page 211.)
210 ··· Vocera Configuration Guide
Recording a Location Name
When the Genie interacts with users, it may need to speak the name of a
location. The Genie can synthesize the necessary name prompts. However, if you
record name prompts yourself, the Genie can use them to provide more natural
sounding speech and to avoid mispronunciations.
To record a name prompt for a location:
1. Log in with a badge as a user with system administration privileges. See
Permissions for Administrators on page 176 for details.
2. Press the Call button, wait for the Genie to answer, and then say, “Record a
name for location name.” (For example, “Record a name for the
Cafeteria.”)
The Genie will prompt you to record variations of the location name.
Note: If multiple sites, users, groups, locations, and address book entries have
the same name or alternate spoken name, you can record a name prompt for
only one of them.
Working with Locations ··· 211
212 ··· Vocera Configuration Guide
Server Administration
The following topics describe features and settings that affect the Vocera server
as a whole:
• Using the Vocera Control Panel on page 215
Describes the Vocera Control Panel, which displays server status messages
and lets you control the server.
• About the Administration Console on page 219
Describes the Administration Console, a browser-based application that lets
you manage a Vocera system.
• System Settings on page 221
Describes the System screen of the Administration Console, which provides
four pages of settings that establish defaults for the entire Vocera
Communications System.
• Maintaining the Server on page 223
Describes tasks you can perform using the Maintenance page in the
Administration Console.
• Email Setup on page 231
Describes how you can enable users to receive email messages and display
them on their badges.
• Working With Locales on page 235
Describes how to use locales. A locale determines the language of
installation, administration console, tools, online documentation, and other
components of the product. It also determines country-specific hardware
settings, such as radio channel selections.
Server Administration ··· 213
214 ··· Vocera Configuration Guide
Using the Vocera Control Panel
When the Vocera server starts running, the following windows appear on the
server computer’s desktop:
• The Vocera Control Panel, that displays status messages and lets you control
the Vocera server.
• A command window called \vocera\server\launcher.exe, that displays
status messages as Vocera processes are started and stopped.
Important: Do not close the Vocera Control Panel or the command window.
Closing these applications will shut down the server. You can block access to the
control panel or hide it as described in Preventing Access to the Vocera
Server Control Panel.
You can use the Control Panel to perform the following tasks:
• Stopping and Restarting the Vocera Server
• Shutting Down Vocera
• Controlling the Display of Events
• Preventing Access to the Vocera Server Control Panel
Stopping and Restarting the Vocera Server
In certain situations, you may need to stop and restart the Vocera server. For
example, if you want to use the server to update the properties in all your
badges at the same time, you must stop the Vocera server and then restart it.
You may want to restart the server when only a few people are using the
system. When you stop the server, users will not be able to communicate with
their badges until you start it again. The server stops and starts fairly quickly, so if
few people are using the system, there will be very little interruption.
Note: You can also use the Maintenance tab in the Administration Console to
stop and start the Vocera server.
Using the Vocera Control Panel ··· 215
Use the following procedure to stop and start the Vocera server only. See
Shutting Down Vocera on page 216 for information about stopping Vocera
and all the related services that Vocera uses, such as Tomcat and Nuance.
To stop and restart the Vocera server:
1. Choose Stop from the Run menu in the Vocera Control Panel, or hold
down the Alt key and press Q.
The Control Panel displays the messages Shutting down server and
Server exiting to indicate that the server has stopped.
2. Choose Start from the Run menu in the Vocera Control Panel, or hold
down the Alt key and press S.
The Control Panel displays the messages Ready and TX ServerStarted to
indicate that the server has started.
Shutting Down Vocera
When you shut down Vocera, you stop the Vocera server and all the related
services that it uses, such as Tomcat and Nuance.
To shut down Vocera:
1. Choose Exit from the Run menu in the Vocera Control Panel, or hold down
the Alt key and press X.
The Control Panel displays a dialog box, asking you to confirm that you
want to shut down Vocera.
2. Click OK.
The dialog box closes, and the Control Panel also closes. The command
window displays messages indicating that Vocera and its related services are
stopping.
When Vocera and the services have stopped, the command window closes.
Shutting Down
Vocera when
the Control
Panel is hidden
You can use the Windows Services dialog box to stop the Vocera Launcher
service when the Control Panel is hidden. As this service stops, it also shuts
down all the services related to Vocera, such as Tomcat and Apache.
Note: If the Vocera Telephony service command window is hidden, you can shut
it down in the same manner.
To shut down Vocera when the Control Panel is hidden:
1. From the Windows Start menu, select Settings/Control Panel/
Administrative Tools/Services.
216 ··· Vocera Configuration Guide
The Services dialog box appears, displaying the list of installed Windows
services.
2. Right-click the Vocera Launcher service and select Stop.
3. The Vocera Launcher service stops, shutting down Vocera and its related
services.
Controlling the Display of Events
For convenience, the Vocera Control Panel displays a continuously scrolling list of
system events, letting you view the system status at a glance. You determine the
level of detail that the Control Panel displays through settings that you make in
the menus. You can specify any of the following settings on the Display menu of
the Vocera Control Panel:
• Normal displays only the most significant system events in the Control
Panel. This is the default.
• Detailed displays all events in the Control Panel.
• Off displays no events in the Control Panel.
Vocera records all system events in the system log files, regardless of the setting
you make for the display of events. See the “Performing Server Maintenance”
chapter of the Vocera Administration Guide for information about using and
maintaining the log files.
Preventing Access to the Vocera Server Control Panel
After Vocera is up and running, you may want to prevent the Vocera Control
Panel from appearing on screen. For example, you can block access to the
Control Panel by logging off or hide the Control Panel to prevent people from
inadvertently disrupting service by interacting with it.
Note: If the Vocera Telephony Solution Software is installed, you can hide its
command window in the same manner. See Preventing Access to the
Telephony Control Panel on page 119.
Logging Off
and Blocking
Access
You can log off the computer that is running the Vocera server to prevent access
to the Vocera Server Control Panel.
To log off and block access to the Vocera Server Control Panel:
1. From the Windows Start menu, select Log Off.
A confirmation dialog box appears.
2. Click Yes.
Using the Vocera Control Panel ··· 217
Windows logs you off and blocks access to the Vocera Control Panel. The
Log on to Windows dialog box appears.
To log in again:
1. Enter your User name and Password in the Log on to Windows dialog box.
2. Click OK.
Windows logs you in and lets you access the Vocera Control Panel again.
Hiding the
Vocera Server
Control Panel
By default, the Vocera Launcher service allows the Vocera Control Panel and its
command window to appear on screen. You can disable the Allow service to
interact with desktop property in the Windows Services dialog box, which
hides the Vocera Control Panel and its command window. When this property is
disabled, Vocera runs in the background without displaying any windows. All
system events are still written to the log files, even though the Vocera Control
Panel is hidden.
To hide the Vocera Control Panel and its command window:
1. From the Windows Start menu, select Settings/Control Panel/
Administrative Tools/Services.
The Services dialog box displays the list of installed Windows services.
2. Right-click the Vocera Launcher service and select Properties.
The Vocera Launcher Properties dialog box appears. By default, the General
pane is visible.
3. Click the Log On tab.
The Log On pane of the Vocera Launcher Properties dialog box appears.
4. Uncheck the box labelled Allow service to interact with desktop.
5. Click OK.
The Vocera Launcher Properties dialog box closes, saving your changes.
6. Restart the computer for the new settings to take effect.
When the computer boots, Vocera starts, but the Vocera Control Panel and
its command window remain hidden.
218 ··· Vocera Configuration Guide
About the Administration Console
The Administration Console lets you manage a Vocera system. It is a browserbased application, accessible from any computer on the network. The console
URL is
http://vocera_ip_address/console/adminindex.jsp
where vocera_ip_address is the numeric IP address of the Vocera server. If
you are logging in from the computer that is running the Vocera server, the IP
address is 127.0.0.1.
Vocera supports a built-in administrator account, with the user ID
Administrator and the default password admin. You can also create a group
that has administration permission. Users in this group can access the
administration console using their own log in name and password.
About the Administration Console ··· 219
After you log in, you can display console screens by clicking buttons in the
navigation panel on the left side of the console. Screens contain tabs you can
click to display pages, and pages contain fields and buttons you can use to enter
and edit data.
The Vocera Administration Console Reference provides task-based instructions
for logging in and using the Administration Console.
220 ··· Vocera Configuration Guide
System Settings
The System screen of the Administration Console provides pages that establish
defaults for the entire Vocera Communications System. These settings are siteindependent—they affect the entire Vocera system.
Page
Description
License
Information
The License Information page of the System screen lets you specify a
company name and provides basic information about your Vocera
and Telephony server licenses.
Passwords
The Passwords page of the System screen lets you maintain two
default passwords:
• The Administrator Password provides access to the built-in
administrator account.
By default, the Administrator Password is admin. The login
name for this built-in administrator account is Administrator.
• The Initial User Password provides a default password for each
new user account. Users can specify this password to gain access
to the User Console the first time they log in. Users can then
change this initial password.
By default, the Initial User Password is blank. That is, users do
not have to provide a password the first time they log in to the
User Console.
In addition to using the built-in administrator account, you can also
create a group that has administration permission. Users in this
group can access the administration console using their own log in
name and password.
Preferences
The Preferences page of the System screen establishes default
settings for the entire Vocera Communications System. These
settings are site-independent—they are basic preferences that
determine how the entire Vocera system operates. Preference
categories include Login Options and Inner Circle.
System Settings ··· 221
Page
Description
Sweep
The sweep feature lets the Vocera server clean up voice messages,
text messages, email messages, and inner circle entries at regular
intervals that you specify. When a sweep occurs, the Vocera server
performs the following tasks:
• It deletes messages regardless of whether the user has played
them or read them.
• It deletes inner circle entries that have been added through
automatic adaptation if a user has not referenced them since the
previous sweep.
The sweeps are permanent—users cannot access messages or inner
circle entries after the Vocera server sweeps them.
Independent of the sweep mechanism, the Vocera server also limits
the combined total of text and email messages each individual can
store or save.
• Each user can store up to 20 combined text and email messages
at a time. When a user receives a 21st message, the Vocera server
deletes the oldest unsaved message.
• Each user can save up to ten of the 20 stored messages.
222 ··· Vocera Configuration Guide
Maintaining the Server
The Maintenance section of the Administration Console helps you perform
routine Vocera maintenance and lets you make sure that your system continues
to operate smoothly. The following sections describe the maintenance tasks you
can perform in the Administration Console:
• Backing Up and Restoring Data on page 223
• Importing Data on page 224
• Exporting Data on page 227
• Updating the Vocera Database on page 227
• Working with Server Log Files on page 229
• Stopping and Starting the Vocera Server on page 230
Backing Up and Restoring Data
You should back up your data regularly to ensure its safety. Vocera lets you back
up your data manually at any time, or automatically, at a time and interval that
you specify. The backup operation does not stop the server or interfere with its
use; you can perform the operation at any time.
If you need to restore data, you can choose from any backup file you have
previously created. The restore operation briefly stops the server, empties all your
existing data, then completely restores data from the backup file. The restore
operation automatically logs out all your badges; users must log in again after
the restore completes.
The backup and restore operations preserve all system data, including
preferences, defaults, messages, and voice prints.
Maintaining the Server ··· 223
Vocera backs up your data to a file in the \vocera\backup directory. The file is
named with the following syntax, where <MonDD> is the three letter
abbreviation of the month followed by the day, and <HHMM> is the time in 24hour format:
backup-<MonDD>-<HHMM>.zip
For example, the following backup file was created on July 23rd, in the current
year, at 1:45 PM:
backup-jul23-1345.zip
Backing up system data and restoring it may solve many data corruption
problems. If you notice problems with your data and think that the database is
corrupt, try backing up your data and immediately restoring it.
Importing Data
When you enter data through the Administration Console, you use one of the
Add dialog boxes to specify all the related information for a single entry. For
example, to create a new user, you use the fields and tabs in the Add New User
dialog box to provide User Information, Speech Recognition, and Group
Membership data.
If you need to enter a large amount of the same kind of data at a single time,
however, it is faster to import it from a specially formatted CSV (comma
separated value) file. For example, when you first load the Vocera database, it is
often faster to import data for all your users from a single CSV file, rather than
to create each user individually in the Administration Console.
You can specify the same range of information in the CSV files that you can
when you create an entry in the Administration Console. Each line in a CSV file
represents a separate database entry. Within each line, commas separate the
values that qualify the entry.
For example, each line in the CSV file you use to import user data represents a
single user. Within each line, commas separate the values that you would enter
in the fields and tabs of the Add New User dialog box.
The following sections show you how to set up the CSV files and use the
Administration Console to load the data they contain:
• About the Templates on page 225
• Sites and Templates on page 226
• Validating and Importing Data on page 226
224 ··· Vocera Configuration Guide
About the
Templates
The installation program provides both templates that you use to create CSV files
and also sample CSV files in the \vocera\samples directory of the Vocera server
computer:
• The templates are in Microsoft Excel format. Use these templates to enter
the data you want to load, then save them in CSV format.
• The sample files are in CSV format. The CSV files contain representative data
that you can use for reference when you enter values in your spreadsheets.
The following table lists the templates and sample CSV files in the
\vocera\samples directory:
Type of Data
Template
Sample File
Users
users-template.xls
users.csv
Groups
groups-template.xls
groups.csv
Group Members
members-template.xls
members.csv
Locations
locations-template.xls
locations.csv
Access Points
accesspoints-template.xls
accesspoints.csv
Address Book Entries
addresses-template.xls
addresses.csv
Sites
sites-template.xls
sites.csv
A file called \vocera\samples\TemplateInfo.txt on the Vocera server
computer lists the fields in each template. Each column in a template
corresponds to a field in the Add dialog box. Create new rows in the template by
supplying appropriate values in the fields under each column. When you are
finished, delete the original place holder row, and save the template as a CSV
file.
To prepare a CSV file:
1. Open the appropriate template in Microsoft Excel.
2. Provide information for each entry you want to import on a separate row of
the spreadsheet. See the appropriate chapter in this guide for information
about the data you should provide.
For example, if you are importing user data, you provide information for
each user on a separate row of the users-template.xls spreadsheet. See
Managing User Profiles on page 155 for information about the data that
defines a user.
Maintaining the Server ··· 225
3. When you finish entering data, delete the row of column headings—you do
not want to load the headings into the Vocera database.
4. Save the spreadsheet as a CSV file.
Sites and
Templates
You reference site data in the templates in two different ways:
• To assign an entity you are creating to a site, use the Site column in the
template.
For example, to create a user called Lin Yao and assign her to the San
Francisco site, enter San Francisco in the Site column of userstemplate.xls.
• To qualify a value in a specific spreadsheet column by specifying its site, use a
colon to separate the value from the site name (Value:Site name).
For example, to specify that Maddie Hall at the Santa Cruz site is a member
of the Tech Support group at the Santa Cruz site, enter Maddie Hall:Santa
Cruz in the Member Name column and Tech Support:Santa Cruz in the
Group Name column of groupmembers-template.xls.
The following spreadsheet columns support the Value:Site name syntax:
• The Conference Group and Departments columns of userstemplate.xls.
If you do not specify a site, the value in the Site column is assumed by
default.
• The Member Name and Group Name columns of groupmemberstemplate.xls.
If you do not specify a site, the Global site is assumed by default.
• The Location Name column of accesspoints-template.xls.
If you do not specify a site, the Global site is assumed by default.
See the TemplateInfo.txt file in \vocera\samples directory for additional
information.
Validating and
Importing Data
After you have finished preparing the CSV files, you are ready to load the
database. Vocera lets you validate the data in your CSV file before you import it:
• When you validate data, Vocera examines each row in the CSV file to
confirm that it is formatted correctly. Vocera reports any errors, provides
details to help you correct the errors, and lets you fix the problems before
importing.
226 ··· Vocera Configuration Guide
• When you import data, Vocera loads each row in the CSV file that is
formatted correctly. Vocera flags any rows that have errors, reports the type
of error, and does not load the data in the problem rows.
Even if you import data without validating it, Vocera will not let you corrupt the
database with incorrectly formatted data. However, it is usually more convenient
to validate the data before importing it.
Exporting Data
You may occasionally want to export large sets of data from the Vocera
database to a CSV file. Exporting data is useful when you want to examine all
your data or make global changes that would be time consuming to make in the
Administration Console.
For example, suppose changes to the phone system caused your organization to
reassign desk extensions for all users. You can export the existing user data to a
CSV file, make the changes to desk extensions, and then use the Update feature
(Updating the Vocera Database on page 227) to replace the existing user data
with the data in your CSV file.
Note: Exporting data does not remove it from the database. See Emptying the
Vocera Database on page 228.
Updating the Vocera Database
The Update page of the Maintenance screen lets you use the data in CSV files to
update or delete the data in the Vocera database. Using CSV files in this way is
convenient when you want to modify or delete data for large numbers of users
at the same time. It is usually more convenient to change or delete data for a
few users through the Users section of the Administration Console.
The following sections describe the tasks you can perform with the Update
page:
• Modifying and Deleting User Data with CSV Files on page 227
• Emptying the Vocera Database on page 228
Modifying and
Deleting User
Data with CSV
Files
Because a login name uniquely identifies a user, Vocera uses this value to key the
data in the CSV file with the appropriate database records. You cannot use CSV
files to modify a login name—you must edit it manually.
When you use CSV files to update the database, the CSV data must be
formatted as described in About the Templates on page 225.
Maintaining the Server ··· 227
You typically export existing user data to a CSV file as described in Exporting
Data on page 227, edit the CSV file, and then use the update feature to copy
data from the CSV file back to the Vocera database. For each row in the CSV file,
new field values overwrite corresponding values in the database, blank field
values leave the corresponding database values unchanged, and the literal string
value *blank* in a CSV row erases the corresponding value in the database.
For example, suppose a user profile in the database includes the following data:
User ID
Last Name
First Name
jsmith
Smith
John
Identifying Phrase
Email Address
[email protected]
Next, suppose a row in a CSV file contains the following field values:
jsmith, , Jack, , *blank*
When you upload the CSV file, the value of the User ID field specifies which
database record to update, the values of the Last Name and Identifying Phrase
fields are not changed, the value of the First Name field is changed from John to
Jack, and the value of the Email Address field is erased (empty).
When you use CSV files to delete users from the database, the only required
value in each row of the CSV file is the login name. The login name of each user
you want to delete must be the first value in each row; if other data exists in the
row, the login name must be followed by a comma. When you use the delete
feature, all data related to the user is deleted from the database, not just the
data that is specified in the CSV file.
Emptying the
Vocera
Database
You can also use the Update page to empty all of the custom data you have
entered into the Vocera database, returning it to its default condition. If you
perform this procedure, you will need to restore your data from a backup file or
set Vocera up again before users can communicate with their badges.
When you empty the Vocera database, you remove any settings you have made
and delete any data you have entered. The database is restored to the condition
it was in immediately after your installation. The Vocera server automatically
stops and then restarts when you empty the database.
Important: Back up your database before emptying your data from it. You
cannot restore data after you have emptied it unless you first create a backup
file. See Backing Up and Restoring Data on page 223.
228 ··· Vocera Configuration Guide
Working with Server Log Files
The Vocera server maintains two sets of log files in the \vocera\logs directory:
• System logs record general system events for trouble shooting.
The names of these files begin with the log prefix.
• Report logs record data that the Vocera Report server uses to create reports.
The names of these files begin with the report prefix.
The Telephony server maintains log files used for trouble shooting telephony
problems in its own \vocera\logs directory. The names of these files begin with
the phone prefix. If the Telephony server is installed on the same computer as
the Vocera server, the \vocera\logs directory contains all three sets of log files.
Vocera names all log files with the following syntax, where <Prefix> indicates
the type of log file, <MonDD> is the three letter abbreviation of the month
followed by the day, and <HHMM> is the time in 24-hour format:
<Prefix>-<MonDD>-<HHMM>.txt
For example, the following log file was created on July 4th, in the current year, at
11:30 PM to record system events:
log-jul04-2330.txt
When the Vocera server starts, it creates one log file to record system events and
a separate log file to keep track of data for the Report Server. By default, the
server continues to write data to a log until the file reaches 100,000 lines or until
the server stops. At that time, the server closes the file and opens another one.
By default, the Vocera server saves up to 100 system logs and 100 report logs. If
the number of either type of log will exceed 100, the server deletes the oldest
file and saves the most recent one, so there are never more than 100 of any type
of log.
Similarly, the Telephony server maintains up to 100 phone logs of up to 100,000
lines each.
Vocera technical support needs to examine the system logs to trouble shoot
almost any serious problem. You can use the Logging page of the Maintenance
screen in the Administration Console to configure the Vocera server to email logs
to Vocera automatically.
Maintaining the Server ··· 229
Stopping and Starting the Vocera Server
In certain situations, you may need to stop and restart the Vocera server. For
example, if you want to use the server to update the properties in all your
badges at the same time, you must stop the Vocera server and then restart it
before it can download the new properties to the badges.
Use the Server Control page in the Maintenance screen to stop and start the
Vocera server. The buttons on the Server Control page control the Vocera server
only; they do not stop the related services that Vocera uses, such as Tomcat and
Nuance.
You may want to restart the server when only a few people are using the system.
When you stop the server, any existing calls will be terminated, and users will not
be able to communicate with their badges until you start the server again. The
server stops and starts fairly quickly, so if few people are using the system, there
will be very little interruption.
Note: You can also use the Vocera Control Panel to stop and start the Vocera
server.
230 ··· Vocera Configuration Guide
Email Setup
Email Setup makes it possible for badge users to send voice email to anyone who
has an email account anywhere in the world. It also allows users to receive plain
text email messages and read them on their badge displays.
Vocera email settings are divided into two categories:
• Incoming Mail Settings configure the Vocera server to receive email
messages and distribute them to badges. These settings configure the mail
server and the Vocera system mailbox.
• Outgoing Mail Settings configure the Vocera server to send voice emails
from user’s badges to any email account. These settings configure the SMTP
server.
Email settings are site-independent: they affect email for all your sites.
A voice email is an email message with a .WAV file attached that contains the
voice message. Badge users can send a voice email by commanding the Genie to
“Send email to person’s first and last names,” and then recording a message.
The Vocera server checks the recipient’s profile and sends the voice email as an
attachment to a text email.
Users can also receive conventional email messages on their badges. Such
messages are limited to 130 characters. When this limit is reached, the message
is truncated. Regardless of the intended recipient, senders address all of their
plain text email messages to the Vocera server’s email account. To specify the
recipient of the email, the sender enters a user’s Vocera login name or a Group
Name in the subject line of the message. The Vocera server retrieves the
message and forwards it to the user’s badge. If the Subject line contains a group
name, the message is sent to the badges of all group members.
The Vocera User Guide gives instructions for sending email messages from
badges and for reading email messages on the badge display.
Email Setup ··· 231
The following illustration shows the process of sending a voice email message
from a badge:
1. A badge user records a voice message.
2. The Vocera server saves the recording as a .WAV file and attaches it to an
email message.
3. The email message is sent to the SMTP host.
4. The email message is sent to the recipient, who plays the message with
sound software such as Windows Media Player.
232 ··· Vocera Configuration Guide
The following figure outlines the process for sending email messages to badges:
1. All email messages for badges are sent to a single address, the Vocera
System mailbox. Email subject is a user login name or the name of the group
that should receive the message. If the login name or group name is invalid,
the email goes to the Default Recipient Email Address. If the Default
recipient Email Address is not defined, the message is returned to the
sender.
2. Mail host receives the message.
3. Vocera server logs in to the Mail Host and retrieves all the messages.
Email Setup ··· 233
234 ··· Vocera Configuration Guide
Working With Locales
A Vocera locale designates a specific language in combination with a particular
cultural, political, or geographic region. For example, US English and Canadian
French designate locales. Internally, Vocera represents locales with two-letter
codes. For example, the codes US, CA, GB, AU, and NZ represent Englishspeaking US, Canada, Great Britain, Australia, and New Zealand, respectively.
You specify a locale when you install Vocera. The installation program copies the
required files to the server computer and configures appropriate settings.
The locale determines several aspects of the Vocera system, as described in the
following topics:
• Genie Personas on page 235
• Language Packs on page 236
• Grammars on page 236
• Dialing Plan on page 237
Genie Personas
The Vocera system locale determines which Genie personas are available in the
Administration Console and the User Console. For example, when Vocera is
configured for the United States (US) locale, the Genie personas Mark and Jean
are available. When Vocera is configured for the United Kingdom (GB) locale, the
Genie personas John and Liz are available. The Genies for each locale use the
appropriate language and accent for prompts and responses.
You can choose a Genie persona (and specify whether users can override this
choice) from the Genie Settings page of the Defaults screen in the
Administration Console. Users can choose a Genie persona from the Genie
Settings page of the Announcements screen in the User Console (if granted
access by an administrator).
Working With Locales ··· 235
Language Packs
Vocera uses language packs for speech recognition and Text-to-Speech actions.
They are installed and used based on the locale specified when Vocera is
installed. The following table lists supported locales and corresponding language
packs.
Locale
Speech Recognition
Text-to-Speech
Genies
US
English US
English US
Mark, Jean
Canada
English US
English US
Mark, Jean
UK
English UK
English UK
John, Liz
Australia
English AUS/NZ
English UK
John, Liz
New Zealand
English AUS/NZ
English UK
John, Liz
The binary representation of a learned name or learned command in Vocera
database tables depends on the language pack (and therefore the acoustic
model) in use when the name or command is learned. When the Vocera system
learns a name or keyword, it notes which language pack is in use. Vocera keeps
a separate set of learned names and keywords for each language pack.
Grammars
Each locale has an associated grammar directory (under
\vocera\server\grammars) that stores the system grammars (mainmenu,
phonenumber, etc.) for that locale. In Vocera version 3.0, these grammar
directories were in one-to-one correspondence with the Nuance packages, and
had the same names as the packages. In version 3.1, different locales can share
the same language pack but have different grammars. The AU and NZ locales
are an example. For this reason, the grammar directories have locale names
rather than package names. Directories for all supported grammars are created
on the server computer when you install Vocera.
236 ··· Vocera Configuration Guide
Dialing Plan
In a Vocera installation that includes the telephony integration, the locale
determines the dialing plan, which specifies how phone numbers are formatted
and interpreted.
For example, the dialing plan for the United States (US) locale assumes that
phone numbers longer than 10 digits contain complete information. Given an
11-digit number, Vocera would dial it as-is, without adding access codes or area
codes.
That same number would be handled differently by a Vocera system configured
for the United Kingdom (GB) locale. The corresponding dialing plan supports
home and business phone numbers up to 11 digits in length, so Vocera would
add access codes or area codes, as appropriate, before dialing.
Working With Locales ··· 237
238 ··· Vocera Configuration Guide
Appendixes
The following topics provide additional information about installing and
configuring Vocera:
• Installation Details on page 241
Provides information about software and system settings affected by the
Vocera installation program.
• Voice Command Reference on page 249
Summarizes voice commands for system setup and administration.
Appendixes ··· 239
240 ··· Vocera Configuration Guide
Installation Details
The following topics provide information about software and system settings
affected by the Vocera installation program:
• Third-Party Software
• Vocera Server Directory Structure
• IP Port Usage
• Environment Variables
Third-Party Software
Vocera installs the following third-party software:
Software
Description
Nuance
Speech recognition software used by Vocera server.
MySQL Database
Database used by the server, to access user info. and
dynamic grammars.
ODBC Drivers
Component required by Nuance to access dynamic
grammars.
TOMCAT
Application Server
JRE
Java Runtime Environment.
Apache
Apache HTTP web server.
Dialogic
Dialogic telephony software and drivers (installed with
telephony integration).
Installation Details ··· 241
Vocera Server Directory Structure
The Vocera installer creates the following directories at the top level on the
Vocera Server machine:
Software
Install directory
Vocera Server Program
\vocera\server
Vocera Server Logs
\vocera\logs
Vocera Data
\vocera\data
Vocera Configuration
Utilities
\vocera\config
Vocera Web
Components
\tomcat\webapps\
Nuance Speech
Recognition and
Vocalizer software
\nuance
MySQL Database
Program
\mysql
ODBC Drivers for
Nuance
\WinNT\System
TOMCAT Application
Server
\tomcat
JRE
\jre
Apache Web Server
\apache\Apache2
Vocera Telephony Server
\vocera\server, \vocera\dialogic, and \dialogic
You may occasionally need to work with the following directories under
\vocera:
• \vocera\logs
Contains server activity logs. The name of each log file begins with “log”,
followed by the date and time the log was created.
• \vocera\backup
Contains system backup files.
• \vocera\config
Contains utilities for setting badge properties and configuring badges.
242 ··· Vocera Configuration Guide
IP Port Usage
The following table indicates the ports used by system components for IP
communication:
Description
Protocol
Port No
Badge < > Server Signalling
UDP
Server receives on 5002
Badges receive on 5002
Badge < > Server Audio
UDP
Server receives on 5100 - 5199
Badges receive on 5200
Badge < > Badge Audio
UDP
Badges receive on 5200
Vocera Server < > Telephony
Server Signaling
TCP
Vocera Server listens on 5001
Vocera Server < > Telephony
Server Audio
UDP
Vocera Server receives on
5100 - 5149
Telephony Server receives on
5300 - 5399
Badge < > Telephony Server Audio
UDP
Telephony Server receives on
5300 - 5399
Badges receive on 5200
Badge < > Updater Signalling
UDP
Server receives on 5400
Badges receive on 5400
Browser < > Apache Signalling
TCP
Server listens on 8080
Make sure the following ports are open for communication:
• If a firewall separates the Vocera server machine from the wireless network,
you will need to make sure all ports required for badge < > server
communication are open. These include 5100 - 5200, and 5400. Also open
5300 - 5399 for communications among the badges, the Vocera server
machine, and the Telephony server machine (which may or may not be the
same as the Vocera server machine).
• If access to the User Console or Administration Console is required from
outside the firewall, you must also open port 8080 for communication to
the Vocera server.
Installation Details ··· 243
Environment Variables
Vocera adds or modifies the following environment variables during installation:
Software
Environment Variables
Nuance
NUANCE, NUANCE_PACKAGE, JNUANCE, LIB, Include,
CLASSPATH, PATH
TOMCAT
TOMCAT_HOME, CATALINA_HOME
JRE
JAVA_HOME
MySQL
MYSQL_HOME
Vocera Server
VOCERA_DRIVE, VOCERA_LOCALE, VOCERA_LICENSE,
VOCERA_LOCAL_HOST_ADDRESS
Vocera Clustering
VOCERA_DATA_DRIVE, VOCERA_DB_URL
VOCERA_LOCAL_HOST_ADDRESS
Vocera Telephony Server
VOCERA_SERVER_IP_ADDRESS, VOCERA_TELEPHONY
• If the Telephony server machine is different than the
Vocera server machine, also the following:
VOCERA_DRIVE, VOCERA_LOCALE, JAVA_HOME
• If the Telephony server machine is the same as the
Vocera server machine, also the following:
VOCERA_LOCAL_HOST_ADDRESS
• If the Telephony server machines is associated with a
specific site, also the following: VOCERA_SITE
Dialogic
DIALOGICDIR, DIALOGICDRV, DLCFGPATH, DLFWLPATH,
DNASDKDIR, DLINFPATH, TSTDIR, DLGCDESTDIR
These environment variables control the following settings:
Environment Variable
Value
CATALINA_HOME
Specifies the location where Tomcat is installed.
This variable is set on the Vocera server machine.
This variable should be set to z:\tomcat, where
z: is the drive on which the Vocera server is
installed.
CLASSPATH
244 ··· Vocera Configuration Guide
Specifies the location of Java classes used by
Vocera and Nuance. This variable is set on the
Vocera server machine.
Environment Variable
Value
DIALOGICDIR
Specifies the parent directory for Dialogic. This
variable is set on the Telephony server machine.
This variable should be set to z:\, where z: is the
drive on which the Telephony server is installed.
DIALOGICDRV
Specifies the letter of the drive where Dialogic is
installed. This variable is set on the Telephony
server machine.
This variable should be set to z:, where z: is the
drive on which the Telephony server is installed.
DLCFGPATH
Specifies the location of Dialogic configuration
data. This variable is set on the Telephony server
machine.
This variable should be set to z:\Dialogic\cfg,
where z: is the drive on which the Telephony
server is installed.
DLFWLPATH
Specifies the location of Dialogic data. This
variable is set on the Telephony server machine.
This variable should be set to z:\Dialogic\data,
where z: is the drive on which the Telephony
server is installed.
DLGCDESTDIR
Specifies the letter of the drive where Dialogic is
installed. This variable is set on the Telephony
server machine.
This variable should be set to z:, where z: is the
drive on which the Telephony server is installed.
DLINFPATH
Specifies the location of Dialogic inf files. This
variable is set on the Telephony server machine.
This variable should be set to z:\Dialogic\inf,
where z: is the drive on which the Telephony
server is installed.
DNASDKDIR
Specifies the location of Dialogic binary files. This
variable is set on the Telephony server machine.
This variable should be set to z:\Dialogic\bin,
where z: is the drive on which the Telephony
server is installed.
Installation Details ··· 245
Environment Variable
Value
JAVA_HOME
Specifies the location of the Java Runtime
Environment (JRE). This variable is set on both
the Vocera server and the Telephony server
machines.
This variable should be set to z:\JRE, where z: is
the drive on which either the Vocera server or
the Telephony server is installed.
JNUANCE
Specifies the location of Java classes used by
Nuance. This variable is set on the Vocera server
machine.
This variable should be set to
z:\Nuance\v8.0.0\java, where z: is the drive on
which the Vocera server is installed.
LIB
Specifies the location of libraries used by
Nuance. This variable is set on the Vocera server
machine.
This variable should be set to
z:\Nuance\v8.0.0\bin\win32, where z: is the
drive on which the Vocera server is installed.
MYSQL_HOME
Specifies the location where MySQL is installed.
This variable is set on the Vocera server machine.
This variable should be set to z:\mysql, where z:
is the drive on which the Vocera server is
installed.
NUANCE
Specifies the location where Nuance is installed.
This variable is set on the Vocera server machine.
This variable should be set to z:\Nuance\v8.0.0,
where z: is the drive on which the Vocera server
is installed.
NUANCE_PACKAGE
Specifies the Nuance package used for speech
recognition. This variable is set on the Vocera
server machine as follows:
• In the United States, this variable should be
set to english.america.3_withsv.
• In the United States, this variable should be
set to english.ausnz.3_withsv.
PATH
246 ··· Vocera Configuration Guide
Specifies the location of executables and DLLs
used by Nuance. This variable is set on both the
Vocera server and the Telephony server
machines.
Environment Variable
Value
TOMCAT_HOME
Specifies the location where Tomcat is installed.
This variable is set on the Vocera server machine.
This variable should be set to z:\tomcat, where
z: is the drive on which the Vocera server is
installed.
TSTDIR
Specifies the location of the Windows system
directory. This variable is set on the Telephony
server machine.
This variable should be set to
%SystemRoot%\system32.
VOCERA_DATA_DRIVE
Specifies the letter of the shared Vocera data
drive in a clustered installation. This variable is
set on each Vocera server machine in a cluster.
VOCERA_DB_URL
Specifies the URL of the shared MySQL database
in either of the following environments:
• In a clustered server environment.
• On a single server with dual NIC cards that do
not have a virtual IP address.
This variable is set on the Vocera server machine.
VOCERA_DRIVE
Specifies the letter of the drive where the
\Vocera directory is installed. This variable is set
on both the Vocera server and the Telephony
server machines.
VOCERA_LICENSE
Specifies the universal license key that allows
you to use Vocera, Nuance, and Vocalizer. This
variable is set on both the Vocera server and the
Telephony server machines.
VOCERA_LOCALE
Specifies the locale for which the Vocera server
or Telephony server is installed. This variable is
set on both the Vocera server and the Telephony
server machines.
This variable should be set to one of the
following codes, depending upon the locale for
which the server is installed: US, CA, GB, AU, or
NZ. These codes represent English-speaking US,
Canada, Great Britain, Australia, and New
Zealand, respectively.
Installation Details ··· 247
Environment Variable
Value
VOCERA_LOCAL_HOST_ADDRESS
Specifies either of the following values on the
Vocera server:
• In a clustered server environment, specifies
the virtual IP address of the cluster.
• On a single server with dual NIC cards that do
not have a virtual IP address, specifies the
physical IP address of the card that Vocera
binds to.
Specifies the following value on the Telephony
server:
• On a stand-alone Telephony server with dual
NIC cards that do not have a virtual IP
address, specifies the physical IP address of
the card that telephony binds to.
This variable is set on both the Vocera server and
the Telephony server machines.
VOCERA_SERVER_IP_ADDRESS
Specifies the IP address of the Vocera server. This
variable is set on the Telephony server machine.
When the Telephony server and Vocera server
are on the same machine, this variable should be
set to 127.0.0.1.
VOCERA_SITE
If the Vocera server supports multiple sites,
specifies the name of the site the Telephony
server supports. This variable is set on the
Telephony server machine.
VOCERA_TELEPHONY
Specifies that the Telephony server is installed on
this machine.
This variable should be set to
z:\vocera\dialogic, where z: is the drive on
which the Telephony server is installed.
248 ··· Vocera Configuration Guide
Voice Command Reference
The following topics summarize voice commands for system setup and
administration. These commands are not listed in the Vocera User Guide, and all
require permissions that should be granted only to system administrators.
• Log In As Another User
• Access Point Location Administration
• Voiceprint Administration
Log In As Another User
Action
Recommended Commands (examples in italics)
Log in as an arbitrary user,
bypassing authentication
Log in as John Smith.
Voice Command Reference ··· 249
Access Point Location Administration
Action
Recommended Commands (examples in italics)
Begin access point tour
Begin tour.
End access point tour
End tour.
Assign location name to
currently associated access point
Assign location.
Record a name for a location.
Record name prompt for Cafeteria.
Voiceprint Administration
Action
Recommended Commands (examples in italics)
Erase a user’s voiceprint, thereby
allowing that user to log in
without authentication.
Erase voiceprint of John Smith.
250 ··· Vocera Configuration Guide
Index
A
Access points
relationship to locations 209
Administration Console
description 17
administrator account 219
default password 219
default user name 219
Administrator Password 221
Advanced properties
setting 73
Alternate DNS property 71
Alternative Spoken Names 190
analog integration
hardware 96
analog telephony boards 96
analog telephony cables 96
Apache/Tomcat Web server 16
Assign Location Name Voice Command 250
Authentication property 66
authentication protocols 68
B
badge
configuring 74, 76
Badge Configuration Utility 74
Badge operation
default permissions 174
Badge Properties Editor 64
General properties 65
Setting Advanced properties 73
Setting Security properties 66
Index ··· 251
Setting TCP/IP properties 71
starting 64
badge property 63
Badge Status Monitor 89
badge.properties file 64, 74, 76, 80
Begin Tour Voice Command 250
Broadcast Uses IGMP property 72
C
cables
analog telephony 96
digital telephony 99
character set 156
Cisco LEAP 68
Configuration properties 79
D
D-channel tracing 134
Default Gateway property 71
Defaults
strategy for use 162
Deleting
email messages 222
text messages 222
voice messages 222
department 168
department group 168
Dialogic
Card 93, 96, 98
card 97
digital integration
hardware 98
digital telephony
boards 98
cables 99
E
Email
deleting messages automatically 222
sending to badges (illustration) 232
Encryption 69
Encryption Key property 67
End Tour Voice Command 250
252 ··· Vocera Configuration Guide
Erase Voiceprint Of Voice Command 250
G
General properties
setting 65
grammar directory 236
group profile 145
Groups
adding 164
general information 164
name limitations 162
nested 164
recording name prompts for 167
H
Hide Boot Menus property 65
I
Identifying Phrase 191
incoming calls
routing 95
inner circle 160
adding members 161
enabling 160
removing members 161
integration
analog 96
digital 98
J
Java
JRE plug-in 26
JVM 26
JVM 26
L
Language packs 236
learned command 236
learned name 236
Lightweight Extensible Authentication Protocol 68
locale 235
Locations
configuration overview 209
Index ··· 253
definition 209
mapping 210
recording location names 211
Log In As Voice Command 249
Login Name
strategy for assigning 156
M
Message Sweep 222
Messages
deleting 222
email 231
MIC 70
monitoring badge usage 89
MySQL 16
N
Names
recording group name prompts 167
recording location names 211
valid characters 162
Neighbors
definition 210
nested groups 164
Nuance speech recognition software
description 16
O
Open authentication 68
P
Password
changing the Administrator Password 221
Password property 66
PEAP 68, 69
Permissions
default 174
definition 173
strategy for use 162
Preferred DNS property 71
PreShared Key property 66
profile 155
group 145
254 ··· Vocera Configuration Guide
site 145
user 145
properties file 79
PSK 68, 69
R
Record Name Prompt for Location Voice Command 250
Recording names
group prompts 167
locations 211
recording utterances 191
Requirements for Vocera server 24
Roaming Policy property 73
S
Scan Default Channels property 72
Security properties
setting 66, 68
self registration 162
Server - see “Vocera Server”
Short Preamble property 72
site profile 145
SSID property 65
Subnet Roaming property 72
System default properties 79
System links
Message Sweep 222
System requirements 24
system software 16
T
TCP/IP properties
setting 71
Telephony
analog cables 96
analog integration 96
Card 93, 96, 98
digital cables 99
digital integration 98
Hardware Installation 111
loop current drop 102
Overview 93
Software Installation 105
Index ··· 255
telephony boards
analog 96
digital 98
Telephony Control Panel 117
hiding 127
preventing access 127
Telephony Integration
description 18
Telephony integration
major components 93
procedure 100
Telephony server
configuration diagram 94
incoming calls 95
logging off 127
logging on 127
outgoing calls 94
shutting down 125, 126
starting 125
stopping 125
Telephony Solution Software
features 95
Temporal Key Integrity Protocol 69
Text message, deleting 222
TKIP 69
TKIP-Cisco 69
TKIP-WPA 69
U
Use Static Settings property 71
User Console 162
description 17
User Name property 66
user profile 145, 155
utilities 16
utterances
recording 191
V
VIP Status 187
Vocera launcher 17
Vocera Messaging Interface 18
Vocera server
256 ··· Vocera Configuration Guide
changing IP address 126
description 16
system requirements 24
Vocera Server IP Address property 65
Vocera server, description 17
Vocera Telephony Server 18
Voiceprints
Commands 186
Recommendations for Use 186
W
WEP 69
WEP encryption 70
WEP keys 70
Wi-Fi Protected Access 69
Wi-Fi Protected Access Pre-Shared Key 68
Wi-Fi Protected Access Protected Extensible Authentication Protocol 68
Wired Equivalent Privacy 69
WPA 69
WPA-PEAP 68
WPA-PSK 68
Index ··· 257
258 ··· Vocera Configuration Guide