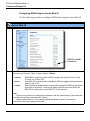
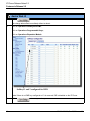
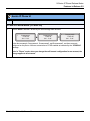
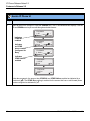
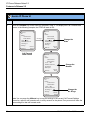
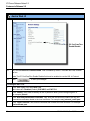
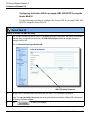
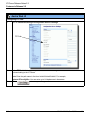
1
51i, 53i, 55i, 57i, and 57i CT
SIP IP
SI
I PHONE
RN-001029-00
Rev 06
Release Note
Release 2.2
Aastra Telecom will not accept liability for any damages and/or long distance charges, which result
from unauthorized and/or unlawful use. While every effort has been made to ensure accuracy,
Aastra Telecom will not be liable for technical or editorial errors or omissions contained within this
documentation. The information contained in this documentation is subject to change without notice.
Copyright 2008 Aastra Telecom. www.aastra.com
All Rights Reserved.
General Information ........................................................................................................ 2
Release Content Information ...................................................................................... 2
Hardware Supported ................................................................................................... 2
Bootloader Requirements ........................................................................................... 2
Features in Release 2.2................................................................................................... 3
Description .................................................................................................................. 3
Usability Features ....................................................................................................... 5
Dial Plan Support for Secondary Dial Tone .......................................................... 5
Account-Based Do Not Disturb (DND) and Call Forward (CFWD) ....................... 6
Multicast Group Paging ...................................................................................... 60
Simplified Transfer Using BLF and Speeddial Keys ........................................... 68
Ability to Disable Switching Focus to a Ringing Line When on a Call ................ 74
Security Features ...................................................................................................... 76
802.1x Support ................................................................................................... 76
Improved Configuration File Encryption ............................................................. 90
XML Features............................................................................................................ 91
SIP NOTIFY Triggers an XML Event .................................................................. 91
RTP and Multicast RTP via XML ........................................................................ 97
Text Wrap for XML TextMenu Items .................................................................. 102
Non-Blocking HTTP Connections ..................................................................... 103
Polling Action URI ............................................................................................. 104
Deployability Features ............................................................................................. 106
SIP Registration Status in Aastra Web UI ......................................................... 106
Support for HTTP and HTTPS Configuration Servers on Non-Standard Ports 108
Ability to Set TFTP and FTP Path for Configuration Servers ........................... 113
NAT Traversal Features .......................................................................................... 120
Configurable SIP and TLS Source Ports .......................................................... 120
RPORT Support ................................................................................................ 123
RN-001029-00, Rev 06, Release 2.2
iii
Contents
Contents
Contents
BroadSoft Interoperability Features ........................................................................ 126
CMS Support .................................................................................................... 126
Server-Side Do Not Disturb (DND), Call Forward (CFWD) ,
and Automatic Call Distribution (ACD) Support ................................................ 130
Issues Resolved on Series 5i Phones in Release 2.2 .............................................. 136
Contacting Aastra Telecom Support .......................................................................... 139
iv
RN-001029-00, Rev 06, Release 2.2
SIP IP Phone
Models 51i, 53i, 55i, 57i, and 57i CT
Release Note 2.2
About this Document
This document provides an overview of the 2.2 features on the 5i Series phones
(51i, 53i, 55i, 57i, and 57i CT).
For more detailed information about the features associated with each phone, and
for information on how to use the phones, see your model-specific SIP IP Phone
Installation Guide and the SIP IP Phone User Guide. For detailed information
about more advanced features, see the SIP IP Phone Administrator Guide.
Topics in this release note include:
•
•
•
•
General Information
(release content, hardware supported, bootloader requirements)
Features in Release 2.2
Issues Resolved on Series 5i Phones in Release 2.2
Contacting Aastra Telecom Support
RN-001029-00, Rev 06, Release 2.2
1
IP Phone Release Notes 2.2
General Information
General Information
Release Content Information
This document provides release content information on the Aastra 51i, 53i, 55i,
57i, and 57i CT SIP IP phone firmware.
Model
Release Name
Release Version
Release Filename
Release Date
51i
Generic SIP
2.2
FC-001126-00-06
March 2008
53i
Generic SIP
2.2
FC-001086-00-09
March 2008
55i
Generic SIP
2.2
FC-001087-00-09
March 2008
57i
Generic SIP
2.2
FC-001088-00-09
March 2008
57i CT
Generic SIP
2.2
FC-001089-00-09
March 2008
Hardware Supported
This release of firmware is compatible with the following Aastra IP portfolio
products:
•
•
•
•
•
51i
53i
55i
57i
57i CT
Bootloader Requirements
This release of firmware is compatible with the following Aastra IP portfolio
product bootloader versions:
•
•
•
•
•
2
51i - Bootloader 2.0.1.1055 or higher
53i - Bootloader 2.0.1.1055 or higher
55i - Bootloader 2.0.1.1055 or higher
57i - Bootloader 2.0.1.1055 or higher
57i CT - Bootloader 2.0.1.1055 or higher
RN-001029-00, Rev 06, Release 2.2
5i Series IP Phone Release Notes
Features in Release 2.2
Features in Release 2.2
Description
This section describes the new features included in Release 2.2 of the 5i Series IP
Phones. The following table specifies the 2.2 Features and provides the page
number for each feature.
Feature
Page Number
Usability Features
Dial Plan Support for Secondary Dial Tone
page 5
Account-Based Do Not Disturb (DND) and Call Forward (CFWD)
page 6
Multicast Group Paging
page 60
Simplified Transfer Using BLF and Speeddial Keys
page 68
Ability to Disable Switching Focus to a Ringing Line When on a Call
page 74
Security Features
802.1x Support
page 76
Improved Configuration File Encryption
page 90
Deployability Features
SIP NOTIFY Triggers an XML Event
page 91
RTP and Multicast RTP via XML
page 97
Text Wrap for XML TextMenu Items
page 102
Non-Blocking HTTP Connections
page 103
Polling Action URI
page 104
Deployability Features
SIP Registration Status in Aastra Web UI
page 106
Support for HTTP and HTTPS Configuration Servers on Non-Standard Ports
page 108
Ability to Set TFTP and FTP Path for Configuration Servers
page 113
Deployability Features
Configurable SIP and TLS Source Ports
page 120
RPORT Support
page 123
RN-001029-00, Rev 06, Release 2.2
3
IP Phone Release Notes 2.2
Features in Release 2.2
Feature
Page Number
BroadSoft Interoperability Features
CMS Support
page 126
Server-Side Do Not Disturb (DND), Call Forward (CFWD) , and Automatic Call
Distribution (ACD) Support
page 130
4
RN-001029-00, Rev 06, Release 2.2
5i Series IP Phone Release Notes
Features in Release 2.2
Usability Features
Dial Plan Support for Secondary Dial Tone
The IP phones now support a feature that allows the user to dial a predefined
dial string, obtain a dial tone, and continue dialing. A User or Administrator can
configure this using the existing Dial Plan feature on the phone.
You can enter a new character string in the dial plan that allows you to
configure the secondary dial tone. The character string is of the form ".;." ,
where the period indicates an arbitrary number of digits and the semicolon
indicates that the phone is to present a dial tone after the previous dialed digit.
For example, in the string:
"9;xxxxx"
the user dials “9” to get the outside line, listens for the dial tone, and continues
to dial the applicable number. The “;” tells the phone to present a second dial
tone after the previously dialed digit. “The “xxxxx” in the example tells the
phone that a phone number is dialed after the secondary dial tone is audible.
You can enter the Secondary Dial Tone string in the Dial Plan using the
configuration files or the Aastra Web UI.
You use the following parameter in the configuration files to configure a
secondary dial tone:
•
sip dial plan
Example: sip dial plan: “9;xxxxxxx”
You use the following parameter in the Aastra Web UI to configure a secondary
dial tone:
Local Dial Plan
RN-001029-00, Rev 06, Release 2.2
5
IP Phone Release Notes 2.2
Features in Release 2.2
Account-Based Do Not Disturb (DND) and Call Forward (CFWD)
In previous releases of the IP Phone, you could configure a DND key to set “do
not disturb” on all the lines on the phone. Also in previous releases, you could
configure CFWD on all lines (global settings) or on specific lines (local settings)
on the phone.
In Release 2.2, the IP phones have a new DND and CFWD feature that allows an
Administrator and User to configure “do not disturb” and “call forwarding” by
account. You can set specific modes for the way you want the phone to handle
DND and CFWD. The three modes you can set on the phone for these features
are:
•
Account
•
Phone
•
Custom.
The following paragraphs describe account-based DND and CFWD:
•
DND Account-Based Configuration
•
CFWD Account-Based Configuration
DND Account-Based Configuration
Previous to release 2.2, DND was configurable on the phone-side only on a global
basis by configuring a DND key. Now an Administrator or User can configure
DND on the phone-side by setting a mode for the phone to use (account, phone,
or custom). Once the mode is set, you can use the IP Phone UI to use the DND
feature.
Note: If there is only one account configured on the phone, then the
mode setting is ignored and the phone behaves as if the mode was set
to “Phone”.
6
RN-001029-00, Rev 06, Release 2.2
5i Series IP Phone Release Notes
Features in Release 2.2
The following describes the softkey behavior for each DND mode.
•
Account - DND key toggles the account in focus on the IP Phone UI, to ON
or OFF if DND enabled for that account.
•
Phone - DND key toggles all accounts on the phone to ON or OFF.
•
Custom - DND key displays custom screens on the IP Phone UI. User can
select whether to enable/disable DND per account, enable DND on all
accounts, or disable DND on all accounts.
The following table describes the softkey and Message Waiting Indicator (MWI)
LEDs when you enable DND on the IP Phone.
Softkey LED Behavior
for All Modes
MWI LED Behavior
for All Modes
DND key LED RED if current account in
focus has DND ON.
DND key LED OFF when current account
in focus has DND disabled.
MWI LED ON if current account in focus has
DND ON.
MWI LED OFF if current account in focus
has DND OFF.
You can configure the DND softkey and the DND mode (Account, Phone,
Custom) using the configuration files or the Aastra Web UI. Once you configure
DND, you can access the DND screen on the IP Phone UI.
Important Notes
•
In the Aastra Web UI, the “Account Configuration” page replaces the
previous “Call Forward Settings” page.
•
In the IP Phone UI, the new DND key feature now has new menu screens.
•
If you make changes to the configuration for DND via the IP Phone UI,
you must refresh the Aastra Web UI screen to see the changes.
RN-001029-00, Rev 06, Release 2.2
7
IP Phone Release Notes 2.2
Features in Release 2.2
Configuring DND Using the Configuration Files
You use the following parameters to configure DND on the IP Phone:
•
dnd key mode
•
softkeyN type, topsoftkeyN type, prgkeyN type, or expmodX keyN type
•
softkeyN states (optional)
Parameter –
dnd key mode
Aastra Web UI:
Basic Settings->Preferences->General
Configuration Files aastra.cfg, <mac>.cfg
Description
Sets the mode for how the phone uses “do not disturb” (DND):
•
account
•
phone
•
custom
Sets DND for a specific account.
DND key toggles the account in focus on the
IP Phone UI, to ON or OFF.
Sets DND ON for all accounts on the phone.
DND key toggles all accounts on the phone to ON or
OFF.
Sets the phone to display custom screens after
pressing the DND key, that list the account(s)
on the phone. The user can select a specific
account for DND, turn DND ON for all accounts,
or turn DND OFF for all accounts.
Note: If there is only one account configured on the phone, then the
mode setting is ignored and the phone behaves as if the mode was set
to “Phone”..
Format
Integer
Default Value
1 (phone)
Range
0 (account)
1 (phone)
2 (custom)
Example
dnd key mode: 2
You use the following parameters to configure a DND softkey:
•
softkeyN type, topsoftkeyN type, prgkeyN type, or expmodX keyN type
•
softkeyN states (optional)
Note: If there is no DND key configured or if it is removed, DND is
disabled on the IP Phone.
8
RN-001029-00, Rev 06, Release 2.2
5i Series IP Phone Release Notes
Features in Release 2.2
Example
The following is an example of configuring the mode for DND in the
configuration files:
dnd key mode: 2
softkey1 type: dnd
softkey1 states: idle connected incoming outgoing busy
In the above example, softkey 1 is configured for DND for line 1 only, with a
“custom” configuration. Pressing softkey 1 displays DND screens for which you
can customize on the phone. For specific screens that display in the IP Phone UI,
see the section, “Using DND Modes via the IP Phone UI” on page 13.
RN-001029-00, Rev 06, Release 2.2
9
IP Phone Release Notes 2.2
Features in Release 2.2
Configuring DND Using the Aastra Web UI
Use the following procedure to configure DND mode using the Aastra Web UI:
Aastra Web UI
1
Click on Basic Settings->Preferences->General..
DND Key Mode
Parameter
2
In the “DND Key Mode” field, select a “do not disturb” (DND) mode to use on the phone.
Valid values are: Account, Phone, Custom. Default is Phone.
•
account
•
phone
•
custom
Sets DND for a specific account. DND key toggles the account in focus on the
IP Phone UI, to ON or OFF.
Sets DND ON for all accounts on the phone. DND key toggles all accounts on the
phone to ON or OFF.
Sets the phone to display custom screens after pressing the DND key, that list the
account(s) on the phone. The user can select a specific account for DND, turn
DND ON for all accounts, or turn DND OFF for all accounts.
Notes:
1.
If there is only one account configured on the phone, then the mode setting is ignored and the
phone behaves as if the mode was set to “Phone”.
2.
Using the Aastra Web UI, if you change the DND Key Mode to “phone”, all accounts
syncrhonize to the current setting of Account 1.
10
RN-001029-00, Rev 06, Release 2.2
5i Series IP Phone Release Notes
Features in Release 2.2
Aastra Web UI
3
Click
to save your changes.
The change takes effect immediately without a reboot.
4
Click on Basic Settings->Account Configuration..
5
For each account, enable DND by placing a check mark in the box. Disable DND by unchecking the
box.
Notes:
1. If you selected “Account” or “Custom” mode in step 2, you can enable/disable each account or
all accounts as applicable.
If you selected “Phone” mode, the first account allows you to change the DND status for all accounts.
2. Number and name of accounts that display to this screen are dependant on the number and
name of accounts configured on the phone. In the screen in step 4, Screenname1 is configured on
Line 1, Screenname2 is configured on Line 2, and Screenname3 is configured on Line 3. The name
for the account is dependant on the name specified for the “Screen Name” parameter at the path
Advanced Settings->LineN. If you do not specify a value for the “Screen Name” parameter, the
account name is based on the “Phone Number” parameter at the path Advanced Settings->LineN.
If neither the “Screen Name” nor the “Phone Number” parameters are specified, the account name
shows “1”, “2”, “3”, etc. only.
RN-001029-00, Rev 06, Release 2.2
11
IP Phone Release Notes 2.2
Features in Release 2.2
Aastra Web UI
6
Click
to save your changes.
The change takes effect immediately without a reboot.
7
Click on Operation->Softkeys and XML;
or
Click on Operation->Programmable Keys;
or
Click on Operation->Expansion Module.
Softkeys 1 and 2 configured for DND
Note: If there is no DND key configured or if it is removed, DND is disabled on the IP Phone.
8
12
Click
to save your changes.
RN-001029-00, Rev 06, Release 2.2
5i Series IP Phone Release Notes
Features in Release 2.2
Using DND Modes via the IP Phone UI
If you add a DND key using the configuration files or the Aastra Web UI, you can
toggle the DND state using the IP Phone UI. Use the following procedure to
enable/disable DND on the IP Phone.
The following procedure assumes you have already configured a DND key AND
assumes there are three accounts configured on the phone.
Notes:
1. If there is no DND key configured or if it is removed, DND is
disabled on the IP Phone.
2. If there is only one account configured on the phone, then the
mode setting is ignored and the phone behaves as if the mode was set
to “Phone”.
3. Using the Aastra Web UI, if you change the DND key mode to
“phone”, all accounts synchronize to the current setting of Account 1.
RN-001029-00, Rev 06, Release 2.2
13
IP Phone Release Notes 2.2
Features in Release 2.2
.
Aastra IP Phone UI
Step
Action
DND in Account Mode
On the 51i and 53i:
With the account in focus on the IP Phone UI, press the DND key to toggle DND ON or OFF for the
account. Use the RIGHT and LEFT arrow keys to scroll through each account.
1
2
Screenname1
DND On
Jan 1 12:96
3
Screenname2
Jan 1 12:96
Screenname3
DND On
Jan 1 12:96
In the above example, Screenname1, Screenname2, and Screenname3, are three accounts
configured on the phone. Only Screenname1 and 3 have DND ON. Screenname 2 has DND OFF.
On the 55i, 57i, and 57i CT:
With the account in focus on the IP Phone UI, press the DND key to toggle DND ON or OFF for the
account. Use the RIGHT and LEFT arrow keys to scroll through each account.
Services
Dir
Callers
L1
Screenname1
Services
Dir
Callers
L2
Screenname2
Services
Dir
Callers
L3
Screenname3
DND On
Tues Jan1 10:00am
Tues Jan1 10:00am
DND On
Tues Jan1 10:00am
- DND
- DND
- DND
In the above example, Screenname1, Screenname2, and Screenname3, are three accounts
configured on the phone. Only Screenname1 and 3 have DND ON. Screenname 2 has DND OFF.
14
RN-001029-00, Rev 06, Release 2.2
5i Series IP Phone Release Notes
Features in Release 2.2
Aastra IP Phone UI
Step
Action
DND in Phone Mode
On the 51i and 53i:
Press the DND key to toggle DND ON or OFF for all accounts on the phone. Toggling to ON enables
DND on all accounts on the phone. Toggling to OFF disables DND on all accounts on the phone. Use
the RIGHT and LEFT arrow keys to scroll through each account.
1
2
Screenname1
DND On
Jan 1 12:96
3
Screenname2
DND On
Jan 1 12:96
Screenname3
DND On
Jan 1 12:96
In the above example, toggling Screenname1 to DND ON, enabled DND for Screenname2 and 3
also.
On the 55i, 57i, and 57i CT:
Press the DND key to toggle DND ON or OFF for all accounts on the phone. Toggling to ON enables
DND on all accounts on the phone. Toggling to OFF disables DND on all accounts on the phone. Use
the RIGHT and LEFT arrow keys to scroll through each account.
Services
Dir
Callers
L1
Screenname1
Services
Dir
Callers
L2
Screenname2
Services
Dir
Callers
L3
Screenname3
DND On
Tues Jan1 10:00am
DND On
Tues Jan1 10:00am
DND On
Tues Jan1 10:00am
- DND
- DND
- DND
In the above example, toggling Screenname1 to DND ON, enbabled DND for Screenname2 and 3
also.
Note: Enabling DND in “Phone” mode toggles all accounts on the phone to DND ON.
RN-001029-00, Rev 06, Release 2.2
15
Aastra IP Phone UI
Step
Action
DND in Custom Mode
On the 51i and 53i:
Press the DND key on the phone. The screen displays a list of the accounts on the phone and allows
you to enable/disable a specific account or all accounts. Use the UP and DOWN arrow keys to scroll
through the accounts.
DND
1. Screenname1
Change
Done
Indicates
DND On
Indicates
DND Off
DND
X
2. Screenname2
Change
Done
DND
3. Screenname3
Change
Done
DND
4. All Off
Done
Set
DND
5. All On
Done
Set
In the above example, Screenname1 and 3 have DND ON as indicated by a checkmark ( 3).
Screenname2 has DND off as indicated by an X. Items 4 and 5 allow you to disable or enable DND
on all accounts, respectively.
You use the CHANGE key to enable or disable DND for a specific account. You use the SET key to
enable/disable DND for all accounts. After making the change, you must press DONE and then
Confirm (#) to save the change. Pressing Cancel (0) cancels the attempted change. The following
screen displays after pressing a DONE key:
Apply Changes?
0 Cancel
# Confirm
5i Series IP Phone Release Notes
Features in Release 2.2
Aastra IP Phone UI
Step
Action
DND in Custom Mode (continued)
On the 55i, 57i, and 57i CT:
Press the DND key on the phone. The screen displays a list of the accounts on the phone and allows
you to enable/disable a specific account or all accounts. Use the UP and DOWN arrow keys to scroll
through the accounts.
Services
Dir
Callers
DND
1. Screenname1
2. Screenname2
3. Screenname3
- Change
- All On
- All Off
X
Cancel -
Indicates
DND On
Indicates
DND Off
Done -
In the above example, Screenname1 and 3 have DND ON as indicated by a checkmark ( 3).
Screenname2 has DND off as indicated by an X. The ALL ON and ALL OFF softkeys allow you to
enable or disable DND on all accounts, respectively.
You use the CHANGE key to enable or disable DND for a specific account selected. After making the
change, you must press DONE to save the change.
RN-001029-00, Rev 06, Release 2.2
17
IP Phone Release Notes 2.2
Features in Release 2.2
CFWD Account-Based Configuration
Call Forward (CFWD) on the IP phone allows incoming calls to be forwarded to
another destination.
Previous to Release 2.2, you could configure CFWD on all lines (global settings)
or on specific lines (local settings) on the phone, using the IP Phone UI and the
Aastra Web UI. You could configure call forwarding on the IP Phone UI on a
global basis only using the Options Menu.
An Administrator or User can now configure CFWD on the phone-side by setting
a mode for the phone to use (Account, Phone, or Custom). Once the mode is set,
you can use the IP Phone UI to use the CFWD feature at Options->Call Forward
or by pressing a configured Call Forward softkey/programmable key/extension
module key.
The following describes the behavior for each CFWD mode.
•
Account mode - The account mode allows you to configure CFWD on a per
account basis. Pressing a configured CFWD key applies to the account in
focus.
•
Phone mode - The Phone mode allows you to set the same CFWD
configuration for all accounts (All, Busy, and/or No Answer). When you
configure the initial account, the phone applies the configuration to all other
accounts. (In the Aastra Web UI, only the account you configured is enabled.
All other accounts are grayed out but set to the same configuration.) Using the
Aastra Web UI, if you make changes to that initial account, the changes apply
to all accounts on the phone.
•
Custom mode - The Custom mode allows you to configure CFWD for a
specific account or all accounts. You can configure a specific mode (All,
Busy, and/or No Answer) for each account independently or all accounts. On
the 51 and 53i phones, you can set all accounts to ALL On or ALL Off. On
the 55i, 57i, and 57i CT, you can set all accounts to All On, All Off, or copy
the configuration for the account in focus to all other accounts using a
CopytoAll softkey.
Note: If there is only one account configured on the phone, then the
mode setting is ignored and the phone behaves as if the mode was set
to “Phone”.
18
RN-001029-00, Rev 06, Release 2.2
5i Series IP Phone Release Notes
Features in Release 2.2
In previous releases, you could configure one phone number and then select the
current mode (All, Off, Busy, No Answer, Busy No Answer). In Release 2.2, you
can enable different call forwarding rules/modes independently (for example, you
can set different phone numbers for Busy, All, and NoAns modes and then turn
them on/off individually).
The following table describes the key and Message Waiting Indicator (MWI)
LEDs when you enable CFWD on the IP Phone.
Key LED Behavior
for All Modes
MWI LED Behavior
for All Modes
CFWD key LED RED if CFWD All, CFWD MWI LED ON if current account in focus has
Busy, or CFWD No Answer is enabled for CFWD ALL enabled.
the account in focus.
MWI LED OFF if CFWD All is disabled.
CFWD key LED OFF if any CFWD mode
is disabled.
You can enable/disable CFWD and set a CFWD key using the configuration files
or the Aastra Web UI. You can set CFWD mode (Account, Phone, Custom)
using the configuration files, Aastra Web UI or IP Phone UI.
RN-001029-00, Rev 06, Release 2.2
19
IP Phone Release Notes 2.2
Features in Release 2.2
Important Notes
20
•
In the configuration files, the new “call forward key mode” parameter listed
in the section “Configuring CFWD Using the Configuration Files”, is in
addition to the previous call forward parameter (call forward disabled). You
can still use the previous call forwarding parameter if desired in the
configuration files.
•
In the Aastra Web UI, the “Account Configuration” page replaces the
previous “Call Forward Settings” page.
•
In the IP Phone UI, the new CFWD feature has new menu screens at the path
Options->Call Forward or by pressing a configured CFWD key.
•
If you make changes to the configuration for CFWD via the IP Phone UI,
you must refresh the Aastra Web UI screen to see the changes.
RN-001029-00, Rev 06, Release 2.2
5i Series IP Phone Release Notes
Features in Release 2.2
Configuring CFWD Using the Configuration Files
You use the following parameters to set CFWD on the IP Phone using the
configuration files:
•
•
•
call forward key mode
softkeyN type, topsoftkeyN type, prgkeyN type, or expmodX keyN type
softkeyN states (optional)
Notes:
1.
If there is no CFWD key configured on the phone or it is
removed, you can still set the CFWD modes via the IP Phone UI at the
path Options->Call Forward.
2.
If there is only one account configured on the phone, then the
mode setting is ignored and the phone behaves as if the mode was set
to “Phone”.
3.
When configuring a CFWD mode (All, Busy, No Answer) for
an account, you must configure a CFWD number for that mode in
order for the mode to be enabled.
RN-001029-00, Rev 06, Release 2.2
21
IP Phone Release Notes 2.2
Features in Release 2.2
Parameter –
call forward key mode
Aastra Web UI:
Basic Settings->Preferences->General
Configuration Files aastra.cfg, <mac>.cfg
Description
Sets the mode for how the phone uses “call forwarding” (CFWD)
• account
The account mode allows you to configure CFWD on a per account
basis. Pressing a configured CFWD key applies to the account in
focus.
• phone
The Phone mode allows you to set the same CFWD configuration
for all accounts (All, Busy, and/or No Answer). When you
configure the initial account, the phone applies the configuration to
all other accounts. (In the Aastra Web UI, only the account you
configured is enabled. All other accounts are grayed out but set to
the same configuration.) Using the Aastra Web UI, if you make
changes to that initial account, the changes apply to all accounts on
the phone.
• custom
The Custom mode allows you to configure CFWD for a specific
account or all accounts. You can configure a specific mode (All,
Busy, and/or No Answer) for each account independently or all
accounts. On the 51 and 53i phones, you can set all accounts to
ALL On or ALL Off. On the 55i, 57i, and 57i CT, you can set all
accounts to All On, All Off, or copy the configuration for the
account in focus to all other accounts using a CopytoAll softkey.
Notes:
1. If there is no CFWD key configured on the phone or it is removed,
you can still set the CFWD modes via the IP Phone UI at the path
Options->Call Forward.
2. If there is only one account configured on the phone, then the
mode setting is ignored and the phone behaves as if the mode was set
to “Phone”.
3. When configuring a CFWD mode (All, Busy, No Answer) for an
account, you must configure a CFWD number for that mode in order for
the mode to be enabled.
Format
Integer
Default Value
0 (account)
Range
0 (account)
1 (phone)
2 (custom)
Example
call forward key mode: 2
22
RN-001029-00, Rev 06, Release 2.2
5i Series IP Phone Release Notes
Features in Release 2.2
You use the following parameters to configure a CFWD key and number of rings:
•
softkeyN type, topsoftkeyN type, prgkeyN type, or expmodX keyN type
•
softkeyN states (optional)
Example
The following is an example of configuring the mode for CFWD in the
configuration files:
call forward key mode: 2
softkey1 type: call forward
softkey1 states: idle connected incoming outgoing busy
In the above example, softkey 1 is configured for CFWD on line 1 (account 1)
with a “custom” configuration. Pressing softkey 1 displays CFWD screens for
which you can customize on the phone. For specific screens that display in the IP
Phone UI, see the section, “Using CFWD Modes via the IP Phone UI” on page 29.
RN-001029-00, Rev 06, Release 2.2
23
IP Phone Release Notes 2.2
Features in Release 2.2
Configuring CFWD Using the Aastra Web UI
Use the following procedure to configure CFWD mode using the Aastra Web UI:
Aastra Web UI
1
Click on Operation->Softkeys and XML;
or
Click on Operation->Programmable Keys;
or
Click on Operation->Expansion Module.
Softkey 2 configured for CFWD
2
24
Click
to save your changes.
RN-001029-00, Rev 06, Release 2.2
5i Series IP Phone Release Notes
Features in Release 2.2
Aastra Web UI
3
Click on Basic Settings->Preferences->General..
Call Forward
Key Mode
Parameter
Note: If there is no CFWD key configured on the phone or it is removed, you can still set the CFWD
modes via the IP Phone UI at the path Options->Call Forward.
RN-001029-00, Rev 06, Release 2.2
25
IP Phone Release Notes 2.2
Features in Release 2.2
Aastra Web UI
4
In the “Call Forward Key Mode” field, select a call forward mode to use on the phone.
Valid values are: Account, Phone, Custom. Default is Account.
•
•
•
account
The account mode allows you to configure CFWD on a per account basis. Pressing a configured
CFWD key applies to the account in focus.
phone
The Phone mode allows you to set the same CFWD configuration for all accounts (All, Busy,
and/or No Answer). When you configure the initial account, the phone applies the configuration
to all other accounts. (In the Aastra Web UI, only the account you configured is enabled. All other
accounts are grayed out but set to the same configuration.) Using the Aastra Web UI, if you make
changes to that initial account, the changes apply to all accounts on the phone.
custom
The Custom mode allows you to configure CFWD for a specific account or all accounts. You can
configure a specific state (All, Busy, and/or No Answer) for each account independently or all
accounts. On the 51 and 53i phones, you can set all accounts to ALL On or ALL Off. On the 55i,
57i, and 57i CT, you can set all accounts to All On, All Off, or copy the configuration for the
account in focus to all other accounts using a CopytoAll softkey.
Notes:
1. If there is no CFWD key configured on the phone or it is removed, you can still set the CFWD
modes via the IP Phone UI at the path Options->Call Forward.
2. If there is only one account configured on the phone, then the mode setting is ignored and the
phone behaves as if the mode was set to “Phone”.
3. When configuring a CFWD state (All, Busy, No Answer) for an account, you must configure a
CFWD number for that state in order for the state to be enabled.
5
Click
to save your changes.
The change takes effect immediately without a reboot.
26
RN-001029-00, Rev 06, Release 2.2
5i Series IP Phone Release Notes
Features in Release 2.2
Aastra Web UI
6
Click on Basic Settings->Account Configuration..
7
For each account, enable CFWD state by placing a check mark in one or more of the following
“State” fields:
•
•
•
All
Busy
No Answer
The “All” option forwards all incoming calls for this account to the specified phone number regardless
of the state of the phone. The phone can be in the Busy or No Answer states, or can be in the idle
state. The phone still forwards all calls to the specified number.
The “Busy” option call forwards incoming calls only if the account is in the busy state. The calls are
forwarded to the specified phone number.
The “No Answer” option call forwards incoming calls only if the account rings but is not answered in
the defined number of rings. The call gets forwarded to the specified number.
Note: You can use the “Busy” and “No Answer” states together using different forwarding phone
numbers. If these states are enabled for an account (the “All” state is disabled), and the phone is in
the busy state when a call comes in, the phone can forward the call to the specified phone number
(for example, voicemail). If there is no answer on the phone after the specified number of rings, the
phone can forward the call to a different specified number, such as a cell phone number.
RN-001029-00, Rev 06, Release 2.2
27
IP Phone Release Notes 2.2
Features in Release 2.2
Aastra Web UI
8
For each account, in the “Number” field, enter the phone number for which you want the incoming
calls to forward to if the phone is in the specified state.
If using the “Account” mode or “Custom” mode, you can enter different phone numbers for each
account.
Notes:
1. If you selected “Account” mode in step 4, you can enable/disable each account or all accounts
as applicable. You can enter different phone number for each enabled state.
If you selected “Custom” mode, you can enable/disable each account or all accounts as applicable.
You can enter different phone numbers for each enabled state.
If you selected “Phone” mode, all accounts are set to the same CFWD configuration (All, Busy, and/
or No Answer) as Account 1 on the phone. (In the Aastra Web UI, only Account 1 is enabled. All
other accounts are grayed out but use the same configuration as Account 1.)
Using the Aastra Web UI, if you make changes to Account 1, the changes apply to all accounts on
the phone. Using the IP Phone UI, if you make changes to any other account other then Account 1,
the changes also apply to all accounts on the phone. When enabling a CFWD state, you must specify
a phone number for the phone to CFWD to. The number you specify applies to all accounts of the
same mode.
2. Number and name of accounts that display to this screen are dependant on the number and
name of accounts configured on the phone. In the screen in step 6, Screenname1 is configured on
Line 1, Screenname2 is configured on Line 2, and Screenname3 is configured on Line 3. The name
for the account is dependant on the name specified for the “Screen Name” parameter at the path
Advanced Settings->LineN. If you do not specify a value for the “Screen Name” parameter, the
account name is based on the “Phone Number” parameter at the path Advanced Settings->LineN.
If neither the “Screen Name” nor the “Phone Number” parameters are specified, the account name
shows “1”, “2”, “3”, etc. only.
9
For the No Answer state, in the “No. Rings” field, enter the number of times that the account rings
before forwarding the call to the specified number. Valid values are 1 through 20. Default is 1.
Note: When using the “Account” mode or “Custom” mode, you can enter a different number of rings
for each account. If you use the Aastra Web UI to change the Call Forward Key Mode to “Phone”, all
accounts synchronize to Account 1.
10
Click
to save your changes.
The change takes effect immediately without a reboot.
28
RN-001029-00, Rev 06, Release 2.2
5i Series IP Phone Release Notes
Features in Release 2.2
Using CFWD Modes via the IP Phone UI
If you enable/disable CFWD using the configuration files or the Aastra Web UI,
you can use the CFWD screens that display to the IP Phone UI. You can access the
CFWD parameters by pressing a configured CFWD key (if previously
configured) OR by pressing Options->Call Forward on the phone’s front panel.
The following procedure assumes you have already configured a CFWD key
AND assumes there are three accounts configured on the phone.
Notes:
1.
If there is no CFWD key configured on the phone or it is
removed, you can still enable CFWD via the IP Phone UI at the path
Options->Call Forward.
2.
If there is only one account configured on the phone, then the
mode setting is ignored and the phone behaves as if the mode was set
to “Phone”.
3.
Using the Aastra Web UI, if you change the CFWD key mode to
“Phone”, all accounts synchronize to the current setting of Account 1.
RN-001029-00, Rev 06, Release 2.2
29
IP Phone Release Notes 2.2
Features in Release 2.2
.
Aastra IP Phone UI
Step
Action
CFWD in Account Mode (51i and 53i)
1
Use the RIGHT and LEFT arrow keys to scroll through each account.
1
Screenname1
CFWD All
Jan 1 12:96
2
3
Screenname2
Jan 1 12:96
Screenname3
CFWD Busy
Jan 1 12:96
In the above example, Screenname1, Screenname2, and Screenname3, are three accounts
configured on the phone. Screenname1 has “CFWD All” enabled, Screenname 2 has CFWD
disabled as indicated by no message displayed, and Screenname3 has “CFWD Busy” enabled.
2
Press the Call Forward key. The Call Forward Mode screen displays. Use the UP and DOWN arrow
keys to scroll through each state type.
Indicates
CFWD Enabled
Indicates
no CFWD
phone number
configured
Indicates
CFWD Disasbled
Cfwd Mode
1. All
Done
Change
Cfwd Mode
2. Busy
Done
Change
Cfwd Mode
3. NoAns
Done
X
Change
Cfwd Mode
4. All Off
Done
Set
Cfwd Mode
5. All On
Done
Set
!
In the above example, CFWD All is enabled as indicated by a checkmark ( 3), CFWD Busy is
enabled but no call forward phone number configured as indicated by a !, and CFWD NoAns is
disabled, as indicated by an X.
30
RN-001029-00, Rev 06, Release 2.2
5i Series IP Phone Release Notes
Features in Release 2.2
Aastra IP Phone UI
Step
Action
3
Select a state for the account(s) in focus using the UP and DOWN arrow keys.
You can enable/disable any or all of the following states for an account:
•
All - Enables CFWD All for an account and forwards all incoming calls for that account, to the
specified number.
•
Busy - Enables CFWD Busy for an account and forwards incoming calls to a specified number if
DND has been enabled for that account OR if the account is currently engaged in another call.
•
No Answer - Enables CFWD NoAns for an account and forwards incoming calls to a specified
number if the call has not been answered for the specified number of rings.
Note: If CFWD All AND CFWD Busy AND CFWD NoAns are all enabled (and/or if the account has
DND enabled), the CFWD All settings take precedence over CFWD Busy and CFWD NoAns.
You can also use the following keys if required:
All Off - Disables all CFWD states for the current account in focus.
All On - Enables all CFWD states for the current account in focus.
4
Press the CHANGE key for the state you selected in step 3. Scroll to the CFWD State screen. This
displays the current state of the mode you selected. In the following example, the CFWD All state is
ON..
Use
CFWD State
Screen
to view
1. Cfwd State
On
Done
Change
Change
1. Cfwd All
Cfwd State
On
Next
Cfwd State
Off
Next
Set
Set
5
Press the CHANGE key in the CFWD State screen. Press NEXT to toggle the state of the CFWD
mode ON or OFF. In the example in Step 4, you press NEXT to change the option to OFF.
6
Press the SET key to save the change.
RN-001029-00, Rev 06, Release 2.2
31
IP Phone Release Notes 2.2
Features in Release 2.2
Aastra IP Phone UI
Step
Action
7
In the CFWD State screen, press the DOWN arrow key to scroll to the CFWD Number screen and
press CHANGE.
1. Cfwd All
Use
to view
1. Cfwd State
On
Done
CFWD Number
Screen
Change
2. Cfwd Number
Done
Change
Change
Cfwd Number
__
Cancel
Set
8
Enter a phone number to apply to the current state in focus. When the phone is in the state you
specified, and a call comes into the phone, it forwards the call to the number you specify.
9
Press SET to save the change.
32
RN-001029-00, Rev 06, Release 2.2
5i Series IP Phone Release Notes
Features in Release 2.2
Aastra IP Phone UI
Step
Action
10
For the CFWD No Answer state, In the CFWD Number screen, press the DOWN arrow key to scroll
to the CFWD No. Rings screen and press CHANGE.
1. Cfwd NoAns
Use
to view
1. Cfwd State
On
Done
CFWD No.
Rings Screen
Change
2. Cfwd Number
Change
Done
Change
3. No. Rings
Done
11
Change
No. Rings
1
Next
Set
Press the NEXT key to select the number of rings to apply to the phone for call forwarding incoming
calls. Valid values are 1 to 20. Default is 1.
When the phone receives an incoming call, and call forward is configured on the phone, the phone
rings the number of times you specify in the No. Rings screen, and then forwards the call if there is
no answer.
12
Press SET to save the change.
13
Press DONE to save CFWD All Number, CFWD All State, CFWD Busy Number, CFWD Busy State,
CFWD No Answer Number, CFWD No Answer State, CFWD No Answer Rings.
Each time you press DONE, the following “Apply Changes” screen displays.
Apply Changes?
0 Cancel
# Confirm
RN-001029-00, Rev 06, Release 2.2
33
IP Phone Release Notes 2.2
Features in Release 2.2
Aastra IP Phone UI
Step
Action
14
Press # to confirm the change(s) each time the “Apply Changes” screen displays.
All changes are saved to the phone.
34
RN-001029-00, Rev 06, Release 2.2
5i Series IP Phone Release Notes
Features in Release 2.2
Aastra IP Phone UI
Step
Action
CFWD in Phone Mode (51i and 53i)
1
Use the RIGHT and LEFT arrow keys to scroll through each account.
1
Screenname1
CFWD All
Jan 1 12:96
2
Screenname2
CFWD All
Jan 1 12:96
3
Screenname3
CFWD All
Jan 1 12:96
In the above example, Screenname1, Screenname2, and Screenname3, are three accounts
configured on the phone. All three accounts have CFWD enabled as indicated by the “CFWD All”
message.
Note: In ”Phone” mode, when you change the call forward configuration for an account, the
change applies to all accounts.
RN-001029-00, Rev 06, Release 2.2
35
IP Phone Release Notes 2.2
Features in Release 2.2
Aastra IP Phone UI
Step
Action
2
Press the Call Forward key. The Call Forward Mode screen displays. Use the UP and DOWN arrow
keys to scroll through each state type.
Indicates
CFWD ALL
enabled
Indicates
no CFWD
phone number
configured for
Busy
Indicates
CFWD NoAns
enabled
Cfwd Mode
1. All
Done
Change
Cfwd Mode
2. Busy
Done
Change
Cfwd Mode
3. NoAns
Done
Change
Cfwd Mode
4. All Off
Done
Set
Cfwd Mode
5. All On
Done
Set
!
In the above example, the account has CFWD All and CFWD NoAns enabled as indicated by a
checkmark ( 3). The CFWD Busy setting is enabled but no call forward phone number is configured
as indicated by a !
36
RN-001029-00, Rev 06, Release 2.2
5i Series IP Phone Release Notes
Features in Release 2.2
Aastra IP Phone UI
Step
Action
3
Select a state using the UP and DOWN arrow keys.
You can enable/disable a specific account on the phone with any or all of the following states.
However, the configuration you set will apply to all accounts on the phone.
•
All - Enables CFWD All on the phone and forwards all incoming calls to the specified number.
•
Busy - Enables CFWD Busy on the phone and forwards incoming calls to a specified number if
DND has been enabled OR if the phone is currently engaged in another call.
•
No Answer - Enables CFWD NoAns on the phone and forwards incoming calls to a specified
number if the call has not been answered for the specified number of rings.
Note: If CFWD All AND CFWD Busy AND CFWD NoAns are all enabled (and/or if the account has
DND enabled), the CFWD All settings take precedence over CFWD Busy and CFWD NoAns.
You can also use the following keys if required:
All Off - Disables all CFWD states for the phone.
All On - Enables all CFWD states for the phone.
Note: In “Phone” mode, the initial configuration you set for an account applies to all the
accounts on the phone.
4
Press the CHANGE key for the mode you selected in step 2. Scroll to the CFWD State screen. This
displays the current state of the mode you selected. In the following example, the CFWD All state is
ON..
Use
CFWD State
Screen
RN-001029-00, Rev 06, Release 2.2
to view
1. Cfwd State
On
Done
Change
Change
1. Cfwd All
Cfwd State
On
Next
Cfwd State
Off
Next
Set
Set
37
IP Phone Release Notes 2.2
Features in Release 2.2
Aastra IP Phone UI
Step
Action
5
Press the CHANGE key in the CFWD State screen. Press NEXT to toggle the state of the CFWD
state ON or OFF. In the example in Step 4, you press NEXT to change the option to OFF.
6
Press the SET key to save the change.
7
In the CFWD State screen, press the DOWN arrow key to scroll to the CFWD Number screen and
press CHANGE.
1. Cfwd All
Use
to view
1. Cfwd State
On
Done
CFWD Number
Screen
Change
2. Cfwd Number
Done
Change
Change
Cfwd Number
__
Cancel
Set
8
Enter a phone number to apply to the current state in focus. When the phone is in the state you
specified, and a call comes into the phone, it forwards the call to the number you specify.
9
Press SET to save the change.
38
RN-001029-00, Rev 06, Release 2.2
5i Series IP Phone Release Notes
Features in Release 2.2
Aastra IP Phone UI
Step
Action
10
For the CFWD No Answer state, in the CFWD Number screen, press the DOWN arrow key to scroll
to the CFWD No. Rings screen and press CHANGE.
1. Cfwd NoAns
Use
to view
1. Cfwd State
On
Done
CFWD No.
Rings Screen
Change
2. Cfwd Number
Change
Done
Change
3. No. Rings
Done
11
Change
No. Rings
1
Next
Set
Press the NEXT key to select the number of rings to apply to the phone for call forwarding incoming
calls. Valid values are 1 to 20. Default is 1.
When the phone receives an incoming call, and call forward is configured on the phone, the phone
rings the number of times you specify in the No. Rings screen, and then forwards the call.
12
Press SET to save the change.
13
Press DONE to save CFWD All Number, CFWD All State, CFWD Busy Number, CFWD Busy State,
CFWD No Answer Number, CFWD No Answer State, CFWD No Answer Rings.
Each time you press DONE, the following “Apply Changes” screen displays.
Apply Changes?
0 Cancel
# Confirm
RN-001029-00, Rev 06, Release 2.2
39
IP Phone Release Notes 2.2
Features in Release 2.2
Aastra IP Phone UI
Step
Action
14
Press # to confirm the change(s) each time the “Apply Changes” screen displays.
All the same changes are saved to all accounts on the phone.
40
RN-001029-00, Rev 06, Release 2.2
5i Series IP Phone Release Notes
Features in Release 2.2
Aastra IP Phone UI
Step
Action
CFWD in Custom Mode (51i and 53i)
1
Use the RIGHT and LEFT arrow keys to scroll through each account.
1
Screenname1
CFWD All
Jan 1 12:96
2
3
Screenname2
CFWD Busy
Jan 1 12:96
Screenname3
CFWD NoAns
Jan 1 12:96
In the above example, Screenname1, Screenname2, and Screenname3, are three accounts
configured on the phone. All three accounts have CFWD enabled as indicated by the “CFWD All”,
“CFWD Busy”, and “CFWD NoAns” messages.
Press the Call Forward key. The CFWD Account screens display. Use the UP and DOWN arrow
keys to scroll through each account.
Call Forward
1. Screenname1
Change
Done
Indicates
CFWD Enabled
Indicates
CFWD Disabled
Indicates
no CFWD phone
number
configured
Call Forward
X
2. Screenname2
Change
Done
Call Forward
!
3. Screenname3
Change
Done
Call Forward
4. All Off
Done
Set
Call Forward
5. All On
Done
Set
In the above example, Screenname1 has one or more CFWD states enabled as indicated by a
checkmark ( 3). Screenname2 has one or more CFWD states disabled as indicated by an X.
Screenname3 has one or more CFWD states configured but a specific state has no call forward
phone number configured as indicated by a !. Items 4 and 5 allow you to disable or enable CFWD on
all accounts, respectively.
RN-001029-00, Rev 06, Release 2.2
41
IP Phone Release Notes 2.2
Features in Release 2.2
Aastra IP Phone UI
Step
Action
2
Select an account to configure. Press the CHANGE key. The CFWD Mode screen displays. Use the
UP and DOWN arrow keys to scroll through each state screen..
Indicates
CFWD All
enabled
Indicates
no CFWD
phone number
configured for
Busy
Indicates
CFWD NoAns
enabled
Cfwd Mode
1. All
Done
Change
Cfwd Mode
2. Busy
Done
Change
Cfwd Mode
3. NoAns
Done
Change
Cfwd Mode
4. All Off
Done
Set
Cfwd Mode
5. All On
Done
Set
!
In the above example, the account has CFWD All and CFWD NoAns enabled as indicated by a
checkmark ( 3). The CFWD Busy setting is enabled for the account but has no call forward phone
number configured as indicated by a !.
42
RN-001029-00, Rev 06, Release 2.2
5i Series IP Phone Release Notes
Features in Release 2.2
Aastra IP Phone UI
Step
Action
3
Select a state for the account(s) in focus using the UP and DOWN arrow keys.
You can enable/disable any or all of the following states for a specific account or for all accounts (with
individual configurations):
•
All - Enables CFWD All for an account and forwards all incoming calls for that account, to the
specified number. The phone number can be different between accounts.
•
Busy - Enables CFWD Busy for an account and forwards incoming calls to a specified number if
DND has been enabled for that account OR if that account is currently engaged in another call.
The phone number can be different between accounts.
•
No Answer - Enables CFWD NoAns for an account and forwards incoming calls to a specified
number if the call has not been answered for a specified number of rings. The phone number can
be different between accounts.
Note: If CFWD All AND CFWD Busy AND CFWD NoAns are all enabled (and/or if the account has
DND enabled), the CFWD All settings take precedence over CFWD Busy and CFWD NoAns.
You can also use the following keys if required:
All Off - Disables all CFWD states for the current account in focus or all accounts.
All On - Enables all CFWD states for the current account in focus or all accounts.
4
Press the CHANGE key for the mode you selected in step 2. Scroll to the CFWD State screen. This
displays the current state of the mode you selected. In the following example, the CFWD All state is
ON..
Use
CFWD State
Screen
RN-001029-00, Rev 06, Release 2.2
to view
1. Cfwd State
On
Done
Change
Change
1. Cfwd All
Cfwd State
On
Next
Cfwd State
Off
Next
Set
Set
43
IP Phone Release Notes 2.2
Features in Release 2.2
Aastra IP Phone UI
Step
Action
5
Press the CHANGE key in the CFWD State screen. Press NEXT to toggle the state of the CFWD
state ON or OFF. In the example in Step 4, you press NEXT to change the option to OFF.
6
Press the SET key to save the change.
7
In the CFWD State screen, press the DOWN arrow key to scroll to the CFWD Number screen and
press CHANGE.
1. Cfwd All
Use
to view
1. Cfwd State
On
Done
CFWD Number
Screen
Change
2. Cfwd Number
Done
Change
Change
Cfwd Number
__
Cancel
Set
8
Enter a phone number to apply to the current state in focus. When the phone is in the state you
specified, and a call comes into the phone, it forwards the call to the number you specify.
9
Press SET to save the change.
44
RN-001029-00, Rev 06, Release 2.2
5i Series IP Phone Release Notes
Features in Release 2.2
Aastra IP Phone UI
Step
Action
10
For the CFWD No Answer state, in the CFWD Number screen, press the DOWN arrow key to scroll
to the CFWD No. Rings screen and press CHANGE.
1. Cfwd NoAns
Use
to view
1. Cfwd State
On
Done
CFWD No.
Rings Screen
Change
2. Cfwd Number
Done
Change
Change
3. No. Rings
Done
11
Change
No. Rings
1
Next
Set
Press the NEXT key to select the number of rings to apply to the phone for call forwarding incoming
calls. Valid values are 1 to 20. Default is 1.
When the phone receives an incoming call, and call forward is configured on the phone, the phone
rings the number of times you specify in the No. Rings screen, and then forwards the call.
12
Press SET to save the change.
RN-001029-00, Rev 06, Release 2.2
45
IP Phone Release Notes 2.2
Features in Release 2.2
Aastra IP Phone UI
Step
Action
13
Press DONE to save CFWD All Number, CFWD All State, CFWD Busy Number, CFWD Busy State,
CFWD No Answer Number, CFWD No Answer State, CFWD No Answer Rings.
Each time you press DONE, the following “Apply Changes” screen displays.
Apply Changes?
0 Cancel
# Confirm
14
Press # to confirm the change(s) each time the “Apply Changes” screen displays.
All changes are saved to the phone for all accounts.
46
RN-001029-00, Rev 06, Release 2.2
5i Series IP Phone Release Notes
Features in Release 2.2
.
Aastra IP Phone UI
Step
Action
CFWD in Account Mode (55i, 57i, and 57i CT)
1
Use the RIGHT and LEFT arrow keys to scroll through each account.
Services
Dir
Callers
L1
Screenname1
Services
Dir
Callers
L2
Screenname2
Services
Dir
Callers
L3
Screenname3
CFWD All
Tues Jan1 10:00am
CFWD Busy
Tues Jan1 10:00am
Tues Jan1 10:00am
- Call Fwd
- Call Fwd
- Call Fwd
In the above example, Screenname1, Screenname2, and Screenname3, are three accounts
configured on the phone. Screenname1 has “CFWD All” enabled, Screenname2 has “CFWD Busy”
enabled, and Screenname3 has CFWD disabled as indicated by no message displayed.
2
Ppress the Call Forward key. The Call Forward Mode screen displays for the account you selected.
Use the UP and DOWN arrow keys to scroll through each state type.
Call Forward
Mode Screen
Services
Dir
Callers
Indicates
CFWD Enabled
Call Forward Mode
1. All
2. Busy
3. No Answer
- Change
- All Off
- All On
!
X
CopytoAll Cancel Done -
Indicates
no CFWD phone
number configured
Indicates
CFWD Disabled
In the above example, CFWD All is enabled as indicated by a checkmark ( 3), CFWD Busy is
enabled but no call forward phone number is configured as indicated by a !, and CFWD NoAns is
disabled as indicated by an X.
RN-001029-00, Rev 06, Release 2.2
47
IP Phone Release Notes 2.2
Features in Release 2.2
Aastra IP Phone UI
Step
Action
3
Select a state for the account(s) in focus using the UP and DOWN arrow keys.
You can enable/disable any or all of the following states for an account:
•
All - Enables CFWD All for an account and forwards all incoming calls for that account, to the
specified number.
•
Busy - Enables CFWD Busy for an account and forwards incoming calls to a specified number if
DND has been enabled for that account OR if the account is currently engaged in another call.
•
No Answer - Enables CFWD NoAns for an account and forwards incoming calls to a specified
number if the call has not been answered for the specified number of rings.
Note: If CFWD All AND CFWD Busy AND CFWD NoAns are all enabled (and/or if the account has
DND enabled), the CFWD All settings take precedence over CFWD Busy and CFWD NoAns.
You can also use the following keys if required:
All Off Key- Disables all CFWD states for the current account in focus.
All On Key - Enables all CFWD states for the current account in focus.
CopytoAll Key - Copies the call forward phone number and state of the Call Forward mode (All,
Busy, No Answer) in focus to every Call Forward mode of that account. For example, if you have the
cursor pointing at the “All” state and it is enabled and has a call forward phone number configured,
pressing the CopytoAll Key enables the Busy state and the NoAns state and assigns the same
phone number to both states.
Cancel Key - Cancels any configuration you may have made without saving. To cancel a
configuration, you must press this CANCEL key before pressing the DONE key.
48
RN-001029-00, Rev 06, Release 2.2
5i Series IP Phone Release Notes
Features in Release 2.2
Aastra IP Phone UI
Step
Action
4
For the CFWD No Answer state, press the CHANGE key for the mode you selected in step 2. This
displays the Call Forward State screen. In the following example, the CFWD All state is ON..
Services
Dir
Callers
Call Forward
Mode NoAns
State:
On
Number: 5551212
No. Rings: 1
- Change
Cancel - AllAccts
Done -
Call Forward
State Screen
Services
Dir
Callers
Change
Call Forward
Mode NoAns
State:
Off
Number: 5551212
No. Rings: 1
- Change
Cancel - AllAccts
Done -
Change the
State
Services
Dir
Callers
Call Forward
Mode NoAns
State: Off
Number: 5551212__
No. Rings: 1
- Backspace
Cancel - AllAccts
Done -
Services
Dir
Callers
Call Forward
Mode NoAns
State: Off
Number: 5551212
No. Rings: 3
- Change
Cancel - AllAccts
Done -
Change the
Number
Change the
No. Rings
Note: You can press the AllAccts key to copy the settings in the current Call Forward Settings
screen for a specific call forward mode, to every account on the phone. Every account will have the
same settings for that call forward mode.
RN-001029-00, Rev 06, Release 2.2
49
IP Phone Release Notes 2.2
Features in Release 2.2
Aastra IP Phone UI
Step
Action
5
Press the CHANGE key in the CFWD State screen. With the cursor in the “State” field, toggle the
state ON and OFF by pressing the CHANGE key.
Note: You can press the AllAccts key to copy the settings in the current Call Forward Settings
screen for a specific call forward mode, to every account on the phone. Every account will have the
same settings for that call forward mode.
6
Use the DOWN arrow key to scroll to the “Number” field. Enter a phone number to apply to the
current state in focus. When the phone is in the state you specified, and a call comes into the phone,
it forwards the call to the number you specify.
Use the BACKSPACE key if required to delete characters.
Note: You can press the AllAccts key to copy the settings in the current Call Forward Settings
screen for a specific call forward mode, to every account on the phone. Every account will have the
same settings for that call forward mode.
7
Use the DOWN arrow key to scroll to the “No. Rings” field. Press the CHANGE key to select the
number of rings to apply to the phone for call forwarding incoming calls. Valid values are 1 to 20.
Default is 1.
When the phone receives an incoming call, and call forward is configured on the phone, the phone
rings the number of times you specify in the No. Rings screen, and then forwards the call.
Note: You can press the AllAccts key to copy the settings in the current Call Forward Settings
screen for a specific call forward mode, to every account on the phone. Every account will have the
same settings for that call forward mode.
8
50
Press DONE in the CFWD State Screen to save all changes.
Press DONE in the CFWD Mode Screen to save all changes.
RN-001029-00, Rev 06, Release 2.2
5i Series IP Phone Release Notes
Features in Release 2.2
Aastra IP Phone UI
Step
Action
CFWD in Phone Mode (55i, 57i, and 57i CT)
1
Use the RIGHT and LEFT arrow keys to scroll through each account.
Services
Dir
Callers
L1
Screenname1
Services
Dir
Callers
L2
Screenname2
Services
Dir
Callers
L3
Screenname3
CFWD All
Tues Jan1 10:00am
CFWD All
Tues Jan1 10:00am
CFWD All
Tues Jan1 10:00am
- Call Fwd
- Call Fwd
- Call Fwd
In the above example, Screenname1, Screenname2, and Screenname3, are three accounts
configured on the phone. Screenname1, 2 and 3 have “CFWD All” enabled.
Note: In “Phone” mode, the initial configuration you set for an account applies to all the
accounts on the phone.
2
Press the Call Forward key. The Call Forward Mode screen displays. Use the UP and DOWN arrow
keys to scroll through each state type.
Call Forward
Mode Screen
Services
Dir
Callers
Indicates
CFWD Enabled
Call Forward Mode
1. All
2. Busy
3. No Answer
- Change
- All Off
- All On
!
X
CopytoAll Cancel Done -
Indicates
no CFWD phone
number configured
Indicates
CFWD Disabled
In the above example, CFWD All is enabled as indicated by a checkmark ( 3), CFWD Busy is
enabled but no call forward phone number is configured as indicated by a !, and CFWD No Answer
is disabled, as indicated by an X.
RN-001029-00, Rev 06, Release 2.2
51
IP Phone Release Notes 2.2
Features in Release 2.2
Aastra IP Phone UI
Step
Action
3
Select a state for the phone using the UP and DOWN arrow keys.
You can enable/disable a specific account on the phone with any or all of the following states.
However, the configuration you set will apply to all accounts on the phone.
•
All - Enables CFWD All on the phone and forwards all incoming calls to the specified number.
•
Busy - Enables CFWD Busy on the phone and forwards incoming calls to a specified number if
DND has been enabled OR if the phone is currently engaged in another call.
•
No Answer - Enables CFWD NoAns on the phone and forwards incoming calls to a specified
number if the call has not been answered for the specified number of rings.
Note: If CFWD All AND CFWD Busy AND CFWD NoAns are all enabled (and/or if the account has
DND enabled), the CFWD All settings take precedence over CFWD Busy and CFWD NoAns.
You can also use the following keys if required:
All Off Key- Disables all CFWD modes.
All On Key - Disables all CFWD modes.
CopytoAll Key - Copies the call forward phone number and state of the Call Forward mode (All,
Busy, No Answer) in focus to every Call Forward mode. For example, if you have the cursor pointing
at the “All” state and it is enabled and has a call forward phone number configured, pressing the
CopytoAll Key enables the Busy state and the NoAns state and assigns the same phone number to
both states.
Cancel Key - Cancels any configuration you may have made without saving. To cancel a
configuration, you must press this CANCEL key before pressing the DONE key.
52
RN-001029-00, Rev 06, Release 2.2
5i Series IP Phone Release Notes
Features in Release 2.2
Aastra IP Phone UI
Step
Action
4
In the CFWD No Answer state, press the CHANGE key for the mode you selected in step 2. This
displays the Call Forward State screen. In the following example, the CFWD All state is ON..
Services
Dir
Callers
Call Forward
Mode NoAns
State:
On
Number: 5551212
No. Rings: 1
- Change
Cancel Done -
Call Forward
State Screen
Change
Services
Dir
Callers
Call Forward
Mode NoAns
State:
Off
Number: 5551212
No. Rings: 1
- Change
Cancel Done -
Services
Dir
Callers
Call Forward
Mode NoAns
State: Off
Number: 5551212__
No. Rings: 1
- Backspace
Cancel Done -
Services
Dir
Callers
Call Forward
Mode NoAns
State: Off
Number: 5551212
No. Rings: 3
- Change
Cancel Done -
5
Change the
State
Change the
Number
Change the
No. Rings
Press the CHANGE key in the CFWD State screen. With the cursor in the “State” field, toggle the
state ON and OFF by pressing the CHANGE key.
RN-001029-00, Rev 06, Release 2.2
53
IP Phone Release Notes 2.2
Features in Release 2.2
Aastra IP Phone UI
Step
Action
6
Use the DOWN arrow key to scroll to the “Number” field. Enter a phone number to apply to the
current state in focus. When the phone is in the state you specified, and a call comes into the phone,
it forwards the call to the number you specify.
Use the BACKSPACE key if required to delete characters.
7
Use the DOWN arrow key to scroll to the “No. Rings” field. Press the CHANGE key to select the
number of rings to apply to the phone for call forwarding incoming calls. Valid values are 1 to 20.
Default is 1.
When the phone receives an incoming call, and call forward is configured on the phone, the phone
rings the number of times you specify in the No. Rings screen, and then forwards the call.
8
Press DONE in the CFWD State Screen to save all changes.
Press DONE in the CFWD Mode Screen to save all changes.
Note: In “Phone” mode, the configuration applies to all the accounts on the phone.
54
RN-001029-00, Rev 06, Release 2.2
5i Series IP Phone Release Notes
Features in Release 2.2
Aastra IP Phone UI
Step
Action
CFWD in Custom Mode (55i, 57i, and 57i CT
1
Use the RIGHT and LEFT arrow keys to scroll through each account.
Services
Dir
Callers
L1
Screenname1
Services
Dir
Callers
L2
Screenname2
Services
Dir
Callers
L3
Screenname3
CFWD All
Tues Jan1 10:00am
CFWD Busy
Tues Jan1 10:00am
Tues Jan1 10:00am
- Call Fwd
- Call Fwd
- Call Fwd
In the above example, Screenname1, Screenname2, and Screenname3, are three accounts
configured on the phone. Screenname1 has “CFWD All” enabled, Screenname2 has “CFWD Busy”
enabled, and Screenname3 has CFWD disabled as indicated by no message displayed.
2
With the account in focus on the IP Phone UI, press the Call Forward key. The Call Forward Account
screen displays which lists all the accounts on the phone. Use the UP and DOWN arrow keys to
scroll through each account.
Call Forward
Account Screen
Services
Dir
Callers
Call Forward
1. Screenname1
2. Screenname2
3. Screenname3
- Change
- All Off
- All On
Indicates
CFWD Enabled
!
X
CopytoAll Cancel Done -
Indicates
no CFWD phone
number configured
Indicates
CFWD Disabled
In the above example, Screenname1 has one or more CFWD states enabled as indicated by a
checkmark ( 3), Screenname 2 has one or more CFWD states enabled but a specific state has no
call forward phone number configured as indicated by a !, and Screenname3 has one or more
CFWD states disabled as indicated by an X.
RN-001029-00, Rev 06, Release 2.2
55
IP Phone Release Notes 2.2
Features in Release 2.2
Aastra IP Phone UI
Step
Action
3
Select an account using the UP and DOWN arrow keys.
You can also use the following keys if required:
All Off Key- Disables CFWD for all accounts on the phone.
All On Key - Enables CFWD for all accounts on the phone.
CopytoAll Key - Copies all settings for the acccount you select, to all other accounts on the Call
Forward Account screen. For example, if you have the cursor pointing at Screenname1, and you
press the CopytoAll key, all of the CFWD settings for Screenname1 are copied to Screenname2 and
Screenname3.
Cancel Key - Cancels any configuration you may have made without saving. To cancel a
configuration, you must press this CANCEL key before pressing the DONE key.
4
After selecting an account, press CHANGE.
The Call Forward Mode screen displays for the account you selected. Use the UP and DOWN arrow
keys to scroll through each state type.
Call Forward
Mode Screen
Services
Dir
Callers
Indicates
CFWD Enabled
Call Forward Mode
1. All
2. Busy
3. No Answer
- Change
- All Off
- All On
!
X
CopytoAll Cancel Done -
Indicates
no CFWD phone
number configured
Indicates
CFWD Disabled
In the above example, CFWD All is enabled as indicated by a checkmark ( 3), CFWD Busy is
enabled but no call forward phone number is configured as indicated by a !, and CFWD No Answer
is disabled, as indicated by an X.
56
RN-001029-00, Rev 06, Release 2.2
5i Series IP Phone Release Notes
Features in Release 2.2
Aastra IP Phone UI
Step
Action
5
Select a state for the selected account(s) using the UP and DOWN arrow keys.
You can enable/disable any or all of the following states for a specific account or for all accounts (with
individual configurations):
•
All - Enables CFWD All for an account and forwards all incoming calls for that account, to the
specified number. The phone number can be different between accounts.
•
Busy - Enables CFWD Busy for an account and forwards incoming calls to a specified number if
DND has been enabled for that account OR if that account is currently engaged in another call.
The phone number can be different between accounts.
•
No Answer - Enables CFWD NoAns for an account and forwards incoming calls to a specified
number if the call has not been answered for a specified number of rings. The phone number can
be different between accounts.
Note: If CFWD All AND CFWD Busy AND CFWD NoAns are all enabled (and/or if the account has
DND enabled), the CFWD All settings take precedence over CFWD Busy and CFWD NoAns.
You can also use the following keys if required:
All Off Key- Disables all CFWD states for the selected account.
All On Key - Enables all CFWD states for the selected account.
CopytoAll Key - Copies the call forward phone number and state of the selected Call Forward mode
(All, Busy, No Answer) to every Call Forward mode of that account. For example, if you have the
cursor pointing at the “All” state and it is enabled and has a call forward phone number configured,
pressing the CopytoAll Key enables the Busy state and the NoAns state and assigns the same
phone number to both states.
Cancel Key - Cancels any configuration you may have made without saving. To cancel a
configuration, you must press this CANCEL key before pressing the DONE key.
RN-001029-00, Rev 06, Release 2.2
57
IP Phone Release Notes 2.2
Features in Release 2.2
Aastra IP Phone UI
Step
Action
6
Press the CHANGE key for the mode you selected in step 4. This displays the Call Forward State
screen. In the following example, the CFWD All state is ON..
Services
Dir
Callers
Call Forward
Mode NoAns
State:
On
Number: 5551212
No. Rings: 1
- Change
Cancel - AllAccts
Done -
Call Forward
State Screen
Services
Dir
Callers
Change
Call Forward
Mode NoAns
State:
Off
Number: 5551212
No. Rings: 1
- Change
Cancel - AllAccts
Done -
Change the
State
Services
Dir
Callers
Call Forward
Mode NoAns
State: Off
Number: 5551212__
No. Rings: 1
- Backspace
Cancel - AllAccts
Done -
Services
Dir
Callers
Call Forward
Mode NoAns
State: Off
Number: 5551212
No. Rings: 3
- Change
Cancel - AllAccts
Done -
Change the
Number
Change the
No. Rings
Note: You can press the AllAccts key to copy the settings in the current Call Forward Settings
screen for a specific call forward mode, to every account on the phone. Every account will have the
same settings for that call forward mode.
58
RN-001029-00, Rev 06, Release 2.2
5i Series IP Phone Release Notes
Features in Release 2.2
Aastra IP Phone UI
Step
Action
7
Press the CHANGE key in the CFWD State screen. With the cursor in the “State” field, toggle the
state ON and OFF by pressing the CHANGE key.
Note: You can press the AllAccts key to copy the settings in the current Call Forward Settings
screen for a specific call forward mode, to every account on the phone. Every account will have the
same settings for that call forward mode.
8
Use the DOWN arrow key to scroll to the “Number” field. Enter a phone number to apply to the
current state in focus. When the phone is in the state you specified, and a call comes into the phone,
it forwards the call to the number you specify.
Use the BACKSPACE key if required to delete characters.
Note: You can press the AllAccts key to copy the settings in the current Call Forward Settings
screen for a specific call forward mode, to every account on the phone. Every account will have the
same settings for that call forward mode.
9
Use the DOWN arrow key to scroll to the “No. Rings” field. Press the CHANGE key to select the
number of rings to apply to the phone for call forwarding incoming calls. Valid values are 1 to 20.
Default is 1.
When the phone receives an incoming call, and call forward is configured on the phone, the phone
rings the number of times you specify in the No. Rings screen, and then forwards the call.
Note: You can press the AllAccts key to copy the settings in the current Call Forward Settings
screen for a specific call forward mode, to every account on the phone. Every account will have the
same settings for that call forward mode.
10
Press DONE in the CFWD State screen to save all changes.
Press DONE in the CFWD Mode screen to save all changes.
Press DONE in the CFWD Account screen to save all changes.
RN-001029-00, Rev 06, Release 2.2
59
IP Phone Release Notes 2.2
Features in Release 2.2
Multicast Group Paging
An Administrator or User can configure a specific softkey on the phone that
allows you to send/receive a Real Time Transport Protocol (RTP) stream to/from
pre-configured multicast address(es) without involving SIP signaling. This is
called Group Paging on the IP phones. You can specify up to 5 listening multicast
addresses.
An Administrator can use the following parameters in the configuration files to set
Group Paging RTP Settings:
•
paging group listening
•
softkeyN type, topsoftkeyN type, prgkeyN type, or expmodX keyN type
•
sofkeyN label, topsoftkeyN label, or expmodX keyN label
•
softkeyN value, topsoftkeyN value, prgkeyN value, or expmodX keyN
value
An Administrator or User can use the following parameters in the Aastra Web UI
to set Group Paging RTP Settings:
•
Paging Listen Addresses (Basic Settings->Preferences->Group Paging RTP
Settings)
•
<Paging> Softkey (Operation->Softkeys and XML,
Operation->Programmable Keys, Operation->Expansion Keys)
How it works
After pressing a configured “Paging” softkey on the phone, the Phone sends RTP
to a preconfigured multicast address. Any phone in the local network then listens
for RTP on the preconfigured multicast address. For both sending and receiving of
the multicast RTP there is no sip signaling involved. The Phone displays the
“Paging” message to the phone’s LCD.
Note: Multicast RTP is one way only - from sender to the receiver (i.e.
from sender to the multicast address (receiver)).
The phone uses the G711 uLaw CODEC for multicast RTP.
60
RN-001029-00, Rev 06, Release 2.2
5i Series IP Phone Release Notes
Features in Release 2.2
The recipient can drop the incoming page if required. The recipient can also set
Do Not Disturb (DND) to ignore any incoming pages.
Note: For outgoing RTP multicasts, all other existing calls on the phone
are put on hold.
For incoming RTP multicasts, the ringing display is dependant on the “Allow
Barge-In” parameter. If this parameter is disabled, and there is no other call on
the phone, then the paging is automatically played via the preferred audio
device (see the model-specific IP Phone User Guide for setting Audio
Mode on the phone).
If there is an existing call on the phone, the call initially displays in the ringing
state. The user has the option to accept/ignore the call. If the “Allow Barge-In”
parameter is enabled, the RTP multicast call barges in, and any existing calls are
put on hold.
If an RTP multicast session already exists on the phone, and the phone receives
another incoming RTP multicast session, the priority is given to the first multicast
session and the second multicast session is ignored. The behavior for the
incoming calls in this case is also based on the setting for the “Allow Barge-in”
parameter. The incoming call is handled as if there were an existing call already
on the phone.
RN-001029-00, Rev 06, Release 2.2
61
IP Phone Release Notes 2.2
Features in Release 2.2
Configuring Group Paging RTP Settings
Receiving End of Page Using the Configuration Files
Use the following parameters to configure RTP streaming on the receiving end for
Paging applications using the configuration files.
•
paging group listening.
Parameter –
paging group listening
Aastra Web UI:
Basic Settings->Preferences->
Group Paging RTP Settings
Configuration Files aastra.cfg, <mac>.cfg
Description
Specifies the multicast address(es) and the port on which the phone
listens for incoming multicast RTP packets.
Note: If this field is blank, Paging listening capability is disabled on the
phone.
Format
Comma separated list of IP Address in dotted decimal format:Port #
Default Value
N/A
Range
N/A
Example
paging group listening: 239.0.1.15:10000,239.0.1.20:15000
62
RN-001029-00, Rev 06, Release 2.2
5i Series IP Phone Release Notes
Features in Release 2.2
Receiving End of Page Using the Aastra Web UI
Use the following procedure to configure RTP streaming on the receiving end for
Paging applications using the Aastra Web UI.
Aastra Web UI
1
Click on Basic Settings->Preferences->Group Paging RTP Settings.
2
In the “Paging Listen Addresses” text box, enter the multicast IP address(es) and port number on
which the phone listens for incoming multicast RTP packets.
Note: Enter the IP address in dotted decimal format (for example,
239.0.1.15:10000,239.0.1.20:15000) If this field is blank, Paging listening capability is disabled on
the phone.
3
Click
to save your changes.
RN-001029-00, Rev 06, Release 2.2
63
IP Phone Release Notes 2.2
Features in Release 2.2
Sending End of Page Using the Configuration Files
Use the following parameters to configure RTP streaming on the sending end for
Paging applications using the configuration files.
•
softkeyN type, topsoftkeyN type, prgkeyN type, or expmodX keyN type
•
sofkeyN label, topsoftkeyN label, or expmodX keyN label
•
softkeyN value, topsoftkeyN value, prgkeyN value, or expmodX keyN
value.
Example
The following is an example of configuring RTP streaming for Paging
applications using the configuration files:
softkey1 type: paging
softkey1 label: Group 1
softkey1 value: 239.0.1.15:10000
Note: The “softkeyN value” field allows for one multicast address
entry only. The “paging group listening” parameter value allows for
multiple multicast addresses.
64
RN-001029-00, Rev 06, Release 2.2
5i Series IP Phone Release Notes
Features in Release 2.2
Sending End of Page Using the Aastra Web UI
Use the following procedure to configure RTP streaming for Paging applications
using the Aastra Web UI.
Aastra Web UI
1
Click on Softkeys and XML.
or
Click on Programmable Keys.
or
Click on Expansion Module Keys.
2
Choose a key that you want to assign as the Paging Key and select Paging from the “Type” field.
3
In the “Label” field, enter a key label to assign to the Paging key (for example, “Group 1”).
RN-001029-00, Rev 06, Release 2.2
65
IP Phone Release Notes 2.2
Features in Release 2.2
Aastra Web UI
4
In the “Value” field, enter a multicast IP address and a port number for the Paging key. When you
press this key, the phone initiates an outgoing multicast RTP session to the specified address(es)
using the specified port. (For example, 239.0.1.15:10000).
Notes:
1. When you select Paging for the “Type” field, the “Line” field and state fields are disabled.
2. The “Value” field allows for one multicast address entry only. The “Paging Listen Addresses”
parameter in Step 2 allows for multiple multicast addresses.
5
66
Click
to save your changes.
RN-001029-00, Rev 06, Release 2.2
5i Series IP Phone Release Notes
Features in Release 2.2
Using the Configured Paging Key on the IP Phone
The following procedure describes the use of the Paging key. The procedures
assumes you have already configured the Paging key using the configuration files
or the Aastra Web UI.
Notes:
1.
Recipient of a Paging call can set a global “Do Not Disturb”
(DND) to ignore any incoming pages.
2.
For incoming Paging, the phones use the Intercom configuration
settings. The incoming Page is dependant on the “Allow Barge-In”
parameter setting and the “Idling/On Call” state.
Aastra IP Phone UI
Step
Action
On the IP Phone, press the softkey you configured for Paging (labeled as “Group 1” in the following
illustration).
Services
Dir
Callers
Icom
Tues Jan1 10:00am
Group 1
LAB
ACD
The phone opens a multicast RTP session and an outgoing OR incoming phone screen displays as
follows:
Paging
00:01
Drop
Press the Drop softkey to end the multicast RTP session and return to the idle screen.
Note: If you enable global DND on the phone, the incoming multicast RTP session is dropped.
RN-001029-00, Rev 06, Release 2.2
67
IP Phone Release Notes 2.2
Features in Release 2.2
Simplified Transfer Using BLF and Speeddial Keys
In Release 2.2, a transfer (Xfer) enhancement has been added to the original
functionality of the BLF and Speeddial keys - BLF/Xfer and Speeddial/Xfer.
Prior to this release, the IP Phones supported BLF, Xfer, and Speeddial softkeys
and programmable keys. The BLF key allows one or more extensions to be
monitored, and once there is any state change with those extensions, the key
shows the status of the monitored lines. The Xfer key allows a call to be
transferred to other recipients blindly or consultatively. The Speeddial key allows
a number to be dialed quickly by pressing one key configured for speeddialing.
After answering a call, the recipient can transfer the call to an extension by:
1.
Pressing Xfer key
2.
Entering the number of the extension or pressing speeddial or BLF key.
3.
Pressing Xfer key again
Release 2.2 introduces a simpler way of transferring calls using the keys called
BLF/Xfer and Speeddial/Xfer. The BLF/Xfer key combines the BLF and Xfer
key's functionality together allowing the user to transfer calls or use BLF with one
key. Similarly, the Speeddial/Xfer key combines the Speeddial key and Xfer
key's functionality together allowing the user to press one key to speeddial and
transfer calls.
Note: It is recommended that you enable the “switch focus to
ringing” parameter when using the BLF and Speeddial transfer key
feature. For more information about this parameter, see “Ability to
Disable Switching Focus to a Ringing Line When on a Call” on
page 74.
68
RN-001029-00, Rev 06, Release 2.2
5i Series IP Phone Release Notes
Features in Release 2.2
BLF/Xfer Key Requirements and Functionality
•
BLF/Xfer and BLF
A BLF/Xfer key can be configured for subscribing to an extension and
monitor the status of the extension, similar to the the BLF key functionality.
Changes of the state of the monitored extension are indicated by a LED / Icon.
•
BLF/Xfer and Blind Transfer Calls
When the focused line is in the “Connected” state, pressing the BLF/Xfer key
transfers the call to the extension unconditionally, disregarding the status of
the monitored extension.
If transferring a call to an extension fails, a message “Transfer Failed”
displays on the phone, and you can reconnect the call (get the call back) by
pressing the line key again.
•
BLF/Xfer and Call forward
When the focused line is in the “Ringing” state, pressing the BLF/Xfer key
forwards the call to the extension unconditionally, disregarding the status of
the monitored extension.
•
BLF/Xfer and Speeddial
When the focused line and the monitored extension are idle, pressing the
BLF/Xfer key causes the phone to go offhook and dial the number of the
extension.
RN-001029-00, Rev 06, Release 2.2
69
IP Phone Release Notes 2.2
Features in Release 2.2
Speeddial/Xfer Key Requirements and Functionality
The Speeddial/Xfer key has the following capabilities:
•
Speeddial/Xfer and Speeddial
When the phone is in the “Idle” state, pressing the Speeddial/Xfer key causes
the phone to go offhook and dial the predefined extension.
•
Speeddial/Xfer and Blind Transfer
When the phone is connected to a call, pressing the Speeddial/Xfer key blind
transfers the call to the predefined target.
If transferring a call fails, a message “Transfer Failed” displays, and you can
reconnect the call (get the call back) by pressing the line key again.
•
Speeddial/Xfer and Call Forward
When the phone is in the “Ringing” state, pressing the Speeddial/Xfer key
forwards the call to the predefined extension.
70
RN-001029-00, Rev 06, Release 2.2
5i Series IP Phone Release Notes
Features in Release 2.2
Configuring the BLF/Xfer Key and the Speeddial/Xfer Key Using the
Configuration Files
You use the following parameters in the configuration files to configure the
BLF/Xfer key and/or Speeddial/Xfer key on the IP Phone.
Softkey Parameters
Programmable Key Parameters Expansion Module Parameters
softkeyN type
softkeyN label
softkeyN value
softkeyN line
softkeyN states
prgkeyN type
prgkeyN value
prgkeyN line
expmodN keyN type
expmodN keyN label
expmodN keyN value
expmodN keyN line
Top Softkey Parameters
topsoftkeyN type
topsoftkeyN label
topsoftkeyN value
topsoftkeyN line
Examples:
softkey1
softkey1
softkey1
softkey1
softkey1
type: speeddialxfer
label: BX7801
value: 7801
line: 1
states: idle connected incoming outgoing busy
prgkey1 type: blfxfer
prgkey1 value: 35
prgkey1 line: 1
RN-001029-00, Rev 06, Release 2.2
71
IP Phone Release Notes 2.2
Features in Release 2.2
Configuring the BLF/Xfer Key and the Speeddial/Xfer Key Using the
Aastra Web UI
You configure the BLF/Xfer key and/or the Speeddial/Xfer Key on the IP phone
similar to configuring a BLF key or speeddial key using the Aastra Web UI. Use
the following procedure to configure BLF/Xfer and/or Speeddial/Xfer..
Aastra Web UI
1
Click on Operation->Softkeys and XML.
or
Click on Operation->Programmable Keys.
or
Click on Operation->Expansion Keys.
Bottom Keys Tab (57i example).
72
RN-001029-00, Rev 06, Release 2.2
5i Series IP Phone Release Notes
Features in Release 2.2
Aastra Web UI
Top Keys Tab (57i example)
2
Choose a key that you want to assign the BLF/Xfer key or a Speeddial/Xfer key to, and select BLF/
Xfer or Speeddial/Xfer from the “Type” field..
3
In the “Label” field, enter a key label to assign to the BLF/Xfer key (for example, “BX35”).
4
In the “Value” field, enter the monitored extension (for example, “35”).
5
In the “Line” field, select the line for which you want to use the key functionality.
6
On the Bottom Key tab, in the States field, select the state(s) (idle, connected, incoming, outgoing,
busy) for which you want to use on the key.
Note: States are not applicable to programmable keys.
7
Click
to save your changes.
RN-001029-00, Rev 06, Release 2.2
73
IP Phone Release Notes 2.2
Features in Release 2.2
Ability to Disable Switching Focus to a Ringing Line When on a Call
In Release 2.2, it is now possible to control the behavior of the phone when it
receives an incoming call when it is already in a connected call. By default, and in
the previous release behavior, the phone switches focus to the ringing line to
enable the user to see who is calling them.
In Release 2.2, you can now turn off this functionality so that the phone now stays
focused on the connected call. You can do this using the “switch focus to ringing
line” parameter in the configuration files or the Aastra Web UI.
Note: If you configure the BLF/Xfer key(s) and/or Speeddial/Xfer
key(s) on the phone, you can enable or disable the switching of the
user interface focus to ringing line while the phone is in the connected
state.
Configuring “Switch Focus to Ringing Line” Using the Configuration
Files
You use the following parameter in the configuration files to enable or disable
“Switch Focus to Ringing Line”:
•
switch focus to ringing line
Parameter –
switch focus to ringing line
Aastra Web UI:
Basic Settings->Preferences->General
Configuration Files aastra.cfg, <mac>.cfg
Description
Specifies whether or not the UI focus is switched to a ringing line while
the phone is in the connected state.
Format
Boolean
Default Value
1 (enable)
Range
0 (disable)
1 (enable)
Example
switch focus to ringing line: 1
74
RN-001029-00, Rev 06, Release 2.2
5i Series IP Phone Release Notes
Features in Release 2.2
Configuring “Switch Focus to Ringing Line” Using the
Aastra Web UI
Use the following procedure to enable or disable the “Switch Focus to Ringing
Line” using the Aastra Web UI.
Aastra Web UI
1
Click on Basic Settings->Preferences->General.
.
“Switch Focus to Ringing Line” Parameter
2
The “Switch Focus to Ringing Line” field is enabled by default. To disable this field, uncheck the
box.
3
Click
to save your changes.
RN-001029-00, Rev 06, Release 2.2
75
IP Phone Release Notes 2.2
Features in Release 2.2
Security Features
802.1x Support
The IP phones now support the IEEE 802.1x protocol. The 802.1x protocol is a
standard for passing Extensible Authentication Protocol (EAP) over a wired or
wireless Local Area Network (LAN).
The 802.1x protocol on the IP phone facilitates media-level access control, and
offers the capability to permit or deny network connectivity, control LAN access,
and apply traffic policy, based on user or endpoint identity. This feature supports
both the EAP-MD5 and EAP-TLS protocols.
If 802.1x on the phone is enabled, the following screen displays during startup of
the phone.
>> 10%
802.1x Authenticating....
If the 802.1x failed to authenticate with the server, the phone continues it's normal
startup process using DHCP. However, the network port on the phone may or may
not be disabled, depending on the switch configuration.
76
RN-001029-00, Rev 06, Release 2.2
5i Series IP Phone Release Notes
Features in Release 2.2
Certificates and Private Key Information
•
If the certificates and private key are NOT stored in the phone:
— the phone connects to an open unauthenticated VLAN and the certificates
are downloaded.
or
— the phone connects using EAP-MD5 to a restricted VLAN and the
certificates are downloaded.
•
If the certificates and private key ARE stored in the phone, the phone uses
them during the authentication process.
•
If the phone uses EAP-TLS for successful authentication, after the phone
reboots, it downloads the latest certificates and private key files to the phone.
•
The private key uses AES-128 to encrypt the private key file.
•
Switch Supplicant Mode - The switch supports the following 2 modes:
— Single supplicant - This mode enables the port once any machine
connected to this port is authenticated. For security reasons, the IP phone
has the option to disable the pass-through port.
— Multiple supplicants - Using this mode, the switch can support multiple
clients connected to same port. The switch distinguishes between the
clients based on their MAC address.
•
Factory default and recovery mode deletes all certificates and private keys,
and sets the EAP type to disabled.
You can configure the 802.1x feature on the IP phone using the configuration
files, the IP Phone UI, or the Aastra Web UI.
Note: If configuring 802.1x using the IP Phone UI, the certificates
and private keys must already be configured and stored on the phone.
Use the configuration files or the Aastra Web UI to load certificates
and private keys.
RN-001029-00, Rev 06, Release 2.2
77
IP Phone Release Notes 2.2
Features in Release 2.2
Configuring the 802.1x Protocol Using the Configuration Files
Use the following parameters to configure the 802.1x Protocol on your phone
using the configuration files.
For EAP-MD5 use:
•
eap type
•
identity
•
md5 password
•
pc port passthrough enabled
For EAP-TLS use:
78
•
eap type
•
identity
•
802.1x root and intermediate certificates
(use 1 root and 0 or 1 intermediate certificates)
•
802.1x local certificate
(use 1 local certificate)
•
802.1x private key
(1 private key that corresponds to local certificate)
•
802.1x trusted certificates
(0 or more trusted certificates (a maximum of 2))
•
pc port passthrough enabled
RN-001029-00, Rev 06, Release 2.2
5i Series IP Phone Release Notes
Features in Release 2.2
Parameter –
pc port passthru enabled
IP phone UI
Aastra Web UI
Configuration Files
Options->Administrator Menu->
Network Settings->Ethernet Link
Advanced Settings->Network->
Basic Network Settings
aastra.cfg, <mac>.cfg
Description
Enables or disables the LAN PC port on the phone.
Format
Integer
Default Value
1 (enable)
Range
0 (disable)
1 (enable)
Example
pc port passthru enabled: 1
Parameter –
eap type
IP Phone UI:
Options->Administrator Menu->
Network Settings->Ethernet Link->
802.1x Settings
Aastra Web UI:
Advanced Settings->802.1x Support->General
Configuration Files aastra.cfg, <mac>.cfg
Description
Specifies the type of authentication to use on the IP Phone.
Format
Integer
Default Value
0 (disable)
Range
0 (disable)
1 (MD5)
2 (TLS)
Example
eap type: 1
RN-001029-00, Rev 06, Release 2.2
79
IP Phone Release Notes 2.2
Features in Release 2.2
Parameter –
identity
IP Phone UI:
Options->Administrator Menu->
Network Settings->Ethernet Link->
802.1x Settings->EAP-MD5 Settings
Aastra Web UI:
Advanced Settings->802.1x Support->General
Configuration Files aastra.cfg, <mac>.cfg
Description
Specifies the identity or username used for authenticating the phone.
Note: The value you enter for this parameter also displays in the Aastra
Web UI at the path Advanced Settings->
802.1x Support->General->Identity.
Format
String
Default Value
N/A
Range
N/A
Example
identity: phone1
Parameter –
md5 password
IP Phone UI:
Description
Specifies the password used for the MD5 authentication of the phone.
Options->Administrator Menu->
Network Settings->Ethernet Link->
802.1x Settings->EAP-MD5 Settings
Aastra Web UI:
Advanced Settings->802.1x Support->
EAP-MD5 Settings
Configuration Files aastra.cfg, <mac>.cfg
Note: The value you enter for this parameter also displays in the Aastra
Web UI at the path Advanced Settings->
802.1x Support->EAP-MD5 Settings->MD5 Password. The password
displays as “*******”.
Format
String
Default Value
N/A
Range
N/A
Example
md5 password: password1
80
RN-001029-00, Rev 06, Release 2.2
5i Series IP Phone Release Notes
Features in Release 2.2
Parameter –
802.1x root and intermediate
certificates
Aastra Web UI:
Advanced Settings->802.1x Support->
EAP-TLS Settings
Configuration Files aastra.cfg, <mac>.cfg
Description
Specifies the file name that contains the root and intermediate
certificates related to the local certificate.
Format
String
Default Value
N/A
Range
N/A
Example
802.1x root and intermediate certificates: filename.pem
Parameter –
802.1x local certificate
Aastra Web UI:
Description
Specifies the file name that contains the local certificate.
Format
String
Default Value
N/A
Range
N/A
Example
802.1x local certificate: filename.pem
Parameter –
802.1x private key
Aastra Web UI:
Description
Specifies the file name that contains the private key.
Format
String
Default Value
N/A
Range
N/A
Example
802.1x private key: filename.pem
Advanced Settings->802.1x Support->
EAP-TLS Settings
Configuration Files aastra.cfg, <mac>.cfg
Advanced Settings->802.1x Support->
EAP-TLS Settings
Configuration Files aastra.cfg, <mac>.cfg
RN-001029-00, Rev 06, Release 2.2
81
IP Phone Release Notes 2.2
Features in Release 2.2
Parameter –
802.1x trusted certificates
Aastra Web UI:
Description
Specifies the file name that contains the trusted certificates.
Format
String
Default Value
N/A
Range
N/A
Example
802.1x trusted certificates: filename.pem
82
Advanced Settings->802.1x Support->
EAP-TLS Settings
Configuration Files aastra.cfg, <mac>.cfg
RN-001029-00, Rev 06, Release 2.2
5i Series IP Phone Release Notes
Features in Release 2.2
Configuring the 802.1x Protocol Using the IP Phone UI
Use the following procedure to configure the 802.1x Protocol on your phone
using the IP Phone UI.
Note: If configuring 802.1x using the IP Phone UI, the
certificates and private keys must already be configured and
stored on the phone. Use the configuration files or the Aastra
Web UI to load certificates and private keys.
Aastra IP Phone UI
Step
Action
1
Press
2
Select Administrator Menu and enter your Administrator password.
3
Select Network Settings->Ethernet->Enable PassThru Port.
to enter the Options List.
Ethernet Link
1. LAN Port Link
2. PC Port Link
3. Enable PassThru Port
4. 802.1x Settings
- Select
Done -
RN-001029-00, Rev 06, Release 2.2
83
IP Phone Release Notes 2.2
Features in Release 2.2
Aastra IP Phone UI
Step
Action
4
The PC PassThru Port is enabled by default.
Enable PassThru Port
Enable PassThru Port
Yes
- Change
Cancel Done Note: The PC PassThru Port must be enabled to use the 802.1x Protocol.
5
Press Done.
6
Select 802.1x Settings.
7
Select 802.1x Mode.
802.1x Settings
1. 802.1x Mode
2. EAP-MD5 Settings
- Select
Done -
84
RN-001029-00, Rev 06, Release 2.2
5i Series IP Phone Release Notes
Features in Release 2.2
Aastra IP Phone UI
Step
Action
8
Select EAP-MD5 to configure the phone to use MD5 authentication;
or
Select EAP-TLS to configure the phone to use TLS authentication.
802.1x Mode
Disabled
EAP-MD5
EAP-TLS
Cancel Done Note: The 802.1x Protocol is disabled by default. If you select EAP-TLS authentication, you must use
the configuration files or the Aastra Web UI to configure the certificates and private key for the phone.
9
Press Done.
10
To configure MD5, select EAP-MD5 Settings.
11
Select Identity.
EAP-MD5 Setting
1. Identity
2. MD5 Password
- Select
Done -
RN-001029-00, Rev 06, Release 2.2
85
IP Phone Release Notes 2.2
Features in Release 2.2
Aastra IP Phone UI
Step
Action
12
Enter the identity or username used for authenticating the phone.
Username
Username:
|
- Backspace Nextspace Cancel - ABC
Done -
13
Use the softkeys as applicable while entering the username; then press Done.
14
Enter the password used for authenticating the phone.
Password
Password:
|
- Backspace Nextspace Cancel - ABC
Done -
15
Use the softkeys as applicable while entering the password; then press Done.
16
Press the
86
key to save your settings and exit from the IP Phone UI.
RN-001029-00, Rev 06, Release 2.2
5i Series IP Phone Release Notes
Features in Release 2.2
Configuring the 802.1x Protocol Using the Aastra Web UI
Use the following procedure to configure the 802.1x Protocol on your phone
using the Aastra Web UI.
Aastra Web UI
Click on Advanced Settings->802.1x Support.
To configure EAP-MD5:
17
In the “EAP Type” field, select EAP-MD5.
Valid values are: Disabled (Default), EAP-MD5, and EAP-TLS.
18
In the “Identify” field, enter an Identity for the IP phone for which you are configuring 802.1x.
For example, phone1.
19
In the “MD5 Password” field, enter a password used for the MD5 authentication of the phone.
For example, password1.
20
Click
to save your changes.
RN-001029-00, Rev 06, Release 2.2
87
IP Phone Release Notes 2.2
Features in Release 2.2
Aastra Web UI
21
Click on Advanced Settings->Network->Basic Network Settings.
PC Port PassThru
Enable/Disable
22
The “PC Port PassThru Enable/Disable” field is enabled by default. To disable this field, uncheck
the box.
Note: The PC Port PassThru Enable Disable field must be enabled to use the 802.1x Protocol.
23
Click
to save your changes.
To configure EAP-TLS:
1
In the “EAP Type” field, select EAP-TLS.
Valid values are: Disabled (Default), EAP-MD5, and EAP-TLS.
2
In the “Identify” field, enter an Identity for the IP phone for which you are configuring 802.1x.
For example, phone1.
3
In the “Root and Intermediate Certificates” field, enter the filename that contains the root and
intermediate certificates related to the local certificate. For example: root_Intermed_certifi.pem.
4
In the “Local Certificate” field, enter the filename that contains the local certificate. For example:
localcertificate.pem.
88
RN-001029-00, Rev 06, Release 2.2
5i Series IP Phone Release Notes
Features in Release 2.2
Aastra Web UI
5
In the “Private Key” field, enter the filename that contains the private key. For example:
privatekey.pem.
6
In the “Trusted Certificates” field, enter the filename that contains the trusted certificates. For
example: trusted_certificates.pem.
7
Click
8
Click on Advanced Settings->Network->Basic Network Settings.
to save your changes.
PC Port PassThru
Enable/Disable
9
The “PC Port PassThru Enable/Disable” field is enabled by default. To disable this field, uncheck
the box.
Note: The PC Port PassThru Enable Disable field must be enabled to use the 802.1x Protocol.
10
Click
to save your changes.
RN-001029-00, Rev 06, Release 2.2
89
IP Phone Release Notes 2.2
Features in Release 2.2
Improved Configuration File Encryption
The IP phones have an encryption feature that allows Service Providers the
capability of storing encrypted files on their server to protect against unauthorized
access and tampering of sensitive information (i.e., user accounts, login
passwords, registration information). Service Providers also have the capability of
locking a phone to use a specific server-provided configuration only.
Only an System Administrator can encrypt the configurations files for an IP
Phone. System Administrators use a password distribution scheme to manually
pre-configure or automatically configure the phones to use the encrypted
configuration with a unique key. From a Microsoft Windows command line, the
System Administrator uses an Aastra-supplied encryption tool called
"anacrypt.exe" to encrypt the <MAC>.tuz file.
The security feature described above prevents unauthorized parties from reading
or writing the contents of the <MAC>.tuz file.
In Release 2.2, the IP phones include an improved encryption mechanism that:
90
•
Prevents users from using the <MAC>.tuz file that does not match the user’s
phone MAC address.
•
Renders the <MAC>.tuz file invalid if the user renames the file.
•
Works with IP phone releases prior to Release 2.2.
•
Provides compatibility between the previous encryption routine and the new
decryption routine.
RN-001029-00, Rev 06, Release 2.2
5i Series IP Phone Release Notes
Features in Release 2.2
XML Features
SIP NOTIFY Triggers an XML Event
In order for an XML push to bypass the NAT/firewall, in Release 2.2 the phone
now supports a proprietary SIP NOTIFY event (aastra-xml) with or without XML
content.
If XML content is provided in the SIP NOTIFY, it is processed directly by the
phone as it is done for an XML PUSH.
If the content is empty in the SIP NOTIFY, the phone automatically triggers a new
pre-configured action uri (action uri xml sip notify).
Example of a SIP NOTIFY with XML Content
NOTIFY sip:[email protected]:5060 SIP/2.0
Via: SIP/2.0/UDP 10.30.100.103:5060;branch=z9hG4bK7bbc1fac;rport
From: <sip:[email protected]:5060>;tag=81be2861f3
To: Jacky200 <sip:[email protected]:5060>
Contact: <sip:[email protected]>
Call-ID: 59638f5d95c9d301
CSeq: 4 NOTIFY
Max-Forwards: 70
Event: aastra-xml
Content-Type: application/xml
Content-Length: 115
<AastraIPPhoneExecute><ExecuteItem URI="http://10.30.100.39/XMLtests/
SampleTextScreen.xml"/></AastraIPPhoneExecute>
When the phone receives the SIP NOTIFY, the XML content is processed as any
XML object. In the above example, the phone calls http://10.30.100.39/XMLtests/
SampleTextScreen.xml after reception of the SIP NOTIFY.
Note: The phone supports all the current XML objects with all
the existing limitations. For example if an
AastraIPPhoneExecute is used, the embedded uri(s) can not be
HTTPS based.
RN-001029-00, Rev 06, Release 2.2
91
IP Phone Release Notes 2.2
Features in Release 2.2
Example of a SIP NOTIFY without XML Content
NOTIFY sip:[email protected]:5060 SIP/2.0
Via: SIP/2.0/UDP 10.30.100.103:5060;branch=z9hG4bK7bbc1fac;rport
From: <sip:[email protected]:5060>;tag=81be2861f3
To: Jacky200 <sip:[email protected]:5060>
Contact: <sip:[email protected]>
Call-ID: 59638f5d95c9d301
CSeq: 4 NOTIFY
Max-Forwards: 70
Event: aastra-xml
Content-Type: application/xml
Content-Length: 0
When the phone receives the SIP NOTIFY, it will trigger the action uri xml sip
notify parameter,if it has been previously configured using the configuration files
or the Aastra Web UI. If the action uri xml sip notify parameter is not
configured, the phone does not do anything.
On the phone side, a System Administrator can enable or disable this SIP
NOTIFY feature using the configuration files or the phone Web UI.
Also to ensure that the SIP NOTIFY is coming from a trusted source, it is
recommended that you enable the Whitelist feature (Whitelist Proxy parameter)
on the IP phone. If enabled, and the phone receives a SIP NOTIFY from a server
that is NOT on the whitelist, the phone rejects the message.
92
RN-001029-00, Rev 06, Release 2.2
5i Series IP Phone Release Notes
Features in Release 2.2
Configuring XML SIP NOTIFY Feature Using the Configuration Files
You can enable or disable the XML SIP NOTIFY feature using the following
parameter in the configuration file:
•
sip xml notify event
Parameter –
sip xml notify event
Aastra Web UI:
Advanced Settings->Global SIP->
Advanced SIP Settings
Configuration Files aastra.cfg, <mac>.cfg
Description
Enables or disables the phone to accept or reject an aastra-xml SIP
NOTIFY message.
Note: To ensure the SIP NOTIFY is coming from a trusted source, it is
recommended that you enable the Whitelist feature (Whitelist Proxy
parameter) on the IP phone. If enabled, and the phone receives a SIP
NOTIFY from a server that is NOT on the whitelist (i.e. untrusted
server), the phone rejects the message.
Format
Boolean
Default Value
0
Range
0 - disabled
1 - enabled
Example
sip xml notify event: 1
RN-001029-00, Rev 06, Release 2.2
93
IP Phone Release Notes 2.2
Features in Release 2.2
Configuring XML SIP NOTIFY Feature Using the Aastra Web UI
Use the following procedure to enable/disable the XML SIP NOTIFY feature in
the Aastra Web UI.
Aastra Web UI
Enabling/Disabling the XML SIP NOTIFY Feature
1
Click on Advanced Settings->Global SIP->Advanced SIP Settings.
XML SIP Notify Parameter
94
Enabling Whitelist Proxy is recommended
RN-001029-00, Rev 06, Release 2.2
5i Series IP Phone Release Notes
Features in Release 2.2
Aastra Web UI
2
The “XML SIP Notify" field is disabled by default. To enable this field, check the box.
This field enables or disables the phone to accept or reject an aastra-xml SIP NOTIFY message.
Note: To ensure the SIP NOTIFY is coming from a trusted source, it is recommended that you enable
the Whitelist feature (Whitelist Proxy parameter) on the IP phone. If enabled, and the phone
receives a SIP NOTIFY from a server that is NOT on the whitelist (i.e. untrusted server), the phone
rejects the message..
3
Click
to save your changes.
Configuring the Action URI for an empty XML SIP NOTIFY using the
Configuration Files
If the content is missing in the SIP NOTIFY message received by the phone, the
phone automatically uses the value you specify for the following parameter:
•
action uri xml sip notify
Parameter –
action uri xml sip notify
Aastra Web UI:
Advanced Settings->Action URI
Configuration Files aastra.cfg, <mac>.cfg
Description
Specifies the URI to be called when an empty XML SIP NOTIFY is
received by the phone.
Note: The sip xml notify event parameter must be enabled.
Format
HTTP(s) server path or Fully Qualified Domain Name
Default Value
N/A
Range
N/A
Example
action uri xml sip notify: http://myserver.com/myappli.xml
RN-001029-00, Rev 06, Release 2.2
95
IP Phone Release Notes 2.2
Features in Release 2.2
Configuring the Action URI for an empty XML SIP NOTIFY using the
Aastra Web UI
Use the following procedure to configure the Action URI for an empty XML SIP
NOTIFY using the Aastra Web UI.
Aastra Web UI
Setting an Action URI XML SIP Notify
1
If the content is missing in the SIP NOTIFY message received by the phone, the phone automatically
uses the value you specify for the Action URI XML SIP Notify parameter at the path Advanced
Settings->Action URI.
Click on Advanced Settings->Action URI.
XML SIP Notify Parameter
2
Specify a URI to be called when an empty XML SIP NOTIFY is received by the phone.
Note: The sip xml notify event parameter at the path Advanced Settings->Global SIP->Advanced
SIP Settings must be enabled.
3
96
Click
to save your changes.
RN-001029-00, Rev 06, Release 2.2
5i Series IP Phone Release Notes
Features in Release 2.2
RTP and Multicast RTP via XML
The IP Phones have new XML commands an Administrator can use with the
“AastraIPPhoneExecute” object. These commands allow the phone to send/
recieve an RTP stream to/from given multicast/unicast addresses (without
involving SIP signaling). The new XML commands to use with the
AastraIPPhoneExecute object in an XML application are:
•
RTPRx (Receive (Rx) a Unicast RTP stream or stop receiving a Unicast/
Multicast RTP streams)
•
RTPTx (Transmit (Tx) a Unicast RTP stream or stop transmitting a Unicast/
Multicast RTP streams)
•
RTPMRx (Receive (Rx) a Multicast RTP stream)
•
RTPMTx (Transmit (Tx) a Multicast RTP stream)
The phones support the following RTP stream format:
•
G.711 mu-law CODEC
•
20 ms packet size
Note: If one of the previous commands is sent to the phone which is
already in a call, the phone places the current call on hold and the RTP
streaming commands are performed using a new audio path.
RN-001029-00, Rev 06, Release 2.2
97
IP Phone Release Notes 2.2
Features in Release 2.2
RTPRx
The RTPRx URI instructs the phone to receive a Unicast RTP stream or stop
receiving Unicast or Multicast RTP streams. The RTPRx formats to use with the
AastraIPPhoneExecute object in the URI are:
•
RTPRx:i:p:v
•
RTPRx:Stop
Where
i
Specifies the IP Address from which the stream is coming.
p
Specifies the UDP port on which to receive the RTP stream.
Ensure that this is a number greater than 3100.
v
Indicates the optional volume setting that controls the volume of the stream
(optional) playout. The supplied value is an offset to the current volume setting. After the
initial volume level gets set and the stream starts, you can manually change
the volume level as required using this “v” option. If you do not specify the
optional volume parameter, the phone uses the current volume setting on the
phone as the default.
Stop
Specifies to stop any active RTP stream from being received on channel one.
Example: This example receives a unicast RTP stream from 10.30.100.20 at UDP port
21000 with the voice settings at 3 levels more than the current offset.
<AastraIPPhoneExecute>
<ExecuteItem URI = ”RTPRx:10.30.100.20:21000:3”>
<AastraIPPhoneExecute>
Example:
This example receives a unicast RTP stream from 10.30.100.20 at UDP port 21000 with
the voice settings as used in the previous RTP stream.
<AastraIPPhoneExecute>
<ExecuteItem URI = ”RTPRx:10.30.100.20:21000”>
<AastraIPPhoneExecute>
Example:
This example stops an incoming active multicast/unicast RTP stream.
<AastraIPPhoneExecute>
<ExecuteItem URI=”RTPRx:Stop”>
<AastraIPPhoneExecute>
98
RN-001029-00, Rev 06, Release 2.2
5i Series IP Phone Release Notes
Features in Release 2.2
Note: Once the RTPRx command in the URI is sent to the phone, it stops
the phone from listening to any previous RTPRx or RTPMRx commands.
The phone starts listening based on the most recent RTPRx command
received. This behavior also applies to the RTPRx:Stop and
RTPMRx:Stop commands as well but does not enable any further
listening.
RTPTx
The RTPTx URI instructs the phone to transmit a Unicast RTP stream or to stop
transmitting Unicast or Multicast RTP streams. The RTPTx formats to use with
the AastraIPPhoneExecute object in the URI are:
•
RTPTx:i:p
•
RTPTx:Stop
Where
i
Specifies the IP Address to which an RTP stream is transmit ed.
p
Specifies the UDP port on which to transmit the RTP stream.
Ensure that this is a number greater than 3100.
Stop
Specifies to stop any active RTP stream from being transmitted on channel
one.
Example: This example sends a unicast RTP stream to 10.30.100.20 on UDP port
21000.
<AastraIPPhoneExecute>
<ExecuteItem URI = ”RTPTx:10.30.100.20:21000”>
<AastraIPPhoneExecute>
Example:
This example stops an outgoing active multicast/unicast RTP stream.
<AastraIPPhoneExecute>
<ExecuteItem URI=”RTPTx:Stop”>
<AastraIPPhoneExecute>
RN-001029-00, Rev 06, Release 2.2
99
IP Phone Release Notes 2.2
Features in Release 2.2
RTPMRx
The RTPMRx URI instructs the phone to receive a Multicast RTP stream. The
RTPMRx format to use with the AastraIPPhoneExecute object in the URI is:
•
RTPMRx:i:p:v
Where
i
Specifies the multicast IP Address from which to receive an RTP stream.
p
Specifies the UDP port on which to receive the RTP stream.
Ensure that this is a number greater than 3100.
v
Indicates the optional volume setting that controls the volume of the stream
(optional) playout. The supplied value is an offset to the current volume setting. After the
initial volume level gets set and the stream starts, you can manually change
the volume level as required using this “v” option. If you do not specify the
optional volume parameter, the phone uses the current volume setting on the
phone as the default.
Example: This example receives a multicast RTP stream from 239.0.1.20 on UDP port
21000 with the voice settings at -3 levels less than the current offset.
<AastraIPPhoneExecute>
<ExecuteItem URI = ”RTPMRx:239.0.1.20:21000:-3”>
<AastraIPPhoneExecute>
Example:
This example receives a multicast RTP stream from 239.0.1.20 at UDP port 21000 with
the voice settings as used in the previous RTP stream.
<AastraIPPhoneExecute>
<ExecuteItem URI = ”RTPMRx:239.0.1.20:21000”>
<AastraIPPhoneExecute>
Note: Once the RTPMRx command in the URI is sent to the phone, it
stops the phone from listening to any previous RTPRx or RTPMRx
commands. The phone starts listening based on the most recent RTPMRx
command received. This behavior also applies to the RTPRx:Stop and
RTPMRx:Stop commands as well, but tbe “Stop” command does not
enable any further listening.
100
RN-001029-00, Rev 06, Release 2.2
5i Series IP Phone Release Notes
Features in Release 2.2
RTPMTx
The RTPMTx URI instructs the phone to transmit a Multicast RTP stream. The
RTPMTx format to use with the AastraIPPhoneExecute object in the URI is:
•
RTPMTx:i:p
Where
i
Specifies the Multicast IP Address to which an RTP stream is transmitted.
p
Specifies the UDP port on which to transmit the RTP stream.
Ensure that this is a number greater than 3100.
Example: This example sends a multicast RTP stream to 239.0.1.20 from UDP port
21000.
<AastraIPPhoneExecute>
<ExecuteItem URI = ”RTPMTx:239.0.1.20:21000”>
<AastraIPPhoneExecute>
RN-001029-00, Rev 06, Release 2.2
101
IP Phone Release Notes 2.2
Features in Release 2.2
Text Wrap for XML TextMenu Items
The AastraIPPhoneTextMenu object now supports text wrapping on two lines for
its items. This is done using a new attribute called "wrapList". This attribute
allows you to specify the text wrapping to an additional line rather than truncating
and dropping the text.
Note: If the menu item begins with more than one large word (with no
spaces or hyphens), the first full word displays on the first line truncated
and the next full word displays on the next line.
The example below illustrates the IP Phone text wrapping prior to 2.2, and the
new text wrapping in Release 2.2.
55i, 57i, and 57i CT
Top Stories
Top Stories
DNA shows Columbian
Blurry-eyed front-ru
Analysis: Iowa is ov
Fed to lend $60 bil
DNA shows Columbian
captor fathered boy
Blurry-eyed frontrunners take first
- Select
- Select
Done -
51i and 53i
Done -
1 DNA shows Colo
Next
1 DNA shows
Columbian capt
Enter
Text Wrapping
Prior to Release 2.2
Next
Enter
Text Wrapping
in Release 2.2
You can use the RIGHT arrow key to scroll the screen to the right to view
additional text.
102
RN-001029-00, Rev 06, Release 2.2
5i Series IP Phone Release Notes
Features in Release 2.2
Configuring the Text Wrapping Parameter
You use the following parameter with the XML AastraIPPhoneTextMenu object:
•
wrapList
Example
<AastraIPPhoneTextMenu destroyOnExit’”yes” wrapList=”yes”....
.....
<AastraIPPhoneTextMenu>
Non-Blocking HTTP Connections
In Release 2.2, the IP Phones support a non-blocking HTTP connection feature.
This feature allows the user to continue using the phone when there is a
delay during an HTTP connection while the phone is waiting for the HTTP
server to respond. This feature also allows a user to abort the connection and
perform other operations on the phone (which will abort the HTTP connection
automatically). A user can also abort the HTTP loading by pressing the
GOODBYE key while the phone is displaying “Loading Page.......”.
Note: This feature impacts only the HTTP calls triggered by a phone key
(softkey or programmable key); the HTTP calls performed by action
URIs are still blocking in Release 2.2.
RN-001029-00, Rev 06, Release 2.2
103
IP Phone Release Notes 2.2
Features in Release 2.2
Polling Action URI
Another way to reach a phone behind a NAT/firewall is to have the phone make an
XML call at periodic intervals. A new Action URI was added in Release 2.2
called action uri poll which commands the phone to perform an XML call at
configurable intervals.
An Administrator can specify the URI to be called and specify the interval
between polls using the configuration files or the Aastra Web UI. Configuration of
this feature is dynamic (no reboot required).
Configuring Polling Action URI via the Configuration Files
Use the following parameters to configure the polling Action URI on the IP
Phones.
•
action uri poll
•
action uri poll interval
Parameter –
action uri poll
Aastra Web UI
Advanced Settings->Action URI
Configuration Files aastra.cfg, <mac>.cfg
Description
Specifies the URI to be called every "action uri pool interval" seconds.
Format
HTTP(s) server path or Fully Qualified Domain Name
Default Value
N/A
Range
N/A
Example
action uri poll: http://myserver.com/myappli.xml
Parameter –
action uri poll interval
Aastra Web UI
Advanced Settings->Action URI
Configuration Files aastra.cfg, <mac>.cfg
Description
Specifies the interval, in seconds, between calls from the phone to the
"action uri poll".
Format
Integer
Default Value
0 (disabled)
Range
N/A
Example
action uri poll interval: 60
104
RN-001029-00, Rev 06, Release 2.2
5i Series IP Phone Release Notes
Features in Release 2.2
Configuring Polling Action URI via the Aastra Web UI
Use the following procedure to configure polling Action URI using the Aastra
Web UI.
Aastra Web UI
1
Click on Advanced Settings->Action URI.
2
In the “Poll” field, enter a URI to be called every "action uri pool interval" seconds. Enter the value in
a URI format. For example, http://myserver.com/myappli.xml.
3
In the “Interval” field, enter the interval, in seconds, between calls from the phone to the "action uri
poll". The value of “0” is disabled.
4
Click
to save your changes.
RN-001029-00, Rev 06, Release 2.2
105
IP Phone Release Notes 2.2
Features in Release 2.2
Deployability Features
SIP Registration Status in Aastra Web UI
The IP Phones now show the SIP registration status on the IP Phone’s Network
Status screen in the Aastra Web UI.
If there are accounts configured on the IP Phone, their SIP status displays in the
Network Status window. The 51i displays only one status line. All other model
phones display the status of up to 9 lines.The following is an illustration of the
Network Status screen in the Aastra Web UI with SIP status displayed.
SIP Status on the Network Status Screen
The following table describes the status conditions that can display for an
account(s).
106
RN-001029-00, Rev 06, Release 2.2
5i Series IP Phone Release Notes
Features in Release 2.2
Status Condition
Desription
Registered
Displays this status on accounts that HAVE been registered with the SIP proxy
server.
Example:
Backup
Registrar
Line SIP Account
Status
Used?
1
[email protected]:5060Registered Yes
where
Account Number is “1”
SIP Account is “[email protected]” on port “5060”
Status is “Registered”
Backup registrar is used (“Yes”)
SIP Error Number
Displays on accounts when registration fails with the SIP proxy server.
Example:
Line SIP Account
Status
4
[email protected]:5060401
Backup
Registrar
Used?
No
where
Account Number is “4”
SIP Account is “[email protected]” on port “5060”
Status is “401” - Unregistered if SIP registration fails.
Backup registrar is used (“No”)
RN-001029-00, Rev 06, Release 2.2
107
IP Phone Release Notes 2.2
Features in Release 2.2
Support for HTTP and HTTPS Configuration Servers on
Non-Standard Ports
Prior to Release 2.2, the IP Phones used the default port numbers for loading
configuration over HTTP (Port 80), HTTPS (Port 443) and DHCP option 66. Now
the IP Phones allow an Administrator to configure the HTTP/HTTPS port number
when required for configuration servers (
Two new parameters for configuring the HTTP and HTTPS port numbers are as
follows:
•
http port
•
https port
An Administrator can configure these parameters using the configuration files, the
IP Phone UI, or the Aastra Web UI.
Configuring HTTP and HTTPS Port Using the Configuration Files
An Administrator can use the following parameters in the configuration files to
configure the HTTP or HTTPS ports.
Parameter –
http port
IP Phone UI:
Description
Specifies the HTTP port that the server uses to load the configuration to
the phone over HTTP.
Format
Integer
Default Value
80
Range
1 through 65535
Example
http port: 1025
108
Options->Administrator Menu->
Configuration Server->HTTP Settings
Aastra Web UI:
Advanced Settings->Configuration Server->
Settings
Configuration Files aastra.cfg, <mac>.cfg
RN-001029-00, Rev 06, Release 2.2
5i Series IP Phone Release Notes
Features in Release 2.2
Parameter –
https port
IP Phone UI:
Options->Administrator Menu->
Configuration Server->HTTPS Settings->
HTTPS Client->Download Port
Aastra Web UI:
Advanced Settings->Configuration Server->
Settings
Configuration Files aastra.cfg, <mac>.cfg
Description
Specifies the HTTPS port that the server uses to load the configuration
to the phone over HTTPS.
Format
Integer
Default Value
443
Range
1 through 65535
Example
https port: 1026
Configuring HTTP and HTTPS Port Using the IP Phone UI
Use the following procedure to configure the HTTP or HTTPS port using the IP
Phone UI.
Aastra IP Phone UI
Step
Action
Configuring HTTP Port
1
Press Options->Administrator Menu.
2
Enter your Administrator password and press Enter.
3
Select Configuration Server->HTTP Settings->HTTP Port.
RN-001029-00, Rev 06, Release 2.2
109
IP Phone Release Notes 2.2
Features in Release 2.2
Aastra IP Phone UI
Step
Action
4
Enter the HTTP port that the server uses to load the configuration to the phone over HTTP.
HTTP Port
HTTP Port
80
- Backspace
Cancel Done -
Press Done.
5
Press Options to save your changes and exit from the Options Menu.
Configuring HTTPS Port
1
Press Options->Administrator Menu.
2
Enter your Administrator password and press Enter.
3
Select Configuration Server->HTTPS Settings->HTTPS Client->Download Port.
4
Enter the HTTPS port that the server uses to load the configuration to the phone over HTTPS.
HTTPS Port
HTTPS Port
443
- Backspace
Cancel Done -
Press Done.
5
110
Press Options to save your changes and exit from the Options Menu.
RN-001029-00, Rev 06, Release 2.2
5i Series IP Phone Release Notes
Features in Release 2.2
Configuring HTTP and HTTPS Port Using the Aastra Web UI
Use the following procedure to configure the HTTP or HTTPS port using the
Aastra Web UI..
Aastra Web UI
Configuring HTTP Port
1
Click on Advanced Settings->Configuration Server->Settings.
2
In the “Download Procotol” field, select HTTP.
3
In the “HTTP Server” field, enter the HTTP server that downloads the configuration to the phone.
Enter the value in the format 0.0.0.0. For example, 10.40.50.90.
4
In the “HTTP Path” field, enter the HTTP path of the HTTP server.
If the IP phone’s configuration and firmware files are located in a sub-directory beneath the server’s
HTTP root directory, the relative path to that sub-directory should be entered in this field.
5
In the “HTTP Port” field, enter the HTTP port that the server uses to download the configuration to
the phone. Default value is 80. Valid values are 1 through 65535.
6
Click
to save your changes.
RN-001029-00, Rev 06, Release 2.2
111
IP Phone Release Notes 2.2
Features in Release 2.2
Aastra Web UI
Configuring HTTPS Port
1
Click on Advanced Settings->Configuration Server->Settings.
2
In the “Download Procotol” field, select HTTPS.
3
In the “HTTPS Server” field, enter the HTTPS server that downloads the configuration to the phone.
Enter the value in the format 0.0.0.0. For example, 10.40.50.90.
4
In the “HTTPS Path” field, enter the HTTPS path of the HTTPS server.
If the IP phone’s configuration and firmware files are located in a sub-directory beneath the server’s
HTTPS root directory, the relative path to that sub-directory should be entered in this field.
5
In the “HTTPS Port” field, enter the HTTPS port that the server uses to download the configuration to
the phone. Default value is 443. Valid values are 1 through 65535.
6
Click
112
to save your changes.
RN-001029-00, Rev 06, Release 2.2
5i Series IP Phone Release Notes
Features in Release 2.2
Ability to Set TFTP and FTP Path for Configuration Servers
The IP Phones now allow the acquisition of configuration files from
subdirectories when connecting to either a TFTP or FTP server. An Administrator
can specify a TFTP path, an alternate TFTP path, or an FTP path for where the
configuration files reside on the TFTP or FTP server. An Administrator can
configure this path using the configuration files, the IP Phone UI, or the Aastra
Web UI.
Configuring a TFTP or FTP Path Using the Configuration Files
Use the following parameters to configure a TFTP path or FTP path on the IP
Phones.
•
tftp path
•
alternate tftp path
•
ftp path
Parameter –
tftp path
Aastra Web UI
Advanced Settings->
Configuration Server->Settings
IP Phone UI
Options->Administrator Menu->
Configuration Server->TFTP Settings
Configuration Files aastra.cfg, <mac>.cfg
Description
Specifies the path name for which the configuration files reside on the
TFTP server for downloading to the IP Phone.
Note: Enter the path name in the form folderX\folderX\folderX. For
example, ipphone\57i\configfiles.
Format
String
Default Value
N/A
Range
Up to 64 alphanumeric characters
Example
tftp path: configs\tftp
RN-001029-00, Rev 06, Release 2.2
113
IP Phone Release Notes 2.2
Features in Release 2.2
Parameter –
alternate tftp path
Aastra Web UI
Advanced Settings->
Configuration Server->Settings
IP Phone UI
Options->Administrator Menu->
Configuration Server->TFTP Settings
Configuration Files aastra.cfg, <mac>.cfg
Description
Specifies a path name for which the configuration files reside on an
alternate TFTP server for downloading to the IP Phone.
Note: Enter the path name in the form folderX\folderX\folderX. For
example, ipphone\57i\configfiles.
Format
String
Default Value
N/A
Range
Up to 64 alphanumeric characters
Example
alternate tftp path: configs\alternate
Parameter –
ftp path
Aastra Web UI
Description
Specifies a path name for which the configuration files reside on an FTP
server for downloading to the IP Phone.
Advanced Settings->
Configuration Server->Settings
IP Phone UI
Options->Administrator Menu->
Configuration Server->FTP Settings
Configuration Files aastra.cfg, <mac>.cfg
Note: Enter the path name in the form folderX\folderX\folderX. For
example, ipphone\57i\configfiles.
Format
String
Default Value
N/A
Range
Up to 64 alphanumeric characters
Example
ftp path: configs\ftp
114
RN-001029-00, Rev 06, Release 2.2
5i Series IP Phone Release Notes
Features in Release 2.2
Configuring a TFTP or FTP Path Using the Aastra Web UI
Use the following procedure to configure a TFTP path or FTP path on the IP
Phones..
Aastra Web UI
Configuring TFTP and Alternate TFTP Path
1
Click on Advanced Settings->Configuration Server->Settings.
TFTP Path
Alternate TFTP
Path
2
In the “TFTP Path” field enter the path name for which the configuration files reside on the TFTP
server for downloading to the IP Phone.
Note: Enter the path name in the form folderX\folderX\folderX. For example,
ipphone\57i\configfiles. You can enter up to 64 alphanumeric characters.
3
If an alternate TFTP server is used in the network, in the “Alternate TFTP Path” field enter the path
name for which the configuration files reside on the alternate TFTP server for downloading to the IP
Phone.
Note: Enter the path name in the form folderX\folderX\folderX. For example,
ipphone\57i\configfiles. You can enter up to 64 alphanumeric characters.
4
Click
to save your changes.
RN-001029-00, Rev 06, Release 2.2
115
IP Phone Release Notes 2.2
Features in Release 2.2
Aastra Web UI
Configuring FTP Path
1
Click on Advanced Settings->Configuration Server->Settings.
FTP Path
2
In the “FTP Path” field, enter the path name for which the configuration files reside on the FTP server
for downloading to the IP Phone.
Note: Enter the path name in the form folderX\folderX\folderX. For example,
ipphone\57i\configfiles. You can enter up to 64 alphanumeric characters.
3
116
Click
to save your changes.
RN-001029-00, Rev 06, Release 2.2
5i Series IP Phone Release Notes
Features in Release 2.2
Configuring a TFTP or FTP Path Using the IP Phone UI
Use the following procedure to configure a TFTP or FTP path using the IP Phone
UI.
Aastra IP Phone UI
Step
Action
Configuring TFTP Path
1
Press Options->Administrator Menu.
2
Enter your Administrator password and press Enter.
3
Select Configuration Server->TFTP Settings->Primary TFTP Path.
4
Enter the enter the path name for which the configuration files reside on the primary TFTP server for
downloading to the IP Phone. To enter the “\” character, press the “#” key several times to cycle
through the characters until you see the “\” character.
Note: Enter the path name in the form folderX\folderX\folderX. For example,
ipphone\57i\configfiles. You can enter up to 64 alphanumeric characters.
2 Pri TFTP Path
Primary TFTP Path
Next
Enter
Primary TFTP Path
iphone\57i\configfiles
- Backspace Nextspace Cancel - ABC
Done -
Pri TFTP Path
iphone\53i\configfiles
Cancel
55i/57i/57i CT
For 55i, 57i, and 57i CT:
Press BACKSPACE to delete characters.
Press ABC to toggle between upper and lower case letters.
Press NEXTSPACE to add a blank space.
Press CANCEL to cancel the entry for the TFTP path.
Set
51i/53i
For 51i, and 53i:
Press ENTER to display the Primary TFTP Path screen.
Press NEXT to move to the next option in the TFTP Settings Menu.
Press CANCEL to cancel the entry.
Press SET to save the entry for the TFTP Path.
RN-001029-00, Rev 06, Release 2.2
117
IP Phone Release Notes 2.2
Features in Release 2.2
Aastra IP Phone UI
Step
Action
5
Press DONE to save the entry for the TFTP Path to the phone’s configuration.
Configuring Alternate TFTP Path
1
Press Options->Administrator Menu.
2
Enter your Administrator password and press Enter.
3
Select Configuration Server->TFTP Settings->Alternate TFTP Path.
4
Enter the enter the path name for which the configuration files reside on the alternate TFTP server for
downloading to the IP Phone. To enter the “\” character, press the “#” key several times to cycle
through the characters until you see the “\” character
Note: Enter the path name in the form folderX\folderX\folderX. For example,
ipphone\57i\configfiles. You can enter up to 64 alphanumeric characters.
Alternate TFTP Path
Alternate TFTP Path
iphone\57i\configfiles
- Backspace Nextspace Cancel - ABC
Done -
55i/57i/57i CT
1 Alternate TFTP
Next
Enter
Alternate TFTP
iphone\53i\configfiles
Cancel
Set
51i/53i
For 55i, 57i, and 57i CT:
Press BACKSPACE to delete characters.
Press ABC to toggle between upper and lower case letters.
Press NEXTSPACE to add a blank space.
Press CANCEL to cancel the entry for the TFTP path.
For 51i, and 53i:
Press ENTER to display the Alternate TFTP Path screen.
Press NEXT to move to the next option in the TFTP Settings Menu.
Press CANCEL to cancel the entry.
Press SET to save the entry for the Alternate TFTP Path.
118
RN-001029-00, Rev 06, Release 2.2
5i Series IP Phone Release Notes
Features in Release 2.2
Aastra IP Phone UI
Step
Action
5
Press DONE to save the entry for the Alternate TFTP Path to the phone’s configuration.
Configuring FTP Path
1
Press Options->Administrator Menu.
2
Enter your Administrator password and press Enter.
3
Select Configuration Server->FTP Settings->FTP Path.
4
Enter the enter the path name for which the configuration files reside on the FTP server for
downloading to the IP Phone. For example, config\ftp. To enter the “\” character, press the “#” key
several times to cycle through the characters until you see the “\” character
Note: Enter the path name in the form folderX\folderX\folderX. For example,
ipphone\57i\configfiles. You can enter up to 64 alphanumeric characters.
FTP Path
FTP Path
iphone\57i\configfiles
- Backspace Nextspace Cancel - ABC
Done -
55i/57i/57i CT
2 FTP Path
Next
Enter
FTP Path
iphone\53i\configfiles
Cancel
Set
51i/53i
For 55i, 57i, and 57i CT:
Press BACKSPACE to delete characters.
Press ABC to toggle between upper and lower case letters.
Press NEXTSPACE to add a blank space.
Press CANCEL to cancel the entry for the FTP path.
For 51i, and 53i:
Press ENTER to display the FTP Path screen.
Press NEXT to move to the next option in the FTP Settings Menu.
Press CANCEL to cancel the entry.
Press SET to save the entry for the FTP Path.
5
Press DONE to save the entry for the FTP Path to the phone’s configuration.
RN-001029-00, Rev 06, Release 2.2
119
IP Phone Release Notes 2.2
Features in Release 2.2
NAT Traversal Features
Configurable SIP and TLS Source Ports
A System Administrator can now configure the SIP and TLS source ports on the
IP Phone. Previously, the IP phone used default values (5060 for UDP/TCP and
5061 for TLS). The two new parameters for configuring the SIP and TLS source
ports are:
•
sip local port
•
sip local tls port
You can configure the SIP and TLS source ports using the configuration files or
the Aastra Web UI. After configuring these parameters, you must reboot the
phone.
If NAT is disabled, the port number also shows in the VIA and Contact SIP
headers.
If you enable NAT, the phone uses the NAT port number (and NAT IP address) in
the Via and Contact SIP headers of SIP messages, but still use the configured
source port.
Note: By default, the IP phones use symmetric UDP signaling for
outgoing UDP SIP messages. When symmetric UDP is enabled, the IP
phone generates and listens for UDP messages using port 5060.If
symmetric UDP signaling is disabled, the phone sends from random
ports but it listens on the configured SIP local port.
120
RN-001029-00, Rev 06, Release 2.2
5i Series IP Phone Release Notes
Features in Release 2.2
Configuring SIP and TLS Source Ports Using the Configuration Files
Parameter –
sip local port
Aastra Web UI:
Advanced Settings->Global SIP->
Advanced SIP Settings
Configuration Files aastra.cfg, <mac>.cfg
Description
Specifies the local source port (UDP/TCP) from which the the phone
sends SIP messages
Format
Numeric
Default Value
5060
Range
Greater than 1024 and less than 65535
Notes:
1. It is recommended that you avoid the conflict RTP port range in case
of a UDP transport.
2. By default, the IP phones use symmetric UDP signaling for outgoing
UDP SIP messages. When symmetric UDP is enabled, the IP phone
generates and listens for UDP messages using port 5060.If symmetric
UDP signaling is disabled, the phone sends from random ports but it
listens on the configured SIP local port.
Example
sip local port: 5060
Parameter –
sip local tls port
Aastra Web UI:
Description
Specifies the local source port (SIPS/TLS) from which the phone sends
SIP messages.
Format
Numeric
Default Value
5061
Range
Greater than 1024 and less than 65535
Advanced Settings->Global SIP->
Advanced SIP Settings
Configuration Files aastra.cfg, <mac>.cfg
Note: It is recommended that you avoid the conflict with any TCP ports
being used. For example: WebUI HTTP server on 80/tcp and HTTPS
on 443/tcp.
Example
sip local tls port: 5061
RN-001029-00, Rev 06, Release 2.2
121
IP Phone Release Notes 2.2
Features in Release 2.2
Configuring SIP and TLS Source Ports Using the Aastra Web UI
Use the following procedure to configure SIP and TLS source ports using the
Aastra Web UI..
Aastra Web UI
1
Click on Advanced Settings->Global SIP->Advanced SIP Settings.
.
“Local SIP UDP/TCP Port” Parameter
2
“Local SIP TLS Port” Parameter
The “Local SIP UDP/TCP Port” field has a default value of 5060. Change this value if required to a
value greater than 1024 and less than 65535.
Note: It is recommended that you avoid the conflict RTP port range in case of a UDP transport.
122
RN-001029-00, Rev 06, Release 2.2
5i Series IP Phone Release Notes
Features in Release 2.2
Aastra Web UI
3
The “Local SIP TLS Port” field has a default value of 5061. Change this value if required to a value
greater than 1024 and less than 65535.
Note: It is recommended that you avoid the conflict with any TCP ports being used. For example:
WebUI HTTP server on 80/tcp and HTTPS on 443/tcp.
4
Click
to save your changes.
RPORT Support
The Session Initiation Protocol (SIP) operates over UDP and TCP. When used
with UDP, responses to requests are returned to the source address from which the
request came, and returned to the port written into the topmost “Via” header of the
request. However, this behavior is not desirable when the client is behind a
Network Address Translation (NAT) or firewall.
A new parameter created for the “Via” header called “Rport” in RFC 3581,
allows a client to request that the server send the response back to the source IP
address and the port from which the request came.
When you enable “Rport, the phone always uses symmetric signaling (listens on
the port used for sending requests).
An Administrator can configure “Rport” using the configuration files or the
Aastra Web UI.
RN-001029-00, Rev 06, Release 2.2
123
IP Phone Release Notes 2.2
Features in Release 2.2
Configuring Rport Using the Configuration Files
Use the following parameter to configure Rport on your phone.
•
sip rport
Parameter –
sip rport
Aastra Web UI:
Advanced Settings->Network->
Advanced Network Settings
Configuration Files aastra.cfg, <mac>.cfg
Description
Allows you to enable (1) or disable (0) the use of Rport on the IP phone.
“Rport” in RFC 3581, allows a client to request that the server send the
response back to the source IP address and the port from which the
request came.
Format
Boolean
Default Value
0
Range
0 (disable)
1 (enable)
Example
sip rport: 1
124
RN-001029-00, Rev 06, Release 2.2
5i Series IP Phone Release Notes
Features in Release 2.2
Configuring Rport Using the Aastra Web UI
Use the following procedure to configure Rport on your phone using the Aastra
Web UI.
Aastra Web UI
1
Click on Advanced Settings->Network->Advanced Network Settings.
Rport
Parameter
2
In the "Advanced Network Settings" section, enable the "Rport (RFC3581" field by checking the
check box. (Disable Rport by unchecking the box).
“Rport” in RFC 3581, allows a client to request that the server send the response back to the source
IP address and the port from which the request came.
3
Click
to save your changes.
RN-001029-00, Rev 06, Release 2.2
125
IP Phone Release Notes 2.2
Features in Release 2.2
BroadSoft Interoperability Features
CMS Support
The IP phones now support HTTP/HTTPS digest authentication as defined in
RFC 2617. (The HTTP client supports digest authentication; the HTTP server
does not; the HTTP server supports basic authentication). This feature allows the
phones to interoperate with Broadsoft’s CMS phone configuration tool.
Using the configuration files, you can enable/disable the following parameter to
display a LOG IN softkey which allows the HTTP/HTTPS server to perform
digest authentication:
•
http digest force login - specifies whether or not to display the LOG IN
softkey on the IP Phone UI screen. Valid values are 0 (disabled) or 1
(enabled). Default is 0 (disabled).
If the “http digest force login” parameter is set to 1 (enabled), after the phone
boots, the LOG IN softkey displays on the phone’s LCD. If the user presses this
softkey, a username/password screen displays, allowing the user to enter the
configured username and password that is sent to the HTTP/HTTPS server for
digest authentication by the server. By default, username is “aastra” and
password is “aastra”. You can enter the username and password in two ways:
•
Using the configuration files, you can change the default values for the
following parameters:
— http digest username - specifies the username to use for HTTP/HTTPS
digest authentication.
— http digest password - specifies the password to use for HTTP/HTTPS
digest authentication.
•
126
By enabling the “http digest force login” parameter (setting to 1) - the phone
displays the LOG IN key so the user can enter the default username/password
via the IP Phone UI.
RN-001029-00, Rev 06, Release 2.2
5i Series IP Phone Release Notes
Features in Release 2.2
Configuring HTTP/HTTPS Digest Authentication Using the
Configuration Files
Use the following parameters to configure HTTP/HTTPS Digest Authentication
on the phone.
Parameter –
http digest username
Configuration Files aastra.cfg, <mac>.cfg
Description
Specifies the username to use for HTTP/HTTPS digest authentication..
The server uses this username for authentication purposes when
loading configuration to the phone over HTTP/HTTPS. This parameter
initiates a “Username/Password” screen after pressing the Log In
softkey.
Notes:
1. The Username field accepts special characters, such as, @, #, %,
=, _, etc. You can also specify domain names (i.e., user@domain).
2. You must reboot the phone after setting the HTTP/HTTPS digest
authentication parameters.
Format
String
Default Value
N/A
Range
Up to 40 alphanumeric characters
Example
http digest username: mysuername
Parameter –
http digest password
Configuration Files aastra.cfg, <mac>.cfg
Description
Specifies the password to use for HTTP/HTTPS digest authentication..
The server uses this password for authentication purposes when
loading configuration to the phone over HTTP/HTTPS. This parameter
initiates a “Username/Password” screen after pressing the Log In
softkey.
Notes:
1. The Password field accepts special characters, such as, @, #, %,
=, _, etc.
2. You must reboot the phone after setting the HTTP/HTTPS digest
authentication parameters.
Format
String
Default Value
N/A
Range
Up to 20 alphanumeric characters
Example
http digest password: mypassword
RN-001029-00, Rev 06, Release 2.2
127
IP Phone Release Notes 2.2
Features in Release 2.2
Parameter –
http digest force login
Configuration Files aastra.cfg, <mac>.cfg
Description
Enables and disables the display of a LOGIN key on the phone’s idle
screen.
Note: After the server has authenticated the phone, this parameter
must be set to “0” in order for the server to send the default profile to the
phone.
Format
Boolean
Default Value
0 (disable)
Range
0 (disable)
1 (enable)
Example
http digest force login: 1
How it Works with the BroadSoft CMS Tool
If you enable the HTTP/HTTPS digest authentication feature, the phone behaves
as follows with the BroadSoft CMS tool:
1.
Factory default the phone.
2.
Configure the HTTP or HTTPS server (specify the HTTP or HTTPS server,
path, and port).
3.
Restart the phone.
The first time the phone reboots, the phone is challenged by the server. The
phone sends the default username of “aastra” and the default password of
“aastra” to the server.
The server sends the default profile to the phone. This profile includes the
information “http digest force login: 1”.When the phone receives the profile,
it displays the “Log In” key on the IP Phone UI’s idle screen.
128
RN-001029-00, Rev 06, Release 2.2
5i Series IP Phone Release Notes
Features in Release 2.2
4.
Press the “Log In" key to displays the username/password screen.
Note: On the 55i, 57i, and 57i CT, you use the Log In softkey to log in.
On the 51i, and 53i, you press the right arrow key to log in.
51i and 53i Login Screens
Please Enter:
Username:
Next
471348471
Tues Jan1 10:00am
Log In
Submit
55i, 57i, and 57i CT Login Screens
L1
471348471
Tues Jan1 10:00am
Log In -
5.
Please Enter:
Username:
Password:
- Backspace
Cancel -
- abc...
Submit -
Enter a username in the “Username” field (up to 40 characters) and a
password in the “Password” field (up to 20 characters).
Note: The “Username” and “Password” fields accept special
characters, such as, @, #, %, =, _, etc. You can also specify domain names
in the Username field (i.e., user@domain).
6.
After entering the username and password, press Submit.
The phone attempts to authenticate with the server. If successful, the phone
reboots and loads the user configuration. If unsuccessful, the phone displays
“Authentication Failed”.
RN-001029-00, Rev 06, Release 2.2
129
IP Phone Release Notes 2.2
Features in Release 2.2
Server-Side Do Not Disturb (DND), Call Forward (CFWD) ,
and Automatic Call Distribution (ACD) Support
The IP phones now support server-side DND, CFWD, and ACD feature
events.This feature is called “as-feature-event” and works with the DND, CFWD,
and ACD keys.
Notes:
1. The 51i supports server-side DND and CFWD only.
2. The DND, CFWD, and ACD server-side feature is not applicable to
the CT handset.
This feature is configurable using the configuration files or the Aastra Web UI.
How it Works on the Phone UI
When you enable the “as-feature-event” on the phone, AND you activate a DND,
CFWD, and/or ACD key, pressing the key performs as follows:
•
If the key is configured for an account on the phone, the server applies DND,
CFWD or ACD to that account. (for information about CFWD and DND
account configuration, see the section, “Account-Based Do Not Disturb
(DND) and Call Forward (CFWD)” on page 6).
•
If the key is “custom” configured, a screen displays on the phone allowing the
user to choose the account to apply DND or CFWD. (for information about
CFWD and DND custom configuration, see the section, “Account-Based Do
Not Disturb (DND) and Call Forward (CFWD)” on page 6).
•
A solid “Message Waiting Indicator” (MWI) indicates if one line/account has
DND or CFWD enabled, and the LED next to the DND/CFWD key is ON. A
status displays on the LCD that indicates the status of the line in focus (for
example, the status of CFWD could be “Call Forward Busy” (CFWDB) or
“Call Forward No Answer” (CFWDNA).
Note: If the ACD key is configured on the phone, and the
“as-feature-event” is not enabled, the phones uses the ACD icons and
LED behavior from a Sylantro server instead.
130
RN-001029-00, Rev 06, Release 2.2
5i Series IP Phone Release Notes
Features in Release 2.2
When you press the DND, CFWD, or ACD key, only one attempt is made to
enable/disable the “as-feature-event” feature on the server. The message “Trying”
displays on the phone’s LCD after pressing the key. If the attempt is successful,
the idle screen displays. If the attempt is unsuccessful, the message “Failed”
displays. The user can press the softkey again to re-attempt the feature if required.
The following screen displays on the IP Phone UI for server-side call forwarding:
Call Forward
Mode: CFA
Next
Done
For server-side ACD, when you press the ACD softkey, the screen that displays is
dependant on the state of the ACD subscription. Possible sttate for ACD are::
•
Logged Out - User has the option of logging in.
•
Logged In - User has the option of logging out or making the phone
unavailable.
•
Unavailable - User has the option of logging out or making the phone
available.
ACD Screen for 53i
ACD
ACD
Logged In
Unavail
Log Out
Logged Out
Log In
ACD
Avail
Unavailable
Log Out
ACD Screen for 55i, 57i, and 57i CT
ACD
ACD
Logged Out
ACD
Logged In
- Log Out
- Log In
Cancel -
RN-001029-00, Rev 06, Release 2.2
- Unavailable
Unavailable
- Log Out
Cancel -
- Available
Cancel -
131
IP Phone Release Notes 2.2
Features in Release 2.2
Note: IMPORTANT!
If DND and CFWD are configured to use “Account” mode on the IP
Phone, pressing the DND and CFWD keys apply to the account in focus
as described in the section, “Account-Based Do Not Disturb (DND) and
Call Forward (CFWD)”.
If ACD is configured on the phone, the ACD softkey applies to the line
for which the key is configured. The ACD softkey must be configured for
the first line of an account. For example, if account 2 has line 3 and line 4
you must configure the ACD softkey for line 3.
132
RN-001029-00, Rev 06, Release 2.2
5i Series IP Phone Release Notes
Features in Release 2.2
Configuring Server-Side DND, CFWD, and ACD Using the
Configuration Files
If the phone-side features of the DND, CFWD, and ACD keys are enabled, the
phone uses the existing parameter values for these keys. If the server-side features
are enabled, the phone saves the state of the features from the server on the phone.
Use the following parameters to enable/disable the server-side “as-feature-event”
on the IP Phone:
•
sip lineN as-feature-event subscription
•
sip as-feature-event subscription period
Parameter –
sip lineN as-feature-event
subscription
Aastra Web UI:
Advanced Settings->LineN->
Advanced SIP Settings
Configuration Files aastra.cfg, <mac>.cfg
Description
Enables or disables the specified line with the BroadSoft’s server-side
DND, CFWD, or ACD features.
Format
Boolean
Default Value
0 (disable)
Range
0 (disable)
1 (enable)
Example
sip line1 as-feature-event subscription: 1
Parameter –
sip as-feature-event
subscription period
Aastra Web UI:
Description
Specifies the amount of time, in seconds, between resubscribing. If the
phone does not resubscribe in the time specified for this parameter, it
loses subscription.
Format
Integer
Default Value
3600
Range
5 to 2147483648
Example
sip as-feature-event subscription period: 600
Basic Settings->Global SIP->
Advanced SIP Settings
Configuration Files aastra.cfg, <mac>.cfg
RN-001029-00, Rev 06, Release 2.2
133
IP Phone Release Notes 2.2
Features in Release 2.2
Configuring Server-Side DND, CFWD, and ACD Using the Aastra Web
UI
Use the following procedure to enable/disable the server-side “as-feature-event”
on the IP Phone using the Aastra Web UI..
Aastra Web UI
1
Click on Advanced Settings->LineN->Advanced SIP Settings.
2
In the “Advanced SIP Settings” section, enable the "As--Feature-Event Subscription" field, by
checking the check box. (Disable this field by unchecking the box).
3
Click
134
to save your changes.
RN-001029-00, Rev 06, Release 2.2
5i Series IP Phone Release Notes
Features in Release 2.2
Aastra Web UI
4
Click on Advanced Settings->Global SIP->Advanced SIP Settings.
As-Feature-Event
Subscription
Period
5
In the “Advanced SIP Settings” section, in the “As-Feature-Event Subscription Period” field, enter
the amount of time, in seconds, that the phone waits after sending a SUBSCRIBE, to recieve a
NOTIFY response from the server side.
Default is 3600. Valid values are
6
Click
to save your changes.
RN-001029-00, Rev 06, Release 2.2
135
IP Phone Release Notes 2.2
Issues Resolved on Series 5i Phones in Release 2.2
Issues Resolved on Series 5i Phones in
Release 2.2
This section describes the issues resolved on the Series 5i IP phones in
Release 2.2. The following table provides the issue number and a brief description
of each fix.
Note: Unless specifically indicated, these resolved issues apply to all
phone models.
Issue Number
Description of Fix
User Interface
DEF07409
Phones no longer display "Unknown Name" when making outbound calls.
DEF07815
You can no longer edit a locked speed dial key from the IP Phone UI.
DEF07876
Speeddial page in the Aastra Web UI now returns a confirmation page after clicking
the “SAVE SETTINGS” button.
DEF07901
When adding a directory entry from the IP Phone UI, the phone now prompts the
user to enter a phone number if they try to exit this field before entering a number..
DEF08025
51i/53i: Phone no longer truncates the time and date on the display when the time
format is set to 1 and date format is set to 3.
DEF08224
You can now set the date via the IP Phone UI when using a non-Aastra supported
language pack.
DEF08595
51i: The lock icon now displays during SRTP calls.
Note: The SRTP implementation in the previous release is not fully compatible with
the new SRTP in release 2.2. There is a change in the upgraded libsrtp library on
the phone which causes interoperability problems for certain codecs between old
releases and the new 2.2. release. It is highly recommended that if you are using
SRTP, all phones are upgraded to release 2.2.
DEF08621
A re-INVITE now updates the Caller ID.
DEF08645
When the DND key is configured on an expansion module, the DND status is now
preserved via a reboot of the phone.
DEF08829
57iCT: The MWI icon on the cordless handset now functions correctly.
136
RN-001029-00, Rev 06, Release 2.2
5i Series IP Phone Release Notes
Issues Resolved on Series 5i Phones in Release 2.2
Issue Number
Description of Fix
DEF08852
Auto-answer calls are no longer rejected when you are already in a call; they are
now treated as normal calls. The previous behavior affected Fonality HUD users.
SIP
DEF07873
Display name portion of the FROM and TO SIP headers are now correctly quoted,
allowing support for characters such as (, ), [, ]
DEF08132
Phones now support updating the RTP destination when the call is taken off hold –
this was causing lost voice path on some servers after transfer.
DEF08245
Phones now send an ACK and the call is cleared down correctly when the far-end
answers the call at the same time that a CANCEL is sent.
DEF08494
Phones initiating the transfer now clear down the transferred call, rather than relying
on the transferee. This fixes issues with other clients that didn’t clear down the call
when they were the transferee.
DEF08558
RFC2833 - DTMF support is no longer advertised when the phone is configured to
only use in-band RTP.
DEF08612
Phones now support updating the Codec when the call is taken off hold– this was
causing lost voice path after a call was put on hold.
DEF08619
Phones now re-subscribe for SCA and MWI events after receiving a 481 error, which
can happen after a server reboot.
DEF08632
Phones now clear down a held call on receipt of a 481 in response to an unhold
attempt or a transfer attempt.
DEF08641
Phones no longer send SDP in the ACK message for calls involving early media.
DEF08649
Phones now support OPTIONS packets within a dialog.
DEF08664
Phones now support Persistent TLS connections using DNS SRV records.
DEF08672
Phones now work correctly behind an ADTRAN TA924E.
DEF08678
Phones now respond to authentication challenges when running behind an
Edgemarc.
DEF08835
Phones now handle sequence rollovers in SRTP calls correctly.
DEF08836
Phones now include SRTP encryption information in re-INVITE requests.
DEF08846
Phones no longer send a re-INVITE if the user does not enter any more digits after
receiving a “484 Address Incomplete” response.
XML
DEF07986
Phones now correctly parse XML objects that have a 'space' at the end of a URI.
ENH08004
List objects now support up to 30 items.
DEF09150
FastReboot now works correctly when no language packs installed.
RN-001029-00, Rev 06, Release 2.2
137
IP Phone Release Notes 2.2
Issues Resolved on Series 5i Phones in Release 2.2
Issue Number
Description of Fix
Robustness
DEF07948
Phones now work properly when they fail to renew a registration, either because of
network issues or because of SIP message floods.
DEF08186
Phones now corrently clear down the call when making a call to a paging group and
when the phones monitor all the group members via BLF.
DEF08330
Phones no longer have a resource leak when they are flooded by SIP
retransmissions. This issue lead to the phone not being able to make or receive
calls. It also prevented the transfer of existing calls.
DEF08555
Phones no longer have a memory leak when processing Syantro BLA messages
DEF08574
Phones no longer have a memory leak when parsing XML Image Screen and Image
Menu Screen objects.
DEF08596
Sipera VIPER 2007-0037 security advisory has been resolved.
DEF08597
Sipera VIPER 2007-0038 security advisory has been resolved.
DEF08655
Phones no longer have a small memory leak when using XML Input Screen objects.
DEF08746
Phones now work properly when connecting to a 3CX server and a transfer is
attempted.
DEF08851
Phones now work properly after processing a 484 Address Incomplete message.
Other
DEF08634
138
Auto-sync time setting format is now independent of the phones language setting.
RN-001029-00, Rev 06, Release 2.2
5i Series IP Phone Release Notes
Contacting Aastra Telecom Support
Contacting Aastra Telecom Support
If you’ve read this release note, and consulted the Troubleshooting section of your
phone model’s manual and still have problems, please send inquiries via email to
[email protected].
RN-001029-00, Rev 06, Release 2.2
139
Generic SIP IP Phone
Model 5i Series
2.2 Release Notes
Copyright © 2008 Aastra Telecom. All rights reserved. Information in this document is subject to
change without notice. Aastra Telecom assumes no responsibility for any errors that may appear in
this document. Product capabilities described in this document pertain solely to Aastra Telecom's
marketing activities in the U.S. and Canada. Availability in other markets may vary.
RN-001029-00 Rev 06
SIP IP Phones Release 2.2
March 2008