1
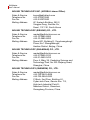
DAQMaster
Configuration-based Device Manager for
ADLINK DAQ Devices
User’s Manual
Manual Rev.
2.00
Revision Date:
August 1, 2007
Part No:
50-11230-1000
Advance Technologies; Automate the World.
DAQMaster
User’s Manual
Copyright 2007 ADLINK TECHNOLOGY INC.
All Rights Reserved.
Disclaimer
The information in this document is subject to change without prior
notice in order to improve reliability, design, and function and does
not represent a commitment on the part of the manufacturer.
In no event will the manufacturer be liable for direct, indirect, special, incidental, or consequential damages arising out of the use or
inability to use the product or documentation, even if advised of
the possibility of such damages.
This document contains proprietary information protected by copyright. All rights are reserved. No part of this manual may be reproduced by any mechanical, electronic, or other means in any form
without prior written permission of ADLINK.
Trademark Information
DAQMaster and DAQPilot are registered trademarks of ADLINK
Technology Inc.
Product names mentioned herein are used for identification purposes only and may be trademarks and/or registered trademarks
of their respective companies.
DAQMaster
User’s Manual
Getting service
Customer satisfaction is our top priority. Contact us should you
require any service or assistance.
ADLINK TECHNOLOGY INC.
Web Site
Sales & Service
Telephone No.
Fax No.
Mailing Address
http://www.adlinktech.com
[email protected]
+886-2-8226-5877
+886-2-8226-5717
9F No. 166 Jian Yi Road, Chungho City,
Taipei Hsien 235, Taiwan, ROC
ADLINK TECHNOLOGY AMERICA, INC.
Sales & Service
Toll-Free
Fax No.
Mailing Address
[email protected]
+1-866-4-ADLINK (235465)
+1-949-727-2099
8900 Research Drive, Irvine,
CA 92618, USA
ADLINK TECHNOLOGY EUROPEAN SALES OFFICE
Sales & Service
Toll-Free
Fax No.
Mailing Address
[email protected]
+49-211-4955552
+49-211-4955557
Nord Carree 3, 40477 Düsseldorf, Germany
ADLINK TECHNOLOGY SINGAPORE PTE LTD.
Sales & Service
Telephone No.
Fax No.
Mailing Address
[email protected]
+65-6844-2261
+65-6844-2263
84 Genting Lane #07-02A,
Cityneon Design Center, Singapore 349584
ADLINK TECHNOLOGY SINGAPORE PTE LTD.
(INDIA Liaison Office)
Sales & Service
Telephone No.
Fax No.
Mailing Address
[email protected]
+91-80-57605817
+91-80-26671806
No. 1357, Ground Floor, “Anupama”,
Aurobindo Marg JP Nagar (Ph-1)
Bangalore - 560078
DAQMaster
User’s Manual
ADLINK TECHNOLOGY INC. (KOREA Liaison Office)
Sales & Service
Telephone No.
Fax No.
Mailing Address
[email protected]
+82-2-20570565
+82-2-20570563
4F, Kostech Building, 262-2,
Yangjae-Dong, Seocho-Gu,
Seoul, 137-130, South Korea
ADLINK TECHNOLOGY (BEIJING) CO., LTD.
Sales & Service
Telephone No.
Fax No.
Mailing Address
[email protected]
+86-10-5885-8666
+86-10-5885-8625
Room 801, Building E, Yingchuangdongli
Plaza, No.1 Shangdidonglu,
Haidian District, Beijing, China
ADLINK TECHNOLOGY (SHANGHAI) CO., LTD.
Sales & Service
Telephone No.
Fax No.
Mailing Address
[email protected]
+86-21-6495-5210
+86-21-5450-0414
Floor 4, Bldg. 39, Caoheting Science and
Technology Park, No.333 Qinjiang Road,
Shanghai, China
ADLINK TECHNOLOGY (SHENZEN) CO., LTD.
Sales & Service
Telephone No.
Fax No.
Mailing Address
[email protected]
+86-755-2643-4858
+86-755-2664-6353
C Block, 2nd Floor, Building A1,
Cyber-tech Zone, Gaoxin Ave. 7.S,
High-tech Industrial Park S.,
Nanshan District, Shenzhen,
Guangdong Province, China
DAQMaster
User’s Manual
Using this manual
Audience and scope
This manual guides you when using the DAQMaster to configure
ADLINK DAQ devices. This manual also describes how to install
and use the DAQMaster for managing and controlling your DAQ
devices.
How this manual is organized
This manual is organized as follows:
Chapter 1 Introduction: This chapter introduces the DAQMaster application including its main features and highlights.
Chapter 2 Installation: This chapter provides information on
DAQMaster system requirements, installation, and user interface.
Chapter 3 Getting to know DAQMaster: The chapter
describes the DAQMaster’s main functions including the
device, software, and task managers.
Chapter 4 Device Manager: The chapter describes all the
functions of the DAQMaster Device Manager for configuring
DAQ modules and devices. This part also includes information
on the memory allocation tool, test panel, and device calibration.
Chapter 5 Software Manager: The chapter lists all the DAQMaster Software Manager functions including information on
how to update installed ADLINK applications using the Update
Wizard and how to use integrated tools such as Code Creator
and DAQ Conversion utilities.
Chapter 6 Task Manager: The chapter describes the DAQMaster Task Manager function that is integrated with the
DAQPilot Task Manager.
Appendix: The Appendix comes with supplementary information including the DAQMaster file distribution and .DAT file format.
DAQMaster
User’s Manual
Conventions
Take note of the following conventions used throughout the manual to make sure that you perform certain tasks and instructions
properly.
NOTE
Additional information, aids, and tips that help you perform particular tasks.
IMPORTANT Critical information and instructions that you MUST perform to
complete a task.
WARNING Information that prevents physical injury, data loss, module damage, program corruption etc. when trying to complete a particular task.
DAQMaster
User’s Manual
Table of Contents
1 Introduction ........................................................................ 1
1.1
1.2
Features............................................................................... 2
Highlights ............................................................................. 2
2 Installation .......................................................................... 3
2.1
2.2
2.3
2.4
2.5
Where to Get ....................................................................... 3
Before You Proceed ............................................................ 3
System Requirements .................................................... 3
Installing DAQMaster........................................................... 4
Checking the DAQ Card Drivers.......................................... 5
Launching the DAQMaster .................................................. 5
3 Getting to Know DAQMaster ............................................. 7
3.1
3.2
Main Menu ........................................................................... 7
File Menu ........................................................................ 7
Options Menu ................................................................. 7
View Menu ...................................................................... 8
Help Menu ...................................................................... 8
DAQMaster Functions ......................................................... 9
Main Function Panel ..................................................... 10
Management Panel ....................................................... 11
Sub-function Panel ....................................................... 12
4 Device Manager ................................................................ 13
4.1
4.2
4.3
Views ................................................................................. 13
Database Functions........................................................... 14
Sub-functions..................................................................... 18
Configuration ................................................................ 18
Test Panel .................................................................... 20
Calibration ..................................................................... 25
5 Software Manager ............................................................ 27
5.1
5.2
5.3
Views ................................................................................. 29
Database Functions........................................................... 29
Software Product Overview .......................................... 29
Hardware Support List .................................................. 30
Refresh ......................................................................... 30
Sub-functions..................................................................... 31
Table of Contents
i
DAQMaster
User’s Manual
Update Wizard .............................................................. 31
Code Creator ................................................................ 33
Data Conversion Tool ................................................... 34
Sample Program Directory ........................................... 34
6 Task Manager .................................................................... 35
Appendix ................................................................................ 37
A
B
ii
DAQMaster Distribution ..................................................... 37
Required Files ............................................................... 37
.DAT File Format................................................................ 38
Header .......................................................................... 38
Data Block .................................................................... 40
Table of Contents
DAQMaster
1
Introduction
The ADLINK DAQMaster is a smart device manager that opens up
access to ADLINK data acquisition and test and measurement
products. DAQMaster enables you to:
X
configure and manage DAQ hardware and software in an
integrated interface
X
dynamically detect and view devices and instruments connected to your system
X
easily update installed test and measurement software
applications
X
execute system diagnostics and perform basic function test.
In addition to these standard functions, DAQMaster also comes
with item-specific tools that you can use to configure, diagnose, or
test your system. DAQMaster offers a powerful, user-friendly, and
easy-to-navigate Windows-based configuration utility that simplifies your DAQ card configuration.
The built-in test utility in DAQMaster allows you to verify basic
hardware operations including analog input/output, digital input/
output, and counter/timer function. In addition, the product page
and sub-function content changes dynamically—depending on the
installed ADLINK card—to show related function and supported
features.
DAQMaster delivers an all-in-one configuration, user can get a full
support matrix to well configure ADLINK Test and Measurement
products.
Introduction
1
DAQMaster
Features
1.1 Features
Z
Supports Windows 98/NT/2000 and 32-/64-bit editions of
Windows XP/Server 2003/Vista
Z
Windows-based utility offers convenient hardware configuration and diagnosis
Z
Simple yet versatile programming examples to speed up
your application development
Z
Supports a comprehensive line of I/O functions including
AI, AO, DI, DO, timer/counter, and event
Z
Online manual offers programming guides during design
time
1.2 Highlights
Device management
The DAQMaster Device Manager offers an efficient management
of installed DAQ and test and measurement devices.
NOTE
If you need help installing your device, refer to the installation guide of related software packages included with
your ADLINK Test and Measurement hardware. DAQMaster also allows you to retrieve the pin map for all supported ADLINK test and measurement devices.
Application management
The DAQMaster also comes with a Software Manager that
enables you to manage installed DAQ and test and measurement
software applications.
Task manager connectivity
The Task Manager delivers connectivity with the DAQPilot, a revolutionary task-oriented DAQ driver and wizard, allowing full
DAQPilot task control.
2
Introduction
DAQMaster
Where to Get
2
Installation
This chapter provides information on DAQMaster system requirements, installation, and user interface information.
2.1 Where to Get
DAQMaster is available from the All-in-One CD that came with
your DAQ card package. You may also download a copy from the
ADLINK Test and Measurement website at http://www.adlinktech.com/TM.
2.2 Before You Proceed
System Requirements
Make sure your system meets the following requirements before
you install DAQMaster.
X
Windows 98/NT/2000 or 32-/64-bit editions of
Windows XP/Server 2003/Vista operating system
X
PC with Intel Pentium-class CPU or higher
X
VGA display or higher
X
Minimum 64 MB of memory
X
Minimum 40 MB of free hard disk space
X
Mouse
Installation
3
DAQMaster
Installing DAQMaster
2.3 Installing DAQMaster
This section provides instructions on how to install DAQMaster in
your system. Prepare the ADLINK All-In-One CD that comes with
the card package.
To install DAQMaster:
1. Place the ADLINK All-in-One CD to the computer’s optical drive.
2. When the installation window appears, click on the DAQMaster installation button.
NOTE
If Autorun is not enabled in your computer, explore the
CD, then double-click on the SETUP.EXE to display the
installation window.
3. When installation is completed, the application launches
automatically.
4
Installation
DAQMaster
Checking the DAQ Card Drivers
2.4 Checking the DAQ Card Drivers
To check if the DAQ card(s) is properly installed and detected by
the system:
1. Launch the Windows Device Manager.
2. Expand the NuDAQ Boards item, then double-click on
the listed DAQ device(s).
3. Click the Resources tab and check if the device I/O port
and IRQ resources are allocated correctly.
NOTE
The necessary DASK libraries are installed during the
DAQMaster installation. These libraries hold the PCISDASK, D2K-DASK, and WD-DASK system files. For
more information on these DASK libraries, install the corresponding software packages.
2.5 Launching the DAQMaster
To launch DAQMaster from the Windows Start menu, click Start >
ADLINK > DAQMaster. The main window appears.
Installation
5
DAQMaster
Launching the DAQMaster
6
Installation
DAQMaster
Main Menu
3
Getting to Know DAQMaster
3.1 Main Menu
Menu
File
Options
Function
System commands
Configuration options (i.e. configuring the DAQPilot
task output directory)
View
View commands
Help
Launches the online help and other support
information
File Menu
The File menu provides the following options:
Report
Reports the current configuration. This item initiates
the DAQMaster report function to create a simple
printable report of system configuration.
Exit
Closes the DAQMaster application.
Options Menu
The Options menu offers the following options:
Task Directory
Configures the default output path of the Task
Manager.
Getting to Know DAQMaster
7
DAQPilot
Main Menu
View Menu
The View menu provides the following options:
Device Manager
Changes the function mode, displays related
data to, and enables all corresponding
functions for the Device Manager.
Software Manager
Changes the function mode, displays related
data to, and enables all corresponding
functions for the Software Manager.
Task Manager
Changes the function mode, displays related
data to, and enables all corresponding
functions for the DAQPilot Task Manager. An
interface connects the DAQMaster with the
DAQPilot.
Help Menu
The Help menu provides the following options:
DAQMaster Help
Launches the DAQMaster online help. You may
also press <F1> to open the online help file.
ADLINK on the Web Opens an Internet browser to the ADLINK
website (www.adlinktech.com).
Technical Support
Displays information on DAQMaster technical
support links and resources.
Ask a Question
Opens a sales query form for easy sending of
inquiries related to the product.
System Information
Displays the system information such as the
operating system version, processor, memory,
and installed ADLINK applications.
System Device Manager
Launches the Windows device manager for
related hardware information.
About
8
Shows the ADLINK DAQMaster version and
copyright statement.
Getting to Know DAQMaster
DAQMaster
DAQMaster Functions
3.2 DAQMaster Functions
The DAQMaster comes with three major function blocks that
dynamically changes depending on the selected device or software application. Refer to the illustration below.
Panel
Main function
panel
Description
Includes the Device Manager, Software Manager,
and Task Manager buttons.
Management
Displays the management tree and product page.
panel and product Each main function has three view modes and
page
four corresponding view functions (minimum).
Sub-function
panel
Displays all available sub-functions depending on
the selected main function.
Getting to Know DAQMaster
9
DAQPilot
DAQMaster Functions
Main Function Panel
The main function panel includes three major functions — Device
Manager, Software Manager, and Task Manager. Depending on
the selected main function, the device manager and software
manager provide three view modes for detailed product information and enable all corresponding functions for device/interface
products and/or software application from the sub-function panel.
Device Manager
The DAQMaster Device Manager comes with item-specific tools
which you can use to configure, diagnose, or test your system. As
you navigate through the DAQMaster, the contents of the product
page and sub-functions change according to the selected main
function. The Device Manager simplifies configuration of plug-in I/
O devices via a Windows-based configuration utility. It also comes
with a test utility that allows you to verify hardware operations
including analog input/output, digital input/output, and counter/
timer function. Refer to Chapter 4 for more information.
Software Manager
The DAQMaster Software Manager comes with an update tool
and utilities for your ADLINK test and measurement applications.
Featuring ease of use and access, the Software Manager enables
you to update the software, find example programs, generate a
reference code for future programming, and convert captured raw
data into scaled information. Refer to Chapter 5 for more information.
The software support matrix displays four related functions on the
sub-function panel, including:
10
X
Update Wizard
X
Samples
X
Code Creator
X
Data Conversion
Getting to Know DAQMaster
DAQMaster
DAQMaster Functions
Task Manager
The Task Manager function bridges the DAQMaster with the
DAQPilot task-oriented DAQ driver and wizard. With DAQPilot
Task Manager you may easily develop DAQ tasks from predefined
run-time specifications. Refer to Chapter 6 for more information.
Management Panel
Management Function Panel
The management function panel includes a tree view browser that
changes depending on the view mode. When in software manager
function, this panel displays the software support matrix and
detailed software/driver support. This panel also shows the device
pin map and illustration for all supported test and measurement
devices.
Product Page
NOTE
This feature requires Internet access.
The embedded web client provides hyperlinks to sites with related
information for your device and/or software application.
Getting to Know DAQMaster
11
DAQPilot
DAQMaster Functions
Sub-function Panel
The sub-function panel shows all related device and/or software
manager functions.
12
Getting to Know DAQMaster
DAQMaster
Views
4
Device Manager
The DAQMaster Device Manager is a powerful tool for configuring
an ADLINK device. This utility detects and lists all installed analog
output, digital I/O, digitizer, GPIB, multifunction, simultaneous, and
time/counter modules for configuration and control. To launch,
click on the Device Manager icon from the main function panel.
NOTE
When an installed device is not displayed, it may be because you have not refreshed the configuration tree, the
device is not PnP-compatible, or DAQMaster does not
support the device’s driver version.
The device manager enables convenient configuration and
retrieval of product information. For information on supported
devices, refer to the table on page 15-16.
4.1 Views
Item
Description
Collapse
Collapses the product tree
Expand
Expands the product tree
Device Manager
13
DAQMaster
Database Functions
4.2 Database Functions
The Device Manager offers several view modes to display related
product information. A list of installed and detected modules with
eight major product classifications are listed below.
Device
Analog output modules (i.e. 6208)
Digital I/O modules (i.e. 7432, 7300)
Digitizer modules (i.e. 9820)
GPIB modules (i.e. 3488)
Multifunction DAQ modules (i.e. 2205)
Simultaneous DAQ modules (i.e. 2010)
Switch modules (i.e. 7901)
Timer/Counter modules (i.e. 8554)
From the tree, you may click on the integrated pin map/definition
database to display the pin information of installed modules. It also
comes with a refresh button and a link to the supported devices
table. Refer to the function table below.
Item
Function
All Hardware Devices Shows all supported devices
14
Installed Devices
Shows all installed devices
Refresh
Refreshes the database
Device Manager
DAQMaster
Database Functions
Device Overview
The table below shows all modules which are currently supported
by DAQMaster.
PXI
PCIe
cPCI
LPCI
PCI
Type
Model
Analog Output
Modules
6208/16
X
6308
X
Digital I/O
Modules
7200
X
X
X
12 MB/s High-Speed 32-CH DI & 32-CH DO
7230
X
X
X
32-CH Isolated Digital I/O
7224
X
24-CH Opto-22 Compatible Digital I/O
7233
X
32-CH Isolated DI
7234
X
7248
X
X
32-CH Isolated DO
X
48-CH Opto-22 Compatible Digital I/O
X
X
7252
48-CH Opto-22 Compatible Digital I/O
X
8-CH Relay Outputs & 8-CH Isolated DI
X
8-CH Relay Output & 16-CH Isolated DI
7256
X
16-CH Latching Relay Outputs & 16-CH Isolated DI
7258
X
32-CH PhotoMos Relay Outputs & 2-CH Isolated DI
7260
X
7300
X
X
80 MB/s High-Speed 32-CH Digital I/O
7432
X
X
64-CH Isolated Digital I/O
7433
X
X
64-CH Isolated DI
7434
X
X
64-CH Isolated DO
7442
X
High-density 128-CH Isolated Digital I/O
7443
X
High-density 128-CH Isolated DI
7444
X
7452
Digitizer
Modules
8/16-CH 16-Bit Analog Output
8-CH 12-Bit Isolated Analog Output
7249
7250
Description
8-CH High-Power Relay Outputs & 8-CH Isolated DI
High-density 128-CH Isolated DO
X
128-CH Isolated Outputs & 128-CH Isolated DI
7296
X
96-CH Opto-22 Compatible Digital I/O
7348
X
High Driving Capability 48-CH Digital I/O
7396
X
High Driving Capability 96-CH Digital I/O
9812
X
4-CH 10/12-bit 20 MS/s Simultaneous-Sampling
Analog Input
9820
X
Device Manager
X
2-CH 14-Bit 65 MS/s Digitizer with 512 MB Memory
15
DAQMaster
Database Functions
PXI
PCIe
cPCI
LPCI
PCI
Type
Model
Description
Multifunction
Modules
2204
X
X
X
64-CH 12-Bit 3 MS/s Multi-Function DAQ
2205
X
X
X
64-CH 16-Bit 500 kS/s Multi-Function DAQ
2206
X
X
X
64-CH 16-Bit 250 kS/s Multi-Function DAQ
2208
X
X
X
96-CH 12-bit 3 MS/s Ultra High-Density Analog
Input Multi-Function DAQ
2213
X
X
X
16-CH 16-Bit 250 kS/s Low-Cost Multi-Function
DAQ w/o Analog Output
2214
X
X
X
16-CH 16-Bit 250 kS/s Low-Cost Multi-Function
DAQ
2501
X
X
X
4-CH 12-Bit 1 MS/s Analog Output Multi-Function
DAQ
2502
X
X
X
8-CH 12-Bit 1 MS/s Analog Output Multi-Function
DAQ
9118
X
X
64-CH 16-Bit 250 kS/s Multi-Function DAQ Module
16-CH 12/16 Bit Up to 333 kS/s Analog Input Card
9116
9114
X
9113
X
9112
X
9111
X
2005
X
X
X
4-CH 16-Bit 500 kS/s Simultaneous-Sampling MultiFunction DAQ
2006
X
X
X
4-CH 16-Bit 250 kS/s Simultaneous-Sampling MultiFunction DAQ
2010
X
X
X
4-CH 14-Bit 2 MS/s Simultaneous-Sampling MultiFunction DAQ
2016
X
X
X
4-CH 16-Bit 800 kS/s Simultaneous-Sampling MultiFunction DAQ
Timer/Counter
Modules
8554
X
GPIB Modules
3488
X
Switch
Modules
7901
X
16-CH General-Purpose SPDT Relay
7921
X
24-CH 2-Wire Multiplexer
Extension
8570
Simultaneous
Modules
7931
16
X
32-CH 16-Bit 250 kS/s Multi-Function DAQ Card
32-CH 12-Bit 100 kS/s Isolated Analog Input Card
X
X
16-CH 12-Bit 250 kS/s Multi-Function DAQ Module
16-CH 12/16-Bit 100 kS/s Low-Cost Multi-Function
DAQ Cards
10/12-CH General-Purpose Timers/Counters & 8CH Digital I/O
X
X
X
High-Performance IEEE488 GPIB Interface
X
4x8 2-Wire Matrix
X
PCI-to-PXI, PXI-to-PXI Extension
Device Manager
DAQMaster
Database Functions
DAQMaster also allows you to view an installed device’s pin map
and/or illustration.
NOTE
When a device’s pin map and/or illustration is not available, refer to the product documentation.
Refresh
Refreshes the tree view and the corresponding product page.
Device Manager
17
DAQMaster
Sub-functions
4.3 Sub-functions
The table below lists all Device Manager sub-functions.
Sub-function
Description
Configuration
Adjusts the memory configuration for modules
performing continuous AI, DI, and DO operations
Test Panel
Provides a basic test function for task diagnosis
Calibration
Calibrates DAQ-2000 series modules
Configuration
The Configuration function allows you to adjust memory allocation
for continuous analog input/output and digital input/output operations. To open the configuration window:
1. Click on the Configuration button. A DAQ Utility window
appears with a list of installed devices.
2. Right-click on a device, then select Device Configuration
from the pop-up menu. A Device Configuration window
appears.
18
Device Manager
DAQMaster
Sub-functions
You may use the memory evaluator to calculate the required
size.
3. Adjust the allocated memory buffer, then click OK.
4. Restart the system to apply the changes.
NOTE
Device Manager
If you do not restart the system, the State field of the selected device from the DAQ Utility window shows Unallocated.
19
DAQMaster
Sub-functions
Test Panel
The DAQMaster integrates a basic test function to analyze test
and measurement tasks and operations supported by the installed
module. To access, click on the test panel button from the subfunction panel. The test panel interface changes according to the
selected module and its supported operation. Refer to the following sections.
Analog Input
When launching the test panel for ADLINK DAQ-2000 Series and
9000 Series modules, click on the AI tab sheet to adjust the following parameters:
X
Mode: Select continuous or polling mode
X
AI Channel: Select the AI channel
X
Reference Ground: Select the reference ground
X
AI Range: Select the AI range
X
Sample Rate: Set the AI sampling rate
Click on Start to test the operation or click Stop to abort.
20
Device Manager
DAQMaster
Sub-functions
Analog Output
When using the test panel for ADLINK DAQ-2000 Series and 6000
Series modules, click on the AO tab sheet to adjust the following
parameters:
X
Mode: Select DC Output or Function Generator
X
AO Channel: Select the channel for analog output
X
Function: Select the output function such as Sine, Square,
Triangle, or Sawtooth Wave
X
Offset: Set the function offset
X
Frequency: Set the function frequency
X
Amplitude: Set the function amplitude
X
Phase: Set the phase value
X
Duty Cycle: Set the duty cycle
For advanced operations, DAQMaster provides a basic function
generator that you may use to set the offset, frequency, amplitude,
phase, and duty cycle.
Click on Start to test the operation or click Stop to abort.
Device Manager
21
DAQMaster
Sub-functions
For 6000 Series modules, you may conveniently adjust the related
parameters such as AO channel number, output range, and output
value.
22
Device Manager
DAQMaster
Sub-functions
Digital Input/Output
To use the test panel for ADLINK DAQ-2000/7000/9000 Series
modules, click on the DIO tab and adjust the DIO port number and
mode accordingly.
When you set the port direction to input, the digital input value is
displayed with the corresponding LED component. When you set
the port direction to output, the utility controls the digital output
value with the corresponding switches.
Device Manager
23
DAQMaster
Sub-functions
Timer/Counter
For ADLINK 8554 timer/counter module, you may test the basic
function after selecting the counter number and adjusting the interval. Refer to the screens below.
24
Device Manager
DAQMaster
Sub-functions
Calibration
The Device Manager integrates a calibration tool for DAQ/PXI2000 Series modules. Calibration brings accurate measurements
for A/D and D/A operations.
To start the calibration process for selected DAQ modules, click
on the Calibration button, then follow screen instructions to proceed.
Refer to the card’s user manual for more information on calibration.
Device Manager
25
DAQMaster
Sub-functions
26
Device Manager
DAQMaster
5
Software Manager
The Software Manager detects and displays installed ADLINK test
and measurement software applications, and features online software updating.
NOTE
DAQMaster currently does not support Linux.
The Software Manager supports the following test and measurement applications, drivers, ActiveX controls, and third-party applications/components:
Type
Windows WDM
Driver
Product Name
PCIS-DASK
ADLINK PCI/PCI Express®/cPCI Series
DAQ Card Drivers for Windows
D2K-DASK
ADLINK DAQ/DAQe/PXI-2000 Series DAQ
Card Drivers for Windows
WD-DASK
ADLINK PCI/PXI-9820 High-Speed
Digitizer Drivers for Windows
DAQPilot
ActiveX Control
Set
Third-Party
Software
Support
Software Manager
Description
Revolutionary Task-oriented DAQ Driver
and Wizard
DAQBench
ActiveX Controls for Measurement and
SCADA/HMI
PCIS-OCX
ActiveX Controls for ADLINK PCI/PCI
Express®/cPCI Series DAQ Cards
D2K-OCX
ActiveX Controls for ADLINK DAQ/DAQe/
PXI-2000 Series DAQ Cards
WD-OCX
ActiveX Controls for ADLINK PCI/PXI-9820
Digitizer
DAQ-LVIEW
PnP
LabVIEW™ Drivers for ADLINK PCI/PCI
Express®/cPCI Series DAQ Cards
DAQ-MTLB for
MATLAB®
MATLAB DAQ Toolbox for ADLINK DAQ
Cards
D2K-VEE
VEE™ Drivers for ADLINK DAQ/DAQe/
PXI-2000 Series DAQ Cards
PCIS-VEE
VEE™ Drivers for ADLINK PCI/cPCI Series
DAQ Cards
27
DAQMaster
Type
Proprietary
Application
28
Product Name
Description
DAQCreator
Data Acquisition System Creator
DAQMaster
Configuration-based Device Manager for
ADLINK DAQ Cards
PCIS-OPC
OPC 2.0-Compliant Servers for ADLINK
Devices
Software Manager
DAQMaster
Views
5.1 Views
Item
Description
Collapse
Collapses the product tree
Expand
Expands the product tree
5.2 Database Functions
Item
Description
Software Product
Overview
Displays an overview of ADLINK test and
measurement software applications
Hardware
Support List
Displays a hardware list classified by
supported software products
Refresh
Refresh the tree view and product page
Software Product Overview
The software product page provides a matrix of ADLINK test and
measurement applications divided into five major product classes:
X
Windows drivers
X
Linux drivers (inquiries only)
X
Third-party software support
X
ActiveX Control (componentware)
X
Proprietary applications
To deliver robust support for ADLINK devices, these applications
are regularly updated, particularly the Windows and Linux drivers.
The Software Manager can help you update these test and measurement applications.
ADLINK has also released the latest versions of DAQ card drivers
including DASK and DAQPilot to support Windows Vista™. You
may visit http://www.adlinktech.com/TM/software-product.html for
detailed information.
Software Manager
29
DAQMaster
Database Functions
Hardware Support List
The Hardware Support List displays all devices that support a particular ADLINK software application. Below are some applications
and the devices which support them.
PCIS-DASK: ADLINK PCI/PCIe/cPCI Series DAQ Card Drivers
for Windows
6208, 6216, 6308, 7200, 7224, 7230, 7233, 7234, 7248, 7250,
7258, 7260, 7296, 7300, 7348, 7396, 7432, 7433, 7434, 7442,
7443, 7444, 7452, 8554, 9111, 9112, 9113, 9114, 9118, 9221,
9810, 9812
D2K-DASK: ADLINK DAQ-/DAQe-/PXI-2000 Series DAQ Card
Drivers for Windows
2005, 2006, 2010, 2016, 2204, 2205, 2206, 2208, 2213, 2214,
2501, 2502
WD-DASK: ADLINK PCI/PXI-9820 Digitizer Driver for Windows
9820
Refresh
Refreshes the tree view and the corresponding product page.
30
Software Manager
DAQMaster
Sub-functions
5.3 Sub-functions
The sub-function panel comes with four functions:
Item
Description
Update Wizard
Displays a version table for software
updating
Code Creator
Launches the Code Creator utility that
guides a user in setting the correct DAQ
task parameters for C code generation and
program DAQ with DASK library
Data Conversion Tool
Launches the data conversion tool that
enables a user to load a captured data file
and export it to various file formats including
scaled or raw
Sample Directory
Redirects the user to the sample program
directory depending on the selected
software application
Update Wizard
NOTE
This function requires Internet connection.
For hardware drivers or application software updates, the Update
Wizard redirects you to the ADLINK website that features an
online version table. The website lets you check for newer product
versions and/or updates. Use the Update Wizard to update your
measurement applications quickly and easily.
Software Manager
31
DAQMaster
Sub-functions
To use the Update Wizard:
1. Launch DAQMaster, then click on Software Manager.
2. Click the Update Wizard button from the sub-function
panel. An Internet browser appears and displays the
update site.
The update site comes with four columns that tell you all available
software applications, the software application(s) installed in your
system, the recommended update, and the update’s release note.
It is recommended that you check the release note before downloading the update to avoid system conflicts and other related
issues.
32
Software Manager
DAQMaster
Sub-functions
Code Creator
Code Creator is an easy-to-use code generator that works with
ADLINK DAQ devices. It provides an intuitive user interface that
reduces system development time. You simply select the devices,
configure the data acquisition parameters and the viewing windows, then generate the corresponding C source code for further
programming. DAQMaster provides a function button that you can
use to launch Code Creator.
Software Manager
33
DAQMaster
Sub-functions
Data Conversion Tool
Data files generated by DAQ functions that perform continuous
data acquisition is written in binary format. Since raw binary files
are difficult to interpret, the DAQCvt tool converts these files into a
readable format for text editors or spreadsheet processing. For
more information on DAQCvt, refer to the documentation that
came with your device or module.
Sample Program Directory
Redirects you to the sample program directory depending on your
selected software application.
34
Software Manager
DAQMaster
6
Task Manager
The DAQMaster Task Manager is an interface bridge to the
DAQPilot Task Manager. This function allows you to manage created DAQ tasks with simple editing functions such as adding/creating, deleting, modifying, copying, and renaming tasks.
Below are the task manager commands:
Item
Description
Add/Create a Task
Adds or creates a new DAQ task
Delete
Deletes the selected task
Modify
Launches the DAQPilot Wizard to reconfigure the task specification
Rename
Renames the selected task
Launch Instant Panel
Launches the DAQPilot’s instant test
panel depending on the selected task
Generate C Code
Generates a C reference code
depending on the selected task. The
generated code may be used for further
programming with DAQPilot API.
NOTE
Task Manager
For more information on DAQPilot, refer to the DAQPilot
user’s manual.
35
DAQMaster
36
Task Manager
DAQMaster
DAQMaster Distribution
Appendix
A
DAQMaster Distribution
Below is the DAQMaster installed directory architecture.
Level 1
Level 2
Note
—
Help
—
Content
DAQMaster.chm
—
Manual
—
Utility
DAQMaster.exe
—
Main application
RelNote.txt
—
DAQMaster release note
Readme.txt
—
Pin maps, HTML files
Memory allocation tools
Required Files
When installing DAQMaster, necessary merge module for DASK
and DAQPilot libraries are automatically installed. These are the
system files for PCIS-DASK, D2K-DASK, WD-DASK, and DAQPilot runtime module. Install the corresponding software packages to
learn more about sample programs for DASK libraries and DAQPilot.
37
DAQMaster
.DAT File Format
B
.DAT File Format
This section describes the file format of .DAT files logged through
the file system. The data file has two parts: Header and Data
Block. The file structure is shown below:
Header
DAQ data
Header
The header part records information related to the stored data with
total length of 60 bytes. The data structure of the file header is
enumerated below:
Header (Total length: 60 bytes)
Elements
Type
Size
(b)
Comments
ID
char
10
File ID, such as ADLINKDAQ1
card_type
short
2
Card type.
• PCI-9111DG: 20
• PCI-9111HR: 21
• PCI-9112: 22
• PCI-9113: 23
• PCI-9114DG: 24
• PCI-9114HG: 25
• PCI-9118DG: 26
• PCI-9118HG: 27
• PCI-9118HR: 28
• PCI-9810: 29
• PCI-9812: 30
• cPCI-9116: 32
num_of_channels
short
2
Total number of scanned channels
(1, 2)
channel_no
unsigned 1
char
Channel number where data was
read from. Available only for single
channel cards. (0, 1)
num_of_scan
long
4
Number of data for each channel.
data_width
short
2
Data width
• 0: 8 bits
• 1: 16 bits
• 2: 32 bits
38
DAQMaster
.DAT File Format
Header (Total length: 60 bytes)
Elements
Type
Size
(b)
Comments
channel_order
short
2
Channel scanned sequence
0: normal (0-1-2-3)
ad_range
short
2
AI range code
• 1: +/-10V
• 2: +/-5V
• 3: +/-2.5V
• 4: +/-1.25V
• 5: +/-0.625V
• 6: +/-0.3125V
• 7: +/-0.5V
• 8: +/-0.05V
• 9: +/-0.005V
• 10: +/-1V
• 11: +/-0.1V
• 12: +/-0.01V
• 13: +/-0.001V
• 14: 0-20V
• 15: 0-10V
• 16: 0-5V
• 17: 0-2.5V
• 18: 0-1.25V
• 19: 0-1V
• 20: 0-0.1V
• 21: 0-0.01V
• 22: 0-0.001V
scan_rate
double
8
Sampling rate for each channel
num_of_channel_range short
2
Not used
start_date
char
8
Starting date of DAQ (12/31/99)
start_time
char
8
Starting time of DAQ (18:30:25)
start_millisec
char
3
Starting millisecond of DAQ (360)
reserved
char
6
Not used
39
DAQMaster
.DAT File Format
Data Block
The data block forms the second part of the .DAT file. The data is
written to file in a 16-bit binary format with the lower byte first (little
endian). For example, the value 0x1234 is written to disk with 34
first followed by 12. The total length of the data block depends on
the data width and the total data count.
Card Type
Data Format
Every 16-bit signed integer data:
PCI-9111DG
D11 D10 D9...D1 D0
C3 C2 C1 C0
Value calculation*
CH# = OD & 0x0F ND
= OD >>4 or ND =
OD/16
Where D11, D10...D0 is the A/D data
and C3, C2, C1, C0 is the channel
numbers.
Every 16-bit signed integer data:
PCI-9111HR
ND = OD
D15 D14 D13...D1 D0
Where D15, D14...D0 is the A/D data.
Every 16-bit unsigned integer data:
PCI-9112
cPCI9112
D11 D10 D9...D1 D0 C3 C2 C1 C0
Where D11, D10...D0 is the A/D data,
and C3, C2, C1, C0 is the channel
number.
Every 32-bit unsigned integer data
(including 12-bit unsigned A/D data):
PCI-9113
B31...B21 C4...C0 B15...B12 D11
D10... D0
Where D11, D10...D0 is the A/D data,
C4, C3, C2, C1, C0 is the channel
number, and B31 to B21 & B15 to
B12 is unused.
40
CH# = OD & 0x0F ND
= OD >>4 or ND =
OD/16
CH# = (OD >>16) &
0x1F ND = OD &
0x0FFF
DAQMaster
.DAT File Format
Card Type
Data Format
Every 32-bit unsigned integer data
(including 16-bit signed A/D data)
PCI-9114DG
PCI-9114HG
Value calculation*
CH# = (OD >>16) &
0x1F ND = OD &
0xFFFF
B31...B21 C4 C3 C2 C1 C0 D15
D14...D1 D0
Where D15, D14...D0 is the A/D data,
C4, C3, C2, C1, C0 is the channel
number, and B31 to B21is unused.
Every 16-bit signed integer data:
cPCI-9116
ND = OD
D15 D14 D13...D1 D0
Where D15, D14...D0 is the A/D data.
Every 16-bit signed integer data:
PCI-9118HR
ND = OD
D15 D14 D13...D1 D0
Where D15, D14...D0 is the A/D data.
Every 16-bit unsigned integer data:
PCI-9118DG
PCI-9118HG
D11 D10 D9...D1 D0 C3 C2 C1 C0
CH# = OD & 0x0F ND
= OD >>4 or ND =
OD/16
Where D11, D10...D0 is the A/D
data, and C3, C2, C1, C0 is the
channel number.
Every 16-bit signed integer data:
ND = OD >>4 or ND =
OD/16
D11 D10 D9...D1 D0 b3 b2 b1 b0
PCI-9812
Where D11, D10...D0 is the A/D
data, b2, b1, b0 is the digital input
data, and b3 is the trigger detection
flag.
41
DAQMaster
.DAT File Format
Card Type
Data Format
Every 16-bit signed integer data:
PCI-9810
Value calculation*
ND = OD >>6 or ND =
OD/64
D9 D8 D7...D1 D0 b5 b4 b3 b2 b1
b0
Where D9, D8...D0 is the A/D data,
b2, b1, b0 is the digital input data, and
b3 is the trigger detection flag.
* channel no. (CH#) * A/D converted data (ND) * Value stored in the file (OD)
The file is written in binary format and may not be supported by
normal text editors. You may use the DAQ Conversion Tool to
view or get the file information and data value. DAQCreator can
load the data file as a data source and may export the data to
Microsoft Excel or CSV file format.
42