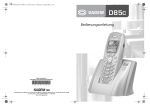
1
Belgacom Twist™ 675
User manual
INTRODUCTION
Dear customer:
Thank you for purchasing a DECT telephone; we appreciate your trust in us.
This product was manufactured with the utmost care, should you encounter any difficulties during its use,
we recommend that you refer to this user guide.
For your comfort and safety, we ask that you read the following paragraph carefully:
Recommendations and safety instructions
Your DECT telephone must not be installed in a humid room (wash room, bathroom, laundry
room, kitchen, etc.) unless it is 1.50 m away from a water point, or outside. Your telephone
must be operated at temperatures ranging from 5°C to 45°C.
Only use the supplied power adapter, connect it to the base socket according to the
installation instructions provided in this booklet and the indications on the identification label
affixed to it (voltage, current, electric network frequency) . As a safety measure, you can use the
power adaptors to cut off the 230V current in case of danger. They must be located near to the
device, and must be easily accessible.
This telephone was designed for use on the public switched telephone network (PSTN). In
case of a problem you must first contact your reseller. Only use the supplied telephone cord.
To avoid damaging your handset, only use certified rechargeable AAA batteries, never use
non rechargeable batteries. Insert the batteries in the handset battery compartment
respecting polarity.
For your personal safety, never place your handset on the base without the batteries, or
without the battery cover, you could get an electric shock.
At the end of their useful life, batteries must be disposed of according to the recycling
instructions presented in this booklet.
Your DECT telephone has an inside radio range of about 50 metres and up to 300 metres in
open space. The immediate presence of metal parts (of a television for example), or of any
electric appliance may result in range reduction.
Some sensitive medical equipment and safety equipment may be affected by the radiofrequency transmissions of your telephone. In all cases, we ask that you respect the safety
recommendations.
In areas where storms are frequent, we recommend that you protect your telephone line using
a surge protection device.
This equipment does not function in the case of an electric network shutdown: For the
emergency calls, use a self-contained cord telephone.
The CE marking certifies that the product meets the essential requirements of Directive 1999/
5/CE of the European Parliament and of the Council pertaining to microwave radio equipment
and telecommunication terminal equipment, for the safety and health of users, for
electromagnetic interference. Furthermore, it efficiently uses the frequency spectrum
attributed to ground and spatial communication to prevent damaging interference.
Belgacom TwistTM 675
services at the touch
of a key
Take a second call and switch between calls
by pressing R and 2.
▼
Call Waiting Signal
a service package
by subscription
Manage your line with utmost simplicity.
Forward your calls to another number.
by subscription
This pack combines the advantages of all
the services on your line.
▼
▼
Call Forwarding
Smart Services Benefit Pack
Display the number of the last call you missed.
▼
1919
free
Automatically ring back the person
you’re trying to call when the line is free,
using the R and 5 keys.
▼
Ring Back
free
Talk with two friends at once,
using the R and 3 keys.
▼
Three Party Conference
free
Send and receive SMS messages.
no subscription
required
Access the list of missed calls.
▼
Caller Number Display
by subscription
Call a preset number automatically by picking
up your handset.
▼
Fixed Destination Calling
by subscription
by subscription
Easy SMS :-)
Send your SMS messages:
Plug in your Twist™ 675. Compose your text message
and send it to the addressee’s fixed-line number or
national mobile number (of participating operators).
And you’re ready to go!
Receive your SMS messages:
The SMS function is automatically activated when
you send your first SMS message.
Want to find out more?
• www.belgacom.be/services
• Your nearest Belgacom point-of-sale
• Our toll-free Customer Service number, 0800 55 800
• Your telephone’s user manual
These services cannot be activated on your line or are likely to adversely affect its operation if you use it in conjunction with a fax, modem, PABX or alarm system.
Seek advice from a Belgacom point-of-sale or call Customer Service toll-free at 0800 55 800. Offer valid from 1 November 2004.
CONTENTS
Your telephone
Unpacking
Your base
Your handset
Connecting the base
Handset set-up
Turning the handset on and off
Replacing the batteries
Installation of a chart SIM
Getting started
Installation guide
Making a call
Belgacom smart services
Services when not in communication
Receiving a call
During a call
Handsfree
Transfer or call from another handset
During communication
Accessing the phonebook or call log
Recording a conversation
Secret mode
Ending a call
Entering a number in the phonebook
Communication between two handsets
Sending an SMS
Menu structure
Your phonebook
Creating an entry
Viewing the phonebook
Editing an entry
Deleting an entry
Searching for a contact
Performing a quick search
Import part or all of a SIM card directory
Transfer all or part of the phonebook
Transfer by intercommunication
Transferring a contact using IrDA
Using a phonebook entry to place a call
SMS service - Mini-messages
Sending a text message
Writing a text message
Sending an SMS
Reading a message
Viewing the memory status
Emptying an SMS folder
SMS settings
Modifying the SMS centre number
Choose the SMS transmission center
Terminal number
1
Modifying the terminal number
SMS boxes
Sub-Addressing
Creating a personal box
Viewing a message from a personal box
Modifying or removing a personal box
1
1
2
4
4
5
5
6
Call log
Viewing the received and dialed call log
Calling the last number dialed (Redial)
Calling a number listed in the dialed
and received call log
Viewing the events log
Activate/deactivate the new events
information screen
7
7
7
7
8
10
10
10
11
11
14
14
15
15
16
17
17
Accessories
Alarm clock
Setting the alarm clock
Activating or deactivating
the alarm clock
Modifying the alarm clock time
Changing the alarm clock ring tone
Timer
Changing the programmed time
of the timer.
Changing the timer ring tone
Displaying or hiding the programmed
time of the timer.
Birthday or organiser alarms
Adding a new birthday (organiser) alarm
Viewing a birthday (or organiser) alarm
Modifying or deleting a birthday
(or organiser) alarm
Monitoring a room
20
22
22
24
25
26
26
26
27
29
29
30
31
Games
Taquin
Fruit Mind
Customizing the handset
Changing the ring tones
Modify the idle screen
Modify the color of the menu backgrounds
Screensaver (Power-saver mode)
Activate or deactivate the Eco mode
Activating or deactivating the beeps
Activating/deactivating the silent mode
Record a personal ring tone
32
32
32
35
38
40
41
IrDA
Security
42
42
43
43
Locking/unlocking the keypad
Programming an emergency number
Modifying the base code
I
43
44
45
45
47
47
49
49
50
50
51
51
53
54
54
54
55
55
56
57
57
57
58
58
59
59
60
62
62
63
65
65
66
67
67
68
68
69
69
71
72
72
73
74
CONTENTS
Defining the call time limit
Defining forbidden prefixes - Call barring
Creating, modifying or deleting
a forbidden prefix
Authorising three-way calling
Settings
Accessing the Settings menu
Programming a key
Modifying the date and time
Adjusting the contrast
Using the auto hang up and pick up
features
Installation guide
Modifying the country code
Modifying the language
Advanced settings/ Handset
settings
Registering a new handset to a base
Modifying the base preference
Resetting the handset
Personnal registering
Renaming the handset
Advanced settings/
Base settings
Using a handset to put the base
in registration mode
Re-initialising the base
De-registering a handset
Renaming the base
Advances settings /
Line settings
Modifying the network type
Modifying the dialing mode
Modifying the flash duration (R key)
Setting a PABX prefix
2nd call
Answering machine
Modifying the remote access code
Setting the message duration
Privileged access
Record mode
Number of rings
75
76
77
77
79
Appendix
79
79
81
82
Care and Maintenance
Problems
Features
Guarantee
Guarantee terms
82
83
83
84
85
85
86
87
87
89
90
90
91
91
92
93
93
94
95
96
97
98
Enabling/disabling the answering machine 98
Modifying the OGM
99
Recording a personal outgoing message 99
Using a pre-recorded anonymous OGM 100
Deleting all your personal OGMs
100
Playing messages
101
Playing messages using the base
101
Playing messages using the handset
102
Remote access to answering machine 102
Deleting all the old messages
103
Recording a memo
104
TAM setting
105
Activating and deactivating call screening 105
II
105
106
107
108
108
110
110
110
111
112
112
YOUR TELEPHONE
Unpacking
Place the box in front of you, open it and make sure it contains the following items:
• one base,
• one handset,
• one battery compartment cover,
• one equipped power adapter,
• one telephone line cord,
• three rechargeable batteries,
• this user guide.
Your base
It fits well into your family and professional environment.
Emplacement du combiné
Voyant secteur
Voyant fixe
- vert : Marche - Répondeur éteint
- rouge : Marche - Répondeur activé, aucun message
Voyant clignotant
- rouge lent : Messages lus
- rouge cadencé : Clignote au rythme du nombre des
messages non lus
Message suivant
Mise en marche / Arrêt du répondeur
(appui long)
Message
précédent
Paging (appui long)
Lecture des messages
Effacement d’un message
(appui long)
Pause en cours de lecture
1
YOUR TELEPHONE
Your handset
With its user-friendly design, you will appreciate how easy it is to hold and its quality during
conversations.
Indicator of
incoming messages
and Phonemail
Color graphics
display
Speaker
Program keys
Infrared port (IrDA)
Direct SMS
access
Phonebook key
Navigator
Pick up
Handsfree
Redial (long press)
Turn on the handset
Hang up
Turn off the handset
Alphanumeric
keypad
Direct answering
machine access
(long press)
Intercommunication
key (handset
intercom)
R key
Microphone
The navigator key, a rapid selection tool.
To confirm or to access a sub-menu
Navigating
To cancel, delete or go to the
previous menu
2
YOUR TELEPHONE
The visual display of your handset
Status icons
Battery indicator
Network indicator
Silent mode on
Alarm clock on
Record mode
SMS Reception
Timer on
Answering mode
Message répondeur non lu
In use
Name of the base and
handset (press OK)
Icon showing
the programmed function
Icon of operator
Services
Silent mode
Operateur Services
Timer
Agenda
Alarm clock
Keypad lock
Number
Redial
Enabling answering machine
Answering machine
Phonemail
Other icons
Accessories
Organiser
Birthday
Missing calls
Home
Fax
Alarm clock
Call log
Mobile
Number 1
Number 2
Number 3
Personnalization
Settings
Phonebook
Answering Machine
Backlighting low
Sécurity
SMS
Timer
Work
When the battery charge icon is at minimum, your screen will not be lit and the volume
level of the hands-free function will be decreased until the battery is recharged.
3
YOUR TELEPHONE
Connecting the base
Before making any connections, please refer to the safety instructions presented at
the beginning of this user guide.
Place the base where it should be located.
Plug the telephone line connector (as shown
in the illustration) into the telephone socket
on the underside of the base and connect the
other end to the telephone wall socket.
Telephone socket
Power socket
Connect the power connector on the
underside of the base and the other end of
the cord to the power socket.
The power supply indicator located on the
base is green. Place the base in its final
location.
Handset set-up
Insert the batteries making sure to respect
the polarity. Place the cover back on the
handset by pushing upwards until it is
completely closed.
Remove the protective film on the screen,
place the handset on the base to fully charge
the batteries.
The charging icon appears on the screen, it
indicates the charging status. Once the icon
is full, your batteries are charged.
Only use certified rechargeable batteries. For optimal battery charge, leave the
handset on the base for at least 6 hours during initial use. During charging, the
batteries may heat up, this is quite normal and without risk.
4
YOUR TELEPHONE
Turning the handset on and off
To turn the handset off, hold down the red key
briefly on the screen. Your handset is now off.
and the message "Goodbye" is displayed
To turn your handset back on, hold down the green key
screen.
. BELGACOM is displayed on the
Information is displayed on the screen, including the name and number of the handset (for
instance HANDSET -2 -), the date and the time. If the message "REGISTER THE HANDSET"
is displayed, refer to page 85 to register your handset to the base.
Replacing the batteries
To avoid damaging your handset, only use certified rechargeable AAA batteries,
never use non rechargeable batteries.
Turn off the handset, and then turn it over to
access the battery compartment cover
Insert a sharp object (pen, paper clip...)
perpendicularly in hole 1 as shown in the
illustration and lift it upwards, the battery
cover opens, slide it downwards as shown in
2.
1
2
Remove the old batteries, and insert the new
batteries in the battery compartment, with the
polarity of each of them aligned as depicted
on the handset label. Replace the handset
battery compartment cover by pushing it
upward until fully closed.
5
YOUR TELEPHONE
Installation of a chart SIM
Take your base, remove the compartment of
chart SIM (reference mark 2) located on the
right side .
Take your chart SIM (reference mark 3) and
make slide it in the compartment by taking
account of the direction of insertion (printed
circuit of the visible chart and notch on the
right).
1
2
Insert the compartment unit and chart SIM in
the housing located on the basis (reference
mark 1) .
3
Recommendation of safety
Your telephone DECT comprises a low-size removable plastic part (drawer of
chart SIM) being able to be introduced By measurement of precaution, to hold
this drawer of chart SIM out of reach children
6
GETTING STARTED
GETTING STARTED
Installation guide
Once the handset has been turned on, press OK and select your
language. Set up assistance is automatically provided. It helps you set
certain parameters for your telephone.
The parameters are:
• language.
• date and time,
• Answering machine,
• name of the handset,
• external ringer,
If you wish to change the language, you can do this by the
following procedure on page 79.
Making a call
Enter the number of your contact using the keypad keys.
If you enter an invalid digit, press C on the navigator key
incorrect digit. Press the green key
to erase the
on your handset to make the call.
You can also make a call by:
- Pressing the green key
to access the line.
- Dialing your contact's number.
To enter the pause mode during dialling, press the 0 key until
symbol "/" appears.
During communication, you can increase or decrease the audio volume of
your handset by pressing the or key on the navigator.
Belgacom smart services
Your handset makes ComfortTM services simpler to use. Certain services
are pre-programmed in the direct access key
menu.
7
or from the Services
GETTING STARTED
They can be accessed when you are not in communication (ring back if
busy, etc.) or during communication (three party conversation, call
transfer, etc.).
Services when not in communication
When not in communication, press key
or from the Services
menu select using or the function that you want to activate from
those found in the following list and press Confirm
.
1919 - Know the last call that entered and was not answered, with
possibility of direct dialling of this number.
Forward On (*21*) - Activation of forward call function: enter a number of
your choice, then press
.
Forward Off (#21#) - Deactivation of forward call function.
No Reply On (*61*) - Activation of forward call in case of no answer
function: enter a number of your choice, then press
.
No Reply Off (#61#) - Deactivation of forward call in case of no answer
function.
Fw. Busy On (*67*) - Activation of forward call in case of line busy
function: enter a number of your choice, then press
8
.
GETTING STARTED
Fw. Busy Off (#67#) - Deactivation of forward call in case of line busy
function.
2 Call On (*43#) - Activation of 2 Call signal.
2 Call Off (#43#) - Deactivation of 2 Call signal.
Fixed Ca On (*53*) - Activation of fixed call function: enter an emergency
number of your choice, then press
.
Fixed Ca Off (#53#) - Deactivation of fixed call function.
Ring back Off (#37#) - Deactivate the Belgacom Ring Back service.
Anon. On (*31*) - Activation of refuse display of your number for next call:
enter this number, then press
.
Anon.Off (#31*) - Deactivation of refuse display of your number for next
call: enter this number, then press
9
.
GETTING STARTED
After each service activation or deactivation, wait for the
confirmation tone (quick intermittent tone), then hang up by
pressing the
key.
Using a password is not possible.
Receiving a call
When you receive a call your telephone rings. If you have subscribed to a
"Caller display" service, the caller's information appears on the screen
(unless your caller has enabled the anonymous mode), otherwise the
"Caller unknown" screen is displayed.
Pick up by pressing the green key
the red key
or
. To turn off the ringer, press
.
At the end of the conversation, press the red key
.
During a call
During a call, numerous options are accessible by pressing Menu
.
Select the desired option in the following list:
- Handsfree:
to activate the handset speaker.
- Internal call:
to transfer the call to another handset.
- Make 2nd Call:
to make a second call.
- Secret mode:
to mute the handset microphone.
- Phonebook:
to access the phonebook.
- Calls:
to access the call log.
- Oper. services:
to access the operator services.
- Record:
to record the conversation in progress.
- Loudspeak.Base: to activate the base loudspeaker.
Handsfree
While having a conversation with your contact, you can enable the
handset. Press Option
.
Select Handsfree or Loudspeak.Base using or and press
Activate
.
10
GETTING STARTED
When pressing the green key
while engaged in a
conversation you automatically activate the handsfree mode of
the handset, by pressing it again you deactivate the handsfree
mode.
The message Handsfree on appears on the screen. Increase or decrease
the audio volume using or .
Transfer or call from another handset
This function is only accessible when two handsets or more are registered
to the same base. During communication, you can transfer the call to
another handset.
During communication, press Menu
.
Using the or arrow, select Internal call. Press Confirm
.
The list of handsets registered to the base appears.
Select the handset you want to call using or . Press Call
.
The handset called rings, once someone picks up transfer the call by
pressing the red key
.
To retake the call before it is picked up by the handset called,
press Menu
.
Using the or arrow, select Hanging up. Press Activate
.
During communication
During communication, you can receive a second incoming call or place a
call to a second contact. You can then switch from one contact to the other,
or have a conference (depending on your subscription).
The following instructions are applicable if you have subscribed to "caller
number" or "caller waiting" - service. In all the other cases you have
access to these functions via the sequence Options, Operator Service.
11
GETTING STARTED
Receiving a second call whilst on line.
During the call, you will hear a beep to tell you that there is a second call
waiting. A screen will show the second caller's details.
Press Accept
to take this new call.
Your other caller is then put on hold and you can talk with your second
caller.
Making a second call whilst on line.
During communication, you can put your contact on hold and call a second
one by pressing Menu
.
Select Make 2nd Call using or . Press Confirm
Select your contact's telephone number in the phonebook by pressing
or dial the number using the keypad.
Once the number is entered, press Call
.
The second call is then launched, with the first call still on hold.
To alternate from one call to the other
Press Menu
.
Select Switch using or .
Press Activate
. The call in progress is put on hold, and you can then
take the second call.
12
GETTING STARTED
To end one of the calls and continue the other one
Press Menu
.
Select Hanging up using or . Press Activate
.
The call in progress is definitely terminated, and you can then take the
second call.
To set up a conference (the two parties and yourself)
Three-way calling is only possible when the second call is made
from your telephone.
Press Menu
.
Select 3-party conf. using or . Press Activate
.
You can then talk to both parties simultaneously.
If you want to end the conference, press Menu
.
Select End of conf. using or . Press Activate
.
Dual incoming call management can also be done via the R key
- Accepting a second incoming call:
+
.
- Making a second call during communication:
- Alternating from one call to the other:
+
- Ending a call and switching to the call on hold:
-Setting up a conference:
13
+
.
.
+ recipient number.
.
+
.
GETTING STARTED
Accessing the phonebook or call log
During communication, you can access your phonebook to look up a
telephone number, a name contained in an entry or information on calls
stored in your call log.
During communication, press Menu
.
Using or , select Phonebook or Calls and press Confirm
Return to the communication menu using
.
.
Recording a conversation
During communication, you can record an entire conversation or just a
portion of it.
Tell the people you are speaking to that you are recording the
conversation.
During communication, press Option
.
Using or , select Record. conv. and press Start
.
To start recording press OK.
The message "Recording in progress" appears on the screen.
•
To cancel the recording press Cancel
•
To end the recording press End
14
.
.
GETTING STARTED
Return to the communication menu using
.
Secret mode
You can switch to private mode at any time during your conversation. Your
handset microphone will be switched off and the other person will not be
able to hear you.
To activate secret mode:
During communication, press Menu
.
Using or , select Secret mode and press Activate
.
The Microphone muted message will appear on the screen and the
flashing
icon will be displayed on the communication screen.
To deactivate secret mode:
Press Menu
Using or , select Secret mode and press Deactivat
.
The Microphone activated message will appear on the screen and the
flashing
icon will disappear.
Your correspondent will be able to hear you again.
You can also choose to activate or deactivate the secret mode by
continuously pressing the C key on the navigator.
Ending a call
At the end of the conversation, press the red key
15
.
GETTING STARTED
Entering a number in the phonebook
Dial the number you want to enter in the phonebook.
If you make an error while entering the number, press C to delete the error.
Press Store
.
The name input screen appears.
Using the keypad keys, enter the name of your contact by pressing
successively on the keypad keys (see page 22 for further details).
Example "Smith":
.
To correct any mistakes made in entering the name, use:
• the C key to clear a letter,
• the , keys to move to a specific location in the name in order to
add or delete a letter.
Once the name is entered. Press Confirm
.
The number is displayed on the screen. Press Confirm
.
Select the icon according to the type of number entered using the or arrow:
- For a home telephone number
- For a work telephone number
- For a mobile telephone number
.
.
.
- For a FAX number
.
You can also use a number icon (1, 2, 3) to identify the entry.
Once the icon is selected, press Confirm
.
All of the information that you entered appears on the screen in the form
of an entry.
16
GETTING STARTED
•
To change the information in the entry, press Edit
. You can now
modify the name, number and/or icon type.
•
If the information is accurate, press Confirm
.
Your entry is created and is now in the phonebook list. You can see the
beginning of your contact's name which is preceded by a number type
icon.
The various phonebook functionalities are described in the menu
Your phonebook, page 22.
Communication between two handsets
To communicate between handsets, both handsets must be
matched to a single base, and must be within range of the base.
To call another handset, press the
key.
Select with the desired handset with the or keys. Press Call
.
The handset rings. Pick up on the second handset using the green
key
.
To end the call, press the red key
.
You can also easily call another handset if you know its number.
From the idle screen, enter the number of the handset.
Then press the green key
.
Sending an SMS
We recommend that you consult the SMS chapter before sending
a message.
17
GETTING STARTED
Press the SMS
key, a screen appears with the Edit SMS option
highlighted. Press Confirm
.
Use the , keys to select either Common box or a personal box if one
has been created. The SMS will be sent to the box selected.
If no personal box has been created, only the shared box is
displayed on the screen.
To create a personal box, select PersoBox Menu and press
Confirm
. Follow the instructions displayed on the screen. For
further details, refer to the paragraph Creating a personal box,
page 45.
Enter the text of your SMS using the keypad.
Press several times on a key to scroll through the letters. Once you have
written your message, press Option
.
Use the , keys to select Send. Press Confirm
.
Enter your recipient's number.
• If the number is listed in your phonebook, you can access it by
pressing
. Then select your contact's number using or , and
press Confirm
•
.
Otherwise, enter the number using the numeric keypad. Once the
number is entered, press Confirm
18
.
GETTING STARTED
Enter your recipient terminal number (default setting 0). press
Confirm
.
A confirmation screen appears. It indicates the type of transmission and
the number to which your message will be sent.
•
If the information is accurate. Press Confirm
•
appears on the screen indicating that the transmission of your SMS is
in progress.
To change the phone number or modify the text message press
Edit
. A message
. A screen allows you to choose the items you want to modify.
Once you are done making your changes, press Confirm
.
Once the message has been sent, you can save a copy of your message.
It will be stored in the Sent SMS box.
Press Yes
to save a copy of the message.
19
MENU STRUCTURE
Phonebook
Sms
Calls
Accessories
Games
Personaliz.
View
New entry
Edit
Delete
Search
Transm.
Lire carte SIM
Edit SMS
Read SMS
Memory
Empty SMS box
Settings
Incoming calls
Outgoing calls
Events
SMS Centers
Sub. Address
Private box
Activer
Désactiver
Consulter
Alarm clock
Organiser
Birthday
Timer
Room monitor
Taquin
Fruit Mind
Ringer
Scrn bckgrnd
Ambiance
Eco mode
Beeps
Silence
Record
IrDA
20
External ringer
Internal ringer
SMS reception
MENU STRUCTURE
Security
Keypad lock
Emergency
Change code
Time limit
Restriction
Intrusion
Confidentialité
Settings
Program keys
Date/time
Contrast
Auto Hang up
Auto Pick up
Adv. Settings
Help
Country code
Language
HS Settings
Base Settings
Line Settings
SMS Settings
TAM Settings
Ans. Mach
Messages
Outgoing msgs
TAM Settings
On/Off
Operator Services
21
Call screening
Remote Code
Mess. Duration
Priv. Access
Record Mode
No of rings
Registration
PreferredBase
Reset HS
Custom
Handset name
Registr. Mode
Reset Base
Delete Handset
Base name
Network type
Dial
Flashing
PABX Prefix
2nd call
See Sms
YOUR PHONEBOOK
YOUR PHONEBOOK
You can store 200 phonebook entries in your phonebook.
Each phonebook entry can contain the name of your contact which can be
a maximum of 16 characters long (spaces included), your contact's
telephone number up to 24 digits and an icon identifying the type of
number (work, home, mobile...).
You can associate a unique ring tone to each entry and thus create your
own call groups. (To use this service, the Display number service must
be active on your line).
Creating an entry
The first time you access your phonebook, only the New entry
element appears in the list.
Below is presented the keypad layout of the alphanumeric keypad:
1
D, E, F, d, e, f, 3
J, K, L, j, k, l, 5
P, Q, R, S, p, q, r, s, 7
W, X, Y, Z, w, x, y, z, 9
space, 0, /, +, @, -, $, &, %
A, B, C, a, b, c, 2
G, H, I, g, h, i, 4
M, N, O, m, n, o, 6
T, U, V, t, u, v, 8
special characters
#,".:;!?’()
To enter text press successively on the desired key until the letter is
displayed on the screen.
On the navigator key
, press or until the Phonebook screen is
displayed, press OK to confirm.
Select New entry. Press Confirm
22
.
YOUR PHONEBOOK
The name input screen appears.
Using the keypad keys, enter the name of your contact by pressing
successively on the corresponding keys.
To correct any mistakes made in entering the name, use:
• the C key to clear a letter,
• the , keys to move to a specific location in the name in order to
add or delete a letter.
Once you are done making your changes, press Confirm
.
The number input screen appears.
Now, enter the name of your contact using the keypad keys.
To correct any mistakes made in entering the number, use:
• the C key to clear a character,
• the , keys to move to a specific location in the number in order to
add or delete a character.
Once you are done making your changes, press Confirm
.
Select an icon for this number, using or to specify the type of number:
- For a home telephone number
- For a work telephone number
- For a mobile telephone number
- For a FAX number
.
.
.
.
- To differentiate numbers
,
or
.
Once the icon is selected, press Confirm
.
The information entered appears on your screen.
•
To change this information, press Edit
.
•
The information is accurate. Press Confirm
.
A new entry is created. It appears in the phonebook list. The name of this
entry corresponds to the beginning of your contact's name which is
preceded by a number type icon.
23
YOUR PHONEBOOK
Viewing the phonebook
On the navigator key
, press or until the Phonebook screen is
displayed, press OK to confirm (you can access the phonebook directly
using the
key).
Select View. Press Confirm
.
Select the entry you want to view using or . Once you have selected
it, press OK to confirm.
You can call the number that is associated to the entry directly by
pressing the green key
.
Once the entry appears on the screen, press Option
to display all of
the available actions that can be executed via the phonebook entry:
- View:
to view the entry data.
- Call:
to call the number associated to the entry.
- Edit:
to edit the entry (name, number, icon).
- Search:
to search for another entry.
- Send SMS:
to send an SMS to a number associated to the
entry.
- Ring tone:
to assign a unique ring tone to your handset that
will be used each time this number calls you (caller
display service mandatory)
- Add number:
to enter a new number for the same name.
- New entry:
to create a new entry in the phonebook.
- Delete:
to delete the entry from your phonebook.
Select the action you wish to perform using or . Press Confirm
To exit the phonebook, press the red key
24
.
.
YOUR PHONEBOOK
Editing an entry
On the navigator key
, press or until the Phonebook screen is
displayed, press OK to confirm (you can access the phonebook directly
using the
key).
Select Edit using or . Press Confirm
.
Select the entry with the keys , or by entering the first letter of the
name of the entry then with the or keys. Press Edit
.
You enter the name input screen. The cursor is at the end of the name.
• The information is accurate. Press Confirm
.
To correct the name, use:
• the C key to clear a letter,
• the , keys to move to a specific location in the name in order to
add or delete a letter, press Confirm
You enter the name input screen. The cursor is at the end of the number.
• The information is accurate. Press Confirm
.
To correct the number, use:
• the C key to clear a character,
• the , keys to move to a specific location in the number in order to
add or delete a character, press Confirm
You enter the number type icon selection screen.
Select the icon according to the type of number entered using or .
Press Confirm
.
The edited entry appears on the screen.
•
To change this information, press Edit
•
The information is accurate. Press Confirm
25
.
.
YOUR PHONEBOOK
To exit the menu, press the red key
.
Deleting an entry
On the navigator key
, press or until the Phonebook screen is
displayed, press OK to confirm (you can access the phonebook directly
using the
key).
Select Delete using or . Press Confirm
.
Select the entry with the keys , or by entering the first letter of the
name of the entry then with the or keys. Press Delete
.
A confirmation screen asks you if you wish to delete the entry.
•
If you do not wish to delete the entry, press No
•
To delete the entry, press Yes
.
. The entry is deleted from the
phonebook.
To exit the menu, press the red key
.
Searching for a contact
When refering to your phonebook, you can search for a contact by:
• navigating through the list using , ,
• using quick search.
Performing a quick search
There are two ways to search:
26
YOUR PHONEBOOK
First method:
Access your phonebook list, press successively on the keypad key which
corresponds to the first letter of the name you are searching for so as to
make it appear at the top of the screen.
Once the first letter of the name is displayed, wait a moment.
The phonebook selects the first name in the list that starts with the
selected letter.
Press or to select the specific entry that you wish to view or call,
press OK to confirm.
Second method:
On the navigator key
, press or until the Phonebook screen is
displayed, press OK to confirm (you can access the phonebook directly
using the
key).
Select Search using or . Press Confirm
.
Type the first letter of the name of the entry that you are looking for.
Press or to select the specific entry that you wish to view or call,
press OK to confirm.
Import part or all of a SIM card directory
With this function, you can quickly and easily transfer contacts from your
SIM card to your handset's directory.
27
YOUR PHONEBOOK
On the base:
Insert the SIM card into the space provided. Reportez-vous au paragaphe
Installing a SIM card, page 8.
On the handset:
, press or until the Phonebook screen is
On the navigator key
displayed, press OK to confirm.
Select Read SIM card using or . Press Confirm
.
Enter the PIN code for your SIM card. Press Confirm
.
If you incorrectly enter a code three times, you SIM card will be
blocked. A screen will show the third and final attempt.
Choose to transfer:
• the entire phonebook,
• several numbers.
using the or keys. Press Confirm
.
Depending on the type of transfer you have chosen, carry out one of the
following procedures:
• To import the entire directory, wait a few seconds. When the operation
is finished, a screen will indicate that the transfer is completed.
• If you chose to import several numbers, do the following:
- From the SIM card directory, select the numbers to be transferred
using the or keys.
Press Transfer. v to send to the receiving handset.
Wait until the transfer is complete. You will then return to the numbers
in the directory.
- Select another number using the or keys and press
Transfer.
.
Repeat the operation until you have transferred all the numbers you
want to transfer. Press Return
28
to exit.
YOUR PHONEBOOK
Transfer all or part of the phonebook
Each of your handsets has a phonebook. However if you do not want to
enter the same list of contacts several times, the transfer function in the
phonebook menu allows you to easily transfer your phonebook from one
handset to the next.
Transfer by intercommunication
On the navigator key
, press or until the Phonebook screen is
displayed, press OK to confirm.
Select Transm. using or . Press Confirm
.
Select By Intercom with the keys or . Press Confirm
.
Choose to transfer:
• the entire phonebook,
• a number of the phonebook,
• several numbers.
using the or keys. Press Confirm
.
Press or , choose the handset to which you wish to transfer the
phonebook. Press Call
.
The receiving handset rings. Pick up by pressing the green key
A screen is displayed, asking you to accept the transfer mode.
Press Yes
.
29
.
YOUR PHONEBOOK
Depending on the type of transfer you selected, follow one of the
procedures below:
• To transfer the entire phonebook, wait a few seconds. Once the
operation is done, a screen indicating the end of the transfer will
appear.
• To transfer a number, take the sending handset and do the following:
- Select the number to be transferred using the or keys .
- Press Transfer.
•
to send it to the receiving handset.
Wait for the transfer to be made. Once completed, a screen
indicates that the transfer has been made.
If you have chosen to transfer several numbers, take the sending
handset and do the following:
- Select one of the numbers in the phonebook using the or keys.
- Press Transfer.
to send it to the receiving handset.
Wait for the transfer to be made. Once completed, you
are returned to the list of numbers in the phonebook.
- Select a new number using the or keys and
press Transfer.
.
Perform the operation until you have transferred all the
numbers that you want to transfer. Press Return
to exit.
Transferring a contact using IrDA
To the receiver device:
Activate IrDA reception mode on the handset or receiver device.
• For D85 handset, please refer to paragraph IrDA, page 68.
• For other devices, consult the relevant user guide.
To the emitter handset:
On the navigator key
, press or until the Phonebook screen is
displayed, press OK to confirm.
Select Transm. using or . Press Confirm
30
.
YOUR PHONEBOOK
Select By IrDA with the keys or . Press Confirm
.
Select the number to be transferred using the or keys.
Press Transfer.
to send it to the receiving handset.
Wait until the transfer is complete. You will then return to the numbers in
the directory.
Select another number using the or keys and press Transfer.
.
Repeat the operation until you have transferred all the numbers you want
to transfer.
To exit the menu, press the red key
.
Using a phonebook entry to place a call
On the navigator key
, press or until the Phonebook screen is
displayed, press OK to confirm.
Select View or Search with the keys or . Press Confirm
You have chosen to use the View menu, and the list of the numbers
appearing in your directory is displayed in alphabetical order.
Select your correspondent using the or keys.
Press the green key
to call them. Your telephone displays the called
number and dials it automatically.
You have chosen to use the Search menu, type the first letter of your
correspondent; the phonebook position goes to the place on the list with
the name closest to the character entered.
Select your correspondent using the or keys.
Press the green key
to make the call. Your telephone displays the
number called and automatically dials it.
31
SMS SERVICE
SMS SERVICE - MINI-MESSAGES
You can use your DECT telephone to send, receive and track SMS
messages (called mini-messages).
You can send SMS messages either another fixed SMS-capable
telephone or a mobile telephone (if your SMS operator enables it).
If your Twist 675 is the only SMS appliance connected to your
line, do not configure anything. If this is not the case, refer to
paragraph SMS settings, page 42.
After having received the second call (as after having
re-initialized the base), Twist 675 automatically sends a SMS
towards number 1212 in order to indicate to waiter SMS of
Belgacom the presence of a compatible terminal. The contents
of this message are " SMS TEXT ACTIVATION ". This message
SMS is not invoiced.
Sending a text message
, press or until the SMS screen is
On the navigator key
displayed, press OK to confirm (
can also be used to directly access
the SMS menu ).
Writing a text message
Once in the SMS menu, press or until the Edit SMS . Press
Confirm
.
Select a send box, press Confirm
.
If no personal box has been created, only the shared box is
displayed on the screen.
To create a personal box, select PersoBox Menu and press
Confirm
. Follow the instructions displayed on the screen. For
further details, refer to the paragraph Creating a personal box,
page 45.
32
SMS SERVICE
Enter the code of the box, if you have selected a personal box. Press
Confirm
.
A text input screen appears.
Using the keypad keys, enter the text message by pressing successively
on the corresponding keys. The capital letters are accessible by long press
on
.
Alphanumeric keypad key correspondence depending on the actived
mode (capital letters or small letters).
’, 1, #, ,, ., :, ?, _,*
d, e, f, 3
j, k, l, 5
p, q, r, s, 7
w, x, y, z, 9
espace, 0, /, +, @, -, $, &, %
a, b, c, 2
g, h, i, 4
m, n, o, 6
t, u, v, 8
caractères spéciaux
#
To enter text press successively on the desired key until the letter is
displayed on the screen. When using Eatoni (See page 34), the
presentation order of the letters may be different.
Making a correction
If you enter the wrong letter, press Delete
key
or C key on the navigator
to delete letter-by-letter.
You can also move through the text to delete characters or insert new
ones.
Go back into the entered text using the or keys.
To clear a character, move the cursor just behind it and press
To insert a character, move the cursor after and enter it.
33
or C.
SMS SERVICE
Capital letters/Small letters
When writing your message, you can enter capital letters or small letters.
You can switch between lowercase and uppercase character modes by
holding down the key
.
When the uppercase mode is selected, the symbol
top of the screen.
is displayed at the
Special characters
During the writing process, certain special characters are accessible by
doing the following.
Press the
button, using or and the keypad numbers, select the
desired character, use
to validate.
(Example: "<" = 3 times on and once on the keypad number "6").
List of special characters:
1
2
3
4
5
6
7
8
EATONI predictive text entry assistance
For text input assistance, you can activate the EATONI predictive textentry help. It works with an entry probability algorithm. When pressing a
key on the numeric keypad, EATONI offers you as its first choice the letter
(among all those corresponding to the key pressed) that, statistically
speaking, will most likely be wanted (depending on the previous
characters entered).
To enable or disable EATONI, press Option
whilst in the text input
screen and then select Activate Eatoni or Deact. Eatoni using or .
Press Confirm
.
34
SMS SERVICE
Writing SMS with EATONI:
Press the alphanumeric keypad key corresponding to the desired letter. A
blinking letter appears.
• If the letter corresponds to the desired letter, continue writing the SMS
by pressing the keypad key corresponding to the next letter (or
to
insert a space or
option to send the SMS).
•
If the letter does not correspond to the desired letter, press
successively on
to modify it until you get the desired letter.
The letters corresponding to the alphanumeric keypad key are
displayed on the top left side of the screen (in the order
respecting the successive presses on the key
).
Sending an SMS
Once you are done writing your text message, press Option
to select
the type of delivery.
You can choose between the following options:
- Send:
to realize a straightforward transmission.
- Store:
to save your text as a draft. It can be sent at a later
time. The draft message is archived in the "Draft"
box.
- Cancel SMS:
to permanently delete the text message that you
just entered.
- Send +:
to send the text message specifying options (refer
to paragraph Realising a send + transmission,
page 36).
Realising a straightforward transmission
Select Send using or . Press Confirm
.
Enter or search for the receiver's number.
• If the receiver is listed in the phonebook as one of your contacts,
press
. Select the number using or keys. Press
Confirm
.
35
SMS SERVICE
•
Enter the number using the keypad. Press Confirm
.
Enter your recipient terminal number (default setting 0). press
Confirm
.
A confirmation screen appears. It indicates the type of transmission and
the number to which your message will be sent.
•
•
If the information is accurate. Press Confirm
. A message
appears on the screen indicating that the transmission of your SMS is
in progress.
To change the phone number or modify your text message, press
Edit
.
At the end of the transmission, you can save a copy of your message. It
will be stored in the Sent SMS folder.
•
To save the message, press Yes
.
•
If you do not want to save the message, press No
.
Realising a send + transmission
Sending + allows you to specify:
• the recipient terminal number
• a transmitter box.
Select Send+ using or . Press Confirm
.
Enter the number of your recipient just like you do for the straightforward
transmission (see previous paragraph). Press Confirm
.
Answer the questions that are asked regarding the functions.
Enter your recipient terminal number. press Confirm
36
.
SMS SERVICE
The transmitter personal box (page 44) selection menu only
appears when at least one personal box is created.
Press Yes
to select a transmitter box.
Select the transmitter box from the list that appears. Press Confirm
.
Once you are done, a screen displays your receiver's number.
•
To make a correction, press Edit
and press Confirm
•
. Make the desired corrections
.
The information is accurate. Press Confirm
. A message appears
on the screen indicating that the transmission of your SMS is in
progress.
At the end of the transmission, you can save a copy of your message. It
will be stored in the Sent SMS folder.
•
To save the message, press Yes
.
•
If you do not want to save the message, press No
.
In the event of a delivery failure
A message on your display informs you that your message could not be
sent.
Press Cont.
.
37
SMS SERVICE
Different options come up on the screen:
- Save:
to save your text in draft form. Once it is saved,
you will be able to resolve the potential
problems and send your message at a later
time without having to enter it again.
- Try again:
to attempt a new delivery.
- Delete SMS:
to permanently delete your SMS.
- See receiver:
to check the phone number or send the SMS
again.
- Edit SMS:
to change the delivery type and number or your
text.
Choose an action using or . Press Confirm
.
Reading a message
Your telephone has 4 different folders in which your SMS messages are
stored.
- New:
contains the unread messages.
- Inbox:
contains the read messages that you have chosen
to keep.
- Sent:
contains the copies of sent messages that you
saved.
- Draft:
contains the messages that you wrote and that
have not been sent out.
On the navigator key
, press or until the SMS menu is displayed,
press OK to confirm.
Select Read SMS using or . Press Confirm
Select a send box, press Confirm
38
.
.
SMS SERVICE
If no personal box has been created, only the shared box is
displayed on the screen.
To create a personal box, select PersoBox Menu and press
Confirm
. Follow the instructions displayed on the screen. For
further details, refer to the paragraph Creating a personal box,
page 45.
Enter the code of the box, if you have selected a personal box. Press
Confirm
.
A list of the different folders appears. The number of messages contained
in each folder is displayed in brackets.
Using or , select the folder containing the message you would like to
view. Press Confirm
.
The list of messages in the folder is displayed from newest to oldest, and
the date and time that the message was received is highlighted on the
upper line.
Select the message you would like to view using or , press
Option
.
Select Read using or . Press Confirm
.
The written message is displayed on the screen.
To return to the list of messages, move to the beginning of the message
and press Return
.
Managing read messages
Once the message has been read, press Option and select:
- Answer
: to write an SMS in response to the message
received (the receiver number of the new SMS will
automatically be entered).
- Archive
: to keep this message. It will be stored in the
"Inbox" message folder.
39
SMS SERVICE
- Delete
- Transfer
: to permanently delete this SMS.
: to forward this message to a new recipient. You
will be able to modify the original message.
- Call
: to call the SMS sender number.
- No. to Phonebk : to save the SMS sender number in your
phonebook.
- Extract :
to extract a number (at least 3 digits) present in the
text from the SMS towards the repertory. For that,
the number must be posted with the screen and
the figures which composes it must consecutive or
separated by one from the following characters : "
"(space), ",", ".", "-" ou "/".
Select the desired option using or . Press Confirm
.
Viewing the memory status
You can store 50 different SMS messages. These can be indiscriminately
distributed between the various folders.
Once the number of stored SMS has reached 30, an information message
will indicate that no new messages can be stored.
Once the maximum storage capacity is reached, you cannot
receive new SMS. To receive new message, please delete some
of the stored messages.
, press or until the SMS screen is
On the navigator key
displayed, confirm using OK.
Select Memory using or . Press Confirm
.
A screen informs you as to the number of messages contained in each
folder (new, inbox, sent and draft). It also indicates the total
number of messages stored and the amount of space available.
40
SMS SERVICE
Use or to view all of the information.
To exit the memory information screen, press Return
.
Emptying an SMS folder
This function is used to delete all the messages contained in a folder. To
delete the messages one by one refer to paragraph Managing read
messages, page 39.
When you empty an SMS folder, all messages linked to a
personal box will not be erased.
, press or until the SMS screen is
On the navigator key
displayed, confirm using OK.
Select Empty SMS Box using or . Press Confirm
.
Select the folder you want to empty by pressing or . Press
Confirm
to delete all messages in the selected folder.
A delete confirmation screen appears.
•
Press No
•
Press Yes
if you do not want to empty the folder.
to empty the folder.
To exit the menu, press the red key
41
.
SMS SETTINGS
SMS SETTINGS
You can access the SMS settings menu via the SMS menu or the Adv.
Settings submenu in the Settings menu.
Modifying the SMS centre number
This function is for changing the numbers of the SMS centers. You can
define up to four SMS center numbers for reception and one for
transmission.
By default, the number of the SMS sending centre (1717 for Belgacom) is
programmed to center SMS 2 and the number of the SMS reception
centre (01717 for Belgacom) to center SMS 1.
, press or until the SMS screen is
On the navigator key
displayed, press OK to confirm.
Select Settings using or . Press Confirm
Select SMS Centers using or . Press Confirm
.
.
Use the or keys to select the SMS center for which you want to enter
or change the number. Press Confirm
An information screen provides the number of the SMS centre.
•
To change the number, press Edit
input screen and press Confirm
•
. Enter the new number in the
.
To keep the number, press Confirm
.
Perform this operation again for each of the other SMS centers.
42
SMS SETTINGS
Then define which SMS center will be used for transmission.
Choose the SMS transmission center
Select SMS send center the using or keys. Press Confirm
•
To change the SMS transmission center, press Edit
.
Select the SMS center wanted using the or keys and press
Confirm
•
.
.
To keep the current SMS center, press Confirm
To exit the menu, press the red key
.
.
Terminal number
This number is configured at the factory and you do not usually need to
modify it, if the Twist 675 terminal is the only compatible terminal
connected on your telephone line. However, if several SMS terminals are
installed on your line, they must have different terminal numbers. You
must modify the terminal number for one of them.
Modifying the terminal number
If you have several SMS-type devices connected to the same telephone
line, you must assign a different number to each device.
Remember to give your contacts the terminal number on which you would
like to receive your messages.
Telephone line
0123456789
Sub-Address
MOTHER
FATHER
SISTER
1
2
3
BROTHER COMMON
4
5
For example, in the case of an SMS message addressed to the device
FATHER your contact will send his SMS to:
0123456789 2
(Telephone number followed by the terminal number)
43
SMS SETTINGS
If your contact forgets to include the terminal number, the SMS
message will be sent to terminal 0 by default.
If you do not assign a different number to each SMS-type
device connected on the same line, you will not be able to
receive SMS.
, press or until the SMS screen is
On the navigator key
displayed, press OK to confirm.
Select Settings. Press Confirm
.
Select Sub-Address using or . Press Confirm
.
An information screen shows the current number of the telephone SMS
terminal.
•
To change the number, press Edit
or keys. Press Confirm
•
. Then select the number using
.
To keep the terminal number, press Confirm
To exit the menu, press the red key
.
.
SMS boxes
"Personal boxes" allow you to receive personal SMS. These SMS will
arrive in the New folder, the box owner will be able to view them by
entering the user code that he will have defined when creating his SMS
box.
You can create up to 9 "personal boxes" which allow the different users to
manage their private SMS (transmission, reception, archive).
Each box is protected by a code and identified by a number representing
the corresponding sub-address.
44
SMS SETTINGS
Sub-Addressing
You have 10 sub-addresses (9 personal and 1 collective) assigned to your
telephone line (telephone number). You can assign each one of these subaddresses:
• to a terminal (the SMS for this sub-address arrive in the DECT base
collective box)
• or to a personal box (the SMS received for this sub-address arrive in
the private pass-word protected SMS box)
The sub-address is a number that must be added at the end of your
telephone number (11th digit) by those who wish to send you SMS.
If you use the same sub-address twice for the same telephone
line, your units may not receive the SMS for this sub-address.
If you do not give a terminal number to each SMS capable device
that is connected to the same telephone line , you cannot receive
SMS.
Example:
MOTHER: Box 6
SMS sent to 0123456789 6
Bertrand : Box 5
SMS sent to 0123456789 5
PAPA : Box 7
SMS sent to 0123456789 7
Telephone line
0123456789
Sub-Address
0
Common box
0123456789 0
1
Common box
0123456789 1
2
Common box
0123456789 2
Creating a personal box
, press or until the SMS screen is
On the navigator key
displayed, press OK to confirm.
Select Settings. Press Confirm
45
.
SMS SETTINGS
Select Private box. Press Confirm
.
Select New using or . Press Confirm
Enter the box name. Press Confirm
.
.
If you enter a name that already exists, a message tells you that
the name already exists. The box name can have no more than
10 characters.
Enter the code associated to the box. Press Confirm
.
The user code must contain 4 digits.
Enter the code associated to the box again. Press Confirm
.
The telephone provides you with a terminal number associated to the box.
Press Confirm
Press Edit
to keep this terminal number.
to change the terminal number. Select one of the terminal
numbers available in the list. Press Confirm
The name is added to the personal box list.
46
.
SMS SETTINGS
Viewing a message from a personal box
, press or until the SMS screen is
On the navigator key
displayed, press OK to confirm.
Select Read SMS. Press Confirm
.
Select the personal box. Press Confirm
Enter the personal box code. Press Confirm
.
Select the folder New or Inbox using or . Press Confirm
Select the message using or . Press Confirm
.
.
The message is displayed on the screen. For details regarding the
operations you can perform, refer to paragraph Reading a message,
page 38.
Modifying or removing a personal box
, press or until the SMS screen is
On the navigator key
displayed, press OK to confirm.
Select Settings. Press Confirm
Select Private box. Press Confirm
.
.
Select Delete or Modify using or keys. Press Confirm
.
Select the name of the personal box you want to modify or delete using or . Press Delete
previously.
or Modify
47
depending on the choice made
SMS SETTINGS
If an SMS is sent to a personal box not listed on your telephone
(or if this box was removed), the SMS will not be delivered.
If you delete a personal box, you must confirm it at the end of the
procedure by entering the basic code. All the messages it
contains are erased.
48
CALL LOG
CALL LOG
This menu enables you to view the call or event lists of your telephone.
The dialed call log presents the calls you made.
The received call log presents the calls you received.
The event log groups together all the new events that took place in your
absence:
• reception of an SMS,
• calls received during your absence,
• new messages on the answering machine.
Viewing the received and dialed call log
, press or until the Calls screen is
On the navigator key
displayed, press OK to confirm.
Choose Incoming calls or Outgoing calls, using or . Press
Confirm
.
The presentation screen for the last call received or dialed appears.
This screen presents the following information :
• Complete name of your correspondent for received calls (if you have
subscribed to the "caller name" or the "caller number" service and that
the name associated with the number is registered in your directory;
For a dialled call if the name is registered in the directory).
• The telephone number for a received call (if you have suscribed for
"caller number" , the date, the time and the duration rounded up to
neares minute.
To view the previous calls, use or . The calls are organized in
chronological order, from the most recent call to the oldest call.
By pressing Option
- Call:
- No.>PhBook:
- Send SMS:
- Delete all:
- Delete:
- View:
, a list of various executable actions appears:
To call the number.
To store the name and number in the phonebook.
To send an SMS to your contact.
To delete all calls.
To delete the call currently viewed.
To view the selected call again.
To return to the call view screen, press Return
49
.
CALL LOG
To exit the menu, press the red key
.
Calling the last number dialed (Redial)
Your telephone has a shortcut key that can be used to automatically redial
the last number dialed.
From the idle screen, press and hold the green key
screen appears. Release
green key
until the Call log
, the last dialed number appears. Press the
again. The number is dialed automatically.
You can view the other dialed calls by pressing or on the
navigator key
.
Calling a number listed in the dialed
and received call log
, press or until the Calls screen is
On the navigator key
displayed, press OK to confirm.
Select Outgoing calls or Incoming calls, using or . Press
Confirm
.
The presentation screen for the last call received or dialed appears.
Use or to locate the contact you wish to call. The calls are organized
in chronological order, from the most recent call to the oldest call.
Once the call is displayed on the screen, press the green key
The number is dialed automatically.
50
.
CALL LOG
Viewing the events log
If one or more new events occurred during your absence, the information
screen "NEW EVENTS View?" appears.
•
If you do not wish to view the event log at this time, press No
•
To view the event log, press Yes
.
.
Once the event log has been viewed, the information screen
disappears. You can however view it again via the "Calls" menu
and the calls missed in the submenu "Incoming calls".
A summary screen appears. It informs you as to the various events that
took place during your absence:
• the new SMS received,
• the calls received during your absence,
• new messages on the answering machine.
Choose the event using or . Press Confirm
.
The event appears on the screen.
Activate/deactivate the new events information screen
The new events information screen can be switched off. Events can then
be consulted in the Calls/Events/View menu. The default setting is active.
, press or until the Calls screen is
On the navigator key
displayed, press OK to confirm.
Select Events using or . Press Confirm
51
.
CALL LOG
Select Activate or Deactivat using or . Press Confirm
.
If the "Deactivat" option is confirmed, you can consult new elements. To
do this:
Select View using or . Press Confirm
.
Choose the event using or . Press Confirm
The event appears on the screen.
52
.
ACCESSORIES
ACCESSORIES
This menu offers you numerous additional functionalities:
• Alarm clock: to use your handset as an alarm clock.
• Organiser: the handset will ring at the set date and time to remind
you of an appointment.
• Birthday: the handset will ring at the set date and time.
• Timer: to remind you of an event (maximum 99 minutes).
• Monitoring : use a handset to monitor a room.
Managing alarms:
For the alarm clock and the timer:
• Triggering of the event when the machine is in
standby mode
The machine announces the event, to press on the
•
•
key
. If no validation is made after 60 seconds, the
screen returns at rest.
Triggering while the user navigates in the menus
The machine leaves the menus, announces the event,
to press on the key
. If no validation is made after 60
seconds, the screen returns at rest.
Triggering of the alarm during communication
A beep is emitted in the ear-phone, the message of
alarm appears on the screen while flickering, to press
on the key
. If no validation is made after 60 seconds,
the screen returns at rest.
For birthdays and the organizer
• Triggering of the event when the machine is in
standby mode
The screen "New Events" is displayed until a button on
the handset is pressed.
• Triggering while the user navigates in the menus
The machine exits the menus, and the screen " New
Events" is displayed until a button on the handset is
pressed.
• Triggering of the alarm during communication
A beep is sounded in the earpiece, and the screen
"New Events" is displayed until a button on the handset
is pressed.
53
ACCESSORIES
Alarm clock
The alarm function enables you to activate the handset ringer every day at
a set time.
When the alarm is triggered the selected ring tone sounds for 60 seconds
through the handset speaker and an alert screen is displayed. To turn off
the alarm press
or
key.
Setting the alarm clock
On the navigator key
, press or until the Accessories screen is
displayed, press OK to confirm.
Select Alarm clock using or . Press Confirm
.
An information screen shows the alarm clock status.
- the time at which the handset will ring,
- if the alarm is on or off.
•
To keep these settings, press Confirm
.
•
To change the alarm time or status (on or off), press Edit
.
A list showing the different settings appears.
Activating or deactivating
the alarm clock
To activate or deactivate the alarm clock without changing the time.
Select Activate or Deactivate in the list using or . Press
Confirm
.
54
ACCESSORIES
The alarm settings information screen appears showing the new status.
Press Confirm
.
Modifying the alarm clock time
Select Set Time in the list using or . Press Confirm
.
Enter the time at which you would like the alarm clock to sound. Press
Confirm
.
The information screen displays the new setting. Press Confirm
.
Once the time has been set, the alarm is automatically
activated.
Changing the alarm clock ring tone
To modify the alarm clock ring tone, select Ring Tone in the alarm clock
menu using or . Press Confirm
.
The list of ring tones appears.
Select the desired ring tone using or .
Press Volume
to access the volume setting screen.
55
ACCESSORIES
Press or to increase or decrease the volume.
Once the volume is set, press Confirm
.
The alarm clock settings information screen appears. Press Confirm
To exit the menu, press the red key
.
.
Timer
The timer function activates the handset ringer at a programmed time. You
can view the programmed time on the screen.
Once the specified time has elapsed, the handset rings for 60 seconds and
the alarm screen is activated. Turn off the alarm by pressing Stop
handset stops ringing.
. The
For access to the timer’s settings (Set time, ring tone and view),
you must stop it when started.
On the navigator key
, press or until the Accessories screen is
displayed, press OK to confirm.
Select Timer using keys or . Press Confirm
.
•
To launch the timer without changing the displayed delay, press OK.
•
To change the programmed time, press Option
A list showing the different settings appears.
56
.
ACCESSORIES
Changing the programmed time
of the timer.
In the timer options, select Set Time in the list. Press Confirm
Enter the desired time. Press Confirm
.
.
The timer activation screen appears with the modification. Press the OK
key to start the timer.
Changing the timer ring tone
In the timer options, select Ring Tone using keys or . Press
Confirm
.
The list of ring tones appears, the handset plays the ring tone.
Select the ring tone using keys or .
Press Volume
to access the volume setting screen.
Press or to increase or decrease the volume.
Once the volume is set, press Confirm
.
The timer activation screen appears. Launch the timer by pressing OK.
Displaying or hiding the programmed
time of the timer.
To display (or hide) the time on the screen during its countdown, select
View in the Timer menu using or . Press Confirm
57
.
ACCESSORIES
A screen appears indicating whether or not the lapsed time of the timer is
visible.
Press Edit
to change the current status. Press Confirm
.
The timer is displayed. Press OK to launch it.
To exit the menu, press the red key
.
Birthday or organiser alarms
You can programme birthday and organiser alarms (10 of each type) on
your DECT telephone. Birthday and appointment reminders will be
presented at the set time and day. Your telephone will ring for 60 seconds
and an alarm screen will appear to remind you of such events.
Adding a new birthday (organiser) alarm
On the navigator key
, press or until the Accessories screen is
displayed, press OK to confirm.
Select Birthday (or Organiser) using or . Press Confirm
.
In the birthday (organiser) alarm list, select New entry using or .
Press Confirm
.
Enter the name of the person concerned (or the appointment) using the
keypad keys. To delete a character, press the C key. Press Confirm
.
Enter the birth date (or appointment date) using the keypad keys. Press
Confirm
.
58
ACCESSORIES
Enter the alarm activation time. Press Confirm
.
A confirmation screen appears.
•
To make a correction, press Edit
.
•
To keep the informationpress Confirm
.
Viewing a birthday (or organiser) alarm
Select Birthday (or Organiser) using or . Press Confirm
.
The list of programmed birthday alarms (or organiser alarms) is then
displayed on the screen.
In the birthday (organiser) alarm list screen, select the alarm you would
like to view using or , and press OK to confirm.
The birthday (or organiser) alarm entry appears on the screen. This entry
consist of:
• the name of the person concerned (or the appointment),
• the birth date (or appointment date),
• the time at which you would like to be notified by the alarm.
Modifying or deleting a birthday (or organiser) alarm
In the birthday (or organiser) alarm list screen, select the alarm you wish
to edit using or . Press Option
59
.
ACCESSORIES
The following options are available:
- View:
to view the alarm data.
- Edit:
to change the alarm name or date.
- Delete:
to remove a birthday or organiser alarm.
- Ring tone:
- New entry:
to set the ring tone that will sound when the alarm
goes off.
to set up a new alarm.
To exit the menu, press the red key
.
Monitoring a room
You can use your handset to monitor a room. This allows you, for example,
to monitor a baby's room.
To do so, place one of the handsets in the room to be monitored. This unit
will be in "sender" mode.
The other handset will remain with you, it is in "receiver" mode.
On the receiver handset:
On the navigator key
, press or until the Accessories screen is
displayed, press OK to confirm.
Select Room monitor using or . Press Confirm
Select the sender handset using or . Press Call
The sender handset rings, pick up using the green key
.
.
.
On the sender handset:
A screen invites you to activate the monitor mode (sender mode). Press
Yes
.
Both handsets are now in monitor mode.
60
ACCESSORIES
•
Place the sender handset in the room to be monitored.
The handset in sender mode does not ring to notify you of
incoming calls. It can therefore be placed in a room where
someone is sleeping.
•
Keep the receiver handset with you.
When in monitor mode, the receiver handset can be used to
make calls.
To make a call: press Call
and dial the number.
To answer a call, press the green key
.
At the end of the call, the handset will automatically return in
monitor mode.
To stop monitoring:
- Press Stop
on the transmitter set. The receiver set will automatically
return to the standby screen.
- Press Stop
Stop
on the receiver set and confirm by pressing Yes
on the transmitter handset at the same time.
61
and
GAMES
GAMES
There are 2 games on your handset - Taquin and Fruit Mind.
Taquin
This is a solitaire-type game, with three levels of difficulty (9, 16 or 25
elements). The aim is to replace identical objects as seen. The goal is to
arrange the objects in the way indicated in the objectives.
On the navigator key
, press or until the Games screen is
displayed, press OK to confirm
Select Taquin using or . Press Confirm
.
Press or to select the game. Press Confirm
Press Goal
pressing Return
.
to display the target result. Go back to the game by
.
Move the pieces using the navigator
objectives.
62
in order to achieve the
GAMES
Key
Action
move the piece located under the empty square
upward
move the piece located above the empty square
downward
OK
move the piece located to the left of the empty
square to the right
C
move the piece located to the right of the empty
square to the left
To exit the games, press the red key
.
Fruit Mind
Fruit Mind is a thinking game, in which you have to work out the random
sequence made up of four fruits. To do this, create combinations of four
fruits, the aim being to find the combination as quickly as possible in the
least amount of attempts.
On the navigator key
, press or until the Games screen is
displayed, press OK to confirm.
Select Fruit Mind using or . Press Confirm
.
Select New game using or . Press Confirm
.
63
GAMES
The new game screen will appear.
Use the keys and indicators below to play.
Key/
Indicators
Action
or
Horizontal movement from one box to another
or
Selecting a fruit
Confirm the combination displayed (possible
when the combination contains four fruits)
TRY
Number of attempts
TIME
Time elapsed
4 balls
This indicator supplies information about
whether certain fruits are in your combination
using different coloured balls:
1 green ball: 1 fruit in the combination and in the
correct place (you don't know which one)
1 orange ball: 1 fruit in the combination but in the
wrong place (you don't know which one)
1 red ball: 1 fruit not used in the combination
(you don't know which one)
NB: There is no direct link between the indicator
balls and the colour of the fruits in your
combination.
For example, if the left ball on your indicator is
green, this does not mean that the fruit on the
left of your combination is in the right place. It
just means that one of the fruits in your
combination is in the correct place.
To exit the games, press the red key
64
.
CUSTOMIZING THE HANDSET
CUSTOMIZING THE HANDSET
This menu allows you to modify the ring tones and the visual interface of
the handset, and particularly:
• to assign different ring tones for incoming calls outsides or intercom
(between handsets),
• to change the idle screen picture,
• to change the menu background color,
• to activate or deactivate power-saver mode,
• o activate or deactivate tones being sounded when pressing the
keypad or when validating the settings informationof your handset.
• activate or deactivate silent mode,
• record a personal ring tone.
Changing the ring tones
This menu is for assigning a different ring tone to each event
that can occur on your handset, particularly:
• an outside call,
• a call between handsets (intercom),
• receiving of SMS,
• message available on your answering machine.
On the navigator key
, press or until the Personaliz. screen is
displayed, press OK to confirm.
Select Ringer using or . Press Confirm
.
Select External ringer or Internal ringer or SMS reception or
Messaging using or . Press Confirm
.
Select the ring tone of your choice using the or keys.
Press Volume
.
65
CUSTOMIZING THE HANDSET
Adjust the ringer volume using ou , press Confirm
To exit the menu, press the red key
.
.
Modify the idle screen
This menu allows is for changing the your handset idle screen picture.
On the navigator key
, press or until the Personaliz. screen is
displayed, press OK to confirm.
Select Scrn bckgrnd using or . Press Confirm
.
Select from among the images presented using the or keys. Press
View
.
The image is displayed on the screen.
Press Confirm
, to keep this image as the background display or use
the or keys to select a different one.
To exit the menu, press the red key
66
.
CUSTOMIZING THE HANDSET
Modify the color of the menu backgrounds
This menu is for changing the menu background color.
On the navigator key
, press or until the Personaliz. screen is
displayed, press OK to confirm.
Select Ambiance using or . Press Confirm
.
Select the desired color using the ou keys, the colors are displayed
on the screen as they are reviewed for selection. Press Confirm
To exit the menu, press the red key
.
.
Screensaver (Power-saver mode)
By activating this function, you can extend the battery charge for longer times between recharges on the base. The backlighting of the handset
screen will either be reduced or turned off after a given time, depending on
whether it is on its base and on the events taking place.
During a call the intensity of the backlight will be reduced after 20
seconds of inactivity.
In normal mode (eco mode not activated), the intensity of the
backlight reduces step by step every 20 seconds of inactivity until
the backlight is low.
In eco mode (eco mode activated), the intensity of the backlight
reduces step by step every 20 seconds of inactivity until the
backlight is deactivated.
Any new event occurring will activate the backlight of your
handset.
67
CUSTOMIZING THE HANDSET
Activate or deactivate the Eco mode
On the navigator key
, press or until the Personaliz. screen is
displayed, press OK to confirm.
Select Eco mode using or . Press Confirm
.
The status is displayed on the screen.
Press Edit
to activate or deactivate the power saver mode.
The status is changed immediately, Press Confirm
To exit the menu, press the red key
.
.
Activating or deactivating the beeps
On the navigator key
, press or until the Personaliz. screen is
displayed, press OK to confirm.
Select Beeps using or . Press Confirm
Select the beep type using or . Press Confirm
.
.
Keypad: the handset beeps when a key is pressed.
Battery: the handset beeps when the battery is too low.
Charger: the handset beeps when you hang up the handset.
An information screen displays the beep status (active or inactive)
for the selected item (Active or Inactive for the battery and charger or
Beeps, Fun or Inactive for the keypad).
•
To change the status, press Edit
68
.
CUSTOMIZING THE HANDSET
•
To keep the status, press Confirm
screen. Press Confirm
. The status is modified on the
.
To exit the menu, press the red key
.
Activating/deactivating the silent mode
When in silent mode, the telephone ringer and keypad beeps are inhibited.
On the navigator key
, press or until the Personaliz. screen is
displayed, press OK to confirm.
Select Silence using or . Press Confirm
.
When you activate the silent mode, your handset is muted for all
timer, organiser-type functions...
Press Yes
to activate the silent mode.
To exit the menu, press the red key
.
Record a personal ring tone
This function allows you to record a personal ring tone of up to 8 seconds.
After validating the recording, the customized ring tone will be presented
in the list of ring tones.
Recording a second personal melody will automatically erase the
preceding one, even if you chose not to keep it.
On the navigator key
, press or until the Personaliz. screen is
displayed, press OK to confirm.
69
CUSTOMIZING THE HANDSET
Select Record using or . Press Confirm
The "Record tone" is displayed. Press Record
.
.
Record your text or an audio sequence of up to 8 seconds. Press End
to stop the recording before reaching the maximum time.
The recording is played, and the message "Do you want to keep the ring
tone?" is displayed on the screen. Press Yes
to keep the recording.
The validated ring tone is placed directly in the submenu "Ring tones"
under the name "User Ring".
To exit the menu, press the red key
70
.
IRDA
IRDA
This menu lets you switch your handset to IrDA reception mode, so that
you can receive files in V-card format from another D85 handset or any
other compatible device.
, press or until the IrDA screen is
On the navigator key
displayed, confirm using OK.
An IrDA reception mode activation screen will appear. press Yes
.
When the IrDA reception mode is activated on your handset, use the
emitter device to transfer the data.
Point the infra-red port on your handset towards the port on the
emitting device.
When your handset has received the data, reply to the questions relating
to the data for the contact added to your directory.
To exit the menu, press the red key
71
.
SECURITY
SECURITY
This menu enables you to change or customise the security parameters of
your telephone. You can:
• lock the keypad,
• programme an emergency number,
• modify the base code,
• define the call time limit,
• define forbidden prefixes,
• authorise or deny communication to a number of handsets,
Locking/unlocking the keypad
To lock / unlock the keypad, hold down on a key
for a few
seconds, and then confirm by pressing the key Yes
You can also lock your keypad via the Security menu.
On the navigator key
, press or until the Security screen is
displayed, press OK to confirm.
Select Keypad lock using or . Press Confirm
Press Yes
.
to lock the keypad
A screen indicates that the keypad is locked. The icon
idle screen.
72
appears on the
SECURITY
Programming an emergency number
This function allows you to define an emergency number which can be
enabled or disabled.
Once it is activated, the emergency number will be automatically dialed
when the green key
•
is pressed from the idle screen.
Once activated, you can however call a different number with predialing by dialing a number and pressing
.
The following types of numbers should not be programmed: Fire,
emergency and police rescue services...
On the navigator key
, press or until the Security screen is
displayed, press OK to confirm.
Select Emergency using or . Press Confirm
.
An information screen displays the current stored emergency number and
indicates whether it is enabled or disabled.
•
To modify the setting, press Edit
•
To keep the setting, press Confirm
.
.
A list offers you to either change the status (on/off) or modify the
emergency number.
To modify the emergency number, select Enter number. Press
Confirm
.
• Enter the new number using the keypad. Press Confirm
or
73
.
SECURITY
•
You can pick a number from the phonebook. Press
selection using or and Confirm
Press Confirm
, make your
. The number is displayed.
.
To exit the menu, press the red key
.
The emergency number is automatically activated. The name of the
handset displayed on the idle screen becomes EMERGENCY.
Modifying the base code
The base code (0000 being the default setting) is required to access
certain security functions. It must be composed of 4 digits.
On the navigator key
, press or until the Security screen is
displayed, press OK to confirm.
Select Change Code using or . Press Confirm
.
Enter the old base code using the keypad. Press Confirm
Enter the new base code using the keypad. Press Confirm
Enter the new code again. Press Confirm
To exit the menu, press the red key
.
.
.
.
Carefully note down the base code number. You will need this
code to change certain settings.
74
SECURITY
Defining the call time limit
You can set your telephone's operating time. Once the call time limit is
used up, it is no longer possible to make calls.
To be able to call again, you will have to deactivate the call time limit or set
a new limit.
If the time limit ends during a telephone conversation,
communication will not be cut off. Once you have hung up, it will
not be possible to make a new call, emergency number included..
Calls between handsets (internal calls) are not affected by the call
time limit.
On the navigator key
, press or until the Security screen is
displayed, press OK to confirm.
Select Time limit using or . Press Confirm
.
An information screen displays the remaining time limit and its status.
•
To modify the setting, press Edit
•
To keep the setting, press Confirm
.
.
Enter the base code (default is 0000). Press Confirm
.
You can change the status (on/off) or modify the time limit.
Select Edit time using or . Press Confirm
.
Enter the new time limit using the keypad (maximum 999 minutes). Press
Confirm
, the active mode is set automatically.
75
SECURITY
Once the modifications have been made, the information screen shows
the new call time limit.
•
To modify the setting, press Edit
•
To keep the setting, press Confirm
To exit the menu, press the red key
.
.
.
Defining forbidden prefixes - Call barring
You can prohibit the use of certain prefixes on your telephone. When a
prefix is forbidden, it will be impossible to call numbers which start with
these prefixes.
Depending on the programmed prefixes, certain numbers will no
longer be accessible. For example, if you programmed 06 as a
forbidden prefix, it will not be possible to call a number that begins
by 06.
On the navigator key
, press or until the Security screen is
displayed, press OK to confirm.
Select Restriction using or . Press Confirm
.
A screen indicating the number of programmed prefixes as well as their
status appears.
•
To modify the displayed data, press Edit
.
•
To keep the displayed data or view the prefixes, press Confirm
A base code input screen appears.
Enter the code. Press Confirm
.
A list appears:
- Activate: The activate the forbidden prefixes.
- Deactivate: To deactivate the forbidden prefixes.
- Edit Prefix : To modify or create a prefix (see below)
76
.
SECURITY
Select the desired option using or . Press Confirm
.
Creating, modifying or deleting
a forbidden prefix
Access the selection screen for the Edit prefix option (see above).
Select Edit Prefix using or . Press Confirm
.
A screen showing the forbidden prefixes appears.
You can programme up to 5 forbidden prefixes.
Select an empty location (dashes) or a prefix to modify using or .
Press Confirm
.
The prefix input screen appears.
Enter the prefix using the keypad. Press Confirm
To exit the menu, press the red key
.
.
Authorising three-way calling
The intrusion function authorises or prohibits a second handset from
joining a conversation that is in progress. If the intrusion mode is active, it
is then possible to join a conversation in progress using another handset.
To join the conversation in progress from the second hanset,
press the green key
.
On the navigator key
, press or until the Security screen is
displayed, press OK to confirm.
77
SECURITY
Select Intrusion using or . Press Confirm
A screen displays the current status (on or off).
•
To change the status, press Edit
•
To keep the status, press Confirm
To exit the menu, press the red key
78
.
.
.
.
SETTINGS
SETTINGS
This menu enables you to change or customise the handset and base
parameters.
Accessing the Settings menu
, press or until the Settings screen is
On the navigator key
displayed, press OK to confirm.
Using the following flowchart, select the setting you would like to modify or
view.
Use or to select an option and the Confirm key
to enter the
menu or access the desired function.
Confidentialité
Settings
Program keys
Date/time
Contrast
Auto Hang up
Auto Pick up
Adv. Settings
Help
Country code
Language
Registration
PreferredBase
Reset HS
Custom
Handset name
Registr. Mode
Reset Base
Delete Handset
Base name
Network type
Dial
Flashing
PABX Prefix
2nd call
HS Settings
Base Settings
Line Settings
SMS Settings
See Sms
TAM Settings
Programming a key
This function enables you to programme the
and
keys on your
handset giving you direct access to certain functions right from the idle
screen.
On the navigator key
, press or until the Settings screen is
displayed, press OK to confirm.
79
SETTINGS
Select Program keys. using or . Press Confirm
A screen presents the function currently assigned the
•
To keep the function, press Confirm
•
To modify the function, press Edit
.
key.
.
.
The graphic
corresponds to programmable key
.
The graphic
corresponds to programmable key
.
Choose from the function list the function you want to assign to the key. Press
or to select one of the following functions:
•
Silent
•
Organiser
•
Operator Services
•
Timer
•
Number
•
Redial
•
Keypad lock
•
Alarm clock
•
Answ.Mach.
•
Enablig Answ.Mach
Press Confirm
.
With the number function, you associate a telephone number to a
program key. You can thus quickly call your contact.
Once the
key
key is programmed, a screen invites you to programme the
.
•
To keep the function, press Confirm
•
To modify the function, press Edit
Once the
.
.
key is programmed, you return to the Settings menu.
80
SETTINGS
To exit the menu, press the red key
.
You can go from programming the
key to programming the
key by pressing or on the navigator key.
Modifying the date and time
The base manages the time displayed on the handset, so the time
indicated on your handset should be re-verified after any loss of
electric power. If the time is not set correctly, proceed as indicated
above to set the time.
On the navigator key
, press or until the Settings screen is
displayed, press OK to confirm.
Select Date/time using or . Press Confirm
.
A screen displays the current date and time.
•
To keep the date and time settings, press Confirm
•
To modify the date and/or time settings, press Edit
.
.
You can enter the date in DD/MM/YY format. Once the date is modified,
press Confirm
.
Enter the time in HH/ MM format and press Confirm
To exit the menu, press the red key
81
.
.
SETTINGS
Adjusting the contrast
On the navigator key
, press or until the Settings screen is
displayed, press OK to confirm.
Select Contrast using or . Press Confirm
.
A list presenting five contrast levels appears.
Select the desired level using or . The contrast is directly visible on
the screen.
Press Confirm
. Adjust the contrast until you have obtained a
satisfactory level.
To exit the menu, press the red key
.
Using the auto hang up and pick up
features
The auto hang up feature enables you to automatically hang up by simply
putting the handset back on its base.
If the auto hang up feature is on, communication ends when the
handset is put back on its base.
When active, the auto pick up feature enables you to automatically pick up
as soon as you remove the handset from its base.
On the navigator key
, press or until the Settings screen is
displayed, press OK to confirm.
Select Auto Hang up (or Auto Pick up) using or . Press
Confirm
.
82
SETTINGS
A screen displays the current status (on or off).
•
To change the status, press Edit
•
To keep the status, press Confirm
screen, press Confirm
.
. The status is modified on the
.
To exit the menu, press the red key
.
Installation guide
You can call up the installation help guide. This will enable you to reset:
• date and time,
• name of the handset,
• Answering machine,
• external ringer.
On the navigator key
, press or until the Settings screen is
displayed, press OK to confirm.
Select Help using or . Press Confirm
.
Answer the questions that are asked and validate your asks by pressing
on
key. When you have finished, you will return to the welcome
screen.
Modifying the country code
In order for your telephone to operate correctly, when reading a SIM card
or transferring a contact by IrDA, you must enter the country code where
the telephone is being used. Contact your provider.
On the navigator key
, press or until the Settings screen is
displayed, press OK to confirm.
Select Country code using or . Press Confirm
83
.
SETTINGS
An information screen will display the current country code.
•
To keep the status, press Confirm
•
To change the status, press Edit
.
.
Using the or keys, move the cursor to the place where you want to
change the number. Press C to delete the number in front of the cursor.
Re-enter the new number and press Confirm
.
The screen will display the new programmed country code. Press
Confirm
.
To exit the menu, press the red key
.
Modifying the language
This function enables you to change the screen display language.
On the navigator key
, press or until the Settings screen is
displayed, press OK to confirm.
Select Language using or . Press Confirm
.
An information screen presents the current language used.
•
To keep the setting, press Confirm
•
To change the setting, press Edit
.
.
Choose the desired language from the language list. Press or to
select the language. Press Confirm
.
The screen shows the new language used. Press Confirm
84
.
SETTINGS
To exit the menu, press the red key
.
ADVANCED SETTINGS/ HANDSET SETTINGS
Registering a new handset to a base
To register a new handset to a base you must:
• put the handset in registration mode,
• put the base in registration mode.
Once this is done, the registration (mutual recognition of the base and the
new handset) will be done automatically (registration can take a few
seconds).
If the code of the base has been modified (different from 0000),
the registration will not be possible with this procedure. Refer to
paragraph Personnal registering, page 87
Take the handset to be registered:
On the navigator key
, press or until the Settings screen is
displayed, press OK to confirm.
Select Adv. Settings using or . Press Confirm
Select HS Settings using or . Press Confirm
Select Registration. Press Confirm
.
.
.
The handset enters the registration mode.
On the base:
Put the base to which you want to register the handset in registration
mode:
•
For the Twist 675, press on the
button on the base for
•
a few seconds.
For other base stations, refer to their user guides.
The green light blinks rapidly, the base is in registration mode.
85
SETTINGS
The new handset and the base are mutually searching for each other. The
registration may take several seconds.
Once the handset is registered, the handset automatically exits the
registration mode et lets you know the registration is done.
You can also set your base to the registration mode using a
handset already registered by selecting the Registration function
in the menu Settings/Adv. Settings/Base setting
Modifying the base preference
This function enables you to specify which base will be used by your
handset to make calls (if your handset is registered to several bases).
On the navigator key
, press or until the Settings screen is
displayed, press OK to confirm.
Select Adv. Settings. Press Confirm
.
Select HS Settings using or . Press Confirm
Select PreferredBase using or . Press Confirm
.
.
An information screen presents the current base preference for your
handset.
•
To keep the preference, press Confirm
•
To modify the preference, press Edit
.
.
A list provides the bases among which you can choose the preferred base
to which you want your handset to be registered. With the automatic mode
you are not required to specify the preference.
86
SETTINGS
Once the preferred base is selected, press Confirm
To exit the menu, press the red key
.
.
Resetting the handset
When you reinitialise your handset, all the parameters are reset to their
initial value (factory settings) with the exception of the phonebook, alarms
(birthdays and organiser) and SMS parameters.
When resetting the handset, the security functions (forbidden
prefixes and time limit duration) are not set back to their initial
value.
On the navigator key
, press or until the Settings screen is
displayed, press OK to confirm.
Select Adv. Settings using or . Press Confirm
Select HS Settings using or . Press Confirm
Select Reset HS using or . Press Confirm
.
.
.
A confirmation screen will prompt you to confirm your request:
•
To re-initialise your handset, press Yes
•
If you do not wish to re-initialise your handset, press No
To exit the menu, press the red key
.
.
.
Personnal registering
To register a handset in the following cases:
• the base’s code is no longer 0000 (you have customised the code),
• you own several bases,
• you want to choose a name for your base (name displayed on the
welcome screen),
• you want to choose the handset registration number.
87
SETTINGS
On the navigator key
, press or until the Settings screen is
displayed, press OK to confirm.
Select Adv. Settings using or . Press Confirm
.
Select HS Settings using or . Press Confirm
Select Custom using or . Press Confirm
Select the required base number. Press Confirm
.
.
.
Delete the current base name using C key (if necessary).
Enter the new name, press Confirm
.
Enter the base code. Press Confirm
.
The handset enters the registration mode, "Handset in registration
mode" is displayed on the screen.
Put the base to which you want to register the handset in registration
mode:
Once the handset is registered, select the required handset number. Press
Confirm
.
88
SETTINGS
On the base:
Put the base to which you want to register the handset in registration
mode:
•
For the Twist 655, press on the
button on the base for
•
a few seconds.
For other base stations, refer to their user guides.
The green light blinks rapidly, the base is in registration mode.
The new handset and the base are mutually searching for each other. The
registration may take several seconds.
Once the handset is registered, the handset automatically exits the
registration mode et lets you know the registration is done.
Renaming the handset
This option enables you to modify the name of your handset.
On the navigator key
, press or until the Settings screen is
displayed, press OK to confirm.
Select Adv. Settings using or . Press Confirm
Select HS Settings using or . Press Confirm
Select Handset name using or . Press Confirm
.
.
.
A screen presents the current handset name
•
To keep the name, press Confirm
•
To change the name, press Edit
the new name. Press Confirm
89
.
. Use the keypad keys to enter
.
SETTINGS
To exit the menu, press the red key
.
ADVANCED SETTINGS/
BASE SETTINGS
Using a handset to put the base in registration mode
This function enables you to put the base in registration mode so you can
register a new handset. Refer to paragraph Registering a new handset
to a base, page 85
On a handset that is already registered the base in question, press or
until the Settings screen is displayed, press OK to confirm.
Select Adv. Settings using or . Press Confirm
.
Select Base Settings using or . Press Confirm
.
Select Registr. Mode using or . Press Confirm
.
A screen prompts you to confirm the setting of the base to the registration
mode. Press Yes
to enter the registration mode. The indicator light on
your base starts to quickly blink green.
You base will remain in registration mode for about 1 minute.
You can also use the base buttons to put the base in registration
mode:
•
Press on the
button on the base for a few
seconds.
90
SETTINGS
Re-initialising the base
When you re-initialise your base, all the base parameters are reset to their
initial values (factory settings).
On the navigator key
, press or until the Settings screen is
displayed, press OK to confirm.
Select Adv. Settings using or . Press Confirm
.
Select Base Settings using or . Press Confirm
.
Select Reset Base using or . Press Confirm
.
A confirmation screen will prompt you to confirm your request:
•
To re-initialise the base, press Yes
•
If you do not wish to re-initialise the base, press No
.
Enter the base code using the keypad. Press Confirm
.
To exit the menu, press the red key
.
.
When re-initialising the base, the base code becomes 0000
again.
De-registering a handset
This function enables you to de-register a handset from your base. This
may be necessary if you have lost a handset or if you already have 6
handsets registered to the same base.
On the navigator key
, press or until the Settings screen is
displayed, press OK to confirm.
91
SETTINGS
Select Adv. Settings using or . Press Confirm
.
Select Base Settings using or . Press Confirm
.
Select Delete Handset using or . Press Confirm
.
Select the handset you wish to unregister in the list by pressing or .
Press Confirm
.
A screen prompts you to confirm the unregistration. Press Yes
to
unregister the handset.
The deleted handset must be registered to its base again. Refer
to paragraph Registering a new handset to a base, page 85
To exit the menu, press the red key
.
Renaming the base
On the navigator key
, press or until the Settings screen is
displayed, press OK to confirm.
Select Adv. Settings using or . Press Confirm
.
Select Base Settings using or . Press Confirm
.
Select Base name using or . Press Confirm
92
.
SETTINGS
Select the base for which you want to modify the name. Press
Confirm
.
Use the C button to make corrections and re-enter the new name using the
keypad. Press Confirm
.
To exit the menu, press the red key
.
ADVANCES SETTINGS /
LINE SETTINGS
Before changing the settings of the telephone line, contact your
operator to obtain the parameters for your line.
Modifying the network type
Your DECT telephone can be installed on a public or private network
(when using a PABX)
This function enables you to configure your telephone according to the
type of network.
On the navigator key
, press or until the Settings screen is
displayed, press OK to confirm.
Select Adv. Settings using or . Press Confirm
.
Select Line Settings using or . Press Confirm
.
Select Network type using or . Press Confirm
.
93
SETTINGS
A screen presents the current status (public or private).
•
To keep the status, press Confirm
•
To change the status, press Edit
screen, press Confirm
.
. The status is modified on the
.
To exit the menu, press the red key
.
Modifying the dialing mode
If you telephone is connected to an old PABX, you might have to change
the number system.
The default dialing mode is tone.
On the navigator key
, press or until the Settings screen is
displayed, press OK to confirm.
Select Adv. Settings. Press Confirm
.
Select Line Settings. Press Confirm
.
Select Dial using or . Press Confirm
.
A screen displays the current status (pulse or tone).
•
To keep the status, press Confirm
•
To modify the status, press Edit
.
.
The status is modified on the screen, press Confirm
To exit the menu, press the red key
94
.
.
SETTINGS
Modifying the flash duration (R key)
If you connect your telephone to a private automatic branch exchange or
use it in a foreign country, you may need to modify the flash duration in
order to use your telephone correctly with regard to the following
functionalities: outgoing 2nd call, incoming 2nd call, conference call.
Contact your administrator, who will supply the appropriate time period,
and proceed to the new settings. The value for Belgacom is 120 ms.
On the navigator key
, press or until the Settings screen is
displayed, press OK to confirm.
Select Adv. Settings. Press Confirm
.
Select Line Settings. Press Confirm
.
Select Flashing using or . Press Confirm
.
An information screen presents the current flash duration.
•
To keep the duration, press Confirm
•
To modify the duration, press Edit
.
.
A list presenting the various flash durations appears, select the new
duration using or . Press Confirm
To exit the menu, press the red key
95
.
.
SETTINGS
Setting a PABX prefix
If a private automatic branch exchange is used, you can programme the
external call prefix.
With this function you can set the:
• PABX prefix number,
• dialed number length at which point the PABX will be automatically
dialed (this length is called "digit before prefix")
• prefix status (on or off).
On the navigator key
, press or until the Settings screen is
displayed, press OK to confirm.
Select Adv. Settings. Press Confirm
.
Select Line Settings. Press Confirm
.
Select PABX prefix using or . Press Confirm
.
An information screen presents the PABX setting in progress.
•
To keep this setting, press Confirm
•
To modify this setting, press Edit
.
.
Select the desired option:
- Activate or Deactivate: to select a status.
- Prefix:
to enter the number giving you access to
the outside line.
- Dig. bef. pref.:
to specify the «digits before prefix».
Set the settings and press Confirm
.
The information screen presents the new PABX settings.
•
To keep these settings, press Confirm
•
To modify these settings, press Edit
96
.
.
SETTINGS
To exit the menu, press the red key
.
To enter the pause mode during dialling, press the 0 key until
syboml "/" appears.
2nd call
This function allows you to activate or deactivate the outgoing 2nd call
option during communication. You can only activate this, if you subscribe
to the "COMFORT" and "Number display" services.
On the navigator key
, press or until the Settings screen is
displayed, press OK to confirm.
Select Adv. Settings. Press Confirm
.
Select Line Settings. Press Confirm
.
Select 2nd call using or . Press Confirm
A screen displays the current status (on or off).
•
To change the status, press Edit
•
To keep the status, press Confirm
To exit the menu, press the red key
97
.
.
.
.
ANSWERING MACHINE
ANSWERING MACHINE
Your telephone's answering machine comes with two answering modes:
- Answer only:
callers cannot leave you a message and an
OGM informs them of your unavailability.
- Answer and record:
an OGM invites your callers to leave
messages.
The telephone answering machine models also offer the following
functionalities:
- Anonymous mode with pre-recorded OGMs.
- Call screening.
- Remote message retrieval.
- VIP access
Enabling/disabling the answering machine
When your answering machine is off, the base indicator is green.
When it is on, the indicator turns red. An icon also appears on the handset
display according to the answering machine mode used:
- Answer only
- Answer and record
On the navigator key
, press or until the Ans. Mach screen is
displayed. Press OK to confirm.
Select On/Off using or . Press Confirm
.
A screen displays the current status of the answering machine (answer
only, answer and record or off)
•
To keep the displayed status, press Confirm
•
To change the status, press Edit
•
•
•
To activate the answer and record mode, select Ans&rec..
To activate the answer only mode, select Ans only.
To turn off the answering machine, select TAM off.
Press Confirm
.
98
.
.
ANSWERING MACHINE
The OGM that will be used is played. At the end of the playback, confirm
the new status of the answering machine by pressing Confirm
.
If you have not recorded a personal OGM, the answering
machine will automatically use the pre-recorded OGM.
You can turn your answering machine on or off using the base
buttons. Press on the
button until the base indicator light
changes colour. The last mode used and its OGM are activated.
Modifying the OGM
In order to modify an OGM, you must first turn on the answering
machine. The OGM that will be modified will be that of the
answering machine activated (answer only or answer and record)
Recording a personal outgoing message
On the navigator key
, press or until the Ans. Mach screen is
displayed. Press OK to confirm.
Select Outgoing msgs using or . Press Confirm
Select Modify using or . Press Confirm
.
.
Press OK to start recording your OGM.
At the sound of the beep transmitted through the handset, start talking in
the handset microphone.
99
ANSWERING MACHINE
To stop recording press End
.
Your outgoing message is automatically played back.
At the end of the playback, a confirmation screen asks you if you want to
keep this new outgoing message. Press Yes
No
to keep your OGM or
to record it again.
Using a pre-recorded anonymous OGM
If you select the anonymous mode, your personal outgoing
message will be definitely replaced by the pre-recorded outgoing
message. You will however be able to record a new personal
outgoing message (see previous paragraph).
On the navigator key
, press or until the Ans. Mach screen is
displayed. Press OK to confirm.
Select Outgoing msgs. Press Confirm
.
Select Anonymous using or . Press Confirm
.
Press Yes
to replace your personal outgoing message with the
anonymous outgoing message.
The anonymous outgoing message for the answering machine mode used
(answer only/answer and record) is automatically played back.
Deleting all your personal OGMs
If you delete all your personal outgoing messages, the answering
machine will automatically be deactivated.
100
ANSWERING MACHINE
On the navigator key
, press or until the Ans. Mach screen is
displayed. Press OK to confirm.
Select Outgoing msgs. Press Confirm
.
Select Delete all using or . Press Confirm
Press Yes
.
to delete all the personal outgoing messages.
Playing messages
When there are messages on your answering machine, the base indicator
light blinks. The rhythm of the flash informs you as to the number of
messages received (ex.: 4 short flashes correspond to 4 received
messages)
The new messages are played back first. Afterwards, the messages that
have already been taken are played back in chronological order (from the
oldest messages to the most recent messages).
The
icon on the handset screen notifies you that there are
messages that have not been played.
If you saved one or more played messages, the
icon appears
on the welcome screen.
Playing messages using the base
Press the
button to start the playback.
Your messages are played back through the base loudspeaker.
During playback, you can use the base buttons to execute the following
actions:
•
Go to the next message:
101
ANSWERING MACHINE
•
Go back to the beginning of the message:
•
Return to the previous message:
•
Pause playback:
•
Start playback after pause:
•
Delete the message being played back: long press on
twice
The answering machine will automatically stop at the end of the last
message.
Playing messages using the handset
On the navigator key
, press or until the Ans. Mach screen is
displayed. Press OK to confirm.
Select Messages using or . Press Confirm
Select Play using or . Press Confirm
.
.
The messages are played through the handset speaker.
Depending on your service provider and your subscription, the name and
number of your contact will be displayed on the screen (except for
confidential calls)
During playback, you can use the handset buttons to execute the following
actions:
: delete the message being played
: return to the previous message.
: momentarily stop the playback (pause).
: go to the next message.
Remote access to answering machine
You can access your answering machine remotely. This function enables
you to retrieve your messages and access your answering machine from
any other telephone located outside your home.
102
ANSWERING MACHINE
To remotely access your answering machine: Dial your telephone number
and wait for the answering machine to come on.
When your outgoing message is played, press # and enter your remote
access code.
The remote access code is 0000 by default. However, it can only
be used once it is customised, refer to paragraph Modifying the
remote access code, page 105.
A beep will indicate access to the answer machine. Any unread messages
will be automatically played back. At the end of playback, a new beep will
sound to let you know that the answer machine is ready. You can carry out
the following operations:
0
: delete the message being played
1
: go back to the beginning of the message
1 (x2) : previous message
2
: pause/play
3
: next message
5
: message read
7
: Answer machine/recorder operating
8
: record
9
: answering machine off
Deleting all the old messages
To delete the old messages one message at a time, refer to the
previous paragraph and delete the unwanted messages during
their play back.
On the navigator key
, press or until the Ans. Mach screen is
displayed. Press OK to confirm.
Select Messages. Press Confirm
.
Select Delete old using or . Press Confirm
.
To confirm the deletion of all the old messages, press Yes
To exit the menu, press the red key
103
.
.
ANSWERING MACHINE
Recording a memo
This function enables you to leave a personal message on your answering
machine. Until the time it is played, it will be considered like a new
message by the answering machine.
On the navigator key
, press or until the Ans. Mach screen is
displayed. Press OK to confirm.
Select Messages. Press Confirm
.
Select Record memo using or . Press Confirm
.
Press OK to start recording.
At the sound of the beep transmitted through the handset, start talking into
the handset microphone.
To stop recording press End
.
You can listen again your memo by pressing OK key on the navigator.
At the end of listen, you come back to the previous menu.
To validate the memo, press Yes
.
To cancel the memo or restart the recording, press No
.
Once validated, your answering machine considers the memo as a new
message until it is played.
The message NEW EVENTS is diplayed and replace the idle screen.
104
TAM SETTING
TAM SETTING
This menu enables you to modify the advanced settings of your answering
machine (depending on the model) You can access the TAM setting
menu through the Ans. Mach. menu or through the Adv. Settings
submenu of the Settings menu.
Activating and deactivating call screening
When activated, the call screening function enables you to listen to the
message left by your caller as it is being recorded. You can pick up at any
time.
On the navigator key
, press or until the Ans. Mach menu is
displayed, press OK to confirm.
Select TAM Settings using or . Press Confirm
Select Call screening using or . Press Confirm
.
.
A screen indicating the function status (on or off) appears.
•
To keep the current status, press Confirm
•
To change the status, press Edit
To exit the menu, press the red key
.
, then Confirm
.
.
Modifying the remote access code
The remote access code enables you to listen to the messages left on your
answering machine via another telephone.
On the navigator key
, press or until the Ans. Mach menu is
displayed, press OK to confirm.
Select TAM Settings. Press Confirm
.
Select Remote Code. Press Confirm
.
105
TAM SETTING
Press Yes
to modify the remote access code.
Enter your Base code (default setting is 0000). Press Confirm
.
Enter the new remote access code (4 digits mandatory). Press
Confirm
.
To exit the menu, press the red key
.
Setting the message duration
This duration corresponds to the recording time that the caller will have to
leave you his message.
On the navigator key
, press or until the Ans. Mach menu is
displayed, press OK to confirm.
Select TAM Settings. Press Confirm
.
Select Mess. Duration using or . Press Confirm
.
A screen indicating the maximum authorised recording time for each
message appears.
•
To keep the current duration, press Confirm
•
To modify the current duration, press Edit
.
.
During the duration modification, a list of the message durations appears
on the screen.
106
TAM SETTING
Select the desired duration using or . Press Confirm
To exit the menu, press the red key
.
.
Privileged access
This service enables you to switch off the handset ringer for all incoming
calls when you do not want to be disturbed, except for privileged calls.
During the reception of a call, the answering machine will switch on after
a certain number of (muted) rings that you will have set and the caller will
be able to leave you a message.
You can programme your telephone in such a way that it will only ring
when specific callers call. To achieve this, they will need to dial 6 (star)
key and a privileged code when they hear the outgoing message. Once
the code has been entered, your telephone rings.
On the navigator key
, press or until the Ans. Mach menu is
displayed, press OK to confirm.
Select TAM Settings. Press Confirm
.
Select Priv. Access using or . Press Confirm
.
The following information is displayed on the screen:
• the privileged access code,
• the service status.
Press Edit
to modify the information displayed on the screen.
Enter the privileged access code.
Give the privileged access code to your privileged callers. When
calling you, they can dial 6 (star) key and a privileged code when
they hear the outgoing message.
Press Confirm
.
107
TAM SETTING
Press Yes
to activate the privileged access mode.
To exit the menu, press the red key
.
Record mode
The record mode enables you to modify the recording time capacity of the
answering machine.
Two quality levels are available:
• Superior quality: for a 15 minute high-quality capacity.
• Standard quality: for a 25 minute normal-quality capacity.
Modifying the message recording quality does not affect the
quality of the outgoing message.
On the navigator key
, press or until the Ans. Mach menu is
displayed, press OK to confirm.
Select TAM Settings. Press Confirm
.
Select Record. Mode using or . Press Confirm
Press Edit
.
to modify the recording quality level displayed on the
screen. Press Confirm
.
To exit the menu, press the red key
.
Number of rings
This parameter enables you to set the number of times your telephone
rings before the answering machine answers a call. The number of rings
can be set between 2 and 7. You can also select the Time saver mode.
The Time saver mode automatically determines the number of rings based
on the number of messages left on the answering machine.
108
TAM SETTING
If there are no new messages on the answering machine, the number of
rings will be 4, otherwise the number of rings will be 2.
On the navigator key
, press or until the Ans. Mach menu is
displayed, press OK to confirm.
Select TAM Settings. Press Confirm
.
Select No. of rings using or . Press Confirm
.
The programmed number of rings is displayed on the screen.
Press Edit
to modify the current number.
In the list, select the desired number of rings (between 2 and 7) using or or the Time saver mode, and press Confirm
To exit the menu, press the red key
109
.
.
APPENDIX
Care and Maintenance
Use a slightly damp cloth to wipe the base and handset, do not use a dry cloth as this may
cause electrostatic charges.
Problems
Refer to the table presented below in case of an operational malfunction:
Problems
Remedies
The base indicator light is not lit
Make sure that :
•
the power adapter is properly connected to a power socket.
•
the power connector is properly plugged into the base.
•
your fuse and circuit-breaker are in working order and that the power
socket is powered.
The handset display is blank
Make sure the batteries are properly installed.
Place the handset on the base and fully charge the batteries.
As time goes by, you may notice a slight decrease in battery performance. Use
your handset until the battery is fully discharged, and then charge it for at least
6 hours.
If these precautionary measures do not resolve this issue, replacement
batteries are available from Belgacom.
The handset does not ring
during an incoming call
Make sure that the telephone is properly connected and that you have a dial
tone.
Make sure your telephone is not set to silent mode (see chapter entitled Ring
Tones).
No radio link between the
handset and base
The network indicator icon
flashes
Make sure the handset is registered by moving closer to the base, if it is
registered correctly, the handset screen should display its own handset number.
Otherwise, register the handset to the base. See “Personnal registering”,
page 87.
You obtain a "busy" dial tone for
each dialed number
Make sure no one else is using another handset (if the intrusion mode is
desactivated).
Make sure that the dial mode (tone or pulse dialing) is compatible with your
telephone line or your automatic branch exchange.
Make sure your time limit has not run out (if activated).
Make sure you are not on call restriction (if activated)
You cannot send or receive
SMSs
Make sure you have subscribed to a caller display service.
Contact Belgacom to check if the SMS service is activated on your line.
Make sure that the server number is 1717 for transmissions and 0717 for
reception.
Have you provided your contacts with the right terminal number?
110
FEATURES
Functions
Default settings
SMS
Functions
Default settings
Beeps
SMS sending centre
1717
SMS reception centre
01717
All active
SETTINGS
ACCESSORIES
Program keys
Silence/Oper. Services
Date/Time
00:00 // 01/01/03
Alarm clock
Off
Auto Hang up
Off
Timer
Off
Auto Pick up
Off
Language
User choice
INTERCOMMUNICATION
Room monitor
Off
Advanced settings
SECURITY
•Line settings
Keypad lock
Off
Network type
Public
Emergency
Off
Dial
Tone
Base code
0000
Flashing
120 ms
Time limit
Off
PABX prefix
Off
Restriction
Off
2nd call
On
Intrusion
Off
•HS setting
RING TONES
Handset name
Handset -1-
•Base settings
Ringer (Ext/Int)
Actualités / Boing
Silent mode
Off
Base name
Base 1
Telephone features
Number of channels
10 x 12 = 120
Autonomy
Radio frequency band
1,88 - 1,90 GHz
standby time
180 hours
Duplex mode
TDMA
talk time
15 hours
Spacing between
1,728 MHz
Bit rate
1152 Kbit/s
open space
up to 300 m
Modulation
GFSK
inside building
up to 50 m
Vocoding
ADPCM
Base dimensions
166 x 112 x 64 mm
Transmitting power
250 mW
Base weight
209 g
Base operating voltage
230 V , 50/60 Hz
Handset dimensions
145 x 51,5 x 29,5
Charging time
6 hours
Handset weight
138 g
Handset range
All of this data is provided to you for information purposes only. Belgacom reserves the right to make any changes without
notice.
111
GUARANTEE
Guarantee terms
The Equipment you have bought has been carefully selected by Belgacom and is covered by a two-year
warranty on spare parts and labor in the event of any material or manufacturing defect, unless otherwise
specified. The warranty shall be valid from the date on which the equipment is collected or delivered.
If you have any problems with the equipment, you should take it to a Teleboutique or to one of our
authorized agents, in its entirety and in its original packaging, or in packaging providing the same degree
of protection, together with the original receipt. The addresses for our Teleboutiques and authorized
agents are given in the Information Section of the White Pages.
Your equipment will be repaired or replaced free of charge, on presentation of the receipt, in the event of
any material or manufacturing defect.
Belgacom alone shall determine what repairs and/or replacements are necessary. The warranty on the
repaired or replaced equipment shall end on the date on which the original warranty on the purchased
equipment expires, but shall not be less than 3 months.
The warranty shall not apply:
-
-
damage of any kind that does not predate the sale;
any damage, faults or defects attributable to the Customer or to causes unrelated to the Equipment:
lightning, power surges, humidity, accidental damage, improper use or poor maintenance, failure to
comply with the instructions in the user manual, and force majeure;
the repair or replacement of movable parts (cords, wires, plugs, aerials, etc.), consumables (cells,
batteries, paper, ink, etc.) needing regular replacement and the supply of cleaning products.
The warranty shall not apply:
-
to any changes or repairs to the terminal Equipment undertaken by the Customer himself/herself or
through the services of persons not designated by Belgacom;
if the Customer removes or tampers with the manufacturer's serial numbers and/or brand names on
the terminal Equipment.
Belgacom shall not be liable for any indirect or immaterial loss sustained by the Customer as a result of
the malfunctioning of the terminal Equipment, such as any loss of production, revenue or contracts.
The General Terms and Conditions for the Sale of Terminal Equipment can be obtained on request
from any Belgacom service available to the public or at www.belgacom.be
Belgacom SA under public law,
Bd. du Roi Albert II 27, B-1030 Brussels VAT BE 0202.239.951, Brussels Register of Legal Entities
112
ENVIRONMENTAL INFORMATION
• The equipment that you bought has required the extraction and use of natural
resources for its production. It may content hazardous substances for the health and
the environment.
• In order to avoid the dissemination of those substances in our environment and to
diminish the pressure on the natural resources, we encourage you to use the
appropriate take-back systems. Those systems will reuse or recycle most of the
materials of your end life equipment in a sound way.
• The crossed-bin symbol invites you to use those systems.
• If you need more information on the collection, reuse and recycling systems, please
contact your local or regional waste administration.
• You can also contact us for more information on the environmental performances of
our products.
DECLARATION OF CONFORMITY
Déclaration de conformité
Konformitätserklärung
We, Wij,
The Manufacturer /Le Constructeur / De fabrikant
E
27, rue Leblanc – F-75512 PARIS CEDEX 15 - FRANCE
Address / Adresse / Adres
declare under our sole responsability that the product
Déclarons sous notre seule responsabilité que le produit
erklärt in eigener Verantwortung, daß das Produkt
Verklaren op onze verantworodelijkheid dat het product
Product designation
Model & Variant
Product Type Designation
Identification :
Dect Telephone
Twist 675
D85V
251686715
Belgium
To which this declaration relates is in conformity with the harmonized standards
Auquel se réfère cette déclaration est conforme aux normes harmonisées
auf welches sich diese Erklärung bezieht,, die vereinheitlichten Normen
Naar hetwelk deze verklaring refereert conform is met de de geharmoniseerde normen
According to
EN 60950 -1
EN 50360
1999/5/EC
73/23/EEC
1999/519/EC
Health EU-Council recommendation
According to
1999/5/EC
89/336/EEC
Artical No 3(1) (b) - R&TTE Directive
Artical No 4 - EMC Directive
According to
1999/5/EC
97/523/EC
Artical No 3(2) - R&TTE Directive
Radio EU-Council Recommendation
: 2000
: 2001
EN 301 489 - 1 : 2000
EN 301 489 - 6 : 2000
EN 301 406
: 2001
Artical No 3(1) (a) - R&TTE Directive
Artical No 2 - Low Voltage Directive
Meets the essential requirements according to article 3 of the following EC-Directive :
Est conformes aux exigences essetielles suivant l’article 3 de la Directive CE :
Die grundlegenden Anforderungen gemäß Artikel 3 der nachstehenden EU-Richtlinie erfüllt :
Conform is met de grondbeginselen van artikel 3 van de EG Richtlijn
Directive, 1999/5/EC of the European parliament and of the council of 09 March 1999 relating to radio and
telecommunication terminal equipment, including the mutual recognition of their conformity.
Directive, 1999/5/EC du Parlement européen et du conseil du 09 mars 1999 concernant les équipements radio et terminaux de
télécommunication, incluant la reconnaissance mutuelle de leur conformité.
Richtlinie 1999/5/EG des Europäischen Parlaments und des Rates vom 09.März 1999 über Funkanlagen und
Telekommunilationsendeinrichtungen und die gegenseitige Anerkennung ihrer Konformität.
Richtlijn 1999/5/EG van het Europees Parlement en de Raad van 9 maart 1999 betreffende radioapparatuur en telecommunicatieeindapparatuur en de wederzijdse erkenning van hun conformiteit
Council Decision 1998/482/EC, Council Decision 1999/303/EC
Terminal equipment (TE) capable of 2-wire access to the anologue Public Switch Telephone Networks, and is capable of originating a circuit
call using Dual Tone Multi Fraquency (DTMF) Signalling and / or receiving an incoming circuit-switched call.
Osny, 13th September 2004
Name and Signature
Nom et signature
Naam en handtekening
on behalf of E
Romain WALLER
Managing Director Residential Terminals BusinessUunit
Terminals and Internet Division
Document SAGEM N° 20 876 735 - 2 / reproduction et divulgation interdites
SAGEM SA - Siège social : Le ponant de Paris - 27, rue Leblanc - 75512 PARIS CEDEX 15 - FRANCE
Société anonyme à directoire et conseil de surveillance au capital de 36.405.229 € - 562 082 909 R.C.S. PARIS"