1
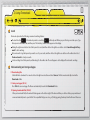
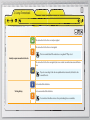
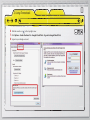
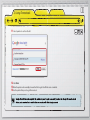
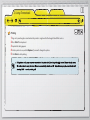
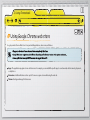
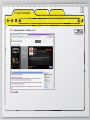
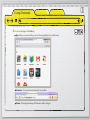
Chrome OS USER GUIDE
Before Reading This Guide
This guide describes the general functions of Chrome OS. Some functions may differ depending on the Chrome OS version or the
Chromebook model.
Copyright
ⓒ 2011 Samsung Electronics Co., Ltd.
Samsung Electronics Co., Ltd. owns the copyright of this manual.
No information contained herein may be distributed or copied in any form whatsoever without the prior written consent of Samsung
Electronics Co., Ltd.
Information in this guide is subject to change due to functional enhancements of the product and other reasons without prior notice.
CONTENTS
1. Getting Started
What is a Chromebook?
Traditional notebook vs. Chromebook
Connecting to the Internet
Creating a Google Account
Signing In
Viewing Help
3. Changing Configurations
Various setups
Customizing the browser option
Removing the browser history
Setting up the bookmark
2. Using Chromebook
Using Browsers
Using shortcuts
Printing
Using Google Chrome web store
4. FAQ
Login
Network Setting
Printing
1 Getting Started
What is a Chromebook?
Traditional Notebook vs. Chromebook
Connecting to the Internet
Creating a Google Account
Signing In
Viewing Help
5
1 Getting Started
What is a Chromebook?
A Chromebook is portable computer that is optimized for internet use. By removing complex functions, it allows you to perform Web-based tasks
faster than a traditional notebook.
Complex features of the existing computer are removed, so you can surf the Web faster. Built-in security system does not bother users to upgrade
the Chromebook to the latest version. The user’s information is always protected safely. The web-based applications such as the documents, presentations, spreadsheets, and more are also available.
Traditional Notebook vs. Chromebook
Items
Installing software
Storing files
Traditional notebook
Can install programs.
Chromebook
Cannot install traditional desktop software.
Instead of installing them, users can use the web-based applications.
Can store files.
Users can use the web-based storage service.
Can install a printer driver on the computer, and then it
can print.
Registers a the printer driver on Cloud Print and then it can print.
System updateing
User updates the system manually.
Automatically updated.
Device connecting
Easy to connect the additional devices with USB port,
wired network port, modem, DMB, etc.
Support a limited connectivity
Printing
6
1 Getting Started
Connecting to the Internet
To use Chromebook, connect to the internet first.
Using a wireless network
Chromebook provides two types of wireless networking.
Normal : 802.11 a/b/g/n
Secured : WEP, WPA/WPA2
1
2
Click the network icon
on the top right corner.
Select Use Wi-Fi to search and connect to a wireless network automatically.
When a wireless network is already connected, you will see the message : Stop
3
4
5
6
To connect to another network, select Join other network.
Enter SSID and password.
Click Connect.
When the connection is successfully finished, you can see this icon
.
When the network connection fails, you will see this icon
.
The number of activated bars in network icon indicates the strength of the network signal.
1 Getting Started
Using a wired network
1Connect the USB internet adapter.
The USB internet adapter should support the Linux system.
2
3
Click the network icon
on the top right corner.
Select Ethernet to search and connect to a wired network automatically.
8
1 Getting Started
Creating a Google Account
Chromebook recommends logging in by using your Google account. If you don’t have a Google account, create one first.
1 Visit www.google.com/accounts/NewAccount.
2 Enter the information, and click I accept. Create my account.
Signing In
Signing in with Google account
If the notebook is already connected to the internet, log in to the Google account during start-up. If the internet is not connected, you can
log on as a guest.
When you log in with your Google ID, you are automatically logged on to the Google site. You can use the various Google features such as
Gmail, Google Calendar, Google Docs. Bookmarks, extensions, and other browser settings are also saved into your account. This makes it
possible for you to load the settings automatically when you log on from another Chromebook.
1
2
3
4
Press the power button
Click add icon
on the keyboard.
.
Enter email address and password for your Google account.
Click Log in.
1 Getting Started
Signing in as a guest
When the network is not connected, you do not have a Google account, or you are temporarily renting a notebook, you can sign in as a
guest. Click the guest icon
when you boot up.
Thee admi
m nist
s rato
t r ca
c n di
d sa
sabl
blee th
t e gu
g est
esst si
s gn
gn-i
-in
n fe
feat
atur
ure.
e
e.
Viewing Help
Visit www.google.com/support/chromeos. You can learn how to use Chromebook. When you need help using Chromebook, you also can search
by using a keyword and find troubleshooting advice.
2 Using Chromebook
Using browsers
Using shortcuts
Printing
Using Google Chrome web store
11
2. Using Chromebook
Using browsers
Tab (Ctrl+T)
To open a new tab, click on the Add icon
at the top of the browser.
Incognito window
In incognito mode, the websites that you have visited and the files that you have downloaded are not recorded in the history. Bookmarks and settings can still be saved.
To open an Incognito window, perform the following:
1
2
Click the wrench icon
on the top right corner.
Select New incognito window.
You can also log in as a guest to avoid leaving history.
The website can still record your search keywords and download history in the website’s account (not in the notebook).
2. Using Chromebook
Prediction service
Enter a keyword in the address bar, and then Google Chrome will predict possible websites or suggest extended keywords. For example, if
you type New York, then the address bar can show New York Times, New Yorker, or http://www.nytimes.com.
■ Disable the prediction service
1 Click the wrench icon
on the top right corner, and select Settings.
2 Un-check Use a prediction service to help complete searches and URLs typed in the address bar From Under the Hood >
Privacy.
Bookmarks
■ Adding a bookmark (keyboard shortcut: Ctrl+D)
Add your favorite websites to bookmarks, and then you can quickly visit the websites.
1
2
3
4
5
icon.
Press Ctrl+D or click on the star
A dialog appears to confirm the addition.
Enter the bookmark name.
Select a save Folder.
Click Close to finish.
■ Using bookmarks
The bookmarks are shown in the bookmark bar on the top of the browser. Click bookmark to navigate to a website quickly.
12
2. Using Chromebook
13
Search
Chromebook provides the following convenient searching features:
The Search button
: Chromebook provides a search key
on the keyboard. When you press this key, a new tab opens. Type
the keyword on the address bar, and then press The Enter key. Search results appears on the display.
Clicking the right mouse button: Select the keyword to search, and then click on the right mouse button. Select Search Google for ‘keyword’ to start searching.
Paste and search: Copy the keyword you want to use for your search, and then click on the right mouse button on the address bar. Select
Paste and search to start your search.
Select and drag: Select the keyword, and then drag it to the address bar. The result appears on the display after automatic searching.
File downloading and storing webpages
■ Downloading files
Click a file link to download. You can also click on the right mouse button and select Save as. The files are automatically stored in the
Downloads folder.
■ Storing web pages (Ctrl+S)
Press Ctrl+S to save web page. The files are automatically stored in the Downloads folder.
■ Opening downloaded files (Ctrl+O)
After you download a file, the Downloads folder appears on the bottom right of the browser. When you click on a file, a proper web-based
viewer automatically runs to open the file. The compatible file types are .doc, .pdf, .html, jpg and .gif, and vary from the Chrome OS version.
14
2. Using Chromebook
Refreshing the browser
Chromebook provides a refresh button
on the keyboard. Click on this button when you want to refresh the browser view.
Checking a webpage’s security
When you connect to a webpage, Chrome browser can show you the status of internet connection, if the internet connection is not fully secured.
Subject
Icon
Meaning
The website does not use SSL.
Using certificates for
a secure connection (SSL)
The website has been securely connected with SSL.
The website has been securely connected, but includes some unsecured contents.
The identity of the website has been verified.
The identity of the website has not been verified.
Site identity
This is a normal status if the website uses a regular HTTP protocol.
The identity of the website has been verified.
15
2. Using Chromebook
The connection to the site is securely encrypted.
The connection to the site is not encrypted.
This is a normal status if the website uses a regular HTTP protocol.
Security on your connection to the site
The connection to the site is encrypted, but some contents can include unsecured information.
If you’re connecting to the site via a public wireless networks, it is better to disconnect the site.
You’ve visited the site before.
Visiting history
You’ve never visited the site before.
You can detect whether a vicious site is pretending to be a normal site.
16
2. Using Chromebook
Using shortcuts
The following shortcuts are provided for your convenience.
Pressing “Ctrl+Alt+/” brings up the keyboard viewer. From here you can easily view the shortcuts.
Shortcuts
Description
Ctrl+N
Open a new window.
Ctrl+Shift+N
Open a new secret window.
Ctrl+T
Open a new tab.
Ctrl+O
Open a file via browser.
Ctrl+Shift+Q
Logout from the Google account.
Ctrl+W
Close the current tab.
Ctrl+Shift+W
Close the current window.
Ctrl+Shift+T
Open again the most-recently-closed tab.
Ctrl+1 ~ Ctrl+8
Move to N-th tab. For example, pressing Ctrl+2 moves the browser to the second tab.
Ctrl+9
Move to the lastly-opened tab.
2. Using Chromebook
Alt+1 ~ Alt+9
Move to the N-th window. For example, pressing Alt+2 moves the browser to the second window.
Alt+9
Move to the lastly-opened window.
Ctrl+Tab
Move to the next tab.
Ctrl+Shift+Tab
Move to the previous tab.
Alt+Tab
Move to the next window.
Alt+Shift+Tab
Move to the previous window.
Ctrl+H
Open the history page.
Ctrl+J
Open a download page.
Shift+Esc
Open the Task Manager page.
Ctrl+Alt+/
Pop-up or remove the keyboard viewer.
Ctrl+?
Open the Help Center page.
Ctrl+Click a link
Open the link in a new tab, but do not move to the tab.
Ctrl+Shift+Click a link
Open the link in a new tab, and move to the tab.
Shift +Click a link
Open the link in a new window.
17
2. Using Chromebook
18
Printing
Chromebook supports Google Cloud Print service. If your printer supports the Google Cloud Print service, you can print without installing the driver
in your Chromebook. If your printer does not support Cloud Print, you need a Windows computer. Then follow the steps below:
Connecting my printer to Google Cloud Print
1
2
Have a Windows XP, Vista, or Windows 7 computer ready.
In case of Windows XP, install Microsoft XML paper
specification pack first.
Install the printer driver on the Windows computer.
3
Install Google Chrome browser on the Windows computer.
4
Run the Google Chrome browser.
5
Visit http://www.google.com/cloudprint.
2. Using Chromebook
6
7
8
Click the wrench icon
on the top right corner.
Click Options > Under the Hood tab> Google Cloud Print > Sign in to Google Cloud Print.
Sign-in to your Google account.
19
2. Using Chromebook
9
When you see the Success page, click OK. To print a test page, click Print a Test Page.
10 Click Print a Test Page again.
20
2. Using Chromebook
11 Select a printer to use from the list.
12 Click Print.
13 When the printer works normally, it means that the Google Cloud Print service is enabled.
14 Use the printer from your Google Chromebook.
Google Cloud Print service registers the printers in your Google account. If you share the Google Chromebook with
others, each member has to enable their own service with their Google account.
21
2. Using Chromebook
Printing
1 Sign-in to your Google account where the printer is registered to the Google Cloud Print service.
2 Press Ctrl+P from keyboard.
3 A printer list dialog appears.
4 Select a printer to use, and click Options if you want to change the options.
5 Click Print to start printing.
If the printer or the proxy computer connected to the printer is off, then the printing job is stored in your Google account.
When the printer is ready, the stored jobs are automatically printed out. Visit https://www.google.com/cloudprint/
manage.html to see the printing jobs.
22
2. Using Chromebook
23
Using Google Chrome web store
Google provides Chrome Web Store to buy and install applications, extensions, and themes.
Upgrade to the latest Chrome browser before using Google Web Store.
Google Web Store navigation can be different depending on the browser version or the system environment.
Some applications in Google Web Store may not support Chrome OS.
Apps : The application programs to run on the browser. For example, you can install the specific apps to send an email, edit documents, play music,
or edit photos.
Extensions : Additional features such as post-it for memo or game to run while using the web site.
Themes : Background image for the browser.
2. Using Chromebook
Installing items from web store
1 Visit http://chrome.google.com/webstore.
24
2. Using Chromebook
2 Select Apps, Extensions, or Themes to install.
3 Click Install.
25
2. Using Chromebook
4
You can see the progress of installation.|
Apps : When you open a new tab, you can see the new application icon on the browser.
Extensions : You can see the new extension’s icon on toolbar.
Themes : The background image of the browser will be changed.
26
3 Changing Configurations
Various setups
Customizing the browser option
Removing the browser history
Setting up the bookmark
3. Changing Configurations
Various setups
Basics
On startup
Set an initial page to start. You can select home page, the last page or a specific web site.
Home page
Assign a home page.
Use the New Tab page : shows installed Apps, most visited sites, or recently closed sites.
Open this page : Enter a specific web site for home page.
Toolbar
Show or hide Home button at toolbar.
Search
Set a default search engine.
Enable Instant for faster searching and browsing Omnibox input may be logged: Check
this option to see the instant search results.
28
3. Changing Configurations
Personal Stuff
Account
Synchronization
See the account information for your current sign-in.
Require password to wake from sleep : Enabling this item locks the notebook when entering sleep
mode. To wake up the notebook, you need to enter a password.
Synchronize information between the Google account and the notebook. You can only define some items to
synchronize. This feature allows you to create the same environment in multiple Chromebooks.
Remove synced data on Google Dashboard : You can remove the synchronization from Google dashboard (https://www.google.com/dashboard/) > Chrome sync.
Set password. You can configure Chrome to remember your password for automatic sign-in.
Password
Form autofill
Themes
When using a shared public notebook, do not enable this feature. Be careful when you enable this
feature on your private notebook, other people can access your account.
Auto complete feature. Stores frequently used names, addresses and numbers, and then they pop-up while you
are typing.
Select a background image to decorate the browser. Click Get themes > select a theme > Apply theme.
29
3. Changing Configurations
System
Date and time
Set a standard time zone for your location.
Touchpad
Set the touchpad’s sensitivity.
Enable tap-to-click : Your finger tab acts as a mouse-click.
Language
Add the display languages in Customize languages and input….
Display Chrome OS in this language : If you added multiple languages to use, you can set a main language by clicking this button.
Accessibility
Enable accessibility features.
Internet
General
Wireless networks
Remembered networks
Enable or disable Wi-Fi.
Display the wireless networks discovered.
Disconnect : Click to disconnect the currently connected network.
Options : See detailed information. You can set this network to connect automatically when discovered.
Connect : Click to connect this wireless network now.
Displays network items that have been connected before.
Forget this network : Remove the network item list.
30
3. Changing Configurations
Under the Hood
Privacy
Web Content
Allow or block cookies, images, JavaScript, plug-ins, pop-up windows, or location sharing.
Cookies : Allow or block creating cookies. Cookies are created when you visit a web site. They include the
temporary record such as login information. Allowing cookies helps simple sign-in, but it increases the
chance of information leakage.
Images : Allow or block the displaying of images.
JavaScript : Allow or block JavaScript-included web page.
Plug-ins : Some contents such as flash or movies embedded in a website need additional plug-ins to play.
You can set Chrome to install the plug-ins automatically.
Pop-ups : Allow or block pop-ups.
Location : Allow or ignore the request of the location service.
Notifications : Allow or block websites from sending notification to the notebook.
Set the font type, font size, and page zoom used to display the web page.
Network
You can use the computer’s system proxy settings to connect to the network. It protects your information and
enhances network speed.
Translate
Enable the translation bar on the top of the browser window. If the languages between the web contents and
OS are different, it asks whether you want to translate or not.
Security
Setup and manage the security certificate. You can decide whether you use SSL 3.0 or TLS 1.0.
Manage certificates: You can manage the certificates to identify users, servers, or certificate organization.
31
3. Changing Configurations
Users
Enable guest browsing
Allow or block guest log-in.
Show usernames and photos on the sign-in screen
To protect private information, you can decide to show usernames and photos on the sign-in screen.
Restrict sign-in to the following users
Permit access only to registered users.
32
3. Changing Configurations
33
Customizing the browser option
Setting up a default search engine
1 Click the wrench icon on the top right corner, and select Settings.
2 Click Basics > Search, and Select a search engine from the dropdown list. Or click Manage search engines… > select a search engine >
Make default.
You can add a new search engine from Manage search engines….
Add a new search engine : Enter a nick name.
Keyword : Enter the address to link with a search engine.
URL with %s in place of query :
1 Navigate to the search engine you want to add.
2 Search a keyword. Example) XYZ
3 You can see the address of the search result page.
Example) http://www.google.com/search?q=XYZ
4. Copy the address and paste it to a URL with %s in place of query. Replace the keyword (Example : XYZ) to %s.
Example) http://www.google.com/search?q=%s
3. Changing Configurations
Removing the browser history
1 Click the wrench icon on the top right corner, and select Settings.
2 Click checkbox on Clear browsing history from Tools > Clear browsing data.
3 Select Clear data from this period to remove the data of specific period, and select Everything to remove all.
4 Click Clear browsing data.
Setting up the bookmark
Always showing the bookmarks bar (keyboard shortcut: Ctrl+Shift+B)
1 Click the wrench icon on the top right corner.
2 Select Tools > Always show bookmarks bar.
Importing bookmarks
1 Click wrench icon on the browser toolbar.
2 Select Bookmark manager > Organize.
3 Click Import bookmarks.
4 Select a file that contains the bookmark list to import.
34
3. Changing Configurations
Exporting bookmarks
1
2
3
4
Click wrench icon
on the browser toolbar.
Select Bookmark manager > Organize.
Select Export bookmarks.
Select a location to export, and click Save.
35
4 FAQ
Login
Network setting
Printing
4. FAQ
Login
Q1 :“Sorry, your password could not be verified.”Message appears.
Reason1 You have entered a wrong e-mail address or a password.
Solution1
Check your email address and password.
If you forgot the password, click http://www.google.com/accounts/recovery to initialize the password.
Reason2 Internet connection is not working.
Solution2
Sign in as a guest, and then check the network settings.
Ask the network administrator about the network connection.
Enable the proxy settings from Settings > Under the Hood > Network. Ask the network administrator for the proxy server
and port number.
37
4. FAQ
Network setting
Q1 : Cannot connect to the network.
Reason1 The wireless network password is not entered correctly.
Solution1
Confirm the password again, and enter it again. If you do not remember the password, ask your] network administrator.
Reason2 wireless network Signal that you select is too weak.
Solution2
Try another network. If you have no other wireless network, try a wired network by using the USB Ethernet adapter.
Reason3 If you are using a network in a school or a company, you may have to setup the proxy.
Solution3
Enable the proxy settings from Settings > Under the Hood > Network. Ask the network administrator for the proxy server
and port number.
38
4. FAQ
Printing
Q1 : Cannot print
Reason Google Cloud Print cannot find the printer.
Solution
Make sure the printer is powered on.
Make sure that you signed-in to your registered Google Cloud Print account.
If the printer is directly connected to a Windows computer, turn on the Windows computer.
Q2 : Cannot see my printer from the Google Cloud Print list.
Reason1 You are signed-in to the wrong account.
Solution1
on the top right corner.
1 Click the wrench icon
2 Check the email address that you used to sign in.
3 Check the email address that you used to registered the printer with Google Cloud Print from Settings > Under the Hood > Google
Cloud Print.
4 Confirm that the two email addresses are the same.
39
4. FAQ
Reason2 The printer is not correctly registered at Google Cloud Print.
Solution2
1 Log on to the Windows computer that the printer connected with.
2 Visit http://www.google.com/landing/cloudprint/win-enable.html with Google Chrome browser.
3 Click Print test page.
4 If the test page is not correctly printed, connect your printer again to Google Cloud Print Service.
40
Version 1.00