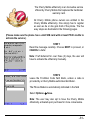
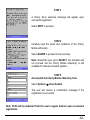
Download Cherry C8 User guide
Transcript
Cherry Mobile C8 User Guide -1- 1 1.1.1 Safety and General Information Brief Introduction Thank you for choosing the Cherry Mobile C8 GSM Dual-SIM Mobile Phone. This guide will help you fully understand the functions of your mobile phone and enjoy all its features. The Cherry Mobile C8 is designed for use on the GSM Network. It is packed with features to satisfy your needs such as Phonebook, Audio Player, Video Player, Camera and FM Radio. The Cherry Mobile C8 meets the GSM technical criteria, and is certified by both local and international authorities. Cherry Mobile reserves the right to modify any content in this User Manual without prior notice. 1.1.2 Important Safety Precautions Please read these guidelines before using your mobile phone. Utmost compliance with these precautions is highly recommended for your safety. Non-compliance may pose danger to you and your mobile phone, and may be illegal. -2- 1.1.3 1) General Precautions Use only authorized accessories and batteries by the manufacturer. The use of incompatible batteries and accessories may cause battery leaks, overheating, rupture or fire. This may also nullify your warranty. Do not put the battery, phone and charger in a high-pressure container or microwave, as this may result in circuit damage or fire. Do not use the mobile phone near flammable and explosive materials. Doing such may cause explosion or fire. Do not store the phone in areas with high temperature as this can cause extensive damage to the handset. Keep the phone out of children’s reach. Phone DO turn off your mobile phone inside aircrafts, hospitals and other locations where its use is restricted. Use of handsets in prohibited areas is dangerous as it may cause interference in the operation of electrical and medical equipment. DO keep your mobile phone away from moisture. Contact with water or other liquid may cause malfunctioning and overheating. DON’T disassemble or remodel your phone as this may cause permanent and irreparable damage. This may also void your mobile phone’s warranty. DON’T use sharp or pointed objects in pressing you phone’s keys as this can cause damage. -3- DON’T use your handset if you notice any damage (e.g. broken antenna) as this may cause injury to the user. 2) Battery Each Cherry Mobile handset is equipped with a rechargeable battery. Use only authorized Cherry Mobile batteries and accessories. For better performance and longer battery life, initial charging of at least four (4) hours is recommended when using the mobile phone for the first time. The optimum performance of a new battery is achieved only after two or three complete charge and discharge cycles. Overcharging, however, may also affect battery life. Do not use a damaged battery or charger. If battery life becomes noticeably shorter than usual, it is recommended to replace it with a new one. While the mobile phone is being charged, keep it out of children’s reach. Store the battery in a cool and dry place away from direct sunlight, dust and water. Avoid exposing batteries to extreme temperature (below -10°C (14°F) or above 45°C (113°F)). Unplug the charger from the electrical outlet when not in use. Avoid using the charger in a wet environment. If the charger comes in contact with water or any form of liquid, immediately unplug it from the outlet to reduce the risk of overheating, charger -4- malfunction, electric shock or fire. Be careful with the disposal of spent batteries. Avoid throwing them in a fire, as this may cause explosion. It is recommended to abide by local environmental laws and guidelines on proper waste disposal. Do not short-circuit the batteries (i.e. when metal objects such as coins, are directly connected to the metal side of the battery). This will damage your phone. It is advisable to handle spare batteries with extra care. 3) Cleaning and Maintenance The handset, battery and charger are not water-resistant and should always be kept dry. Avoid using them in excessively moist areas. Use a soft, dry cloth to clean the handset, battery and charger. Do not use alcohol, thinner, benzene or other solvents to clean the handset. Avoid charging the mobile phone through a dirty outlet as this causes poor electrical contact and results in power lost and charging failure. -5- Overview 2 Keys Specification 3 3.1.1 Keys specification General keypad definitions: Left soft key (LSK) confirms an action Right soft key (RSK) deletes or clears a character or lets you go back to previous action Navigation keys move the cursor up, down, left or right # switches between different input methods -6- * shows a variety of symbols Call calls a dialed number End ends a call 1 ,.-?!’@:#$/_1 2 ABC, abc, 2 3 DEF, def, 3 4 GHI, ghi, 4 5 JKL, jkl, 5 6 MNO, mno, 6 7 PQRS, pqrs, 7 8 TUV, tuv, 8 9 WXYZ, wxyz, 9 0 0, space Press LSK then (*) locks/unlocks keypad -7- 3.1.2 Icon Icons Specification Network signal strength The more stripes visible, the stronger network signal. The top left number indicates the line in use; bottom left number indicates current SIM card in use Message Indicates new SMS received Indicates new MMS received Keypad lock The keypad is locked Earphone An earphone is connected Alarm Sets the alarm time and activate the function Incoming call alert types: Uses a ringing tone Vibrate only Vibrate and ring Vibrate and then ring Battery Indicates the status your phone’s battery -8- 4 4.1.1 User Guide Installing/ Removing the battery Note Always switch the device off and disconnect the charger before removing and installing the battery. 1) Removing the battery 2) Installing the battery 4.1.2 Remove the battery cover. Carefully remove the battery from the battery slot Remove the battery cover. Insert the battery into place, making sure the metal terminals are aligned. Put the battery cover back on. Charging the battery Plug the charger into the electrical outlet. Plug the charger connector into the mobile phone. -9- The battery indicator icon starts to flash until charging is finished. The battery indicator icon ceases to flash when charging is complete. Disconnect the charger connector from the mobile phone and unplug the charger from the electrical outlet. Attention: You can still use the phone while charging, but charging time will increase. When you are charging the handset in its power off state, a charging indicator will appear on the screen. 4.1.3 Inserting/Removing the SIM card/s Note Always switch off the device and disconnect from charger before removing and installing the SIM Card/s. Note: (a) Remove the battery cover. Remove the battery. Insert/remove the SIM card/s by sliding them in or out. Insert the battery back into place. Put the battery cover back on. Your SIM card contains important personal data (Phonebook, PIN (personal identification number), PIN2, PUK (PIN Unlock Code), PUK2(PIN2 Unlock Code)), network information, call history and SMS (Short Message Service) data, so be careful when handling, inserting or removing it. Bending or scratching -10- may cause permanent damage to your SIM card. (b) Keep the SIM card away from static, dust and water. (c) Keep the SIM card out of children’s reach. 4.1.4 Memory Card Use 4.1.5 Inserting/Removing Memory Card a) Inserting b) Remove the battery cover and the battery. Snap off the latch and insert the memory card in intended slot. Insert the battery and put the battery cover back on. Removing Remove the battery cover and the battery. Snap off the latch and remove the memory -11- card from slot. Insert the battery and put the battery cover back on. Power On or Off 4.1.6 Press and hold the key to switch the mobile phone on/off. Make sure the battery is already inserted. Note: Local network service providers furnish each SIM card with a unique PIN. If the PIN is incorrectly entered for three successive attempts, the SIM card will be locked. For assistance and further details regarding PIN and SIM Lock, please contact your local network service provider. If the phone asks for an unlock code when switched on, enter the default unlock code (0000) and press LSK or the middle key to confirm. 5 5.1.1 Call Functions Making a Call On idle state, enter the phone number directly. Press the Call key to make a call. -12- You can enter the number in this order: Area code + phone number then press the Call key Note: During a call, the mobile phone will display information regarding the call’s status. 5.1.2 Emergency Calls You can make emergency calls as long as your current location is covered by the network area. You can check the signal strength on the upper left corner of the screen. Note: Emergency numbers vary by country and those stored in your phone may not work in all locations. Sometimes an emergency call cannot be made due to network, environmental, or other interference issues. 5.1.3 Dialing an International Number Making International calls: For international calls, press the (+) key, followed by the country code and then the complete number. It goes like this: (+) (Country Code) (complete phone number) then press CALL -13- 5.1.4 Rejecting a Call Press the END key to reject or cancel an incoming call. 5.1.5 Missed Calls Unanswered calls will appear on the display screen. Press the middle key to check the details of the missed calls and press CALL to call the number. 5.1.6 Call Waiting This function is used to answer a waiting call during an active call. With this activated, you will be notified of incoming calls even you have a call in progress. The first call will be put on hold when you opt to answer a waiting call. 6 Messaging This function allows you to read, compose, send, save and receive SMS as well as multimedia messages. The icon which is displayed in standby mode refers to any new and unread messages. All messages are organized in folders. -14- Write a message 6.1.1 This allows you to create a text message and send it to a contact. Press the LSK or the middle key to perform the following options: Send – to add recipient(s); to send a message. Insert template – to use a message template from the template list. Add contact info – to add contact information. Add smiley – to add smiley to text message. Save – to save text message to drafts. Inbox 6.1.2 This is where all received messages are stored. After entering the Inbox menu, you can view the SIM1/SIM2 messages list. Press the center key to view a message. Inbox options: Reply – to reply to a message by SMS or MMS. Delete – to delete selected message. Delete all – to delete all the messages in the inbox folder. Call – to call the sender of the message. Mark – to reply to multiple text messages. You can also use this to mark messages you wish to delete in the future. Sort – to sort messages by time, contacts, subject and type. -15- Delete same number – to delete messages of the same number. Inbox message options: (when viewing a message in the Inbox) 6.1.3 Delete – to delete the current message. Reply – to reply to current message via SMS or MMS. Forward – to send current message to another recipient. Call – to call the sender of the current message. Outbox The Outbox menu stores unsuccessfully sent messages. There is a separate outbox messages list for both SIM1 / SIM2. 6.1.4 Drafts The Drafts menu is where saved messages are stored and viewed. 6.1.5 Sent Messages The Sent Messages menu contains all sent messages. 7 Phonebook The Phonebook menu allows you to locate a contact’s number faster. Just enter the initial of the contact you are looking for and related records -16- will be displayed in the middle of the screen. Aside from locating and viewing, the Phonebook also allows you to copy, edit and delete a contact. You can also send SMS / MMS or call a contact directly from the Phonebook. 8 Profiles The Profiles menu lets you customize your phone’s settings to suit your activities, lifestyle and environment. You can use this menu to customize tones for incoming calls, messages, and alarms. The Cherry Mobile C8 boasts of five (5) profile options: Normal, Silent, Meeting, Indoor and Outdoor. Each profile option has sub-options: Activate – to activate selected profile. Customize – to set the selected profile’s settings Rename – to change selected profile’s name 9 Call Center The Call Center menu is where you can view details about calls made and received in your phone. It contains your missed, dialed and received calls, as well their call duration, call history, and call settings. It tracks call records of both SIM 1 and SIM2 separately. 9.1.1 Call History This sub-menu includes the following: Dialed Calls – lists dialed calls -17- Received Calls – lists received calls Missed Calls – lists missed calls Rejected Calls – lists rejected or cancelled calls Delete All - deletes all call records Call Timers – keeps track of the duration of dialed and received calls Call Cost - views call cost record 9.2 Call Settings This menu lets you choose settings for all calls in your phone. The submenu includes: Network Selection – selects which SIM card you want to use Call Divert – diverts your call to your phone to another number Call Barred – allows you to block a contact or umber from calling or being called Call Waiting – allows you to take a new call even when there is a call in progress. Hide ID – hides or displays network ID Select Line – allows you to choose which SIM card to use Flight Mode – automatically adjusts settings appropriate for flights Others – contains extras such as time warnings, -18- answer/reject mode and auto dial. 10 10.1.1 Multimedia Camera This mobile phone is equipped with a standard digital camera that lets you take photos whenever and wherever you like. Saved photos are stored in the phone’s memory or in a memory card (if available). With the screen on camera mode, press the LSK to customize details: Gallery – to skip to the image viewer interface Settings - sets specifications relative to color, exposure, etc. Storage – lets you choose where to save the captured images To capture an image, press the Middle Key while on camera mode. After taking the photo, press the “Back” key to return to the camera’s viewfinder state, or press the LSK for other options. 10.1.2 Video Recorder Aside from the camera, this handset also has video recording capabilities. On camera mode, press the “Options” key to perform the following operations: View video directory – to view videos Settings – to set the video quality Storage – to set the default storage location -19- 10.1.3 Video Player The videos you recorded may also be played in your C8 phone. Choose the Video Player from the Multimedia menu to open and view all your video files. Press the “Option” key and select from the following: Play List – plays the selected video file. Order Play – plays video list in sequence. 10.1.4 Audio Player Another multimedia feature of the Cherry Mobile C8 is the Audio Player. It lets you store music files for playback. After launching the Audio Player, you may press the LSK or the “Options” key to view the music list. Use the navigation keys to utilize the Audio Player features: Up and Down keys – adjusts the volume Middle key – plays or pauses a music file Left and Right keys – skips to next or previous music file 10.1.5 FM Radio Your mobile phone comes with an FM radio which lets you enjoy only the latest music filling the airwaves. -20- Use the navigation keys and the keypad to operate the FM radio feature Left and right navigation keys – lets you search channel frequency (*) or (#) keys – adjusts the volume Right soft key – lets you exit the FM Radio. Left soft key or “Options” key – allows you to perform the following: Auto Search – automatically searches and saves the FM channel frequency Channel List – shows list of radio channels Save – saves current channel list Manual Search – allows you to manually input the FM channel frequency. Open/Close Speaker – turn on / turn off loudspeaker option 10.1.6 Recorder This function lets you record sound in WAV format. 10.1.7 File Manager The File Manager menu helps you organize your files in folders without having to use a computer. Explore your storage device on your phone. -21- 11 Settings Your phone is packed with many other features to suit your needs and lifestyle, such as the Call Settings, Phone Settings, Display Settings and Security Settings. The Settings menu also lets you restore default settings of your phone. 11.1.1 Call Settings You can configure the following options as desired: Dual-SIM, Network Settings, Call Divert, Call Barring, Call Waiting, Hide ID, Select Line, Flight Mode, among others. 11.1.1.1. Dual-SIM Standby mode – lets you choose which SIM to activate. You may activate both at the same time. Reply by original SIM – sends an automatic reply to a message using the SIM to which it is sent. Set SIM name – lets you change the SIM name 11.1.2 Phone Settings This menu lets you configure the following according to your preferences: Time and Date Schedule power on/off Language Power on/off display Shortcuts -22- Power management 11.1.3 Display settings This menu lets you customize your phone’s main display such as wall paper, screen saver, contrast, backlight and animation effects. 11.1.4 Security Settings Change PIN – changes your current PIN password. Change PIN2 – Changes your current PIN2 password. Privacy – allows you to set a password to protect your messages, call logs, camera, file manager, calendar and U Disk. Auto Keypad lock – automatically locks the phone’s keypad. Lock screen – locks the screen by pressing the “end” key. Power on password – prompts you to enter password upon turning on the unit. -23- 11.1.5 Restore Factory settings This menu restores you phone’s default settings. Should you opt to restore the phone’s default settings, all files saved in the unit will be erased. The default password for this setting is 0000. 12 12.1.1 Extra Calculator This mobile phone has a calculator to facilitate simple computations using the 4 basic functions. 12.1.2 Calendar The Calendar application shows the current date and month. You may also add appointments and notes as reminders. 12.1.3 Alarm This mobile phone is geared with three (3) separate alarms that you can set at your chosen time/s. To set an alarm, select one alarm and press left soft key to edit specifics i.e. on/off, time, period, ring and reminding mode. -24- 12.1.4 Flashlight The Cherry Mobile C8 is made with a built-in flashlight. Press and hold the middle key to turn the flashlight on or off. 13 13.1.1 Services STK (SIM ToolKit) The features of your STK are provided by your service provider. If your SIM card supports the STK feature, you will see the STK menu. You may contact your network service provider for more information regarding the STK. 14 14.1.1 Cherry Zone Game The Cherry C8 features Sokoban, a built-in game for you to enjoy. 15 Troubleshooting Below is a list of common problems that may occur when using your mobile phone. Before running to a Cherry Service Center, you may want to troubleshoot the issues first in order to save time and energy. Switch off your mobile phone to optimize its performance. -25- 1) For better performance, it is recommended to always fully charge your battery. Avoid storing too much data in the phone as this may affect its performance. Phone does not switch on Press and hold the end key until image appears on the display. Check the battery charge level. Remove and insert the battery, and switch your phone on again. 2) Phone does not respond for several minutes 3) Press and hold the end key. Remove and insert the battery, and switch your phone on again. The phone switches off by itself Check if the keypad is locked when left unused. Check the battery charge level. Check if the “Auto Power Off” feature has been turned on. -26- 4) The battery won’t charge Make sure the battery is not fully drained. Make sure that the battery is inserted correctly. Use only Cherry Mobile approved batteries and chargers. Double check if the charger connector is properly connected to the mobile phone or not. Note: The charger can be connected only after the battery is inserted. 5) Standby time is too short 6) Standby time has something to do with the system settings of your local network service provider. Switch your phone off in a weak signal area. In some cases, you might need to replace the battery. Cannot connect to a network Move into an area with better coverage. Contact your local network service provider. Try to manually select a network. -27- 7) SIM Error Make sure that SIM card is properly inserted in its intended spot. Make sure that the chip in the SIM card is not damaged or the SIM card is not scratched. Check the coverage of your local network service provider if you appear to be out of coverage or have weak signal. You may opt to move near a window. 8) Cannot make calls Make sure that the number you dialed is correct and the dial key has been pressed. Use the full national area code. When abroad, use country-specific international access codes 9) Cannot receive calls Make sure that your phone is connected to a network (Check if the network is busy or invalid). Check the Call Diverts settings. Check the Incoming Call Barring settings. -28- 10) The caller’s number is not displayed Contact your local network service provider as the caller might have withheld his or her number. 11) Entries cannot be made in Phonebook. Check if the Phonebook is full. If so, you may have to delete some records in order to accommodate new ones. 12) The caller cannot leave a voicemail message Contact your local network service provider Make sure that the voice mail number you have saved is correct. If the network is busy, try again after a few minutes. 13) Messages cannot be sent/received You may have to delete some old or saved messages, as the message capacity of the phone is limited. Contact your local network service provider and verify your service -29- center number. 14) PIN is entered incorrectly three times Enter the PUK code (PIN Unlock Code). This code usually comes with the SIM card upon purchase. Otherwise, contact your local service provider. Thank you for using Cherry Mobile C8. For further questions and concerns, please do not hesitate to contact your local Cherry Mobile Service Center. For information about our Cherry Mobile Service Center contact details, please visit our website at www.cherrymobile.com.ph -30- The Cherry Mobile eWarranty is an innovative service offered by Cherry Mobile that replaces the traditional warranty card. All Cherry Mobile phone owners are entitled to the Cherry Mobile eWarranty. One simply has to register as soon as he or she gets hold of the phone. The five easy steps are illustrated in the following pages. (Please make sure the phone has a valid SIM card with at least P5.00 credits to activate the service.) STEP 1 Read the message carefully. Choose NEXT to proceed, or CANCEL to defer. Note: If left deferred for over three (3) days, the user will have to activate the eWarranty manually. STEP 2 Leave the Frontliner Code field blank, unless a code is provided by a Cherry Mobile authorized distributor. The Phone Model is automatically indicated in the field Select Options Save. Note: The user may also opt to have the Cherry Mobile eWarranty activated upon purchase for more convenience. -31- STEP 3 A Cherry Zone welcome message will appear upon successful registration Select NEXT to proceed. STEP 4 Carefully read the terms and conditions of the Cherry Mobile eWarranty. Select AGREE to proceed to the next step. Note: Should the user opt to REJECT, the activation will not proceed, but the Cherry Mobile eWarranty is still available for manual activation anytime. STEP 5 Accomplish the Cherry Mobile eWarranty form. Select Options Save/ Submit. The user will receive a confirmation message if the registration is successful. Note: P2.50 will be deducted from the user’s regular balance upon successful registration. -32-