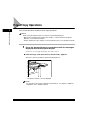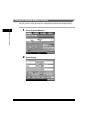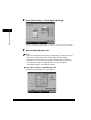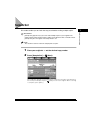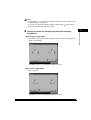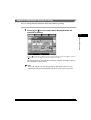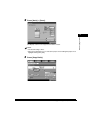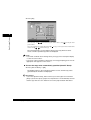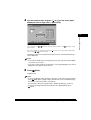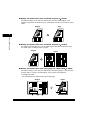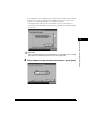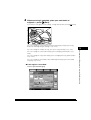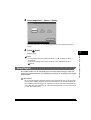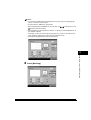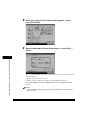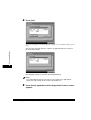
1
Remote
Guide
Copying UI
Guide
Please read this guide before operating this equipment.
After you finish reading this guide, store it in a safe place for future reference.
ENG
0
Otł
imageRUNNER
C3100/C3100N
Copying Guide
Manuals for the Machine
The manuals for this machine are divided as follows. Please refer to them for detailed information.
The manuals supplied with optional equipment are included in the list below. Depending on the system
configuration and product purchased, some manuals may not be needed.
Guides with this symbol are printed manuals.
• Basic Operations
• Troubleshooting
• Copying Instructions
• Mail Box Instructions
• Sending and Fax Instructions
• Setting Up the Network Connection and
Installing the CD-ROM Software
• Remote User Interface Instructions
• Network Connectivity and Setup Instructions
• Color Network ScanGear Installation and
Instructions
• PS/PCL/UFR Printer Instructions
For the imageRUNNER C3100N only.
• UFR Printer Instructions
For the imageRUNNER C3100 only.
• PCL Printer Driver Installation and
Instructions
• PS Printer Driver Installation and
Instructions
• Mac OS X PS Printer Driver Installation and
Instructions
CD-ROM
Guides with this symbol are PDF manuals included on the
accompanying CD-ROM. (See footnote on the next page.)
Reference Guide
Copying Guide
(This Document)
Mail Box Guide
Sending and Facsimile
Guide
Network Quick Start Guide
Remote UI Guide
CD-ROM
Network Guide
CD-ROM
Color Network ScanGear
User's Guide
CD-ROM
PS/PCL/UFR Printer Guide
CD-ROM
UFR Printer Guide
CD-ROM
PCL Driver Guide
CD-ROM
PS Driver Guide
CD-ROM
Mac PS Driver Guide
CD-ROM
• UFR Printer Driver Installation and
Instructions
• Fax Driver Installation and Instructions
UFR Driver Guide
CD-ROM
Fax Driver Guide
CD-ROM
• To view the manual in PDF format, Adobe Reader/Acrobat Reader/Acrobat is required. If Adobe Reader/Acrobat Reader/Acrobat is not installed on
your system, please download it from the Adobe Systems Incorporated website (http://www.adobe.com).
• The machine illustration on the cover may differ slightly from your machine.
How This Manual Is Organized
Chapter 1
Introduction to Copying
Chapter 2
Basic Copying Features
Chapter 3
Special Copying Features - Document Layout
Chapter 4
Special Copying Features - Image Adjustment
Chapter 5
Special Copying Features - Scan Settings and Notifications
Chapter 6
Special Copying Features - Image Editing
Chapter 7
Special Copying Features - Color and Image Quality Adjustments
Chapter 8
Memory Functions
Chapter 9
Customizing Settings
Chapter 10 Appendix
Includes the color copy samples, combination of functions chart, and index.
Considerable effort has been made to ensure that this manual is free of inaccuracies and omissions. However, as we are constantly improving our
products, if you need an exact specification, please contact Canon.
Contents
Preface . . . . . . . . . . . . . . . . . . . . . . . . . . . . . . . . . . . . . . . . . . . . . . . . . . . . . . . . . . x
How To Use This Manual . . . . . . . . . . . . . . . . . . . . . . . . . . . . . . . . . . . . . . . . . . . . x
Symbols Used in This Manual . . . . . . . . . . . . . . . . . . . . . . . . . . . . . . . . . . . . . . x
Keys Used in This Manual . . . . . . . . . . . . . . . . . . . . . . . . . . . . . . . . . . . . . . . . . xi
Displays Used in This Manual . . . . . . . . . . . . . . . . . . . . . . . . . . . . . . . . . . . . . . xi
Illustrations Used in This Manual . . . . . . . . . . . . . . . . . . . . . . . . . . . . . . . . . . . .xii
Legal Notices . . . . . . . . . . . . . . . . . . . . . . . . . . . . . . . . . . . . . . . . . . . . . . . . . . . . xiii
Trademarks . . . . . . . . . . . . . . . . . . . . . . . . . . . . . . . . . . . . . . . . . . . . . . . . . . . xiii
Copyright . . . . . . . . . . . . . . . . . . . . . . . . . . . . . . . . . . . . . . . . . . . . . . . . . . . . . xiii
Disclaimers . . . . . . . . . . . . . . . . . . . . . . . . . . . . . . . . . . . . . . . . . . . . . . . . . . . xiii
All About Color . . . . . . . . . . . . . . . . . . . . . . . . . . . . . . . . . . . . . . . . . . . . . . . . . . xiv
The Primary Colors . . . . . . . . . . . . . . . . . . . . . . . . . . . . . . . . . . . . . . . . . . . . . xiv
Additive and Subtractive Primary Colors . . . . . . . . . . . . . . . . . . . . . . . . . . xiv
Full Color Images . . . . . . . . . . . . . . . . . . . . . . . . . . . . . . . . . . . . . . . . . . . . .xv
The Three Attributes of Color. . . . . . . . . . . . . . . . . . . . . . . . . . . . . . . . . . . . . . xvi
Hue, Density, and Saturation . . . . . . . . . . . . . . . . . . . . . . . . . . . . . . . . . . . xvi
Color Balance Adjustment . . . . . . . . . . . . . . . . . . . . . . . . . . . . . . . . . . . . . xvi
The Complementary Colors. . . . . . . . . . . . . . . . . . . . . . . . . . . . . . . . . . . . . . .xvii
Full and Complementary Colors . . . . . . . . . . . . . . . . . . . . . . . . . . . . . . . . xvii
Surprising Effects. . . . . . . . . . . . . . . . . . . . . . . . . . . . . . . . . . . . . . . . . . . . xvii
The Technique of Color Printing. . . . . . . . . . . . . . . . . . . . . . . . . . . . . . . . . . . xviii
Preserving Color Copies. . . . . . . . . . . . . . . . . . . . . . . . . . . . . . . . . . . . . . . . . . . xix
Chapter 1
Introduction to Copying
Overview of the imageRUNNER C3100/C3100N . . . . . . . . . . . . . . . . . . . . . . . .1-2
Various Copying Features . . . . . . . . . . . . . . . . . . . . . . . . . . . . . . . . . . . . . . . .1-2
Flow of Copy Operations . . . . . . . . . . . . . . . . . . . . . . . . . . . . . . . . . . . . . . . . .1-12
Placing Originals . . . . . . . . . . . . . . . . . . . . . . . . . . . . . . . . . . . . . . . . . . . . . . . .1-21
Orientation . . . . . . . . . . . . . . . . . . . . . . . . . . . . . . . . . . . . . . . . . . . . . . . . . . .1-22
Platen Glass. . . . . . . . . . . . . . . . . . . . . . . . . . . . . . . . . . . . . . . . . . . . . . . . . .1-23
Feeder (DADF-L1) . . . . . . . . . . . . . . . . . . . . . . . . . . . . . . . . . . . . . . . . . . . . .1-27
Canceling a Copy Job . . . . . . . . . . . . . . . . . . . . . . . . . . . . . . . . . . . . . . . . . . . .1-30
Using the Touch Panel Display. . . . . . . . . . . . . . . . . . . . . . . . . . . . . . . . . . . .1-30
Using the Stop Key . . . . . . . . . . . . . . . . . . . . . . . . . . . . . . . . . . . . . . . . . . . .1-31
Using the System Monitor Screen . . . . . . . . . . . . . . . . . . . . . . . . . . . . . . . . .1-32
v
Reserved Copying . . . . . . . . . . . . . . . . . . . . . . . . . . . . . . . . . . . . . . . . . . . . . . 1-35
Reserving Copy Jobs . . . . . . . . . . . . . . . . . . . . . . . . . . . . . . . . . . . . . . . . . . 1-35
Using the Stack Bypass . . . . . . . . . . . . . . . . . . . . . . . . . . . . . . . . . . . . . . . . 1-37
Interrupt Mode . . . . . . . . . . . . . . . . . . . . . . . . . . . . . . . . . . . . . . . . . . . . . . . . . 1-50
Sample Set . . . . . . . . . . . . . . . . . . . . . . . . . . . . . . . . . . . . . . . . . . . . . . . . . . . . 1-53
Confirming Settings. . . . . . . . . . . . . . . . . . . . . . . . . . . . . . . . . . . . . . . . . . . . . 1-56
Changing/Canceling Selected Settings . . . . . . . . . . . . . . . . . . . . . . . . . . . . . 1-58
Chapter 2
Basic Copying Features
Copy Quantity . . . . . . . . . . . . . . . . . . . . . . . . . . . . . . . . . . . . . . . . . . . . . . . . . . 2-3
Specifying the Required Number of Copies . . . . . . . . . . . . . . . . . . . . . . . . . . 2-3
Changing the Copy Quantity . . . . . . . . . . . . . . . . . . . . . . . . . . . . . . . . . . . . . 2-4
Paper Selection . . . . . . . . . . . . . . . . . . . . . . . . . . . . . . . . . . . . . . . . . . . . . . . . . 2-6
Automatic Paper Selection . . . . . . . . . . . . . . . . . . . . . . . . . . . . . . . . . . . . . . . 2-7
Manual Paper Selection . . . . . . . . . . . . . . . . . . . . . . . . . . . . . . . . . . . . . . . . . 2-9
Copy Exposure and Original Type Settings. . . . . . . . . . . . . . . . . . . . . . . . . . 2-17
Manual Exposure Adjustment . . . . . . . . . . . . . . . . . . . . . . . . . . . . . . . . . . . 2-18
Original Type Selection. . . . . . . . . . . . . . . . . . . . . . . . . . . . . . . . . . . . . . . . . 2-19
Automatic Exposure Adjustment . . . . . . . . . . . . . . . . . . . . . . . . . . . . . . . . . 2-21
Exposure Adjustment during Printing. . . . . . . . . . . . . . . . . . . . . . . . . . . . . . 2-23
Changing the Copy (Zoom) Ratio. . . . . . . . . . . . . . . . . . . . . . . . . . . . . . . . . . 2-24
Preset Zoom. . . . . . . . . . . . . . . . . . . . . . . . . . . . . . . . . . . . . . . . . . . . . . . . . 2-27
Zoom by Percentage . . . . . . . . . . . . . . . . . . . . . . . . . . . . . . . . . . . . . . . . . . 2-30
Auto Zoom . . . . . . . . . . . . . . . . . . . . . . . . . . . . . . . . . . . . . . . . . . . . . . . . . . 2-32
Entire Image . . . . . . . . . . . . . . . . . . . . . . . . . . . . . . . . . . . . . . . . . . . . . . . . . 2-35
Reducing/Enlarging Using the Original and Copy Sizes . . . . . . . . . . . . . . . 2-36
Making Copies with the Same XY Copy Ratio (Zoom) . . . . . . . . . . . . . . .2-37
Making Copies with Different XY Copy Ratios (XY Zoom) . . . . . . . . . . . .2-39
Setting the X and Y Axes Independently . . . . . . . . . . . . . . . . . . . . . . . . . . . 2-42
Multi-Page Enlargement. . . . . . . . . . . . . . . . . . . . . . . . . . . . . . . . . . . . . . . . 2-46
Determining the Copy Ratio and Number of Sheets Needed . . . . . . . . .2-46
Specifying the Copy Ratio in Percentage . . . . . . . . . . . . . . . . . . . . . . . .2-47
Selecting the Number of Output Pages . . . . . . . . . . . . . . . . . . . . . . . . . .2-50
Pasting the Sheets of the Divided Image Together . . . . . . . . . . . . . . . . .2-53
Collating Copies. . . . . . . . . . . . . . . . . . . . . . . . . . . . . . . . . . . . . . . . . . . . . . . . 2-56
Page Order (Collate) . . . . . . . . . . . . . . . . . . . . . . . . . . . . . . . . . . . . . . . . . . 2-61
Same Page (Group) . . . . . . . . . . . . . . . . . . . . . . . . . . . . . . . . . . . . . . . . . . . 2-64
Page Order (Staple) . . . . . . . . . . . . . . . . . . . . . . . . . . . . . . . . . . . . . . . . . . . 2-67
Two-Sided Copying . . . . . . . . . . . . . . . . . . . . . . . . . . . . . . . . . . . . . . . . . . . . . 2-73
vi
1 to 2-Sided . . . . . . . . . . . . . . . . . . . . . . . . . . . . . . . . . . . . . . . . . . . . . . . . . .2-75
2 to 2-Sided . . . . . . . . . . . . . . . . . . . . . . . . . . . . . . . . . . . . . . . . . . . . . . . . . .2-78
2 to 1-Sided . . . . . . . . . . . . . . . . . . . . . . . . . . . . . . . . . . . . . . . . . . . . . . . . . .2-80
Book to 2-Sided . . . . . . . . . . . . . . . . . . . . . . . . . . . . . . . . . . . . . . . . . . . . . . .2-83
Changing Color Modes . . . . . . . . . . . . . . . . . . . . . . . . . . . . . . . . . . . . . . . . . . .2-86
Automatic Color Selection . . . . . . . . . . . . . . . . . . . . . . . . . . . . . . . . . . . . . . .2-86
Full Color . . . . . . . . . . . . . . . . . . . . . . . . . . . . . . . . . . . . . . . . . . . . . . . . . . . .2-87
Black . . . . . . . . . . . . . . . . . . . . . . . . . . . . . . . . . . . . . . . . . . . . . . . . . . . . . . .2-89
Chapter 3
Special Copying Features - Document Layout
Two-Page Separation . . . . . . . . . . . . . . . . . . . . . . . . . . . . . . . . . . . . . . . . . . . . .3-2
Cover/Sheet Insertion . . . . . . . . . . . . . . . . . . . . . . . . . . . . . . . . . . . . . . . . . . . . .3-5
Booklet Mode . . . . . . . . . . . . . . . . . . . . . . . . . . . . . . . . . . . . . . . . . . . . . . . . . . .3-13
Transparency Interleaving . . . . . . . . . . . . . . . . . . . . . . . . . . . . . . . . . . . . . . . .3-20
Image Combination . . . . . . . . . . . . . . . . . . . . . . . . . . . . . . . . . . . . . . . . . . . . . .3-25
Chapter 4
Special Copying Features - Image Adjustment
Shifting the Original Image. . . . . . . . . . . . . . . . . . . . . . . . . . . . . . . . . . . . . . . . .4-2
Using the Arrow Keys. . . . . . . . . . . . . . . . . . . . . . . . . . . . . . . . . . . . . . . . . . . .4-3
Using the Numeric Keys . . . . . . . . . . . . . . . . . . . . . . . . . . . . . . . . . . . . . . . . .4-5
Margin Mode . . . . . . . . . . . . . . . . . . . . . . . . . . . . . . . . . . . . . . . . . . . . . . . . . . . .4-8
Frame Erase . . . . . . . . . . . . . . . . . . . . . . . . . . . . . . . . . . . . . . . . . . . . . . . . . . . .4-12
Original Frame Erase . . . . . . . . . . . . . . . . . . . . . . . . . . . . . . . . . . . . . . . . . . .4-14
Book Frame Erase . . . . . . . . . . . . . . . . . . . . . . . . . . . . . . . . . . . . . . . . . . . . .4-18
Binding Erase. . . . . . . . . . . . . . . . . . . . . . . . . . . . . . . . . . . . . . . . . . . . . . . . .4-22
Chapter 5
Special Copying Features - Scan Settings and Notifications
Different Size Originals . . . . . . . . . . . . . . . . . . . . . . . . . . . . . . . . . . . . . . . . . . . .5-2
Job Build . . . . . . . . . . . . . . . . . . . . . . . . . . . . . . . . . . . . . . . . . . . . . . . . . . . . . . .5-5
Job Done Notice . . . . . . . . . . . . . . . . . . . . . . . . . . . . . . . . . . . . . . . . . . . . . . . .5-10
Chapter 6
Special Copying Features - Image Editing
Using Image Creation Modes . . . . . . . . . . . . . . . . . . . . . . . . . . . . . . . . . . . . . . .6-2
Inverting Images (Nega/Posi). . . . . . . . . . . . . . . . . . . . . . . . . . . . . . . . . . . . . .6-4
Image Repeat . . . . . . . . . . . . . . . . . . . . . . . . . . . . . . . . . . . . . . . . . . . . . . . . .6-5
Mirror Image. . . . . . . . . . . . . . . . . . . . . . . . . . . . . . . . . . . . . . . . . . . . . . . . . .6-14
Area Designation . . . . . . . . . . . . . . . . . . . . . . . . . . . . . . . . . . . . . . . . . . . . . . . .6-16
Framing . . . . . . . . . . . . . . . . . . . . . . . . . . . . . . . . . . . . . . . . . . . . . . . . . . . . .6-19
vii
Using the Edit Pen . . . . . . . . . . . . . . . . . . . . . . . . . . . . . . . . . . . . . . . . . .6-20
Using the Numeric Keys. . . . . . . . . . . . . . . . . . . . . . . . . . . . . . . . . . . . . .6-26
Blanking . . . . . . . . . . . . . . . . . . . . . . . . . . . . . . . . . . . . . . . . . . . . . . . . . . . . 6-32
Using the Edit Pen . . . . . . . . . . . . . . . . . . . . . . . . . . . . . . . . . . . . . . . . . .6-32
Using the Numeric Keys. . . . . . . . . . . . . . . . . . . . . . . . . . . . . . . . . . . . . .6-37
Chapter 7
Special Copying Features - Color and Image Quality Adjustments
Adjusting the Color . . . . . . . . . . . . . . . . . . . . . . . . . . . . . . . . . . . . . . . . . . . . . . 7-2
Adjusting the Color Balance . . . . . . . . . . . . . . . . . . . . . . . . . . . . . . . . . . . . . . 7-2
Color Balance Keys . . . . . . . . . . . . . . . . . . . . . . . . . . . . . . . . . . . . . . . . . . . . 7-5
Storing Color Balance Settings . . . . . . . . . . . . . . . . . . . . . . . . . . . . . . . . .7-5
Naming a Color Balance Key . . . . . . . . . . . . . . . . . . . . . . . . . . . . . . . . . . .7-8
Recalling Color Balance Settings. . . . . . . . . . . . . . . . . . . . . . . . . . . . . . . .7-9
Erasing Color Balance Settings . . . . . . . . . . . . . . . . . . . . . . . . . . . . . . . .7-11
Adjusting the Contrast (Sharpness) . . . . . . . . . . . . . . . . . . . . . . . . . . . . . . . 7-14
One Touch Color Mode . . . . . . . . . . . . . . . . . . . . . . . . . . . . . . . . . . . . . . . . . . 7-17
Image Quality Adjustment. . . . . . . . . . . . . . . . . . . . . . . . . . . . . . . . . . . . . . . . 7-20
Remove Background . . . . . . . . . . . . . . . . . . . . . . . . . . . . . . . . . . . . . . . . . . 7-20
Prevent Bleeding . . . . . . . . . . . . . . . . . . . . . . . . . . . . . . . . . . . . . . . . . . . . . 7-23
Copying in a Single Color . . . . . . . . . . . . . . . . . . . . . . . . . . . . . . . . . . . . . . . . 7-26
Chapter 8
Memory Functions
Recalling Previous Copy Jobs . . . . . . . . . . . . . . . . . . . . . . . . . . . . . . . . . . . . . 8-2
Memory Keys . . . . . . . . . . . . . . . . . . . . . . . . . . . . . . . . . . . . . . . . . . . . . . . . . . . 8-4
Storing Copy Settings. . . . . . . . . . . . . . . . . . . . . . . . . . . . . . . . . . . . . . . . . . . 8-4
Naming a Memory Key. . . . . . . . . . . . . . . . . . . . . . . . . . . . . . . . . . . . . . . . . . 8-7
Recalling Copy Settings . . . . . . . . . . . . . . . . . . . . . . . . . . . . . . . . . . . . . . . . . 8-9
Erasing Copy Settings . . . . . . . . . . . . . . . . . . . . . . . . . . . . . . . . . . . . . . . . . 8-10
Chapter 9
Customizing Settings
Copy Settings Table . . . . . . . . . . . . . . . . . . . . . . . . . . . . . . . . . . . . . . . . . . . . . . 9-2
Specifying Standard Keys. . . . . . . . . . . . . . . . . . . . . . . . . . . . . . . . . . . . . . . . . 9-3
Auto Collate . . . . . . . . . . . . . . . . . . . . . . . . . . . . . . . . . . . . . . . . . . . . . . . . . . . . 9-6
Job Duration Display . . . . . . . . . . . . . . . . . . . . . . . . . . . . . . . . . . . . . . . . . . . . . 9-8
Auto Orientation. . . . . . . . . . . . . . . . . . . . . . . . . . . . . . . . . . . . . . . . . . . . . . . . 9-10
Changing the Current Standard Settings . . . . . . . . . . . . . . . . . . . . . . . . . . . 9-12
Storing New Standard Settings . . . . . . . . . . . . . . . . . . . . . . . . . . . . . . . . . . 9-12
Initializing Standard Settings . . . . . . . . . . . . . . . . . . . . . . . . . . . . . . . . . . . . 9-15
viii
Restoring the Default Copy Settings . . . . . . . . . . . . . . . . . . . . . . . . . . . . . . . .9-17
Chapter 10 Appendix
Color Copy Samples . . . . . . . . . . . . . . . . . . . . . . . . . . . . . . . . . . . . . . . . . . . . .10-2
Color Balance . . . . . . . . . . . . . . . . . . . . . . . . . . . . . . . . . . . . . . . . . . . . . . . .10-2
One Touch Color . . . . . . . . . . . . . . . . . . . . . . . . . . . . . . . . . . . . . . . . . . . . . .10-3
Image Quality Adjustments . . . . . . . . . . . . . . . . . . . . . . . . . . . . . . . . . . . . . .10-4
Remove Background . . . . . . . . . . . . . . . . . . . . . . . . . . . . . . . . . . . . . . . . 10-4
Prevent Bleeding . . . . . . . . . . . . . . . . . . . . . . . . . . . . . . . . . . . . . . . . . . . 10-4
Single Color . . . . . . . . . . . . . . . . . . . . . . . . . . . . . . . . . . . . . . . . . . . . . . . . . .10-5
Combination of Functions Chart . . . . . . . . . . . . . . . . . . . . . . . . . . . . . . . . . . .10-6
Index . . . . . . . . . . . . . . . . . . . . . . . . . . . . . . . . . . . . . . . . . . . . . . . . . . . . . . . . .10-10
ix
Preface
Thank you for purchasing the Canon imageRUNNER C3100/C3100N. Please read this
manual thoroughly before operating the machine in order to familiarize yourself with its
capabilities, and to make the most of its many functions. After reading this manual, store it in
a safe place for future reference.
How To Use This Manual
Symbols Used in This Manual
The following symbols are used in this manual to explain procedures, restrictions,
handling precautions, and instructions that should be observed for safety.
.
WARNING
Indicates a warning concerning operations that may lead to death or
injury to persons if not performed correctly. In order to use the machine
safely, always pay attention to these warnings.
CAUTION
Indicates a caution concerning operations that may lead to injury to
persons, or damage to property if not performed correctly. In order to
use the machine safely, always pay attention to these cautions.
IMPORTANT
Indicates operational requirements and restrictions. Be sure to read
these items carefully in order to operate the machine correctly, and to
avoid damage to the machine.
.
.
.
NOTE
x
Indicates a clarification of an operation, or contains additional
explanations for a procedure. Reading these notes is highly
recommended.
Keys Used in This Manual
The following symbols and key names are a few examples of how keys to be
pressed are expressed in this manual:
Touch Panel Display Keys:
[Key Name]
Examples:
[Cancel]
[Done]
Control Panel Keys:
<Key icon> + (Key Name)
Examples:
(Start)
(Stop)
Displays Used in This Manual
Screen shots of the touch panel display used in this manual are those taken when
the imageRUNNER C3100 has the following optional equipment attached to it: the
Feeder (DADF-L1), Color Universal Send Kit, Super G3 FAX Board, Resolution
Switching Board, Finisher-P1, and Cassette Feeding Unit-Y1.
Note that functions that cannot be used depending on the model or options, are not
displayed on the touch panel display.
The keys which you should press are marked with a
, as shown below.
When multiple keys can be pressed on the touch panel display, all keys are marked.
Select the keys which suit your needs.
Place your originals ➞ press [Special Features].
Press this key for operation.
xi
Illustrations Used in This Manual
Illustrations used in this manual are those displayed when the imageRUNNER
C3100 has the following optional equipment attached to it: the Feeder (DADF-L1),
Finisher-P1, and Cassette Feeding Unit-Y1.
xii
Legal Notices
Trademarks
Canon, the Canon logo, and imageRUNNER are trademarks of Canon Inc.
Adobe and Acrobat are trademarks of Adobe Systems Incorporated.
Other product and company names herein may be the trademarks of their
respective owners.
Copyright
Copyright 2003 by Canon Inc. All rights reserved.
No part of this publication may be reproduced or transmitted in any form or by any
means, electronic or mechanical, including photocopying and recording, or by any
information storage or retrieval system without the prior written permission of
Canon Inc.
Disclaimers
The information in this document is subject to change without notice.
CANON INC. MAKES NO WARRANTY OF ANY KIND WITH REGARD TO THIS
MATERIAL, EITHER EXPRESS OR IMPLIED, EXCEPT AS PROVIDED HEREIN,
INCLUDING WITHOUT LIMITATION, THEREOF, WARRANTIES AS TO
MARKETABILITY, MERCHANTABILITY, FITNESS FOR A PARTICULAR
PURPOSE OF USE OR AGAINST INFRINGEMENT OF ANY PATENT. CANON
INC. SHALL NOT BE LIABLE FOR ANY DIRECT, INCIDENTAL, OR
CONSEQUENTIAL DAMAGES OF ANY NATURE, OR LOSSES OR EXPENSES
RESULTING FROM THE USE OF THIS MATERIAL.
xiii
All About Color
This section explains the basics of the three primary colors, the three color
attributes, and the technique of color printing.
The Primary Colors
Additive Primary Colors
Subtractive Primary Colors
Additive and Subtractive Primary Colors
There are three additive primary colors and three subtractive primary colors. The
additive primary colors consist of red, green, and blue, which are spectrum colors.
An equal combination of all three colors results in a clear color (white light). As
indicated in this example, combining all three additive primary colors in different
proportions to make different colors is defined as the method of additive color
synthesis. Color CRT monitors use the three additive primary colors to express
various colors using this method.
The subtractive primary colors consist of cyan (C), magenta (M), and yellow (Y),
which are used in paints, dyes, and color toner inks. The combination of all three
subtractive primary colors to demonstrate variations in the reflection and absorption
of light is defined as the method of subtractive color synthesis. Equal combination
of all three subtractive primary colors results in no reflection of light, commonly
known as black (K). Materials processed by color printing, such as posters and
pamphlets, express a variety of colors using this method.
xiv
Full Color Images
Full color images are generally reproduced using black (K) and the three
subtractive colors. All colors can be theoretically made by mixing the three
subtractive colors in different proportions. However, areas of images expressed in
black are actually reproduced in brown by using this method.
The imageRUNNER C3100/C3100N reproduces full color images in four colors,
including black. The machine also enables you to adjust the balance of each color
that is reproduced, or make copies of originals in one specific (monochrome) color
(Single Color mode).
xv
The Three Attributes of Color
Hue
Density
Density
Saturation
Saturation
Hue, Density, and Saturation
The three attributes of color are hue, density, and saturation. Hue describes the
different distinguishable colors, such as red, blue, or yellow. Color variations can be
created by adjusting the hue.
The density of a color is a measure of how "bright" a color is. It describes the
brightness and darkness of colors. A higher color density area is closer to white,
whereas a lower color density area is closer to black.
The saturation of a color is a measure of how "pure" a color is. It adjusts the
vividness of colors by varying the relative strengths of white. Unsaturated colors
appear as washed out or dull, whereas saturated colors are bold and vibrant.
The colors of the spectrum are of optimal fullness and purity. Color adjustments are
thus made based on these colors.
The density and saturation of colors are interrelated. When mixing colors with
white, for example, the density becomes higher, but due to the subdued tone of the
resulting color, the saturation is lower. This relationship is summarized as the "color
tone" and the colors are described as "vivid" or "tranquil."
Color Balance Adjustment
The imageRUNNER C3100/C3100N enables you to adjust the color balance easily
by using the keys on the touch panel display. Cyan, magenta, yellow, and black can
be adjusted independently by using the Color Balance mode. In addition, the One
Touch Color mode enables you to adjust the copy's image quality (e.g., more vivid
or tranquil) with one touch of a key.
xvi
The Complementary Colors
Color Wheel
Full and Complementary Colors
Full Colors are described as the colors of the spectrum with the highest clarity and
purity. The combination of two full additive colors results in a very bright color.
These colors are called complementary colors as they complement each other to
produce a very bright color, like the color of light in the daytime.
Rapidly rotating two full subtractive colors on a disc combines the colors and makes
them appear as gray. These colors are called physical complementary colors.
The observation of a full subtractive color in the visual field followed by a rapid shift
to a white area results in the illusion of an entirely different color for a short period
of time. These colors are called psychological complementary colors.
Full colors are arranged on the color wheel such that opposing colors are either
physically or psychologically complementary.
Surprising Effects
The imageRUNNER C3100/C3100N uses complementary colors in the Nega/Posi
mode. When an image consisting of three additive primary colors is scanned into
the machine, it automatically replaces these additive primary colors with their
respective complementary colors before printing a four color image consisting of
the subtractive primary colors (C, M, and Y) and black (K).
xvii
The Technique of Color Printing
Color copying reproduces original images in tiny dots of C (cyan), M (magenta), Y
(yellow), and K (black). Therefore, the colors of the original image are separated
into these four colors during copying.
C
M
Y
K
All image data are scanned into the machine as the four colors to match the colors
of the original image, and are developed onto the photoconductive drum by rotating
each of the four color toners in sequence for transfer onto the intermediate transfer
belt for further image reproduction processing.
Intermediate Transfer Belt
Rotates four times.
The toner color changes
each time the intermediate
transfer belt rotates.
After the image data in the
four colors has been transferred
onto the intermediate transfer
belt, copying will begin and
copies with reproduced color
images are output.
Data
C
K
C M Y
K
M
Y
Photoconductive Drum
The printed paper goes through a fixing unit, and is output into a tray.
xviii
Preserving Color Copies
■ Fading Due to Exposure to Light
As with all printed material and photographs, this is not a problem if the copies are stored
under normal conditions. Color copies exposed for two years to the fluorescent lighting
used in general offices will hardly fade, depending on the storage conditions. Color copies
should be stored in binders or in locations that are not exposed to light if they are to be
kept for a long period of time.
■ Use of Clear Covers
Do not use PVC type transparent covers. If copies are stored in such covers, toner on the
copies softens, causing the copies and covers to adhere to each other.
■ Use of Adhesives
Only adhesives that do not dissolve toner should be used for mounting copies; solvents
dissolve toner. Be sure to check the ingredients of the adhesive before you use it. Test
some adhesives with an unwanted color copy before you use it with a valuable copy.
■ Inserting Copies Between Printed Pages
When copies are included in books, the solvents contained in printing ink may cause the
toner to soften. The printed pages should, therefore, be thoroughly dried to evaporate any
solvents before the copies are inserted.
■ Folding Copies
Color copies differ from black-and-white copies in that toners of four colors are used.
These toners are deposited on the surface of the paper in a layer considerably thicker
than black-and-white copies, and they may peel if the copy is folded or wrinkled. Copies
should be stored in flat transparent covers, in binders, or carefully rolled.
■ Effect of High Temperatures
If copies are left in high-temperature areas (near heaters, stoves, etc.), the toner will melt,
and the colors will mix.
xix
xx
Introduction to Copying
1
CHAPTER
This chapter is an introduction to the Copy function.
Overview of the imageRUNNER C3100/C3100N . . . . . . . . . . . . . . . . . . . . . . . . . . . . . . . 1-2
Various Copying Features . . . . . . . . . . . . . . . . . . . . . . . . . . . . . . . . . . . . . . . . . . . . . . . . . . . . . .1-2
Flow of Copy Operations . . . . . . . . . . . . . . . . . . . . . . . . . . . . . . . . . . . . . . . . . . . . . . . . 1-12
Placing Originals. . . . . . . . . . . . . . . . . . . . . . . . . . . . . . . . . . . . . . . . . . . . . . . . . . . . . . . 1-21
Orientation . . . . . . . . . . . . . . . . . . . . . . . . . . . . . . . . . . . . . . . . . . . . . . . . . . . . . . . . . . . . . . . . .1-22
Platen Glass . . . . . . . . . . . . . . . . . . . . . . . . . . . . . . . . . . . . . . . . . . . . . . . . . . . . . . . . . . . . . . . .1-23
Feeder (DADF-L1) . . . . . . . . . . . . . . . . . . . . . . . . . . . . . . . . . . . . . . . . . . . . . . . . . . . . . . . . . . .1-27
Canceling a Copy Job. . . . . . . . . . . . . . . . . . . . . . . . . . . . . . . . . . . . . . . . . . . . . . . . . . . 1-30
Using the Touch Panel Display. . . . . . . . . . . . . . . . . . . . . . . . . . . . . . . . . . . . . . . . . . . . . . . . . .1-30
Using the Stop Key. . . . . . . . . . . . . . . . . . . . . . . . . . . . . . . . . . . . . . . . . . . . . . . . . . . . . . . . . . .1-31
Using the System Monitor Screen . . . . . . . . . . . . . . . . . . . . . . . . . . . . . . . . . . . . . . . . . . . . . . .1-32
Reserved Copying . . . . . . . . . . . . . . . . . . . . . . . . . . . . . . . . . . . . . . . . . . . . . . . . . . . . . 1-35
Reserving Copy Jobs . . . . . . . . . . . . . . . . . . . . . . . . . . . . . . . . . . . . . . . . . . . . . . . . . . . . . . . . .1-35
Using the Stack Bypass . . . . . . . . . . . . . . . . . . . . . . . . . . . . . . . . . . . . . . . . . . . . . . . . . . . . . . .1-37
Interrupt Mode . . . . . . . . . . . . . . . . . . . . . . . . . . . . . . . . . . . . . . . . . . . . . . . . . . . . . . . . 1-50
Sample Set . . . . . . . . . . . . . . . . . . . . . . . . . . . . . . . . . . . . . . . . . . . . . . . . . . . . . . . . . . . 1-53
Confirming Settings . . . . . . . . . . . . . . . . . . . . . . . . . . . . . . . . . . . . . . . . . . . . . . . . . . . . 1-56
Changing/Canceling Selected Settings . . . . . . . . . . . . . . . . . . . . . . . . . . . . . . . . . . . . . 1-58
1-1
Overview of the imageRUNNER C3100/C3100N
Introduction to Copying
1
Most operations of this machine are done from the touch panel display. To use the
Copy function, press the appropriate keys in accordance with the messages
displayed on the touch panel display.
Various Copying Features
Copy Basic Features Screen
The screen on the left, which appears when [Copy]
is selected, is called the Copy Basic Features
screen.
➞ See p. 2-86
Press to select the color mode for copying. (See "Changing Color Modes," on p. 2-86.)
➞ See p. 2-6
Press to select the paper size/type and the paper source. (See "Paper Selection," on p.
2-6.)
➞ See p. 2-24
Press to reduce or enlarge the copy
size. (See "Changing the Copy
(Zoom) Ratio," on p. 2-24.)
➞ See p. 2-24
Press to make copies in the same size as your original. (See "Changing the Copy (Zoom)
Ratio," on p. 2-24.)
1-2
Overview of the imageRUNNER C3100/C3100N
➞ See p. 2-56
[Collate(Page order)] Is Selected
Press to select the Collate, Group,
or Staple mode. (See "Collating
Copies," on p. 2-56.)
➞ See p. 2-73
Introduction to Copying
1
[1 2-Sided] Is Selected
Press to make [1 2-Sided],
[2 2-Sided], [2 1-Sided], or
[Book 2-Sided] copies. (See
"Two-Sided Copying," on p. 2-73.)
➞ See p. 2-17
Press [ ] or [ ] to manually control the
copy exposure. Press [A] (Auto) to select
or cancel the automatic exposure
control. (See "Copy Exposure and
Original Type Settings," on p. 2-17.)
Overview of the imageRUNNER C3100/C3100N
1-3
➞ See p. 2-19
Text/Photo/Map
Printed Image
Photo
Text
Press to make copies according to the
type of original ([Text/Photo/Map],
[Printed Image], [Photo], or [Text]). (See
"Original Type Selection," on p. 2-19.)
Introduction to Copying
1
➞ See p. 1-50
Press to interrupt a copy job to make priority copies. (See "Interrupt Mode," on p. 1-50.)
➞ See Chapters 3 through 8
Press to select a Special Features mode.
➞ See the Reference Guide
Press to check the progress of a copy job, change the order of printing, or cancel printing.
1-4
Overview of the imageRUNNER C3100/C3100N
To close the Special Features screen and return to
the Copy Basic Features screen, press [Done].
Pressing (Help) after selecting a mode displays a
help screen containing guidance information. This is
useful when you want to learn more about the
selected mode.
➞ See p. 3-2
1
1
Press to select or cancel the
Two-page Separation mode. This
mode enables you to copy facing
pages of an opened book onto
separate copy sheets. (See
"Two-Page Separation," on p. 3-2.)
➞ See p. 3-5
[Front Cover] Is Selected
Press to add covers, sheet
insertions, or chapter pages
between specified pages. (See
"Cover/Sheet Insertion," on p. 3-5.)
Overview of the imageRUNNER C3100/C3100N
1-5
1
Introduction to Copying
Special Features Screen 1/2
The screen on the left, which appears on the touch
panel display when you press [Special Features] on
the Copy Basic Features screen, is called the
Special Features screen. This screen is divided into
two screens. Pressing [▼] or [▲] displays the next
or previous screen. All special copy modes are
displayed here. In some cases, when a mode is
selected, a more detailed screen for the selected
mode appears.
➞ See p. 3-13
1
2
3
4
7
2
Press to make copies of several
originals to form a booklet. (See
"Booklet Mode," on p. 3-13.)
1
5
8
Introduction to Copying
6
1
8
4
1
3
6
3
5
6
7
8
➞ See p. 3-20
Transparencies
Press to insert a sheet between
each transparency when copying
transparencies. You can make the
same prints on the interleaf sheets
as those on the transparencies.
(See "Transparency Interleaving,"
on p. 3-20.)
Interleaf Sheets
➞ See p. 3-25
[2 On 1] Is Selected
Press to automatically reduce two,
four, or eight originals to fit onto a
one-sided or two-sided copy sheet.
(See "Image Combination," on p.
3-25.)
1
1
2
➞ See p. 4-2
Press to shift the position of the
original image on the copy sheet.
(See "Shifting the Original Image,"
on p. 4-2.)
1-6
Overview of the imageRUNNER C3100/C3100N
2
➞ See p. 4-8
Press to create margins along the
sides of a copy sheet. (See "Margin
Mode," on p. 4-8.)
➞ See p. 4-12
Introduction to Copying
1
[Original Frame Erase] Is Selected
Original Frame
Erase Mode
Selected
Press to eliminate dark border areas
and lines that appear around
original images or shadows from
binding holes. (See "Frame Erase,"
on p. 4-12.)
Original Frame
Erase Mode Not
Selected
➞ See p. 5-2
Press to make copies feeding
different size originals together in
one group, by placing them in the
feeder. (See "Different Size
Originals," on p. 5-2.)
11" x 17" Original
LTR Original
Original
Feeding
Direction
Overview of the imageRUNNER C3100/C3100N
1-7
➞ See p. 5-5
Press to select or cancel the Job
Build mode. This mode enables you
to divide the originals into several
parts, scan them, and then print
them all together. This is convenient
when you cannot place all of the
originals that you want to copy at
one time. (See "Job Build," on p.
5-5.)
Introduction to Copying
1
➞ See p. 5-10
Press to have the machine notify the user through e-mail when the copy job is done. (See
"Job Done Notice," on p. 5-10.)
Special Features Screen 2/2
The screen on the left appears if you press [▼] on
the Special Features screen.
➞ See p. 6-2
[Nega/Posi] Is Selected
Press to manipulate the image in the
copy by selecting [Nega/Posi],
[Image Repeat], or [Mirror Image].
(See "Using Image Creation
Modes," on p. 6-2.)
1-8
Overview of the imageRUNNER C3100/C3100N
➞ See p. 6-16
Press to designate areas on the
original that you want to copy or to
blank out on the copy. (See "Area
Designation," on p. 6-16.)
Framing
Original
1
1
Introduction to Copying
Blanking
1
Designated Area
➞ See p. 7-2
[Density Fine Adjustment] Is Selected
Original
Press to adjust the color balance or
the density of the image. (See
"Adjusting the Color," on p. 7-2.)
Decrease
High-Density
Magenta
Increase
High-Density
Cyan
Decrease
Low-Density
Magenta
Increase
Low-Density
Cyan
Overview of the imageRUNNER C3100/C3100N
1-9
➞ See p. 7-14
Press to sharpen or soften the
image of the original in the copy.
(See "Adjusting the Contrast
(Sharpness)," on p. 7-14.)
Introduction to Copying
1
Original
Low
High
➞ See p. 7-17
[Retro Photo Image] Is Selected
Press to manipulate the image with
one touch of a key. This mode
enables you to make copies by
selecting the desired look or feel, or
by changing the tone of the image
by selecting [Vivid Colors], [Tranquil
Colors], [Lighten Image], [Darken
Image], [Highlight Reproduction], or
[Retro Photo Image]. (See "One
Touch Color Mode," on p. 7-17.)
➞ See p. 7-20
[Remove Background] Is Selected
When 'A' (automatic exposure) is
selected, press to erase the
background color of the original on
the copy, or to prevent the image on
the reverse side of the original from
showing on the copy. (See "Image
Quality Adjustment," on p. 7-20.)
1-10
Overview of the imageRUNNER C3100/C3100N
➞ See p. 7-26
Press to copy using the selected
color only. (See "Copying in a Single
Color," on p. 7-26.)
Introduction to Copying
1
➞ See p. 8-4
Press to store or recall copy modes. (See "Memory Keys," on p. 8-4.)
➞ See p. 8-2
Press to recall previously set copy modes. (See "Recalling Previous Copy Jobs," on p.
8-2.)
Overview of the imageRUNNER C3100/C3100N
1-11
Flow of Copy Operations
1
Introduction to Copying
This section describes the flow of basic copy operations.
NOTE
Before using the Copy function, it is useful to read the following topics:
- Main power and control panel power (See Chapter 1, "Before You Start Using This
Machine," in the Reference Guide.)
- Routine maintenance (See Chapter 7, "Routine Maintenance," in the Reference Guide.)
1
Press the appropriate keys in accordance with the messages
displayed on the touch panel display.
If there are no messages displayed, proceed to step 2.
● If the message <You must insert a control card.> appears:
❑ Insert a control card into the optional Card Reader-C1.
The Basic Features screen is displayed.
NOTE
For instructions on using the optional Card Reader-C1, see Chapter 3, "Optional
Equipment," in the Reference Guide.
1-12
Flow of Copy Operations
● If the message <Enter the Dept. ID and Password using the numeric
keys.> appears:
❑ Press [Dept. ID] ➞ enter the Department ID using
-
❑ Press [Password] ➞ enter the password using
(numeric keys).
❑ Press
-
(numeric keys).
(ID).
Introduction to Copying
1
The Basic Features screen is displayed.
NOTE
For instructions on using Department ID Management, see Chapter 6, "System
Manager Settings," in the Reference Guide.
2
Press [Copy].
The Copy Basic Features Screen
Flow of Copy Operations
1-13
3
Place your originals.
Introduction to Copying
1
NOTE
• For instructions on placing your originals, see "Placing Originals," on p. 1-21.
• If Auto Collate in Copy Settings (from the Additional Functions screen) is set to
'On', the Collate or the Offset Collate mode is automatically set when you place
your originals in the feeder. (See "Auto Collate," on p. 9-6.)
4
1-14
Specify the desired copy modes on the Copy Basic Features
screen.
Flow of Copy Operations
NOTE
On the Copy Basic Features screen, you can select the color mode, paper size and
type, copy exposure, original type, copy ratio, two-sided mode, and the desired
Finisher mode.
5
Set the desired copy modes on the Special Features screen.
❑ Press [Special Features].
Flow of Copy Operations
1-15
1
Introduction to Copying
IMPORTANT
• When the Auto-Color Select mode is set and your originals contain color sections,
the machine copies them in the Full Color mode. However, the machine may copy
the color originals in the Black mode under the following conditions. To avoid this,
set the color mode to 'Full Color'. (See "Full Color," on p. 2-87.)
- If the originals contain few color sections
- If the color sections are located only on the left side (within 3/8" (10 mm) from the
left edge) of the originals when placing the originals in the feeder
- If the originals contain light color densities
- If the color sections of the originals are close to black
• When using the platen glass to make copies of a bound original, such as a thick
book, in the Auto-Color Select mode, press the book flat against the platen glass,
leaving no space. Otherwise, a black-and-white original may be detected as a color
original.
❑ Press the desired mode key to set the mode.
Introduction to Copying
1
The Special Features screen is divided into two screens. Press [▼] or [▲] to
display the desired mode.
For more information on the other available functions on the Special Features
screen, see Chapters 3 through 8.
6
Enter the copy quantity.
ABC
1
Help
GHI
DEF
2
5
4
Additional Functions PRS
3
MNO
JKL
8
7
6
Counte
WXY
TUV
S
9
Start
OPER
0
Display Contrast
Clear
NOTE
For instructions on setting the number of copies, see "Copy Quantity," on p. 2-3.
1-16
Flow of Copy Operations
Press
(Start).
p
9
Start
Clear
Processing/Data
1
Error
Power
If the following screen is displayed, follow the instructions on the touch panel
display ➞ press
(Start) once for each original. When scanning is complete,
press [Done].
Copying starts.
IMPORTANT
You cannot change copy mode settings, such as the copy quantity, paper size, and
copy ratio, while the machine is copying.
NOTE
If there is a current job, the machine scans the original, and waits to print it. Printing
starts when the current job is complete.
Flow of Copy Operations
1-17
Introduction to Copying
7
8
If you want to stop, interrupt, or copy another original during
a copy job, follow the instructions below.
● If you want to stop a copy job:
❑ Press
1
Counter Check
Y
Introduction to Copying
(Stop).
Stop
9
Start
Clear
Processing/Data
Error
Power
NOTE
• Several copies may be output even after you press
(Stop).
• You can also cancel a copy job from the System Monitor screen. (See "Canceling a
Copy Job," on p. 1-30.)
● If you want to interrupt a copy job:
❑ To interrupt a copy job when you need to make priority copies, press [Interrupt].
NOTE
For instructions on interrupting a copy job, see "Interrupt Mode," on p. 1-50.
1-18
Flow of Copy Operations
● If you want to start copying the next original while a previous
original is printing:
❑ Press [Done] ➞ place your originals ➞ press
(Start).
Introduction to Copying
1
NOTE
For instructions on reserving a copy job, see "Reserved Copying," on p. 1-35.
9
When copying is complete, remove your originals.
10 If the optional Card Reader-C1 is attached, remove the control
card.
NOTE
For instructions on using the optional Card Reader-C1, see Chapter 3, "Optional
Equipment," in the Reference Guide.
Flow of Copy Operations
1-19
11 If Department ID Management is set, press
(ID).
NOTE
For instructions on using Department ID Management, see Chapter 6, "System
Manager Settings," in the Reference Guide.
Introduction to Copying
1
1-20
Flow of Copy Operations
Placing Originals
NOTE
If the original has too many pages to be placed in the feeder all at once, use the Job Build
mode on the Special Features screen. (See "Job Build," on p. 5-5.)
■ Platen Glass
Place the originals on the platen glass when copying bound originals (such as books and
magazines), originals of heavy or lightweight paper, and transparencies.
■ Feeder
Place the originals in the feeder when you want to copy several originals at the same time,
and press
(Start). The machine automatically feeds the originals to the platen glass
and scans them. Two-sided originals can also be automatically turned over and scanned
as two-sided documents.
Placing Originals
1-21
1
Introduction to Copying
Place your originals on the platen glass or in the feeder, depending on the size and
type of the original, and the copy modes that you want to use.
Orientation
You can place an original either vertically or horizontally. Always align the top edge
of your original with the back edge of the platen glass (by the arrow in the top left
corner), or the back edge of the feeder.
1
Introduction to Copying
Platen Glass
Place the original
face down.
Place the original
face down.
Vertical Placement
Horizontal Placement
Feeder
Place the original
face up.
Vertical Placement
1-22
Placing Originals
Place the original
face up.
Horizontal Placement
- Platen glass: LTR, STMT
- Feeder:
LTR
• Horizontally placed LTR and STMT originals are referred to as LTRR and STMTR.
• 11" x 17" and LGL originals must be placed horizontally.
Platen Glass
You should use the platen glass when copying bound originals (such as books and
magazines), originals of heavy or lightweight paper, and transparencies. You should
also place originals onto the platen glass when you want to copy an
11" x 17" original with an image that extends all the way to the edges without the
periphery of the original being cut off. (See "Manual Paper Selection," on p. 2-9,
and "Entire Image," on p. 2-35.)
NOTE
The machine automatically detects the size of the following originals: 11" x 17", LGL,
LTR, and LTRR.
1
Lift the feeder/platen cover.
Sensor
Placing Originals
1
Introduction to Copying
NOTE
• If the top edge of the original is not aligned with the back edge of the platen glass (by the
arrow in the top left corner), your original may not be scanned correctly, depending on the
copy mode that you have set.
• Originals of the following sizes can be placed either vertically or horizontally. However,
the scanning speed for horizontally placed originals is somewhat slower than for
vertically placed originals. Place originals horizontally when scanning with a Preset
Zoom, such as when enlarging an LTR original onto 11" x 17" paper.
1-23
IMPORTANT
This machine is equipped with an open/close sensor on the feeder/platen cover
(see circled area in the above illustration). When placing originals on the platen
glass, lift the feeder/platen cover approximately 11 7/8" (300 mm) so that the
sensor detaches from the feeder/platen cover. If the sensor does not detach from
the feeder/platen cover, the size of the originals may not be detected correctly.
1
Introduction to Copying
2
Place your originals face down.
The surface of the original that you want to copy must be placed face down.
Align the top edge of your original with the back edge of the platen glass (by the
arrow in the top left corner).
Place books and other bound originals on the platen glass in the same way.
NOTE
When you are enlarging an LTR or STMT original onto 11" x 17" or LGL paper,
place the original horizontally on the platen glass, and align it with the LTRR or
STMTR marks.
1-24
Placing Originals
Gently close the feeder/platen cover.
1
CAUTION
• Close the feeder/platen cover gently to avoid catching your hands, as this
may result in personal injury.
• Do not press down hard on the feeder/platen cover when using the platen
glass to make copies of thick books. Doing so may damage the platen
glass and result in personal injury.
IMPORTANT
• If you are placing the original on the platen glass, the size of the original is detected
after the feeder/platen cover is closed. Be sure to close the feeder/platen cover
before copying.
• If the original contains fine text or print, such as a map, the machine may need to
read or scan the document several times. Do not remove the original from the
platen glass until scanning is complete.
• When using the platen glass to make copies of a bound original, such as a thick
book, in the Auto-Color Select mode, press the book flat against the platen glass,
leaving no space. Otherwise, a black-and-white original may be detected as a color
original.
Placing Originals
1-25
Introduction to Copying
3
NOTE
• Remove the original from the platen glass when scanning is complete.
Introduction to Copying
1
• The size of STMT and STMTR originals cannot be detected. After pressing
(Start), follow the instructions on the screen to specify the original size. You can
also manually select the paper size.
1-26
Placing Originals
Feeder (DADF-L1)
You should use the feeder when you want to copy several originals at the same
time. Place the originals in the feeder and press (Start). The machine
automatically feeds the originals to the platen glass and scans them. Two-sided
originals can also be automatically turned over and scanned as two-sided
documents.
Introduction to Copying
1
You can place the following originals in the feeder's original supply tray:
• Weight:
- 13 to 32 lb bond (50 to 128 g/m2)
• Size:
- 11" x 17", LGL, LTR, LTRR, or STMT
• Tray Capacity:
- 50 sheets (20 lb bond (80 g/m2))
IMPORTANT
• Do not place the following types of originals in the feeder:
- Originals with tears or large binding holes
- Severely curled originals or originals with sharp folds
- Clipped or stapled originals
- Carbon backed paper or other originals which might not feed smoothly
- Transparencies and other highly transparent originals
• If the same original is fed through the feeder repeatedly, the original may fold or become
creased, and make feeding impossible. Limit repeated feeding to a maximum of 30 times
(this number varies, depending on the type and quality of the original).
• If the feeder rollers are dirty from scanning originals written in pencil, perform the feeder
cleaning procedure. (See Chapter 7, "Routine Maintenance," in the Reference Guide.)
• Always smooth out any folds in your originals before placing them in the feeder.
1
Adjust the slide guides to fit the size of your originals.
Placing Originals
1-27
2
Neatly place your originals with the side to be copied face up
in the original supply tray.
Place your originals as far into the feeder as they will go, until the Original Set
indicator is lit.
Introduction to Copying
1
Original Set Indicator
If any dirt on the original scanning area is detected when the originals are placed
in the feeder, the following screen appears. Even though streaks may appear on
the copies, you can proceed to scan your documents by pressing [Done]. It is
recommended, however, that you open the feeder, clean the scanning area, and
then close the feeder. The following screen will not appear once the scanning
area is clean. For instructions on cleaning the original scanning area, see
Chapter 7, "Routine Maintenance," in the Reference Guide.
If you still find streaks on the output after the original scanning area has been
cleaned, specify the Remove Background mode to erase the streaks. (See
"Remove Background," on p. 7-20.)
1-28
Placing Originals
IMPORTANT
• Do not add or remove originals while they are being scanned.
• When scanning is complete, remove the originals from the original output area to
avoid paper jams.
Introduction to Copying
1
Original Output Area
NOTE
• When you are enlarging an LTR or STMT original onto 11" x 17" or LGL paper,
place the original horizontally.
• The scanned originals are output into the original output area in the order they are
fed into the feeder.
• You can place different size originals together in the feeder if you set the Different
Size Originals mode. (See "Different Size Originals," on p. 5-2.)
Placing Originals
1-29
Canceling a Copy Job
Introduction to Copying
1
You can cancel a copy job using the touch panel display, the Stop key, or the
System Monitor screen.
Using the Touch Panel Display
1
Press [Cancel] on the pop-up screen that appears while the
machine is scanning, printing, or waiting to print.
The copy job is canceled.
NOTE
If you cancel a copy job during scanning, be sure to remove the original for that job.
1-30
Canceling a Copy Job
Using the Stop Key
You can cancel a copy job by pressing
Press
1
(Stop).
When canceling a job that is being printed, press [Cancel] on the pop-up screen
that appears during printing.
Counter Check
Y
Stop
9
Start
Clear
Processing/Data
2
Error
Power
Select the copy job that you want to cancel ➞ press [Cancel].
You cannot select multiple jobs and cancel them all at once. Select and cancel
one job at a time.
The copy job is canceled.
3
Press [Resume Copying].
Copying resumes.
Canceling a Copy Job
1-31
Introduction to Copying
1
(Stop).
Using the System Monitor Screen
You can cancel a copy job while it is waiting to be processed or during printing.
1
Press [System Monitor].
2
Press [Copy].
Introduction to Copying
1
1-32
Canceling a Copy Job
3
Press [Status].
Introduction to Copying
1
4
Select the copy job that you want to cancel ➞ press [Cancel].
You cannot select multiple jobs and cancel them all at once. Select and cancel
one job at a time.
Canceling a Copy Job
1-33
5
Press [Yes].
Introduction to Copying
1
If you do not want to cancel the job, press [No].
The copy job is canceled.
NOTE
The canceled job is displayed as <NG> (No Good) on the Log screen.
6
Press [Done].
The display returns to the Copy Basic Features screen.
1-34
Canceling a Copy Job
Reserved Copying
NOTE
• You can reserve up to five copy jobs, including the current job. Interrupt copy jobs are not
included in this count.
• You can set different copy modes and paper sources, including the stack bypass, for
each reserved job. (See "Using the Stack Bypass," on p. 1-37.)
Reserving Copy Jobs
Reserved printing can be specified in the following cases:
■ While the Machine Is Waiting
You can specify copy settings or scan originals while the machine is in the waiting state,
such as when the power is just turned ON, or after a paper jam is cleared. Copying
automatically begins when the machine is ready. The message <Reservation copies can
be made.> appears on the machine when it is able to process reserved copying.
NOTE
You can specify reserved copying while the machine is in the waiting state in the following
cases:
- Between the time that the machine is turned ON and when it is ready to copy
- Between the time that the machine wakes up from the Energy Saver mode and when it
is ready to copy
- After a paper jam is cleared
- After a cover on the main unit or an optional unit, such as a finisher, is opened and
closed
■ While the Machine Is Printing
You can specify copy settings for a new job while the machine is printing. Copying of the
new job automatically begins when the current job is complete.
Reserved Copying
1-35
Introduction to Copying
1
You can set the machine to scan originals even while it is printing or waiting to
process a job.
1
Press [Done] on the pop-up screen that appears while the
machine is printing.
Introduction to Copying
1
If the job displayed on the touch panel display is from a function other than the
Copy function, press [Done] ➞ [Copy] to display the Copy Basic Features
screen.
This part of the procedure is not necessary if the machine is in the waiting state.
2
Place your originals ➞ set the desired copy modes and paper
source.
NOTE
To cancel a previously set copy mode, press
3
Press
(Reset).
(Start).
If you specify a reserved copy job while the machine is in the waiting state,
copying automatically begins when the machine is ready.
1-36
Reserved Copying
If you specify a reserved copy job while the machine is printing, copying of the
new job automatically begins when the current job is complete. If the following
screen is displayed, press [OK] ➞ try reserving the job again after the current job
is complete.
Introduction to Copying
1
Scanning starts.
Using the Stack Bypass
You can perform reserved copying from the stack bypass by specifying in advance
the paper to be loaded for the next job. However, this is possible only if paper is
being fed from the stack bypass for the current job.
The following example assumes that 11" x 17" plain paper is being fed from the
stack bypass for the current job, and that you are selecting LTR plain paper to be
fed from the stack bypass for a reserved job.
NOTE
If Stack Bypass Standard Settings in Common Settings (from the Additional Functions
screen) is set to 'On', reserved copying can be performed only for the registered paper
size and type. (See Chapter 4, "Customizing Settings," in the Reference Guide.)
1
Place your originals ➞ set the desired copy modes.
Reserved Copying
1-37
2
Press [Paper Select] ➞ [Stack Bypass Settings].
Introduction to Copying
1
Normally, when reserved copying is not being set, the Stack Bypass Settings
screen is automatically displayed when paper is loaded into the stack bypass.
3
Select the desired paper size.
NOTE
• If you select [Envelope], [Transparency], [Tracing Paper], or [Labels], make sure
that you do not specify any Finisher modes (Collate, Group, or Staple).
• If Stack Bypass Standard Settings in Common Settings (from the Additional
Functions screen) is set to 'On', and the paper size/type have been stored, the
selected paper size/type are displayed on the screen. (See Chapter 4,
"Customizing Settings," in the Reference Guide.)
● If you want to select a standard paper size:
❑ Select the desired paper size ➞ press [Next].
1-38
Reserved Copying
NOTE
To select an A or B series paper size, press [A/B-size].
❑ Select the desired paper type ➞ press [OK].
Introduction to Copying
1
If you are copying on the back side of a previously printed sheet, press [2nd
Side of 2-Sided Page].
The paper size/type currently loaded and the paper size/type reserved to be
loaded are displayed, as shown on the screen below.
The Last Paper Size/Type
Specified for the Reserved
Copy Job
The Paper Size/Type
Currently Loaded
IMPORTANT
When printing on special types of paper, such as heavy paper or transparencies,
be sure to correctly set the paper type, especially if you are using heavy paper. If
the type of paper is not set correctly, it could adversely affect the quality of the
image. Moreover, the fixing unit may become dirty and require a service repair, or
the paper could jam.
Reserved Copying
1-39
NOTE
• [Transparency] can be selected only if [LTR] is selected as the paper size.
• For more information on the paper types, see Chapter 2, "Basic Operations," in the
Reference Guide.
• If there is more than one reserved job waiting to print, only the last paper size/type
specified for the reserved copy job is shown on the Paper Select screen and Copy
Basic Features screen.
1
Introduction to Copying
● If you want to select a nonstandard paper size:
❑ Press [Irreg. Size].
❑ Enter the size of the paper using the numeric keys on the touch panel display.
❑ Press [X] (horizontal axis) ➞ enter a value.
❑ Press [Y] (vertical axis) ➞ enter a value.
❑ Press [OK].
The display returns to the paper size selection screen.
1-40
Reserved Copying
❑ Press [Next].
❑ Select the desired paper type ➞ press [OK].
If you are copying on the back side of a previously printed sheet, press [2nd
Side of 2-Sided Page].
The paper size/type currently loaded and the paper size/type reserved to be
loaded are displayed, as shown on the screen below.
The Last Paper Size/Type
Specified for the Reserved
Copy Job
The Paper Size/Type
Currently Loaded
Reserved Copying
1-41
1
Introduction to Copying
NOTE
• If you make a mistake when entering values, press [C] on the touch panel display
➞ enter the correct values.
• To enter values in millimeters, press [mm].
• When entering values in millimeters, you can also use
(numeric keys), and
(Clear) to clear your entries.
• If you enter a value outside the setting range, a message prompting you to enter an
appropriate value appears on the screen.
• For instructions on entering values in inches, see Chapter 2, "Basic Operations," in
the Reference Guide.
IMPORTANT
When printing on special types of paper, such as heavy paper or transparencies,
be sure to correctly set the paper type, especially if you are using heavy paper. If
the type of paper is not set correctly, it could adversely affect the quality of the
image. Moreover, the fixing unit may become dirty and require a service repair, or
the paper could jam.
1
Introduction to Copying
NOTE
• For more information on the paper types, see Chapter 2, "Basic Operations," in the
Reference Guide.
• If there is more than one reserved job waiting to print, only the last paper size/type
specified for the reserved copy job is shown on the Paper Select screen and Copy
Basic Features screen.
● If you want to select an envelope size:
❑ Press [Envelope].
❑ Select the desired envelope type ➞ press [OK].
The display returns to the paper size selection screen.
1-42
Reserved Copying
IMPORTANT
If the envelope type is not selected correctly, a paper jam will occur.
❑ Press [OK].
The paper size/type currently loaded and the paper size/type reserved to be
loaded are displayed, as shown on the screen below.
Introduction to Copying
1
The Last Paper Size/Type
Specified for the Reserved
Copy Job
The Paper Size/Type
Currently Loaded
NOTE
If there is more than one reserved job waiting to print, only the last paper size/type
specified for the reserved copy job is shown on the Paper Select screen and Copy
Basic Features screen.
4
Press [Done].
This completes the settings for reserving a copy job using the stack bypass. The
subsequent steps show you how to load paper into the stack bypass and
complete the scanning and printing process of the reserved job.
5
Press
(Start).
p
9
Start
Clear
Processing/Data
Error
Power
Scanning starts.
Reserved Copying
1-43
6
When it is time for the reserved copy job to be printed, lift the
paper retaining lever, load the specified paper into the stack
bypass, then lower the paper retaining lever.
1
Introduction to Copying
Paper Retaining Lever
NOTE
• The specified paper size/type is displayed on the screen when it is time for the
reserved copy job to be printed.
• Make sure to load the same paper size and type selected in step 3 into the stack
bypass. Printing does not start if paper of a different size or type is loaded.
7
Select the desired paper size.
If the following screen is displayed, press [OK] ➞ adjust the width of the slide
guides ➞ specify the desired paper size.
1-44
Reserved Copying
If the following screen is displayed, adjust the width of the slide guides to match
the paper size stored in Stack Bypass Standard Settings, or set Stack Bypass
Standard Settings to 'Off' in Common Settings (from the Additional Functions
screen). (See Chapter 4, "Customizing Settings," in the Reference Guide.)
Introduction to Copying
1
IMPORTANT
Set the paper size to the same size as the paper loaded in the stack bypass.
● If you want to select a standard paper size:
❑ Select the desired paper size ➞ press [Next].
NOTE
To select an A or B series paper size, press [A/B-size].
Reserved Copying
1-45
❑ Select the desired paper type ➞ press [Next].
Introduction to Copying
1
If you are copying on the back side of a previously printed sheet, press
[2nd Side of 2-Sided Page].
IMPORTANT
When printing on special types of paper, such as heavy paper or transparencies,
be sure to correctly set the paper type, especially if you are using heavy paper. If
the type of paper is not set correctly, it could adversely affect the quality of the
image. Moreover, the fixing unit may become dirty and require a service repair, or
the paper could jam.
● If you want to select a nonstandard paper size:
❑ Press [Irreg. Size].
❑ Enter the size of the paper using the numeric keys on the touch panel display.
❑ Press [X] (horizontal axis) ➞ enter a value.
❑ Press [Y] (vertical axis) ➞ enter a value.
1-46
Reserved Copying
❑ Press [OK].
Introduction to Copying
1
The display returns to the paper size selection screen.
NOTE
• If you make a mistake when entering values, press [C] on the touch panel display
➞ enter the correct values.
• To enter values in millimeters, press [mm].
• When entering values in millimeters, you can also use
(numeric keys), and
(Clear) to clear your entries.
• If you enter a value outside the setting range, a message prompting you to enter an
appropriate value appears on the screen.
• For instructions on entering values in inches, see Chapter 2, "Basic Operations," in
the Reference Guide.
❑ Press [Next].
❑ Select the desired paper type ➞ press [Next].
If you are copying on the back side of a previously printed sheet, press
[2nd Side of 2-Sided Page].
Reserved Copying
1-47
IMPORTANT
When printing on special types of paper, such as heavy paper or transparencies,
be sure to correctly set the paper type, especially if you are using heavy paper. If
the type of paper is not set correctly, it could adversely affect the quality of the
image. Moreover, the fixing unit may become dirty and require a service repair, or
the paper could jam.
1
Introduction to Copying
● If you want to select an envelope size:
❑ Press [Envelope].
❑ Select the desired envelope type ➞ press [OK].
The display returns to the paper size selection screen.
IMPORTANT
If the envelope type is not selected correctly, a paper jam will occur.
❑ Press [Next].
1-48
Reserved Copying
Confirm that the paper retaining lever is securely set ➞ press
[OK].
1
Introduction to Copying
8
Printing starts.
Reserved Copying
1-49
Interrupt Mode
1
Introduction to Copying
This mode enables you to interrupt the current job or a reserved job to make priority
copies. This mode is useful if you need to make a rush copy during a long copy job.
NOTE
You can make interrupt copies whenever the machine is ready to scan.
1
Press [Interrupt].
If you want to make copies after changing the Department ID while Department
ID Management is enabled, press
(ID) ➞ enter the Department ID and
password using
(numeric keys). (See Chapter 6, "System Manager
Settings," in the Reference Guide.)
1-50
Interrupt Mode
NOTE
The current job does not stop printing immediately after you press [Interrupt].
Printing of the current job stops only when the actual printing of the priority or
interrupt copy starts.
Introduction to Copying
1
2
Place your originals ➞ set the desired copy modes.
NOTE
• To cancel the Interrupt mode, press [Interrupt].
• To cancel previously set copy modes, press
(Reset). (The Interrupt mode itself is
not canceled.)
3
Press
(Start).
When the interrupt copy job starts, [Interrupt] is grayed out.
4
Once the originals are scanned, remove them from the
machine.
When the interrupt copy job is complete, the interrupted job resumes.
Interrupt Mode
1-51
IMPORTANT
• If you want to continue making interrupt copies, wait until the current interrupt copy
job is complete (end of printing). Then, repeat steps 2 to 4.
• If the original contains fine text or print, such as a map, the machine may need to
read or scan the document several times. Do not remove the original from the
platen glass until scanning is complete.
Introduction to Copying
1
1-52
Interrupt Mode
Sample Set
IMPORTANT
[Sample Set] appears only if you set to make multiple copies of your original in the
Collate, Offset Collate, Rotate Collate, Staple, Cover/Sheet Insertion, or Booklet mode.
[Sample Set] does not appear if the Group mode is set.
NOTE
The machine's counter counts the sample print as a print.
1
Place your originals ➞ set the desired copy modes.
2
Press [Sample Set] ➞
(Start).
If the original is placed on the platen glass, follow the instructions that appear on
the touch panel display ➞ press (Start) once for each original. When scanning
is complete, press [Done].
Sample Set
1-53
Introduction to Copying
1
This mode enables you to check the copy result before making multiple copies.
Copying starts and one sample set is output.
Introduction to Copying
1
NOTE
Although only one sample set is output, the number of copies that you specify for
the job does not change.
3
Check the sample set ➞ select [Start Print], [Cancel], or
[Change Settings].
● To print the remaining prints:
❑ Press [Start Print].
● To cancel copying:
❑ Press [Cancel].
1-54
Sample Set
● To change the copy settings:
❑ Press [Change Settings] ➞ change the necessary settings ➞ press [Done].
To enter the number of copies, use
clear your entry.
-
(numeric keys) and
(Clear) to
To change the exposure, press [ ] or [ ].
To change the paper size, press [Paper Select]. (See "Paper Selection," on p.
2-6.)
To collate the copies, press [Finisher]. (See "Collating Copies," on p. 2-56.)
To make two-sided copies, press [2-Sided Copy].
To set a margin for binding, press [Margin]. (See "Margin Mode," on p. 4-8.)
To make color balance adjustments, press [Color Balance]. (See "Adjusting
the Color," on p. 7-2.)
If you print one sample set and then change the setting, pressing [Sample
Set] prints the first set with the new setting.
If you want to check the changes that you have made, press [Sample Set] ➞
repeat step 3.
Sample Set
1-55
Introduction to Copying
1
Confirming Settings
1
Introduction to Copying
Copy mode settings that you have specified, including those that are set from the
Special Features screen, are all grouped together onto one screen so you can
easily check them.
1
Press [Setting Confirmation].
The Setting Confirmation screen is displayed, showing the selected copy mode
settings.
2
Check the settings ➞ press [Done].
If 10 or more copy modes are set, press [▼] to display the next screen. To return
to the previous screen, press [▲].
1-56
Confirming Settings
The display returns to the Copy Basic Features screen.
NOTE
A right triangle ( ) on a copy mode setting key indicates that more setting screens
are available by pressing the key.
Introduction to Copying
1
Confirming Settings
1-57
Changing/Canceling Selected Settings
1
Introduction to Copying
You can use the Setting Confirmation screen to change or cancel selected copy
modes.
1
Press [Setting Confirmation].
The Setting Confirmation screen is displayed, showing the selected copy mode
settings.
2
Press the key of the copy mode to be changed or canceled.
If 10 or more copy modes are set, press [▼] to display the next screen. To return
to the previous screen, press [▲].
The settings screen for the selected copy mode is displayed.
1-58
Changing/Canceling Selected Settings
NOTE
• A right triangle ( ) on a copy mode setting key indicates that more setting screens
are available by pressing the key.
• If you select a copy mode setting key without a right triangle ( ) and then press
[Done], the selected copy mode is canceled.
1
Change or cancel the selected copy mode (for example,
Sharpness).
● To change a copy mode:
❑ Perform the same steps used for setting the mode. Change the setting as you
desire ➞ press [OK].
The display returns to the Setting Confirmation screen.
● To cancel a copy mode:
❑ Press [Cancel].
The display returns to the Setting Confirmation screen.
Changing/Canceling Selected Settings
1-59
Introduction to Copying
3
4
Press [Done].
Introduction to Copying
1
The display returns to the Copy Basic Features screen.
1-60
Changing/Canceling Selected Settings
Basic Copying Features
2
CHAPTER
This chapter describes the basic copying features.
Copy Quantity . . . . . . . . . . . . . . . . . . . . . . . . . . . . . . . . . . . . . . . . . . . . . . . . . . . . . . . . . . 2-3
Specifying the Required Number of Copies . . . . . . . . . . . . . . . . . . . . . . . . . . . . . . . . . . . . . . . .2-3
Changing the Copy Quantity . . . . . . . . . . . . . . . . . . . . . . . . . . . . . . . . . . . . . . . . . . . . . . . . . . . .2-4
Paper Selection . . . . . . . . . . . . . . . . . . . . . . . . . . . . . . . . . . . . . . . . . . . . . . . . . . . . . . . . 2-6
Automatic Paper Selection . . . . . . . . . . . . . . . . . . . . . . . . . . . . . . . . . . . . . . . . . . . . . . . . . . . . . .2-7
Manual Paper Selection . . . . . . . . . . . . . . . . . . . . . . . . . . . . . . . . . . . . . . . . . . . . . . . . . . . . . . . .2-9
Copy Exposure and Original Type Settings . . . . . . . . . . . . . . . . . . . . . . . . . . . . . . . . . . 2-17
Manual Exposure Adjustment . . . . . . . . . . . . . . . . . . . . . . . . . . . . . . . . . . . . . . . . . . . . . . . . . .2-18
Original Type Selection . . . . . . . . . . . . . . . . . . . . . . . . . . . . . . . . . . . . . . . . . . . . . . . . . . . . . . .2-19
Automatic Exposure Adjustment . . . . . . . . . . . . . . . . . . . . . . . . . . . . . . . . . . . . . . . . . . . . . . . .2-21
Exposure Adjustment during Printing. . . . . . . . . . . . . . . . . . . . . . . . . . . . . . . . . . . . . . . . . . . . .2-23
Changing the Copy (Zoom) Ratio . . . . . . . . . . . . . . . . . . . . . . . . . . . . . . . . . . . . . . . . . . 2-24
Preset Zoom . . . . . . . . . . . . . . . . . . . . . . . . . . . . . . . . . . . . . . . . . . . . . . . . . . . . . . . . . . . . . . . .2-27
Zoom by Percentage . . . . . . . . . . . . . . . . . . . . . . . . . . . . . . . . . . . . . . . . . . . . . . . . . . . . . . . . .2-30
Auto Zoom . . . . . . . . . . . . . . . . . . . . . . . . . . . . . . . . . . . . . . . . . . . . . . . . . . . . . . . . . . . . . . . . .2-32
Entire Image . . . . . . . . . . . . . . . . . . . . . . . . . . . . . . . . . . . . . . . . . . . . . . . . . . . . . . . . . . . . . . . .2-35
Reducing/Enlarging Using the Original and Copy Sizes . . . . . . . . . . . . . . . . . . . . . . . . . . . . . .2-36
Setting the X and Y Axes Independently . . . . . . . . . . . . . . . . . . . . . . . . . . . . . . . . . . . . . . . . . .2-42
Multi-Page Enlargement . . . . . . . . . . . . . . . . . . . . . . . . . . . . . . . . . . . . . . . . . . . . . . . . . . . . . . .2-46
Collating Copies . . . . . . . . . . . . . . . . . . . . . . . . . . . . . . . . . . . . . . . . . . . . . . . . . . . . . . . 2-56
Page Order (Collate) . . . . . . . . . . . . . . . . . . . . . . . . . . . . . . . . . . . . . . . . . . . . . . . . . . . . . . . . .2-61
Same Page (Group) . . . . . . . . . . . . . . . . . . . . . . . . . . . . . . . . . . . . . . . . . . . . . . . . . . . . . . . . . .2-64
Page Order (Staple) . . . . . . . . . . . . . . . . . . . . . . . . . . . . . . . . . . . . . . . . . . . . . . . . . . . . . . . . . .2-67
Two-Sided Copying . . . . . . . . . . . . . . . . . . . . . . . . . . . . . . . . . . . . . . . . . . . . . . . . . . . . . 2-73
1 to 2-Sided . . . . . . . . . . . . . . . . . . . . . . . . . . . . . . . . . . . . . . . . . . . . . . . . . . . . . . . . . . . . . . . .2-75
2 to 2-Sided . . . . . . . . . . . . . . . . . . . . . . . . . . . . . . . . . . . . . . . . . . . . . . . . . . . . . . . . . . . . . . . .2-78
2 to 1-Sided . . . . . . . . . . . . . . . . . . . . . . . . . . . . . . . . . . . . . . . . . . . . . . . . . . . . . . . . . . . . . . . .2-80
Book to 2-Sided . . . . . . . . . . . . . . . . . . . . . . . . . . . . . . . . . . . . . . . . . . . . . . . . . . . . . . . . . . . . .2-83
Changing Color Modes . . . . . . . . . . . . . . . . . . . . . . . . . . . . . . . . . . . . . . . . . . . . . . . . . . 2-86
Automatic Color Selection . . . . . . . . . . . . . . . . . . . . . . . . . . . . . . . . . . . . . . . . . . . . . . . . . . . . .2-86
2-1
2. Basic Copying Features
Full Color . . . . . . . . . . . . . . . . . . . . . . . . . . . . . . . . . . . . . . . . . . . . . . . . . . . . . . . . . . . . . . . . . . 2-87
Black . . . . . . . . . . . . . . . . . . . . . . . . . . . . . . . . . . . . . . . . . . . . . . . . . . . . . . . . . . . . . . . . . . . . . 2-89
Basic Copying Features
2
2-2
Copy Quantity
You can make up to 999 copies for each copy job. However, this number can be
changed. For more information, contact your local authorized Canon dealer.
2
1
Basic Copying Features
Specifying the Required Number of Copies
Press
(numeric keys) to enter the desired copy
quantity (1 to 999).
ABC
1
Help
GHI
DEF
2
MNO
JKL
5
4
Additional Functions PRS
3
8
7
6
Counte
WXY
TUV
S
9
Start
OPER
0
Display Contrast
Clear
The copy quantity appears on the right side of the Copy Basic Features screen.
IMPORTANT
You cannot change the copy quantity while the machine is copying.
NOTE
The maximum number of copies allowed varies, according to the copy mode.
Copy Quantity
2-3
Changing the Copy Quantity
1
Press
PRS
(Clear) to clear the entered number.
8
7
Counter Check
WXY
TUV
Stop
9
Start
OPER
0
2
Basic Copying Features
st
Clear
Processing/Data
2
Error
Powe
Press
(numeric keys) to enter the desired copy
quantity (1 to 999).
ABC
1
Help
GHI
DEF
2
MNO
JKL
5
4
Additional Functions PRS
3
8
7
6
Counte
WXY
TUV
S
9
Start
OPER
0
Display Contrast
Clear
The copy quantity appears on the right side of the Copy Basic Features screen.
2-4
Copy Quantity
IMPORTANT
You cannot change the copy quantity while the machine is copying.
Basic Copying Features
2
Copy Quantity
2-5
Paper Selection
You can manually specify a paper size or set the machine to automatically select
the paper size for you.
2
Basic Copying Features
IMPORTANT
If you want to copy an 11" x 17" original with an image that extends all the way to the
edges without the periphery of the original being cut off, load the stack bypass with
12 5/8" x 17 11/16" or 12" x 18" paper, or load a paper drawer with 12" x 18" paper. (See
"Platen Glass," on p. 1-23, and "Entire Image," on p. 2-35.)
NOTE
• If you are copying an original with an image that extends all the way to the edges onto the
same size paper at a copy ratio of 100%, the periphery of the original image may be cut
off slightly on the copy. For more information on how much may be cut off, look under the
margin areas in the Specifications table in Chapter 9 "Appendix," in the Reference Guide.
• If you select the Entire Image mode, the copied image is automatically reduced slightly
based on the copy paper size and the image size. As a result, the entire original image is
reproduced on the copy without being cut off. (See "Entire Image," on p. 2-35.)
• If you select [Envelope], [Transparency], [Tracing Paper], or [Labels], make sure that you
do not specify any Finisher modes (Collate, Group, or Staple).
• If Stack Bypass Standard Settings in Common Settings (from the Additional Functions
screen) is set to 'On', and the paper size/type have been stored, the selected paper size/
type are displayed on the screen. (See Chapter 4, "Customizing Settings," in the
Reference Guide.)
• For instructions on loading paper into the stack bypass, see Chapter 2, "Basic
Operations," in the Reference Guide.
• The default setting is 'Auto'.
2-6
Paper Selection
Automatic Paper Selection
The machine automatically selects the copy paper size.
NOTE
If Drawer Eligibility For APS/ADS in Common Settings (from the Additional Functions
screen) is set to 'Off' for a particular paper source, you cannot make copies on paper
loaded in that paper source in the Automatic Paper Selection mode. (See Chapter 4,
"Customizing Settings," in the Reference Guide.)
1
Place your originals ➞ press [Paper Select].
Paper Selection
2-7
2
Basic Copying Features
IMPORTANT
• The Automatic Paper Selection mode cannot be used with the Auto Zoom, Auto XY
Zoom, Multi-Page Enlargement (by selecting the number of output pages), Rotate
Collate, Rotate Group, Saddle Stitch, Image Combination, Booklet, or Image Repeat
(Auto) mode.
• If the Different Size Originals mode is specified in combination with the Shift mode or the
Cover/Sheet Insertion mode, you cannot use the Automatic Paper Selection mode.
• You cannot use the Automatic Paper Selection mode when copying the following types of
originals. Copy these originals using the Manual Paper Selection mode.
- Nonstandard size originals
- Highly transparent originals, such as transparencies
- Originals with an extremely dark background
- STMT, STMTR, or smaller size originals (however, STMT originals can be detected
when placed in the feeder)
2
Press [Auto] ➞ [Done].
Basic Copying Features
2
The following screen is displayed.
NOTE
When the feeder/platen cover is closed, the paper source holding that paper size is
highlighted along with [Auto].
3
Press
(Start).
Copying starts.
2-8
Paper Selection
Manual Paper Selection
You can make copies after manually selecting the paper size and type of paper
loaded in the paper sources.
1
Place your originals ➞ press [Paper Select].
NOTE
When the feeder/platen cover is closed, the paper source holding that paper size is
highlighted along with [Auto].
Paper Selection
2-9
2
Basic Copying Features
NOTE
You can copy onto envelopes, such as your company logo. You can load envelopes in
either the stack bypass or the paper drawer in which the optional Envelope Feeder
Attachment-C1 is attached. For instructions on loading envelopes in the stack bypass,
see Chapter 2, "Basic Operations," in the Reference Guide. For instructions on loading
envelopes in a paper drawer, see Chapter 3, "Optional Equipment," in the Reference
Guide.
2
Select the desired paper size.
Basic Copying Features
2
Feeder (DADF-L1), Finisher-P1, and
Cassette Feeding Unit-Y1 are attached.
Feeder (DADF-L1), Saddle Finisher-Q2,
Additional Finisher Tray-A1, Puncher Unit-M1,
Cassette Feeding Unit-Y1, and
Paper Deck-Q1 are attached.
To select the stack bypass for the current or reserved job, press [Stack Bypass
Settings]. To set Stack Bypass Settings, proceed to step 3. If you do not want to
set Stack Bypass Settings, proceed to step 5.
2-10
Paper Selection
2
Basic Copying Features
NOTE
• The paper sizes/types are indicated by icons on the touch panel display, in the
order in which they are loaded in the paper drawers.
• Icons indicating the type of paper loaded in each paper drawer can be displayed on
paper selection screens, if you store that information into the machine beforehand.
(See Chapter 4, "Customizing Settings," in the Reference Guide.)
•
indicates that the paper is loaded vertically, and
indicates that the paper is
loaded horizontally. The suffix <R> (such as in LTRR) used in paper size
designations indicates that the paper is loaded in a paper drawer or the stack
bypass horizontally.
3
If you select [Stack Bypass Settings]:
NOTE
If Stack Bypass Standard Settings in Common Settings (from the Additional
Functions screen) is set to 'On', reserved copying can be performed only for the
registered paper size and type. (See Chapter 4, "Customizing Settings," in the
Reference Guide.)
Paper Selection
2-11
● If you want to select a standard paper size:
❑ Select the desired paper size ➞ press [Next].
Basic Copying Features
2
NOTE
To select an A or B series paper size, press [A/B-size].
❑ Select the desired paper type ➞ press [OK].
If you are copying on the back side of a previously printed sheet, press
[2nd Side of 2-Sided Page].
IMPORTANT
When printing on special types of paper, such as heavy paper or transparencies,
be sure to correctly set the paper type, especially if you are using heavy paper. If
the type of paper is not set correctly, it could adversely affect the quality of the
image. Moreover, the fixing unit may become dirty and require a service repair, or
the paper could jam.
NOTE
• [Transparency] can be selected only if [LTR] is selected as the paper size.
• For more information on paper types, see Chapter 2, "Basic Operations," in the
Reference Guide.
2-12
Paper Selection
● If you want to select a nonstandard paper size:
❑ Press [Irreg. Size].
❑ Enter the size of the paper using the numeric keys on the touch panel display.
❑ Press [X] (horizontal axis) ➞ enter a value.
❑ Press [Y] (vertical axis) ➞ enter a value.
❑ Press [OK].
The display returns to the paper size selection screen.
NOTE
• If you make a mistake when entering values, press [C] on the touch panel display
➞ enter the correct values.
• To enter values in millimeters, press [mm].
• When entering values in millimeters, you can also use
(numeric keys), and
(Clear) to clear your entries.
• If you enter a value outside the setting range, a message prompting you to enter an
appropriate value appears on the screen.
• For instructions on entering values in inches, see Chapter 2, "Basic Operations," in
the Reference Guide.
Paper Selection
2-13
Basic Copying Features
2
❑ Press [Next].
❑ Select the desired paper type ➞ press [OK].
Basic Copying Features
2
If you are copying on the back side of a previously printed sheet, press
[2nd Side of 2-Sided Page].
IMPORTANT
• When printing on special types of paper, such as heavy paper or transparencies,
be sure to correctly set the paper type, especially if you are using heavy paper. If
the type of paper is not set correctly, it could adversely affect the quality of the
image. Moreover, the fixing unit may become dirty and require a service repair, or
the paper could jam.
• If you select a nonstandard paper size, the Multi-Page Enlargement, Rotate
Collate, Rotate Group, Offset Collate, Offset Group, Staple Collate, 1 2-Sided,
2 2-Sided, Book 2-Sided, Two-page Separation, Image Combination, Booklet, or
Transparency Interleaving mode cannot be specified.
NOTE
For more information on paper types, see Chapter 2, "Basic Operations," in the
Reference Guide.
2-14
Paper Selection
● If you want to select an envelope size:
❑ Press [Envelope].
Basic Copying Features
2
❑ Select the desired envelope type ➞ press [OK].
The display returns to the paper size selection screen.
IMPORTANT
If the envelope type is not selected correctly, a paper jam will occur.
❑ Press [OK].
Paper Selection
2-15
4
Press [Done].
Basic Copying Features
2
The display returns to the Copy Basic Features screen, and the selected paper
size and type are displayed.
5
Press
(Start).
Copying starts.
NOTE
To cancel all settings and return the machine to the Standard mode, press
(Reset).
2-16
Paper Selection
Copy Exposure and Original Type Settings
You can set the desired copy exposure and select the original type before scanning
the original.
■ Manual Exposure Adjustment
You can manually adjust the copy exposure to the most appropriate level for the original.
■ Original Type Selection
The machine is capable of processing and producing copies according to the type of the
original. You can manually select the original type so that the machine reproduces copies
as faithful as possible to the original. The following four original type modes are available:
Text/Photo/Map
Printed Image
Photo
Text
• Text/Photo/Map Mode
This mode is best suited for making copies of originals containing text, images/photos,
as well as fine graphics, such as those on a map.
• Printed Image Mode
This mode is best suited for making copies of images printed with halftone dots.
• Photo Mode
This mode is best suited for making copies of photos printed on photographic paper.
• Text Mode
This mode is best suited for making copies of text originals. Blueprints or pencil drawn
originals can also be copied clearly.
■ Automatic Exposure Adjustment
This mode enables you to set the machine to automatically adjust the exposure to the
level best suited to the quality of the original.
■ Exposure Adjustment during Printing
You can change the copy exposure while the machine is printing.
Copy Exposure and Original Type Settings
2-17
Basic Copying Features
2
NOTE
You can change the exposure while the machine is printing.
Manual Exposure Adjustment
You can manually adjust the copy exposure to the most appropriate level for the
original.
1
Place your originals ➞ press [ ] or [ ].
Basic Copying Features
2
Press [ ] to move the indicator to the left to make the exposure lighter, or press
[ ] to move it to the right to make the exposure darker.
2
Press
(Start).
Copying starts.
NOTE
To cancel all settings and return the machine to the Standard mode, press
(Reset).
2-18
Copy Exposure and Original Type Settings
Original Type Selection
The machine is capable of processing and producing copies according to the type
of the original. You can manually select the original type so that the machine
reproduces copies as faithful as possible to the original. The following four original
type modes are available.
NOTE
If the original is a transparency, select the original type ➞ adjust the exposure to the most
appropriate level for the original.
■ Text/Photo/Map Mode
This mode is best suited for making copies of originals containing text, images/photos, as
well as fine graphics, such as those on a map.
■ Printed Image Mode
This mode is best suited for making copies of images printed with halftone dots.
■ Photo Mode
This mode is best suited for making copies of photos printed on photographic paper.
■ Text Mode
This mode is best suited for making copies of text originals. Blueprints or pencil drawn
originals can also be copied clearly.
Copy Exposure and Original Type Settings
2-19
2
Basic Copying Features
IMPORTANT
• Combinations of these four modes (Text/Photo/Map, Printed Image, Photo, and Text)
cannot be selected at the same time. If you select one of these modes, the previously set
mode is canceled.
• If you make copies of an original containing halftones, such as a printed image, the moiré
effect (a shimmering, wavy pattern) may occur. In this case, you can lessen the moiré
effect by using the Sharpness mode. (See "Adjusting the Contrast (Sharpness)," on p.
7-14.)
1
Place your originals ➞ press the original type drop-down list
➞ select the original type ([Text/Photo/Map], [Printed Image],
[Photo], or [Text]).
Basic Copying Features
2
Original Type
● If you want to adjust the text/photo/map processing priority level:
❑ Press the original type drop-down list ➞ press [Priority Level].
2-20
Copy Exposure and Original Type Settings
❑ Press [Text Priority] or [Photo Priority] to adjust the degree of priority for text or
photo images ➞ press [OK].
Priority Level
[Text Priority]:
Priority is given to the faithful reproduction of text.
[Photo Priority]:
Priority is given to the faithful reproduction of photos/images,
with as little moiré effect as possible.
The display returns to the Copy Basic Features screen.
2
Press
(Start).
Copying starts.
NOTE
To cancel all settings and return the machine to the Standard mode, press
(Reset).
Automatic Exposure Adjustment
This mode enables you to set the machine to automatically adjust the exposure to
the level best suited to the quality of the original.
NOTE
There are two types of automatic copy exposure adjustments; the Remove Background
mode which enables you to scan by erasing the background color of the original, and the
Prevent Bleeding mode which enables you to prevent the original image on the reverse
side of the original from appearing on the paper. Select the desired exposure adjustment
mode depending on the type of original. The Remove Background mode is selected by
default. (See "Image Quality Adjustment," on p. 7-20.)
Copy Exposure and Original Type Settings
2-21
Basic Copying Features
2
1
Place your originals ➞ press [A].
Basic Copying Features
2
The machine automatically adjusts the exposure to the level best suited to the
quality of the original.
NOTE
An automatic copy exposure adjustment may not work with transparencies. In this
case, adjust the exposure manually by pressing [ ] or [ ].
2
Press
(Start).
Copying starts.
NOTE
To cancel all settings and return the machine to the Standard mode, press
(Reset).
2-22
Copy Exposure and Original Type Settings
Exposure Adjustment during Printing
You can change the copy exposure while the machine is printing.
Press [ ] or [ ] on the screen that is displayed while the
machine is printing.
2
Basic Copying Features
1
Press [ ] to move the indicator to the left to make the exposure lighter, or press
[ ] to move it to the right to make the exposure darker.
The copy exposure is changed. When printing is complete, the display returns to
the Copy Basic Features screen.
NOTE
If the copy exposure has been changed on the Copy Basic Features screen,
adjusting the exposure during printing may not have any effect on the output.
Copy Exposure and Original Type Settings
2-23
Changing the Copy (Zoom) Ratio
You can set the machine to adjust the copy ratio automatically, or you can specify
the copy ratio manually.
2
Basic Copying Features
The following seven types of copy ratio settings are available.
NOTE
To set the copy ratio to 100%, press [Direct].
■ Preset Zoom
The machine offers you a variety of preset copy ratios to reduce or enlarge standard size
originals to another standard paper size.
■ Zoom by Percentage
You can reduce or enlarge originals by any copy ratio, in 1% increments. The copy ratios
for the horizontal (X) and vertical (Y) axes are the same.
Original
Copies
■ Auto Zoom
You can set the machine to automatically select the appropriate copy ratio based on the
size of the original and the selected copy paper. The copy ratios for the horizontal (X) and
vertical (Y) axes are the same.
Original
2-24
Changing the Copy (Zoom) Ratio
Copy
■ Entire Image
If you are copying an original with an image that extends all the way to the edges onto the
same size paper at a copy ratio of 100%, the periphery of the original image may be cut
off slightly on the copy. However, if you set the Entire Image mode, the image is slightly
reduced so that the entire image is copied without being cut off.
■ Reducing/Enlarging Using the Original and Copy Sizes
The Zoom Program mode enables you to enter measurements for the original and copy
sizes, then allows the machine to automatically calculate and set the appropriate copy
ratio.
• Making Copies with the Same XY Copy Ratio
The copy ratio you set is used for both the horizontal (X) and vertical (Y) axes.
Original
X = 4" (100 mm)
LTR
Copy
X = 5 3/16" (132 mm)
LTR
Changing the Copy (Zoom) Ratio
2
Basic Copying Features
The following two Zoom Program modes are available:
2-25
• Making Copies with Different XY Copy Ratios (XY Zoom)
You can set different copy ratios for the horizontal (X) and vertical (Y) axes.
Copy
Original
Y = 4 3/4"
(120 mm)
Y = 8 5/8"
(218 mm)
Basic Copying Features
2
X = 4" (100 mm)
X = 3 3/4" (94 mm)
LTR
LTR
■ Setting the X and Y Axes Independently
The XY Zoom mode enables you to make reduced or enlarged originals with different XY
copy ratios expressed in percentage.
• Manually Specifying the Copy Ratio (XY Zoom)
You can manually set different copy ratios for the horizontal (X) and vertical (Y) axes,
expressed in percentages and in 1% increments.
Copy
Original
Enlarging and
Reducing with
Different XY
Copy Ratios
Y = 76%
Y = 100%
X = 100%
LTR
2-26
Changing the Copy (Zoom) Ratio
X = 140%
LTR
• Automatically Specifying the Copy Ratio (Auto XY Zoom)
The XY copy ratio is automatically set to suit the size of the selected paper.
Copy
Original
LTRR
Selected
Basic Copying Features
2
LTRR
LTR
■ Multi-Page Enlargement
The Multi-Page Enlargement mode enables you to enlarge an original over multiple
sheets of paper.
Original
Copy
Copies Cut and
Pasted Together
Preset Zoom
The machine offers you a variety of preset copy ratios to reduce or enlarge
standard size originals to another standard paper size.
IMPORTANT
• Place the originals horizontally in the following cases:
- If you are enlarging LTR originals to 11" x 17"
- If you are enlarging STMT originals to 11" x 17" (only when the original is placed on the
platen glass)
• If you are reducing 11" x 17" originals to LTR with Auto Orientation in Copy Settings (from
the Additional Functions screen) set to 'Off', load LTRR paper in a paper drawer or the
stack bypass.
Changing the Copy (Zoom) Ratio
2-27
NOTE
Placing an original horizontally means setting the original with the longer side sideways.
(See "Orientation," on p. 1-22.)
■ Reduction
The available preset copy ratios for reducing originals are:
• LGL ➞ LTR (78%)
• 11" x 17" ➞ LGL or 11" x 15" ➞ LTR (73%)
• 11" x 17" ➞ LTR (64%)
2
Basic Copying Features
• 11" x 17" ➞ STMT (50%)
• Minimum (25%)
■ Enlargement
The available preset copy ratios for enlarging originals are:
• Maximum (400%)
• STMT ➞ 11" x 17" (200%)
• LTR ➞ 11" x 17" (129%)
• LGL ➞ 11" x 17" (121%)
1
2-28
Place your originals ➞ press [Paper Select].
Changing the Copy (Zoom) Ratio
2
Press [Auto] ➞ [Done].
The display returns to the Copy Basic Features screen.
NOTE
• The default setting is 'Auto'.
• When the feeder/platen cover is closed, the paper source holding that paper size is
highlighted along with [Auto].
3
Press [Copy Ratio].
Changing the Copy (Zoom) Ratio
2-29
Basic Copying Features
2
4
To reduce the original image, select a preset reduction ratio.
To enlarge the original image, select a preset enlargement
ratio. Following your selection, press [Done].
Enlargement Ratios
Basic Copying Features
2
Reduction Ratios
The selected mode is set, the display returns to the Copy Basic Features screen,
and the selected copy ratio is displayed.
5
Press
(Start).
Copying starts.
NOTE
• To return the copy ratio to 100%, press [Direct].
• To cancel all settings and return the machine to the Standard mode, press
(Reset).
Zoom by Percentage
You can reduce or enlarge originals by any copy ratio, in 1% increments. Any copy
ratio from 25% to 400% can be set. The same copy ratio is used for the horizontal
(X) and vertical (Y) axes.
2-30
Changing the Copy (Zoom) Ratio
1
Place your originals ➞ press [Copy Ratio].
2
Basic Copying Features
2
Press [ ] or [+] to set a copy ratio ➞ press [Done].
You can also use
your entries.
-
(numeric keys) to enter values, and
(Clear) to clear
You can change the value by pressing [ ] or [+], even if you have entered the
value using
(numeric keys).
The selected mode is set, the display returns to the Copy Basic Features screen,
and the specified copy ratio is displayed.
NOTE
If you enter a value outside the setting range, a message prompting you to enter an
appropriate value appears on the screen.
3
Press
(Start).
Copying starts.
Changing the Copy (Zoom) Ratio
2-31
NOTE
• To return the copy ratio to 100%, press [Direct].
• To cancel all settings and return the machine to the Standard mode, press
(Reset).
Auto Zoom
You can set the machine to automatically select the appropriate copy ratio based on
the size of the original and the selected copy paper. The same copy ratio is used for
the horizontal (X) and vertical (Y) axes. Any copy ratio from 25% to 400% may be
used.
Basic Copying Features
2
IMPORTANT
• You cannot use the Auto setting on the Copy Ratio screen with the Automatic Paper
Selection or Image Repeat (Auto) mode.
• You cannot copy highly transparent originals, such as transparencies, using the Auto
setting on the Copy Ratio screen. Use the Preset Zoom or Zoom by Percentage mode
instead.
• To use the Auto setting on the Copy Ratio screen, your originals must conform to one of
the standard paper sizes:
11" x 17", LGL, LTR, LTRR, STMT, or STMTR. (You can place STMTR originals only on
the platen glass.)
NOTE
If you notice a difference between the automatic copy ratio and the actual copy size, you
can try to eliminate this error by making a Zoom Fine Adjustment in Adjustment/Cleaning
(from the Additional Functions screen). (See Chapter 4, "Customizing Settings," in the
Reference Guide.)
1
2-32
Place your originals ➞ press [Paper Select].
Changing the Copy (Zoom) Ratio
2
Select the desired paper size ➞ press [Done].
The display returns to the Copy Basic Features screen.
IMPORTANT
Make sure that you select a paper size other than [Auto]. If you do not select a
paper size, the copy ratio is automatically set to match the size of the paper loaded
in Paper Drawer 1.
3
Press [Copy Ratio].
Changing the Copy (Zoom) Ratio
2-33
Basic Copying Features
2
4
Press [Auto] ➞ [Done].
Basic Copying Features
2
The selected mode is set, the display returns to the Copy Basic Features screen,
and the copy ratio generated by the machine is displayed.
5
Press
(Start).
Copying starts.
NOTE
• If the original is placed on the platen glass, the copy ratio automatically appears
when the feeder/platen cover is closed, provided that the original size can be
detected.
• If the original is placed in the feeder, the copy ratio appears when
(Start) is
pressed.
• To return the copy ratio to 100%, press [Direct].
• To cancel this setting, press [Copy Ratio] ➞ [Auto].
• To cancel all settings and return the machine to the Standard mode, press
(Reset).
2-34
Changing the Copy (Zoom) Ratio
Entire Image
If you are copying an original with an image that extends all the way to the edges
onto the same size paper at a copy ratio of 100%, the periphery of the original
image may be cut off slightly on the copy. However, if you set the Entire Image
mode, the image is slightly reduced so that the entire image is copied without being
cut off.
IMPORTANT
The Entire Image mode cannot be used with the Multi-Page Enlargement, Booklet,
Frame Erase, Image Combination, Image Repeat, or Mirror Image mode.
NOTE
The reduction ratios when the Entire Image mode is specified are:
- 11" x 17": 98.1% (12" x 18": 100%)
- LGL:
97.7%
- LTR:
97.1%
- STMT:
96.3%
1
Place your originals ➞ press [Copy Ratio].
Changing the Copy (Zoom) Ratio
2-35
2
Basic Copying Features
The Entire Image mode should also be set when you want to copy 11" x 17"
originals onto paper larger than 11" x 17" to ensure that the edges of the originals
are not cut off. Make sure to place the originals on the platen glass, and load the
stack bypass with 12 5/8" x 17 11/16" or 12" x 18" paper, or load a paper drawer
with 12" x 18" paper. (See "Platen Glass," on p. 1-23, and "Paper Selection," on p.
2-6.)
2
Press [Entire Image] ➞ [Done].
Basic Copying Features
2
The selected mode is set, and the display returns to the Copy Basic Features
screen.
3
Press
(Start).
Copying starts.
NOTE
• To cancel this setting, press [Copy Ratio] ➞ [Entire Image].
• To cancel all settings and return the machine to the Standard mode, press
(Reset).
Reducing/Enlarging Using the Original and Copy Sizes
The Zoom Program mode enables you to reduce or enlarge originals by individually
entering the dimensions of the original and copy paper. Any copy ratio from 25% to
400% can be used.
The following two Zoom Program modes are available.
NOTE
The specified sizes are converted into a copy ratio (%) by the machine using the formula
below. The result is rounded to the nearest integer.
Copy ratio (%) = (copy size / original size) x 100
■ Making Copies with the Same XY Copy Ratio (Zoom)
The copy ratio you set is used for both the horizontal (X) and vertical (Y) axes.
■ Making Copies with Different XY Copy Ratios (XY Zoom)
You can set different copy ratios for the horizontal (X) and vertical (Y) axes.
2-36
Changing the Copy (Zoom) Ratio
Making Copies with the Same XY Copy Ratio (Zoom)
1
Place your originals ➞ press [Copy Ratio].
2
3
Basic Copying Features
2
Press [Zoom Program].
Use the numeric keys on the touch panel display to enter
values for the original size and copy size.
❑ Press [Original Size] ➞ enter a value.
❑ Press [Copy Size] ➞ enter a value.
Changing the Copy (Zoom) Ratio
2-37
❑ Press [OK].
Basic Copying Features
2
You can enter either the width or the length of the original size. If you enter the
width for the original size, make sure to enter the width for the copy size as
well, and vice versa.
The machine automatically calculates the correct copy ratio based on the
values you entered; however, the original image may be cut off slightly on the
copy depending on the paper size.
If the computation results in a copy ratio less than 25% or greater than 400%,
a message appears telling you that values below 25% will be set to 25%, and
values above 400% will be set to 400%.
The selected mode is set, the display returns to the Copy Basic Features
screen, and the copy ratio generated by the machine is displayed.
NOTE
• If you make a mistake when entering values, press [C] on the touch panel display
➞ enter the correct values.
• To enter values in millimeters, press [mm].
• When entering values in millimeters, you can also use
(numeric keys), and
(Clear) to clear your entries.
• For instructions on entering values in inches, see Chapter 2, "Basic Operations," in
the Reference Guide.
• To specify the horizontal (X) and vertical (Y) axes independently, press [XY Zoom].
4
Press
(Start).
Copying starts.
NOTE
• To return the copy ratio to 100%, press [Direct].
• To cancel this setting, press [Copy Ratio] ➞ [Zoom Program] ➞ [Cancel].
• To cancel all settings and return the machine to the Standard mode, press
(Reset).
2-38
Changing the Copy (Zoom) Ratio
Making Copies with Different XY Copy Ratios (XY Zoom)
1
Place your originals ➞ press [Copy Ratio].
2
Basic Copying Features
2
Press [Zoom Program].
Changing the Copy (Zoom) Ratio
2-39
3
Press [XY Zoom].
Basic Copying Features
2
4
Use the numeric keys on the touch panel display to enter
values for the original size and copy size.
❑ Press [X] (horizontal axis) for Original Size ➞ enter a value.
❑ Press [Y] (vertical axis) for Original Size ➞ enter a value.
❑ Press [X] (horizontal axis) for Copy Size ➞ enter a value.
❑ Press [Y] (vertical axis) for Copy Size ➞ enter a value.
2-40
Changing the Copy (Zoom) Ratio
❑ Press [OK].
The machine automatically calculates the correct copy ratio based on the
values you entered; however, the original image may be cut off slightly on the
copy depending on the paper size.
If the computation results in a copy ratio less than 25% or greater than 400%,
a message appears telling you that values below 25% will be set to 25%, and
values above 400% will be set to 400%.
The selected mode is set, the display returns to the Copy Basic Features
screen, and the copy ratios generated by the machine for the X and Y axes are
displayed.
NOTE
• If you make a mistake when entering values, press [C] on the touch panel display
➞ enter the correct values.
• To enter values in millimeters, press [mm].
• When entering values in millimeters, you can also use
(numeric keys), and
(Clear) to clear your entries.
• For instructions on entering values in inches, see Chapter 2, "Basic Operations," in
the Reference Guide.
• To specify the same copy ratio for both the horizontal (X) and vertical (Y) axes,
press [Zoom].
5
Press
(Start).
Copying starts.
NOTE
• To return the copy ratio to 100%, press [Direct].
• To cancel this setting, press [Copy Ratio] ➞ [Zoom Program] ➞ [Cancel].
• To cancel all settings and return the machine to the Standard mode, press
(Reset).
Changing the Copy (Zoom) Ratio
2-41
Basic Copying Features
2
Setting the X and Y Axes Independently
The XY Zoom mode enables you to make reduced or enlarged copies with different
XY copy ratios expressed in percentages. Any copy ratio from 25% to 400% can be
used.
The following two XY Zoom modes are available:
■ Manually Specifying the Copy Ratio (XY Zoom)
2
Basic Copying Features
You can manually set different copy ratios for the horizontal (X) and vertical (Y) axes,
expressed in percentages and in 1% increments.
NOTE
If you set the copy ratio with the XY Zoom mode, the image of the original may be rotated
before being printed on the paper depending on the outcome of the computation
executed by the machine using the original size and the specified copy ratio. This is so
the orientation of the printed image is best suited to the selected paper size.
■ Automatically Specifying the Copy Ratio (Auto XY Zoom)
The XY copy ratio is automatically set to suit the size of the selected paper.
IMPORTANT
• The Auto XY Zoom mode cannot be used with the Automatic Paper Selection or Image
Repeat (Auto) mode.
• You cannot copy highly transparent originals, such as transparencies, in the Auto XY
Zoom mode. Manually specify the copy ratio for these types of originals.
• If you set the Auto XY Zoom mode, select the paper size using the Manual Paper
Selection mode. If you do not select a paper size, Paper Drawer 1 is automatically
selected and the copy ratio is set to match the size of the paper loaded in that drawer.
• If you set the copy ratio in the Auto XY Zoom mode, Auto Orientation is not performed.
NOTE
If you notice a difference between the copy ratio and the actual copy size, you can try to
eliminate this error by making a Zoom Fine Adjustment in Adjustment/Cleaning (from the
Additional Functions screen). (See Chapter 4, "Customizing Settings," in the Reference
Guide.)
2-42
Changing the Copy (Zoom) Ratio
1
Place your originals ➞ press [Copy Ratio].
2
Press [XY Zoom].
3
Specify the desired copy ratios.
Basic Copying Features
2
● To manually specify the copy ratios (XY Zoom):
❑ Use the numeric keys or press [ ] or [+] on the touch panel display to enter
values.
❑ Press [X] (horizontal axis) ➞ enter a value.
❑ Press [Y] (vertical axis) ➞ enter a value.
Changing the Copy (Zoom) Ratio
2-43
❑ Press [OK].
Basic Copying Features
2
You can also use
your entries.
-
(numeric keys) to enter values, and
(Clear) to clear
You can change the values by pressing [ ] or [+], even if you have entered the
values using
(numeric keys).
The selected mode is set, the display returns to the Copy Basic Features
screen, and the specified copy ratios are displayed.
NOTE
• If you make a mistake when entering values, press [C] on the touch panel display
➞ enter the correct values.
• If you enter a value outside the setting range, a message prompting you to enter an
appropriate value appears on the screen.
● To have the copy ratios automatically specified (Auto XY Zoom):
❑ Press [Auto XY Zoom] ➞ [OK].
The display returns to the Copy Basic Features screen, and the copy ratios
generated by the machine are displayed.
IMPORTANT
If you select [Auto XY Zoom], make sure that you select a paper size other than
[Auto]. If you do not specify a paper size, Paper Drawer 1 is automatically selected
and the copy ratios are set to match the size of the paper loaded in that drawer.
2-44
Changing the Copy (Zoom) Ratio
NOTE
If you select [Auto XY Zoom] in the following cases, <X: Auto %> and <Y: Auto %>
are displayed as the copy ratios on the Copy Basic Features screen:
- When the original is placed in the feeder
- When the machine is not able to detect the size of the original placed on the
platen glass
Basic Copying Features
2
4
Press
(Start).
Copying starts.
NOTE
• To return the copy ratio to 100%, press [Direct].
• To cancel this setting, press [Copy Ratio] ➞ [XY Zoom] ➞ [Cancel].
• To cancel all settings and return the machine to the Standard mode, press
(Reset).
Changing the Copy (Zoom) Ratio
2-45
Multi-Page Enlargement
This mode enables you to enlarge an original to a size larger than 11" x 17" by
copying parts of the original over several sheets of paper, and then pasting the
sheets together.
You can specify the copy ratio for Multi-Page Enlargement by percentage, or by
setting the number of output pages that the original image should be copied over.
2
Basic Copying Features
IMPORTANT
• The Multi-Page Enlargement mode cannot be used with the Entire Image, Automatic
Color Selection, Finisher, Two-sided, Automatic Exposure Control, Two-page Separation,
Cover/Sheet Insertion, Image Combination, Shift, Booklet, Transparency Interleaving,
Margin, Different Size Originals, Job Build, Frame Erase, Image Repeat, Mirror Image, or
Area Designation mode.
• The Automatic Paper Selection mode cannot be set if the Multi-page Enlargement mode
is specified according to the number of output pages.
• If you set the Multi-Page Enlargement mode while the color mode is set to 'Auto-Color
Select', the color mode is automatically set to 'Full Color'.
NOTE
• Copies of the original image made in the Multi-Page Enlargement mode overlap. Join
neighboring sheets together by pasting over the overlapping areas.
• You cannot make more than one copy of the original (over multiple sheets of paper) at
one time using the Multi-Page Enlargement mode.
• The Multi-Page Enlargement mode cannot be used to make copies on transparencies or
nonstandard size paper.
Determining the Copy Ratio and Number of Sheets Needed
If you create a multi-page enlargement by specifying the copy ratio (as opposed to
specifying the number of output sheets), the number of output pages changes
according to the size of the original, the copy ratio setting, and the size of the copy
paper.
Refer to the following table to determine the desired copy ratio.
2-46
Reproduction
Ratio (%)
Paper Size
Total Sheets of
Paper
Total Size
200
11" x 17"
9
22" x 17"
200
8 1/2" x 11" (LTR)
15
22" x 17"
200
8 1/2" x 11" (LTRR)
12
22" x 17"
300
11" x 17"
16
33" x 51"
300
8 1/2" x 11" (LTR)
28
33" x 51"
Changing the Copy (Zoom) Ratio
Paper Size
Total Sheets of
Paper
Total Size
300
8 1/2" x 11" (LTRR)
25
33" x 51"
400
11" x 17"
25
44" x 68"
400
8 1/2" x 11" (LTR)
45
44" x 68"
400
8 1/2" x 11" (LTRR)
42
44" x 68"
NOTE
• The sizes indicated in the table serve only as a guideline. The actual copy ratio may be
different from that indicated in the table.
• After all the sheets have been pasted together, the final size of the actual copy will be
slightly smaller than the size indicated in the table.
• You can create a multi-page enlargement with copy ratios that are not listed in the table.
However, the size of the original must not be larger than 11" x 17", and the copy ratio
cannot exceed 400%.
Specifying the Copy Ratio in Percentage
You can enlarge an original in the Multi-Page Enlargement mode by specifying the
copy ratio in percentage. Any copy ratio from 100% to 400% can be set.
1
Place your originals on the platen glass ➞ press [Copy Ratio].
Changing the Copy (Zoom) Ratio
2-47
2
Basic Copying Features
Reproduction
Ratio (%)
2
Press [Multi-Page Enlarge].
Basic Copying Features
2
NOTE
If the paper source for transparencies or nonstandard size paper is selected,
[Multi-Page Enlarge] is grayed out and cannot be selected.
3
2-48
Press [Copy Ratio(s)] ➞ [Next].
Changing the Copy (Zoom) Ratio
4
Use the numeric keys or press [ ] or [+] on the touch panel
display to enter a copy ratio ➞ press [OK].
You can also use
your entries.
-
(numeric keys) to enter values, and
(Clear) to clear
You can change the value by pressing [ ] or [+], even if you have entered the
value using
(numeric keys).
The display returns to the Copy Basic Features screen, and the specified copy
ratio is displayed.
NOTE
• If you make a mistake when entering values, press [C] on the touch panel display
➞ enter the correct values.
• If you enter a value outside the setting range, a message prompting you to enter an
appropriate value appears on the screen.
5
Press
(Start).
Copying starts.
NOTE
• If you press
(Stop) while copying is in progress to cancel the copy job and then
press
(Start) again, copying resumes from the first sheet of the divided image.
• To return the copy ratio to 100%, press [Direct].
• To cancel this setting, press [Copy Ratio] ➞ [Multi-Page Enlarge] ➞ [Cancel].
• To cancel all settings and return the machine to the Standard mode, press
(Reset).
Changing the Copy (Zoom) Ratio
2-49
Basic Copying Features
2
Selecting the Number of Output Pages
You can enlarge an original in the Multi-Page Enlargement mode by setting the
number of output pages that the original image should be copied over.
1
Place your originals on the platen glass ➞ press [Copy Ratio].
2
Press [Multi-Page Enlarge].
Basic Copying Features
2
NOTE
If the paper source for transparencies or nonstandard size paper is selected,
[Multi-Page Enlarge] is grayed out and cannot be selected.
2-50
Changing the Copy (Zoom) Ratio
3
Press [Number Of Output Pages] ➞ [Next].
Basic Copying Features
2
4
Press [Paper Select].
5
Select the desired paper size ➞ press [Done].
Changing the Copy (Zoom) Ratio
2-51
If you select the stack bypass, the screens for specifying the paper size and
paper type in the stack bypass are displayed.
NOTE
The paper sources for transparencies and nonstandard size paper are grayed out
and cannot be selected.
6
Select the number of output pages ➞ press [OK].
Basic Copying Features
2
Refer to the table under "Determining the Copy Ratio and Number of Sheets
Needed," on p. 2-43 as a guideline for specifying the number of output pages.
The display returns to the Copy Basic Features screen, and the copy ratio is
displayed as <Auto %>.
NOTE
The number of output pages that you have selected is used as a guideline. The
actual number of output pages may be less than what you have selected,
depending on a combination of factors that determine the most appropriate number
of pages. These factors include the size of the original, the selected paper size, and
the enlargement ratio.
7
Press
(Start).
Copying starts.
NOTE
• If you press
(Stop) while copying is in progress to cancel the copy job and then
press
(Start) again, copying resumes from the first sheet of the divided image.
• To return the copy ratio to 100%, press [Direct].
• To cancel this setting, press [Copy Ratio] ➞ [Multi-Page Enlarge] ➞ [Cancel].
• To cancel all settings and return the machine to the Standard mode, press
(Reset).
2-52
Changing the Copy (Zoom) Ratio
Pasting the Sheets of the Divided Image Together
Example: Enlarging an 11" x 17" original by 200% to create a 22" x 17" horizontal
copy.
Size of Original:
11" x 17"
Orientation of Original: Horizontal
22" x 17"
Orientation of Copy:
Horizontal
2
Basic Copying Features
Copy Size:
Based on the above criteria, the table under "Determining the Copy Ratio and
Number of Sheets Needed" indicates that when using LTRR paper, 12 pages
(4 x 3) are output.
Changing the Copy (Zoom) Ratio
2-53
Original
Copy Ratio: 200%
Paper Size: LTRR
The original is placed on the platen
glass without changing its original
orientation.
1
The image of the original is automatically
divided into 12 sections, each of which is
then copied onto a separate sheet of
paper.
2
3
4
5
6
7
8
9
10
11
12
Basic Copying Features
2
Copies
1
2
2nd page
1st page
8
7
7th page
2-54
4
3
Changing the Copy (Zoom) Ratio
4th page
3rd page
10
9
8th page
5
9th page
6
12
11
10th page
6th page
5th page
11th page
12th page
The images on neighboring sheets created by the Multi-Page Enlargement mode
overlap slightly. When pasting the sheets together, trim the overlapping portions,
leaving an adequate amount of overlap to apply the glue.
The width of the overlapping portions differs, according to the copy ratio and paper
size.
Overlap
Overlap
2
Basic Copying Features
Overlap
Overlap
Overlap
Final Image
Changing the Copy (Zoom) Ratio
2-55
Collating Copies
The Finisher modes can be selected to collate the copies in various ways, either by
pages or copy sets.
2
Basic Copying Features
IMPORTANT
The Finisher modes cannot be set if envelopes, transparencies, tracing paper, or labels is
selected.
NOTE
For instructions on using optional Finisher-P1, Finisher-Q1, or Saddle Finisher-Q2, see
Chapter 3, "Optional Equipment," in the Reference Guide.
■ The table below shows all the finishing features that are available with each
different optional unit, and the paper sizes that can be used.
: Available
: Unavailable
Optional
Unit
Staple
Offset
None
Rotate
Double
LTR,
LTRR
Finisher-P1
or
11" x 17",
Finisher-P1
LGL,
and
LTR,
Copy
LTRR
Tray-J1
Inner 2way
Tray-C1
or
Inner 2way
Tray-C1
and
Copy
Tray-J1
Corner
11" x 17",
11" x 17"
LGL, LTRR
(30 sheets)*1,
*1
(30 sheets) ,
LTR
LTR
*1
(50
sheets)
(50 sheets)*1
LTR,
LTRR
*1 The maximum when you are using 17 to 20 lb bond (64 to 80 g/m2) paper.
2-56
Collating Copies
Saddle
Stitch
Hole
Punch
: Available
: Unavailable
Staple
Offset
Rotate
Corner
Double
11" x 17",
LGL,
Finisher-Q1
LTR,
LTRR,
STMT
11" x 17",
11" x 17"
LGL, LTRR
(30 sheets)*1,
*1
(30 sheets) ,
LTR
LTR, EXEC
*1
(50
sheets)
(50 sheets)*1
Finisher-Q1 11" x 17",
and
LGL,
Puncher
LTR,
Unit-M1
LTRR,
STMT
11" x 17",
11" x 17"
LGL, LTRR
(30
sheets)*1,
(30 sheets)*1,
LTR
LTR, EXEC
*1
(50
sheets)
(50 sheets)*1
Saddle
Finisher-Q2
11" x 17",
LGL,
LTR,
LTRR,
STMT
Saddle
11" x 17",
Finisher-Q2
LGL,
and
LTR,
Puncher
LTRR,
Unit-M1
STMT
Hole
Punch
Saddle
Stitch
2
11" x 17",
LGL,
LTR,
LTRR
11" x 17",
11" x 17"
LGL, LTRR
11" x 17",
(30 sheets)*1,
*1
LGL, LTRR
(30 sheets) ,
LTR
LTR, EXEC
(15 sheets)*1
*1
(50
sheets)
*1
(50 sheets)
11" x 17",
11" x 17"
11" x 17",
LGL, LTRR
11" x 17",
*1,
(30
sheets)
LGL,
LGL, LTRR
(30 sheets)*1,
LTR,
LTR
LTR, EXEC
(15 sheets)*1
*1
LTRR
(50
sheets)
(50 sheets)*1
*1 The maximum when you are using 17 to 20 lb bond (64 to 80 g/m2) paper.
Collating Copies
2-57
Basic Copying Features
Optional
Unit
■ If the Collate Mode Is Set:
The copies are automatically collated into sets arranged in page order. The output is as
follows:
Originals
Set 1
Three Copies
of Each Page
Collated in
Page Order
1
1
1
2
2
Set 3
1
2
3
2
3
4
Basic Copying Features
Set 2
2
3
4
3
4
4
IMPORTANT
The Collate mode cannot be used with the Multi-Page Enlargement, Booklet, or
Transparency Interleaving mode.
■ If the Group Mode Is Set:
All copies of the same original page are grouped together. The output is as follows:
Originals
Three Copies
of Each Page
Grouped by
Page
1
Group 1
Group 3
2
1
1
3
Group 4
4
3
2
1
2
Group 2
4
3
2
4
3
4
IMPORTANT
The Group mode cannot be used with the Multi-Page Enlargement, Cover/Sheet
Insertion, Booklet, or Transparency Interleaving mode.
■ If the Staple Mode Is Set:
The copies are automatically collated into sets arranged in page order and stapled. The
output is as follows:
• If you select [Corner] (Top Left):
Originals
1
1
2
3
4
2-58
Collating Copies
Set 2
Set 1
Three Copies
of Each Page
Collated in
Page Order
1
Set 3
1
• If you select [Double] (Left):
Originals
Set 1
Three Copies
of Each Page
Collated in
Page Order
1
1
2
Set 3
Set 2
1
1
3
4
• If you select [Saddle Stitch]:
2
Set 1
Three Copies
of Each Page
Collated in
Page Order
Set 2
Set 3
7
2
8
1
1
8
1
8
6
5
3
3
3
6
1
8
4
6
6
3
IMPORTANT
• The Staple mode cannot be used with the Multi-Page Enlargement, Booklet,
Transparency Interleaving, or Mirror Image modes.
• The Saddle Stitch mode cannot be used with the Hole Punch, 2 1-Sided,
Book 2-Sided, Automatic Paper Selection, Two-page Separation, Cover/Sheet Insertion,
or Image Combination mode, in addition to the above mentioned modes.
• The accuracy of folds created in the Saddle Stitch mode may vary, depending on the
paper type and the number of sheets.
NOTE
• To use the Saddle Stitch mode, the original must already be in booklet form, as shown in
the illustration above. (See "Booklet Mode," on p. 3-13.)
• [Saddle Stitch] can be set only if the 1 2-Sided or 2 2-Sided mode is selected. (See
"Two-Sided Copying," on p. 2-73.)
■ If No Finisher Mode Is Set:
If the Collate, Group, and Staple modes are not set, copies are output as follows:
Originals
Copies
1
1
2
2
3
4
3
4
Collating Copies
2-59
Basic Copying Features
Originals
■ If the Hole Punch Mode Is Set:
The machine punches two or three holes in the copies. The output is as follows:
Originals
Copies
1
2
1
3
2
Basic Copying Features
4
IMPORTANT
• [Hole Punch] can be selected only if the optional Finisher-Q1 or Saddle Finisher-Q2 is
equipped with the optional Puncher Unit-M1.
• The Hole Punch mode cannot be used with the Multi-Page Enlargement, Saddle Stitch,
Booklet, or Transparency Interleaving mode.
• The machine automatically selects the number of hole punches (two or three holes),
depending on the selected paper size.
- Two holes:
LGL, LTRR
- Three holes: 11" x 17", LTR
• You cannot punch holes in STMTR paper.
• Holes cannot be punched in transparencies, tracing paper, and labels.
■ If the Rotate Mode Is Set:
If the copies are of the same size, the sheets are automatically collated into sets arranged
in page order, and are output in alternating directions as follows:
Originals
Copies
1
1
1
2
1
3
4
IMPORTANT
• The Rotate mode cannot be used with the Multi-Page Enlargement, Automatic Paper
Selection, Cover/Sheet Insertion, Booklet, or Transparency Interleaving mode.
• You can only select LTR or LTRR paper.
• [Rotate] can be selected only if the machine is not equipped with an optional finisher.
2-60
Collating Copies
■ If the Offset Mode Is Set:
The copies are slightly offset vertically in the output tray as follows:
Originals
Copies
1
1
2
1
3
1
4
Basic Copying Features
2
IMPORTANT
• [Offset] can be selected only if the machine is equipped with an optional finisher.
• You cannot select STMTR paper.
Page Order (Collate)
1
Place your originals ➞ press [Finisher].
NOTE
If Auto Collate in Copy Settings (from the Additional Functions screen) is set to
'On', the Collate or Offset Collate mode is automatically set when you place your
originals in the feeder. (See "Auto Collate," on p. 9-6.)
Collating Copies
2-61
2
Press [Collate (Page order)].
Basic Copying Features
2
An optional finisher is attached.
The optional Finisher-Q1/Saddle Finisher-Q2
and Puncher Unit-M1 are attached.
A finisher is not attached, or only
the optional Inner 2way Tray-C1 is attached.
2-62
Collating Copies
[Hole Punch] appears only if the optional Puncher Unit-M1 is attached to the
optional Finisher-Q1 or Saddle Finisher-Q2.
If you want hole punches made, press [Hole Punch].
[Offset] appears only if an optional finisher is attached.
[Rotate] appears only if an optional finisher is not attached.
● If you select [Rotate]:
❑ Press [Next] ➞ select [LTR] or [LTRR].
Basic Copying Features
2
IMPORTANT
[Rotate] can be selected only in the following cases:
- If the available paper size is selected manually
- If the available paper size is loaded in both the horizontal and vertical directions
- The selected paper source must have Drawer Eligibility For APS/ADS in Common
Settings (from the Additional Functions screen) set to 'On'. (See Chapter 4,
"Customizing Settings," in the Reference Guide.)
3
Press [OK].
The selected mode is set, and the display returns to the Copy Basic Features
screen.
4
Press
(Start).
If the original is placed on the platen glass, follow the instructions that appear on
the touch panel display ➞ press (Start) once for each original. When scanning
is complete, press [Done].
Copying starts.
Collating Copies
2-63
NOTE
• To cancel this setting, press [Finisher] ➞ [Cancel].
• To cancel all settings and return the machine to the Standard mode, press
(Reset).
Same Page (Group)
1
Place your originals ➞ press [Finisher].
Basic Copying Features
2
NOTE
If Auto Collate in Copy Settings (from the Additional Functions screen) is set to
'On', the Collate or Offset Collate mode is automatically set when you place your
originals in the feeder. (See "Auto Collate," on p. 9-6.)
2
Press [Group (Same pages)].
An optional finisher is attached.
2-64
Collating Copies
Basic Copying Features
2
The optional Finisher-Q1/Saddle Finisher-Q2
and Puncher Unit-M1 are attached.
A finisher is not attached, or only
the optional Inner 2way Tray-C1 is attached.
[Hole Punch] appears only if the optional Puncher Unit-M1 is attached to the
optional Finisher-Q1 or Saddle Finisher-Q2.
If you want hole punches made, press [Hole Punch].
[Offset] appears only if an optional finisher is attached.
[Rotate] appears only if an optional finisher is not attached.
Collating Copies
2-65
● If you select [Rotate]:
❑ Press [Next] ➞ select [LTR] or [LTRR].
Basic Copying Features
2
IMPORTANT
[Rotate] can be selected only in the following cases:
- If the available paper size is selected manually
- If the available paper size is loaded in both the horizontal and vertical directions
- The selected paper source must have Drawer Eligibility For APS/ADS in Common
Settings (from the Additional Functions screen) set to 'On'. (See Chapter 4,
"Customizing Settings," in the Reference Guide.)
3
Press [OK].
The selected mode is set, and the display returns to the Copy Basic Features
screen.
4
Press
(Start).
If the original is placed on the platen glass, follow the instructions that appear on
the touch panel display ➞ press (Start) once for each original. When scanning
is complete, press [Done].
Copying starts.
NOTE
• To cancel this setting, press [Finisher] ➞ [Cancel].
• To cancel all settings and return the machine to the Standard mode, press
(Reset).
2-66
Collating Copies
Page Order (Staple)
IMPORTANT
The Staple mode can be set only if the optional Finisher-P1, Finisher-Q1, or Saddle
Finisher-Q2 is attached.
Place your originals ➞ press [Finisher].
2
Basic Copying Features
1
NOTE
If Auto Collate in Copy Settings (from the Additional Functions screen) is set to
'On', the Collate or Offset Collate mode is automatically set when you place your
originals in the feeder. (See "Auto Collate," on p. 9-6.)
2
Specify the stapling settings.
[Hole Punch] appears only if the optional Puncher Unit-M1 is attached to the
optional Finisher-Q1 or Saddle Finisher-Q2.
If you want hole punches made, press [Hole Punch].
Collating Copies
2-67
● If the optional Finisher-P1 or Finisher-Q1 is attached:
❑ Press [Staple] ➞ [Next].
Basic Copying Features
2
The optional Finisher-P1 or
Finisher-Q1 is attached.
The optional Finisher-Q1 and
Puncher Unit-M1 are attached.
2-68
Collating Copies
❑ Select the stapling type ([Corner] or [Double]) ➞ select the stapling position ➞
press [OK].
Basic Copying Features
2
The selected mode is set, and the display returns to the Copy Basic Features
screen.
Collating Copies
2-69
● If the optional Saddle Finisher-Q2 is attached:
❑ Press [Staple] ➞ [Next].
Basic Copying Features
2
The optional Saddle Finisher-Q2 is attached.
The optional Saddle Finisher-Q2 and
Puncher Unit-M1 are attached.
2-70
Collating Copies
❑ Select the stapling type ([Corner], [Double], or [Saddle Stitch]).
If you want to select [Corner] or [Double]:
• Press [Corner] or [Double] ➞ select the stapling position ➞ press [OK].
Basic Copying Features
2
If you want to select [Saddle Stitch]:
• Press [Saddle Stitch] ➞ [Next].
Collating Copies
2-71
• Select the paper size ➞ press [OK].
Basic Copying Features
2
The selected mode is set, and the display returns to the Copy Basic Features
screen.
NOTE
You can adjust the saddle stitch position in Adjustment/Cleaning (from the
Additional Functions screen). (See Chapter 4, "Customizing Settings," in the
Reference Guide.)
3
Press
(Start).
If the original is placed on the platen glass, follow the instructions that appear on
the touch panel display ➞ press (Start) once for each original. When scanning
is complete, press [Done].
Copying starts.
NOTE
• To cancel this setting, press [Finisher] ➞ [Cancel].
• To cancel all settings and return the machine to the Standard mode, press
(Reset).
2-72
Collating Copies
Two-Sided Copying
This mode enables you to make two-sided copies from one-sided or two-sided
originals, or make one-sided copies from two-sided originals.
■ Making Two-Sided Copies from One-Sided Originals (1 2-Sided)
This feature enables you to make two-sided copies from one-sided originals.
Originals
Copy
Two-Sided Copying
2-73
2
Basic Copying Features
NOTE
• If you are copying in the Two-sided mode, align the top edge of the original with the back
edge of the platen glass (by the arrow in the top left corner), or with the back edge of the
feeder.
• The Two-sided mode you have selected is displayed above [Two-sided] on the Copy
Basic Features screen.
• Paper used to make two-sided copies must conform to the following specifications:
- Paper size: 12" x 18", 11" x 17", LGL, LTR, LTRR, EXEC, or STMTR (envelopes cannot
be used for two-sided copying)
- Paper weight: 17 to 28 lb bond (64 to 105 g/m2)
• There are some types of paper which may meet the above specifications, but cannot be
used to make two-sided copies.
■ Making Two-Sided Copies from Two-Sided Originals (2 2-Sided)
This feature enables you to make two-sided copies from two-sided originals. If the
originals are placed in the feeder, they are automatically turned over to make two-sided
copies.
Copy
Original
Basic Copying Features
2
■ Making One-Sided Copies from Two-Sided Originals (2 1-Sided)
This feature automatically turns over two-sided originals placed in the feeder to make
one-sided copies on different sheets of paper.
Original
Copies
■ Making Two-Sided Copies from Facing Pages in a Book (Book 2-Sided)
This feature enables you to make two-sided copies from facing pages, or from the front
and back sides of a page in bound originals, such as books and magazines.
• Left/Right Two-sided
This setting makes two-sided copies from facing pages.
Copies
Original
1
2
1
1
2-74
Two-Sided Copying
2
• Front/Back Two-sided
This setting makes two-sided copies from the front and back sides of a page.
Copies
1
2
2
1
2
Basic Copying Features
Original
1 to 2-Sided
This feature enables you to make two-sided copies from one-sided originals.
IMPORTANT
• The 1 2-Sided mode cannot be used with the Multi-Page Enlargement, Two-page
Separation, Image Combination, Booklet, or Transparency Interleaving mode.
• Make sure to place originals with a horizontal (landscape) orientation, such as LTRR and
STMTR, horizontally. If these originals are placed vertically, the back side of the copy is
printed upside down. (You can place STMTR originals only on the platen glass.)
NOTE
• If there are an odd number of originals, the back side of the last copy is left blank. (The
machine's counter does not count the blank page as a copy.)
• If the Two-sided mode is used with the Different Size Originals mode, the copies of
different size originals will be printed as one-sided copies on paper of their respective
sizes. If you want to make two-sided copies with different size originals, you must select
the paper size beforehand. (See "Paper Selection," on p. 2-6.)
Two-Sided Copying
2-75
1
Place your originals ➞ press [Two-sided].
2
Press [1
Basic Copying Features
2
2-76
Two-Sided Copying
2-Sided].
To set the orientation of the two-sided copies, press [Option] ➞ select the type of
two-sided orientation ➞ press [Done].
Basic Copying Features
2
Details of each item are shown below.
[Book Type]:
The front and back sides of the copy will have the same
top-bottom orientation.
[Calendar Type]: The front and back sides of the copy will have opposite
top-bottom orientations.
The display returns to the Two-sided feature selection screen.
3
Press [OK].
The display returns to the Copy Basic Features screen, and <1 2-Sided> is
displayed above [Two-sided].
Two-Sided Copying
2-77
4
Press
(Start).
If the original is placed on the platen glass, follow the instructions that appear on
the touch panel display ➞ press (Start) once for each original. When scanning
is complete, press [Done].
Copying starts.
NOTE
• To cancel this setting, press [Two-sided] ➞ [Cancel].
• To cancel all settings and return the machine to the Standard mode, press
(Reset).
Basic Copying Features
2
2 to 2-Sided
This feature enables you to make two-sided copies from two-sided originals. If a
two-sided original is placed in the feeder, it is automatically turned over so that both
sides of the original are copied on the front and back sides of a copy sheet.
IMPORTANT
• 2 2-Sided copying is available only if the optional Feeder (DADF-L1) is attached.
• The 2 2-Sided mode cannot be used with the Multi-Page Enlargement, Two-page
Separation, Image Combination, Booklet, or Transparency Interleaving mode.
1
Place your originals in the feeder ➞ press [Two-sided].
NOTE
If Auto Collate in Copy Settings (from the Additional Functions screen) is set to
'On', the Collate or Offset Collate mode is automatically set when you place your
originals in the feeder. (See "Auto Collate," on p. 9-6.)
2-78
Two-Sided Copying
Press [2
2-Sided].
2
To set the orientation of the originals and the copies, press [Option] ➞ select the
type of two-sided orientation for the originals and the copies ➞ press [Done].
Original
[Book Type]:
The front and back sides of the original have the same
top-bottom orientation.
[Calendar Type]: The front and back sides of the original have opposite
top-bottom orientations.
Copy
[Book Type]:
The front and back sides of the copy will have the same
top-bottom orientation.
[Calendar Type]: The front and back sides of the copy will have opposite
top-bottom orientations.
The display returns to the Two-sided feature selection screen.
Two-Sided Copying
2-79
Basic Copying Features
2
3
Press [OK].
The display returns to the Copy Basic Features screen, and <2 2-Sided> is
displayed above [Two-sided].
Basic Copying Features
2
4
Press
(Start).
If the original is placed on the platen glass, follow the instructions that appear on
the touch panel display ➞ press (Start) once for each original. When scanning
is complete, press [Done].
Copying starts.
NOTE
• To cancel this setting, press [Two-sided] ➞ [Cancel].
• To cancel all settings and return the machine to the Standard mode, press
(Reset).
2 to 1-Sided
This feature automatically turns over two-sided originals placed in the feeder to
make one-sided copies on different sheets of paper.
IMPORTANT
• 2 1-Sided copying is available only if the optional Feeder (DADF-L1) is attached.
• The 2 1-Sided mode cannot be used with the Saddle Stitch, Multi-Page Enlargement,
Two-page Separation, Image Combination, Booklet, or Transparency Interleaving mode.
• Make sure to place originals with a horizontal (landscape) orientation, such as LTRR,
horizontally. If these originals are placed vertically, the back side of the copy is printed
upside down.
2-80
Two-Sided Copying
NOTE
If you want to place your two-sided original on the platen glass, use the Job Build mode
in Special Features to execute 2 1-Sided copying. (See "Job Build," on p. 5-5.)
1
Place your originals in the feeder ➞ press [Two-sided].
Basic Copying Features
2
NOTE
If Auto Collate in Copy Settings (from the Additional Functions screen) is set to
'On', the Collate or Offset Collate mode is automatically set when you place your
originals in the feeder. (See "Auto Collate," on p. 9-6.)
2
Press [2
1-Sided].
Two-Sided Copying
2-81
To set the orientation of the originals, press [Option] ➞ select the orientation of
the originals ➞ press [Done].
Basic Copying Features
2
Details of each item are shown below.
[Book Type]:
The front and back sides of the original have the same
top-bottom orientation.
[Calendar Type]: The front and back sides of the original have opposite
top-bottom orientations.
The display returns to the Two-sided feature selection screen.
3
Press [OK].
The display returns to the Copy Basic Features screen, and <2 1-Sided> is
displayed above [Two-sided].
4
Press
(Start).
Copying starts.
2-82
Two-Sided Copying
NOTE
• To cancel this setting, press [Two-sided] ➞ [Cancel].
• To cancel all settings and return the machine to the Standard mode, press
(Reset).
Book to 2-Sided
IMPORTANT
• The Book 2-Sided mode cannot be used with the Saddle Stitch, Multi-Page
Enlargement, Two-page Separation, Cover/Sheet Insertion, Image Combination, Binding
Erase, Different Size Originals, Booklet, Transparency Interleaving, Image Repeat, or
Area Designation mode.
• Only LTR paper can be used for Book 2-Sided copying.
• If you select [Front/Back Two-sided], the front side of the first two-sided page and the
back side of the last two-sided page are left blank. (The machine's counter does not
count the blank pages as copies.)
• Place your original on the platen glass. The Book 2-Sided mode cannot be used when
the original is placed in the feeder.
1
Place your original on the platen glass ➞ press [Two-sided].
To make copies in the correct page order, begin copying from the first open page
of the book or bound original.
Place your original face down, making sure that its top edge is aligned with the
back edge of the platen glass (by the arrow in the top left corner).
Two-Sided Copying
2-83
2
Basic Copying Features
This feature enables you to make two-sided copies from facing pages, or from the
front and back sides of a page in bound originals, such as books and magazines.
2
Press [Book
3
Select the desired type of two-sided layout ➞ press [OK].
2-Sided] ➞ [Next].
Basic Copying Features
2
Details of each item are shown below.
[Left/Right Two-sided]: The facing pages of a book or bound original are
copied on the front and back sides of a single sheet of
paper.
[Front/Back Two-sided]: The front and back sides of the left page, or the front
and back sides of the right page, are copied on the
front and back sides of a single sheet of paper.
2-84
Two-Sided Copying
The display returns to the Copy Basic Features screen, and <Book 2-Sided> is
displayed above [Two-sided].
4
Press
(Start).
To copy the next two facing pages, turn the page of the original ➞ place your
original on the platen glass ➞ press
(Start).
Scanning starts.
IMPORTANT
If the original contains fine text or print, such as a map, the machine may need to
read or scan the document several times. Do not remove the original from the
platen glass until scanning is complete.
5
When scanning is complete, press [Done].
Copying starts.
NOTE
• To cancel this setting, press [Two-sided] ➞ [Cancel].
• To cancel all settings and return the machine to the Standard mode, press
(Reset).
Two-Sided Copying
2-85
Basic Copying Features
2
Changing Color Modes
This machine comes with the Automatic Color Selection mode, which recognizes
whether an original is in color or black-and-white, and then automatically switches
between the Full Color mode and Black mode. You can also manually switch
between the Full Color and Black modes whenever necessary.
Basic Copying Features
2
NOTE
• The default setting is 'Auto-Color Select'.
• If you set the Single Color mode or select [Retro Photo Image] in the One Touch Color
mode, the color mode is automatically set to 'Single Color'.
• If you set the Multi-Page Enlargement mode while the color mode is set to 'Auto-Color
Select', the color mode is automatically set to 'Full Color'.
Automatic Color Selection
If the Auto-Color Select mode is selected, the machine automatically recognizes
whether the original is in color or black-and-white. Color originals are copied in the
Full Color mode, while black-and-white originals are copied in the Black mode.
IMPORTANT
When the Auto-Color Select mode is set and your originals contain color sections, the
machine copies them in the Full Color mode. However, the machine may copy the color
originals in the Black mode under the following conditions. To avoid this, set the color
mode to 'Full Color'. (See "Full Color," on p. 2-87.)
- If the originals contain few color sections
- If the color sections are located only on the left side (within 3/8" (10 mm) from the left
edge) of the originals when placing the originals in the feeder
- If the originals contain light color densities
- If the color sections of the originals are close to black
2-86
Changing Color Modes
1
Place your originals ➞ press the color selection drop-down
list ➞ press [Auto-Color Select].
Color Selection
2
Press
Basic Copying Features
2
(Start).
If the original is placed on the platen glass, follow the instructions that appear on
the touch panel display ➞ press (Start) once for each original. When scanning
is complete, press [Done].
Copying starts.
NOTE
To cancel all settings and return the machine to the Standard mode, press
(Reset).
Full Color
The Full Color mode always copies in color regardless of whether the original is in
color or black-and-white.
If you select [Auto-Color Select], originals that contain few color sections or
originals with light color densities and colors close to black, may be copied in the
Black mode. In this case, select the Full Color mode manually.
NOTE
If a black-and-white original is copied in the Full Color mode, it is counted as a color copy.
Changing Color Modes
2-87
1
Place your originals ➞ press the color selection drop-down
list ➞ press [Full Color].
Color Selection
Basic Copying Features
2
2
Press
(Start).
If the original is placed on the platen glass, follow the instructions that appear on
the touch panel display ➞ press (Start) once for each original. When scanning
is complete, press [Done].
Copying starts.
NOTE
To cancel all settings and return to the machine to the Standard mode, press
(Reset).
2-88
Changing Color Modes
Black
The Black mode always copies in black-and-white regardless of whether the
original is in color or black-and-white.
Place your originals ➞ press the color selection drop-down
list ➞ press [Black].
Color Selection
2
Press
(Start).
If the original is placed on the platen glass, follow the instructions that appear on
the touch panel display ➞ press (Start) once for each original. When scanning
is complete, press [Done].
Copying starts.
NOTE
To cancel all settings and return the machine to the Standard mode, press
(Reset).
Changing Color Modes
2
Basic Copying Features
1
2-89
Basic Copying Features
2
2-90
Changing Color Modes
Special Copying Features Document Layout
3
CHAPTER
This chapter describes the special copying features for document layout.
Two-Page Separation . . . . . . . . . . . . . . . . . . . . . . . . . . . . . . . . . . . . . . . . . . . . . . . . . . . . 3-2
Cover/Sheet Insertion . . . . . . . . . . . . . . . . . . . . . . . . . . . . . . . . . . . . . . . . . . . . . . . . . . . . 3-5
Booklet Mode . . . . . . . . . . . . . . . . . . . . . . . . . . . . . . . . . . . . . . . . . . . . . . . . . . . . . . . . . 3-13
Transparency Interleaving. . . . . . . . . . . . . . . . . . . . . . . . . . . . . . . . . . . . . . . . . . . . . . . . 3-20
Image Combination. . . . . . . . . . . . . . . . . . . . . . . . . . . . . . . . . . . . . . . . . . . . . . . . . . . . . 3-25
3-1
Two-Page Separation
This mode enables you to copy facing pages in a book or bound original to fit onto
separate pages.
Original
1
Special Copying Features - Document Layout
3
Copies
1
IMPORTANT
• The Two-page Separation mode cannot be used with the Saddle Stitch, Multi-Page
Enlargement, Two-sided, Cover/Sheet Insertion, Image Combination, Booklet,
Transparency Interleaving, Different Size Originals, Binding Erase, Image Repeat, or
Area Designation mode.
• Place your original on the platen glass. The Two-page Separation mode cannot be used
when the original is placed in the feeder.
NOTE
To make two-sided copies of books or bound originals, use the Book 2-Sided copying
feature of the Two-sided mode. (See "Book to 2-Sided," on p. 2-83.)
3-2
Two-Page Separation
1
Place your original on the platen glass ➞ press [Special
Features].
To make copies in the correct page order, begin copying from the first open page
of the book or bound original. Place your originals face down, making sure that
their top edge is aligned with the back edge of the platen glass (by the arrow in
the top left corner).
2
Press [Two-page Separation] ➞ [Done].
The selected mode is set, and the display returns to the Copy Basic Features
screen.
NOTE
If the desired setting is not displayed, press [▼] or [▲] to scroll to the desired
setting.
Two-Page Separation
3-3
Special Copying Features - Document Layout
3
3
Press
(Start).
To scan the next two facing pages, turn the page of the original ➞ place your
originals on the platen glass ➞ press
(Start).
Scanning starts.
IMPORTANT
If the original contains fine text or print, such as a map, the machine may need to
read or scan the document several times. Do not remove the original from the
platen glass until scanning is complete.
3
Special Copying Features - Document Layout
4
When scanning is complete, press [Done].
Copying starts.
NOTE
• To cancel this setting, press [Special Features] ➞ [Two-page Separation].
• To cancel all settings and return the machine to the Standard mode, press
(Reset).
3-4
Two-Page Separation
Cover/Sheet Insertion
This mode enables you to set the machine to automatically add front and back
covers, and sheet insertions or chapter pages using a different type of paper from
that used for the copies. In addition, you can decide whether the front and back
covers, and the sheet insertions are copied on as well. Chapter pages are always
copied on.
NOTE
• If you are copying on the front cover, back cover, or sheet insertions, these sheets are
included in the count of the total number of copies made. If these sheets are left blank,
however, the machine's counter does not count them as copies.
• If you are adding chapter pages, these sheets are included in the count of the total
number of copies made, since chapter pages are always copied on.
■ Front Cover
This setting adds a front cover sheet to each set of copies. You may also copy on the front
cover sheet.
Originals
Copies
Printed
Front Cover
Cover/Sheet Insertion
3-5
Special Copying Features - Document Layout
3
IMPORTANT
• The Cover/Sheet Insertion mode cannot be used with the Automatic Paper Selection,
Group, Offset Group, Rotate Collate, Rotate Group, Saddle Stitch, Multi-Page
Enlargement, Book 2-Sided, Two-page Separation, Image Combination, Booklet,
Transparency Interleaving, Image Repeat, or Mirror Image mode.
• If you select the Staple mode when the optional Finisher-P1 is attached, you cannot
staple more than 50 sheets of LTR paper, or 30 sheets of 11" x 17", LGL, or LTRR paper,
including sheet insertions.
• If you select the Staple mode when the optional Finisher-Q1 or Saddle Finisher-Q2 is
attached, you cannot staple more than 50 sheets of LTR paper, or 30 sheets of 11" x 17",
LGL, or LTRR paper, including sheet insertions.
■ Back Cover
This setting adds a back cover sheet to each set of copies. You may also copy on the back
cover sheet.
Originals
Copies
Printed Back
Cover
Special Copying Features - Document Layout
3
■ Sheet Insertion
This setting inserts a sheet of paper between copies. This feature is useful when you want
to use a blank sheet to help sort out the copies. You may also copy on the sheet
insertions.
Originals
Copies
Printed Sheet
Insertion
■ Chapter Page
This setting adds chapter pages into the copies. Since the chapter page is always copied
on one side, this feature is useful when you want to organize the copies by chapter.
Originals
Copies
Printed
Chapter Page
3-6
Cover/Sheet Insertion
1
Place your originals ➞ press [Special Features] ➞ [Cover/
Sheet Insertion].
Special Copying Features - Document Layout
3
NOTE
If the desired setting is not displayed, press [▼] or [▲] to scroll to the desired
setting.
2
Select the desired Cover/Sheet Insertion feature.
You cannot select the [Sheet Insertion] and [Chapter Page] features at the same
time.
NOTE
To cancel a selected feature, press that key again.
Cover/Sheet Insertion
3-7
3
Press [Paper Select] for each selected feature.
4
Select the paper source ➞ press [Done].
Special Copying Features - Document Layout
3
IMPORTANT
• Select the same size paper for [Front Cover], [Back Cover], and [Sheet Insertion]
(or [Chapter Page]).
• If you try to set a different paper size for one feature, the paper sizes for the other
features are automatically changed to the new paper size. However, if you are only
changing the paper source with the same paper size, the settings for the other
features will not change.
3-8
Cover/Sheet Insertion
5
Press [Next].
If only [Chapter Page] is selected, press [next] ➞ proceed to step 7.
6
Select whether to copy on the front cover, back cover, or sheet
insertion ➞ press [Next].
If either [Sheet Insertion] or [Chapter Page] is not selected, press [OK] ➞
proceed to step 8.
Cover/Sheet Insertion
3-9
Special Copying Features - Document Layout
3
If the Two-sided mode is set, and [Sheet Insertion] or [Chapter Page] is not
selected, and you want to print on the cover(s), press the appropriate print key
under the selected cover feature(s) ➞ press [Option] ➞ select the side to copy
on ➞ press [Done].
Special Copying Features - Document Layout
3
NOTE
• The screens that appear on your machine may differ from those shown here,
depending on the setting in step 2.
• A chapter page is always copied on only one side.
• If you select [Leave Blank] for the front and/or back cover, the machine inserts a
sheet of paper from the paper source that you selected in step 4 to be used as the
copy's front and/or back cover.
- If you are using paper that already has printing on it (e.g., company logo) as your
front and/or back cover, then you must select [Leave Blank]. Otherwise, the
machine will copy your original's first or last page on the preprinted paper.
• If you select [Print] for the front cover, the machine inserts a sheet of paper from
the paper source that you selected in step 4, and prints your original's first page on
it. This will then be used as the copy's front cover.
• If you select [Print on Front Side] or [Print on Back Side] for the back cover, the
machine inserts a sheet of paper from the paper source that you selected in step 4,
and prints your original's last page on either its front or back side. This will then be
used as the copy's back cover.
3-10
Cover/Sheet Insertion
Specify where the sheet insertions or chapter pages should
be added ➞ press [OK].
3
Special Copying Features - Document Layout
7
[Leave Blank] is selected for
sheet insertions.
[Print] is selected for sheet insertions, or
[Chapter page] is selected.
Use
-
(numeric keys) to specify where the pages should be inserted.
IMPORTANT
You cannot set the sheet insertion position or chapter page on the first page. Set
the position starting from the second page.
NOTE
• You can insert up to 20 sheet insertions or chapter pages.
• If you want to insert 10 or more sheets, press [▼] to scroll down one page ➞
continue with your settings.
• To cancel a specific sheet insertion page setting, press [▼] or [▲] ➞ press the
desired page ➞ press
(Clear).
Cover/Sheet Insertion
3-11
8
Press [Done].
The selected mode is set, and the display returns to the Copy Basic Features
screen.
9
Press
(Start).
If the original is placed on the platen glass, follow the instructions that appear on
the touch panel display ➞ press (Start) once for each original. When scanning
is complete, press [Done].
Copying starts.
3
Special Copying Features - Document Layout
NOTE
• To cancel this setting, press [Special Features] ➞ [Cover/Sheet Insertion] ➞
[Cancel].
• To cancel all settings and return the machine to the Standard mode, press
(Reset).
3-12
Cover/Sheet Insertion
Booklet Mode
This mode enables you to copy one-sided or two-sided originals in such a way that
the copies are made into a booklet.
Originals
Copy
1
2
3
4
7
2
1
4
5
8
6
3
1
8
6
3
5
6
Saddle Finisher-Q2 is attached.
7
8
IMPORTANT
• The Booklet mode cannot be used with the Stack Bypass Settings (2nd Side of 2-Sided
Page), Entire Image, Multi-Page Enlargement, Automatic Paper Selection, Finisher,
Two-sided, Two-page Separation, Cover/Sheet Insertion, Shift (No. Key Entry), Image
Combination, Transparency Interleaving, Margin, Different Size Originals, Frame Erase,
Image Repeat, Mirror Image, or Area Designation mode.
• Make sure to place originals with a vertical (portrait) orientation vertically. If these
originals are placed horizontally, the even numbered pages will be printed upside down.
• Saddle stitching is not performed if there is only one output sheet.
• Saddle stitching can be performed only if the optional Saddle Finisher-Q2 is attached.
• The accuracy of folds created in the Saddle Stitch mode may vary, depending on the type
and quantity of paper.
Booklet Mode
3-13
Special Copying Features - Document Layout
3
1
Place your originals ➞ press [Special Features] ➞ [Booklet].
Special Copying Features - Document Layout
3
NOTE
If the desired setting is not displayed, press [▼] or [▲] to scroll to the desired
setting.
2
3-14
Select the original size ➞ press [Next].
Booklet Mode
If the original is two-sided, press [2-Sided Original] ➞ select the type of
two-sided original ➞ press [OK] ➞ [Next].
Details of each item are shown below.
[Book Type]:
The front and back sides of the original have the same
top-bottom orientation.
[Calendar Type]: The front and back sides of the original have opposite
top-bottom orientations.
NOTE
• [2-Sided Original] is available only if the optional Feeder (DADF-L1) is attached.
• To select an A or B series paper size, press [A/B-size].
• [2-Sided Original] cannot be selected if STMTR is the selected original size.
3
Select the desired paper size ➞ press [Next].
The optional Saddle Finisher-Q2 is attached.
Only 11" x 17", LGL, or LTRR paper can be used for the Booklet mode.
Booklet Mode
3-15
Special Copying Features - Document Layout
3
● If you want to add a cover:
❑ Press [Add Cover] ➞ [Next].
❑ Select whether to copy on the cover page.
Special Copying Features - Document Layout
3
❑ Select the desired paper type for the cover page ➞ press [Next].
If the optional Saddle Finisher-Q2 is not attached, press [OK] ➞ proceed to
step 6.
3-16
Booklet Mode
IMPORTANT
• You must select the same paper size for the cover page as that used for copying
the main document.
• If you select [No] for <Select whether to print on covers.>, [Heavy] and [Letterhead
(Heavy)] can be selected.
• Only 17 to 28 lb bond (64 to 105 g/m2) paper can be used for the main document.
• Only the following paper can be used for the cover page:
- If you are printing on the cover:
17 to 28 lb bond (64 to 105 g/m2)
- If you are not printing on the cover: 17 to 60 lb bond (64 to 163 g/m2)
• If you select [Add Cover], you cannot feed the paper used for copying the main
be sure to correctly set the paper type, especially if you are using heavy paper. If
the type of paper is not set correctly, it could adversely affect the quality of the
image. Moreover, the fixing unit may become dirty and require a service repair, or
the paper could jam.
NOTE
• The cover page can be copied only on the front.
• You must load the paper for the cover page face down in the stack bypass.
4
Select whether to saddle stitch the booklet ➞ press [OK].
The selected mode is set.
Booklet Mode
3-17
3
Special Copying Features - Document Layout
document through the stack bypass.
• When printing on special types of paper, such as heavy paper or transparencies,
NOTE
• If the number of sheets is 16 or more, the booklet cannot be saddle stitched.
• The number of saddle stitched booklets that the booklet tray can hold depends on
the number of sheets that each booklet contains.
- 1 to 5 sheets:
25 sets
- 6 to 10 sheets:
15 sets
- 11 to 15 sheets: 10 sets
• If you select [Add Cover], the maximum number that the booklet tray can hold is 10
sets.
• Saddle stitching is not performed if there is only one output sheet.
3
Special Copying Features - Document Layout
• If you set the Booklet mode, the Center Shift mode is also automatically set.
5
Set the Booklet Tray guide to match the paper size.
11" x 17" or LGL
LTRR
IMPORTANT
Make sure to set the Booklet Tray guide correctly to match the paper size. Setting
the Booklet Tray guide incorrectly may result in a paper jam.
6
Press [Done].
The display returns to the Copy Basic Features screen.
7
Press
(Start).
If the original is placed on the platen glass, follow the instructions that appear on
the touch panel display ➞ press (Start) once for each original. When scanning
is complete, press [Done].
Copying starts.
3-18
Booklet Mode
NOTE
• To cancel this setting, press [Special Features] ➞ [Booklet] ➞ [Cancel].
• To cancel all settings and return the machine to the Standard mode, press
(Reset).
Special Copying Features - Document Layout
3
Booklet Mode
3-19
Transparency Interleaving
This mode enables you to automatically add an interleaving sheet of paper
between each sheet of transparency that is output. The interleaf sheets protect the
copied surface of the transparencies. You can also set to copy the content of the
transparencies onto the interleaf sheets.
3
Special Copying Features - Document Layout
IMPORTANT
• The Transparency Interleaving mode cannot be used with the Multi-Page Enlargement,
Finisher, Two-sided, Two-page Separation, Cover/Sheet Insertion, Image Combination,
Booklet, Image Repeat, Mirror Image, or Area Designation mode.
• You cannot make more than one set of copies at a time in the Transparency Interleaving
mode.
• Even if an optional finisher is attached, you cannot use any of the Finisher modes with
the Transparency Interleaving mode.
• Only LTR is available for the Transparency Interleaving mode.
NOTE
• The machine's counter does not count blank interleaf sheets as copies.
• Regardless of Tray Designation settings, transparencies are output as follows. The Tray
Designation settings may vary depending on the optional output units that are attached
to the machine. For instructions on using Tray A, B, or C, see Chapter 4, "Customizing
Settings," in the Reference Guide.
- Tray B if the optional Finisher-P1 and Copy Tray-J1 are attached
- Tray C if the optional Inner 2way Tray-C1 and Copy Tray-J1 are attached
3-20
Transparency Interleaving
■ If You Do Not Want to Print on the Interleaf Sheets:
The [Leave Blank] setting outputs a printed transparency and a blank interleaf sheet
alternately.
Copies
Originals
Transparencies
Blank Interleaf Sheets
■ If You Want to Print on the Interleaf Sheets:
The [Print] setting outputs a printed transparency and a printed interleaf sheet alternately.
Originals
Copies
Transparencies
Printed Interleaf Sheets
Transparency Interleaving
3-21
Special Copying Features - Document Layout
3
1
Place your originals ➞ press [Special Features] ➞
[Transparency Interleaving].
Special Copying Features - Document Layout
3
NOTE
If the desired setting is not displayed, press [▼] or [▲] to scroll to the desired
setting.
2
3-22
Select the paper source for transparencies ➞ press [Next].
Transparency Interleaving
If the following screen is displayed, press [OK] ➞ perform either of the following
procedures in Common Settings (from the Additional Functions screen) (See
Chapter 4, "Customizing Settings," in the Reference Guide.):
• Set Register Paper Type for the selected paper source to [Transparency].
• Set the paper type setting to [Transparency] if Stack Bypass Standard Settings
is set to 'On'.
IMPORTANT
Make sure that transparencies are loaded into the selected paper source. Loading
paper types other than transparencies may result in a paper jam.
3
Select whether to copy on the interleaf sheets ➞ press [Next].
Transparency Interleaving
3-23
Special Copying Features - Document Layout
3
4
Select the paper source for the interleaf sheets ➞ press [OK]
➞ [Done].
Special Copying Features - Document Layout
3
The selected mode is set, and the display returns to the Copy Basic Features
screen.
NOTE
If you are copying onto the interleaf sheets, these sheets are included in the count
of the total number of copies made.
5
Press
(Start).
If the original is placed on the platen glass, follow the instructions that appear on
the touch panel display ➞ press (Start) once for each original. When scanning
is complete, press [Done].
Copying starts.
NOTE
• The copies are output with the copied side face down, alternating between
transparency and interleaf sheet.
• To cancel this setting, press [Special Features] ➞ [Transparency Interleaving] ➞
[Cancel].
• To cancel all settings and return the machine to the Standard mode, press
(Reset).
3-24
Transparency Interleaving
Image Combination
This mode enables you to automatically reduce two, four, or eight originals, as well
as two-sided originals or the facing pages of a book, to fit onto one side or both
sides of a selected paper size.
NOTE
The reduction ratio is automatically set so that the originals fit onto the selected paper
size.
■ 2 On 1
This setting reduces two 1-sided originals or one 2-sided original to fit onto one side or
both sides of the copy sheet.
Originals
Copy
or
1
1
2
2
1
Image Combination
3-25
3
Special Copying Features - Document Layout
IMPORTANT
• The Image Combination mode cannot be used with the Entire Image, Multi-Page
Enlargement, Automatic Paper Selection, Saddle Stitch, Two-sided, Two-page
Separation, Cover/Sheet Insertion, Shift (No. Key Entry), Booklet, Transparency
Interleaving, Different Size Originals, Original Frame Erase, Book Frame Erase, Image
Repeat, Mirror Image, or Area Designation mode.
• Originals copied in the Image Combination mode must all be the same size. You cannot
use the Image Combination mode with the Different Size Originals mode.
■ 4 On 1
This setting reduces four 1-sided or two 2-sided originals to fit onto one side or both sides
of the copy sheet.
Copy
Originals
or
1
2
3
4
1
3
1
2
3
Special Copying Features - Document Layout
3
4
■ 8 On 1
This setting reduces eight 1-sided or four 2-sided originals to fit onto one side or both
sides of the copy sheet.
Originals
Copy
or
7
6
2
4
3-26
Image Combination
3
2
3
5
6
7
4
8
5
7
3
1
1
5
1
8
7
8
1
Place your originals ➞ press [Special Features] ➞ [Image
Combination].
Special Copying Features - Document Layout
3
NOTE
If the desired setting is not displayed, press [▼] or [▲] to scroll to the desired
setting.
2
Select the original size ➞ press [Next].
Image Combination
3-27
If you are copying two-sided originals, press [2-Sided Original] ➞ select the type
of two-sided original ➞ press [OK] ➞ [Next].
Special Copying Features - Document Layout
3
Details of each item are shown below.
[Book Type]:
The front and back sides of the original have the same
top-bottom orientation.
[Calendar Type]: The front and back sides of the original have opposite
top-bottom orientations.
NOTE
• [2-Sided Original] is available only if the optional Feeder (DADF-L1) is attached.
• To select an A or B series paper size, press [A/B-size].
• [2-Sided Original] cannot be selected if STMTR is the selected original size.
3
3-28
Select the desired Image Combination feature ➞ press [Next].
Image Combination
If you want to make two-sided copies, press [2-Sided Copy] ➞ select the type of
two-sided orientation ➞ press [OK] ➞ [Next].
Details of each item are shown below.
[Book Type]:
The front and back sides of the copy will have the same
top-bottom orientation.
[Calendar Type]: The front and back sides of the copy will have opposite
top-bottom orientations.
If you want to specify the image order, press [Option] ➞ select the image order
➞ press [Done] ➞ [Next].
2 On 1
Image Combination
3-29
Special Copying Features - Document Layout
3
3
Special Copying Features - Document Layout
4 On 1, 8 On 1
If you do not change the image order by pressing [Option], the images are
printed as follows:
2 On 1:
Left ➞ Right
4 On 1 and 8 On 1: Upper Left ➞ Upper Right ➞ Lower Left ➞ Lower Right
4
Select the desired paper size ➞ press [OK] ➞ [Done].
The selected mode is set, and the display returns to the Copy Basic Features
screen.
IMPORTANT
You cannot use Automatic Paper Selection in the Image Combination mode.
NOTE
• The machine automatically selects the copy ratio depending on the selected paper
size.
• If you set the Image Combination mode, the Center Shift mode is also
automatically set.
3-30
Image Combination
Press
(Start).
If the original is placed on the platen glass, follow the instructions that appear on
the touch panel display ➞ press (Start) once for each original. When scanning
is complete, press [Done].
Copying starts.
NOTE
• To cancel this setting, press [Special Features] ➞ [Image Combination] ➞ [Cancel].
• To cancel all settings and return the machine to the Standard mode, press
(Reset).
3
Special Copying Features - Document Layout
5
Image Combination
3-31
Special Copying Features - Document Layout
3
3-32
Image Combination
Special Copying Features Image Adjustment
4
CHAPTER
This chapter describes the special copying features for image adjustment.
Shifting the Original Image . . . . . . . . . . . . . . . . . . . . . . . . . . . . . . . . . . . . . . . . . . . . . . . . 4-2
Using the Arrow Keys. . . . . . . . . . . . . . . . . . . . . . . . . . . . . . . . . . . . . . . . . . . . . . . . . . . . . . . . . .4-3
Using the Numeric Keys. . . . . . . . . . . . . . . . . . . . . . . . . . . . . . . . . . . . . . . . . . . . . . . . . . . . . . . .4-5
Margin Mode. . . . . . . . . . . . . . . . . . . . . . . . . . . . . . . . . . . . . . . . . . . . . . . . . . . . . . . . . . . 4-8
Frame Erase . . . . . . . . . . . . . . . . . . . . . . . . . . . . . . . . . . . . . . . . . . . . . . . . . . . . . . . . . . 4-12
Original Frame Erase . . . . . . . . . . . . . . . . . . . . . . . . . . . . . . . . . . . . . . . . . . . . . . . . . . . . . . . . .4-14
Book Frame Erase . . . . . . . . . . . . . . . . . . . . . . . . . . . . . . . . . . . . . . . . . . . . . . . . . . . . . . . . . . .4-18
Binding Erase . . . . . . . . . . . . . . . . . . . . . . . . . . . . . . . . . . . . . . . . . . . . . . . . . . . . . . . . . . . . . . .4-22
4-1
Shifting the Original Image
You can make copies with the entire original image shifted to the center or a corner.
IMPORTANT
• The Shift mode cannot be used with the Multi-Page Enlargement, Image Repeat, or
Mirror Image mode.
• The Shift (No. Key Entry) mode cannot be used with the Image Combination or Booklet
mode, in addition to the modes mentioned above.
• The Shift mode cannot be selected if you set the Different Size Originals mode in
combination with the Automatic Paper Selection mode.
• If the original and the copy paper are the same size and the copy ratio is set at 100%, the
image of the original is not shifted.
• The default setting is 'Center'.
• If you use the numeric keys to enter the shift position, the original image may be partially
cut off on the copy, depending on the size of the original, the size of the copy paper, and
the amount of shift specified.
Special Copying Features - Image Adjustment
4
■ Using the Arrow Keys
The [Center/Corner Shift] setting enables you to use the arrow keys on the touch panel
display to make copies with the entire original image shifted to the center or a corner.
Original
4-2
Shifting the Original Image
Copy with the
Original Image
Shifted to the Center
Copy with the
Original Image
Shifted to a Corner
■ Using the Numeric Keys
The [No. Key Entry] setting enables you to shift the entire image to a position that you
specify using
(numeric keys).
Copy
Original
4 3/4" (120 mm)
Using the Numeric
Keys to Shift the
Position
3 1/8" (80 mm)
Using the Arrow Keys
Special Copying Features - Image Adjustment
1
4
Place your originals ➞ press [Special Features].
Shifting the Original Image
4-3
2
Press [Shift].
4
Special Copying Features - Image Adjustment
NOTE
If the desired setting is not displayed, press [▼] or [▲] to scroll to the desired
setting.
3
Press [Center/Corner Shift] ➞ select the shift direction with an
arrow key.
The shift direction is the direction that you want the original image moved to, if
you first visualize the original image as being face up and appearing in the
center of the copy page.
4
Press [OK] ➞ [Done].
The selected mode is set, and the display returns to the Copy Basic Features
screen.
4-4
Shifting the Original Image
5
Press
(Start).
Copying starts.
NOTE
• To cancel this setting, press [Special Features] ➞ [Shift] ➞ [Cancel].
• To cancel all settings and return the machine to the Standard mode, press
(Reset).
Using the Numeric Keys
Place your originals ➞ press [Special Features] ➞ [Shift].
If necessary, see the screen shots in steps 1 and 2 of "Using the Arrow Keys," on
p. 4-3.
NOTE
If the desired setting is not displayed, press [▼] or [▲] to scroll to the desired
setting.
2
Use numeric keys on the inch entry pop-up screen to enter
the shift position.
❑ Press [No. Key Entry].
❑ Select the shift direction.
❑ Enter the shift value using the numeric keys on the inch entry pop-up screen.
❑ Press [Done].
NOTE
• To change a value you entered, select the shift direction ➞ enter the correct value
using the numeric keys on the inch entry pop-up screen.
• If you make a mistake when entering values, press [C] on the inch entry pop-up
screen ➞ enter the correct values.
• To enter values in millimeters, press [mm].
• When entering values in millimeters, you can also use
(numeric keys), and
(Clear) to clear your entries.
• If you enter a value outside the setting range, a message prompting you to enter an
appropriate value appears on the screen.
• For instructions on entering values in inches, see Chapter 2, "Basic Operations," in
the Reference Guide.
Shifting the Original Image
4-5
4
Special Copying Features - Image Adjustment
1
● Example: To move the original image to the left:
❑ Press the left [
].
❑ Enter the shift value.
Special Copying Features - Image Adjustment
4
● Example: To move the original image in a diagonal direction:
❑ Press the top [
].
❑ Enter the shift value.
❑ Press the right [
].
❑ Enter the shift value.
A diagonal arrow pointing in the direction of the shift appears.
3
Press [OK] ➞ [Done].
The selected mode is set, and the display returns to the Copy Basic Features
screen.
4-6
Shifting the Original Image
Press
(Start).
Copying starts.
NOTE
• To cancel this setting, press [Special Features] ➞ [Shift] ➞ [Cancel].
• To cancel all settings and return the machine to the Standard mode, press
(Reset).
4
Special Copying Features - Image Adjustment
4
Shifting the Original Image
4-7
Margin Mode
This mode enables you to make copies with the entire original image shifted by a
designated width to the left, right, top, or bottom to create a margin on the copies.
Use this mode to make copies ready for placement in ring binders.
Original
Left Margin
Selected
Right Margin
Selected
Top Margin
Selected
Bottom Margin
Selected
Special Copying Features - Image Adjustment
4
IMPORTANT
• The Margin mode cannot be used with the Multi-Page Enlargement, Booklet, Image
Repeat, or Mirror Image mode.
• The Margin mode shifts the entire original image by the designated width. Therefore, an
original whose image extends all the way to the edges of the sheet may be partially cut
off on the copy. However, if you specify the Entire Image mode with the Margin mode, the
machine automatically changes the copy ratio to ensure that the image is not cut off.
NOTE
You can choose to only create a margin on the back side of a copy. Therefore, originals
that already have a margin can be copied in the 1 2-Sided mode or 2 1-Sided mode.
1
4-8
Place your originals ➞ press [Special Features] ➞ [Margin].
Margin Mode
NOTE
If the desired setting is not displayed, press [▼] or [▲] to scroll to the desired
setting.
Select the desired margin type ➞ enter the margin width.
4
IMPORTANT
• If you are using the Margin and Two-sided modes together and copying an original
that already has a left or right margin, follow the instructions below:
- 1 2-Sided: Set the Margin mode for the back only.
- 2 2-Sided: You do not need to set the Margin mode. Proceed to make copies
in the usual way.
- 2 1-Sided: Set the Margin mode for the back only.
• If you are using the Margin and Two-sided modes together and copying an original
that does not have a margin, follow the instructions below:
- 1 2-Sided: Set the Margin mode for both the front and back.
- 2 2-Sided: Set the Margin mode for both the front and back.
- 2 1-Sided: Set the Margin mode for both the front and back.
NOTE
• To enter values in millimeters, press [mm].
• The default setting is '3/8" (10 mm)'.
Margin Mode
4-9
Special Copying Features - Image Adjustment
2
● If you select [Left Margin] or [Right margin]:
❑ Press [ ] or [+] to set the margin width for the front and back (0" to 13/16" or 0
mm to 20 mm) ➞ press [OK] ➞ [Done].
Special Copying Features - Image Adjustment
4
The selected mode is set, and the display returns to the Copy Basic Features
screen.
● If you select [Top Margin] or [Bottom Margin]:
❑ Press [ ] or [+] to set the margin width (1/16" to 13/16" or 1 mm to 20 mm) ➞
press [OK] ➞ [Done].
The selected mode is set, and the display returns to the Copy Basic Features
screen.
NOTE
• When entering values in millimeters, you can also use
(numeric keys), and
(Clear) to clear your entries.
• You can change the value by pressing [ ] or [+], even if you have entered the value
using
(numeric keys).
• If you enter a value outside the setting range, a message prompting you to enter an
appropriate value appears on the screen.
4-10
Margin Mode
Press
(Start).
Copying starts.
NOTE
• To cancel this setting, press [Special Features] ➞ [Margin] ➞ [Cancel].
• To cancel all settings and return the machine to the Standard mode, press
(Reset).
4
Special Copying Features - Image Adjustment
3
Margin Mode
4-11
Frame Erase
This mode enables you to erase shadows and lines that appear when copying
various types of originals. The following three Frame Erase modes are available.
IMPORTANT
Combinations of the three Frame Erase modes cannot be set. If you select one of these
modes, the previously set mode is canceled.
■ Original Frame Erase
4
Special Copying Features - Image Adjustment
This mode erases the dark borders and frame lines that appear around the copy if the
original is smaller than the selected paper size. You can also use this mode to create a
blank border around the edge of the copy.
Copy (LTR)
Original (STMT)
Original Frame
Erase Selected
Copy (LTR)
Original Frame
Erase Not Selected
4-12
Frame Erase
■ Book Frame Erase
This mode erases the dark borders, as well as center and contour lines that appear if you
are copying facing pages in a book or bound original onto a single sheet of paper.
Copy
Book Frame
Erase Selected
Original
Copy
■ Binding Erase
This mode erases the shadows that appear on copies from binding holes on originals.
Copy
Original
Binding Erase
Selected
Copy
Binding Erase
Not Selected
Frame Erase
4-13
Special Copying Features - Image Adjustment
4
Book Frame
Erase Not
Selected
Original Frame Erase
This mode erases the dark borders and frame lines that appear around the copy if
the original is smaller than the selected paper size. You can also use this mode to
create a blank border around the edge of the copy.
IMPORTANT
The Original Frame Erase mode cannot be used with the Entire Image, Multi-Page
Enlargement, Image Combination, Booklet, Image Repeat, Mirror Image, or Area
Designation (Framing) mode.
1
Special Copying Features - Image Adjustment
4
Place your originals ➞ press [Special Features] ➞ [Frame
Erase].
NOTE
If the desired setting is not displayed, press [▼] or [▲] to scroll to the desired
setting.
4-14
Frame Erase
2
Press [Original Frame Erase].
3
Press [ ] or [+] to set the frame erase width.
NOTE
• To enter values in millimeters, press [mm].
• When entering values in millimeters, you can also use
(numeric keys), and
(Clear) to clear your entries.
• You can change the value by pressing [ ] or [+], even if you have entered the value
using
(numeric keys).
• If you enter a value outside the setting range, a message prompting you to enter an
appropriate value appears on the screen.
• The default setting is '1/8" (4 mm)'. The maximum original frame erase width that
you can set is '1 15/16" (50 mm)'.
Frame Erase
4-15
Special Copying Features - Image Adjustment
4
● If you want to set the same width for all four borders:
❑ Press [ ] or [+] to set the frame erase width ➞ press [Next].
4
Special Copying Features - Image Adjustment
● If you want to set the top, left, right, and bottom widths
independently:
❑ Press [Adjust Each Dim.].
❑ Select the desired frame erase borders ➞ press [ ] or [+] to set their respective
frame erase widths ➞ press [Next].
To return to the screen for setting the same width for all four borders, press
[Adjust All At Once].
4-16
Frame Erase
Select the original size ➞ press [OK] ➞ [Done].
The selected mode is set, and the display returns to the Copy Basic Features
screen.
IMPORTANT
You can set the Original Frame Erase mode only for the original paper sizes shown
on the touch panel display.
NOTE
To select an A or B series paper size, press [A/B-size].
5
Press
(Start).
Copying starts.
NOTE
• To cancel this setting, press [Special Features] ➞ [Frame Erase] ➞ [Cancel].
• To cancel all settings and return the machine to the Standard mode, press
(Reset).
Frame Erase
4-17
4
Special Copying Features - Image Adjustment
4
Book Frame Erase
This mode erases the dark border, as well as center and contour lines that appear if
you are copying facing pages in a book or bound original onto a single sheet of
paper.
IMPORTANT
The Book Frame Erase mode cannot be used with the Entire Image, Multi-Page
Enlargement, Image Combination, Booklet, Image Repeat, Mirror Image, or Area
Designation (Framing) modes.
1
Special Copying Features - Image Adjustment
4
Place your original on the platen glass ➞ press [Special
Features] ➞ [Frame Erase].
If necessary, see the screen shot in step 1 of "Original Frame Erase," on p. 4-14.
NOTE
If the desired setting is not displayed, press [▼] or [▲] to scroll to the desired
setting.
2
4-18
Frame Erase
Press [Book Frame Erase].
3
Press [ ] or [+] to set the frame erase widths.
NOTE
• To enter values in millimeters, press [mm].
• When entering values in millimeters, you can also use
(numeric keys), and
(Clear) to clear your entries.
• You can change the value by pressing [ ] or [+], even if you have entered the value
using
(numeric keys).
• If you enter a value outside the setting range, a message prompting you to enter an
appropriate value appears on the screen.
• The default settings are '3/8" (10 mm)' for [Center] and '1/8" (4 mm)' for [Top], [Left],
[Right], and [Bottom]. The maximum book frame erase width that you can set is
'1 15/16" (50 mm)'.
❑ Press [Center] and [Sides] ➞ press [ ] or [+] to set their respective frame erase
widths ➞ press [Next].
Frame Erase
4-19
Special Copying Features - Image Adjustment
4
● If you want to set the same width for all four borders:
● If you want to set the top, left, center, right, and bottom widths
independently:
❑ Press [Adjust Each Dim.].
❑ Select the desired frame erase borders ➞ press [ ] or [+] to set their respective
frame erase widths ➞ press [Next].
Special Copying Features - Image Adjustment
4
To return to the screen for setting the same width for all four borders, press
[Adjust All At Once].
4
Select the size of the bound original when it is open ➞ press
[OK] ➞ [Done].
The selected mode is set, and the display returns to the Copy Basic Features
screen.
IMPORTANT
You can set the Book Frame Erase mode only for the original paper sizes shown on
the touch panel display.
4-20
Frame Erase
NOTE
To select an A or B series paper size, press [A/B-size].
Press
(Start).
Copying starts.
NOTE
• To cancel this setting, press [Special Features] ➞ [Frame Erase] ➞ [Cancel].
• To cancel all settings and return the machine to the Standard mode, press
(Reset).
4
Special Copying Features - Image Adjustment
5
Frame Erase
4-21
Binding Erase
This mode erases the shadows that appear on copies from binding holes on
originals.
IMPORTANT
• The Binding Erase mode cannot be used with the Entire Image, Multi-Page Enlargement,
Book 2-Sided, Two-page Separation, Booklet, Image Repeat, Mirror Image, or Area
Designation (Framing) mode.
• Do not place originals with binding holes in the feeder, as this may damage the originals.
• If you are using the Binding Erase mode, the borders you do not select are also erased
by 1/8" (4 mm).
4
Special Copying Features - Image Adjustment
1
Place your original on the platen glass ➞ press [Special
Features] ➞ [Frame Erase].
If necessary, see the screen shot in step 1 of "Original Frame Erase," on p. 4-14.
NOTE
If the desired setting is not displayed, press [▼] or [▲] to scroll to the desired
setting.
2
Press [Binding Erase] ➞ select the border where the binding
holes are located.
The border is where the binding holes are located on the original, if you visualize
the original as being face up.
4-22
Frame Erase
3
Press [ ] or [+] to set the frame erase width ➞ press [OK] ➞
[Done].
The selected mode is set, and the display returns to the Copy Basic Features
screen.
NOTE
• To enter values in millimeters, press [mm].
• When entering values in millimeters, you can also use
(numeric keys), and
(Clear) to clear your entries.
• You can change the value by pressing [ ] or [+], even if you have entered the value
using
(numeric keys).
• If you enter a value outside the setting range, a message prompting you to enter an
appropriate value appears on the screen.
• The default setting is '3/4" (18 mm)'. The maximum binding erase width that you
can set is '13/16" (20 mm)'.
4
Press
(Start).
Copying starts.
IMPORTANT
If the original contains fine text or print, such as a map, the machine may need to
read or scan the document several times. Do not remove the original from the
platen glass until scanning is complete.
NOTE
• To cancel this setting, press [Special Features] ➞ [Frame Erase] ➞ [Cancel].
• To cancel all settings and return the machine to the Standard mode, press
(Reset).
Frame Erase
4-23
Special Copying Features - Image Adjustment
4
Special Copying Features - Image Adjustment
4
4-24
Frame Erase
Special Copying Features Scan Settings and Notifications
5
CHAPTER
This chapter describes the scan settings and notification settings.
Different Size Originals . . . . . . . . . . . . . . . . . . . . . . . . . . . . . . . . . . . . . . . . . . . . . . . . . . . 5-2
Job Build . . . . . . . . . . . . . . . . . . . . . . . . . . . . . . . . . . . . . . . . . . . . . . . . . . . . . . . . . . . . . . 5-5
Job Done Notice . . . . . . . . . . . . . . . . . . . . . . . . . . . . . . . . . . . . . . . . . . . . . . . . . . . . . . . 5-10
5-1
Different Size Originals
This mode enables you to copy different size originals together.
IMPORTANT
• The Different Size Originals mode cannot be used with the Multi-Page Enlargement,
Book 2-Sided, Two-page Separation, Image Combination, Booklet, or Image Repeat
mode.
• If the originals are placed in the feeder, make sure that the different size originals are of
the same weight (paper type).
• Align the top edge of the originals with the back edge of the feeder if you are placing
originals with different widths.
• Set different size originals with different widths and lengths in the following combinations.
Other combinations may damage the originals.
- 11" x 17" and LGL, LTR and LGL, LTR and LTRR.
• If you place originals with different widths in the feeder, the originals may move slightly
when fed to the platen glass. As a result, the images may be scanned and copied as
slanted.
• If the Different Size Originals mode is set in combination with the Shift mode or the
Cover/Sheet Insertion mode, you cannot use the Automatic Paper Selection mode.
• Stapling cannot be performed if you place originals with different widths.
• If the Different Size Originals mode is set, Auto Orientation is not performed.
• If the Different Size Originals mode is set, the scanning speed is slower than normal.
Special Copying Features - Scan Settings and Notifications
5
NOTE
If the Different Size Originals mode is used with the 1 2-Sided mode, the copies are
output as one-sided copies on paper of their respective sizes if the originals for the front
and back sides of a two-sided copy are different in size.
5-2
Different Size Originals
1
Place your originals ➞ press [Special Features].
2
Press [Different Size Originals]
Special Copying Features - Scan Settings and Notifications
5
NOTE
If the desired setting is not displayed, press [▼] or [▲] to scroll to the desired
setting.
Different Size Originals
5-3
3
Select the type of originals ➞ press [OK] ➞ [Done].
If you are placing originals with the same width, press [Same Width].
If you are placing originals with different widths, press [Different Width].
5
Special Copying Features - Scan Settings and Notifications
The selected mode is set, and the display returns to the Copy Basic Features
screen.
4
Press
(Start).
If the original is placed on the platen glass, follow the instructions that appear on
the touch panel display ➞ press (Start) once for each original. When scanning
is complete, press [Done].
Copying starts.
NOTE
• To cancel this setting, press [Special Features] ➞ [Different Size Originals] ➞
[Cancel].
• To cancel all settings and return the machine to the Standard mode, press
(Reset).
5-4
Different Size Originals
Job Build
This mode enables you to scan originals that are too many to be placed at once, by
dividing them into multiple batches. You can use both the feeder and the platen
glass for scanning. The originals are printed as one document after all of the
batches have been scanned.
Originals
Copies
IMPORTANT
• The Job Build mode cannot be used with the Multi-Page Enlargement mode.
• You cannot change the copy settings while the machine is scanning originals in the Job
Build mode. You need to set the necessary copy settings beforehand, according to the
type of originals or the desired Finisher mode.
• You can change or specify the following settings before scanning the next batch of
originals (i.e., between batches): the number of copies, Two-sided Original mode, original
type, copy exposure, color mode, and copy ratio. However, if you specify the Image
Combination mode with the Job Build mode, you cannot change the copy exposure,
original type, color mode, and copy ratio.
• If you place your originals in the feeder, remove the originals from the original output area
when the scanning of each batch is complete.
Job Build
5-5
Special Copying Features - Scan Settings and Notifications
5
NOTE
• If you place different size originals in the feeder, set the Different Size Originals mode.
• If you want to copy one-sided and two-sided originals as two-sided copies, divide the
originals into one-sided and two-sided batches. For example, if the first batch of originals
to be copied consists of two-sided originals, set the Two-sided Original mode. Thereafter,
you have to manually set or cancel the Two-sided Original mode for each batch of
originals that you scan.
• It is useful to store originals in an inbox first and print them later using the Merge
Documents mode if you cannot prepare the originals at one time, or if you want to specify
different settings for each original. (See Chapter 5, "Using/Arranging Documents Stored
in an Inbox," in the Mail Box Guide.)
1
Place your first batch of originals ➞ press [Special Features].
If necessary, see the screen shot in step 1 of "Different Size Originals," on p. 5-2.
5
Special Copying Features - Scan Settings and Notifications
2
Press [Job Build] ➞ [Done].
The selected mode is set, and the display returns to the Copy Basic Features
screen.
NOTE
If the desired setting is not displayed, press [▼] or [▲] to scroll to the desired
setting.
3
Press
(Start).
Scanning starts.
NOTE
To cancel scanning, press [Cancel] or
5-6
Job Build
(Stop).
When scanning is complete, place your next batch of
originals ➞ press
(Start).
If you want to change the scan settings, change them before pressing
(Start).
You can change the copy exposure and the original type setting. (See "Copy
Exposure and Original Type Settings," on p. 2-17.)
5
You can change the number of copy sets. (See "Copy Quantity," on p. 2-3.)
You can change the color mode setting. (See "Changing Color Modes," on p.
2-86.)
You can change the copy ratio setting. (See "Changing the Copy (Zoom) Ratio,"
on p. 2-24.)
You can change the one-sided or two-sided original setting. (See "Two-Sided
Copying," on p. 2-73.)
● If the original is two-sided:
❑ Press [Two-sided Original].
Job Build
5-7
Special Copying Features - Scan Settings and Notifications
4
❑ Select the type of two-sided original ➞ press [OK].
Details of each item are shown below.
[Book Type]:
5
The front and back sides of the original have the same
top-bottom orientation.
Special Copying Features - Scan Settings and Notifications
[Calendar Type]: The front and back sides of the original have opposite
top-bottom orientations.
Do not forget to set or cancel the Two-sided Original mode, according to the
type of originals you place next.
To cancel the Two-sided Original mode, press [Two-sided Original] ➞
[Cancel].
Repeat this step as necessary.
IMPORTANT
If the original contains fine text or print, such as a map, the machine may need to
read or scan the document several times. Do not remove the original from the
platen glass until scanning is complete.
NOTE
[Two-sided Original] is available only if the optional Feeder (DADF-L1) is attached.
5-8
Job Build
After the last batch of originals is scanned, press [Done].
Copying starts.
5
NOTE
• To cancel this setting, press [Special Features] ➞ [Job Build].
• To cancel all settings and return the machine to the Standard mode, press
(Reset).
Job Build
Special Copying Features - Scan Settings and Notifications
5
5-9
Job Done Notice
This mode enables you to set the machine to notify you through e-mail when the
current copy job is done. This is especially useful when you are waiting in line for a
large copy job to complete.
IMPORTANT
• The Job Done Notice can be set only if the optional Color Universal Send Kit and
Resolution Switching Board are installed.
• To be able to set the Job Done Notice mode, you must first store your e-mail address in
the Address Book. (See Chapter 10, "Storing/Editing Address Book Settings," in the
Sending and Facsimile Guide.)
Special Copying Features - Scan Settings and Notifications
5
1
Place your originals ➞ press [Special Features] ➞ [Job Done
Notice].
NOTE
If the desired setting is not displayed, press [▼] or [▲] to scroll to the desired
setting.
5-10
Job Done Notice
If you want to select a destination managed with the Access
Number Management mode, press [Access Number].
If you want to select a destination that is not managed with the Access Number
Management mode, or if the Access Number Management mode is not set to
'On', proceed to step 4.
NOTE
To display the [Access Number] key, set Access Number Management to 'On'. To
access the Access Number Management mode, press (Additional Functions) ➞
[System Settings] ➞ [Manage/Access to Address Book] ➞ [Access Number
Management]. (See Chapter 11, "System Manager Settings," in the Sending and
Facsimile Guide.)
3
Enter the access number for the selected destination using
(numeric keys) ➞ press [OK].
If you press [No Access Number], the destinations that are not managed with the
Access Number Management mode are displayed.
Job Done Notice
5-11
5
Special Copying Features - Scan Settings and Notifications
2
If you press [Cancel], the display returns to the screen that was displayed before
pressing [Access Number].
4
Select the destination of the job done notice ➞ press [OK] ➞
[Done].
Special Copying Features - Scan Settings and Notifications
5
If the desired destination is not displayed, press [▼] or [▲] to scroll to the
desired destination.
The selected mode is set, and the display returns to the Copy Basic Features
screen.
NOTE
• For instructions on selecting a destination, see Chapter 2, "Basic Sending
Methods," in the Sending and Facsimile Guide.
• You cannot select multiple destinations at one time.
5
Press
(Start).
Copying starts.
Once copying is complete, a job done notice is sent to the selected destination.
NOTE
• To cancel this setting, press [Special Features] ➞ [Job Done Notice] ➞ [Cancel].
• To cancel all settings and return the machine to the Standard mode, press
(Reset).
5-12
Job Done Notice
Special Copying Features Image Editing
6
CHAPTER
This chapter describes the special copying features for image editing.
Using Image Creation Modes . . . . . . . . . . . . . . . . . . . . . . . . . . . . . . . . . . . . . . . . . . . . . . 6-2
Inverting Images (Nega/Posi). . . . . . . . . . . . . . . . . . . . . . . . . . . . . . . . . . . . . . . . . . . . . . . . . . . .6-4
Image Repeat. . . . . . . . . . . . . . . . . . . . . . . . . . . . . . . . . . . . . . . . . . . . . . . . . . . . . . . . . . . . . . . .6-5
Mirror Image . . . . . . . . . . . . . . . . . . . . . . . . . . . . . . . . . . . . . . . . . . . . . . . . . . . . . . . . . . . . . . . .6-14
Area Designation . . . . . . . . . . . . . . . . . . . . . . . . . . . . . . . . . . . . . . . . . . . . . . . . . . . . . . 6-16
Framing . . . . . . . . . . . . . . . . . . . . . . . . . . . . . . . . . . . . . . . . . . . . . . . . . . . . . . . . . . . . . . . . . . .6-19
Blanking . . . . . . . . . . . . . . . . . . . . . . . . . . . . . . . . . . . . . . . . . . . . . . . . . . . . . . . . . . . . . . . . . . .6-32
6-1
Using Image Creation Modes
The Image Creation modes enable you to rearrange the images of originals for the
effect that you want. The following three types of Image Creation modes are
available:
■ Nega/Posi
This mode enables you to make copies of the original image by inverting the hues and
gradations.
Original
Copy
Special Copying Features - Image Editing
6
■ Image Repeat
This mode enables you to repeatedly copy the entire original image in either the vertical or
horizontal direction. The following two settings are available for the Image Repeat mode:
• Automatic Setting
The original image is copied so that the maximum possible number of repeats fit onto
the selected paper size.
Original
6-2
Using Image Creation Modes
Copy
• Manual Setting
The original image is copied the specified number of times.
Original
Copy
Example: If '3 times' is specified,
images overlap when copied.
■ Mirror Image
This mode enables you to copy the original image reversed, as if it were a reflection in a
mirror.
Copy
6
Special Copying Features - Image Editing
Original
Using Image Creation Modes
6-3
Inverting Images (Nega/Posi)
This mode enables you to make copies of the original image by inverting the hues
and gradations.
1
Place your originals ➞ press [Special Features].
2
Press [▼] or [▲] until [Image Creation] appears ➞ press
[Image Creation].
Special Copying Features - Image Editing
6
6-4
Using Image Creation Modes
3
Press [Nega/Posi] ➞ [Done] ➞ [Done].
The selected mode is set, and the display returns to the Copy Basic Features
screen.
Press
(Start).
6
Copying starts.
NOTE
• To cancel this setting, press [Special Features] ➞ [▼] ➞ [Image Creation] ➞
[Nega/Posi].
• To cancel all settings and return the machine to the Standard mode, press
(Reset).
Image Repeat
This mode enables you to repeatedly copy the entire original image in either the
vertical or horizontal direction. The following two settings are available for the Image
Repeat mode.
IMPORTANT
• To use Area Designation (Framing) with the Image Repeat mode, first specify the Image
Repeat mode, and then designate the desired area. Only one area can be designated.
• If the number of times the image to be repeated is set to too many or the designated area
is too small, the color original may be scanned in the Black mode, even if the color mode
is set to 'Auto-Color Select'.
Using Image Creation Modes
6-5
Special Copying Features - Image Editing
4
■ Automatic Setting
The original image is copied so that the maximum possible number of repeats fit onto the
selected paper size.
IMPORTANT
The Image Repeat (Auto) mode cannot be used with the Automatic Paper Selection,
Auto Zoom, Auto XY Zoom, Entire Image, Multi-Page Enlargement, Book 2-Sided,
Two-page Separation, Cover/Sheet Insertion, Image Combination, Shift, Booklet,
Transparency Interleaving, Margin, Different Size Originals, Frame Erase, Mirror Image,
or Area Designation (Blanking) mode.
■ Manual Setting
The original image is copied the specified number of times.
IMPORTANT
The Image Repeat (Manual) mode cannot be used with the Entire Image, Multi-Page
Enlargement, Book 2-Sided, Two-page Separation, Cover/Sheet Insertion, Image
Combination, Shift (No. Key Entry), Booklet, Transparency Interleaving, Margin, Different
Size Originals, Frame Erase, Mirror Image, or Area Designation (Blanking) mode.
6
Special Copying Features - Image Editing
1
Place your originals ➞ select the desired paper size/type ➞
press [Special Features].
If you are designating the area to repeat using the edit pen, place the original on
the platen glass.
To copy multiple originals using the same designated area, remove the original
from the platen glass after specifying the area (after completing step 6), and then
place all of the originals in the feeder.
6-6
Using Image Creation Modes
2
Press [▼] or [▲] until [Image Creation] appears ➞ press
[Image Creation].
If necessary, see the screen shot in step 2 of "Inverting Images (Nega/Posi)," on
p. 6-4.
3
Press [Image Repeat].
4
Set the number of times that you want the image to repeat for
both the vertical and horizontal directions.
● If you want to set the number of repeats automatically:
❑ Press [Auto].
The default setting is 'Auto'. If [Auto] is already selected, this step is not
necessary.
The original image is copied so that the maximum possible number of repeats
fit onto the selected paper size.
Using Image Creation Modes
6-7
Special Copying Features - Image Editing
6
● If you want to set the number of repeats manually:
❑ Press [ ] or [+] to set the number of times that you want the image to repeat.
You can set the number of repeats from 1 to 20.
IMPORTANT
The repeated images may overlap or have gaps between them, depending on the
number of repeats that you set.
Special Copying Features - Image Editing
6
5
If you want only a designated area on the original to be
repeated, press [Framing].
If you are not designating an area to repeat, proceed to step 7.
6
Designate the area.
NOTE
If you designate an area using the edit pen, the output image may not reflect the
designated area precisely. To designate an area precisely, entering values by using
the numeric keys is recommended.
6-8
Using Image Creation Modes
● Using the edit pen:
❑ Press [Pen Entry].
❑ Press [Start Scan].
Special Copying Features - Image Editing
6
Scanning starts.
IMPORTANT
Check that the original is placed on the platen glass.
Using Image Creation Modes
6-9
❑ Designate the area using the edit pen.
Mark the two opposing points with the edit pen.
Ratio
If you designate a point outside the permitted area, a message appears to
inform you that the specified position is not acceptable.
NOTE
• To clear the first point entered, press [Erase Point]. (Once an area is designated,
[Erase Point] changes to [Clear Area].)
• To clear a designated area, press [Clear Area].
• To zoom in on any area on the original, press the ratio drop-down list ➞ select an
enlargement ratio ➞ press [ ], [ ], [▼], or [▲] to specify the area to display.
• To check the designated area, press [Preview].
• To modify a designated area that was specified using the edit pen, press [Area Fine
Adj.] ➞ [Point select] until the screen displays the desired point that you want to
modify ➞ press [ ], [ ], [ ], or [ ] to move the point ➞ press [Done] ➞
[Preview] to check the modified area.
Special Copying Features - Image Editing
6
❑ Press [OK].
The display returns to the Image Repeat screen.
6-10
Using Image Creation Modes
● Using the numeric keys:
❑ Press [Numeric Key Entry].
How to Measure the Area to Be Framed
Original
8 1/2"
Y1
Result
8 1/2"
X2
AB
Y2
X1
AB
11"
11"
[X1] = 5 1/2"
-
[X1]:
[X2]:
[Y1]:
[Y2]:
[X2] = 7 1/4"
[Y1] = 1 1/8"
[Y2] = 1 7/8"
The distance of the area's right border to the original's right edge.
The distance of the area's left border to the original's right edge.
The distance of the area's top border to the original's top edge.
The distance of the area's bottom border to the original's top edge.
Using Image Creation Modes
6-11
6
Special Copying Features - Image Editing
IMPORTANT
• Before performing the next step, you must manually measure the size and position
of the area that you want to designate on the original.
• When you measure the XY values, always start measuring from the image out to
the right side edge of the original and up to the top of the original. These
measurements tell the machine the desired framed area's size and position.
❑ Press [X1], [X2], [Y1], and [Y2] ➞ enter their respective measurements using
the numeric keys on the inch entry pop-up screen ➞ press [Done] ➞ [OK].
Special Copying Features - Image Editing
6
The setting range for [X1] and [X2] is 0" to 17" (0 mm to 432 mm).
The setting range for [Y1] and [Y2] is 0" to 11 11/16" (0 mm to 297 mm).
The display returns to the Image Repeat screen.
6-12
Using Image Creation Modes
NOTE
• If you make a mistake when entering values, press [C] on the inch entry pop-up
screen ➞ enter the correct values.
• To enter values in millimeters, press [mm].
• When entering values in millimeters, you can also use
(numeric keys), and
(Clear) to clear your entries.
• If you enter a value outside the setting range for [X1], [X2], [Y1], or [Y2], a message
prompting you to enter an appropriate value appears on the screen.
• For instructions on entering values in inches, see Chapter 2, "Basic Operations," in
the Reference Guide.
• To change a value you entered, press [X1], [X2], [Y1], or [Y2] ➞ enter the correct
value using the numeric keys on the inch entry pop-up screen.
• To check the designated area, press [Check Area].
• To clear all your entries, press [Clear Area].
Press [OK] ➞ [Done] ➞ [Done].
The selected mode is set, and the display returns to the Copy Basic Features
screen.
8
Press
(Start).
If you need to designate the same area for multiple originals using the edit pen,
remove the original from the platen glass after specifying the area ➞ place all of
the originals in the feeder ➞ press
(Start).
Copying starts.
NOTE
• To cancel this setting, press [Special Features] ➞ [▼] ➞ [Image Creation] ➞
[Image Repeat] ➞ [Cancel].
• To cancel all settings and return the machine to the Standard mode, press
(Reset).
Using Image Creation Modes
6-13
6
Special Copying Features - Image Editing
7
Mirror Image
This mode enables you to copy the original image reversed, as if it were a reflection
in a mirror.
IMPORTANT
The Mirror Image mode cannot be used with the Entire Image, Multi-Page Enlargement,
Cover/Sheet Insertion, Image Combination, Shift, Booklet, Transparency Interleaving,
Margin, Frame Erase, or Image Repeat mode.
1
Place your originals ➞ press [Special Features].
If necessary, see the screen shot in step 1 of "Inverting Images (Nega/Posi)," on
p. 6-4.
2
6
Press [▼] or [▲] until [Image Creation] appears ➞ press
[Image Creation].
Special Copying Features - Image Editing
If necessary, see the screen shot in step 2 of "Inverting Images (Nega/Posi)," on
p. 6-4.
3
Press [Mirror Image] ➞ [Done] ➞ [Done].
The selected mode is set, and the display returns to the Copy Basic Features
screen.
4
Press
(Start).
Copying starts.
6-14
Using Image Creation Modes
NOTE
• To cancel this setting, press [Special Features] ➞ [▼] ➞ [Image Creation] ➞ [Mirror
Image].
• To cancel all settings and return the machine to the Standard mode, press
(Reset).
Special Copying Features - Image Editing
6
Using Image Creation Modes
6-15
Area Designation
The Area Designation mode enables you to frame areas to copy or areas to blank
out in the copy. You can designate up to four areas using the edit pen on the
preview screen, or the numeric keys on the inch entry pop-up screen.
NOTE
• You can use the numeric keys to modify areas designated with the edit pen.
• If you designate an area using the edit pen, the output image may not reflect the
designated area precisely. To designate an area precisely, enter the values using the
numeric keys.
■ Framing
This setting enables you to copy only the contents of the designated area while discarding
the rest of the image. The following two designation methods are available:
6
• Using the edit pen
Special Copying Features - Image Editing
- Use the edit pen to specify the area.
Original
Copy
Use two points to
designate the area
1
Designate an Area
Area
Points
Use multiple points
to designate the area
1
Designate an Area
Area
6-16
Area Designation
• Using the numeric keys
- Use the numeric keys on the inch entry pop-up screen to specify the area.
Original
Copy
X2
X1
1
Designate
an Area
Y1
Y2
Area
1
Designate
Multiple Areas
6
Special Copying Features - Image Editing
Area
Area Designation
6-17
■ Blanking
This setting enables you to blank out the contents of the designated area. The following
two designation methods are available:
• Using the edit pen
- Use the edit pen to specify the area.
Original
Copy
Use two points to
designate the area
1
1
Designate an Area
Area
Points
Use multiple points to
designate the area
1
1
Special Copying Features - Image Editing
6
Designate an Area
Area
6-18
Area Designation
• Using the numeric keys
- Use the numeric keys on the inch entry pop-up screen to specify the area.
Copy
Original
X2
X1
1
Designate
an Area
Y1
1
Y2
Area
1
1
Designate
Multiple Areas
Framing
This setting enables you to copy only the contents of the designated area while
discarding the rest of the image.
You can designate the area using the edit pen or the numeric keys on the inch entry
pop-up screen.
IMPORTANT
• The Framing mode cannot be used with the Multi-page Enlargement, Book 2-Sided,
Two-page Separation, Image Combination, Booklet, Transparency Interleaving, Frame
Erase, or Image Repeat mode.
• If the designated area is too small, the color original may be scanned in the Black mode,
even if the color mode is set to 'Auto-Color Select'.
Area Designation
6-19
Special Copying Features - Image Editing
6
Area
Using the Edit Pen
You can use the edit pen to designate two different types of areas: a rectangular
area (two points) and a polygonal area (four points or more).
IMPORTANT
• You can designate only one polygonal area at a time.
• You cannot designate a rectangular area and a polygonal area at the same time.
1
Place your original on the platen glass ➞ press [Special
Features].
If necessary, see the screen shot in step 1 of "Inverting Images (Nega/Posi)," on
p. 6-4.
2
Press [▼] or [▲] until [Area Designation] appears ➞ press
[Area Designation].
Special Copying Features - Image Editing
6
6-20
Area Designation
3
Press [Pen Entry].
4
Press [Start Scan].
Special Copying Features - Image Editing
6
Scanning starts.
IMPORTANT
Confirm that the original is placed on the platen glass.
Area Designation
6-21
5
Designate the area using the edit pen.
If you designate a point outside the permitted area, a message appears to inform
you that the specified position is not acceptable.
NOTE
• To clear the last point entered, press [Erase Point]. (Once an area is designated,
[Erase Point] changes to [Clear Area].)
• To clear a designated area, press [Clear Area].
• To zoom in on any area on the original, press the ratio drop-down list ➞ select an
enlargement ratio ➞ press [ ], [ ], [▼], or [▲] to display the desired area.
● To designate a rectangular area with two points:
❑ Designate two opposing points with the edit pen.
Special Copying Features - Image Editing
6
Ratio
You can designate up to four different areas.
● To designate an area with multiple points:
❑ Press [Multi-point] ➞ specify the area with the edit pen.
❑ After designating the last point, press [Fix Multipoints].
6-22
Area Designation
You can designate up to 10 points.
IMPORTANT
• If you select [Multi-point] only one area can be designated at a time.
• An area that is designated by selecting [Multi-point] cannot be modified using the
numeric keys on the inch entry pop-up screen or
(numeric keys) on the
control panel.
6
Press [Framing].
If you want to use different settings for different areas, select the area by pressing
the appropriate area key ➞ select [Framing] or [Blanking].
7
Press [Preview] ➞ check the designated area ➞ press [Done].
Area Designation
6-23
Special Copying Features - Image Editing
6
NOTE
• If the designated area is rectangular, and you want to continue designating other
areas, repeat steps 5 to 7. Areas that have already been designated are displayed
with the new area.
• To modify a designated area that was specified using the edit pen, press [Area Fine
Adj.] ➞ [Point select] until the screen displays the desired point that you want to
modify ➞ press [ ], [ ], [ ], or [ ] to move the point ➞ press [Done] ➞
[Preview] to check the modified area.
Special Copying Features - Image Editing
6
8
6-24
Press [Next].
Area Designation
9
Select [Shift center] or [Do not shift center] ➞ press [OK] ➞
[Done].
The selected mode is set, and the display returns to the Copy Basic Features
screen.
10 Press
(Start).
If you need to designate the same area for multiple originals, remove the original
from the platen glass ➞ place all of the originals in the feeder ➞ press
(Start).
Copying starts.
NOTE
• To cancel this setting, press [Special Features] ➞ [▼] ➞ [Area Designation] ➞ [Pen
Entry] ➞ [Cancel].
• To cancel all settings and return the machine to the Standard mode, press
(Reset).
Area Designation
6-25
6
Special Copying Features - Image Editing
NOTE
• If the Center Shift mode is already specified beforehand, the Center Shift Settings
screen does not appear.
• The Center Shift settings specified within the Area Designation mode are deleted
when the area settings are canceled.
Using the Numeric Keys
1
Place your original on the platen glass ➞ press [Special
Features].
If necessary, see the screen shot in step 1 of "Inverting Images (Nega/Posi)," on
p. 6-4.
2
Press [▼] or [▲] until [Area Designation] appears ➞ press
[Area Designation].
If necessary, see the screen shot in step 2 of "Using the Edit Pen," on p. 6-20.
3
Press [Numeric Key Entry].
Special Copying Features - Image Editing
6
IMPORTANT
• Before performing the next step, you must manually measure the size and position
of the area that you want to designate on the original.
• When you measure the XY values, always start measuring from the image out to
the right side edge of the original, and up to the top of the original. These
measurements tell the machine the desired framed area's size and position.
6-26
Area Designation
How to Measure the Area to Be Framed
Original
8 1/2"
Y1
Result
8 1/2"
X2
AB
Y2
X1
AB
11"
11"
[X1] = 5 1/2"
[X1]:
[X2]:
[Y1]:
[Y2]:
[Y1] = 1 1/8"
[Y2] = 1 7/8"
The distance of the area's right border to the original's right edge.
The distance of the area's left border to the original's right edge.
The distance of the area's top border to the original's top edge.
The distance of the area's bottom border to the original's top edge.
6
Special Copying Features - Image Editing
-
[X2] = 7 1/4"
Area Designation
6-27
4
Press [X1], [X2], [Y1], and [Y2] ➞ enter their respective
measurements using the numeric keys on the inch entry
pop-up screen ➞ press [Done].
Special Copying Features - Image Editing
6
You can designate up to four areas.
The setting range for [X1] and [X2] is 0" to 17" (0 mm to 432 mm).
The setting range for [Y1] and [Y2] is 0" to 11 11/16" (0 mm to 297 mm).
6-28
Area Designation
NOTE
• If you make a mistake when entering values, press [C] on the inch entry pop-up
screen ➞ enter the correct values.
• To enter values in millimeters, press [mm].
• When entering values in millimeters, you can also use
(numeric keys), and
(Clear) to clear your entries.
• For instructions on entering values in inches, see Chapter 2, "Basic Operations," in
the Reference Guide.
• To change a value you entered, press [X1], [X2], [Y1], or [Y2] ➞ enter the correct
value using the numeric keys on the inch entry pop-up screen.
• To check the designated area, press [Check Area].
5
Special Copying Features - Image Editing
6
Press [Framing].
Area Designation
6-29
NOTE
• To continue designating other areas, press an area key ➞ repeat step 4.
Area Keys
• To redesignate an area, select the area by pressing the appropriate area key ➞
repeat step 4 ➞ press [Done].
• To clear a designated area, select the area by pressing the appropriate area key ➞
press [Clear Area].
Special Copying Features - Image Editing
6
• If you want to use different settings for different areas, select the area by pressing
the appropriate area key ➞ select [Framing] or [Blanking].
6
Press [Next].
NOTE
If you enter a value outside the setting range for [X1], [X2], [Y1], or [Y2] in step 4, a
message prompting you to enter an appropriate value appears on the screen.
6-30
Area Designation
7
Select [Shift center] or [Do not shift center] ➞ press [OK] ➞
[Done].
The selected mode is set, and the display returns to the Copy Basic Features
screen.
8
Press
(Start).
Copying starts.
NOTE
• To cancel this setting, press [Special Features] ➞ [▼] ➞ [Area Designation] ➞
[Numeric Key Entry] ➞ [Cancel].
• To cancel all settings and return the machine to the Standard mode, press
(Reset).
Area Designation
6-31
6
Special Copying Features - Image Editing
NOTE
• If the Center Shift mode is already specified beforehand, the Center Shift Settings
screen does not appear.
• The Center Shift settings specified within the Area Designation mode are deleted
when the area settings are canceled
Blanking
This setting enables you to blank out the contents of the designated area. You can
designate the area using the edit pen or the numeric keys on the inch entry pop-up
screen.
IMPORTANT
The Blanking mode cannot be used with the Multi-Page Enlargement, Book 2-Sided,
Two-page Separation, Image Combination, Booklet, Transparency Interleaving, or Image
Repeat mode.
Using the Edit Pen
You can use the edit pen to designate two different types of areas: a rectangular
area (two points) and a polygonal area (four points or more).
IMPORTANT
• You can designate only one polygonal area at a time.
• You cannot designate a rectangular area and a polygonal area at the same time.
Special Copying Features - Image Editing
6
1
Place your original on the platen glass ➞ press [Special
Features].
If necessary, see the screen shot in step 1 of "Inverting Images (Nega/Posi)," on
p. 6-4.
2
Press [▼] or [▲] until [Area Designation] appears ➞ press
[Area Designation].
If necessary, see the screen shot in step 2 of "Using the Edit Pen," on p. 6-20.
3
Press [Pen Entry].
If necessary, see the screen shot in step 3 of "Using the Edit Pen," on p. 6-20.
6-32
Area Designation
4
Press [Start Scan].
Scanning starts.
IMPORTANT
Confirm that the original is placed on the platen glass.
Designate the area using the edit pen.
If you designate a point outside the permitted area, a message appears to inform
you that the specified position is not acceptable.
NOTE
• To clear the last point entered, press [Erase Point]. (Once an area is designated,
[Erase Point] changes to [Clear Area].)
• To clear a designated area, press [Clear Area].
• To zoom in on any area on the original, press the ratio drop-down list ➞ select an
enlargement ratio ➞ press [ ], [ ], [▼], or [▲] to display the desired area.
Area Designation
6-33
Special Copying Features - Image Editing
5
6
● To designate a rectangular area with two points:
❑ Designate two opposing points with the edit pen.
Ratio
You can designate up to four different areas.
● To designate an area with multiple points:
❑ Press [Multi-point] ➞ specify the area with the edit pen.
6
Special Copying Features - Image Editing
❑ After designating the last point, press [Fix Multipoints].
You can designate up to 10 points.
IMPORTANT
• If you select [Multi-point], only one area can be designated at a time.
• An area that is designated by selecting [Multi-point] cannot be modified using the
numeric keys on the inch entry pop-up screen or
(numeric keys) on the
control panel.
6-34
Area Designation
6
Press [Blanking].
If you want to use different settings for different areas, select the area by pressing
the appropriate area key ➞ select [Framing] or [Blanking].
Press [Preview] ➞ check the designated area ➞ press [Done].
6
Special Copying Features - Image Editing
7
Area Designation
6-35
NOTE
• If the designated area is rectangular, and you want to continue designating other
areas, repeat steps 5 to 7. Areas that have already been designated are displayed
with the new area.
• To modify a designated area that was specified using the edit pen, press [Area Fine
Adj.] ➞ [Point select] until the screen displays the desired point that you want to
modify ➞ press [ ], [ ], [ ], or [ ] to move the point ➞ press [Done] ➞
[Preview] to check the modified area.
Special Copying Features - Image Editing
6
8
Press [OK] ➞ [Done].
The selected mode is set, and the display returns to the Copy Basic Features
screen.
NOTE
If there are multiple designated areas and [Framing] is specified for one or more of
the areas, press [Next] ➞ select [Shift center] or [Do not shift center] ➞ press [OK]
➞ [Done].
9
Press
(Start).
If you need to designate the same area for multiple originals, remove the original
from the platen glass ➞ place all of the originals in the feeder ➞ press
(Start).
Copying starts.
NOTE
• To cancel this setting, press [Special Features] ➞ [▼] ➞ [Area Designation] ➞ [Pen
Entry] ➞ [Cancel].
• To cancel all settings and return the machine to the Standard mode, press
(Reset).
6-36
Area Designation
Using the Numeric Keys
1
Place your original on the platen glass ➞ press [Special
Features].
If necessary, see the screen shot in step 1 of "Inverting Images (Nega/Posi)," on
p. 6-4.
2
Press [▼] or [▲] until [Area Designation] appears ➞ press
[Area Designation].
If necessary, see the screen shot in step 2 of "Using the Edit Pen," on p. 6-20.
Press [Numeric Key Entry].
If necessary, see the screen shot in step 3 of "Using the Numeric Keys," on p.
6-26.
IMPORTANT
• Before performing the next step, you must manually measure the size and position
of the area that you want to designate on the original.
• When you measure the XY values, always start measuring from the image out to
the right side edge of the original, and up to the top of the original. These
measurements tell the machine the desired framed area's size and position.
How to Measure the Area to Be Framed
Original
8 1/2"
Y1
X2
AB
CD
Y2
11"
[X1] = 5 1/2"
-
[X1]:
[X2]:
[Y1]:
[Y2]:
Result
8 1/2"
X1
CD
[X2] = 7 1/4"
[Y1] = 1 1/8"
11"
[Y2] = 1 7/8"
The distance of the area's right border to the original's right edge.
The distance of the area's left border to the original's right edge.
The distance of the area's top border to the original's top edge.
The distance of the area's bottom border to the original's top edge.
Area Designation
6-37
6
Special Copying Features - Image Editing
3
4
Press [X1], [X2], [Y1], and [Y2] ➞ enter their respective
measurements using the numeric keys on the inch entry
pop-up screen ➞ press [Done].
Special Copying Features - Image Editing
6
You can designate up to four areas.
The setting range for [X1] and [X2] is 0" to 17" (0 mm to 432 mm).
The setting range for [Y1] and [Y2] is 0" to 11 11/16" (0 mm to 297 mm).
6-38
Area Designation
NOTE
• If you make a mistake when entering values, press [C] on the inch entry pop-up
screen ➞ enter the correct values.
• To enter values in millimeters, press [mm].
• When entering values in millimeters, you can also use
(numeric keys), and
(Clear) to clear your entries.
• For instructions on entering values in inches, see Chapter 2, "Basic Operations," in
the Reference Guide.
• To change a value you entered, press [X1], [X2], [Y1], or [Y2] ➞ enter the correct
value using the numeric keys on the inch entry pop-up screen.
• To check the designated area, press [Check Area].
5
Special Copying Features - Image Editing
6
Press [Blanking].
Area Designation
6-39
NOTE
• To continue designating other areas, press an area key ➞ repeat step 4.
Area Keys
• To redesignate an area, select the area by pressing the appropriate area key ➞
repeat step 4 ➞ press [Done].
• To clear a designated area, select the area by pressing the appropriate area key ➞
press [Clear Area].
Special Copying Features - Image Editing
6
• If you want to use different settings for different areas, select the area by pressing
the appropriate area key ➞ select [Framing] or [Blanking].
6
Press [OK] ➞ [Done].
The selected mode is set, and the display returns to the Copy Basic Features
screen.
NOTE
• If you enter a value outside the setting range for [X1], [X2], [Y1], or [Y2] in step 4, a
message prompting you to enter an appropriate value appears on the screen.
• If there are multiple designated areas and [Framing] is specified for one or more of
the areas, press [Next] ➞ select [Shift center] or [Do not shift center] ➞ press [OK]
➞ [Done].
6-40
Area Designation
Press
(Start).
Copying starts.
NOTE
• To cancel this setting, press [Special Features] ➞ [▼] ➞ [Area Designation] ➞
[Numeric Key Entry] ➞ [Cancel].
• To cancel all settings and return the machine to the Standard mode, press
(Reset).
6
Special Copying Features - Image Editing
7
Area Designation
6-41
Special Copying Features - Image Editing
6
6-42
Area Designation
Special Copying Features - Color
and Image Quality Adjustments
7
CHAPTER
This chapter describes the special copying features for color and image quality adjustments.
Adjusting the Color . . . . . . . . . . . . . . . . . . . . . . . . . . . . . . . . . . . . . . . . . . . . . . . . . . . . . . 7-2
Adjusting the Color Balance. . . . . . . . . . . . . . . . . . . . . . . . . . . . . . . . . . . . . . . . . . . . . . . . . . . . .7-2
Color Balance Keys . . . . . . . . . . . . . . . . . . . . . . . . . . . . . . . . . . . . . . . . . . . . . . . . . . . . . . . . . . .7-5
Adjusting the Contrast (Sharpness) . . . . . . . . . . . . . . . . . . . . . . . . . . . . . . . . . . . . . . . . 7-14
One Touch Color Mode . . . . . . . . . . . . . . . . . . . . . . . . . . . . . . . . . . . . . . . . . . . . . . . . . . 7-17
Image Quality Adjustment. . . . . . . . . . . . . . . . . . . . . . . . . . . . . . . . . . . . . . . . . . . . . . . . 7-20
Remove Background . . . . . . . . . . . . . . . . . . . . . . . . . . . . . . . . . . . . . . . . . . . . . . . . . . . . . . . . .7-20
Prevent Bleeding . . . . . . . . . . . . . . . . . . . . . . . . . . . . . . . . . . . . . . . . . . . . . . . . . . . . . . . . . . . .7-23
Copying in a Single Color . . . . . . . . . . . . . . . . . . . . . . . . . . . . . . . . . . . . . . . . . . . . . . . . 7-26
7-1
Adjusting the Color
You can make fine adjustments to the color by varying the relative strength and
density of yellow, magenta, cyan, and black. The color adjustments that you make
can be stored and recalled for future use. (See "Color Balance," on p. 10-2.)
Adjusting the Color Balance
You can adjust the color by changing the relative strength and density of yellow,
magenta, cyan, and black.
1
Place your originals ➞ press [Special Features].
Special Copying Features - Color and Image Quality Adjustments
7
7-2
Adjusting the Color
3
Press [▼] or [▲] until [Color Balance] appears ➞ press [Color
Balance].
Press [ ] or [+] to adjust the strength of each color.
7
You can also press [Recall/Store] to recall and change the previously stored color
balance settings. (See "Recalling Color Balance Settings," on p. 7-9.)
Adjusting the Color
7-3
Special Copying Features - Color and Image Quality Adjustments
2
4
Press [Density Fine Adjustment].
5
Select the color that you want to adjust ➞ press [ ] or [+] to
adjust the density levels for the darker (high), medium, and
lighter (low) density areas ➞ press [OK].
6
Press [OK] ➞ [Done].
Special Copying Features - Color and Image Quality Adjustments
7
The selected mode is set, and the display returns to the Copy Basic Features
screen.
7
Press
(Start).
Copying starts.
7-4
Adjusting the Color
NOTE
• To cancel this setting, press [Special Features] ➞ [▼] ➞ [Color Balance] ➞
[Cancel].
• To cancel all settings and return the machine to the Standard mode, press
(Reset).
Color Balance Keys
You can store color balance settings and recall them for future use. Up to four
different settings can be stored.
Storing Color Balance Settings
1
Press [Special Features] ➞ press [▼] or [▲] until [Color
Balance] appears ➞ press [Color Balance].
If necessary, see the screen shots in steps 1 and 2 of "Adjusting the Color
Balance," on p. 7-2.
Press [ ] or [+] to specify the color balance settings that you
want to store ➞ press [Recall/Store].
For instructions on adjusting the color balance, see "Adjusting the Color
Balance," on p. 7-2.
Adjusting the Color
7-5
7
Special Copying Features - Color and Image Quality Adjustments
2
3
Select a key ([C1] to [C4]) for storing the color balance
settings ➞ press [Store].
NOTE
• Keys that already have settings stored in them are displayed with a colored triangle
( ) in the lower right corner of the key.
• If you select a key that already has settings stored in it, the settings are displayed.
● If you select a key without settings:
7
Special Copying Features - Color and Image Quality Adjustments
❑ A screen appears, asking for your confirmation to store the settings.
Press [Yes].
To cancel storing the settings, press [No].
The message <Stored in memory.> appears for approximately two seconds on
the touch panel display.
The key in which you stored the settings is displayed with a colored triangle
( ) in the lower right corner, and the stored settings are displayed.
7-6
Adjusting the Color
● If you select a key that already has settings stored in it:
❑ A screen appears, asking for your confirmation to overwrite the previous
settings. Press [Yes].
To cancel overwriting the settings, press [No].
The message <Stored in memory.> appears for approximately two seconds on
the touch panel display.
The stored settings are displayed.
7
Press [Cancel] ➞ [Cancel] ➞ [Done].
The display returns to the Copy Basic Features screen.
NOTE
Pressing [Cancel] ➞ [Cancel] ➞ [Done] only stores the color balance settings in
the selected key ([C1] to [C4]), but does not recall them. If you press [OK] ➞ [OK]
➞ [Done], the color balance settings are stored in the selected key ([C1] to [C4]),
and recalled at the same time.
Adjusting the Color
7-7
Special Copying Features - Color and Image Quality Adjustments
4
Naming a Color Balance Key
1
Press [Special Features] ➞ press [▼] or [▲] until [Color
Balance] appears ➞ press [Color Balance].
If necessary, see the screen shots in steps 1 and 2 of "Adjusting the Color
Balance," on p. 7-2.
2
Press [Recall/Store].
3
Select a key ([C1] to [C4]) to name ➞ press [Register Name].
Special Copying Features - Color and Image Quality Adjustments
7
NOTE
• Keys that already have settings stored in them are displayed with a colored triangle
( ) in the lower right corner of the key.
• If you select a key that already has settings stored in it, the settings are displayed.
• You can also name keys with no settings stored in them.
7-8
Adjusting the Color
4
Enter a name ➞ press [OK].
The maximum number of characters that you can enter for a key name is 10.
The assigned name appears on the key.
5
Press [Cancel] ➞ [OK] ➞ [Done].
The display returns to the Copy Basic Features screen.
NOTE
Pressing [Cancel] ➞ [OK] ➞ [Done] only names the selected key ([C1] to [C4]), but
does not recall the color balance settings. If you press [OK] ➞ [OK] ➞ [Done], the
name is stored in the selected key ([C1] to [C4]), and the color balance settings are
recalled at the same time.
Recalling Color Balance Settings
1
Press [Special Features] ➞ press [▼] or [▲] until [Color
Balance] appears ➞ press [Color Balance].
If necessary, see the screen shots in steps 1 and 2 of "Adjusting the Color
Balance," on p. 7-2.
Adjusting the Color
7-9
7
Special Copying Features - Color and Image Quality Adjustments
NOTE
• For instructions on entering characters, see Chapter 2, "Basic Operations," in the
Reference Guide.
• If you press [OK] without entering any characters, the key name reverts to its
current name (default C1 to C4).
2
3
Press [Recall/Store].
Select the key containing the color balance settings that you
want to recall ➞ verify the settings ➞ press [OK].
Special Copying Features - Color and Image Quality Adjustments
7
If you select a key that does not have color balance settings stored in it, [OK] is
grayed out and cannot be pressed.
You can select another key that has color balance settings stored in it, or press
[Cancel].
NOTE
• Recalling color balance settings from memory cancels the current color balance
settings.
• You can make changes to the recalled color balance settings.
• If you press another key, the color balance settings stored in that key are recalled.
7-10
Adjusting the Color
4
Press [OK] ➞ [Done].
The selected mode is set, and the display returns to the Copy Basic Features
screen.
Erasing Color Balance Settings
1
Press [Special Features] ➞ press [▼] or [▲] until [Color
Balance] appears ➞ press [Color Balance].
If necessary, see the screen shots in steps 1 and 2 of "Adjusting the Color
Balance," on p. 7-2.
2
Press [Recall/Store].
3
Select the key containing the color balance settings that you
want to erase ➞ press [Erase].
Adjusting the Color
7-11
Special Copying Features - Color and Image Quality Adjustments
7
A screen appears, asking for your confirmation to erase the settings.
IMPORTANT
Make sure to check the settings first before erasing them.
NOTE
• Keys that already have settings stored in them are displayed with a colored triangle
( ) in the lower right corner of the key.
• If you select a key that already has settings stored in it, the settings are displayed.
4
Press [Yes].
Special Copying Features - Color and Image Quality Adjustments
7
To cancel erasing the settings, press [No].
The message <Erased.> appears for approximately two seconds on the touch
panel display.
The stored color balance settings are erased.
NOTE
Key names are not erased. For instructions on changing a key name, see "Naming
a Color Balance Key," on p. 7-8.
7-12
Adjusting the Color
Press [Cancel] ➞ [OK] ➞ [Done].
The display returns to the Copy Basic Features screen.
NOTE
When a color balance key is not in use, as is the case when you delete its settings,
[OK] is grayed out, and you must press [Cancel] ➞ [OK] ➞ [Done] to complete the
procedure.
7
Special Copying Features - Color and Image Quality Adjustments
5
Adjusting the Color
7-13
Adjusting the Contrast (Sharpness)
This mode enables you to make copies of originals with a sharper or softer
contrast. To reproduce text or lines with a sharper contrast, use [High] as the
setting. To copy originals containing printed images or other halftones with a softer
contrast, use [Low] as the setting.
■ Low
If you make copies of an original containing halftones, such as a printed image, using the
Printed Image mode, the moiré effect (a shimmering, wavy pattern) may occur. However,
you can lessen this moiré effect by using [Low] as the setting to produce a clearer copy.
Copy
Original
The world's coral reefs, where
brilliantly colored fish and a
myriad of other tropical creatures
come together.
Low Set
Low Not Set
The world's coral reefs, where
brilliantly colored fish and a
myriad of other tropical creatures
come together.
The world's coral reefs, where
brilliantly colored fish and a
myriad of other tropical creatures
come together.
Special Copying Features - Color and Image Quality Adjustments
7
■ High
This setting enhances the edges of original images so that faint or fine text is reproduced
with a sharper contrast. This setting is particularly suited to copying blueprints and faint
pencil drawn images.
Copy
Original
7-14
High Set
High Not Set
The world's coral reefs, where
brilliantly colored fish and a
myriad of other tropical creatures
come together.
The world's coral reefs, where
brilliantly colored fish and a
myriad of other tropical creatures
come together.
The world's coral reefs, where
brilliantly colored fish and a
myriad of other tropical creatures
come together.
Aptly nicknamed
“Tropical Forests under the sea”,
these spots of breathtaking
beauty serve as home to
countless varieties of life,
and to us of the land,
this alluring,
dream-like world
forms a tropical
paradise filled
with romance.
Aptly nicknamed
“Tropical Forests under the sea”,
these spots of breathtaking
beauty serve as home to
countless varieties of life,
and to us of the land,
this alluring,
dream-like world
forms a tropical
paradise filled
with romance.
Aptly nicknamed
“Tropical Forests under the sea”,
these spots of breathtaking
beauty serve as home to
countless varieties of life,
and to us of the land,
this alluring,
dream-like world
forms a tropical
paradise filled
with romance.
Adjusting the Contrast (Sharpness)
1
Place your originals ➞ press [Special Features].
If necessary, see the screen shot in step 1 of "Adjusting the Color Balance," on p.
7-2.
2
Press [▼] or [▲] until [Sharpness] appears ➞ press
[Sharpness].
3
Press [Low] or [High] to adjust the sharpness ➞ press [OK] ➞
[Done].
To copy text or lines clearly, the setting should be towards [High]. To copy
originals containing printed images or other halftones, the setting should be
towards [Low].
The selected mode is set, and the display returns to the Copy Basic Features
screen.
Adjusting the Contrast (Sharpness)
7-15
Special Copying Features - Color and Image Quality Adjustments
7
4
Press
(Start).
Copying starts.
NOTE
• To cancel this setting, press [Special Features] ➞ [▼] ➞ [Sharpness] ➞ [Cancel].
• To cancel all settings and return the machine to the Standard mode, press
(Reset).
Special Copying Features - Color and Image Quality Adjustments
7
7-16
Adjusting the Contrast (Sharpness)
One Touch Color Mode
You can make copies by selecting the look of the image with just one touch of a key.
The following six options are available.
IMPORTANT
One Touch Color mode settings are actually preset color balance settings. Therefore, if
you change the One Touch Color mode settings, any color balance settings that you may
have made are also changed.
■ Vivid Colors
This setting enables you to make copies with more vivid color tones and increased color
saturation.
■ Tranquil Colors
This setting enables you to make copies with subdued color tones and decreased color
saturation.
This setting enables you to make copies with lighter color tones by decreasing the density,
while maintaining a good balance throughout.
■ Darken Image
This setting enables you to make copies with heavier color tones by increasing the
density, while maintaining a good balance throughout.
■ Highlight Reproduction
This setting enables you to make copies by reproducing the highlighted areas that
normally tend to appear as white more faithfully. This is achieved by increasing the copy
exposure of areas that have a low exposure.
■ Retro Photo Image
This setting enables you to make copies that look like old-fashioned photographs.
IMPORTANT
The Retro Photo Image mode cannot be used with the Single Color mode.
1
Place your originals ➞ press [Special Features].
If necessary, see the screen shot in step 1 of "Adjusting the Color Balance," on p.
7-2.
One Touch Color Mode
7-17
Special Copying Features - Color and Image Quality Adjustments
7
■ Lighten Image
2
Press [▼] or [▲] until [One Touch Color] appears ➞ press
[One Touch Color].
3
Select the desired One Touch Color feature ➞ press [OK] ➞
[Done].
Special Copying Features - Color and Image Quality Adjustments
7
You can combine different One Touch Color features, but the following cannot be
selected together:
• [Vivid Colors] and [Tranquil Colors]
• [Lighten Image] and [Darken Image] and [Highlight Reproduction]
The selected mode is set, and the display returns to the Copy Basic Features
screen.
NOTE
If you select [Retro Photo Image], [Single Color] is displayed on the Copy Basic
Features screen.
7-18
One Touch Color Mode
Press
(Start).
Copying starts.
NOTE
• To cancel this setting, press [Special Features] ➞ [▼] ➞ [One Touch Color] ➞
[Cancel].
• To cancel all settings and return the machine to the Standard mode, press
(Reset).
7
Special Copying Features - Color and Image Quality Adjustments
4
One Touch Color Mode
7-19
Image Quality Adjustment
You can set the machine to automatically adjust the copy exposure by selecting [A]
(Auto) for the exposure setting. There are two types of automatic copy exposure
adjustments, which you can set through the Image Quality Adjustment mode.
IMPORTANT
• If [A] (Auto) is selected as the copy exposure on the Copy Basic Features screen,
pressing [Image Qual. Adjustment] and making fine adjustments cancels the automatic
copy exposure setting. Similarly, if you select [A] (Auto) for the copy exposure setting
when image quality adjustments have been made, the Image Quality Adjustment mode is
canceled, and the automatic copy exposure is used instead.
• The Remove Background mode cannot be used with the Prevent Bleeding mode.
■ Remove Background
This mode enables you to make copies by erasing the background color of the original.
This feature is especially useful for copying originals, such as catalogues and paper, that
have turned yellow from age. Also, if you find streaks on the output, you can use this
mode to erase the streaks.
Special Copying Features - Color and Image Quality Adjustments
7
■ Prevent Bleeding
This mode enables you to make copies by preventing the original image on the reverse
side of thin originals from appearing on the copies.
Remove Background
This mode enables you to make copies by erasing the background color of the
original. This feature is especially useful for copying originals, such as catalogues
and paper, that have turned yellow from age. (See "Color Copy Samples," on p.
10-2.) Also, if you find streaks on the output, you can use this mode to erase the
streaks.
7-20
Image Quality Adjustment
1
Place your originals ➞ press [A] ➞ [Special Features].
2
Press [▼] or [▲] until [Image Qual. Adjustment] appears ➞
press [Image Qual. Adjustment].
Special Copying Features - Color and Image Quality Adjustments
7
Image Quality Adjustment
7-21
3
Press [Remove Background].
If the background color remains, or if you want to make the background color
darker when the original is scanned in the Remove Background mode, make fine
adjustments to the density of the background color.
If you want to make fine adjustments to the density of the background color,
press [Fine Adjustment] ➞ press [ ] or [+] to specify the amount of each color
that you want to remove ➞ press [OK].
Special Copying Features - Color and Image Quality Adjustments
7
For example, if the background color (yellow) of the original remains, press [ ]
next to <Yellow> to adjust the density.
Adjusting Yellow automatically adjusts the levels of Red and Green to the same
level as Yellow. However, adjusting the levels of Red or Green sets Yellow back to
its default level.
7-22
Image Quality Adjustment
NOTE
• The Remove Background mode is already activated as the default setting. Only
when you select [Fine Adjustment] and change the setting, does <Remve Bgnd +
Fine Adj.> appear above [Image Qual. Adjustment] on the Special Features
screen.
• Pressing [ ] or [+] adjusts the density of each color. Press [ ] to make the color
lighter, or press [+] to make the color darker.
• If you make fine adjustments to the density, the automatic copy exposure setting is
canceled, and the original is scanned according to the Fine Adjustment settings.
4
Press [OK] ➞ [Done].
The selected mode is set, and the display returns to the Copy Basic Features
screen.
5
Press
(Start).
Copying starts.
Prevent Bleeding
This mode enables you to prevent the original image on the reverse side of thin
originals from appearing on the copies.
1
Place your originals ➞ press [A] ➞ [Special Features].
If necessary, see the screen shot in step 1 of "Remove Background," on p. 7-20.
2
Press [▼] or [▲] until [Image Qual. Adjustment] appears ➞
press [Image Qual. Adjustment].
If necessary, see the screen shot in step 2 of "Remove Background," on p. 7-20.
Image Quality Adjustment
7-23
7
Special Copying Features - Color and Image Quality Adjustments
NOTE
• To cancel this setting, press [Special Features] ➞ [▼] ➞ [Image Qual. Adjustment]
➞ [Cancel].
• To cancel all settings and return the machine to the Standard mode, press
(Reset).
3
Press [Prevent Bleed-thru].
If you want to make fine adjustments to the density, press [Fine Adjustment] ➞
press [ ] or [+] to specify the amount of bleeding that you want to prevent ➞
press [OK].
Special Copying Features - Color and Image Quality Adjustments
7
Details of each item are shown below.
[ ]: This setting prevents dark areas on the reverse side of the original from
appearing on the copies, but light areas on the front side may not be copied
either.
[+]: This setting may not be able to completely prevent dark areas on the
reverse side of the original from appearing on the copies, but light areas on
the front side of the original are always copied.
NOTE
If you make fine adjustments to the density, the automatic copy exposure setting is
canceled, and the original is scanned according to the Fine Adjustment settings.
7-24
Image Quality Adjustment
4
Press [OK] ➞ [Done].
The selected mode is set, and the display returns to the Copy Basic Features
screen.
Press
(Start).
Copying starts.
NOTE
• To cancel this setting, press [Special Features] ➞ [▼] ➞ [Image Qual. Adjustment]
➞ [Cancel].
• To cancel all settings and return the machine to the Standard mode, press
(Reset).
7
Special Copying Features - Color and Image Quality Adjustments
5
Image Quality Adjustment
7-25
Copying in a Single Color
You can make copies in one specific color only. (See "Single Color," on p. 10-5.)
IMPORTANT
The Single Color mode cannot be used with the One Touch Color (Retro Photo Image)
mode.
NOTE
To copy in black only, press [Black] in the color selection drop-down list. (See "Changing
Color Modes," on p. 2-86.)
1
Place your originals ➞ press [Special Features].
If necessary, see the screen shot in step 1 of "Adjusting the Color Balance," on p.
7-2.
7
Special Copying Features - Color and Image Quality Adjustments
2
7-26
Press [▼] or [▲] until [Single Color] appears ➞ press [Single
Color].
Copying in a Single Color
3
Select the desired color ➞ press [OK] ➞ [Done].
The selected mode is set, and the display returns to the Copy Basic Features
screen.
[Single Color] is displayed on the Copy Basic Features screen.
Press
(Start).
Copying starts.
7
NOTE
• To cancel this setting, press [Special Features] ➞ [▼] ➞ [Single Color] ➞ [Cancel].
• To cancel all settings and return the machine to the Standard mode, press
(Reset).
Copying in a Single Color
7-27
Special Copying Features - Color and Image Quality Adjustments
4
Special Copying Features - Color and Image Quality Adjustments
7
7-28
Copying in a Single Color
Memory Functions
8
CHAPTER
This chapter describes the memory functions.
Recalling Previous Copy Jobs . . . . . . . . . . . . . . . . . . . . . . . . . . . . . . . . . . . . . . . . . . . . . 8-2
Memory Keys . . . . . . . . . . . . . . . . . . . . . . . . . . . . . . . . . . . . . . . . . . . . . . . . . . . . . . . . . . 8-4
Storing Copy Settings. . . . . . . . . . . . . . . . . . . . . . . . . . . . . . . . . . . . . . . . . . . . . . . . . . . . . . . . . .8-4
Naming a Memory Key. . . . . . . . . . . . . . . . . . . . . . . . . . . . . . . . . . . . . . . . . . . . . . . . . . . . . . . . .8-7
Recalling Copy Settings . . . . . . . . . . . . . . . . . . . . . . . . . . . . . . . . . . . . . . . . . . . . . . . . . . . . . . . .8-9
Erasing Copy Settings . . . . . . . . . . . . . . . . . . . . . . . . . . . . . . . . . . . . . . . . . . . . . . . . . . . . . . . .8-10
8-1
Recalling Previous Copy Jobs
You can recall the three most recent copy jobs and make copies using these
settings.
IMPORTANT
• The machine considers any one of the following operations a copy job:
- When copy settings, such as the copy ratio, number of copies, and copy exposure,
are specified and then
(Start) or
(Reset) is pressed
- If and when the Auto Clear mode activates after copy settings are specified
- If you recall copy settings stored in Mode Memory
Memory Functions
Therefore, if you make settings but do not press either the
(Start) or
(Reset)
key, and the Auto Clear mode does not activate, the settings you have made are not
stored in memory for recall by pressing [Recall].
• The Standard mode is not stored in Recall memory.
• Identical copy settings are stored only once in Recall memory.
NOTE
Once stored, the last three copy jobs are kept in memory even if the power is turned OFF.
8
1
8-2
Place your originals ➞ press [Special Features].
Recalling Previous Copy Jobs
Press [▼] or [▲] until [Recall] appears ➞ press [Recall].
3
Select [1 Before], [2 Before], or [3 Before].
Memory Functions
2
8
4
Verify the settings ➞ press [OK] ➞ [Done].
The selected mode is set, and the display returns to the Copy Basic Features
screen.
NOTE
• If there are more stored copy settings than are currently displayed, you can scroll
through the list by pressing [▼] or [▲].
• You can change the recalled copy settings before making copies.
5
Press
(Start).
Copying starts.
Recalling Previous Copy Jobs
8-3
Memory Keys
You can set any possible combination of copy modes and store them in a memory
key. There are nine memory keys, and they can be assigned names for increased
convenience. This feature is useful for storing frequently used copy settings.
NOTE
• The copy settings stored in memory are not erased, even if the power is turned OFF.
• You can store any function or mode in a memory key, except for the Interrupt mode.
Memory Functions
Storing Copy Settings
1
Specify the copy settings that you want to store on the Copy
Basic Features screen and/or Special Features screen.
8
NOTE
In the example above, the Finisher and Two-sided modes are specified.
8-4
Memory Keys
Press [Special Features] ➞ press [▼] or [▲] until [Mode
Memory] appears ➞ press [Mode Memory].
3
Select a key ([M1] to [M9]) for storing the copy settings ➞
press [Store].
Memory Functions
2
8
NOTE
• Keys that already have settings stored in them are displayed with a colored triangle
( ) in the lower right corner of the key.
• If you select a key that already has settings stored in it, the settings are displayed.
• If there are more stored copy settings than are currently displayed, you can scroll
through the list by pressing [▼] or [▲].
Memory Keys
8-5
● If you select a key without settings:
❑ A screen appears, asking for your confirmation to store the settings. Press
[Yes].
Memory Functions
To cancel storing the settings, press [No].
The message <Stored in memory.> appears for approximately two seconds on
the touch panel display.
The key in which you stored the settings is displayed with a colored triangle
( ) in the lower right corner, and the stored settings are displayed.
● If you select a key that already has settings stored in it:
❑ A screen appears, asking for your confirmation to overwrite the previous
8
settings. Press [Yes].
To cancel overwriting the settings, press [No].
The message <Stored in memory.> appears for approximately two seconds on
the touch panel display.
The stored settings are displayed.
8-6
Memory Keys
4
Press [OK] ➞ [Done].
The display returns to the Copy Basic Features screen.
NOTE
You can assign a name to the memory key by pressing [Register Name].
Naming a Memory Key
1
Press [Special Features] ➞ press [▼] or [▲] until [Mode
Memory] appears ➞ press [Mode Memory].
If necessary, see the screen shot in step 2 of "Storing Copy Settings," on p. 8-4.
Select a key ([M1] to [M9]) to name ➞ press [Register Name].
Memory Functions
2
8
NOTE
• Keys that already have settings stored in them are displayed with a colored triangle
( ) in the lower right corner of the key.
• If you select a key that already has settings stored in it, the settings are displayed.
• You can also name keys with no settings stored in them.
• If there are more stored copy settings than are currently displayed, you can scroll
through the list by pressing [▼] or [▲].
Memory Keys
8-7
3
Enter a name ➞ press [OK].
The maximum number of characters that you can enter for a key name is 10.
Memory Functions
The assigned name appears on the key.
NOTE
• For instructions on entering characters, see Chapter 2, "Basic Operations," in the
Reference Guide.
• If you press [OK] without entering any characters, the key name reverts to its
current name (default M1 to M9).
4
8
Press [Cancel] ➞ [Done].
The display returns to the Copy Basic Features screen.
NOTE
Pressing [Cancel] ➞ [Done] only names the selected key ([M1] to [M9]), but does
not recall the stored settings. If you press [OK] ➞ [Done], the name is stored in the
selected key ([M1] to [M9]), and the settings are recalled at the same time.
8-8
Memory Keys
Recalling Copy Settings
1
Press [Special Features] ➞ press [▼] or [▲] until [Mode
Memory] appears ➞ press [Mode Memory].
If necessary, see the screen shot in step 2 of "Storing Copy Settings," on p. 8-4.
Select the key containing the copy settings that you want to
recall.
Memory Functions
2
3
8
Verify the settings ➞ press [OK] ➞ [Done].
If you select a key that does not have copy settings stored in it, [OK] is grayed
out and cannot be pressed.
You can select another key that has copy settings stored in it, or press [Cancel].
The selected mode is set, and the display returns to the Copy Basic Features
screen.
NOTE
• Recalling copy settings from memory cancels the current copy settings.
• You can make changes to the recalled copy settings.
• If you press another key, the copy settings stored in that key are recalled.
Memory Keys
8-9
Erasing Copy Settings
1
Press [Special Features] ➞ press [▼] or [▲] until [Mode
Memory] appears ➞ press [Mode Memory].
If necessary, see the screen shot in step 2 of "Storing Copy Settings," on p. 8-4
Select the key containing the copy settings that you want to
erase ➞ press [Erase].
Memory Functions
2
8
A screen appears, asking for your confirmation to erase the settings.
IMPORTANT
Make sure to check the settings first before erasing them.
NOTE
• Keys that already have settings stored in them are displayed with a colored triangle
( ) in the lower right corner of the key.
• If you select a key that already has settings stored in it, the settings are displayed.
• If there are more stored copy settings than are currently displayed, you can scroll
through the list by pressing [▼] or [▲].
8-10
Memory Keys
3
Press [Yes].
The message <Erased.> appears for approximately two seconds on the touch
panel display.
Memory Functions
To cancel erasing the settings, press [No].
8
The stored copy settings are erased.
NOTE
Key names are not erased. For instructions on changing a key name, see "Naming
a Memory Key," on p. 8-7.
4
Press [Cancel] ➞ [Done].
The display returns to the Copy Basic Features screen.
NOTE
When a memory key is not in use, as is the case when you delete its settings, [OK]
is grayed out, and you must press [Cancel] ➞ [Done] to complete the procedure.
Memory Keys
8-11
Memory Functions
8
8-12
Memory Keys
Customizing Settings
9
CHAPTER
This chapter explains how to change the machine's default settings and customize them to suit
your needs.
Copy Settings Table . . . . . . . . . . . . . . . . . . . . . . . . . . . . . . . . . . . . . . . . . . . . . . . . . . . . . 9-2
Specifying Standard Keys. . . . . . . . . . . . . . . . . . . . . . . . . . . . . . . . . . . . . . . . . . . . . . . . . 9-3
Auto Collate . . . . . . . . . . . . . . . . . . . . . . . . . . . . . . . . . . . . . . . . . . . . . . . . . . . . . . . . . . . 9-6
Job Duration Display. . . . . . . . . . . . . . . . . . . . . . . . . . . . . . . . . . . . . . . . . . . . . . . . . . . . . 9-8
Auto Orientation . . . . . . . . . . . . . . . . . . . . . . . . . . . . . . . . . . . . . . . . . . . . . . . . . . . . . . . 9-10
Changing the Current Standard Settings . . . . . . . . . . . . . . . . . . . . . . . . . . . . . . . . . . . . 9-12
Storing New Standard Settings . . . . . . . . . . . . . . . . . . . . . . . . . . . . . . . . . . . . . . . . . . . . . . . . .9-12
Initializing Standard Settings . . . . . . . . . . . . . . . . . . . . . . . . . . . . . . . . . . . . . . . . . . . . . . . . . . .9-15
Restoring the Default Copy Settings. . . . . . . . . . . . . . . . . . . . . . . . . . . . . . . . . . . . . . . . 9-17
9-1
Copy Settings Table
The following items can be stored or set in Copy Settings from the Additional
Functions screen.
Customizing Settings
Item
Settings
Applicable
Page
Standard Key 1 Settings
Various modes (no settings*1)
p. 9-3
Standard Key 2 Settings
Various modes (no settings*1)
p. 9-3
Auto Collate*2
On*1, Off
p. 9-6
Job Duration Display
On, Off*1
p. 9-8
Auto Orientation
On*1,
Off
p. 9-10
Standard Settings
Store, Initialize
p. 9-12
Initialize Copy Settings
Initialize
p. 9-17
*1 Indicates the default setting.
*2 Indicates items that appear only when the appropriate optional equipment is attached.
NOTE
• For instructions on setting the modes not described in this manual, refer to the other
manuals listed in the front of this Copying Guide. (See "Manuals for the Machine," on p.
ii.)
• The Copy Settings screen consists of a list of individual settings. Press [▼] or [▲] to
scroll to the desired setting.
9
9-2
Copy Settings Table
Specifying Standard Keys
You can store up to two Standard keys that contain frequently used copy settings
on the Copy Basic Features screen. The settings that can be selected include the
Copy Ratio, Finisher, and Two-sided modes on the Copy Basic Features screen, the
keys on the Special Features screen, or the memory keys containing copy settings
stored in Mode Memory.
It is useful to have keys that directly access frequently used settings on the Copy
Basic Features screen because they are always displayed while the Copy function
is selected.
Press
(Additional Functions) ➞ [Copy Settings].
Customizing Settings
1
9
Specifying Standard Keys
9-3
2
Press [Standard Key 1 Settings].
To set Standard Key 2, press [Standard Key 2 Settings].
Customizing Settings
NOTE
If the desired setting is not displayed, press [▼] or [▲] to scroll to the desired
setting.
3
Press [▼] or [▲] to display the desired setting group ➞ select
the desired group.
9
To cancel a Standard key setting, press [No Settings] ➞ [OK] ➞ press [Done]
repeatedly until the Copy Basic Features screen appears.
9-4
Specifying Standard Keys
4
Select the setting that you want to store ➞ press [OK].
5
Press [Done] repeatedly until the Copy Basic Features screen
appears.
Example: The stored standard keys appear on the Copy Basic Features screen as
shown below.
Standard Key 1
Customizing Settings
To cancel storing the setting, press [Cancel].
9
Standard Key 2
Specifying Standard Keys
9-5
Auto Collate
If Auto Collate is set to 'On', the machine automatically sets the Collate (Offset
Collate) mode when originals are placed in the feeder. This is useful when making
multiple sets of copies, because you do not need to remember to select the
Finisher mode.
IMPORTANT
The Auto Collate mode is available only if the optional Feeder (DADF-L1) is attached.
Customizing Settings
NOTE
• If Auto Collate is set to 'On' and an optional finisher is attached, the Offset Collate mode
is set. However, if no finisher is attached, the Collate mode is set instead.
• The default setting is 'On'.
1
Press
(Additional Functions) ➞ [Copy Settings] ➞ [Auto
Collate].
9
NOTE
If the desired setting is not displayed, press [▼] or [▲] to scroll to the desired
setting.
9-6
Auto Collate
2
Select [On] or [Off] ➞ press [OK].
3
Press [Done] repeatedly until the Copy Basic Features screen
appears.
Customizing Settings
The selected mode is set.
9
Auto Collate
9-7
Job Duration Display
If Job Duration Display is set to 'On', the remaining time that it takes to complete an
operation is displayed in units of one minute on the touch panel display. However,
not all copy modes support this feature.
Customizing Settings
NOTE
• The waiting time is displayed as <Approx Prt Time> (approximate printing time) on the
screen that is displayed when the machine is printing.
• Even if Job Duration Display is set to 'On', the waiting time is not displayed in the
following cases:
- The waiting time is less than one minute.
- When the Different Size Originals mode is set with the 1 2-Sided or 2 2-Sided mode
- When the Multi-Page Enlargement or Transparency Interleaving mode is set
• The default setting is 'Off'.
1
Press
(Additional Functions) ➞ [Copy Settings] ➞ [Job
Duration Display].
9
NOTE
If the desired setting is not displayed, press [▼] or [▲] to scroll to the desired
setting.
9-8
Job Duration Display
2
Select [On] or [Off] ➞ press [OK].
3
Press [Done] repeatedly until the Copy Basic Features screen
appears.
Customizing Settings
The selected mode is set.
9
Job Duration Display
9-9
Auto Orientation
If Auto Orientation is set to 'On', the machine uses information, such as the size of
the original and the zoom ratio, to determine the most suitable orientation for the
specified paper size and automatically rotates the image, if necessary.
NOTE
The default setting is 'On'.
Press
(Additional Functions) ➞ [Copy Settings] ➞ [Auto
Orientation].
Customizing Settings
1
9
NOTE
If the desired setting is not displayed, press [▼] or [▲] to scroll to the desired
setting.
9-10
Auto Orientation
2
Select [On] or [Off] ➞ press [OK].
NOTE
• If LTR or STMT originals are enlarged onto 11" x 17" or LGL copy paper, Auto
Orientation is not performed even if you select [On].
• Only the images of standard size originals, up to LTR paper, can be rotated when
the copy ratio is set to 100%.
• If Automatic Paper Selection is set and the most suitable paper size is not
available, the paper source that is loaded with paper of the same size, even if the
orientation is different, is displayed as the optimal paper to use.
3
Press [Done] repeatedly until the Copy Basic Features screen
appears.
Auto Orientation
9-11
Customizing Settings
The selected mode is set.
9
Changing the Current Standard Settings
The Standard Settings refers to a combination of copy modes that the machine
automatically returns to after the power is turned ON, or when (Reset) is
pressed.
The Standard Settings can be changed to suit your needs, or restored to their
default settings.
NOTE
The default settings are:
- Copy Quantity:
1
Customizing Settings
- Paper Selection: Auto
9
- Copy Exposure:
Manual Exposure Adjustment
- Original Type:
Text/Photo/Map
- Copy Ratio:
Direct
- Color Selection:
Auto-Color Select
- Copy Function:
1 1-Sided Copy
Storing New Standard Settings
You can store your own copy settings as the Standard Settings.
To store your own standard settings, specify the desired settings on the Copy Basic
Features screen and/or the Special Features screen, then follow the procedure
below.
1
Press
(Additional Functions) ➞ [Copy Settings].
If necessary, see the screen shot in step 1 of "Specifying Standard Keys," on p.
9-3.
9-12
Changing the Current Standard Settings
3
Press [▼] or [▲] until [Standard Settings] appears ➞ press
[Standard Settings].
Press [Store].
Customizing Settings
2
9
Changing the Current Standard Settings
9-13
4
Press [Yes].
To cancel storing the currently displayed settings as the Standard Settings, press
[No].
Customizing Settings
The message <Stored in memory.> appears for approximately two seconds on
the touch panel display.
9
The displayed settings are stored as the Standard Settings.
NOTE
The settings displayed are the currently set copy settings. Press [▼] or [▲] to
display any copy settings that do not fit into the display area.
5
9-14
Press [Done] repeatedly until the Copy Basic Features screen
appears.
Changing the Current Standard Settings
Initializing Standard Settings
You can restore the Standard Settings to their default settings.
1
Press
(Additional Functions) ➞ [Copy Settings].
If necessary, see the screen shot in step 1 of "Specifying Standard Keys," on
p. 9-3.
2
Press [▼] or [▲] until [Standard Settings] appears ➞ press
[Standard Settings].
If necessary, see the screen shot in step 2 of "Storing New Standard Settings," on
p. 9-12.
Press [Initialize].
Customizing Settings
3
9
Changing the Current Standard Settings
9-15
4
Verify the settings ➞ press [Yes].
To cancel initializing the Standard Settings, press [No].
Customizing Settings
The message <Initialized.> appears for approximately two seconds on the touch
panel display.
9
The Standard Settings are initialized.
5
9-16
Press [Done] repeatedly until the Copy Basic Features screen
appears.
Changing the Current Standard Settings
Restoring the Default Copy Settings
Modes that have been changed in Copy Settings (from the Additional Functions
screen) can be restored to their default settings. (See "Copy Settings Table," on p.
9-2.)
1
Press
(Additional Functions) ➞ [Copy Settings].
If necessary, see the screen shot in step 1 of "Specifying Standard Keys," on p.
9-3.
Press [▼] or [▲] until [Initialize Copy Settings] appears ➞
press [Initialize Copy Settings].
Customizing Settings
2
9
Restoring the Default Copy Settings
9-17
3
Press [Yes].
To cancel initializing the Copy Settings, press [No].
Customizing Settings
The message <Initialized.> appears for approximately two seconds on the touch
panel display.
9
The Copy Settings are initialized.
4
9-18
Press [Done] repeatedly until the Copy Basic Features screen
appears.
Restoring the Default Copy Settings
Appendix
10
CHAPTER
This chapter provides the color copy samples, combination of functions chart, and index.
Color Copy Samples. . . . . . . . . . . . . . . . . . . . . . . . . . . . . . . . . . . . . . . . . . . . . . . . . . . . 10-2
Color Balance. . . . . . . . . . . . . . . . . . . . . . . . . . . . . . . . . . . . . . . . . . . . . . . . . . . . . . . . . . . . . . .10-2
One Touch Color. . . . . . . . . . . . . . . . . . . . . . . . . . . . . . . . . . . . . . . . . . . . . . . . . . . . . . . . . . . . .10-3
Image Quality Adjustments . . . . . . . . . . . . . . . . . . . . . . . . . . . . . . . . . . . . . . . . . . . . . . . . . . . .10-4
Single Color . . . . . . . . . . . . . . . . . . . . . . . . . . . . . . . . . . . . . . . . . . . . . . . . . . . . . . . . . . . . . . . .10-5
Combination of Functions Chart . . . . . . . . . . . . . . . . . . . . . . . . . . . . . . . . . . . . . . . . . . . 10-6
Index . . . . . . . . . . . . . . . . . . . . . . . . . . . . . . . . . . . . . . . . . . . . . . . . . . . . . . . . . . . . . . . 10-10
10-1
Color Copy Samples
This section provides you with a visual description of how color copies are
produced using different color adjustment modes.
Color Balance
This mode enables you to make fine adjustments to the color by varying the relative
strength and density of yellow, magenta, cyan, and black.
Increase Yellow
Decrease Yellow
Increase Magenta
Decrease Magenta
Increase Cyan
Decrease Cyan
Increase Black
Decrease Black
Appendix
Original
10
10-2
Color Copy Samples
One Touch Color
This mode enables you to make copies by selecting the look of the image with just
one touch of a key.
Vivid Colors
Lighten Image
Darken Image
Highlight
Reproduction
Retro Photo Image
Appendix
Original
Tranquil Colors
10
Color Copy Samples
10-3
Image Quality Adjustments
You can improve the image quality of copies by erasing the background color of
originals, and by making sure that dark areas on the reverse side of originals do not
appear on the copies.
Remove Background
This mode enables you to make copies by erasing the background color of the
original. This feature is especially useful for copying originals, such as catalogues
and paper, that have turned yellow from age.
Copy with the Background
Color Erased
Original
Prevent Bleeding
Appendix
This mode enables you to make copies by preventing the original image on the
reverse side of thin originals from appearing on the copies.
Copy
Two-Sided Original
on Thin Paper
10
Image on
Front Side
Image on
Back Side
Normal Settings
Prevent Bleeding
Selected
10-4
Color Copy Samples
Single Color
This mode enables you to make copies in one specific color only.
Copy
Appendix
Original
10
Color Copy Samples
10-5
Combination of Functions Chart
✕ Combination
Unavailable
Priority to
▲ Latest Set Mode
to Image
● Priority
Combination, and
Booklet Modes (Ratio
can be changed)
Functi
on
Combination Available
Alrea
Prese
dy Se
t Zoom
t
Zoom
by Pe
rcenta
XY Zo
ge
om
Auto X
Y
Auto Z Zoom
oo
Zoom m
Progra
m
Entire
Image
Multi-P
age E
nlarge
Autom
men
ati
Full C c Color Sele t
olor
ction
Black
Copy
Expos
ure (A
Printe
utoma
d Ima
tic)
ge
Photo
Text
Text/P
ho
Autom to/Map
ati
Stack c Paper Se
lection
Bypas
s
Collate
Group
Rotate
C
Rotate ollating
G
Offset roup
Collate
Offset
Group
Staple
Saddle
S
Hole P titch
un
Interru ch
pt Cop
y
Reserv
e
1 2-S Copy
ided
2 2-S
id
2 1-S ed
ided
Book
2-Side
d
This chart shows the available combinations of settings when you want to set more
than one function at a time.
Function to Be Set
Appendix
Preset Zoom
Zoom by Percentage
XY Zoom
Auto XY Zoom
Auto Zoom
Zoom Program
Entire Image
Multi-Page Enlargement
Automatic Color Selection
Full Color
Black
Copy Exposure (Automatic)
Printed Image
Photo
Text
Text/Photo/Map
Automatic Paper Selection
Stack Bypass
Collate
Group
Rotate Collating
Rotate Group
Offset Collate
Offset Group
Staple
Saddle Stitch
Hole Punch
Interrupt Copy
Reserve Copy
1 2-Sided
2 2-Sided
2 1-Sided
Book 2-Sided
10
*3
*2 *2 *1 *1 *3 *3 *3 *3 *2
*3
*3 *3
*3
*2
*2
*1
*1
*3
*3
*3
*3
*2
*3
*3
*3
*1 You cannot combine these modes if you select a paper type and size other than plain, recycled, color, and heavy
types of LTR, LTRR, STMT, and STMTR.
*2 You cannot combine these modes when envelope is selected.
*3 You cannot combine these modes when a nonstandard paper size or envelope is selected.
10-6
Combination of Functions Chart
Booklet Modes (Ratio
can be changed)
A
Functi
on
✕ Combination
Unavailable
to
▲ Priority
Latest Set Mode
Priority to Image
● Combination, and
lready
Prese
Set
t Zoom
Zoom
by Pe
rc
entag
XY Zo
e
om
Auto X
Y Zoo
m
Auto
Zo
Zoom om
Progra
m
Entire
Im
Multi-P age
age E
n
Autom
largem
ati
en
Full C c Color Sele t
olo
ction
Black r
Copy
Expos
ure (A
Printe
utoma
d Ima
tic)
ge
Photo
Text
Text/P
ho
Autom to/Map
ati
Stack c Paper Se
lection
By
Collate pass
Group
Rotate
C
Rotate ollating
G
Offset roup
Collate
Offset
Group
Staple
Saddle
S
Hole P titch
un
Interru ch
pt
Reserv Copy
e
1 2-S Copy
id
2 2-S ed
id
2 1-S ed
ided
Book
2-Side
d
Combination Available
Function to Be Set
*3
*3
*8
*8
*8
*8
*8
*8
*4
*4
*4
*4
*3
*3
*3
*6 *7
*9
*9 *9
*10 *10 *10
*5
*5
Appendix
Two-Page Separation
Image Combination
Original Frame Erase
Book Frame Erase
Binding Erase
Margin
Shift (Using the Arrow Keys)
Shift (Using the Numeric Keys)
Front Cover
Back Cover
Sheet Insertion (Printed/Leave Blank)
Chapter Page
Transparency Interleaving
Booklet
Booklet : Saddle Stitch
Booklet : Add Cover (Printed/Leave Blank)
Sample Set
Different Size Originals
Job Build
Sharpness
Nega/Posi
Image Repeat
Mirror Image
Blanking
Framing
Single Color
Color Balance
One Touch Color
Remove Background
Prevent Bleeding
*3 You cannot combine these modes when a nonstandard paper size or envelope is selected.
*4 You cannot combine these modes when envelope is selected.
10
*5 You cannot combine these modes when you make fine adjustments to the density.
*6 You can set the Sample Set mode as the Interrupt mode.
*7 You can set the Sample Set mode as the reserve copy mode.
*8 You cannot combine these modes when the Different Size Originals mode is set.
*9 You can set these modes in combination with the Image Repeat (manual setting).
*10 If the Retro Photo Image mode is selected, these functions can be set if it is specified last (Priority to Latest Set
Mode).
Combination of Functions Chart
10-7
Booklet Modes (Ratio
can be changed)
A
Functi
on
✕ Combination
Unavailable
to
▲ Priority
Latest Set Mode
to Image
● Priority
Combination, and
lready
Two-P
Set
ag
Image e Separatio
n
Comb
ination
Origin
al Fra
me Era
Book
se
Fra
Bindin me Erase
gE
Margin rase
Shift (U
sin
Shift (U g the Arro
wK
sing th
e Num eys)
Front
Cover
eric K
eys)
Back C
over
Sheet
Insertio
n (P
Chapte
r Page rinted/Leave
Blank)
Trans
paren
c
y Interl
Bookle
eaving
t
Bookle
t:
Booklet Saddle Stitc
: A dd C
over (P h
Samp
rinted/Le
le S
ave Bla
Differe et
nk)
nt
Job B Size Origina
uild
ls
Sharp
nes
Nega/P s
o
Image si
Repea
t
Mirror
Im
Blankin age
g
Framin
g
Single
Color
Color
Balan
ce
One T
ou
Remo ch Color
ve Ba
c
kgroun
Preve
d
nt Ble
eding
Combination Available
Function to Be to Set
Appendix
Preset Zoom
Zoom by Percentage
XY Zoom
Auto XY Zoom
Auto Zoom
Zoom Program
Entire Image
Multi-Page Enlargement
Automatic Color Selection
Full Color
Black
Copy Exposure (Automatic)
Printed Image
Photo
Text
Text/Photo/Map
Automatic Paper Selection
Stack Bypass
Collate
Group
Rotate Collating
Rotate Group
Offset Collate
Offset Group
Staple
Saddle Stitch
Hole Punch
Interrupt Copy
Reserve Copy
1 2-Sided
2 2-Sided
2 1-Sided
Book 2-Sided
10
*9
*9
*10
*10
*10
*5 *5
*3 *3
*8 *8 *8 *8 *8 *8
*4 *4 *4 *4 *4 *3 *3
*9
*11
*12
*3 You cannot combine these modes when a nonstandard paper size or envelope is selected.
*4 You cannot combine these modes when envelope is selected.
*5 You cannot combine these modes when you make fine adjustments to the density.
*8 You cannot combine these modes when the Different Size Originals mode is set.
*9 You can set these modes in combination with the Image Repeat (manual setting).
*10 If the Retro Photo Image mode is selected, these functions can be set if it is specified last (Priority to Latest Set
Mode).
*11 You cannot make an Interrupt copy while copying with the Sample Set mode, or while changing the settings after
the Sample Set has been made.
*12 You cannot reserve a copy job while copying with the Sample Set mode, or while changing the settings after the
Sample Set has been made.
10-8
Combination of Functions Chart
Booklet Modes (Ratio
can be changed)
Alr
Functi
on
✕ Combination
Unavailable
to
▲ Priority
Latest Set Mode
to Image
● Priority
Combination, and
eady
Two-P
Set
ag
Image e Separatio
n
Comb
ination
Origin
al Fra
me Era
Book
se
Fra
Bindin me Erase
g Eras
e
Margin
Shift (U
sin
Shift (U g the Arro
wK
sing th
e Num eys)
Front
Cover
eric K
eys)
Back C
over
Sheet
Insertio
n
(P
Chapte
r Page rinted/Leave
Blank)
Trans
pare
Bookle ncy Interle
aving
t
Bookle
t:
Booklet Saddle Stitc
: Add C
over (P h
Samp
rinted/Le
le S
ave Bla
Differe et
nk)
nt Size
Origin
Job B
als
uild
Sharp
nes
Nega/P s
o
Image si
Repea
t
Mirror
Image
Blankin
g
Framin
g
Single
Color
Color
Ba
One T lance
ou
Remo ch Color
ve Ba
ckgrou
Preve
nd
nt Ble
eding
Combination Available
Function to Be Set
Two-Page Separation
Image Combination
Original Frame Erase
Book Frame Erase
Binding Erase
Margin
Shift (Using the Arrow Keys)
Shift (Using the Numeric Keys)
Front Cover
Back Cover
Sheet Insertion (Printed/Leave Blank)
Chapter Page
Transparency Interleaving
Booklet
Booklet : Saddle Stitch
Booklet : Add Cover (Printed/Leave Blank)
Sample Set
Different Size Originals
Job Build
Sharpness
Nega/Posi
Image Repeat
Mirror Image
Blanking
Framing
Single Color
Color Balance
One Touch Color
Remove Background
Prevent Bleeding
*13
*14
Appendix
*13 *14
*13 You cannot combine these modes when the Retro Photo Image mode is set.
*14 If you set Lighten Image or Darken Image in the One Touch Color mode, these functions can be set if it is specified
last (Priority to Latest Set Mode).
Combination of Functions Chart
10-9
10
Index
Numerics
C
1 to 2-sided, 2-73, 2-75
Canceling copy job
2 On 1, 3-25
Canceling, 1-30
2 to 1-sided, 2-74, 2-80
Using Stop key, 1-31
2 to 2-sided, 2-74, 2-78
Using System Monitor screen, 1-32
4 On 1, 3-26
Using touch panel display, 1-30
8 On 1, 3-26
Canceling selected settings, 1-58
Changing
Color modes, 2-86
A
Copy (zoom) ratio, 2-24
Area designation
Area Designation mode, 6-16
Blanking, 6-18, 6-32
Framing, 6-16, 6-19
Appendix
Area Designation key, 1-9
Auto collate, 9-6
Auto orientation, 9-10
Auto zoom, 2-24, 2-32
Copy quantity, 2-4
Changing/Canceling selected settings
Canceling mode, 1-59
Changing mode, 1-59
Changing/canceling, 1-58
Chapter page, 3-6
Collate mode, 2-56, 2-58, 2-61
Collating
Collate mode, 2-58, 2-61
Collating copies, 2-56
10
B
Group mode, 2-58, 2-64
Back cover, 3-6
Offset mode, 2-61
Binding Erase, 4-13, 4-22
Rotate mode, 2-60
Blanking
Saddle stitch mode, 2-59
Hole punch mode, 2-60
Blanking mode, 6-18, 6-32
Using edit pen, 6-32
Using numeric keys, 6-37
Staple mode, 2-58, 2-67
Color
About, xiv
Book Frame Erase, 4-13, 4-18
Additive primary colors, xiv
Book to 2-sided, 2-74, 2-83
Complementary colors, xvii
Booklet key, 1-6
Density, xvi
Booklet mode, 3-13
Full colors, xvii
Hue, xvi
10-10
Index
Primary colors, xiv
Copy exposure
Saturation, xvi
Adjustment during printing, 2-23
Subtractive primary colors, xiv
Automatic, 2-21
Color Balance key, 1-9
Copy exposure settings, 1-3, 2-17
Color balance settings
Manual, 2-18
Adjusting, 7-2, 10-2
Copy job
Erasing, 7-11
Canceling, 1-30
Naming color balance key, 7-8
Interrupting, 1-50
Recalling, 7-9
Recalling, 8-2
Storing, 7-5
Color copies, preserving, xix
Color copy samples
Copy quantity
Changing, 2-4
Specifying, 2-3
Color Balance, 10-2
Copy Ratio key, 1-2
Image Quality Adjustment, 10-4
Copy settings table, 9-2
One Touch Color, 10-3
Copying features, 1-2
Single Color, 10-5
Cover/Sheet insertion
Color modes
Back cover, 3-6
Automatic color selection, 2-86
Chapter page, 3-6
Black, 2-89
Cover/Sheet Insertion mode, 3-5
Changing, 2-86
Front cover, 3-5
Full color, 2-87
Sheet insertion, 3-6
Color printing, xviii
Cover/Sheet Insertion key, 1-5
D
Appendix
Color selection drop-down list, 1-2
Default copy settings, restoring, 9-17
10
Combination of functions chart, 10-6
Confirming settings, 1-56
Contrast (Sharpness)
Adjusting, 7-14
High, 7-14
Low, 7-14
Copy (Zoom) Ratio
Auto zoom, 2-24, 2-32
Changing, 2-24
Density, xvi
Different Size Originals, 5-2
Different Size Originals key, 1-7
Direct key, 1-2
Displays used in this manual, xi
Entire Image, 2-25, 2-35
Multi-Page Enlargement, 2-27, 2-46
Preset zoom, 2-24, 2-27
E
XY Zoom, 2-26, 2-42
Enlargement copy ratios, 2-28
Zoom by percentage, 2-24, 2-30
Enlarging using original and copy sizes, 2-36
Zoom Program, 2-25, 2-36
Entire Image, 2-25, 2-35
Copy Basic Features screen, 1-2
Index
10-11
F
Image Combination key, 1-6
Image Creation
Feeder, 1-21, 1-27
Image Creation modes, 6-2
Finisher key, 1-3
Image Repeat, 6-2, 6-5
Finisher modes, 2-56
Mirror Image, 6-3, 6-14
Finisher-P1, 2-56
Nega/Posi, 6-2, 6-4
Finisher-Q1, 2-57
Image Creation key, 1-8
Flow of copy operations, 1-12
Image Qual. Adjustment key, 1-10
Frame Erase
Image Quality Adjustment
Binding Erase, 4-13, 4-22
Image Quality Adjustment mode, 7-20, 10-4
Book Frame Erase, 4-13, 4-18
Prevent Bleeding, 7-20, 7-23, 10-4
Frame Erase mode, 4-12
Original Frame Erase, 4-12, 4-14
Remove Background, 7-20, 10-4
Image Repeat
Frame Erase key, 1-7
Automatic, 6-6
Framing
Image Repeat mode, 6-2, 6-5
Framing mode, 6-16, 6-19
Manual, 6-6
Using edit pen, 6-20
Initializing standard settings, 9-15
Using numeric keys, 6-26
Interrupt key, 1-4
Front cover, 3-5
Interrupt mode, 1-50
Interrupting copy job, 1-50
Appendix
G
10
Group mode, 2-58, 2-64
J
Job Build, 5-5
Job Build key, 1-8
H
Job Done Notice, 5-10
Hole punch mode, 2-60
Horizontal placement, 1-22
Job Done Notice key, 1-8
Job Duration Display, 9-8
Hue, xvi
K
I
Keys used in this manual, xi
Illustrations used in this manual, xii
Image Combination
2 On 1, 3-25
M
4 On 1, 3-26
Margin key, 1-7
8 On 1, 3-26
Margin mode, 4-8
Image Combination mode, 3-25
Memory key
10-12
Index
Erasing, 8-10
Photo mode, 2-17
Naming, 8-7
Printed Image mode, 2-17
Recalling, 8-9
Text mode, 2-17
Settings in memory, 8-4
Storing, 8-4
Mirror Image, 6-3, 6-14
Text/Photo/Map mode, 2-17
Original type drop-down list, 1-4
Overview, 1-2
Mode Memory key, 1-11
Multi-Page Enlargement
Determining copy ratio and number of sheets
needed, 2-46
Multi-Page Enlargement mode, 2-27, 2-46
Pasting sheets of divided image together, 2-53
Selecting number of output pages, 2-50
Specifying copy ratio, 2-47
P
Paper Select key, 1-2
Paper selection
Automatic, 2-7
Manual, 2-9
Paper selection types, 2-6
Photo mode, 2-17
N
Nega/Posi, 6-2, 6-4
Placing originals
Feeder, 1-21, 1-27
Orientation, 1-22
Placing originals, 1-21
Platen glass, 1-21, 1-23
Offset mode, 2-61
One Touch Color
Darken Image, 7-17
Highlight Reproduction, 7-17
Lighten Image, 7-17
One Touch Color Mode, 7-17, 10-3
Retro Photo Image, 7-17
Platen glass, 1-21, 1-23
Preset zoom
Appendix
O
Enlargement, 2-28
Preset Zoom mode, 2-24, 2-27
Reduction, 2-28
10
Prevent Bleeding, 7-20, 7-23, 10-4
Printed Image mode, 2-17
Priority copies, 1-50
Tranquil Colors, 7-17
Vivid Colors, 7-17
One Touch Color key, 1-10
Orientation
R
Recall key, 1-11
Horizontal placement, 1-22
Recalling previous copy jobs, 8-2
Orientation of original, 1-22
Reducing/Enlarging using original and copy sizes
Vertical placement, 1-22
Different XY copy ratios, 2-36
Original Frame Erase, 4-12, 4-14
Same XY copy ratio, 2-37
Original Output Area, 1-29
Zoom Program mode, 2-36
Original type
Reduction copy ratios, 2-28
Index
10-13
Remove Background, 7-20, 10-4
Reserved copying
T
Reserving copy job, 1-35
Text mode, 2-17
Using stack bypass, 1-37
Text/Photo/Map mode, 2-17
Restoring default copy settings, 9-17
Rotate mode, 2-60
Transparency Interleaving
Not printing on interleaf sheets, 3-21
Printing on interleaf sheets, 3-21
Transparency Interleaving mode, 3-20
S
Transparency Interleaving key, 1-6
Two-page Separation, 3-2
Saddle Finisher-Q2, 2-57
Two-page Separation key, 1-5
Saddle stitch mode, 2-59
Two-sided copying
Sample set, 1-53
1 to 2-sided, 2-73, 2-75
Saturation, xvi
2 to 1-sided, 2-74, 2-80
Sharpness, 7-14
2 to 2-sided, 2-74, 2-78
Sharpness key, 1-10
Book to 2-sided, 2-74, 2-83
Sheet Insertion, 3-6
Shift key, 1-6
Two-sided mode, 2-73
Two-sided key, 1-3
Shifting original image
Shift mode, 4-2
Using arrow keys, 4-3
Using numeric keys, 4-5
Appendix
Single Color, 7-26, 10-5
Single Color key, 1-11
10
Standard keys, specifying, 9-3
Special Features key, 1-4
Special Features screen, 1-5, 1-8
Standard Settings
Initializing, 9-15
Storing, 9-12
Stapling
V
Vertical placement, 1-22
X
XY Zoom
Automatic, 2-42, 2-44
Manual, 2-42, 2-43
XY Zoom mode, 2-26, 2-42
Corner, 2-58
Double, 2-59
Finisher-P1, 2-56
Z
Finisher-Q1, 2-57
Zoom by percentage, 2-24, 2-30
Saddle Finisher-Q2, 2-57
Zoom Program
Saddle stitch, 2-59
Different XY copy ratios, 2-36, 2-39
Staple mode, 2-58, 2-67
Same XY copy ratio, 2-37
Symbols used in this manual, x
System Monitor key, 1-4
10-14
Index
Zoom Program mode, 2-25, 2-36
The contents of this guide are
printed on 100% recycled paper.
The ink used in this guide is
completely free of any volatile
organic compounds.
CANON INC.
30-2, Shimomaruko 3-chome, Ohta-ku, Tokyo 146-8501, Japan
CANON U.S.A., INC.
One Canon Plaza, Lake Success, NY 11042, U.S.A.
CANON CANADA INC.
6390 Dixie Road Mississauga, Ontario L5T 1P7, Canada
CANON EUROPA N.V.
Bovenkerkerweg 59-61 P.O. Box 2262, 1180 EG Amstelveen, The Netherlands
CANON FRANCE S.A.
17, quai du Président Paul Doumer 92414 Courbevoie Cedex, France
CANON (U.K.) LTD.
Woodhatch, Reigate, Surrey, RH2 8BF, United Kingdom
CANON DEUTSCHLAND GmbH
Europark Fichtenhain A10, 47807 Krefeld, Germany
CANON ITALIA S.p.A.
Via Milano, 8 - 20097 San Donato Milanese (MI) Italy
CANON LATIN AMERICA, INC.
703 Waterford Way Suite 400 Miami, Florida 33126 U.S.A.
CANON AUSTRALIA PTY. LTD
1 Thomas Holt Drive, North Ryde, Sydney, N.S.W. 2113, Australia
CANON SINGAPORE PTE. LTD.
1 HarbourFront Avenue #04-01 Keppel Bay Tower, Singapore 098632
CANON HONGKONG CO., LTD
9/F, The Hong Kong Club Building, 3A Chater Road, Central, Hong Kong
FA7-5831 (000)
C CANON INC. 2003
PRINTED IN JAPAN