1
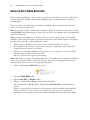
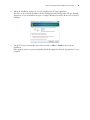
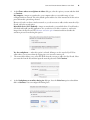
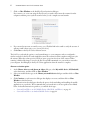
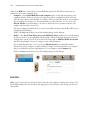
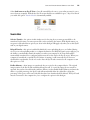
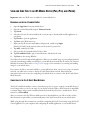
Mobility with Eye-Fi
Scanning Guide
Scan and Transfer Images Wirelessly
with Eye-Fi
This document is to be used in addition to the scanner’s user guide located on the installation disc. The
instructions in this guide are for using your Visioneer Mobility scanner with the Eye-Fi card provided in
the box.
This chapter includes:
• Install the Eye-Fi Center Application on page 3
• Log In and Activate the Eye-Fi Card on page 5
• The Eye-Fi Card Settings on page 8
• Scan and Send Files to a Computer on page 13
• Scan and Send Files to an iOS Mobile Device (iPad, iPod, and iPhone) on page 16
• Scan and Send Files to an Android Mobile Device on page 22
• PDF File Transfer using Evernote on page 26
• Access and Delete Images from Eye-Fi Card on page 28
• Troubleshooting and Error Messages on page 29
An Eye-Fi card is a secure digital high-capacity (SDHC) memory card with wireless function. Using an
Eye-Fi card you can scan and transfer images wirelessly from the Visioneer Mobility Air scanner to your
computer, online file sharing site, or mobile device.
You will need to install the Eye-Fi Center software on your computer to activate the card and register it to
an Eye-Fi account. The Eye-Fi Center software installer is located on the Eye-Fi card. After you have
activated the Eye-Fi card with your account, you can then configure the options to send the image files to
your computer, online account, or mobile device.
Currently you can transfer images to iOS and Android based mobile devices. BlackBerry and Windows
mobile devices are not supported at this time.
VISIONEER MOBILITY WITH EYE-FI SCANNING GUIDE
2
3
VISIONEER MOBILITY WITH EYE-FI SCANNING GUIDE
INSTALL THE EYE-FI CENTER APPLICATION
Before you begin installing the software, make sure you have an active Internet connection. The Eye-Fi
software will look for updated software during installation and you will be prompted to install any
available updates.
You can use either a standard memory card reader or install the software with the Eye-Fi card in the
scanner, connected and powered on.
Note: Do not delete any files or folders that are already on the Eye-Fi card when you first use it. A folder
named DCIM is created when images are saved to the card. This is the only folder that you should modify
or delete from the card.
Tip: the scanner automatically powers off after 2 minutes to conserve battery power. If you decide to
install the software using the scanner as the memory card reader, tap the function button occasionally to
keep the scanner powered on while installing the software.
1. With the scanner off and Eye-Fi card in the scanner, connect the cable to the scanner.
2. Press and hold the power button on the scanner until you see a light flash on the scanner. The
computer detects the scanner as a disc drive.
3. Windows users—AutoRun will display a list of options for you to choose how to view the folder.
Select the option to “Open folder to view files”.
Mac users—an Eye-Fi icon appears on the desktop.
Note: if Eye-Fi does not appear on the desktop (Mac users) or if AutoRun does not prompt you (Windows
users), open a computer window to locate the disc drive. You can also try plugging the scanner into a
different USB port if the scanner is not being detected properly.
4.
Click or double-click the EYE-FI drive to open it.
5.
6.
7.
Open the START HERE folder.
Open the Mac OS X or Windows folder.
Windows—double-click on Setup to launch the Eye-Fi installer.
Mac—double-click on Eye-Fi and then double-click on Eye-Fi Installer to launch the Eye-Fi
installer.
If there is an active Internet connection to your computer, the Eye-Fi installer will automatically
check to see if there is a newer version of the software. If a newer version is found it will be
downloaded to your computer and then the installer will launch when the download is complete.
SCAN AND TRANSFER IMAGES WIRELESSLY WITH EYE-FI
4
8.
Follow the installation prompts on-screen to install the Eye-Fi Center application.
Windows—at the end of the installation the Eye-Fi Helper Firewall Tuning utility will open. Read the
instructions on screen and follow the steps to configure Windows Firewall to allow access for the EyeFi Helper.
9.
The Eye-Fi Center automatically opens when you click on Close or Finish at the end of the
installation.
If the application does not open automatically, launch the application from the programs list for your
computer.
5
VISIONEER MOBILITY WITH EYE-FI SCANNING GUIDE
LOG IN AND ACTIVATE THE EYE-FI CARD
Make sure the Eye-Fi card is in a memory card reader or in the scanner with the power on before you
continue.
When the Eye-Fi Center opens the first time after installation, a login window is displayed. If you already
have an Eye-Fi account please login now. Your new Eye-Fi card will be activated to your existing account.
If this is your first time using Eye-Fi, you need to create an account. A valid Email address is required for
registering, activating, and using the Eye-Fi card.
As you go through the card activation steps described below, you will also be configuring the Eye-Fi card’s
network settings and image transfer options. We recommend that you leave the default options selected
during setup. You can change these options later.
Note: If the scanner times out during the registration process, turn it on again by pressing the power
button until a light flashes.
1.
2.
3.
Launch the Eye-Fi Center application as follows:
Windows users—open Start > Eye-Fi > Eye-Fi Center.
Mac users—open the Applications folder, access the Eye-Fi folder, then Eye-Fi Center.
Input your email address and password in the appropriate fields. If you are logging into an existing
account click the login button. If you are creating an account, re-type the password and click the
option to create the account.
If prompted to update the firmware on the card, do so by clicking the Update button.
During the firmware update it is important that the Eye-Fi card is not removed from the computer. If
you are using an memory card reader, make sure you leave the card in the computer until the Eye-Fi
application displays a window that the firmware update is complete. If the Eye-Fi card is in the
scanner, the scanner lights will continuously flash while the update is in process. The lights will stop
flashing when the firmware update is complete.
When the firmware update is complete, you can proceed with activating the card and configuring the
card settings.
SCAN AND TRANSFER IMAGES WIRELESSLY WITH EYE-FI
4.
5.
6.
6
At the Choose where to send photos & videos dialogue, select the options you want and then click
on Continue.
My computer—images are transferred to your computer when you are within range of your
configured wireless network. This is the default option and the rest of the instructions in this section
proceed from this option being selected.
However, if you do not have a wireless network, or you do not want to add a wireless network to EyeFi card, select the second option.
My mobile device (iOS / Android)—images are transferred to your mobile device. You will need to
download and install a mobile application onto your device to be able to connect to, and receive
images from, the Eye-Fi card. The Alternate activation option instructions below describes the
activation process from selecting this option.
Yes, also send photos...—when this option is selected, all images are also saved to Eye-Fi View
online where you can access them by logging into your account at www.eye.fi.
The next window allows you to select the Wi-Fi network you want to add to the Eye-Fi card. Select
your network from the list and then input the network password. Click Continue.
At the Send photos to an online sharing site dialogue, leave the Select later option selected then
click on Continue. You can configure file sharing later.
7
VISIONEER MOBILITY WITH EYE-FI SCANNING GUIDE
7.
Click on Close Window on the final Eye-Fi card activation dialogue.
If you want to see a test scan using the Eye-Fi card, you need to disconnect the scanner from the
computer and then power cycle the scanner before you do a sample scan and transfer.
8.
If you created an account, an email is sent to you. Click the link in the email to verify the account. A
welcome email is then sent to you. [moved from above]
Click Close on the Eye-Fi Center welcome screen.
9.
That’s it! If you selected the option to send scanned images to your computer, and you configured a
wireless network for the Eye-Fi card, simply disconnect the scanner from the computer and power cycle
the scanner. When the scanner power is back on, insert a page into the front of the scanner. When
scanning is finished the image is saved to the Eye-Fi card and transmitted over your wireless network to
your computer. It will display in the Eye-Fi Center application when the transfer is complete.
Alternate activation option
1. At the Choose where to send photos & videos dialogue, select My mobile device (iOS/Android)
as the destination, and then click on Close Window.
2. Select your mobile device type at the Choose your mobile device dialogue and then click on Close
Window.
3. Click Continue on each successive dialogue that displays on-screen, and then click on Close
Window on the final screen.
The instructions in these dialogues describe the process for downloading and installing the mobile
application on your device. We recommend that you instead refer to the user guide section linked
below for detailed instructions specific to you mobile device type.
• Scan and Send Files to an iOS Mobile Device (iPad, iPod, and iPhone) on page 16
• Scan and Send Files to an Android Mobile Device on page 22
SCAN AND TRANSFER IMAGES WIRELESSLY WITH EYE-FI
8
THE EYE-FI CARD SETTINGS
This section describes configuring the Eye-Fi card settings for scanning and wireless transfer of images. For
any options not described here-in, clicking on the help button in the Eye-Fi center window will open the
online help site for the Eye-Fi Center application.
Many of the options discussed in this section will have already been configured based on your selections
while registering and activating the card. The purpose of this section is to describe the most commonly
configured options for the Eye-Fi card.
Some of the options in the Eye-Fi Center can only be configured when the Eye-Fi card is connected to the
computer as those settings are saved to the Eye-Fi card. Other options do not require the Eye-Fi card to be
connected as the settings are saved in the Eye-Fi Center and to your Eye-Fi account when applicable.
THE EYE-FI HELPER UTILITY
The Eye-Fi Helper utility is the link between your computer and your online account and is responsible
for routing files to your computer from the Eye-Fi Servers. The Eye-Fi Helper also relays the settings you
choose in the Eye-Fi Center application to your online account as needed. For example, when you enable
Eye-Fi View in the Eye-Fi Center, the Eye-Fi Helper passes this setting to the Eye-Fi servers, and when you
log into your account at www.eye.fi, the you will be able to view your files online after you scan.
Alternatively, if you do not enable Eye-Fi View in the Eye-Fi Center, when you go to www.eye.fi and log
into your account, you will have the option to enable Eye-Fi View at that time. When you enable Eye-Fi
view online, the Eye-Fi Helper utility passes this information to the Eye-Fi Center on your computer, and
the next time you open the settings for your account, you will see that Eye-Fi View is enabled in the EyeFi Center. The Eye-Fi Helper maintains a constant link between your computer and the Eye-Fi servers.
The Eye-Fi Helper, which is installed when you install the Eye-Fi center application, starts automatically at
the end of the installation and each time the computer starts. When the Eye-Fi Helper is running it
displays an icon next to your system clock.
To close the Eye-Fi Helper utility, click on the icon and select Exit from the menu. You can start the EyeFi Helper by clicking on its icon in the Eye-Fi folder located in the applications list for your computer.
To prevent the Eye-Fi Helper utility from starting automatically each time the computer starts, click on
the icon and then click on Auto-start Eye-Fi Helper to deselect that option.
ADDING OR REMOVING PRIVATE WIRELESS NETWORKS
Note: you will need to have the Eye-Fi Card connected to the computer to configure the network options
for the card. You can either insert the card into the scanner, connect it the computer and turn on the
power, or you can use a standard SDHC memory card reader.
Use the Private Networks tab to add or change a wireless network for your Eye-Fi card. You can have
multiple networks configured for the Eye-Fi card so that if you are within range of any one of these
networks the Eye-Fi card will be able to transfer the scanned images.
9
VISIONEER MOBILITY WITH EYE-FI SCANNING GUIDE
1.
Click the Networks tab, then the Private Networks tab.
Wireless networks that are already configured for the Eye-Fi card are displayed in the lower part of the
screen.
2.
Click on the drop menu arrow and select a wireless network from the list. This list includes all
wireless networks within range of the Eye-Fi card.
To refresh the list select Refresh Network List.
Input the network password and fill in any other fields required to access the network.
Click the Add network to card button to use the wireless network.
3.
4.
Other Networks
If you want to connect to a network that you are not within range of at this time, select Other network in
the list and then configure the settings for that network.
1. Enter the name for the other network.
2. Select the security type for the other network from the drop down menu.
3. Enter that network’s password.
4. Select Network is out of range.
5. Click add Network to Card.
DIRECT MODE
Note: you will need to have the Eye-Fi Card connected to the computer to configure the network options
for the card. You can either insert the card into the scanner, connect it the computer and turn on the
power, or you can use a standard SDHC memory card reader.
Direct Mode is the Eye-Fi card’s ability to transfer images directly to a mobile device when the Eye-Fi card
is not in range of a configured wireless network. Please click on one of the links below to go to the section
of this user’s guide for instructions on configuring your mobile device to receive images from the Eye-Fi
card.
• Scan and Send Files to an iOS Mobile Device (iPad, iPod, and iPhone) on page 16
SCAN AND TRANSFER IMAGES WIRELESSLY WITH EYE-FI
•
10
Scan and Send Files to an Android Mobile Device on page 22
TRANSFERRING PHOTO FILES (JPG FILES)
Note: you do not need to have the Eye-Fi card connected to the computer to change these settings. The
Eye-Fi Helper utility will route the files to the appropriate locations based on the settings you choose in
this window.
Click on the Photos tab to select where you want JPG files transferred. The JPG scan function is
indicated on the scanner with a camera icon.
• Computer—select Upload photos to this computer option to have images transferred to your
computer when the scanner is in range of a wireless network you configured for the Eye-Fi card. Your
computer must be on to receive the scanned images. Select the other options in this dialogue as
needed for where you want files saved on your computer. If your computer is not always on, we
recommend that you also enable the Transfer Mode type Relayed Transfer if you want images to be
saved on the Eye-Fi servers, and then routed to your computer the next time you turn it on.
If you have configured a mobile device to receive scanned images, the device that the files will be sent
to is displayed in this dialogue.
Click on the Save button when you are done making changes in this dialogue.
• Online—select Eye-Fi Card allows you to share photos online and then choose the file sharing site
that you want to use for uploading and sharing files. Follow the dialogue prompts on-screen to
configure these options.
If your site is not shown in the list click on More Sites, and then select the option to display all sites
from the menu.
If you enable this option the Transfer Mode type Relayed Transfer is automatically enabled.
Note that even if you configure an online sharing site, images are still transferred to your computer
unless you deselect the option to upload photos to your computer on the Computer tab.
Click on the Save button when you are done making changes in this dialogue.
TRANSFERRING RAW FILES (PDF FILES)
Note: you do not need to have the Eye-Fi card connected to the computer to change these settings. The
Eye-Fi Helper utility will route the files to the appropriate locations based on the settings you choose in
this window.
11
VISIONEER MOBILITY WITH EYE-FI SCANNING GUIDE
Click on the RAW tab to select where you want PDF files transferred. The PDF scan functions are
indicated on the scanner with page icons.
• Computer—select Upload RAW files to this computer option to have files transferred to your
computer when the scanner is in range of a wireless network you configured for the Eye-Fi card.
Select the other options in this dialogue as needed for where you want files saved on your computer.
If your computer is not always on, we recommend that you also enable the Transfer Mode type
Relayed Transfer if you want images to be saved on the Eye-Fi servers, and then routed to your
computer the next time you turn it on.
If you have configured a mobile device to receive scanned files, the device that the files will be sent to
is displayed in this dialogue.
Click on the Save button when you are done making changes in this dialogue.
• Online—select Eye-Fi Card allows you to share RAW files online and then choose the file sharing
site that you want to use for uploading and sharing files. Follow the dialogue prompts on-screen to
configure these options. If your site is not shown in the list click on Add New Online Destination
and follow the prompts on-screen to configure a new online destination.
If you enable this option the Transfer Mode type Relayed Transfer is automatically enabled.
Note that even if you configure an online sharing site, images are still transferred to your computer
unless you deselect the option to upload photos to your computer on the Computer tab.
Click on the Save button when you are done making changes in this dialogue.
EYE-FI VIEW
Note: you do not need to have the Eye-Fi card connected to the computer to change these settings. The
Eye-Fi Helper utility will route the files to the appropriate locations based on the settings you choose in
this window.
SCAN AND TRANSFER IMAGES WIRELESSLY WITH EYE-FI
12
Select Send items to my Eye-Fi View to have all scanned files also sent to your online account for you to
access from any computer. With the free Eye-Fi account the files are available for up to 7 days. Note that if
you enable this option Transfer Mode is automatically enabled.
TRANSFER MODE
Selective Transfer—the options in this window are for choosing how you want protected files to be
transferred. At this time you cannot protect files on the card using the scanner. With digital camera you
can protect a file and whatever options you select in this dialogue will apply only when you use this Eye-Fi
card in your digital camera.
Relayed Transfer—this option is enabled by default if you are uploading photos to an Online Sharing
site. If you are only uploading media to a computer destination, the Relayed Transfer option will give you
the ability to automatically transfer the media even when your computer is off. Your media will be
automatically transferred via a configured wireless network on the card to the Eye-Fi servers. When your
computer is turned back on and the Eye-Fi Software is running, it will contact the Eye-Fi Servers to
download the staged media. You do not need to have the Eye-Fi card connected to the computer to turn
this option on or off.
Endless Memory—when images are transferred, they are copied to the computer/device. The original
images remain on the Eye-Fi card until deleted from the card. So even if the images do not transfer as
expected, they can be accessed from the card later. When you select Enable Endless Memory and move the
slider to a specific percentage, the Eye-Fi card will automatically delete the oldest files to keep that
percentage of free space on the card. Only files that have been transferred will be deleted. The Eye-Fi card
must be connected to the computer for you to configure the options in this dialogue.
13
VISIONEER MOBILITY WITH EYE-FI SCANNING GUIDE
SCAN AND SEND FILES TO A COMPUTER
When images are transferred, they are copied to the computer/device. The original images remain on the
Eye-Fi card until deleted from the card. So even if the images do not transfer as expected, they can be
accessed from the card later. Before scanning, make sure you have configured your Eye-Fi card for wireless
image transfer as described in the previous section.
1. Turn on the scanner power.
2. All of the LEDs will flash as the scanner initializes. When the scanner is ready to scan, a single LED
will be lit next to the first function represented by a camera icon.
3. Tap the function button on the scanner to cycle through the scan options until the LED is lit next to
the option you want to use to scan.
Scans in color at 300dpi and creates a JPG (*.jpg) file.
Scans in black & white at 300dpi and creates an Adobe PDF (*.pdf ) file.
Scans in color at 300dpi and creates an Adobe PDF (*.pdf ) file.
4.
Insert an item face up in the paper feed slot, aligned to the left side of the scanner.
5.
The scanner detects the page and starts to feed it through the scanner.
Note that there will be a short pause after you insert the page before the scanner starts to feed the
page. This pause allows you to straighten the item in the paper feed slot.
SCAN TO A WINDOWS COMPUTER
On a Windows computer, when the Eye-Fi software is running in the background and scanning is
performed within the wireless network, a visual indicator appears for each image being transferred
automatically. The following figure shows that the Eye-Fi software is running in the background (second
icon).
1.
To view the images, open the Eye-Fi Center application, either by clicking the icon on the taskbar or
launching from the menu, for example Start > Eye-Fi > Eye-Fi Center.
SCAN AND TRANSFER IMAGES WIRELESSLY WITH EYE-FI
14
2.
Double-click the icon that displays the images for that date. The folder expands to display the images
as icons.
3.
Double-click an image icon to view the image.
SCAN TO A MAC COMPUTER
On a Mac computer, when the Eye-Fi software is running in the background and scanning is performed
within the wireless network, the images are transferred automatically to the computer. There is no visual
indicator that the transfer is taking place.
1. To view the images, open the Eye-Fi Center application, either by clicking the icon on the dock or by
accessing the Applications folder. The following figure shows the Eye-Fi software running on the
dock (second icon).
2.
3.
Double-click the icon that displays the images for that date. The folder expands to display the images
as icons.
Double-click an image icon to view the image.
ACCESS IMAGES FROM EYE-FI WEB SITE
When the option to send items to Eye-Fi View is enabled, you can access your scanned images from any
computer through the Eye-Fi website.
Images are stored for seven days in the Eye-Fi account using the free account.
To access images:
1. In a web browser, access http://www.eye.fi
2. Click the login link.
15
VISIONEER MOBILITY WITH EYE-FI SCANNING GUIDE
3.
Log in.
4.
Select the specific card from the drop-down list on the left side instead of the device or My Activity.
5.
Click an image icon to access the folder.
SCAN AND TRANSFER IMAGES WIRELESSLY WITH EYE-FI
16
SCAN AND SEND FILES TO AN IOS MOBILE DEVICE (IPAD, IPOD, AND IPHONE)
Important: make sure Wi-Fi access is enabled on your mobile device.
DOWNLOAD AND INSTALL VISIONEER DOCAIR
1.
2.
3.
4.
Open the App Store from your mobile device.
Open the search field and then input: Visioneer DocAir
Tap Search.
Select the Visioneer DocAir and follow the on-screen steps to download the mobile application to
your device.
5. Tap DocAir to open the application.
6. Tap Next on the Welcome screen.
7. Input your Eye-Fi account email address and password, and then tap Login.
If the Eye-Fi card is in the scanner, make sure the scanner is powered on.
8. Tap Add... under Eye-Fi Cards.
9. Select your Eye-Fi card under Select Device to Pair.
10. Tap Pair with this Card to pair your mobile device with the Eye-Fi card.
11. Tap Done on the settings Window.
You will now be in the DocAir mobile application. When you are within range of your configured wireless
network, scanned images will be sent directly to your mobile device from the Eye-Fi card in your Visioneer
Mobility Air scanner. Please refer to Using DocAir on page 19 for instructions on scanning and sending
images to your mobile device.
If you want to be able to scan and send files to your mobile device when you are not in range of a wireless
network, you will need to connect to the Eye-Fi card’s Direct Mode network. Please follow the
instructions in the next section for configuring your mobile device to connect to the Eye-Fi card’s Direct
Mode Network.
CONNECTING TO THE EYE-FI DIRECT MODE NETWORK
The Eye-Fi card has the ability to create a network access point, for your to connect your mobile device, to
receive images when you are not in range of your wireless network. When a Wi-Fi network is unavailable
to transfer images, images can be transferred wirelessly from the Eye-Fi card to a mobile device. This is
referred to as Direct Mode.
After you connect to the Eye-Fi Direct Mode network as described below, you will not need to follow
these instructions again unless you intentionally remove the Eye-Fi network from you mobile device.
While going through these instructions you will be configuring the Eye-Fi Card settings using the Eye-Fi
Center application on your computer, and configuring the mobile application on your mobile device.
17
VISIONEER MOBILITY WITH EYE-FI SCANNING GUIDE
Tip: the scanner automatically powers off after 2 minutes to conserve battery power. Tap the function
button occasionally to keep the scanner powered on while initiating the connection between your mobile
device and the scanner. Alternatively, if you have a memory card reader, you can insert the Eye-Fi card into
the card reader for configuring the connection between your mobile device and the Eye-Fi card’s Direct
Mode network.
1. On your computer—open the Eye-Fi Center application.
2. With the Eye-Fi card in the scanner, connect the scanner to the computer and turn on the power.
3. When the Eye-Fi card shows as connected in the Eye-Fi Center application, click on the gear icon to
open the settings for your Eye-Fi card.
4.
5.
6.
7.
8.
9.
Click the Networks tab, then the Direct Mode tab.
Make sure the option to use Direct Mode when no known Wi-Fi networks are in range is selected.
Move the sliders left or right to change the wait times for the Eye-Fi card. When the Eye-Fi card is
broadcasting a network it is using the scanner battery to power the network. The recommended
settings are:
Select 2 minutes for Direct Mode to wait for a device to connect to it.
Select 30 seconds for the Direct Mode to stay on after the last item is received.
Click the Save button.
Do not close this window yet. You will need to have this window open to start the direct mode
network.
On your mobile device—tap DocAir to open the application.
These instructions assume that you have already logged into your Eye-Fi account, and paired to the
Eye-Fi card, as indicated in the instructions for Download and Install Visioneer DocAir on page 16.
Tap Gear icon to show the settings for DocAir.
If you are looking at a document tap Documents to show the documents list and then tap Edit.
SCAN AND TRANSFER IMAGES WIRELESSLY WITH EYE-FI
18
10. Tap your Eye-Fi card in the Eye-Fi Cards list.
The next screen displays your Eye-Fi card’s network information, including the password for the
Direct Mode Network. You can either write down the Direct mode Wi-Fi password, or you can press,
hold, then release your finger on the password to highlight it, and then tap Copy when that prompt
displays.
11. Tap Settings to return to the Settings screen.
12. Tap Done on the Settings screen.
13. Open the Wi-Fi settings for your mobile device.
If the Eye-Fi card is in the scanner, make sure the scanner is still connected to the computer and
powered on.
14. On your computer—in the Eye-Fi Center application on your computer, click on Start Direct Mode
Network.
If the card is in your scanner, the lights on the scanner will start flashing indicating that the Direct
Mode Network has been initialized.
15. On your mobile device—tap the Eye-Fi Card when it displays in the list of available networks under
Choose a Network.
16. Tap in the password field for the Eye-Fi Card network.
17. Input the password for the Direct Mode Network that was described in step 10 of theses instructions.
If you copied the password, press, hold, and then release in the password field, and then tap Paste
when that prompt displays.
18. Tap Join.
19. The Settings for the mobile device will now show that it is connecting to the Eye-Fi Card network.
Technical note: if the Eye-Fi card doesn’t display in the list of available networks for your mobile device
after a minute, try clicking Start Direct Mode Network in the Eye-Fi Center application again.
Note that if you had previously selected Photos and RAW files to be sent to your computer during the
initial setup, pairing your mobile device with the Eye-Fi card automatically changes Photos and RAW files
to be transferred to your mobile device.
Testing the Direct Mode Network
After you have connected to the Direct Mode network we recommend that you run a test scan to verify
the software is working as expected.
Note: if you have configured a wireless network for the Eye-Fi card, you will need to either temporarily
disable your wireless network if possible, or remove the wireless network from the Eye-Fi card and then
add it back again when you are done. If the Eye-Fi card is within range of a configured wireless network
the scanned images will be transferred using the wireless network. Please refer to Adding or Removing
Private Wireless Networks on page 8.
Test Scan for the Direct Mode Network
1. Disable your wireless network or remove the network from the Eye-Fi card.
2. Disconnect the scanner from the computer and power cycle the scanner.
19
3.
4.
5.
6.
7.
VISIONEER MOBILITY WITH EYE-FI SCANNING GUIDE
When the scanner power is back on, insert a photo in the scanner.
The scanner scans saves the image to the Eye-Fi card, and the card starts transmitting the image.
Open the DocAir application.
The scanned image file will now start transferring into the DocAir application.
When the scanned image appears in the document list you know that the Direct Mode connection is
working as intended.
Depending on how you chose to set your wireless network for this test, you can either re-enable the
network or connect the Eye-Fi card to the computer and add the wireless network to the Eye-Fi card.
Please refer to Adding or Removing Private Wireless Networks on page 8.
Now that your mobile device has been configured for first time use, you should not have to repeat these
steps. You can turn your wireless access point back on and whenever you are away from your network, you
can scan directly to your tablet or phone.
USING DOCAIR
After you have configured the software to connect to the Eye-Fi card, you can use DocAir to view and
share scanned images. The scanned images that are transferred to your mobile device and will be displayed
in the Documents list in the application.
Documents list and Image view
iPod and iPhone—when the full image view is open, tap the Documents icon to return to show the full
documents list. You can scroll the list up and down. Tap on a document in the documents list to show the
full image view.
iPad portrait—tap the Documents icon to show a drop menu of the full document list. You can scroll the
list up and down. Tap on a document to show the full image view and close the document list.
iPad landscape—the Document list always appears on the left side of the full image view. You can scroll
the list up and down. Tap on a document to show the full image view on the right side.
Renaming Documents
1. In the Documents list, tap the file you want to rename.
2. Tap the Rename button.
3. Type a name for the file and then tap Rename to save the changes.
Sharing Documents
1. In the Documents list, tap the Edit button.
A selection circle will be displayed next to each time in the documents list.
2. Tap on each file name that you want to send.
3. Tap the share icon.
4. Select the option you want to use to share the files. For example, tap Email to have the images
attached to a blank email message.
SCAN AND TRANSFER IMAGES WIRELESSLY WITH EYE-FI
20
Deleting Documents
1. In the Documents list, tap the Edit button.
A selection circle will be displayed next to each time in the documents list.
2. Tap on each file name that you want to send.
3. Tap the trash can icon.
4. Tap the option to confirm that you want to delete the files you selected.
SCANNING TO DOCAIR
After you have successfully configured your mobile device, you can then scan any time following these
simple steps:
1. Open DocAir on your mobile device.
2. Turn on the scanner power.
3. All of the LEDs will flash as the scanner initializes. When the scanner is ready to scan, a single LED
will be lit next to the first function represented by a camera icon.
4. Tap the function button on the scanner to cycle through the scan options until the LED is lit next to
the option you want to use to scan.
Scans in color at 300dpi and creates a JPG (*.jpg) file.
Scans in black & white at 300dpi and creates an Adobe PDF (*.pdf ) file.
Scans in color at 300dpi and creates an Adobe PDF (*.pdf ) file.
5.
Insert an item face up in the paper feed slot, aligned to the left side of the scanner.
6.
The scanner detects the page and starts to feed it through the scanner.
Note that there will be a short pause after you insert the page before the scanner starts to feed the
page. This pause allows you to straighten the item in the paper feed slot.
The scanner starts scanning, when finished it is saved to the Eye-Fi card and the card starts
transmitting the file. In the DocAir application on your mobile device, you will see images loading
into the software.
7.
21
VISIONEER MOBILITY WITH EYE-FI SCANNING GUIDE
ICLOUD AND DOCAIR
You can connect DocAir to iCloud to have your scanned files synchronized between DocAir and other
devices you have configured to connect to your iCloud account.
• You need to enable iCloud in the Settings for your mobile device and log into your iCloud account.
• Turn on Photo Stream to synchronize JPG files.
• Turn on Documents & Data to synchronize PDF files.
• In the Settings for DocAir tap iCloud Document Storage to enable or disable synchronization
between DocAir and iCloud.
If you have not turned on iCloud and logged into your account through the main Settings options
for your iOS device, then the option for iCloud Document Storage will be disabled in DocAir.
TROUBLESHOOTING
Problem – not all of my scanned files are showing up in DocAir.
We recommend that you disable Eye-Fi View if you want to use Visioneer DocAir for scanning and
transmitting images to your mobile device. Images will not be transferred to Eye-Fi View when the
destination is DocAir on your mobile device. However, when you are within range of a configured wireless
network, and Eye-Fi View is enabled, images may instead be transferred to Eye-Fi View and your
computer instead of DocAir.
SCAN AND TRANSFER IMAGES WIRELESSLY WITH EYE-FI
22
SCAN AND SEND FILES TO AN ANDROID MOBILE DEVICE
DOWNLOAD AND INSTALL THE EYE-FI MOBILE APPLICATION
1.
2.
3.
4.
5.
On your Android device, access the Google Market application.
Search for the Eye-Fi application. You want the free one by Eye-Fi, Inc.
Download the application to install it.
Upon installation, touch the Open button to launch the application.
Input your Eye-Fi account email address and password, and then tap Login.
If the Eye-Fi card is in the scanner, make sure the scanner is powered on.
6. Select your Eye-Fi card in the Pairing screen and then tap Continue.
7. A confirmation dialogue will display on your device. Make sure the options for Photos (JPG files)
and RAW photos (PDF files) is selected, and then tap the option to Switch to [your mobile device
model].
8. Tap Continue on the Eye-Fi Card Pairing screen.
9. Tap Continue on the FAQ screen.
10. Touch Ok on the What’s New screen if one is displayed.
You will now be in the Eye-Fi mobile application. When you are within range of your configured wireless
network, scanned images will be sent directly to your mobile device from the Eye-Fi card in your Visioneer
Mobility Air scanner.
Note that if you had previously selected Photos and RAW files to be sent to your computer during the
initial setup, pairing your mobile device with the Eye-Fi card automatically changes Photos and RAW files
to be transferred to your mobile device.
If you want to be able to scan and send files to your mobile device when you are not in range of a wireless
network, you will need to connect to the Eye-Fi card’s Direct Mode network. Please follow the
instructions in the next section for configuring your mobile device to connect to the Eye-Fi card’s Direct
Mode Network.
CONNECTING TO THE EYE-FI DIRECT MODE NETWORK
The Eye-Fi card has the ability to create a network access point, for your to connect your mobile device, to
receive images when you are not in range of your wireless network. When a Wi-Fi network is unavailable
to transfer images, images can be transferred wirelessly from the Eye-Fi card to a mobile device. This is
referred to as Direct Mode.
After you connect to the Eye-Fi Direct Mode network as described below, you will not need to follow
these instructions again unless you intentionally remove the Eye-Fi network from you mobile device.
23
VISIONEER MOBILITY WITH EYE-FI SCANNING GUIDE
Tip: the scanner automatically powers off after 2 minutes to conserve battery power. Tap the function
button occasionally to keep the scanner powered on while initiating the connection between your mobile
device and the scanner. Alternatively, if you have a memory card reader, you can insert the Eye-Fi card into
the card reader for configuring the connection between your mobile device and the Eye-Fi card’s Direct
Mode network.
1. On your computer—open the Eye-Fi Center application.
2. With the Eye-Fi card in the scanner, connect the scanner to the computer and turn on the power.
3. When the Eye-Fi card shows as connected in the Eye-Fi Center application, click on the gear icon to
open the settings for your Eye-Fi card.
4.
5.
6.
7.
Click the Networks tab, then the Direct Mode tab.
Make sure the option to use Direct Mode when no known Wi-Fi networks are in range is selected.
Move the sliders left or right to change the wait times for the Eye-Fi card. When the Eye-Fi card is
broadcasting a network it is using the scanner battery to power the network. The recommended
settings are:
Select 2 minutes for Direct Mode to wait for a device to connect to it.
Select 30 seconds for the Direct Mode to stay on after the last item is received.
Click the Save button.
8.
Disconnect the scanner from your computer and power cycle the scanner.
Testing the Direct Mode Network
After you have configured the Direct Mode network we recommend that you run a test scan to verify the
software is working as expected.
SCAN AND TRANSFER IMAGES WIRELESSLY WITH EYE-FI
24
Note: if you have configured a wireless network for the Eye-Fi card, you will need to either temporarily
disable your wireless network if possible, or remove the wireless network from the Eye-Fi card and then
add it back again when you are done. If the Eye-Fi card is within range of a configured wireless network
the scanned images will be transferred using the wireless network. Please refer to Adding or Removing
Private Wireless Networks on page 8.
Test Scan for the Direct Mode Network
1. Disable your wireless network or remove the network from the Eye-Fi card.
2. Disconnect the scanner from the computer and power cycle the scanner.
3. When the scanner power is back on, insert a photo in the scanner.
4. The scanner scans saves the image to the Eye-Fi card, and the card starts transmitting the image.
5. Open the Eye-Fi application.
6. Tap Connect to connect your mobile device to the Eye-Fi Direct Mode network.
7. When the scanned image appears in the document list you know that the Direct Mode connection is
working as intended.
Note: You can set the application to automatically connect to the Eye-Fi network. When the option is
selected, each time that you scan and open the Eye-Fi application, the device is automatically switched to
the Eye-Fi network without being prompted. From the menu options, press Settings, then Application
Preferences, and Automatically Connect.
Depending on how you chose to set your wireless network for this test, you can either re-enable the
network or connect the Eye-Fi card to the computer and add the wireless network to the Eye-Fi card.
Please refer to Adding or Removing Private Wireless Networks on page 8.
Now that your mobile device has been configured for first time use, you should not have to repeat these
steps. You can turn your wireless access point back on and whenever you are away from your network, you
can scan directly to your tablet or phone.
SCANNING TO EYE-FI
After you have successfully configured your mobile device, you can then scan any time following these
simple steps:
1. Open Eye-Fi on your mobile device.
2. Turn on the scanner power.
3. All of the LEDs will flash as the scanner initializes. When the scanner is ready to scan, a single LED
will be lit next to the first function represented by a camera icon.
25
4.
VISIONEER MOBILITY WITH EYE-FI SCANNING GUIDE
Tap the function button on the scanner to cycle through the scan options until the LED is lit next to
the option you want to use to scan.
Scans in color at 300dpi and creates a JPG (*.jpg) file.
(note that a thumbnail of the image is displayed in the document view for this file
type)
Scans in black & white at 300dpi and creates an Adobe PDF (*.pdf ) file.
(note that a generic palm tree icon is displayed in the document view for this file
type)
Scans in color at 300dpi and creates an Adobe PDF (*.pdf ) file.
(note that a generic palm tree icon is displayed in the document view for this file
type)
5.
Insert an item face up in the paper feed slot, aligned to the left side of the scanner.
6.
The scanner detects the page and starts to feed it through the scanner.
Note that there will be a short pause after you insert the page before the scanner starts to feed the
page. This pause allows you to straighten the item in the paper feed slot.
The scanner starts scanning, when finished it is saved to the Eye-Fi card and the card starts
transmitting the file. In the Eye-Fi application on your mobile device, you will see images loading
into the software.
7.
SCAN AND TRANSFER IMAGES WIRELESSLY WITH EYE-FI
26
PDF FILE TRANSFER USING EVERNOTE
Evernote is an application that allows you to store notes and content. Using Eye-Fi and Evernote, you can
scan and send PDF files from your scanner to your iPad or any other mobile device.
You can also configure Eye-Fi to send scans automatically to Evernote, after which you simply need to
email them to your computer or device.
CONFIGURE EYE-FI TO SHARE WITH EVERNOTE
1.
2.
3.
In the Eye-Fi Center software, click File > Settings > Eye-Fi Card.
Click the Photos, then the Online tab.
Configure Eye-Fi for your Evernote account. The user accounts for Evernote and Eye-Fi do not need
to be the same. When scanning, to automatically send images to Evernote, enable the Share photos
online or the Upload all photos to ‘My Evernote’ check box.
TRANSFER IMAGES TO EVERNOTE ON WINDOWS
1.
2.
3.
In the Eye-Fi Center, if a required image is not already in the tray at the bottom of the window, drag
and drop it to the tray or right-click the image and add it to the tray.
Delete any other images in the tray.
Click the Publish button. A window opens.
27
VISIONEER MOBILITY WITH EYE-FI SCANNING GUIDE
4.
Select Evernote, and click Share Now. The images are sent to your Evernote account, as shown here.
5.
Send them by email to your computer/device.
SCAN AND TRANSFER IMAGES WIRELESSLY WITH EYE-FI
28
ACCESS AND DELETE IMAGES FROM EYE-FI CARD
To copy or delete the images from the card manually, connect the scanner to a computer and turn it on.
The scanner will be detected as a disc drive. Open the option on your computer to display the disc drives
and then open the drive for your scanner. You can also remove the card from the scanner and insert it into
a memory card reader in the computer.
29
VISIONEER MOBILITY WITH EYE-FI SCANNING GUIDE
TROUBLESHOOTING AND ERROR MESSAGES
Inserted device does not belong to this account—this message means that the user account was open on
one computer while the card was added to the user account on another computer. Log out and in again as
prompted.
Not in range, secured with WPA/WPA2 PSK—this message appears in the Wi-Fi networks on an Android
device, for example. Connect the scanner to the computer with Eye-Fi Center software installed, and click
the Start Direct Mode Network button in the Direct Mode tab. On the mobile device, check that Wi-Fi is
on and select the Eye-Fi card if it does not automatically connect. If that does not work, change one of the
sliders in the Direct Mode tab, click Save, click the Start Direct Mode Network button, and repeat the WiFi connection.
Unpaired card. Please pair card in Settings—this message appears in Eye-Fi on an iPad or iPhone. It means
that the card has not been set to work with the device. Press the gear icon at the top left, press Eye-Fi Card
Settings. If Card Pairing window is blank, it means that there is no Internet connection.
We are having difficulty connecting to the Eye-Fi servers. Please check your network connection to access
this functionality.—Try accessing the Settings for the device, turn on Wi-Fi, and select the Eye-Fi card. If
you cannot connect to the card because of a “not in range” message, connect the scanner to the computer
with Eye-Fi Center software installed, and click the Start Direct Mode Network button in the Direct
Mode tab.
INTELLIGENT SCANNING SOLUTIONS
Copyright ©2012 Visioneer, Inc.
VMA-Eye-Fi-100