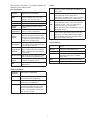
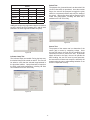
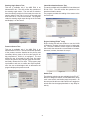
1
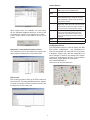
ACom Diagnostics
Diagnostic Software for ABS
User Guide 5.9
™
© 1996-2008 Bendix Commercial Vehicle Systems LLC, a member of the Knorr-Bremse Group.
All Rights Reserved
INDEX
General Information . . . . . . . . . . . . . . . 3
RP1210B adapters . . . . . . . . . . . . . . . . 3
PC hardware requirements. . . . . . . . . . . . 3
Technical Assistance . . . . . . . . . . . . . . . 3
Installing ACom™ Diagnostics . . . . . . . . . . 5
Uninstall ACom™ Diagnostics . . . . . . . . . . 6
Help . . . . . . . . . . . . . . . . . . . . . . . 6
Demo Mode . . . . . . . . . . . . . . . . . . . 6
Hardware Adapter Selection . . . . . . . . . . . 6
Functions of Software . . . . . . . . . . . . . . 6
Diagnostic Trouble Code Screen. . . . . . . . . 8
Configuration Screen. . . . . . . . . . . . . . . 9
Wheel Speed Screen. . . . . . . . . . . . . . 13
Component Test . . . . . . . . . . . . . . . . 14
Installation Test. . . . . . . . . . . . . . . . . 17
Pressure Sensor . . . . . . . . . . . . . . . . 22
Stability Sensor . . . . . . . . . . . . . . . . 22
Scratch Pad . . . . . . . . . . . . . . . . . . 22
ADL Auxiliary Design Language . . . . . . . . 23
Known Issues with
ACom™ Diagnostics Operation . . . . . . . . . 24
2
Windows 95, Windows 98, Windows NT, Windows 2000,
Windows Vista and Windows XP are either registered
trademarks or trademarks of Microsoft Corporation in
the United States and/or other countries.
Known Issues with RP1210B adapters
• Tool does not support two adapters connected at
the same time.
• Noregon PLC - 1708 Adapter does not support USB
connection.
This guide, as well as the software described in it,
is furnished under license and may only be used
or copied in accordance with the terms of the
license.
PC hardware requirements
ACom™ diagnostic software will run on Windows 98,
NT, 2000, XP, and Vista operating systems. Below are
the minimum requirements for running the application.
• Intel Pentium II processor or compatible, 450 MHz
• 64 MB RAM
• 300 MB free disk space
• Microsoft Internet Explorer Version 4.1 (current
version will be part of distribution CD)
• Adobe Acrobat Version 4.0 (current version will be
part of distribution CD)
• Communication port
• VGA standard graphics adapter, 800 x 600 resolution
(1024 x 768 primary usage)
• Window compatible keyboard and mouse
The information provided in this manual is for
informational purposes only and is subject
to change without notice and should not be
construed as a commitment by Bendix Commercial
Vehicle Systems LLC (“Bendix”). Bendix assumes
no responsibility or liability for any errors or
inaccuracies that may appear in this publication.
General Information
ACom™ diagnostics will provide the user with the
capability to view and repair ABS component diagnostic
trouble codes, monitor wheel speeds, display and edit
configuration of ABS ECU, self-configure ABS ECU,
and test ABS components.
NOTE: Tool is not guaranteed to operate correctly
on Windows 95 operating systems.
This application will support the Bendix® EC-60™,
Bendix® EC-17, Bendix® EC-30™, Gen 4, Gen 5 (U12
and U16), ABS 2X, Bendix® TABS-6, Bendix® EC-30™T
and A-18 ABS ECUs.
Technical Assistance
For any questions regarding setup or operation
of ACom™ diagnostics please contact Bendix at
1-800-AIR-BRAKE (1-800-247-2725).
The application requires the usage of RP1210B
complaint adapter. A list of the recommended adapters
is shown below.
Additionally, monitor the Bendix website, www.bendix.
com for updates to the software.
RP1210B adapters
ACom™ Diagnostics relies on RP1210B compliant
hardware adapters for communication.
NOTE: ACom™ Diagnostics will remain in the demo
mode unless there is at least one RP1210B driver
installed on the computer.
The following are a list of supported hardware adapters
for the software. Verify that the driver (.dll) for the
adapter to be used for communications is loaded on
the computer.
• Nexiq – Parallel Data Module (PDM)/USB Adapter
Parallel Data Module (PDM)
• Nexiq – USB Link (USB)
• Nexiq – Wireless Vehicle Link (WVL)
• Noregon – PLC-1708 Adapter
• Noregon – Data Link Adapter (DLA/USB)
• Dearborn – Adapter III, DPA 4 USB, DPA4+USB
• Bendix – Brake Link Adapter
• IC3Com Interface
• IC4Com USB Interface
• EZTech Link (Wireless)
• Eaton – MD 100
• Cummins Inline 4.15 (must be updated with at least
driver version 5.2.11.2, Inline4 firmware 4.17, or
Inline5 firmware 5.25.
• AutoTap Heavy Duty Vehicle Adapter (HDVA 100AZ)
Licensing Information
BENDIX® “ACom™ diagnostic software”
END USER LICENSE AGREEMENT.
BY CLICKING ON THE “OK” BUTTON OR OPENING
THE PACKAGE, YOU ARE CONSENTING TO
BE BOUND BY THIS AGREEMENT. IF YOU DO
NOT AGREE TO ALL OF THE TERMS OF THIS
AGREEMENT, CLICK THE “CANCEL” BUTTON
AND THE INSTALLATION PROCESS WILL NOT
CONTINUE.
*REDISTRIBUTION NOT PERMITTED.
Bendix Commercial Vehicle Systems LLC. (“Bendix”)
grants you a non-exclusive, non-transferable, license to
use, for your internal purposes only, the Software and
Documentation, free of charge if you are (a) a customer
of Bendix or (b) an employee of Bendix.
DISCLAIMER OF WARRANTY.
This Software and Documentation is provided on an
“AS IS” basis, without warranty of any kind.
3
BENDIX MAKES NO REPRESENTATION OR
WARRANTY OF ANY KIND, EXPRESS OR IMPLIED,
WITH RESPECT TO THE SOFT-WARE, INCLUDING
WITHOUT LIMITATION, ANY WARRANTIES OF
MERCHANTABILITY, FITNESS FOR A PARTICULAR
PURPOSE AND NON-INFRINGEMENT, ALL OF
WHICH ARE DISCLAIMED.
copyright, patents or common law property rights of
Bendix pertaining to the Software or Documentation.
The license granted in this Agreement shall not be
construed expressly, by implication or estopped, as the
grant of a license under any trademark, patent or other
intellectual property of Bendix.
THIRD PARTY RIGHTS
Bendix® ACom™ diagnostic software products may
require the use of third party software products and
require an additional license from such third parties
to use those third party products. As of the date of
this License Agreement, the following third party
products are provided by Licensor with the Licensed
Products; some documents included in the help of the
diagnostic program requires the use of the Adobe®
Acrobat® Reader. Licensee agrees that, in addition to
the terms and conditions of this Agreement, any copies
of Adobe® Acrobat® Reader it receives hereunder
are subject to the terms and conditions of the Adobe
Systems Incorporated Electronic End-User License
Agreement for Adobe® Acrobat® Reader included. New
releases of the Bendix® ACom™ software may contain
additional third party products. Licensee agrees and
acknowledges that, to the extent that the ACom™
diagnostic software applications contain any such third
party software: (i) such third party software is provided
on an ‘as-is’, pass-through basis, and as such is
provided to Licensee without warranty, indemnification,
support or other representation by Licensor, except as
independently provided directly to Licensee from the
third party licensor; (ii) Licensor bears no liability with
respect to such products; and (iii) Licensee may be
required to purchase new versions of such third party
products as they become available and are required by
the ACom™ diagnostic software.
The entire risk as to the quality and performance of the
Software is borne by you. Should the Software prove
defective, you and not Bendix, assume the entire cost
of any service and repair. This disclaimer of warranty
constitutes an essential part of the Agreement. Bendix
does not warrant that your use of the Software will be
uninterrupted or that the operation of the Software will
be error-free.
TITLE
Licensee acknowledges that title, ownership rights,
and intellectual property rights in the Software and
Documentation shall remain exclusively in Bendix
and/or its suppliers respectively. The Software and
Documentation are protected by the copyright laws and
treaties. Title and related rights in the content accessed
through the Software is the property of the applicable
content owner and may be protected by applicable law.
This License gives you no ownership rights to such
content.
The license granted herein expressly excludes any right
to reproduce, duplicate, copy, disassemble, decompile,
distribute, sublicense, sell, assign or otherwise transfer
the Software or Documentation or any part thereof
without the prior written consent of Bendix. If such
consent is given, and in order to protect the intellectual
property of Bendix in the Software and Documentation,
Licensee agrees to reproduce and incorporate
appropriate Bendix notice for trade secrets, copyright
or any other identifying legends in any reproductions,
duplications or copies of the Software or Documentation
or any part thereof made by Licensee. Notwithstanding
the above, Licensee may make one (1) copy of the
Software for back-up purposes only.
The general help system may require the use of the
Microsoft® Internet Explorer® software. Licensee
agrees that, in addition to the terms and conditions
of this Agreement, any copies of Microsoft® Internet
Explorer® software it receives hereunder are subject
to the terms and conditions of the Microsoft® EndUser License Agreement for the Internet Explorer®
software included. New releases of the Bendix® ACom™
software may contain additional third party products.
Licensee agrees and acknowledges that, to the extent
that Bendix® ACom™ diagnostic software applications
contain any such third party software: (i) such third party
software is provided on an ‘as-is’, pass-through basis,
and as such is provided to Licensee without warranty,
indemnification, support or other representation by
Licensor, except as independently provided directly
to Licensee from the third party licensor; (ii) Licensor
bears no liability with respect to such products; and (iii)
Licensee may be required to purchase new versions of
such products as they become available and required
by the ACom™ diagnostic software.
Licensee covenants not to disclose the Software or
Documentation or any part thereof, or cause or permit
the Software or Documentation, or any part thereof, to
be used by any person other than approved employees
of the Licensee engaged in the business activities of
the Licensee on the authorized commercial equipment
at the Licensee’s business location. The Licensee
agrees to refrain from disclosing or delivering the
Software or Documentation, or any part thereof, to
any unauthorized person or entity consistent with the
provisions hereof.
RESERVATION OF RIGHTS
The rights granted to Licensee hereunder shall not affect
the exclusive ownership by Bendix of any trademark,
4
MODIFICATIONS AND IMPROVEMENTS
If the Licensee, or any of its officers, agents or
employees modifies or devise any improvements in
the Software or Documentation in any manner, the
Licensee shall promptly disclose such modification or
improvement to Bendix and Bendix shall have a nonexclusive, irrevocable, royalty free license to use such
modification or improvement for any purpose including
the right to grant royalty free sub-licenses thereof.
The next screen is a disclaimer stating, “Bendix CVS
LLC can not take responsibility for incorrect usage of
this program or for the stability of any other software or
data previously or later installed.”
CONFIDENTIALITY
Licensee agrees to treat the ACom™ Software and
Documentation as confidential proprietary information
of Bendix and to use the same degree of care with such
Bendix proprietary information as it uses to protect its
own proprietary information, but in no event less than
reasonable standard of care.
Figure 2
Then the license agreement is displayed and the user is
required to accept the terms for the program to install.
TERMINATION
The license will terminate automatically if you fail
to comply with the limitations described herein. On
termination, you must destroy all copies of the Software
and Documentation.
LIMITATION OF LIABILITY
UNDER NO CIRCUMSTANCES AND UNDER NO
LEGALTHEORY, TORT, CONTRACT, OR OTHERWISE,
SHALL BENDIX OR ITS SUPPLIERS OR RESELLERS
BE LIABLE TO YOU OR ANY OTHER PERSON FOR
ANY DIRECT, INDIRECT, SPECIAL, INCIDENTAL, OR
CONSEQUENTIAL DAMAGES OF ANY CHARACTER
INCLUDING, WITHOUT LIMITATION, DAMAGES
FOR LOSS OF GOODWILL, WORK STOPPAGE,
COMPUTER FAILURE OR MALFUNCTION, OR ANY
AND ALL OTHER COMMERCIAL DAMAGES OR
LOSSES.
Figure 3
Now the user is asked if they want to: Install the
programs automatically, uninstall the program, and
install add-on programs e.g. Acrobat, or if the user
needs help with installing the program.
Installing ACom™ Diagnostics
When installing ACom™ Diagnostics it is recommended
that all other programs be closed prior to running the
installation.
Figure 4
The user has two options available to install the
program: automatic (install program selects directory
for software) or customized. The custom installation
method also allows the user to select specific software
components to install.
RUN SETUP
The first screen that appears states that the installation
program is going to install ACom™ Diagnostics.
Figure 5
Figure 1
Next the installation window will display the disk space
requirements for ACom™ Diagnostics program.
5
Figure 6
Install program displays that the program has been
installed on the computer.
Figure 8
Functions of Software
Once communication has been established the program
displays the Status screen.
The user will now be able to view the following screens
for all ECUs
• ECU Status
• Diagnostic Trouble Codes
• Wheel speed
• Configuration
• Component test
• Installation test
Figure 7
Uninstall ACom™ Diagnostics
If there is a need to uninstall ACom™ diagnostics it is
recommended that the user: click on the “Start” button
on the task bar, Program, find Bendix, ECU installer,
choose “uninstall”.
Additional screen functions provided based on ECU
type
• Stability Sensors (EC-60™ Advanced)
• Pressures (EC-60™ Advanced)
• Scratch Pad (Trailer ABS ECUs)
• ADL (EC-60™ and TABS-6)
• Dyno Mode (EC-60™)
NOTE: EC-17 is only supported with ECU status, DTC
and Configuration screens.
Help
Provides you access to the help files available for
ACom™ diagnostics. These files will provide you
with information about features / operation of ACom™
diagnostics. To access the Help contents, select the
Help icon from any screen or the main menu.
Demo Mode
The demo mode allows the user to get familiar with the
software without having to be connected to a vehicle and
an ECU. The information shown is for demonstration
purposes only, and does not necessarily reflect actual
conditions.
Status Screen
The status screen provides an overview of the current
ABS system. Not all information is supported or available
from all the ECUs, in such a case the data field will
display not available (NA). Information displayed will be
read once at the opening of the screen.
Input voltage, active faults and in-cab lamps will be
continuously updated.
Hardware Adapter Selection
The user will be prompted to select the adapter they are
using for communications. The adapter selection list is
generated from the drivers installed on the computer for
the RP1210B devices. Additionally, there is a vehicle
interface selection button which brings up the available
adapter selection list.
Figure 9
6
The following information is provided regarding the
ABS ECU on the status screen:
ECU Information
Information
Displayed
Explanation of information
Model
ABS ECU model reference such as
EC-60™, TABS-6 , EC-17, EC-30™ /
EC-30™T, U12, U16, 2X, A-18
Part number
Bendix ABS ECU part number
Serial number
Bendix ABS ECU serial number
Software
number
Bendix ABS ECU software release
number
ABS
configuration
Number of sensors and modulators the
ECU is currently configured for
Traction
Control
Displays mode(s) of ATC ECU is
currently configured as either engine
or brake, no control if ABS ECU is not
configured for ATC but supports it. N/A
if ECU does not support ATC
PLC support
Will only indicate when a tractor ECU
can support receiving DTC information
over PLC with a Yes or No
Engine hours/
odometer
Will display engine hours if it is a
tractor, displays odometer mileage if a
trailer or displays N/A if information is
not available
ADL Program #
Will display the ADL Program the ABS
ECU currently has programmed in it.
Stability
Control
Will display only if the ABS ECU
supports any stability control
HSA
Will display if EC-60™ ECU supports
Hill Start Aid
Lamps
Lamp If lamp is illuminated (highlighted) this indicates
diagnostic trouble code(s) within the ABS and/or
ATC system
Explanation of information
Input Voltage
The battery voltage read at the power
input connections to the ABS ECU
Active DTCs
The number of active diagnostic trouble
codes read from the ABS ECU.
Event History
The number of diagnostic trouble codes
recorded in the ABS ECU history. Will
not show if ECU does not support this
function. This information is read once
when screen is opened.
ABS indicator lamp when illuminated indicates
active diagnostic trouble code(s) with a
component in the ABS system. User may double
click on illuminated lamp to go to DTC screen
ATC
or
ESP
ATC indicator lamp when illuminated indicates
active diagnostic trouble code with a component
in the ATC system. User may double click on
illuminated lamp to go to DTC screen.
NOTE: Will display ESP if the ABS ECU supports
the stability control
TABS Trailer in cab ABS indicator lamp indicates current
status of trailer ABS indicator lamp in the cab of
the tractor. The tractor ABS ECU must support
PLC functionality with a PLC complaint trailer in
order for the lamp to illuminate
Control Buttons
Status Information
Information
Displayed
ABS
7
DTCs
Will launch diagnostic trouble code
screen
Wheels
Will launch wheel speed screen
Config
Will launch configuration screen
Report
Provides a report of the status
information which can be e-mailed,
faxed, saved
Help
Will launch the help for status screen
Close
Will close the status screen
Diagnostic Trouble Code Screen
The diagnostic trouble code window has three main
parts: active diagnostic trouble codes, inactive or
memorized diagnostic trouble codes, and event history.
One or more of these tabs may not appear in the
window, because they are ABS ECU dependent. All
active diagnostic trouble codes (DTC’s) are displayed
“real” time, which means the ABS ECU is reporting a
currently active DTC. Inactive/Memorized diagnostic
trouble codes are DTCs, which were active in the past.
Event history entries are chronological listing of DTCs
and other events, maintained by the ABS ECU.
Troubleshooting Information
The embedded bitmap and test information will show
the connectors with highlighted terminal locations to
assist in troubleshooting. Highlighting the selected
diagnostic trouble code will provide Service Data Sheet
information, on how to fix the diagnostic trouble code in
the panel below the active DTC description.
Figure 12
Diagnostic Trouble Code Events
Diagnostic trouble code events are stored in this
section. These events are stored in chronological
order, with the newest event displayed first in the
list. The Description column is the text indicating
the particular diagnostic trouble code event. The
Occurrence Counts column displays how many times
a DTC has happened. If the DTC occurs consecutively
there will be an entry of the original DTC and the last
DTC. The last DTC will indicate how many times the
DTC has occurred since the first, but not including the
first occurrence. The Power Up Time column is a time
stamp indicating when the DTC occurred after power
up. There are 4 possible time stamps: 0 to 10 seconds,
10 seconds to 15 minutes, 15 minutes to 1 hour, and
greater than 1 hour. The Vehicle Velocity is the vehicle
speed at which the diagnostic trouble code occurred.
The B is the mileage at which the diagnostic trouble
code occurred. The Time Stamp is a record of when
the event occurred in terms of either power cycles or
engine hours. The power cycle time stamp is recorded
when engine hours is unavailable and identifies how
many power cycles ago the event occurred. The power
cycle time stamp stops counting when the value of 255
has been reached.
Figure 10
Diagnostic Trouble Code Window Tabs
Active diagnostic trouble code tab will be displayed for
all ABS ECU’s, while the inactive diagnostic trouble
code will only be displayed with U12, U16, ABS 2X,
A18, and TABS-6 ABS ECUs. The event tab will be
displayed for EC-17, EC-30™, EC-30™T, EC-60™
controller and TABS-6. The Advanced EC-60™ ECU
has an additional tab, ESP Counter.
Diagnostic Trouble Code Specific Information
Active diagnostic trouble code information consists of
descriptions, occurrence counts, sub-system identifiers
(SID), and failure mode identifiers (FMI). Reference
service data sheets for more information. If the ABS
ECU does not support occurrence count information,
N/A will be displayed. Additionally, each tab will display
the current odometer (trailer) / engine hours (tractor)
depending on the ABS ECU and what it supports.
Figure 11
8
Control Buttons
Repair
Launches detailed repair information for
ONLY sensor and modulator DTCs.
Service
Data
Launches the service data sheet
Read
Manually command a read of the ECU.
This is dependent upon which tab is active.
Active diagnostic trouble codes will always
automatically refresh.
Clear
Clears the diagnostic trouble codes,
depending on the active tab, this function will
send a clear command for active, inactive or
the event history, and information events.
Report
This will launch a dialog and prompt the
user for more specific platform and user
information, and provide a written record
of the system diagnostic trouble code(s) in
question.
Help
Launches Help dialog
Close
Closes diagnostic trouble code screen
Figure 13
When engine hours are available, the time stamp
will be displayed (displayed hhhh:mm, h=hours and
m=minutes) for a tractor or the odometer for a trailer.
Current engine hours are provided at the top of the
screen.
Configuration Screen
The configuration screen is used to display the ABS
ECU system configurations. Any unregistered or
incorrect configuration will cause the ECU to generate
a diagnostic trouble code, and the configuration will
not be changed. Therefore, any change to the system
must be fully understood by the user. If any questions
should arise, consult Bendix for clarification.
Call 1-800-AIR-BRAKE or,
visit on the web at www.bendix.com.
Figure 14
Diagnostic Trouble Code Information Events
The comments (not DTC information) are stored in the
same manner as diagnostic trouble code entries.
Figure 15
ESP Counter
ESP counter provides a listing of the ESP events that
have occurred. The listing identifies the event, displays
a counter for number of times event has occurred, and
the engine hours of the last event.
Figure 17
Figure 16
9
Antilock
The antilock section displays the current number of
sensors and modulators of the system.
Odometer
The odometer section displays the current odometer
reading. The trip odometer reading is the odometer
mileage since the odometer was cleared. The service
odometer is the mileage left before service is needed.
Figure 18
Additional Axle for Trailer
The additional axle for trailer will display if the axle is a
lift or not lift axle only for configurations of 4S/2M and
4S/3M.
Figure 23
Tire Size
The tire size section displays the current rolling radius
value programmed into the ABS ECU. These values
are for both tires on one axle. These are dependent on
the circumference of the tire, and how many complete
revolutions the tire makes over one mile. These values
should be obtained from the tire manufacturer and
typically are different for each tire model. The tool
assumes a tone ring with 100 teeth.
Figure 19
In Cab Trailer Lamp (for EC-30™ ECU ONLY)
There is a configuration item for the In Cab trailer
lamp (PLC). The possible configurations are enabled
(meaning PLC is supported) or disabled (meaning PLC
is not supported).
Figure 20
Figure 24
Retarder
The retarder section displays the current control of the
retarder.
Note: The actual value of tire size may be slightly
different than the value inputted due to scaling of
calculation.
Figure 21
Figure 25
ATC
The ATC section displays the current configuration of
the Automatic Traction Control system.
ESP
The ESP section displays a list of ESP parameters
stating if they are enabled or disabled. Additionally, a
listing of the stability sensors indicating they’re mounted
as standard or inverted.
Figure 22
Figure 26
10
Configuration Diagram
The diagram will reflect the typical ABS installation for
the configuration read from the ABS ECU.
Possible configurations are listed below.
Configuration
4S / 4M
Tractor
6S / 4M
6S / 5M
6S / 6M
4S / 3M
Trailer
4S / 2M
2S / 1M
Control will be
either axle or side
2S/ 2M
Tire Size
Tire size is adjustable to within the limits available for the
ABS ECU. Consult the tire manufacturer specifications
for these values. Additionally, the ECU will set a DTC
if the tire sizes are out of range. NOTE: The program
assumes that a 100-tooth tone ring is being used.
The tire size read back from the ECU may not be
what the user selected because of how the tool
scales the values.
Figure 27
Control Buttons
Modify
Launches the Configuration Modification screen
Self Config
Performs a self configuration of the ABS System
Broadcast
Launches the Broadcast options
AUX I/O
Launches a window displaying the status of the auxiliary
inputs / outputs
Calibrate
(Advanced
Only)
Launches the sensor calibration services the Advanced
ESP sensors require.
ESP Parameters
(Advanced
Only)
Launches the ESP parameter information. Once the window has been launched a save parameter option becomes
available.
Help
Launches Help system
Close
Closes the configuration screen
Figure 29
NOTE: ACom Diagnostics 5.3 and up allow the tone
ring to be changed for the TABS-6 ONLY.
Modify Button
The modify button opens the change configuration
window allowing the following configuration information
to be changed: Antilock number of sensors and
modulators, Tire size, Retarder, ATC.
NOTE: ESP parameters are read only.
Retarder
The available control methods are typically:
Not Controlled – No retarder control for this
configuration
Retarder Relay – Retarder controlled by a retarder
disable relay
Retarder Data link – Retarder controlled by J1939
communications
Figure 30
ATC
The available control methods are:
No Control – No traction control present or enabled
Brake – Brake control is automatically activated when
drive wheel(s) on one side of the vehicle are spinning,
which typically occurs on a split-coefficient surface
(such as asphalt and ice). The traction system will
then lightly apply the brake to the drive wheel(s) that
are spinning. The vehicle differential will then drive the
wheels on the other side of the vehicle. Brake control
is available at vehicle speeds up to 25 MPH.
Figure 28
Antilock
This field will show the available sensor / modulator
combinations for the ABS ECU. Trailer applications
will display the control method along with the sensor
/ modulator combination. Consult Bendix if you are
unsure how to correctly configure these parameters.
11
Brake / Engine
For optimal ATC performance, both engine and brake
control methods are recommended. Engine control is
automatically activated to control the wheel slip of the
driven axle(s). This is accomplished by sending a J1939
torque limitation request to the engine ECU. Engine
control must follow SAE J1939 protocol. Bendix CVS
approval is required for all new applications. Engine
control is available at all vehicle speeds.
Figure 34
AUX I/O
This screen is available for some tractor and trailer
ECUs only. It displays the configuration for the auxiliary
inputs and outputs. The type will display what the
auxiliary is configured as either input, output, input ADL
or output ADL. The mode is either off, digital, analog,
or tristate.
Figure 31
Additional Axle (Trailer ONLY TABS 6)
The additional axle is configurable only if the ABS
configuration is 4S/2M or 4S/3M.
Figure 32
Odometer (Trailer ONLY)
The odometer displays the accumulated mileage of
the ECU. The trip odometer can be reset. The service
interval mileage is set here.
NOTE: The odometer write can not be set below the
actual accumulated mileage stored in the ECU. The
service odometer can be set to a mileage for service
intervals. Any values inputted for odometer need to be
positive numbers. If the number inputted is not correct
the screen will remain with change.
Figure 35
Control Buttons
Write
Writes new configuration
Cancel
Closes window
Calibrate
This test is available only if the ABS ECU is an Advanced
EC-60™, providing calibration for steering angle and
lateral acceleration sensors.
Start begins the calibration; the current step will display
information / instructions that the user will have to
perform and acknowledge in order for calibration to
occur.
Figure 33
Broadcast Options
This screen is for configuring broadcast parameters.
There are generally three different data links in which
messages can be broadcast: J1939, J1587 (J1708),
or J2497 (PLC) depending on the ABS ECU. These
broadcast messages are typically used by other
components on the vehicle links.
Figure 36
12
Control Buttons
Start
Begins calibration
Stop
Stops calibration
Yes
Acknowledges condition needed
to continue
No
Allows condition to be met
Cancel
Stops calibration
Close
Closes dialog
Wheel Speed Screen
This screen allows the user to monitor wheel speeds.
Along with this functionality, the user has the ability to
perform data acquisition of the wheel speeds and save
the results to a comma delimited file. The wheel speeds
may be monitored both graphically and numerically.
Figure 39
Data Acquisition of Wheel Speeds
It is possible to log data collected by the wheel speed
screen and save it to a comma delimited file. Before
attempting this, please ensure that settings such as
units and graph type are set to their desired settings,
as they can not be changed once data logging has
begun.
Data Acquisition Control Buttons
Figure 37
Manipulating Graphs
The user is able to display graphical data in either line
or bar graph form. It is possible to switch between the
two types of graphs through the “Graph Type” region of
the wheel speed screen.
Start
Begins data logging
Stop
Ends data logging session
Rewind
Allows user to move backwards in time
through the data
Forward
Allows user to move forward in time
through the data
Figure 40
Information
The “elapsed” field of this region refers to the elapsed
time of the current data logging session. In other
words, how long data has been recording, since the
start button was pressed. If the “auto save” check box
is selected before the data logging procedure begins,
the user will be immediately prompted to enter a file
name. When the stop button is pressed at the end of
a data logging session, the data will automatically be
saved to the file that was created by the user. Each
subsequent data trace will be saved under an autoincremented file name with no further input from the
user. If the “auto save” checkbox is not selected, the
user will be prompted to enter a file name, if they wish
to save the data they have recorded as the result of a
data logging session.
Figure 38
Numeric Display of Data
The number of wheels displayed in each graph is
configurable. Notice the “wheel speeds in MPH”
region of the screen has check boxes. If the boxes
are checked, the data for that wheel speed will be
displayed. In order to remove a particular wheel from
the graph screen; simply uncheck the box beside its
name.
Each wheel speed is displayed in the same color as
shown in the wheel speed box.
Also the user can select between miles per hour
and kilometer per hour by selecting the correct radio
button.
The value displayed under the wording of Sensor
Threshold speed indicates the strength of the sensor
signal in relationship to the sensor gap.
Figure 41
13
Viewing Saved Data
The user is able to view saved data at a later time by
pressing the “Open File” button. Once the open file
button has been pressed the user will be prompted to
select the data file that they want to view.
Figure 42
Control Buttons
Open
Opens saved data
Close
Closes the configuration screen
Help
Launches Help System
Figure 44
Modulator Tests
Given the current configuration of the ECU, a list
of modulator tests will appear in the “Modulator Test
Region”. A modulator test consists of actuating a
given modulator, to produce an audible sound. By
listening to the sound that is made, the user will be able
to determine if it is functioning properly or not. The
user can select which modulator to test. The program
provides instructions for the test in the window.
A chuff test is a test of all of the known modulators on
the system, given the current configuration of the ECU.
This test is conducted in two cycles. Each modulator
is chuffed once during the first cycle, then again on the
second cycle. After each test, the user will be asked to
verify that the selected modulator, or in the case of the
chuff test, all modulators behaved correctly.
The chuff test sequence is:
Steer axle right
Steer axle left
Drive axle right
Drive axle left
Additional axle right
Additional axle left
Component Test
This window enables the user to test the connection to
various components that interface with the ABS ECU.
If the expected results are not observed, the user is
able to retrieve service data information to assist in
resolving the issue. All tests, except the sensor test,
are intended to be performed with the vehicle parked.
Before a test can be initiated the user will be prompted
to acknowledge a warning regarding the vehicle being
parked on a level flat surface with wheels blocked and
keep hands, feet etc. away from moving parts.
Figure 43
Test Selection
The test selection region allows the user to choose a
test to conduct. There are a maximum of six different
tabs to choose from Modulators, Lamps, Switches,
Sensors, ESP and Miscellaneous. Depending on the
type of ECU and its’ configuration, will determine which
tests are available. Furthermore, within a given test
list, only tests that are valid for the ABS ECU and its’
configuration will be visible. To navigate between these
categories, the user clicks on the corresponding tab at
the top of the region. After selecting which component
to test, a list of valid tests will be displayed. Aside from
the list of valid tests, status is only displayed when test
is selected.
Figure 45
The tables below indicate which modulators are valid
for a given configuration of the ECU.
Trailer
14
Config
PCV A
PCV B
2S/1M
X
2S/2M
X
X
4S/2M
X
X
Switch Test
The purpose of a given switch test is to determine if the
circuit for that switch is operational. Once the test has
begun, the user will be prompted to toggle the given
switch to a requested position and verify the status of
the switch. Switch tests listed will be based on ECU
model and configuration, including Hill Start Aid if
enabled on EC-60™ ECU Only.
Tractor
Config
4S/4M
6S/4M
6S/6M
Left Str
X
X
X
Right Str
X
X
X
Left Drv
X
X
X
Right Drv
X
X
X
Left Add
X
Right Add
X
Additional components supported under the modulators
are ATC valve if the ECU supports ATC, and hill start
solenoid if the ECU supports Hill Start Aid (HSA).
Figure 48
Sensor Test
The purpose of the sensor test is to determine if the
sensor gap is correct by outputting voltage. Once
the test has begun, the user will be prompted by the
instructions on how to perform the test. A particular
wheel will need to be spun, the tool will provide the
MPH reading, the user will need to press start/next,
the instructions will state test complete, and finally the
program asks the user to acknowledge whether or not
the ECU responded correctly.
Figure 46
Indicator Lamp Test
The indicator lamps are testable. During the lamp test,
the desired lamp will be turned on and off. The user will
be asked to verify that the selected lamp behaved in
the described manner. Lamps listed will be based on
the ECU model and configuration, including Hill Start
Aid if enabled on EC-60™ ECU Only.
Figure 49
Figure 47
15
ESP Tests
The purpose of the ESP tests is to verify the operation
of various ESP components. Steering angle checks
the output of sensor versus the movement of the
steering wheel. Yaw rate / Lateral acceleration is
used to provide an indication of the vehicle lateral
acceleration and rotation around the vertical axis.
Primary pressure monitors the primary pressure of the
air system. Secondary pressure monitors the secondary
pressure of the system. Air bag sensor monitors the
air bag pressure. ESP valves provide the testing of
the front ATC valve and trailer control modulator. Once
the program has begun, the user will be prompted to
do various operations; the program will display status.
The program asks the user to acknowledge whether or
not the ECU responded correctly.
Figure 53
Engine limiting test will test whether or not the J1939
command to increase the engine torque is being sent
out. The user is asked to rev the engine to 1200 RPM,
hold it while the test sends out commands to increase,
decrease, increase, decrease the torque.
Conducting a Test
All tests are controlled via the control buttons on the
right side of the screen.
Figure 50
Miscellaneous Tests
The following tests are available under this category
battery voltage test, Aux I/O, and the engine limiting
test (EC-60™ ECUs only). The battery voltage test is
available on any ECU with any configuration. During
this test, both the loaded and unloaded battery voltages
are tested. The user is instructed to make sure that
these measured values fall between the operating
range of the ABS ECU. At the end of this test the user
is asked if the voltages are acceptable or not.
Start/Next
Initiates the selected test
Abort
Cancels the selected test
Service Data
Displays service data information
Help
Launches Help system
Close
Closes the configuration screen
Example Test
To run a test:
1. Select a test to run from the test selection.
2. Press the “Start/Next” button.
3. Follow the instructions shown in the “Test Procedure
Region” of the window.
4. After the instructions have been followed and the
test complete, the user will be asked if the test was
successful or not, “Did the ECU respond correctly?”
If the ECU did respond correctly, press “Yes” and a
green check mark will appear next to the name of
the test in the “Test Selection Region”. Otherwise,
press “No”, a red “X” will appear.
12.15
Figure 51
The AUX I/O will test the auxiliary input or output.
Figure 52
16
Figure 54
Figure 57
Installation Test
NOTE: The installation test is for reference only; it
does not replace the need for an automated end of
line test process.
Report Settings
The report settings portion of Customize allows the
user to save the report using the VIN as the file name
and to select the folder to save the report in or the user
can select to always have to enter the folder and file
name for the report. Additionally, the user can select
the feature of remembering the technician name for the
report so it will not have to be entered every time. If the
overwrite VIN & Free Text is checked this will take the
information from the installation test scratch pad and
write into the OEM and Fleet scratch pads.
Installation Test Report Format
The installation report format is selectable either HTML
or TEXT.
Figure 55
The installation test window will open up and wait for
user input. Either customize the test or start the test.
Wheel Speed Unit
The wheel speed unit allows for the wheel speed
information to be recorded in MPH or RPM (rotation
per minute).
Other Settings
The last option will disable the program from going to
the next step until a failed step has been corrected.
Report
The report can be printed at the end of the installation
test or saved for printing or record retention. Again the
report can be saved in either HTML or Text. The report
provides ECU information, and the results of the test.
Figure 56
Test Steps
A green check mark will be displayed when a test
passes. Similarly, a red “X” will be displayed should the
test fail. Some tests will require the user to respond if
the test data is good in order for test to complete.
Customize
This allows the user to customize various aspects
of the installation test. Such as change the order in
which tests are performed. This is accomplished
by selecting the test and then selecting up or down.
Additionally, the user has the discretion to omit specific
tests according to the OEM’s vehicle quality testing
needs. This is accomplished by selecting (check mark)
or deselecting (no check mark) which test to perform.
ECU information and Scratch pad information are not
configurable, meaning they will always be part of the
test sequence.
ECU Information
This test will provide the user specific ABS ECU
information. If any data can not be read from the
ABS ECU, the Start/Next button will not enable. This
maintains the integrity of the overall test and ensures
components are available for testing.
17
Pulse Modulator Test
This test verifies whether the modulator(s) are installed
correctly. The tractor and trailer pulse modulator
sequence test are different. The trailer pulse modulator
test will display order in which the modulators will be
energized. The test energizes the modulator(s) in the
predefined order: right (curbside) and left (curbside)
if axle control, then right additional (if equipped) and
left additional (if equipped). The tester will validate a
correct response on the vehicle. At the completion of all
modulators being energized, the program will ask the
tester whether the modulator(s) responded correctly.
Figure 58
Sensor Sequence Test
This test verifies the correct installation of the wheel
speed sensors. The tractor and trailer sensor sequence
test are different. The trailer sensor sequence test will
display order in which the wheels are to be rotated is
listed under the heading Prescribed Order. The current
prescribed order is, right (curbside), right additional (if
equipped), left additional (if equipped), left (roadside).
The second column displays the speed, which was read.
The third column shows the actual order in which wheel
speeds were read. The wheel speed must be greater
than 1.0 MPH to be considered a valid reading.
Trailer
Figure 61
The tractor pulse modulator test will test energizes the
modulator(s) in the predefined order, by axle: steer axle
right and left, drive axle right and left, then additional
axle right and left. The tester will validate a correct
response on the vehicle. At the completion of all
modulators being energized, the program will ask the
tester whether the modulator(s) responded correctly.
Trailer
Figure 59
The tractor sensor sequence test displays the order in
which the wheels are to be rotated, under the heading
Prescribed Order. The current prescribed order is: right
then left steer axle, drive axle and additional axle (if
equipped). The second column displays the speed,
which was read. The third column shows the actual
order in which wheel speeds were read. The wheel
speed must be above 1.0 MPH to be considered a valid
reading
Tractor
Figure 62
Battery Voltage Test
This test verifies the battery voltage in an unloaded
and loaded state (modulators energized). The lowest
detected voltage will be displayed after the tests are
finished. The tester is asked to confirm the result of
the test.
Tractor
Figure 60
18
Traction Disable Test
This test verifies that the traction control system can
be disabled.
Figure 63
Indicator Lamp Test
This test shall verify the wiring of the lamp and the ABS
ECU’s ability to illuminate the lamp. The tester is asked
to confirm the result of the test.
Figure 67
ATC Valve Test
This test will verify the wiring and plumbing of the
ATC valve and the ABS ECU’s ability to energize the
modulator for 3.5 seconds wait 3 seconds and then
re-energize the traction modulator for another 3.5
seconds.
The tester will be asked to confirm the results of the
test.
If the vehicle has ESP it will have an additional
ATC valve on the steer axle of the vehicle.
Figure 64
Traction Lamp Test
This test verifies the wiring of the lamp and the ABS
ECU’s ability to illuminate the lamp. The tester is asked
to confirm the result of the test.
Figure 68
Trailer Modulator Chuff Test
This test is available only if the ABS ECU is an Advanced
EC-60™. The test verifies the trailer modulator is
functioning correctly when the foot brake is applied,
while the program energizes the modulators, and the
user listens for air or no air being exhausted.
Figure 65
Retarder Test
This test shall verify the operation of the retarder by
enabling and disabling the retarder while the user revs
the engine and listens for retarder to be enabled or
disabled. The tester is asked to confirm the result of
the test.
Figure 69
Figure 66
19
Steering Angle Sensor Test
This test is available only if the ABS ECU is an
Advanced EC-60™. The test verifies the operation of
the steering angle sensor. The user will be asked to
have the steering straight for 30 seconds, then turn the
steering wheel to the right ¼ turn for 30 seconds and
then to the left a ¼ turn for 30 seconds. The program
reads the steering angle output during the 30 seconds
and displays it on the screen.
Lateral Acceleration Sensor Test
This test is available only if the ABS ECU is an Advanced
EC-60™ ECU. The test verifies the operation of the
lateral acceleration sensor.
The program provides the reading of the sensor at the
end of the test.
Figure 72
Engine Limiting (EC-60™ Only)
Engine limiting test will test whether or not the J1939
command to increase the engine torque is being sent
out. The user is asked to rev the engine to 1200 RPM
hold it while the test sends out commands to increase,
decrease, increase, decrease the torque.
Figure 70
Pressure Sensor Test
This test is available only if the ABS ECU is an
Advanced EC-60™ ECU. The test verifies the operation
of the pressure sensors installed at the primary and
secondary delivery ports of the foot valve plus the air
bag suspension if vehicle is so equipped. The test
allows the user 30 seconds for each step, first make
sure the air system is fully charged, apply the foot valve,
and finally release the foot valve. The program pops
up windows to ask user to confirm the action required,
once the user acknowledges with an affirmative the
program displays the pressures read.
Figure 73
Switch Test
The following switch tests are available for the EC-60™
ABS ECU: diagnostic switch, off road ABS switch, deep
mud / snow switch, and brake (stop) lamp switch. All
the tests provide the user with instructions to toggle the
switch and view the appropriate dash or stop lamp for
activity.
Figure 71
20
Diagnostic Switch
Hill Start Aid Switch – If Hill Start Aid is enabled
(EC-60™ ECU Only).
The HSA switch test allow user to verify that the switch
is operating correctly by toggling the switch verifying
the status of the HSA lamp.
Figure 74
Figure 78
Off Road Switch
Hill Start Aid Lamp – If Hill Start Aid is enabled
(EC-60™ ECU Only).
The test will illuminate and extinguish the HSA lamp,
asking the user to verify status of HSA lamp.
Figure 75
Deep Mud / Snow Switch
Figure 79
Hill Start Aid Solenoid – If Hill Start Aid is enabled
(EC-60™ ECU Only).
The test will energize and de-energize the HSA solenoid
asking the user to verify if exhausts of air is heard.
Figure 76
Stop (Brake) Lamp Switch
Figure 80
Figure 77
21
Scratch Pad
The tester is requested to input data into the fields
displayed on the screen. This data will be stored in a
file for use by the program. If the ABS ECU supports
scratch pad capability, a confirmation dialog will appear
and ask the tester to proceed. Once the information
is written, a “test complete” dialog box pops up stating
“Use the Save or Print Button to Create the Report”.
Figure 82
Stability Sensor
This screen is available only if the ABS ECU is an
Advanced EC-60™ ECU. The stability sensor screen
allows the user to monitor stability sensors. Along with
this functionality, the user has the ability to perform
data acquisition of the stability sensors and save the
results to a comma delimited file. The pressures may
be monitored both graphically and numerically.
Figure 81
Control Buttons
Start/Next
Initiates the selected test
Stop
Stops current test
Repeat
Repeats current test
Print
Prints test report
Save
Saves test report to file
Customize
Customizes test process
Help
Launches Help system
Close
Closes the configuration screen
Figure 83
The stability sensor window has features and operates
similar to the wheel speed window. You can select
which sensors to display what type of graph, save data,
and etc. The control buttons operate the same as on
the wheel speed window.
Pressure Sensor
This screen is available only if the ABS ECU is an
Advanced EC-60™ ECU. The pressure sensor screen
allows the user to monitor pressure sensors. Along
with this functionality, the user has the ability to perform
data acquisition of the pressures and save the results
to a comma delimited file. The pressures may be
monitored both graphically and numerically.
Data Acquisition Control Buttons
The pressure sensor window features are similar to the
wheel speed window. You can select which pressure
or pressures to display by having the check mark next
to pressure name. You can select graph type. The
information provides the amount of time data acquisition
has been active. The buttons and their functionality are
also the same as on the wheel speed screen.
Start
Begins data logging
Stop
Ends data logging session
Rewind
Allows user to move backwards in
time through the data
Forward
Allows user to move forward in time
through the data
Control Buttons
Open
Opens saved data
Close
Closes screen
Help
Launches Help System
Scratch Pad
Not all ABS ECUs supported by ACom™ diagnostics
have the scratch pad. Typically the trailer ABS ECUs
have a scratch pad. Scratch pad enables the reading
22
and writing to a specified area of memory in the ABS
ECU. This allows information to be stored for OEM
manufacturing data and fleet service management.
Figure 86
Program information section provides the user with
read only information regarding the program number
of the ADL function, the ECU type the ADL program is
intended for, and instruction set information.
Auxiliary I/O displays which I/O the ADL function will use
what type, either input or output, and the description of
the ADL feature.
The ABS flex program description explains the operation
of the ADL feature.
For more details on ADL please call 1-800-AIR-BRAKE
(1-800-247-2725).
Figure 84
Fleet scratch pad is shown next.
Control Buttons
Reads information from the scratch pad
Writes information to the scratch pad
Help
Launches Help system
Close
Closes screen
Load
Select ADL program to load (*.adl)
Program
Download of ADL program
Erase
Erases ADL program
Drawing
Displays system drawing of ADL program
(*.pdf)
Help
Launches Help system
Close
Closes screen
This mode is available only for EC-60™ premium and
advanced ECUs. It allows the ECU to be tested on a
dynamometer.
Control Buttons
Write
Reads ECU current ADL program
information
DYNO Mode
Figure 85
Read
Read ECU
ADL Auxiliary Design Language
This screen provides the mechanism to add an ADL
program, which allows an AUX input or output of the
ABS ECU to be programmed for a specific function.
Currently the TABS-6 and EC-60™ ECUs are the only
ABS ECU models to support ADL.
Figure 87
23
Known Issues with ACom™ Operation
•
•
•
•
•
•
•
Hot keys do not work with program.
Older models of the EC-30T™ ECU may not support scratch pad. If user is in the installation test
at the scratch pad step the program may freeze. NOTE: Stand alone scratch pad works fine.
TABS-6 event history may take two clear commands to actually clear the history.
Extreme graphics causes the right side and bottom of some screens to be cut off. Please change
graphics back to small or 96dpi.
EC-17/30™ ECUs with an event history wrap around, will display Data read in progress forever.
ACom™ Diagnostics Software will not run on Windows 95.
Registry is not completely removed during uninstall.
BW2668 ©2008 Bendix Commercial Vehicle Systems LLC, a member of the Knorr-Bremse Group • 11/08 • All Rights Reserved
24