1
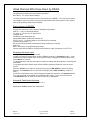
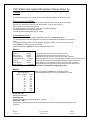
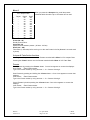
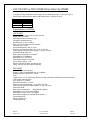
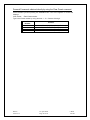
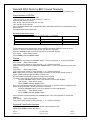
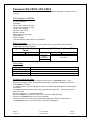
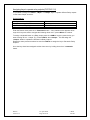
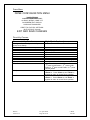
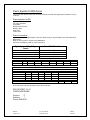
Using Domes on
Digital Sprite Multiplexers
Contents
Page
Pelco
Ultrak Diamond KD6 Dome Direct by RS485
Ultrak Diamond KD6 Dome switch settings
VCL Orbiter and Jupiter Microsphere Domes Direct by RS485
JVC TK-C675 or TKC-C553E Dome Direct by RS485
Using a TK-C675E (U)
Using a TK-C675BE(BU)
Dennard 2050 Dome Direct by RS485
Dennard 2050 Dome by BBV Coaxial Telemetry
Panasonic WV-CS850 / WV-CS854
Direct key presses
Presets
Patrol & Autopan
Relay Outputs
Sensormatic Speed Dome
Pelco Spectra II 'P' Protocol
2
3
5
6
8
9
10
11
13
14
15
16
19
20
21
24
Appendix - Obtaining the DS/DSL Telemetry Drivers Versions
30
Domes
Version 1.3
23 April 2002
Page 1 of 29
I.James
E & OE
Pelco
The DSL/DS generates Pelco Extended Coaxitron Protocol but does not support the following: • Random Scan function
• Auto Scan function
These functions are only available via a Pelco controller.
Features available to DS/DSL using Pelco coaxial.
Variable speed Pan/Tilt
Zoom/Focus
32 Presets (00 to 31)
Auto 180° Flip
Goto 0 Degree position.
Presets
Recall Presets by pressing the <Preset> button. Once a box appears on screen that displays:
Goto Preset.
Enter Preset number.
Type in the Preset number by using cameras 1 - 10. Camera 10 being 0.
Save Presets by pressing and holding the <Preset> button. Once a box appears on screen that
displays:
Save Preset.
Enter Preset number.
Type in the Preset number by using cameras 1 - 10. Camera 10 being 0.
Cancel Presets by double pressing the <Preset> button. Once a box appears on screen that
displays:
Clear Preset. Enter Preset number.
Type in the Preset number by using cameras 1 - 10. Camera 10 being 0.
Pelco Commands obtained directly by using the Preset command
Preset Number
32
33
Function
Auto 180° Flip.
Goto 0 Degree position.
In order to retrieve further features you will need to use a BBV RX100 Protocol converter.
Further features using a BBV RX100.
RX100 Features using a DS/DSL:
Variable speed Pan/Tilt
Zoom/Focus, Autofocus
16 Presets
2 Preset patrols
4 alarm inputs driving to preset 1 -4
Dome Pattern definition and playback
Display Dome Menu (Preset 95) *889 002.
Enter within menu
*889 003
Pattern define start
*889 004
Pattern define stop
*889 005
Our Patrol key recalls Patrol 1.
Our Autopan key starts Pattern 1.
Domes
Version 1.3
23 April 2002
Page 2 of 29
I.James
E & OE
Ultrak Diamond KD6 Dome Direct by RS485
The Ultrak dome needs to be set to Maxpro Emulation.
See Table 1. For correct switch settings.
You have full access to the dome menu and functions by the DS/DSL. The only function that is
not possible to use is the privacy zones and iris open/close of the camera (Not in menu option).
Also Preset (Preshot) names aren't available.
Dome features via DS/DSL:
Variable speed Pan/Tilt.
Zoom/Focus, Autofocus, Auto exposure, Backlight compensation.
460TVL 1.7 lux (0.15 with slow shutter).
72x zoom 4.1-73.8mm (18:1) optical zoom.
4x digital zoom.
400 deg/sec pan 200 deg/sec tilt.
80 Presets/Preshots (Preset 00 to Preset 79).
3 PTZ Tours (1 - 3) Has the ability to store manual PTZ movement.
4 Patrols (VectorScan 0 - 3).
Still shot on Preset (Freezes camera picture when travelling to a Preset).
Auto Pivot.
Built in dome menu for programming and setup.
4 alarm inputs with the ability to recall a Preset (Preshot), Patrol (Vectorscan) or PTZ Tour.
Accessing the dome menu
See Figure 1 for the Domes Menu Screen.
In order to access the domes Menu using the DS/DSL press the <* Command> button. A key
assistance box appears which says which keys are used to navigate the following dome menu,
press <Menu> to continue.
* Is displayed next to the time and date (on screen) to indicate that the keyboard is controlling the
dome menu.
To navigate around the domes menu use the DS/DSL keyboards joystick to move the cursor
around.
Press the <Enter> key to select a menu item/entry (also is IRIS OPEN key, within the menu).
Press the <* Command> key to exit a menu item/page (also is IRIS CLOSE key, within the
menu).
To exit out of the Domes menu goto the Domes first page then Press the <* Command> button.
The * will still appear at the bottom of the DS/DSL main monitor. Press and hold down the
<* Command> button to switch dome menu control off (* disappears).
Autopan & Patrol button functions
Pressing the <Autopan> button runs PTZ Tour 1.
Pressing the <Patrol> button runs Vectorscan 0.
Domes
Version 1.3
23 April 2002
Page 3 of 29
I.James
E & OE
Presets
Recall Presets by pressing the <Preset> button. Once a box appears on screen that displays:
Goto Preset.
Enter Preset number.
Type in the Preset number by using cameras 1 - 10. Camera 10 being 0.
Save Presets by pressing and holding the <Preset> button. Once a box appears on screen that
displays:
Save Preset.
Enter Preset number.
Type in the Preset number by using cameras 1 - 10. Camera 10 being 0.
Cancel Presets by double pressing the <Preset> button. Once a box appears on screen that
displays:
Clear Preset. Enter Preset number.
Type in the Preset number by using cameras 1 - 10. Camera 10 being 0.
Ultrak Commands obtained directly by using the Preset command.
Recall preset by pressing the goto <Preset> button. Once a box appears on screen that displays
Goto Preset.
Enter Preset number.
Type in the Preset number by using cameras 1 - 10. Camera 10 being 0.
E.g. For preset 1 press <preset> button then press <Camera 10> (0) then <Camera 1>.
If inputting single figure presets you can press the preset number then the <Enter> key.
E.g. For preset 1 press <preset> button then press the <Camera 1> then the <Enter> key.
Preset Number
80
81
82
83
84
85
86
87
88
89
90
91
Function
Run PTZ Tour 1
Run PTZ Tour 2
Run PTZ Tour 3
Program PTZ Tour 1
Program PTZ Tour 2
Program PTZ Tour 3
Terminate PTZ Tour Programming
Run Patrol 1 (VectorScan 1)
Run Patrol 2 (VectorScan 2)
Run Patrol 3 (VectorScan 3)
Start Menu (Same as <* command> key)
Toggles the error table display ON/OFF
Toggles auto Exposure ON/OFF. The
92
Factory default is on.
Toggles Backlight Compensation ON/OFF
93
The unit must be in auto exposure mode for
backlight compensation to function.
Toggles between standard operation and
nightshot mode. (model CA470S4N,
94
CA470S4P, CA480S4N, and CA480S4P
cameras only).
95
Decrease Goto Preset speed
96
Increase Goto Preset speed
(Not implemented) Toggles between freeze
95
and unfreeze video
(Not implemented) Invokes the Flashback
96
Function
Preset 94 hasn't been tested. Presets 95 & 96 have been reassigned to Increase & Decrease
Goto Preset Speed.
Domes
Version 1.3
23 April 2002
Page 4 of 29
I.James
E & OE
Table 1
Ultrak KD6 Switch settings
* Please refer to Ultrak Documentation for latest switch settings *
R Firmware
st
M Firmware 1 August 2001
th
L Firmware 25 April 2001
th
K Firmware 24 January 2001
Control System
S4-1
S4-2
S4-3
Maxpro
Closed
Open
Open
S4-4
Open
th
J Firmware 24 October 2000
Control System
S4-1
S4-2
S4-3
S4-4
Maxpro
Closed
Open
Open
Open
th
H Firmware 14 August 2000
Control System
S4-1
S4-2
S4-3
S4-4
Maxpro
Open
Closed
Open
Open
** Using a DSL with Ultrack Drivers version 1.1 has problems entering and exiting the dome menu (Rev H firmware only).
This is due to a slight change in the Ultrack protocol. In order to rectify the problem the Ultrack Drivers will need to
upgraded in the DSL. This problem doesn't effect the DS, as it has version 1.2 or above, drivers installed. Please contact
DM technical support for the latest DSL Ftp Telemetry Drivers software. See appendix at the end of the document for the
procedure to obtain the DSL Telemetry Driver version. **
th
G Firmware 26 May 2000
Control System
S4-1
S4-2
S4-3
S4-4
Maxpro
Closed
Open
Open
Closed
*NOTE: When you initially power up the dome an information screen will appear
describing the protocol it has been set to.
Figure 1
Ultrak Dome Menu screen
---- UltraDome KD6 ---518 584-2980 RevH
---------------------------------1 Language……..English
2 Display Options
3 Control Options
4 Diagnostic Options
5 Camera Options
6 Function Programming
IRIS CLOSE to Exit
Domes
Version 1.3
23 April 2002
Page 5 of 29
I.James
E & OE
VCL Orbiter and Jupiter Microsphere Domes Direct by
RS485
The dome doesn't have any in-built menus so the DSL/DS generates 3 different menus.
Dome features via DS/DSL:
Variable speed Pan/Tilt/Zoom up to 400°/second (Orbiter) with variable speed zoom lens.
Zoom/Focus, Autofocus, Auto iris, Auto Mono/Colour, Auto IR, Auto 180° tilt.
Mono, Colour and Colour/mono options.
Low light capability, 0.4 lux Colour mono with full frame intergration.
2 programmable tours (Autopan and Patrol)
100 fully programmable presets (64 for Jupiter).
Accessing the menus
In order to access the Menu using the DS/DSL press the <* Command> button.
* Is displayed next to the time and date (on screen) to indicate that the keyboard is in the dome
menu.
To navigate around the menu use the DS/DSL keyboards joystick to move the cursor around.
Press <Menu> to move onto the next screen.
Press and hold down <Menu> to exit the telemetry dome menu.
Menu 1
VCL Options
Toggles the Auto Iris function on the camera on or off.
Auto Iris
On/Off
Toggles the Auto Focus function on the camera on or off.
Auto Focus
On/Off
Automatically change the camera to mono in low light conditions.
Auto Mono/Col
On/Off
Manually toggle Mono / Colour camera operation. (Disables 'Auto Mono/Col' option).*
Toggle Mono/Col
---/Toggle
Toggle the infrared Filter On or Off for Black and White Night-time operation. *
Auto IR
On/Off
When tilting down automatically turn 180° to keep the correct orientation.
Auto 180 tilt
On/Off
Automatically return to patrol after an alarm preset, after 001-999 seconds.
Patrol Return
---/001-999
* Dome / camera dependable. Patrol Return is available on Digital Sprite only.
Menu 2
VCL Patrol Data
>
>
>
>
>
>
>
>
>
Preset
----------
Speed
00
00
00
00
00
00
00
00
00
Dwell
001
001
001
001
001
001
001
001
001
When you press the <Patrol> key recall the presets
contained within this table. Up to 16 Presets can be used.
Preset (00 - 99)
Recall preset number.
Speed (00 -99)
Speed of travel between presets (00 slow - 99 fast).
Dwell (001 - 240)
Time taken (In Seconds) before moving on to the next preset in the list (Nearest 2 seconds used
by head).
Domes
Version 1.3
23 April 2002
Page 6 of 29
I.James
E & OE
Menu 3
VCL Autopan Data
>
>
>
>
>
>
>
>
>
>
>
>
Preset
-------------
Speed
00
00
00
00
00
00
00
00
00
00
00
00
Dwell
001
001
001
001
001
001
001
001
001
001
001
001
When you press the <Autopan> key recall the presets
contained within this table. Up to 16 Presets can be used.
Preset (00 - 99)
Recall preset number.
Speed (00 -99)
Speed of travel between presets. (00 slow - 99 fast)
Dwell (001 - 240)
Time taken (In Seconds) before moving on to the next Preset in the list (Nearest 2 seconds used
by head).
Autopan & Patrol button functions
Pressing the <Autopan> button runs the Presets contained within Menu 3: VCL Autopan Data.
Pressing the <Patrol> button runs the Presets contained within Menu 2: VCL Patrol Data.
Presets
Recall Presets by pressing the <Preset> button. Once a box appears on screen that displays:
Goto Preset.
Enter Preset number.
Type in the Preset number by using cameras 1 - 10. Camera 10 being 0.
Save Presets by pressing and holding the <Preset> button. Once a box appears on screen that
displays:
Save Preset.
Enter Preset number.
Type in the Preset number by using cameras 1 - 10. Camera 10 being 0.
Cancel Presets by double pressing the <Preset> button. Once a box appears on screen that
displays:
Clear Preset. Enter Preset number.
Type in the Preset number by using cameras 1 - 10. Camera 10 being 0.
Domes
Version 1.3
23 April 2002
Page 7 of 29
I.James
E & OE
JVC TK-C675 or TKC-C553E Dome Direct by RS485
If using a TK-C675 model there are two types of JVC telemetry protocol, Type 1 and Type 2,
which must be selected in the Alarms and Presets menu. Default is Type 2.
Type 1
TK-C675E
TK-C675U
--
Type 2
TK-C675BE
TK-C675BU
TK-C553E
Dome features via DS/DSL:
JVC TK-C675
1/3 inch 480 TVL Colour CCD Camera, 24V AC
Digital Signal Processor
64 Preset positions (Preset 00 - 63)
360 degree endless panning
Sensitivity 0.9 lux at f1.2 (wide)
Easy Auto Focus during manual operation
16x zoom 4.5 to 72mm
Horizontal Resolution: 480 TV Lines
Minimum required Illumination: 0.9 Lux (f1.2, AGC on)
Video Output: Composite Video signal 1.0 V(p-p) 75 Ohms
Video S/N: 48 dB (AGC off)
Back Light Compensation: 4 Patterns
White Balance: ATW/Manual
Zoom Ratio: 16:1, 4.5-75mm
Zoom Speed: Approx. 2 seconds
Focus Speed: Approx. 1 sec
Panning: 360-deg endless, 240 deg per sec
Tilting: 120 deg / sec plus auto flip 180 deg
TKC-C553E
Varifocal Zoom Lens 2.6-6mm
Digital 2 x Zoom with selectable Pan & Tilt Modes
Compact Design 112mm Dia x 113mm
4 Lux
Image Device: 1/4" IT CCD Pickup Element: Interline-Transfer CCD Effective Picture Elements:
752H x 582V 440,000 pixels
Sync System: LL / Internal
Horizontal Resolution: 470 TVL
Minimum required Illumination: 4 Lux with Cover ON
Video Output: Composite Video Signal 1.0V (p-p) 75 Ohms
Video S/N: 50 dB
Back Light Compensation:
Selectable BLC Modes
White Balance: Full Auto White Balance
Zoom Ratio: 2.6mm - 6mm + 2 x Digital
Zoom Speed: Digital only (Default Zoom Speed 1)
Focus Speed: N/A
Panning: Digital only
Tilting: Digital only
Domes
Version 1.3
23 April 2002
Page 8 of 29
I.James
E & OE
The Domes Internal Switch settings should be as follows:
Disp
on
Multi-drop
on
Simplex
on
Sync
Int
Machine ID set the camera number 1- 16
Using a TK-C675E (U)
If using the earlier TK-C675E (U) then this doesn't have any internal menus. In order to change
any settings you will need to use the goto Preset command.
JVC Commands obtained directly by using the Preset command.
Recall Preset by pressing the goto <Preset> button. Once a box appears on screen that displays
Goto Preset.
Enter Preset number.
Type in the Preset number by using cameras 1 - 10. Camera 10 being 0.
Preset Number
Function
Change Shutter Speed. Cycles through the different speed.
64
1/50 (1/60), 1/60 (1/100), 1/1000, 1/2000, 1/4000,1/10000
Change Backlight compensation. Cycles through different options.
65
BLC OFF, BLC MODE AREA 1, BLC MODE AREA 2, BLC MODE AREA 3, BLC
MODE AREA 4.
66
Increase Zoom Speed, cycles through speeds 0, 1, 2, 3.
67
Increase Focus Speed, cycles through speeds 0, 1, 2, 3.
Pressing the <Autopan> button runs Autopan
Domes
Version 1.3
23 April 2002
Page 9 of 29
I.James
E & OE
Using a TK-C675BE(BU)
Using the later model this has a in built dome menus.
Accessing the dome menu
In order to access the domes Menu using the DS/DSL press the <* Command> button. A key
assistance box appears which says which keys are used to navigate the following dome menu,
press <Menu> to continue.
* Is displayed next to the time and date (on screen) to indicate that the keyboard is controlling the
dome menu.
To navigate around the dome menu use the DS/DSL keyboards joystick to move the cursor
around.
Press the <Enter> key to select a menu item.
Press the <* Command> key to exit a menu item/page.
To exit out of the Domes menu goto the Domes first page then Press and hold down the
<* Command> button to switch dome menu control off (* disappears).
When the first page of the domes menu is on screen each time you press the <* Command>
button the domes menu display will toggle on or off. Make sure before you hold down the
<* Command> Button to exit out of the menu that the domes menu is on screen.
If you don't, when you exit, the dome menu will reappear on screen but you will have exited out of
dome menu control..
Autopan & Patrol button functions
Pressing the <Autopan> button runs Autopan function as defined in the JVC Dome menu.
Pressing the <Patrol> runs Preset Sequence as defined in the JVC Dome Menu.
Presets
Recall Presets by pressing the <Preset> button. Once a box appears on screen that displays:
Goto Preset.
Enter Preset number.
Type in the Preset number by using cameras 1 - 10. Camera 10 being 0.
Save Presets by pressing and holding the <Preset> button. Once a box appears on screen that
displays:
Save Preset.
Enter Preset number.
Type in the Preset number by using cameras 1 - 10. Camera 10 being 0.
Cancel Presets by double pressing the <Preset> button. Once a box appears on screen that
displays:
Clear Preset. Enter Preset number.
Type in the Preset number by using cameras 1 - 10. Camera 10 being 0.
JVC Commands obtained directly by using the Preset command.
Recall Preset by pressing the goto <Preset> button. Once a box appears on screen that displays
Goto Preset.
Enter Preset number.
Type in the Preset number by using cameras 1 - 10. Camera 10 being 0.
Preset Number
Function
66
Increase Zoom Speed, cycles through speeds 0, 1, 2, 3.
67
Increase Focus Speed, cycles through speeds 0, 1, 2, 3.
JVC Dome Menu
>
SETUP
POSITION SETUP . .
CAMERA . .
CONTROL UNIT . .
Domes
Version 1.3
> is the item cursor.
. . Submenu to be followed.
See the JVC documentation for further menu details.
23 April 2002
Page 10 of 29
I.James
E & OE
Dennard 2050 Dome Direct by RS485
This has its own Dome menu that can be accessed by the DS/DSL.
Dome features via DS/DSL:
Variable speed Pan/Tilt.
Zoom/Focus, Autofocus.
18 x 1 zoom lens, 4.1mm to 73.8mm zoom; F1.4 to F3.0.
Autofocus with manual override.
768 horizontal x 494 vertical, pixels. More than 470 TVL..
0.05° to 300° / second max (both Pan and Tilt).
180° Auto Flip. At 90° tilt down.
Up to 90 Preset positions with programmable titles. 90 (00 - 89)…?? (additional presets can be
programmed using dome's menu)
32 programmable sectors (pan only).
Accessing the dome menu
In order to access the domes Menu using the DS/DSL press the <* Command> button. A key
assistance box appears which says which keys are used to navigate the following dome menu,
press <Menu> to continue.
* Is displayed next to the time and date (on screen) to indicate that the keyboard is controlling the
dome menu.
To navigate around the domes menu use the DS/DSL keyboards joystick to move the cursor
around.
Press the <Enter> key to select a menu item.
Press the <* Command> key to exit a menu item/page.
To exit out of the Domes menu goto the Domes first page then Press and hold down the
<* Command> button to switch dome menu control off (* disappears).
Autopan & Patrol button functions
Pressing the <Autopan> button runs Queue 1.
Pressing the <Patrol> button runs Sequence 1.
Presets
Recall Presets by pressing the <Preset> button. Once a box appears on screen that displays:
Goto Preset.
Enter Preset number.
Type in the Preset number by using cameras 1 - 10. Camera 10 being 0.
Save Presets by pressing and holding the <Preset> button. Once a box appears on screen that
displays:
Save Preset.
Enter Preset number.
Type in the Preset number by using cameras 1 - 10. Camera 10 being 0.
Note: When saving a Preset on the Dennard it is possible for the Naming Preset screen to
appear (Option within the Dennard Menu, Default is on).
Use the DS/DSL keyboards joystick to move the cursor around.
To select a entry use the <Enter> key.
Once you have finished naming the Preset move the cursor to ACCEPT, EDIT or CANCEL at the
bottom of the screen then use the <Enter> key.
Cancel Presets by double pressing the <Preset> button. Once a box appears on screen that
displays:
Clear Preset. Enter Preset number.
Type in the Preset number by using cameras 1 - 10. Camera 10 being 0.
Domes
Version 1.3
23 April 2002
Page 11 of 29
I.James
E & OE
Dennard Commands obtained directly by using the Clear Preset command.
Cancel Presets by double pressing the <Preset> button. Once a box appears on screen that
displays:
Clear Preset. Enter Preset number.
Type in the Preset number by using cameras 1 - 10. Camera 10 being 0.
Clear Preset
Number
90
91
92
93
Domes
Version 1.3
Function
Increment Zoom speed by 1 (5 steps Default 3)
Decrement Zoom speed by 1
Increment Focus speed by 1 (5 steps Default 1)
Decrement Focus speed by 1
23 April 2002
Page 12 of 29
I.James
E & OE
Dennard 2050 Dome by BBV Coaxial Telemetry
If using a 2050 by BBV Coaxial telemetry then the Dennard uses a BBV RX100 interface unit.
Dome features via DS/DSL:
Automatic return to preset or tour mode.
18 x 1 zoom lens, 4.1mm to 73.8mm zoom; F1.4 to F3.0.
Autofocus with manual override.
0.05° to 300° / second max (both Pan and Tilt).
180° Auto Flip. At 90° tilt down.
Up to 16 Preset positions with programmable titles (additional presets can be programmed using
dome's menu)
32 programmable sectors (pan only).
Accessing the dome menu
In order to access the domes menus you need to type in * commands.
Advanced Features
Telemetry Command
Menu Password
Dome User Menu
*889 002
---Dome Supervisor Menu
*889 003
1111
Dome Service/Technician Menu
*889 004
9999
Use <*> and the camera buttons (Camera 1 to 10) on the keyboard to enter the commands.
To navigate around the domes menu use the DS/DSL keyboards joystick to move the cursor
around. To select a menu item/entry use the goto Preset 1 command.
Press the <Preset> button. Once a box appears on screen that displays:
Goto Preset.
Enter Preset number.
Press <CAM1> then the <Enter> button.
Presets
Recall Presets by pressing the <Preset> button. Once a box appears on screen that displays:
Goto Preset.
Enter Preset number.
Type in the Preset number by using cameras 1 - 10. Camera 10 being 0.
Save Presets by pressing and holding the <Preset> button. Once a box appears on screen that
displays:
Save Preset.
Enter Preset number.
Type in the Preset number by using cameras 1 - 10. Camera 10 being 0.
Note: When saving a Preset on the Dennard it is possible for the Naming Preset screen to
appear (Option within the Dennard Menu, Default is on).
Use the DS/DSL keyboards joystick to move the cursor around.
To select a menu item or entry use the goto Preset 1 command.
Press the <Preset> button. Once a box appears on screen that displays:
Goto Preset.
Enter Preset number.
Press <CAM1> then the <Enter> button.
Once you have finished naming the Preset move the cursor to ACCEPT, EDIT or CANCEL at the
bottom of the screen then use the goto Preset 1 command.
Press the <Preset> button. Once a box appears on screen that displays:
Goto Preset.
Enter Preset number.
Press <CAM1> then the <Enter> button.
Cancel Presets by double pressing the <Preset> button. Once a box appears on screen that
displays:
Clear Preset. Enter Preset number.
Type in the Preset number by using cameras 1 - 10. Camera 10 being 0.
Autopan & Patrol button functions
Pressing the <Autopan> button runs the domes internal Sequence 001.
Pressing the <Patrol> button runs Patrol 1.
Domes
Version 1.3
23 April 2002
Page 13 of 29
I.James
E & OE
Panasonic WV-CS850 / WV-CS854
This has its own Dome menu that can be accessed by the DS with Application software 2.0 (015)
or above.
Dome features via DS/DSL:
Variable P/T/Z
Full menu operation.
64 presets.
Home position (uses one preset)
1/4-type Super Dynamic II CCD
480 line colour imaging
Automatic / Manual Iris
Electronic Shutter
360° endless panning range
RS485 Control
Patrol & Autopan
*See the Panasonic Data Sheet for more details*
Dome Connection
Connection from the Digital Sprite is from the Serial 9 way D- type Female to the Panasonic
RS485 Data Port (RJ11 Connector).
Digital Sprite - 9 Way D-Type
Female
1
9
Data A +
Data B -
Panasonic RS485 Data Port - 6 way MMJ
Data
Reception
Data
Transmission
GND
Green
Yellow
R (A)
R (B)
Not Used
Dome Setup*
Protocol Selection
RS485 Setting
Parameter Selection
Unit Number
Panasonic's conventional.
Full Duplex (4 line).
19200 Baud Rate, 8 Data Bit, Parity Check None, Stop Bit 1.
1 to 16. Must be relative to Camera Number on Digital Sprite. *
* Please refer to the Panasonic Documentation on exact switch settings.
Accessing the dome menu
In order to access the domes Menu using the DS press the <* Command> button. A key
assistance box appears which says which keys are used to navigate the following dome menu,
press <Menu> to continue.
* Is displayed next to the time and date (on screen) to indicate that the keyboard is controlling the
dome menu.
To navigate around the domes menu use the DS keyboards joystick (á, â) to move the cursor
from Line to Line.
Move the Joystick (ß, à) to change the value.
Press the <Enter> key to select a menu item. Panasonic's CAM (SET) key.
Press the <* Command> key to exit a menu item/page.
To exit out of the Domes menu goto the Domes first page then Press and hold down the
<* Command> button to switch dome menu control off (* disappears).
Domes
Version 1.3
23 April 2002
Page 14 of 29
I.James
E & OE
Dome Menu
** SET UP MENU **
PRESET 1* Ê
MAP Ê
HOME POSITION 1
SELF RETURN
OFF
AUTO MODEOFF
AUTO PAN KEY
AUTO PAN
DIGITAL FLIP
ON
LOCAL/REMOTE LOCAL
SPECIAL1 Ê
CAMERA Ê
RS485 SET UP Ê
Ê Indicates there is a submenu.
Direct Key Presses:
Panasonic Key/Function
<F2> Open Special 2 (In Dome Menu)
<F3> All Reset (In Dome Menu)
CAM (SET) Enter Setting / Open a submenu
Close a submenu / ESC
Open CAM SETUP (Enter Dome Setup)
Close CAM SETUP (Exit Dome Setup)
Move the Cursor
Select a parameter
Adjust the level
Focus near
Focus far
Ones shot focus
Zoom in
Zoom out
Manual Iris
Auto key / Autopan
Patrol
Close Aux. 1 output
Close Aux. 2 output
Domes
Version 1.3
Digital Sprite Keyboard press
<Camera 3>
<Camera 4>
<Enter>
Press <* Command>
Press <*Command> then Press <Menu>
Press and hold <*Command>
Joystick (ß,á,â,à)
Joystick (ß,à)
Joystick (ß,à)
<focus near>
<focus far>
Press <focus near> <focus far> together
<Zoom +>
<Zoom ->
Press <Zoom +> <Zoom -> together, then
press <Zoom +> for Iris Open, <Zoom -> for Iris
close.
Move Joystick (ß,á,â,à) to return keys to
normal <Zoom +> <Zoom -> function.
<auto-pan>, runs either the SEQUENCE,
SORT, PATROL PLAY or AUTO PAN.
Set by Panasonic menu.
<patrol>, recalls the PATROL.
<Wash>, momentary close
<Wiper>, latching ON/OFF
23 April 2002
Page 15 of 29
I.James
E & OE
Presets
Recall Presets by pressing the <Preset> button. Once a box appears on screen that displays:
Goto Preset.
Enter Preset number.
Type in the Preset number by using cameras 1 - 10. Camera 10 being 0.
Saving a preset is done by entering the Panasonic's OSD Menu.
Move the dome to the position where you want to store the preset.
In order to access the domes Menu using the DS press the <* Command> button. A key
assistance box appears which says which keys are used to navigate the following dome menu,
press <Menu> to continue.
* Is displayed next to the time and date (on screen) to indicate that the keyboard is controlling the
dome menu.
** SET UP MENU **
PRESET 1*Ê
MAP Ê
HOME POSITION
SELF RETURN
AUTO MODE
AUTO PAN KEY
DIGITAL FLIP
LOCAL/REMOTE
SPECIAL1 Ê
CAMERA Ê
RS485 SET UP Ê
1
OFF
OFF
AUTO PAN
ON
LOCAL
With the cursor highlighting the PRESET 1*Ê
Ê select the Preset you want to store by using the
Joystick (ß,à). The * mark means the position number is preset.
Press <Enter> to select the preset.
Now the screen changes to..
PRESET NO. 2
POSITION SET
PRESET ID
ALC/MANUAL
DWELL TIME
SCENE FILE
PRESET SPEED
RET
Ê
ON Ê
MANUAL Ê
3S
OFF
………I
L
H
DEL
To change any parameters on this screen..
Use the Joystick (á,â) to move the cursor from line to line. Use Joystick (ß,à) to change any
parameters or <Enter> to select the sub menu (Ê ).
See Panasonic documentation for further information.
Domes
Version 1.3
23 April 2002
Page 16 of 29
I.James
E & OE
Once you have changed the parameters move the cursor to
PRESET NO. 2
POSITION SET
Ê
Press <Enter> on the DS keyboard you will see a new screen.
** POSITION 2 **
PAN/TILT
àPUSH SET
ZOOM/FOCUS
àPUSH SET
PAN OFFSET SET ß + 0.0 à
RET
2
Use the joystick (ß,á,â,à) to move the cursor around the menu.
Highlight PAN/ TILT
àPUSH SET then press <Enter>. The screen will change to..
** POSITION 2 **
PAN/TILT
àPUSH SET
ZOOM/FOCUS
àPUSH SET
U TILT D / L PAN R
PAN OFFSET SET ß + 0.0 à
RET
2
Press <Enter> again to set the pan and tilt axis.
Move the cursor down to ZOOM/FOCUS
Press <Enter>. The screen will change to..
** POSITION 2 **
PAN/TILT
ZOOM/FOCUS
àPUSH SET
àPUSH SET
àPUSH SET
U ZOOM D / L FOCUS R
PAN OFFSET SET ß + 0.0 à
RET
2
Press <Enter> again to set the zoom and focus axis.
Once the Preset has been stored either Press and Hold down the <* Command> button or use
the RET option to return back through the menus.
Domes
Version 1.3
23 April 2002
Page 17 of 29
I.James
E & OE
For further information please refer to the Panasonic documentation.
** If a preset is already stored in a position then you will need to delete the preset before
you can store a new preset in the same position **
Deleting a Preset is done by entering the Panasonic's OSD Menu.
In order to access the domes Menu using the DS press the <* Command> button. A key
assistance box appears which says which keys are used to navigate the following dome menu,
press <Menu> to continue.
* Is displayed next to the time and date (on screen) to indicate that the keyboard is controlling the
dome menu.
** SET UP MENU **
PRESET 1*Ê
MAP Ê
HOME POSITION
SELF RETURN
AUTO MODE
AUTO PAN KEY
DIGITAL FLIP
LOCAL/REMOTE
SPECIAL1 Ê
CAMERA Ê
RS485 SET UP Ê
1
OFF
OFF
AUTO PAN
ON
LOCAL
With the cursor highlighting the PRESET 1*Ê
Ê select the Preset you want to store by using the
Joystick (ß,à). The * mark means the position number is preset.
Press <Enter> to select the preset.
Now the screen changes to..
PRESET NO. 2
POSITION SET
PRESET ID
ALC/MANUAL
DWELL TIME
SCENE FILE
PRESET SPEED
RET
Ê
ON Ê
MANUAL Ê
3S
OFF
………I
L
H
DEL
Use the Joystick (ß,á,â,à) to move the cursor to DEL and press <Enter> to delete the preset.
Domes
Version 1.3
23 April 2002
Page 18 of 29
I.James
E & OE
Learning the PATROL
Enter the Panasonic's Menu. By the <* command> key.
Goto SPECIAL1 Ê using the joystick (ß,á,â,à).
Press the <Enter> key.
Change menu item to PATROL
LEARN
Press and hold the <* Command> button to exit from the menu.
You will now have LEARNING in the middle of the screen.
The dome is now learning the PATROL use the joystick (ß,á,â,à) and <Zoom +>, <Zoom ->.
To finish the PATROL either wait until LEARNING disappears from the screen or go back into
the Panasonic's Menu.
Press the <* Command> button. A key assistance box appears which says which keys are used
to navigate the following dome menu, press <Menu> to continue.
* See Panasonic manual for further Information on PATROL *
This is recalled by pressing the <Patrol> key.
Setting the Auto Pan
Enter the Panasonic's Menu. By the <* command> key.
Goto AUTO MODE
AUTO PANÊ using the joystick (ß,á,â,à).
Press the <Enter> key.
You will see different screen.
** AUTO PAN **
POSITION
START
END
SPEED
…I…..
L
H
PAN LIMIT
OFF
ENDLESS
OFF
DWELL TIME 2S
RET
Use the Joystick (ß,á,â,à) move the cursor to POSITION
Press the <Enter> key to select START. Pan the camera to the start of the Autopan using
joystick (ß, à). Press <Enter> to mark the start of the Autopan, the cursor will move over to
END. Pan the camera to the end of the Autopan using joystick (ß, à). Press <Enter> to mark
the end of the Autopan.
Autopan is now setup, use <* command> to exit the menu.
* When in this menu panning the camera the movement will be slow *
This is recalled by pressing the <autopan> key. This must be set via the Panasonic menu.
Domes
Version 1.3
23 April 2002
Page 19 of 29
I.James
E & OE
Assigning keys to operate relay outputs (CNT-CLS 1-2)
It is possible to assign the <Wash>, <Wipe> or <Lamps> keys to operate different Relay outputs
on the Alarm Output connector.
Default Settings.
DM Key
<Lamps> , latching ON/OFF
<Wash>, momentary close
<Wiper>, latching ON/OFF
Panasonic function
Not assigned
Close Aux 1 output
Close Aux 2 output
Enter the Domes menu press the <* Command> button. A key assistance box appears which
says which keys are used to navigate the following dome menu, press <Menu> to continue.
To assign a keyboard button to a Relay output press the <CAM 1> key then press the key you
want to assign to Aux. 1 output. E.g. Press <CAM 1> then <Lamps> . This will assign the
<Lamps> button to operate the Panasonic's Relay Output 1.
Repeat the same process as above but use the <CAM 2> to assign the key to Panasonic Relay
Output 2.
Once the keys have been assigned exit the dome menu by holding down the <* command>
button.
Domes
Version 1.3
23 April 2002
Page 20 of 29
I.James
E & OE
Sensormatic SpeedDome Camera Dome
This has its own Dome menu that can be accessed by the DS with Application software 2.0 (015)
or above.
Dome features via DS/DSL:
Variable P/T/Z
Full menu operation.
50 presets.
Presets 1 - 7 Programmable in Menu and DS. Presets 8 - 50 programmable by DS.
RS422 2 wire Control
3 Programmable patterns.
1 Spiral pattern.
Dome Connection
Connection from the Digital Sprite is from the Serial 9 way D- type Female to the Sensomatic
Mounting Base IO Board.
See Sensormatic Installation and service guide for more information.
Digital Sprite - 9 Way D-Type
Female
Pin 1 Data A +
Pin 9 Data B -
Sensormatic RS422 Data Port
P1
P1
P1
P1
Pin
Pin
Pin
Pin
1
3
2
4
RS422 Data In High (+)
RS422 Data Out High (+)
RS422 Data In Low (-)
RS422 Data Out Low (-)
Connected Together
Connected Together
After the dome has powered up the screen will say 'CHECKING NETWORK TYPE' move the DS
joystick (ß,á,â,à) then you will have control.
Accessing the dome menu
In order to access the domes Menu using the DS press the <* Command> button. A key
assistance box appears which says which keys are used to navigate the following dome menu,
press <Menu> to continue.
* Is displayed next to the time and date (on screen) to indicate that the keyboard is controlling the
dome menu.
To navigate around the domes menu use the DS keyboards joystick (á, â) to move the highlight
bar from Line to Line.
Press the <focus far> key to select a menu item.
Press the <Zoom +>, <Zoom -> key to change a setting.
To exit out of the Domes menu Press and hold down the <* Command> button to switch dome
menu control off (* disappears).
To save a setting within the Menu select EXIT AND SAVE CHANGES then press <focus far> to
select menu item. The domes menu will disappear from the screen but * will still be at the bottom
of the screen. Press and hold down the <* Command> button to switch dome menu control off
(* disappears).
To quit without saving in the Menu select QUIT WITHOUT SAVING then press <focus far> to
select menu item. The domes menu will disappear from the screen but * will still be at the bottom
of the screen. Press and hold down the <* Command> button to switch dome menu control off
(* disappears).
Domes
Version 1.3
23 April 2002
Page 21 of 29
I.James
E & OE
Dome Menu
DOME CONFIGURATION MENU
PAN/TILT/ZOOM
CAMERA / LENS FUNCTIONS
ALARMS / AREAS / HOME / PZ
ON-SCREEN TEXT DISPLAY
LANGUAGE PASSWORD
RESET TO FACTORY SETTINGS
QUIT WITHOUT SAVING
EXIT AND SAVE CHANGES
Direct Key Presses:
Sensormatic Key/Function
Digital Sprite Keyboard press
Starting the Dome Configuration Utility
(Enter Dome Setup)
Exit Dome Menu
Enter Setting / Open a submenu (Enter)
Move the Cursor
Select a parameter
Focus near
Focus far
Zoom in
Zoom out
Spiral pattern
Patterns 1 - 3 / Patrols
Press <*Command> then Press <Menu>
Iris Open
Iris Close
Domes
Version 1.3
Press and hold <*Command>
<focus far>
Joystick (á,â)
<Zoom+>,<Zoom ->
<focus near>
<focus far>
<Zoom +>
<Zoom ->
<auto-pan>, Cancelled by joystick (ß,á,â,à)
<patrol>, recalls the 3 Patterns.
st
nd
1 press recalls Pattern 1, 2 press recalls
rd
th
Pattern 2, 3 press recalls Pattern 3, 4 press
cancels pattern
Press <Zoom +> and <Zoom -> together, then
<Zoom +>. Press <Zoom +> and <Zoom ->
together to return to normal Zoom operation.
Press <Zoom +> and <Zoom -> together, then
<Zoom ->. Press <Zoom +> and <Zoom ->
together to return to normal Zoom operation.
23 April 2002
Page 22 of 29
I.James
E & OE
Presets
Recall Presets by pressing the <Preset> button. Once a box appears on screen that displays:
Goto Preset.
Enter Preset number.
Type in the Preset number by using cameras 1 - 10. Camera 10 being 0.
Save Presets by pressing and holding the <Preset> button. Once a box appears on screen that
displays:
Save Preset.
Enter Preset number.
Type in the Preset number by using cameras 1 - 10. Camera 10 being 0.
It isn't possible to Cancel Presets on the Sensormatic dome.
* * IMPORTANT INFORMATION ON PRESETS * *
When storing presets numbers 1 - 7 these are assessable via the Goto Preset button on the
Digital Sprite Keyboard and via the Sensormatic Menu.
It is possible to save Presets 8 - 96 via the Sensormatic Menu but using the Goto Preset button
on the Digital Sprite will NOT recall them. These can only be recalled by using functions in the
domes menu.
If you Save Presets 1 - 50 via the Digital Sprite keyboard these can be recalled by the Digital
Sprite keyboard, but note that presets 8 - 50 are NOT the same as the presets stored in the
Sensormatic Menu.
Commands obtained directly by using the Preset command.
Recall Preset by pressing the goto <Preset> button. Once a box appears on screen that displays
Goto Preset.
Enter Preset number.
Type in the Preset number by using cameras 1 - 10. Camera 10 being 0.
Preset Number
Function
90
Delete pattern 1
91
Delete pattern 2
92
Delete pattern 3
Programming Patterns
Access the domes Menu using the DS press the <* Command> button. A key assistance box
appears which says which keys are used to navigate the following dome menu, press <Menu> to
continue.
* Is displayed next to the time and date (on screen) to indicate that the keyboard is controlling the
dome menu.
Once the Sensormatic menu is displayed on screen use the Joystick (á,â) to highlight
QUIT WITHOUT SAVING press <focus far> to select.
Then screen displays DATA NOT SAVED QUIT ANYWAY?
NO
Use the <zoom +> key to select YES then press <focus far> to enter.
The screen will be cleared, but * will be displayed next to the time and date.
Press the <patrol> key and then either <CAM 1>, <CAM 2> or <CAM 3> relating the pattern
number.
A timer will appear on screen for the chosen pattern. All movements (ß,á,â,à) will be
recorded.
To end the timer press the <patrol> key.
To preview the pattern press the <autopan> key.
If you wish to save the pattern press <enter>.
To exit the pattern learning mode press and hold the <* command> key (* disappears).
Domes
23 April 2002
I.James
Version 1.3
Page 23 of 29
E & OE
Pelco Spectra II SD5 Dome
This has its own Dome menu that can be accessed by the DS with Application software 2.0 (021)
or above.
Dome features via DS:
Variable P/T/Z
Full menu operation.
64 presets.
RS422 2 wire Control
Randon Scan
Auto Scan
Frame Scan
Dome Connection
Connection from the Digital Sprite is from the Serial 9 way D- type Female to the Pelco Mounting
Base Board.
Must be set for Pelco 'P' protocol and 9600 Baud.
See Pelco Installation guide for more information.
Digital Sprite - 9 Way D-Type
Female
Pelco RS422 Data Port
Pin 1 Data A +
Pin 9 Data B Not connected
Not connected
Control Rx +
Control Rx Control Tx +
Control Tx -
"P" Version
Dip Switch
On
1
Dip Switch
RX Address 1
RX Address 16
Switch Value
Dip Switch
Off
2
1
Off
On
1
SW-1 Protocol Selection DIP switches
Off
Off
Off
Off
3
4
5
6
Off
7
Off
8
SW-2 Address DIP switches
"P" Version
Rx Address = Switch Value plus 1
2
3
4
5
Off
Off
Off
Off
On
On
On
Off
2
4
8
16
6
Off
9600 Baud
7
On
8
Off
Once the dome has been powered up the screen will say.
PELCO SPECT II 3.31
CONFIGURE DOME
Protocol
P
Address
1
Comm 9600,N,8,1
Domes
Version 1.3
23 April 2002
Page 24 of 29
I.James
E & OE
Accessing the dome menu
In order to access the domes Menu using the DS press the <* Command> button. A key
assistance box appears which says which keys are used to navigate the following dome menu,
press <Menu> to continue.
* Is displayed next to the time and date (on screen) to indicate that the keyboard is controlling the
dome menu.
To navigate around the domes menu use the DS keyboards joystick (á, â) to move the Cursor
from Line to Line.
Press the <Zoom +> key to select a menu item.
Press the <Zoom -> key to cancel.
To exit out of the Domes menu Select EXIT in the menu and press <Zoom +> (Enter).
The domes menu will disappear from the screen but * will still be at the bottom of the screen.
Press and hold down the <* Command> button to switch dome menu control off
(* disappears).
Domes Menu
<Camera>
<Line Sync>
<Power Up Mode>
<Aux>
<Alarms, Zone Blank>
Exit
The
symbol is the cursor.
Direct Key Presses:
Pelco Key/Function
Digital Sprite Keyboard press
Press <*Command> then Press <Menu>
Select EXIT in menu, then press and hold
<* command>
Enter Setting / Open a submenu (Enter)
<Zoom +>
Move the Cursor
Joystick (á,â)
Select a parameter
Joystick (á,â)
Focus near
<focus near>
Focus far
<focus far>
Zoom in
<Zoom +>
Zoom out
<Zoom ->
Auto Scan
<auto-pan>, Cancelled by joystick (ß,á,â,à)
Patrol / Pattern
<patrol>, Recalls the saved Programmed
Pattern. Cancelled by joystick (ß,á,â,à)
Iris Open
Press <Zoom +> and <Zoom -> together, then
<Zoom +>. Press <Zoom +> and <Zoom ->
together to return to normal Zoom operation.
Iris Close
Press <Zoom +> and <Zoom -> together, then
<Zoom ->. Press <Zoom +> and <Zoom ->
together to return to normal Zoom operation.
Close Relay Output 0
<wash> momentary close
Close Relay Output 1
<wipe> latching ON/OFF
Close Relay Output 2
<lamp> latching ON/OFF
Domes
23 April 2002
I.James
Version 1.3
Page 25 of 29
E & OE
Access Main Menu (Enter Dome Setup)
Exit Dome Menu
Presets
Recall Presets by pressing the <Preset> button. Once a box appears on screen that displays:
Goto Preset.
Enter Preset number.
Type in the Preset number by using cameras 1 - 10. Camera 10 being 0.
Save Presets by pressing and holding the <Preset> button. Once a box appears on screen that
displays:
Save Preset.
Enter Preset number.
Type in the Preset number by using cameras 1 - 10. Camera 10 being 0.
Cancel Presets by double pressing the <Preset> button. Once a box appears on screen that
displays:
Clear Preset. Enter Preset number.
Type in the Preset number by using cameras 1 - 10. Camera 10 being 0.
Pelco Commands obtained directly by using the Preset command.
Refer to the Pelco operating instructions for more details.
Preset Number
Function
1
1-7
8 - 32
33
34
35 - 66
Save Preset 90 - 91
Clear Preset 90 - 91
Save Preset 92 - 93
Clear Preset 92 - 93
94
Save Preset 95
96
97
98
99
Park
Alarms Presets, If used
Normal Preset Positions
'Flip' (Pan dome drive 180°)
'Pan Zero' (Factory set zero reference point)
Normal Preset Positions
Set Manual limit stops
Clear Manual limit stops
Scan limit Stops
Clear Scan limit Stops
Remote Reset ?
Select Camera programming menu
Stop a Scan
Random Scanning
Frame Scanning
Start Auto Scanning
Domes
Version 1.3
23 April 2002
Page 26 of 29
I.James
E & OE
Programming Zones / Sector
Access the domes Menu using the DS press the <* Command> button. A key assistance box
appears which says which keys are used to navigate the following dome menu, press <Menu> to
continue.
* Is displayed next to the time and date (on screen) to indicate that the keyboard is controlling the
dome menu.
Once the Pelco menu is displayed on screen use the Joystick (á,â) to move the cursor
EXIT press <zoom +> to select.
to
The screen will be cleared, but * will be displayed next to the time and date.
Press <CAM 1> to <CAM 8> to establish the Zone to be set eg. <CAM 1> is zone 1, <CAM 4> is
zone 4 etc.
Position the camera to the left of the scene to set then press <autopan>, now move the camera
to the right of the scene and press the <autopan> again, this will now have set up the sector.
Repeat this process for the other Zones.
To exit the programming mode press and hold the <* command> key.
To delete a Zone/Sector
Access the domes Menu using the DS press the <* Command> button. A key assistance box
appears which says which keys are used to navigate the following dome menu, press <Menu> to
continue.
* Is displayed next to the time and date (on screen) to indicate that the keyboard is controlling the
dome menu.
Once the Pelco menu is displayed on screen use the Joystick (á,â) to move the cursor
EXIT press <zoom +> to select.
to
The screen will be cleared, but * will be displayed next to the time and date.
Press <CAM 1> to <CAM 8> to establish the Zone to be deleted eg. <CAM 1> is zone 1,
<CAM 4> is zone 4 etc.
Position the camera to the left of the scene to set then press <autopan>, but avoid pressing the
<autopan> again to set the right, this will have deleted the sector.
To exit the programming mode press and hold the <* command> key.
Domes
Version 1.3
23 April 2002
Page 27 of 29
I.James
E & OE
To learn the Patrol / Pattern mode
Access the domes Menu using the DS press the <* Command> button. A key assistance box
appears which says which keys are used to navigate the following dome menu, press <Menu> to
continue.
* Is displayed next to the time and date (on screen) to indicate that the keyboard is controlling the
dome menu.
Once the Pelco menu is displayed on screen use the Joystick (á,â) to move the cursor
EXIT press <zoom +> to select.
to
The screen will be cleared, but * will be displayed next to the time and date.
Press the <patrol> key.
On screen will display PROGRAMMING PATTERN. All movements will be recorded
(ß,á,â,à).
Press the <patrol> key again to stop the programming.
To exit the patrol learning mode press and hold the <* command> key (* disappears).
Setting the Zoom and Focus Speeds.
There are 4 speeds available for Zoom and Focus, 0 to 3
Setting the Zoom speed.
Press the <focus near>, <focus far> keys together.
To set the Zoom speed move the joystick (ß or à ), full pan position will set speed 3, joystick at
rest will set 0.
Press the <focus near>, <focus far> keys together, to store the settings.
Setting the Focus speed.
Press the <focus near>, <focus far> keys together.
To set the Zoom speed move the joystick (á or â), full tilt position will set speed 3, joystick at
rest will set 0.
Press the <focus near>, <focus far> keys together, to store the settings.
Domes
Version 1.3
23 April 2002
Page 28 of 29
I.James
E & OE
Appendix
Obtaining the DS/DSL Telemetry Drivers Versions
First Select the Serial Telemetry Type in the System Options menu page. Change this to the type
you are using e.g. JVC, Ultrak, VCL etc. Move the cursor to Serial Telemetry Type and wait 20
seconds, the version number should then be displayed.
Domes
Version 1.3
23 April 2002
Page 29 of 29
I.James
E & OE