1
Fitting the Stone Fascia
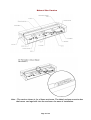
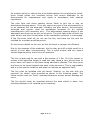
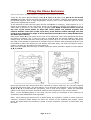
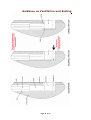
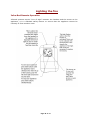
Stone Fascia Hanging Bracket Positioning
Note: the Enclosure on the Stone Fascia Version must protrude by a total of 20mm from the wall. If
this is not done flame performance will be affected and possible enclosure and burner damage will
occur. This is NOT covered by the warranty.
The Wall bracket is supplied in 2 pieces. The first part is bonded to the stone at the factory. The
second part is fixed to the wall. The fascia is supplied with the wall bracket attached. Remove the 4
cross headed screws, remove the wall bracket and put the fascia and screws in a safe place. Ensure
the wall is flush before fitting the fascia. Position the wall bracket as shown below. Measure the
dimension as shown below from top of enclosure lintel to the top edge of the wall bracket. The fascia
is very heavy and the wall bracket must be secured into a solid surface using suitable screws & rawl
plugs to ensure it cannot fall or be pulled from the wall.
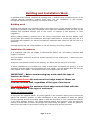
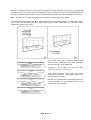
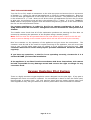
Ventilation Air Intake.
For the burner to work correctly there should be an air
intake cut-out below the front shelf as shown in the above
image. This air void provides burner ventilation to ensure
the flame remains stable and the remote system remains
cool. The Air Flow is provided via the from fascia lower
intake. Failure to ensure this will result in serious damage
to the remote system. This damage is not covered by the
warranty.
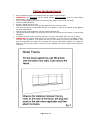
Hanging the Stone Fascia.
With the help of an assistant, lift the fascia into place.
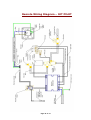
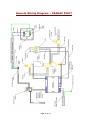
Unclip the remote magic eye and plug into the remote
control (as shown on wiring diagram).
Once the remote is attached lift the fascia on to the wall
bracket. Refit the 4 cross headed screws and ensure fascia
is secure.
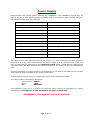
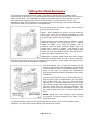
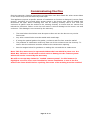
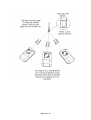
WARNING: The fascia must never be sealed or built flush
into the wall. The Fascia has an air vent at the lower edge.
This with Air Intake provides ventilation to the burner unit.
If this is blocked or the fascia not fitted in the way shown
then serious damage to the burner and remote system will
result. This damage is NOT covered by the warranty. See
image left.
Page 21 of 44