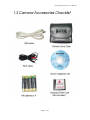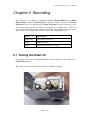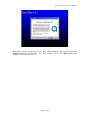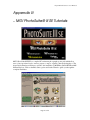
1
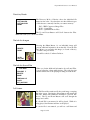
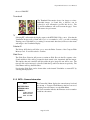
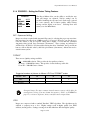
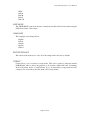
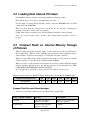
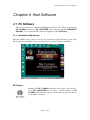
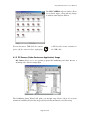
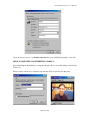
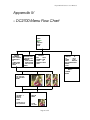
Argus DC2700 Camera User Manual
Argus DC2700
Digital Camera User Manual
NOTE THAT THIS DOCUMENT IS SUBJECT TO CHANGE WITHOUT NOTICE.
Page 1 of 28
Argus DC2700 Camera User Manual
Table of Contents
Chapter 1 Introduction __________________________________________ 3
1.1 Specifications and PC requirements_________________________________________ 3
1.2 Physical Descriptions _____________________________________________________ 4
1.3 Camera Accessories Checklist _____________________________________________ 5
Chapter 2 Recording_____________________________________________ 6
2.1 Turning the Power On ____________________________________________________ 6
2.2 Using the Live Viewfinder _________________________________________________ 7
Adjusting Exposure (brightness) ______________________________________________________ 7
2.3 Using Camera with TV ___________________________________________________ 7
2.4 Recording a Still Picture __________________________________________________ 8
2.5 Make a Video with Sound ________________________________________________ 9
2.6 Make a Sond Recording only _____________________________________________ 11
Chapter 3 Using the Menu System
____________________________ 14
3.1 Main Menu
3.1.1
3.1.2
3.1.3
3.1.4
3.1.5
THE SELF TIMER __________________________________________________________ 14
REVIEW – Reviewing Pictures and Sounds _______________________________________ 14
INFO – Camera Information ___________________________________________________ 16
PROCESS – Setting the Picture Taking Features ___________________________________ 17
SETUP – Changing the Basic Camera Settings _____________________________________ 18
3.2 Loading New Camera Firmware __________________________________________ 20
3.3 Compact Flash vs. Internal Memory Storage of Pictures ______________________ 20
Compact Flash Error and Status Messages _____________________________________________ 20
Chapter 4 Host Software _______________________________________ 21
4.1 PC Software ___________________________________________________________ 21
4.1.1 MY Camera ________________________________________________________________ 21
4.1.2 PC Camera Usage ___________________________________________________________ 22
Appendix I – Trouble Shootings _________________________________________ 24
Appendix II -- QuickTime Tutorials______________________________________ 25
Appendix III – MGI PhotoSuite® III SE Tutorials __________________________ 27
Appendix IV – DC2700 Menu Flow Chart ________________________________28
Page 2 of 28
Argus DC2700 Camera User Manual
Chapter 1 Introduction
The DC2700 Digital Camera is a state of the art VGA resolution digital camera with a
complete set of sophisticated features.
1.1 Specifications
•
•
•
•
•
•
•
•
•
•
•
•
HP 640X480 CMOS Sensor with
10 bit A/D
Three Record Modes
• Still Frame
• Video with Sound
• Sound
320X240X24 bit Color Micro
Display
Auto Exposure - +/- 2 f/stops
manual compensation
Auto White Balance
Attachable external Flash
7mm f/1.8 Fixed Focus Lens with
Manual Macro Position (Fully
Coated, includes IR Filter)
Electronic Shutter
• B to 1/2000 Second
Compact Flash Removable
Memory
2 Mbytes Synchronous DRAM for
Rapid Fire
1 Mbytes NV Flash RAM for
Program and 10 Picture Storage
Clarity 2 ASIC
•
•
•
•
•
•
•
•
•
•
•
•
•
•
•
PC Requirements
Microsoft Windows 98 (version 2) or higher versions.
PC with Pentium 75MHz processor or higher
16 MB RAM or higher
Super VGA card and color monitor
Available USB port (Window 98)
100 MB free disk space for software installation.
Page 3 of 28
ARM7 48MHz Processor with
integral 8KB Cache
USB Interface
Composite Video Out
• NTSC/PAL Selection
4 AA battery power supply
Battery level monitor
Small Size and Weight
Rapid Fire – Zero delay between
shots
Audio Recording and Playback
Self Timer
Digital 2X Zoom
Variable JPEG Compression – 40
to 90
Variable Quality Modes – Fine,
Economy
Shutter Release Button
3 Feature Selection Buttons
PC Host Software Ensemble
• Browser and Image Processor
• Video for Windows Driver
Argus DC2700 Camera User Manual
1.2 Physical Descriptions
The DC2700 is shown below:
Page 4 of 28
Argus DC2700 Camera User Manual
1.3 Camera Accessories Checklist
Page 5 of 28
Argus DC2700 Camera User Manual
Chapter 2 Recording
The operation of your camera is controlled through three Feature Buttons and a Shutter
Release Button. In general, Feature Up Button causes the selection to increase, the Feature
Down Button causes it to decrease and the Feature Select Button causes a selection to occur.
Your camera can operate in any of three record modes or a playback mode. The record
modes include: Still frame, Sound and Movie with Sound. The playback mode can be used to
view or listen to recorded pictures, sounds or movies. Record Specifications are:
Mode
Specification
Still Frame
640 x 480 x 24 bit Color
Sound
8KHz 16 bit Mono
Movie
160 x 120 x 24 bit Color at 15fps
2.1 Turning the Power On
To turn the power on, press either the Power Button located on the rear of the camera or the
Shutter Release button.
The camera can be powered on either by batteries or USB power supply.
Page 6 of 28
Argus DC2700 Camera User Manual
To turn the power off, press the Power button. Or, power will turn off automatically when
the Power Off Timeout occurs with no user action. You can change the Power Off Timeout
through the SETUP MENU.
When power is first applied, the camera always starts with the Live Viewfinder running.
If the camera is attached to a USB port, then, the power is obtained from the USB and the
power will not turn off automatically.
2.2 Using the Live Viewfinder
The Live Viewfinder is an Active display that allows you to see what the camera sees. The
Live Viewfinder accurately indicates the tonality and composition of the scene that you will
capture. While constantly updating the image, the camera automatically determines the best
exposure setting and the best white balance setting.
If you pan to a new scene that is much brighter or darker than the last, the camera may
require several seconds to adjust to the new lighting condition. Take a picture when these
modifications have completed.
Note that the DC2700 is designated with its best focus at 1.867 m
The Viewfinder may require focus adjustment. A Focus Adjustment Knob is located at the
top of your camera. This focus adjustment does not change the lens focus and therefore will
not affect pictures in any way. It is only an adjustment for your viewing of the Viewfinder.
Adjusting Exposure (brightness)
While looking at the Live Viewfinder, you can easily adjust the brightness of the image with
the Feature Up and Down buttons. The Up button will increase the brightness, while the
Down button decreases it. This can be especially useful with a scene that has a strong back
light (such as a window), behind the subject. Brightening the image will adjust the exposure
for the subject and allow the window to saturate.
Note that any exposure adjustment that you make will be indicated in the Record Menu. It
however, is not saved when you turn the camera power off.
2.3 Using Camera with TV
TV mode vs LCD mode
The Live Video and MENU (OSD) on Cyber Display can be transferred to TV ( TV mode ) by
connecting the camera via RCA cable. Basically, displaying on TV serves the same purpose as
displaying on the Viewfinder except that TV will enable an instant playback of recorded sound
files.
Page 7 of 28
Argus DC2700 Camera User Manual
Note: While in TV mode, Cyber Display may turn off.
2.4 Recording a Still Picture
While in the Live Viewfinder Mode, if you momentarily press the Shutter Release Button
you will capture a single Still image. After the image is captured, a Freeze Frame
presentation of the captured image will appear in the Viewfinder. This Freeze Frame
accurately represents the image that you have captured and therefore gives you the ability to
decide immediately if another shot is required.
Still images are stored in .JPG format in your camera.
At this point, pressing the Shutter Release Button again will return you to the Live
Viewfinder, and more Still Pictures can be taken.
After the first picture in a sequence, you may immediately return to the Live Viewfinder and
take a second picture. However, after the second in a series of pictures is taken, attempting
again to return to the Live Viewfinder may result in displaying a BUSY message. This
indicates that the camera has no more Scratch Memory for image capture. After
approximately 4 seconds, the camera will return to Live Viewfinder mode automatically.
Page 8 of 28
Argus DC2700 Camera User Manual
2.5 Make a Video with Sound
You can take a short Quick Time ( Please see APPENDIX II for the download and operation
of Quicktime applications ) movie ( maximum 10 seconds ) with your camera by pressing and
holding the Shutter Release button down. At first, your camera will take a Still Picture.
But, if the Shutter Release still being held down, Quick Time Movie will then be acquired.
The movie will continue to be acquired until either you release the Shutter Release Button,
or after 10 seconds have elapsed.
You will notice a "Q" at the bottom-right hand corner of the Viewfinder, indicating that the
image is a Quick Time Movie.
Movies are stored in .MOV format in your camera.
Steps:
-
Power on the camera
-
Hold SHUTTER button to begin capturing a video clip.
-
Release SHUTTER button when finished
-
Image with Q sign appearing at the bottom-right corner of a still frame indicates a
Quicktime video file.
View a Video ( At PC only, not for TV mode )
Steps:
-
Power on the Camera
Page 9 of 28
Argus DC2700 Camera User Manual
-
Make sure your PC support Quicktime applications, please see APPENDIX II for details
-
Connect the Camera to PC by USB cable
-
Launch “My Camera” application
-
By double clicking the .mov video files, Quicktime application will be activated
automatically.
Page 10 of 28
Argus DC2700 Camera User Manual
2.6 Make a Sound Recording only
A sound recording can be made by pressing and holding the Record Button. Note that the
Viewfinder will display the Filename followed by a time counter, in seconds, that shows the
current recording length. Releasing the Record Button, or consuming the remaining
Compact Flash memory will stop the recording.
Sound Recording consumes 16kBytes per second of Compact Flash Memory. They are
stored as .WAV files in your camera.
Suggested length of sound file
Available
Memory Size
Length of
Sound
Recording
Without
Compact Flash Card
Internal Memory
30 sec
Steps of Recording Sound:
-
Power on the camera
Hold the “Rec” button
Page 11 of 28
With
Compact Flash Card
4M
8M
16M
4 min
16sec
8 min
32 sec
17 min
4 sec
Argus DC2700 Camera User Manual
-
Speak to the Microphone (on camera)
Cyber Display Viewfinder shows incrementing counter
SVI_0003.WAV
00:00:03
-
Release “Rec” button when completed
How to play back ?
On TV
-
Power on the camera
Establish connection between camera and TV via RCA cable
-
Select “REVIEW” from “MAIN MENU” on the Viewfinder Display
Select “TV”, the display will then be transferred to the TV ( Note that Cyber Display will go
off at this moment )
Page 12 of 28
Argus DC2700 Camera User Manual
-
Sound file ( .wav format ) can be played back in the REVIEW mode, THUMBNAIL,
FULLSCREEN or DIRECTORY.
On PC
-
Power on the camera
Establish connection between camera and PC by USB cable
-
Launch “My Camera”, double click the xxxxx.wav icon will bring up windows’ default
player (e.g. Windows Media Player ) automatically.
Page 13 of 28
Argus DC2700 Camera User Manual
Chapter 3 Using the Menu System
3.1 The Main Menu
MAIN MENU
TIMER
REVIEW
INFO
PROCESS
SETUP
DONE
Pressing the Feature Select Button will cause the display of
the Main Menu. From this menu, you can review captured
images and sounds and change the various camera settings
and features.
One of the menu items will be highlighted to Green,
indicating that it is selected. Using the Feature Up and
feature Down Buttons will scroll through the selections.
Pressing the Feature Select Button will choose the
highlighted selection.
Gray menu items are disabled and may not be selected.
At any time, pressing the Shutter Release Button will return you to the Viewfinder.
You can use the Shutter Release Button as a quick way to navigate back to the top menu.
Just press the Shutter Release Button and then return to the menu system with the Feature
Select Button.
Note that Default Values are shown as Underlined in this text.
3.1.1 THE SELF TIMER
The Self Timer is used to allow you to get into your own pictures. Just select this item and
you will be returned to the Live Viewfinder. You will see a red timer ICON at the lower
right hand corner of the viewfinder. The next press of the Shutter Release Button will
begin a 10 second delay followed by the Still Image Capture. A green Timer ICON at the
lower right corner will appear during the delay period.
3.1.2 REVIEW – Reviewing Pictures and Sounds
REVIEW
THUMBNAIL
FULL SCREEN
DIRECTORY
TV
SLIDE SHOW
DELETE ALL
DONE
From the Review Menu, you can review images, sounds and
movies on your display or TV. Several presentation modes
are available including: Thumbnail, Full Screen and
Directory.
Selecting Done will return you to the Main Menu.
Page 14 of 28
Argus DC2700 Camera User Manual
Directory Mode
SVI_0001.JPG
SVI_0002.JPG
SVI_0003.WAV
DONE
The Directory Mode of Review shows the individual file
names in time order. Note that there are three different types
of files that are commonly found in your camera memory:
JPG – JPEG Compressed Image Files
WAV – Sound Files
MOV – Quicktime Movie Files
The Up and Down Buttons will Scroll between the Files.
Done will return you to the Review Menu.
File Info for Images
FILE INFO
DELETE
DONE
Pressing the Select Button, for an individual image will
present additional information about that file. From the File
Info Menu, you can Delete this image (or Sound or Movie),
or return to the prior menu.
You will be asked to Confirm a Deletion.
34 KB
SVI_0007
File Info for Sound Files
FILE INFO
VOLUME
DELETE
DONE
7
When you obtain additional information about Sound Files,
you can adjust the volume while playing. The total play time
and the current time of the playing recording are both shown.
TIME 00:01:15
34 KB
SVI_0007.WAV
Full Screen
SVI_00007.JPG
The Full Screen Presentation will show each image occupying
the entire screen. Pressing the Select Button will present the
File Info Menu with additional information (see File Info
above). The Up and Down Buttons will scroll through the
images and sounds.
If a Sound File is encountered, it will be played. While it is
being played, the filename and time are displayed.
If a movie file is encountered, you will see a still frame and
Page 15 of 28
Argus DC2700 Camera User Manual
the word "MOVIE."
Thumbnail
The Thumbnail Presentation shows four images at a time.
Individual images (or Sound files or Movies) can be
selected for more information (see File Info above). The
Up and Down Buttons will scroll between the pages. Done
will return to the prior menu.
TV
Selecting TV will transfer the display output to the NTSC/PAL Video source. Note that the
Viewfinder Display will go blank and if you're not attached to a TV, you will see nothing.
Turning power off and then on (or waiting for an automatic shut down) will restore the menus
and images to the Viewfinder Display.
Delete All
The Delete All Selection will allow you to erase the Entire Contents of the Compact Flash
Memory Card. You will be asked to Confirm.
Slide Show
The Slide Show Selection will present a continuous Slide Show in the file sequence order.
Sound and Movie files will be presented in their natural order, intermixed with the images.
This implies that each sound file will play while the prior image file can still be seen. The
time per slide can be increased or decreased with the Up and Down buttons respectively. The
Select Button will stop the Slide Show.
Note that the Slide Show can be shown either on the internal Viewfinder or external TV by
selecting that display first.
3.1.3 INFO – Camera Information
INFO
BATTERY FULL
VERSION 3.009
MEMORY
USED 1604 KB
FREE 2284 KB
SIZE 3888 KB
DONE
The Camera Info Menu displays the current battery level and
the amount of Compact Flash Memory that has been used.
Selecting Done will return you to the Main Menu
The Version number indicates the Firmware revision number
loaded into the camera.
Page 16 of 28
Argus DC2700 Camera User Manual
3.1.4 PROCESS – Setting the Picture Taking Features
PROCESS
EXP
FORMAT
JPEG
CONTRST
SAVE
AUTO
FINE
70
AUTO
The Record Menu offers you the ability to modify the way
that still images are captured. Various settings can be
modified including the exposure level, flash usage (optional
for some cameras), the resolution quality, white balance
settings and the digital zoom factor. Selecting Done will
return you to the Main Menu.
EXP – Exposure Setting
Images are always acquired with Automatic Exposure for selecting the proper exposure time.
Exposure times can range from 1/2000 second to 1/15 second. However, you can choose to
force the camera to use an exposure setting that is higher or lower than the calculated
Automatic value in half f/stop increments (decrements). These settings are indicated as
AUTO+2.0 to AUTO-2.0. Note that while viewing the active Viewfinder, the Up and Down
buttons, will modify this value by half f/stop increments (decrements) without the need to
enter the menu system.
FORMAT
There are two Quality settings available:
Fine – 640x480 Resolution. This provides the best quality resolution.
Economy – 320x240 Resolution. This provides for the smallest possible file.
Zoom X2 – 320x240 Center of frame.
Suggested numbers of pictures at different “JPG” and “FORMAT” modes
Format \ JPG
40
70
90
Fine
19
8
6
Economy
25
17
8
Corrupted image files may consume internal memory storage which affect the
actual picture storage. You may format the memory ( Please see FORMAT at
page 15 ) to destroy all picture, movie, sound files and corrupted data.
JPEG
Images are compressed with a standard "Baseline" JPEG algorithm. The algorithm can be
adjusted to compress more or less. Higher settings result in higher quality (less JPEG
artifacts) and larger files. Settings can range from 40 to 90 where 90 is the highest quality.
Page 17 of 28
Argus DC2700 Camera User Manual
A JPEG setting of 70 is recommended for most applications.
Contrast
The user can select between three Contrast Settings: High, Normal and Low. This setting
changes the gamma of the lookup table that is used to convert the raw sensor data to viewed
image data. The following table summarizes the settings:
Setting
Gamma
AUTO
Automatic
High
0.8
Normal
0.65
Low
0.5
3.1.5 SETUP – Changing the Basic Camera Settings
SETUP
TIMEOUT 60 SEC
TV
NTSC
SHOW
5 SEC
LANG
ENGLISH
RESTORE DEFAULTS
MORE…
SAVE
There are two Setup Menu Screens that link to one another
through the More… selection. Through these menus, you can
control the basic settings of your camera.
The SAVE_RAW and CAL_WB are manufacturing features
and will not appear and therefore should not be used by
customers.
MORE…
FORMAT
DONE
TIMEOUT
The Timeout Feature, controls the length of time the Viewfinder can be active without
touching any button until an automatic power down occurs. Settings range from None,
implying that power will not automatically turn off, to 90 seconds in 15 second increments.
TV MODE
The TV MODE can be set to one of several TV Standards including:
Page 18 of 28
Argus DC2700 Camera User Manual
NTSC
PAL B
PAL M
PAL N
PAL CN
SLIDE SHOW
The SLIDE SHOW controls the amount of time that each slide will be shown when using the
Slide Show feature of the camera.
LANGUAGE
The Language can be changed from:
English
French
German
Spanish
Chinese
RESTORE DEFAULTS
This selection allows the user to force all of the settings back to the factory defaults.
FORMAT
Format allows you to re-format a storage media. This can be applied to either the internal
NVRAM (this will not destroy the program) or an external compact flash card. Formatting
destroys all picture, movie or sound file data. It is to be used when a storage media becomes
corrupt as can occur if the power fails when a file is being written.
Page 19 of 28
Argus DC2700 Camera User Manual
3.2 Loading New Camera Firmware
New Firmware can be loaded into your camera with the following procedure:
First, turn the power off or allow to automatically power down.
Second, Insert a Compact Flash card that contains a new file MAIN.BIN and does NOT
contain a file called LOADED.
Third, note that when the camera starts, you should see the message: "Loading New
Program" followed by "Done" when it is complete.
Fourth, Turn off the power and re-start. The new Firmware should be in and operating.
Note: Do not turn off the power, or remove the compact flash card while a load is in
progress.
3.3 Compact Flash vs. Internal Memory Storage
of Pictures
When a Compact Flash card is inserted, images, sounds and movies are all stored directly into
the Compact Flash. When it is full, a Full Message will appear in the Viewfinder and you
will be unable to acquire any more images or sounds until you delete some files.
When a Compact Flash card is NOT inserted into the camera, you can still store a limited
number of images or sound files in the available internal NVRAM.
When you insert a Compact Flash Card and there are any files resident within the internal
memory, then these files are ignored. You will see a message on your screen that says "NEW
CARD PRESS SHUTTER RELEASE TO CONTINUE."
Note that DC2700 is compatible to Compact Flash card of different memory sizes.
Suggested picture capacity at different Compact Flash memory size (@JPG 70, FORMAT Fine)
Compact Flash memory size
4M
8M
16M
32M
64M
128M
No of pictures
80
160
320
640
1280
2560
Compact Flash Error and Status Messages
Various error and status conditions can occur when using Compact Flash.
Error or Status Condition
Message
You Should…
Card full
Card full, press Shutter
Release to Continue
Replace Card or delete files
and re-do operation
Card Inserted
New Card, press Shutter
Release to Continue
Continue
Page 20 of 28
Argus DC2700 Camera User Manual
Chapter 4 Host Software
4.1 PC Software
There are two methods for using the DC2700 when attached to a PC. These are through the
MY CAMERA extension to MY COMPUTER and by using the supplied STREAMING
DRIVER for use as an attached PC camera with applications like NetMeeting.
4.1.1 Installation of My Camera
Place the ARGUS driver CD into your PC, the Auto Run program will bring up the Argus
Drivers interface immediately. Click on the “My Camera” options to begin the installation.
MY Camera
Installing the MY CAMERA application will install a new ICON to
you’re MY COMPUTER set of objects. Double Clicking on MY
CAMERA will launch this explorer window that presents files that are
stored within your camera.
Page 21 of 28
Argus DC2700 Camera User Manual
The MY CAMERA explorer window allows
you to Delete, Open, or drag and drop images
as with any other Explorer window.
Do not disconnect USB while the camera
power off the camera before unplugging
is ON. In other words, remember to
the USB cable.
4.1.2 PC Camera (Video Conference Application) Usage
My Camera allows you to use popular programs like NetMeeting and others that use a
streaming video driver for image input.
The NetMeeting Setup Wizard will guide you through setup. Please follow all on-screen
instructions carefully and select the category that best fit the information you will be using.
Page 22 of 28
Argus DC2700 Camera User Manual
Select the directory server, e.g. uls.microsoft.com, that you would like Netmeeting to start with
SETUP IS COMPLETE AND NETMEETING STARTS !!!!
After identifying the individual(s) by using their E-mail address, select their address and click the
CALL icon.
Please note the connection is completed only after the call is accepted by the other party.
Page 23 of 28
Argus DC2700 Camera User Manual
Appendix I – Trouble Shootings
Troubles
Solutions
1 Fail to establish a USB connection.
2 Fail to view images from MyCamera,
PC Host Software.
3 Deleting MyCamera.
4 Abnormal and distorted images shown
on Cyber Display
5 Cyber Display turns “ RED”
6 Camera takes lesser pictures than
suggested
Check if the USB connection between the
computer and the camera has been established.
Check if the camera is ON
Make sure your computer is operated with
Windows 98 (versions 2) or higher versions.
Make sure USB connection is established before
powering up the camera and opening the
“ MyCamera” .
You may press “ F5” (Refresh) to see if the
problem has been fixed.
Go to “ Control Panel” of your PC ->
“ Add/Remove Programs” , select “ MyCamera”
from the list and click “ Add/Remove” .
MyCamera will then be deleted.
Improper handling (e.g. crashing) of the camera
would cause a sudden bad contact of battery
circuitry.
Disconnecting USB while the camera is ON
would cause a hang-like phenomenon.
Open the battery door and close it again will
solve the problems.
Low Battery power would cause the Display to
turn RED. Replace the batteries will enable the
Cyber Display to function properly again.
Alkaline batteries are recommended.
Please see the table, “Suggested Numbers of
picture at different JPG and FORMAT mode” to
see if you are justifying under same condition.
Corrupted image files may consume internal
memory storage. Please go to “REVIEW” of
main menu, select “DELETE ALL” or you may
format the memory storage directly (“MENU” ->
“SETUP” -> “FORMAT ” ) to eliminate the
corrupted files.
Page 24 of 28
Argus DC2700 Camera User Manual
Appendix II – Quicktime Tutorials
Introductions
QuickTime is Apple's complete technology for handling video, sound, animation, graphics, text,
music, and even 360-degree virtual reality (VR) scenes since 1991. A gateway for rich media
including images, music, MIDI, MP3 and more, QuickTime enables you to experience more than
200 kinds of digital media with Mac or PC and it offers unparalleled quality, ease of use and
functionality.
Quicktime application can be downloaded via the following address
http://www.apple.com/quicktime/
Double click the Quicktime setup.exe icon, the Setup Wizard will then guide you through setup.
Please follow all on-screen instructions and enter the information you are willing to supply.
Page 25 of 28
Argus DC2700 Camera User Manual
Everytime you want to playback your video files, double clicking the file icon will activate the
Quicktime application automatically. ( See “View a Video” under session “Make a Video with
Sound” for the detail operations. )
Page 26 of 28
Argus DC2700 Camera User Manual
Appendix III
– MGI PhotoSuite® III SE Tutorials
MGI’s PhotoSuite® III SE is a complete PC an internet photography power pack which allow
users of any experience level to retrieve, prepare, compose, organize, share and print photos. The
Argus Driver Interface will direct you both to the installation of MGI PhotoSuite® III SE and MS
Internet Explorer. Click on the PhotoSuite options and let the Wizard to guide you through the
complete installation.
Page 27 of 28
Argus DC2700 Camera User Manual
Appendix IV
– DC2700 Menu Flow Chart
MAIN MENU
TIMER
REVIEW
INFO
PROCESS
SETUP
DONE
REVIEW
THUMBNAIL
FULL SCREEN
DIRECTORY
TV
SLIDE SHOW
DELETE ALL
DONE
PROCESS
INFO
BATTERY FULL
VERSION 3.009
MEMORY
USED 1604KB
FREE 2284KB
SIZE 3888 KB
DONE
EXP
AUTO
FORMAT FINE
JPEG
70
CONTRST AUTO
SAVE
SETUP
TIMEOUT
90
TV
NTSC
SHOW
5 SEC
LANG
ENGLISH
RESTORE DEFAULT
MORE…
SAVE
MORE…
SVI_0001.JPG
SVI_0002.JPG
SVI_0003.WAV
DONE
FILE INFO
VOLUME
DELETE
00:00:32
DONE
7
34 KB 00:01:15
ISVI_0007.WAV
FORMAT
DONE
SVI_0007.JPG
FILE INFO
DELETE
DONE
34 KB
SVI_0007
Page 28 of 28