1
29112 rev1
1/9/06
09:40
Page 1
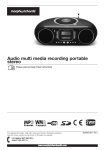
Audio multi media recording micro
system
Please read and keep these instructions
For replacement parts, help with using your Morphy
Richards, problems and lots more, contact us by phone or
through our website.
UK Helpline: 0870 060 2614
Ireland 1800 409119
www.morphyrichardsaudio.com
AD29112 MUK Rev1
29112 rev1
1/9/06
09:40
Page 2
INDEX
INSTALLATION
HOW TO CONNECT THE SPEAKERS TO MAIN UNIT
3
TIPS FOR CONNECTING THE SPEAKER WIRES
3
SPEAKER TERMINALS
3
TERMINALS OF UNIT
3
TO AVOID SHORT-CIRCUITING THE SPEAKERS
4
CONNECT THE FM ANTENNA TO THE FM ANT JACK
4
NAME OF CONTROLS (MAIN UNIT)
5
NAME OF CONTROLS (REMOTE UNIT)
6
CONNECT TO THE WALL OUTLET
6
SETTING
HOW BACLKLIGHT ILLUMINATES IN STANDBY MODE
6
DIGITAL CLOCK&TIMER SETTING FUNCTION
7
HOW TO SET TIME CORRECTLY (In standby mode)
7
HOW TO PRESET THE TIMER FUNCTION
7
WAKE TO MICRO SYSTEM (CD, USB, SD, RADIO, AUX)
7
ON TIME
7
OFF TIME
7
SOURCE
7
PRESS TIMER ON THE REMOTE TO SET
8
VOLUME
8
DISC
SLEEP FUNCTION (Falling asleep to your Micro system)
8
DISC PLAYBACK
8
STOP BUTTON
8
SKIPPING TRACKS AND SEARCHING BETWEEN TRACKS
8
REPEAT MODES
8
RANDOM PLAY
9
INTROSCAN PLAY
9
SETUP PROGRAM in CD/DATA DISC
9
BROWSER MODE
9
TUNER
DIGITAL TUNER OPERATION
UK Helpline 0870 060 2614
9
Ireland Helpline 1800 409119
29112 rev1
1/9/06
09:40
Page 3
TO STORE THE CURRENT RADIO STATION
10
RDS OPERATION OF DIGITAL TUNER
10
OPERATION
VOL +/-BUTTONS
10
MUTE BUTTON
10
USE THIS PLAYER AS AN EXTERNAL POWER AMPLIFIER
10
EQUALISER AND BASS BOOST
11
USB & CARD OPERATION
EXTERNAL MEMORY MEDIA OPERATION (USB/MMC)
11
PREPARE THE PLAYER FOR EXTERNAL MEMORY MEDIA
3
OPERATION
11
SKIPPING TRACKS AND SEARCHING BETWEEN TRACKS
11
REPEAT MODES
11
RANDOM PLAY
11
INTROSCAN PLAY
12
PREPARE THE MICRO SYSTEM CONNECTED WITH EXTERNAL
MEMORY MEDIA FOR RECORDING OPERATION
12
DELETING FILES
12
FORMATTING
12
RECORDING PROCESS
12
TIMER RECORD
13
MENU OPERATION
13
EQ BUTTON (REMOTE CONTROL ONLY)
13
X-BASS BUTTON
13
VOL -/+ BUTTONS
13
MUTE BUTTON (REMOTE CONTROL ONLY)
13
MENU STRUCTURE TABLE
14
COMPACT DISC
15
WARNING LABELS
15
ID3
17
TIPS FOR SUPPORTING FAMOUS MP3 PLAYERS
17
TECHNICAL SPECIFICATION
18
GUARANTEE
19
www.morphyrichardsaudio.com
2
29112 rev1
1/9/06
09:40
Page 4
HOW TO CONNECT
THE SPEAKERS TO
MAIN UNIT
Tips for connecting
the speaker wires
Push and hold the speaker
terminal tab down to insert each
wire.
Release the tab to lock the wire
into the terminal, make sure the
wire is fully inserted, but the
insulation is not covering the
inserted part of the speaker
wires.
GO ON TO THE NEXT WIRE &
REPEAT ABOVE. REMEMBER
WIRES MUST GO FROM THE
SET TO THE SPEAKERS.MAKE
SURE POWERS IS OFF WHEN
DOING THE ABOVE.
NOTE: Be sure to match the
speaker wire to the appropriate
terminal on the components: (+)
to (+) (colour), and (-) to (-)
(black). If the wires are reserved,
the sound will be distorted and
will lack some tones. Follow the
colour of each speaker.
Speaker terminals
⁄
TERMINAL
TAB
TERMINAL
TAB
Push down on each tab of terminal.
¤
While holding down the tab of the terminal,
Stick the exposed part of the wire into the
Hole of the terminal.
‹
Remove your finger from the terminal to
Lock the wire inside the terminal
Terminals of unit
›
On the back of
the set , you will
need to push up
the colored
terminals and
down on the
black terminals.
3
UK Helpline 0870 060 2614
Ireland Helpline 1800 409119
4
29112 rev1
•
1/9/06
09:40
Page 5
To avoid short
circuiting the
speakers
A
Make sure the stripped end of
each speaker wire does not
touch another speaker terminal
or the stripped end of another
speaker wire.
B
Connect the FM
antenna to the FM
ANT Jack
Take out the FM antenna and
extend it to its full length A.
Connect it to the FM ANT Jack
by simply plugging it to the
Jack B.
5
www.morphyrichardsaudio.com
4
29112 rev1
1/9/06
09:40
Page 6
11
12
13
14
1
2
3
4
15
16
17
5
6
7
18
19
8
9
10
20
21
24
25
26
22
23
Name of controls
(main unit)
14 VOLUME UP BUTTON
15 VOLUME DOWN BUTTON
1
PROGRAM/DELETE BUTTON
2
MENU BUTTON
3
ON/STAND BY BUTTON
4
FUNCTION BUTTON
5
REMOTE SENSOR
6
SKIP - BUTTON
7
STOP/MONO/ST BUTTON
8
PHONES JACK
9
USB INDICATOR
16 LCD DISPLAY
17 SKIP + BUTTON
18 RECORD/TIMER BUTTON
19 PLAY/PAUSE/BAND BUTTON
20 SD/MMC CARD INDICATOR
21 SD/MMC CARD SLOT
22 AC SOCKET
23 POWER ON/OFF SWITCH
24 FM ANTENNA
10 USB PORT
25 AUX IN JACKS
11 INTRO/PTY SELECT BUTTON
26 SPEAKER TABS
12 RANDOM/PRESET DOWN
BUTTON
13 REPEAT/PRESET UP BUTTON
5
UK Helpline 0870 060 2614
Ireland Helpline 1800 409119
6
29112 rev1
1/9/06
09:40
Page 7
1
2
3
4
5
6
7
8
9
10
12
13
14
15
16
17
18
19
20
21
11
Name of controls
(remote unit)
11 REC BUTTON
12 BASS BUTTON
1
EQ BUTTON
2
STANDBY BUTTON
3
FUNCTION BUTTON
4
TIMER BUTTON
5
SLEEP BUTTON
6
DELETE/STORE/PROGRAM
BUTTON
18 FF. BUTTON
7
PTY SELECT BUTTON
19 PLAY/PAUSE/BAND BUTTON
8
INTRO/RDS MODE BUTTON
20 STOP BUTTON
9
REW. BUTTON
21 RANDOM/PRESET DOWN
BUTTON
13 MUTE BUTTON
14 NUMERIC BUTTONS
15 STEREO/MONO BUTTON
16 MENU BUTTON
17 REPEAT/PRESET UP BUTTON
10 VOLUME BUTTONS
Connect to the wall
outlet
Plug the unit to a live wall outlet
insure the on/off switch is
switched to ON/STANDBY.
(ON/STANDBY will glow red).
How backlight
illuminates in standby
mode
Press any key (excepted
ON/STANDBY) on the unit front
panel or the remote control in
standby mode of unit, the
backlight for the display
illuminates and keeps on for a
10-second time span for you to
check the information on the
display.
7
UK Helpline 0870 060 2614
Repwlw
acwe.meonrpt hPyarrictsha0r8d7s0au1d5i7o.6c6o4m5
Ireland Helpline 1800 409119
6
29112 rev1
1/9/06
09:40
Page 8
DIGITAL
CLOCK&TIMER
SETTING FUNCTION
How to set time
correctly (In standby
mode)
Press menu button.
Press SKIP +/- button to locate
the item CLOCK and press
PLAT/PAUSE button to confirm.
Press SKIP +/- buttons to adjust
the hour, and then press
PLAY/PAUSE
Again, use SKIP +/- buttons to
adjust the minute. And again
press PLAY/PAUSE button to
confirm the time setting.
as soon as the presetting time
arrives.
Press MENU button, then Press
SKIP +/- buttons to locate the
item TIMER and press
PLAY/PAUSE button to enter.
‘On time’ will appear in the LCD
display, press PLAY/PAUSE
button to confirm, use SKIP +/buttons to adjust the hour, and
then press PLAY/PAUSE button
to confirm.
Again, use SKIP +/- buttons to
adjust the minute, and then
PRESS/PAUSE button to
confirm the time setting.
Off time
The time set will remain until you
switch off the unit by means of
the Power switch.
‘Of time’ setting means that the
nit will power off automatically
as soon as the presetting time
arrives.
How to preset
the timer function
Use SKIP +/- buttons to adjust
the time much in the same way
as depicted above for On Time
setting.
Press the TIMER button on the
remote control or press
RECORD/TIMER button on the
main unit at standby mode to
enable the timer according to
user setting, when setting the
timer, the icon will appear in the
display, pressing again will
disable the setting.
Press MENU button on the unit
to enter menu mode.
Press SKIP +/- buttons to locate
the item TIMER and press
PLAY/PAUSE button to enter.
Utilise SKIP +/- buttons to select
among the items, such as, On
TIme, Off Time , SOURCE and
VOLUME, the operating method
is described as below:
Wake to micro
SYSTEM (CD,USB,SD,
RADIO,AUX)
On time
Source
Press SKIP +/- buttons to select
the item SOURCE, then press
PLAY/PAUSE button to enter the
source items, use SKIP +/buttons to select among he
items PRE REC, DISC, USB,
CARD, TUNER, AUX.
Take the DISC as an example for
TImer setting:
Press SKIP +/- buttons to locate
the item SOURCE and press
PLAY/PAUSE button to enter
Use SKIP+/- buttons to select
the item DISC, press
PLAY/PAUSE button to confirm,
then press SKIP +/- buttons to
locate the item On Time to set
the power on time and Off Time
to set power off time.
Press MENU button to exit the
timer setting, and press the
ON/STANDBY button to turn off
the unit.
On time setting means that the
unit will power on automatically
7
UK Helpline 0870 060 2614
Ireland Helpline 1800 409119
29112 rev1
1/9/06
09:40
Page 9
Press timer on the
remote to set
Disk playback
The unit will power on
automatically and enter the
presetting Source DISC mode
as soon as the presetting time
arrives.
NOTE: The unit will power on
and enter the TUNER mode
automatically if there is no disc
in the disc tray or there is no
music files in the USB or
SD/MMC card.
Volume
Press SKIP +/- button to locate
the item VOLUME, press
PLAY/PAUSE button to confirm,
and again use the SKIP +/buttons to adjust the volume.
The unit’s volume.
30
15
The display shows the number
of tracks and time of disk
playback as whole after the
player reads the disk
successfully.
4
In Mp3 mode, the display does
not show the time of disk
playback as a whole.
5
Press PLAY/PAUSE button to
begin CD playback; press this
button again to pause playback.
Press SKIP buttons once to skip
the current track and go back to
the beginning of this track,
press this button continuously
to go back to corresponding
tracks at back.
05
When the SLEEP function is
activated, the player goes to
standby mode the moment
playback or broadcasting
reaches the Preset Sleep time.
While the SLEEP function is
activated, you may press SLEEP
button once to check the
amount of time.
Press SLEEP button twice to
change your sleep setting.
3
When in play mode, Press SKIP
+ button once to skip the
current track and play the next
track, press this button
continuously to go to
corresponding tracks ahead.
Sleep time in a sequence as
follows:
45
Insert a disc onto the CD tray.
Skipping tracks and
searching between
tracks
Press the SLEEP button on the
remote control in music stop or
play mode or Radio broadcasts,
the player enters the sleep
mode, press the button again
the display changes.
60
2
Press this button in music play
mode to stop playing.
Sleep function (falling
asleep to your Micro
System)
90
Press FUNCTION button until
the player enters CD mode.
Stop button
The unit’s volume will increase
the presetting value
automatically.
120
1
off
When not in play mode, press
and hold SKIP buttons to initiate
high-rate scanning between
tracks; release one of them to
begin playback of music at
normal speed.
Repeat modes
In CD playing mode, press
REPEAT button once to repeat
the current track;the LCD shows
the icon for single track repeat.
Press REPEAT button twice to
repeat tracks as a whole; the
LCD shows the icon for all
tracks repeat.
9
wwww
.m.m
oroprhpyhryicrihcahradrsdasu.cdoiom.com
9
8
29112 rev1
1/9/06
09:40
Page 10
Setup program in
data disc
Press REPEAT button three
times to cancel repeat, the
repeat icon will disappear.
To program MP3 or WMA
format tracks, follow the steps
below:
In MP3/WWA playing mode,
press REPEAT button once to
repeat current track, twice to
repeat tracks as a whole, three
times to repeat directory, four
times to cancel repeat.
In CD stop mode, press the
PROGRAM button once, ‘P:01”
shows in the LCD with a
flickering album or directory ‘00’
select the album number to be
programmed using the SKIP
buttons, and press PROGRAM
again to store, the track number
‘000” flickers waiting for your
selection. Select the first track
to be programmed using the
SKIP buttons, press PROGRAM
again to store and advance to
the next input.Repeat the steps
above to program more tracks.
Press STOP to exit the program
mode.
Random play
Press RANDOM button once in
play or stop mode to activate
random playback immediately,
the player will pick up tracks in
a random sequence for
playback. You may press this
button once again to exit
random play mode and return
to normal playback.
Introscan play
Press INTRO button once in
play or stop mode to activate
introscan playback immediately,
the player will pick up tracks for
playback of the first 10 seconds
of each track in a sequential
order. You may press this button
once again to exit introscan
play mode and return to normal
playback from the track it is
arrived at.
1
2
3
4
5
9
Browser mode
1
To enter browser mode, press
STOP button while playing disc.
2
In the browser mode, the
‘music logo’ will be displayed
on the screen indicating that the
unit is in track select mode.
3
Press FFWD
/REW
buttons to advance to your
desired track.
Setup program
in CD
4
Press STOP button again to
enter the directory mode.
To program tracks, follow the
steps below:
5
Press FFWD
/REW
buttons to advance to your
desired directory.
6
Press PLAY/PAUSE button to
play the desired track/directory.
Press PROGRAM button in disc
Stop mode.
Press SKIP/SEARCH buttons or
numeric buttons on the remote
control to select the track.
Press the PROGRAM button
again to save this track to
memory and step into the next
programming step.
Repeat the processes specified
above to go on with the
programming.
A total of 32 tracks can be
programmed.
Digital tuner
operation
Press FUNCTION button to
enter Tuner mode.
Press BAND button o select
between MW and FM.
Press SKIP+/- buttons manually
tune in the frequency.
Press and hold SKIP +/buttons for 2 seconds to
automatically tune the radio
UK Helpline 0870 060 2610
Ireland Helpline 1800 409119
29112 rev1
1/9/06
09:40
Page 11
NEWS - AFFAIRS - INFO SPORT - EDUCATE - DRAMA CULTURE - SCIENCE - VARIED
M - POP M - ROCK M - MOR
M - LIGHT M - CLASSIC OTHER M - WEATHER FINANCE - CHILD - SOCIAL RELIGION - PHONE - TRAVEL HOBBY - JAZZ - COUNTRY NATION - OLDIES - FOLK M DOCUMENT - TESTS - ALARM
- (BACK TO NEWS)
frequency. When the tuning
goes to one station available,
broadcasting starts immediately.
NOTE: If a particular FM
(STEREO) station is weak, or
you hear too much background
noise, try pressing the
MONO/ST button to enter the
FM (MONO) mode. This can
often result in a much clearer
reception.
To store the current
radio station, follow
the steps below:
Use the SKIP/SEARCH buttons
to select the particular program
after Programming is done.
1
Press DEL/STORE/PROG
button on the remote control or
the program button on unit.
VOL +/- buttons
2
Press MEM Up or DOWN
button or directly press the
numeric buttons on the remote
control to select a memory
position.
3
Press the DEL/STORE/PROG
button again to sore frequency.
4
Press these buttons to increase
or decrease the volume level.
The volume level can be change
from 0-30.
MUTE button
Press this button to turn mute
on or off. In mute or mode, the
sound is cut off.
To recall the preset station
frequency, press the MEM UP or
DOWN button or the NUMERIC
buttons.
Use this player as an
external power
amplifier
A total of 30 stations can be
stored in Memory, 20 for FM
and 10 for MW and the memory
will erased after you unplug the
unit.
Power the player on and press
FUNCTION button until you
have entered AUX mode.
This player can be used as
power amplifier. To it for this
purpose you need:
RDS operation of
digital tuner
When the radio stops at a radio
station which supports RDS, the
LCD shows the radio name,
program type and radio text
step by step.
User can also select the
displayed text by pressing the
RDS mode button. The display
toggles as follows:
Back to
STATION NAME - PROGRAM
TYPE - RADIO TEXT - STATION
NAME
If a user wants to enjoy a
particular type of program, they
can press the PTY SEL button.
Press this button continuously,
the LCD shows as follows:
www.morphyrichardsaudio.com
1
An audio player (a digital radio or
an MP3 digital audio player) with
a line-out port
2
With two one-pin plug which is
to connect both devices.
3
Play the audio player
4
Adjust the volume level.
Equalizer effect and bass/treble
level of this player.
10
29112 rev1
1/9/06
09:40
Page 12
Equaliser and bass
boost
Press MENU button to enter the
main menu display then use
SKIP buttons to locate
Equalizer, press PLAY/PAUSE
button to confirm and again use
the SKIP buttons to scroll
among Flat, Custom, Jazz,
Rock, Classic, POP.
NOTE: Pressing PLAY/PAUSE
button when you have located
the item Custom will initiate a
two-option menu (User Bass &
User Treble) for you to choose
from. You may use the SKIP
buttons to choose and then
PLAY/PAUSE button to confirm
and again use the SKIP buttons
to make the adjustments in the
value of the Bass and Treble. You
may feel the change in Bass or
treble effect while doing the
adjustments.
EXTERNAL MEMORY
MEDIA OPERATION
(USB/MMC)
Prepare the player for
External memory
media operation
Insert an MP3 Player into the
USB mode.
An icon of READING shows in
the LCD and after the USB has
been successfully detected and
read, the track number as a
total shows in the LCD.
Press PLAY/PAUSE button to
begin playback from track
Number 1.
OR
Insert an MMC/SD card into the
card slot.
Press FUNCTION button
continuously until the player
enters MMC/SD mode.
NOTE: The player can
successfully play the music files
with USB 1.0 and 2.0 storage
devices.
NOTE: For Creative ZEN series,
11
user should enable the
removable disk function before
plug into the unit (Menu - Extras
- Removable disk)
Skipping tracks and
searching between
tracks
When in play mode. Press SKIP
+ button once to skip the
current track and play the next
track, press this button
continuously to go to
corresponding tracks ahead.
Press SKIP button once to skip
the current track and go back to
the beginning of this track,
press this button continuously
to go back to corresponding
tracks back.
When in play mode, press and
hold SKIP buttons to initiate
high-rate scanning between
tracks. Release one of them to
begin playback of music at
normal speed.
Repeat modes
Press REPEAT button once to
repeat the current track, the
LCD shows the icon for single
track repeat.
Press REPEAT button twice to
repeat tracks on stored on this
storage media (USB/MMC card)
as a whole. The LCD shows the
icon for all tracks repeat.
Press REPEAT button three
times to repeat the whole tracks
in the current directory, the LCD
shows the icon for all tracks in
the current directory.
Random play
Press RANDOM button once in
play or stop mode to activate
random playback immediately,
the player will pick up tracks in
a random sequence for
playback. You may press this
button once again to exit
random play mode and return to
normal playback.
Introscan play
UK Helpline 0870 060 2614
Ireland Helpline 1800 409119
29112 rev1
1/9/06
09:40
Page 13
Press INTRO button once in play
or stop mode to activate
introscan playback immediately.
The player will pick up tracks for
playback of the first 10 seconds
of each track in a sequential
order. You may press this button
once again to exit introscan play
mode and return to normal
playback from the track it’s
arrived at.
NOTE: In playback mode, press
DELETE button, the LCD will
display ‘DELETE FILE?’ press
DELETE button again, the file will
be deleted..
NOTE: Pressing and holding
DELETE button in browse mode
to delete all music files.
Formatting
Prepare the Micro
System connected
with External
Memory media for
recording operation
Press MENU button to enter
main menu display interface.
Insert a MP3 Player or MMC/SD
card into the USB or card slot
and turn on the Micro system.
Utilise SKIP +/- buttons to select
YES/NO setting, select ON item
and press PLAY/PAUSE button
to format the flash memory (only
for SD/MMC card)
Press SKIP +/- buttons to locate
the item FORMAT and press
PLAY/PAUSE button to confirm.
Select recording device by
MENU mode (Menu-Record-REC
to USB or REC to card).
Press FUNCTION button to
select the desired source from
which you would like to record to
the Storage media while being
aware that it is not possible to
record files from USB data
traveller to MMC card or from
MMC card to USB data traveller.
NOTE: Audio from the various
sources is recorded and stored
in the Storage media as Mp3
format.
Recording process
1
Insert the devise that is to be
recorded to: into its correct slot
(SD card or USB device).
2
Select the recording destination
SD card or USB device. (Menu Record - Rec to card or Rec to USB).
3
Use the function button to select
the function button to select the
function that is to be recorded
from 3. If TUNER or AUX are
selected, the record button can
be pressed straight away to
record directly form the radio or
AUX resource.
4
If CD is selected, choose the
track that is to be recorded.
Using the SKIP +/- buttons press
PLAY/PAUSE button and then
REC button.
5
Press the STOP button at any
stage to stop the recording.
6
Use the FUNCTION button to
select Card or USB mode and
press PLAY/PAUSE to play the
track/radio program that has just
been recorded.
Deleting files
You may delete any files that is
correctly recorded or stored in
either of storage media (USB or
MMC/SD card). Follow the steps
specified below to delete files:
In USB/MMC card play mode:
1
Press STOP button to stop
playback and enter Browser
mode.
2
Locate the file that is needed to
be deleted via the SKIP buttons.
3
Press DELETE button to delete
the chosen file, then press
PLAY/PAUSE button to confirm.
Repeat the steps above to delete
more files.
www.morphyrichardsaudio.com
NOTE: If the Radio recording
performance is not ideal, try to
find another place with better
reception. If the performance is
still not acceptable, switch the
12
29112 rev1
1/9/06
09:40
Page 14
Menu operation
FM mode from ST to MONO.
Timer record
1
Insert the device that is to be
recorded to : into its correct slot
(SD card or USB device).
2
Press the MENU button and use
the SKIP +/- button to advance
to TIMER and press
PLAY/PAUSE.
3
4
5
6
‘ON TIME’ is displayed. Press
the PLAY/PAUSE button, use
the SKIP +/- button to set the
hour. Press PLAY/PAUSE and
use the SKIP +/- buttons again
to set the minutes. Press
PLAY/PAUSE.
Press MENU button in any
mode to go to menu mode.
2
Press
or
buttons to
select function setting in same
level as below chart.
3
Press PLAY button to confirm
function setting or go to next
level of menu chart.
4
Press MENU button to go back
previous chart level of menu
chart.
5
Press STOP button to exit menu
mode.
‘ON TIME’ is now displayed
again. Use the SKIP +/- buttons
to advance to ‘OFF TIMER’. Use
the same process as point 3 to
set this function.
‘OFF TIMER’ is now displayed
again. Use the SKIP +/- buttons
to advance to ‘SOURCE’. Press
PLAY/PAUSE and use the SKIP
+/- buttons to advance to ‘PRE
REC’. Press PLAY/PAUSE.
‘RADIO’ is now displayed. Use
the SKIP +/- buttons to choose
between radio or AUX. Press
PLAY/PAUSE to select.
7
If RADIO is selected, PRC 01 is
displayed. Use the SKIP +/buttons to advance to the
desired. Preset radio station in
FM.
8
Use the MENU button to return
to the main screen.
9
1
Press the ON/STANDBY button.
In short, details please refer to
the menu structure table. (Page 14)
Other Functions
EQ button (remote
control only)
Press EQ to toggle the EQ effect
of the system; the EQ effect will
change between
FLAT - ROCK - CLASSIC - POP
- JAZZ
X-Bass button
Press this button to turn on or
off the bass boost button
function. It will turn off all EQ
settings.
Vol +/- buttons
Press these buttons to increase
or decrease the volume level.
The volume level can be
changed from 0-30.
10 Press the TIMER button.
NOTE:The back light will come
on five minutes before the
recording time to check the SD
card or USB device is present.
13
www.morphyrichardsaudio.com
Mute button (remote
control only)
Press this button to turn mute
on or off. In mute or mode, the
sound is cut off.
29112 rev1
1/9/06
Menu
09:40
Page 15
Record
Menu structure table
Rec to USB
Rec to SD
Clock
Setting Clock
Timer
Setting On
Time
Setting Off
Time
Source
Pre Rec
Radio
Volume
Disc
AUX
Present 1
Present 20
USB
Card
Tuner
EQ
Custom
Bass
Jazz
Rock
+10
-10
Treble
Classic
+10
-10
Pop
Flat
Bass
ON
OFF
ID3
ON
OFF
YES
Format
UK Helpline 0870 060 2614
NO
Ireland Helpline 1800 409119
14
29112 rev1
1/9/06
09:40
Page 16
Compact disc
Warning labels
Always use compact discs
bearing the mark shown
WARNING: To reproduce the risk
of an electric shock, do not
expose this application to rain or
moisture.
Handling discs
•
Removing the disc from its
storage case and load it.
•
Do not touch the reflective
record surface.
•
Do not stick paper or write
anything on the surface.
•
Do not bend the disc.
Storage
•
Store the disc in its case.
•
Do not expose discs to direct
sunlight or high temperatures,
high humidity or dusty places.
Cleaning a disc
•
Should the disc become soiled,
wipe off dust, dirt and
fingerprints with a soft cloth.
•
The disc should be cleaned from
the centre to the edge.
•
Never use benzene, thinners,
record cleaner fluid or anti static
spray.
•
Be sure to close the CD door so
the lens is not contaminated by
dust.
•
15
Do not touch the lens.
www.morphyrichardsaudio.com
ATTENTION: To
reduce the risk
of an electric
shock, do not
remove the
cover. There are no user
serviceable parts inside the unit.
Refer any servicing to qualified
personnel.
Lightning flash will
arrowhead symbol within the
triangle is a warning sign
alerting the user of ‘dangerous
voltage’ inside the unit.
The exclamation point within
the triangle is a warning sign
alerting the user of important
instructions accompanying the
product.
To prevent fire or shock hazard
do not expose this apparatus to
dripping or splashing.
Ventilation warning
The normal ventilation of the
product shall not be impeded for
intended use.
Maintenance
Do not expose your system to
extreme of temperatures. The
product should be kept in a
warm environment free from
dust and damp. For external
cleaning use only a soft, clean,
damp cloth. Use of detergents
may damage the finish.
29112 rev1
1/9/06
09:40
Page 17
Recorded file
structure and bit rate
table
FM mode
AUX IN mode
CD mode
File directory
FM00001
AUX00001
CD00001
File name
FM00001.mp3
FM00002.mp3
AUX00001.mp3
AUX00002.mp3
CD00001.mp3
CD00002.mp3
Bit rate
96kbps
128kbps
128kbps
NOTE:
•
When the timer function is set,
all buttons are locked except
TIMER, MUTE, VOL +/- MUTE
buttons.
•
In the starting time, the portable
stereo will advance 5 minutes to
turn on for searching storage
device,and the portable stereo
will increase the volume 0 to
pre-set volume level within 10
seconds.
•
Timer record only for FM and
AUX record to USB storage
device or memory card.
•
You can not copy music files
between USB and SD card
alternately.
UK Helpline 0870 060 2614
Ireland Helpline 1800 409119
16
29112 rev1
1/9/06
09:40
Page 18
ID3
The system default setting is
ID3 ON, support up to ID3 V2.0
If the system set to ID3 ON,
and the unit is playing MP3, the
music info is displayed.
If the system set to ID3 OFF,
LCD will show track no. and
play time.
Tips for supporting
famous MP3 players
Due to the legal issue, we can
not edit the structure of the
following MP3 players. Please
follow below after ripping.
Creative ZEN series
1
Enable the removable disk
function before plug into the
unit (Menu-Extras-Removable
disk).
2
After ripping, plug the Creative
to the PC and move the ripped
file into Creative MP3 structure
by its software.
Sony series
1
After ripping, plug the Sony
MP3 player to the PC.
2
Move the ripped file into Sony
MP3 structure by SonicStage.
iPod series
17
1
After ripping, plug the IPod
MP3 player to the PC.
2
Move the ripped file into the
iPod MP3 structure by iTune.
www.morphyrichardsaudio.com
29112 rev1
1/9/06
09:40
Page 19
Technical
Specification
AC power supply:
Max. AC power consumption:
Remote control battery:
Speakers:
Max. output power:
Radio:
MP3 Bitrate (Playback):
WMA Bitrate (Playback):
MP3 Bitrate (Encoding):
Compatible disc:
230 V-50HZ
70W
1 x CR2025
4” woofer, 2" ” tweeter
2 x 15W (Max THD 10%)
FM 87.5MHz - 108MHz
MW 522kHz - 1620kHz
8 - 320kbps and VBR
32 - 320kbps
CD/AUX - 128 kbps,
Radio - 96kbps
CD / CD-R / CD-RW
The system is for indoor
use only.
WARNING: This unit
uses a laser beam. To
prevent an accident
occurring the unit
should only be opened
by a qualified engineer.
If the door interlocks
become defective the
laser may cause
invisible radiation.
Avoid exposure to the
beam.
Electrostatic
discharge
In case of malfunction due
to electrostatic discharge
just reset the micro system
(reconnection of power
may be required) to resume
normal operation.
UK Helpline 0870 060 2614
Ireland Helpline 1800 409119
18
29112 rev1
1/9/06
09:40
Page 20
Guarantee
Morphy Richards products
are manufactured to
internationally accepted
quality standards. In
addition to your statutory
rights. Morphy Richards
guarantee your product to
be free from manufacturing
and component defects for
a period of TWO YEARS
from date of purchase.
If your product proves to
be defective within 28 days
of purchase, your Morphy
Richards dealer from who
the product was purchased
will be pleased to replace it
free of charge.
Should your product
develop a defect within the
guarantee period but after
the replacement period,
please return the product
to the following address,
together with the proof of
purchase, brief details of
the symptoms and your
own name and address
Your post office will provide
a certificate of posting. The
product will be repaired
and returned you promptly.
For electrical products sold within the
European Community. At the end of the
electrical products useful life it should
not be disposed of with household
waste.
Please recycle where facilities exist.
Check with your Local Authority or
retailer for recycling advice in your
country.
The After Sales Division
Morphy Richards Ltd
Mexborough, South Yorkshire,
England, S64 8AJ
Morphy Richards products are intended for household use only.
Morphy Richards has a policy of continuous improvement in product quality and
design. The company, therefore reserves the right to change the specification of its
models at any time.
Helpline (office hours)
UK 0870 060 2614
Republic of Ireland 1800 409119
AD29112 MUK Rev 1 08/06
For details of other products in the Morphy Richards range please see our website . . .
15
www.morphyrichardsaudio.com
19