1
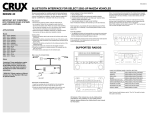
GENUINE
CAR-NAVIGATION UNIT
INSTALLATION INSTRUCTIONS
Thank you for purchasing a genuine Mazda accessory.
Before removal and installation, be sure to thoroughly read these instructions.
Please read the contents of this booklet in order to properly install and use the
car-navigation unit. Your safety depends on it.
Keep these instructions with your vehicle records for future reference.
WARNING
• There are several
WARNING and
CAUTION sections in this booklet concerning
safety when installing or removing the car-navigation unit. Always read and follow them
in order to prevent injuries, accidents, and possible damage to the vehicle.
WARNING: Indicates a situation in which serious injury or death could result if
the warning is ignored.
CAUTION: Indicates a situation in which bodily injury or damage to the vehicle
could result if the caution is ignored.
• For areas indicating the tightening torque in this instruction manual, tighten to the
specified torque using a torque wrench. For areas in which the tightening torque is
indicated inside parentheses ( ), the tightening torque is indicated as a reference value,
however tightening using a torque wrench is not necessary.
• Do not modify the car-navigation unit.
• Do not install the car-navigation unit in any way other than described in the following
instructions.
• If in any doubt, please ask your Mazda dealer to install the accessory in order to
prevent errors in installation.
• If you have any questions about the use of the accessory, ask your Mazda dealer for
proper advice before using it.
• Mazda and its suppliers are not responsible for injuries, accidents, and damage to
persons and property that arise from the failure of the dealer or installer to follow these
instructions.
• To ensure safety and reliability of the work, installation, removal and disposal work
must be carried out by an Authorized Mazda Dealership.
• Be careful not to lose removed parts, and be sure that they are kept free from
scratches, grease or other dirt.
PART NAME: CAR-NAVIGATION UNIT
PART NUMBER: GJY1 79 EZX (US/CANADA)
GJY2 79 EZX (MEXICO)
VEHICLE: MAZDA6
NOTE
To the dealer
• Please turn over these instructions to the customer after installation.
To the customer
• Keep these instructions after installation. The instructions may be necessary
for installing other optional parts or removal of this accessory.
• Should the vehicle or this accessory be resold, always leave these instructions
with it for the next owner.
1
GJY179EZX_00
NOTE: Requires factory installed 5.8” display. Not needed on vehicles with the
Technology Package (they already have factory navigation). All parts are the
same as OE (including SD card KD37-66-EZ1).
1. PARTS
▼ PARTS LIST
NOTE:
• Before installation, verify that the kit includes all the following parts and that they are free of dirt, scratches,
or damage.
• GJY1 79 EZX (US/CANADA), GJY2 79 EZX (MEXICO)
Part
Part name
Qty.
Car-navigation
unit
1
Owner’s
manual
1
Part
Part name
Qty.
Lid-NAVI
1
Part
Part name
Installation
instruction
Qty.
1
2. BEFORE INSTALLATION
▼ REQUIRED TOOLS
☆Phillips screwdriver
☆Torque wrench
☆Tape-wrapped flathead screwdriver
☆Socket wrench (10mm) or Spanner wrench (10mm)
☆Clean rag (soft cloth)
WARNING
• To prevent short related accidents while performing procedures, disconnect the negative battery cable
before beginning any work.
• When disconnecting the connector, hold the connector itself to remove while pressing the connector lock.
• Do not apply excessive force to the wiring harness as it could cause an open circuit.
• When locking connectors, listen for a click that will indicate they are securely locked.
• Be careful not to pinch the wiring harness. Otherwise, the harness may be broken.
CAUTION
• When removing and installing vehicle parts, make sure they are clean with no scratches. Also, be sure to
cover the vehicle body with protectors or mats when removing/installing parts to prevent scratches and dirt.
NOTE:
• Refer to the applicable Workshop Manual for removal and installation of vehicle parts. Not following the
procedures for removal/installation in the Workshop Manual could result in an accident or vehicle
malfunction.
• When the negative battery cable is removed, the clock, radio, trip meters and other memories will be
erased. Before performing work, record the content of the memory.
2
3. VEHICLE PARTS REMOVAL
NOTE:
z The following vehicle parts removal procedure is for left-hand drive vehicles. Perform the same procedure
for right-hand drive vehicles.
Negative battery cable disconnection
1. Set the selector lever to P range.
(AT vehicles only)
WARNING
• When removing/installing the parts, park the vehicle on
level ground and apply the side brake securely. Be sure to
turn the ignition switch off, otherwise the vehicle can move,
causing personal injury or vehicle damage.
Negative
battery cable
2. Disconnect the negative battery cable and wrap tape around it
to insulate.
WARNING
• When the negative battery cable is connected during
operation, it may cause electric shock or other personal
injuries. Disconnect the negative battery cable before
removal/installation.
4. INSTALLATION
CAR-NAVIGATION UNIT INSTALLATION
Pocket Assy Removal
Lid-Pocket
1. Open the lid-pocket, remove the pins (1 each, left and right)
from the underside of the lid-pocket, and remove the lid.
• Dispose of the removed lid-pocket.
Pin
3
2. Insert two pieces of wire or two bands (use hard acrylic bands)
into the locations shown in the figure and secure both ends.
A
(Figure shows bands being used)
3. Pull the wires or bands in the direction shown in the figure and
pull out the pocket assy.
A
Wire or band
Lower panel
Pocket
assy
Wire or band
Vehicle
front
Lower panel
SEC. A-A
4. Remove the wiring harness clips (2) on the back of the pocket
Harness
clips
assy.
• Be careful not to apply excessive force to the wiring
harness when removing the connectors.
5. Disconnect the connectors (3).
• Reuse harness clips(2).
• Dispose of the removed pocket assy.
Connectors
Car-navigation unit Installation
USB
connector
Car-navigation unit
1. Connect the USB, GPS antenna, and +B/ACC connectors to the
+B/ACC
connector
car-navigation unit.
GPS antenna
connector
4
2. Install the wiring harness clips(2).
Harness clip installation hole
For
+B/ACC
Harness
clip
For GPS
antenna
harness
clip
+B/ACC harness clip
Car-navigation unit
GPS antenna
harness clip
3. Press the clips (4 locations) shown in the figure and install the
Car-navigation unit
car-navigation unit to the lower panel.
CAUTION
Clips
Clips
Clips
Clips
• Be careful not to press the car-navigation unit when
installing it.
Lower panel
4. Install the lid-NAVI included in the kit.
Pin
Pin
Lid-NAVI
5
GPS CONNECTOR INSTALLATION(US/CANADA only)
Glove compartment removal
1. Push the glove compartment in the direction of the arrow (1)
Hook A
and hooks A.
2. Pull the stay damper in the direction of the arrow (2) shown in
the figure and remove the hook B.
Hook A
(1)
Hook A
(1)
CAUTION
• If the glove compartment is closed without being joined to
the stay damper, the stay damper may be damaged. Verify
that the stay damper is joined to the glove compartment
Stay damper
(2)
before closeing the glove compartment.
Glove compartment
Stay damper
Hook B
3. Pull down the glove compartment in the direction of the arrow
(3).
4. Pull the glove compartment in the direction of the arrow (4) and
remove it while detaching hooks C.
(3)
(4)
Hook C
GPS connector installation
1. Disconnect the connector from the unit and connect it to the
connector shown in the figure.
2. Install the glove compartment in the reverse order of removal.
GPS connector
6
5. OPERATION CHECK
1. Connect the negative battery cable and perform an operation check by referring to the owner’s manual
applicable to the vehicle.
2. If there is any malfunction, disconnect the negative battery cable and verify that each connector is properly
connected and the wiring harnesses are not damaged or pinched, then perform the operation check again. If it
does not operate normally, contact the dealer where the unit was purchased.
■ After installing the car-navigation unit, verify the connections of the GPS antenna, +B/ACC, and USB
connectors using the following procedure:
Audio off screen
Connection verification of GPS antenna connector
1. Turn the ignition switch to the ON position.
2. After the opening screen ends, the Audio off screen is
displayed.
3.
Press the POWER/VOLUME dial to switch to the on screen.
4.
Press the POWER/VOLUME dial and SEEK UP button at the
POWER/VOLUME dial
Audio on screen
SEEK UP button
same time on the Audio on screen (press POWER/VOLUME
dial a little earlier).
POWER/VOLUME dial
5.
After switching to the AUDIO system screen, touch the
buttons in the order of “1”, “5” and “ENTER” on the screen.
7
6.
After switching to the Vehicle and Navi Signal Check screen,
touch “
“on the screen to switch the display screen to
“NAVI GPS ANT”. Verify that “NAVI GPS ANT: OK” is
displayed. If not OK, verify the connection condition again.
7.
Press the POWER/VOLUME dial to switch to the AUDIO
screen.
8.
Switch the ignition off
Connection verification of +B/ACC connector and USB connector
Audio off screen
1.
2.
Turn the ignition switch to the ON position.
When the Audio off screen is displayed after the opening
screen ends, press the NAV button.
NAV button
3.
When the screen in the figure on the left is displayed, the
connection verification is completed. If it is not displayed,
verify the connection condition again.
• The procedure from this screen is performed by a user.
This procedure ends on this screen.
• If the continue button is pressed, perform the “Reset
procedure (Pg.9)”.
Negative battery cable
4.
Switch the ignition off.
5.
Connect the negative battery cable.
Tightening torque: 4.0-6.0 N・m
• Refer to “Required servicing after disconnecting/connecting
negative battery cable” in the vehicle workshop manual or
the owner’s manual to restore the vehicle functions.
8
Reset procedure
• This procedure is in Step 3 of, “Connection verification of
+B/ACC connector and USB connector (Pg. 8)”, and is
implemented only if the “Continue” button is pressed by
mistake and the screen advances too far.
1. Touch "No”.
2. Touch “Join Map Share”.
3. Touch “Continue”.
4. Touch “Yes”.
5. Touch “I agree”.
9
6. Touch the screen.
7. Touch “Setting”.
8. Touch the location shown in the figure.
9. Touch “Reset factory setting”.
10. Touch “Yes”.
10
11. Touch “Yes”.
12. Setting is finished when “Welcome” screen appears.
13. Switch the ignition off.
11
Date
VIN
,
,
Person in
charge
Checked
Approved
Car-navigation unit
INSTALLATION
INSPECTION
SHEET
MAZDA6
GJY1 79 EZX (US/CANADA)
GJY2 79 EZX (MEXICO)
Perform the following inspections
Check
1. Inspection items after installation
•
Verify the fitting between the vehicle part and the installed part, and inspect for damage or
dirt.
Check
•
When connecting connectors, verify the connection again to prevent poor connection or
mis-connection. (Insert two times.)
2. Vehicle parts reinstallation
Inspected part
Negative battery terminal
Function restore procedure after
removal/installation of battery
Inspection
item
Inspection
Torque
change
Is the nut for the negative battery terminal tightened to
the specified torque?
Operation
Have the vehicle’s functions been restored by referring
to “Required servicing after disconnecting/connecting
negative battery cable”, in the vehicle workshop manual
or the owner's manual?
Check
3. Installation of accessory, operation check
Inspected part
Car-navigation unit
Inspection
item
Check
The term of validity for this sheet : 3 year
Inspection
Was “5. Operation check” performed?
Check