1
PRINTER INTERFACE TYPE 60
OPERATOR’S MANUAL
Trademark Notice:
Epson and Epson ESC/P are registered trademarks of Seiko Epson Corporation.
Epson LQ-2500, Epson FX-800/1000, Epson FX-86e/286e, Epson GL, Epson LQ, Epson FX,
Epson LQ-1050/850, Epson LQ-500, Epson LQ-1500, Epson FX-85, Epson FX-80, Epson GL Identity
Card, Epson Roman T, and Epson Sans Serif U are registered trademarks of Epson America Inc.
IBM and IBM PC are trademarks of International Business Machines Corporation.
HP LaserJet, HP LaserJet+, HP LaserJet 500, HP LaserJet series II, HP LaserJet IIP, HP LaserJet series III, HP LaserJet IIIP, and HP LaserJet IIISi are trademarks, and Hewlett-Packard and PCL are
registered trademarks of Hewlett-Packard Company.
LocalTalk is a trademark of Apple Computer, Inc.
Barf Watcher’s Field Identification Kit is a trademark of the Kanagawa Kulture Klub
Centronics is a trademark of Centronics Data Computer Corporation.
ITC Zapf Dingbats is a U.S.registered trademark of International Typeface Corporation.
Bitstream is a registered trademark of Bitstream Inc.
Speedo and FaceLift are trademarks of Bitstream Inc.
CG Times is a product of AGFA Compugraphic, a division of AGFA Corporation.
Univers is a U.S. registered trademark of Linotype AG and its subsidiaries.
MS-DOS is a registered trademark and Windows is a trademark of Microsoft Corporation.
CONTENTS
INTRODUCTION
ABOUT THE PRINTER INTERFACE
What this Printer Interface Can Do
Sharing the Printer with Two Computers
Working with the Printer and the Fax Machine at the Same Time
Operating the Printer
CONVENTIONS
ABOUT THIS MANUAL
1
1
1
2
3
3
4
OPERATION PANEL
BUTTONS
INDICATORS
DISPLAY
5
6
6
INSTALLATION
INSTALLING THE INTERFACE KIT
CONNECTION TO THE COMPUTER
TESTING THE PRINTER
Printing a Test Page
Printing the Status Sheet and Font Samples
OPTIONAL KITS
Memory Expansion Board
Optional Font and Emulation Mode Cards
Optional Font Cartridges
CONNECTING THE PRINTER TO TWO COMPUTERS
Multi-user Modes
Configuring the Serial and Parallel Channels
7
7
8
8
9
10
10
11
12
13
13
13
BASIC OPERATIONS
TURNING THE PRINTER ON LINE AND OFF LINE
FORM FEED
RESETTING THE PRINTER
SELECTING THE CASSETTE FOR COMPUTER PRINTING
14
14
15
15
SELECTING THE EMULATION MODE
OVERVIEW
HP LASERJET III EMULATION MODE
EPSON LQ AND FX EMULATION MODES
CHANGING THE EMULATION MODE
Using the MODE ASSIGN Feature
Using an Emulation Control Language
16
16
17
17
17
18
ADJUSTING THE PRINTER SETTINGS
INTRODUCTION
Selectype Mode (Printer Setup Mode - Function 35)
Level 1 Features
Level 2 Features
Using Selectype Mode
The Display
Buttons
Sample Selectype Procedure
SELECTYPE LEVEL 1 FEATURES
How to Enter Selectype Level 1
INPUT
PAGE SIZE
COPIES
ORIENT.
FONT
STATUS SHEET
FONT SAMPLE
SUB CONFIG.
SYSTEM CONFIG.
FULL PRINT
MEMORY LEFT
T-OFFSET and L-OFFSET
SAVE MACRO
LOAD MACRO
POWERON MACRO
DELETE MACRO
SELECTYPE LEVEL 2 FEATURES
How to Enter Selectype Level 2
TEST PRINT
MODE ASSIGN
I/F CONFIG. (Interface Configuration)
Parallel Channel
Serial Channel
RX-BUFFER SIZE (Receive Buffer Size)
CH (Channel)
21
21
21
22
23
23
23
24
26
26
27
27
27
28
28
28
28
28
29
29
30
30
31
32
33
33
34
34
34
34
35
35
36
37
38
CH TIMEOUT (Channel Timeout)
AUTO CONT (Auto Continue)
P-CONFIG SAVE (Power-up Configuration)
FACTORY RESET
VERSION
PAGE COUNTER
STANDBY
40
41
41
42
42
43
43
SOLVING PROBLEMS
STATUS AND ERROR MESSAGES
PRINTING PROBLEMS
PROBLEMS WITH GRAPHICS
PROBLEMS WITH SELECTYPE MODE
PROBLEMS WITH OPTIONAL CARDS AND CARTRIDGES
DATA DUMP MODE
RESETTING THE PRINTER
44
48
50
51
52
53
54
APPENDIX A. SPECIFICATIONS
TABLE OF SPECIFICATIONS
A-1
APPENDIX B. HP EMULATION MODE
HP EMULATION MODE VS HP LASERJET III
Printable Area
Character Clipping
Paper Handling
Resident Fonts
Downloaded Fonts
Symbol Sets
OPERATING AS A LASERJET IIISi
USING SELECTYPE MODE TO ADJUST THE HP EMULATION MODE
ORIENT (Page Orientation)
FONT
SUB CONFIG.
AVAILABLE FONTS AND SYMBOL SETS
Resident Bitmap Fonts
Resident Scalable Fonts
Symbol Sets
HP EMULATION COMMAND SUMMARY
B-1
B-1
B-2
B-2
B-2
B-2
B-3
B-4
B-5
B-5
B-5
B-7
B-8
B-8
B-9
B-9
B-21
APPENDIX C. EPSON LQ AND FX EMULATION
MODES
OPERATING AS AN LQ OR FX PRINTER
Printable Area
USING SELECTYPE MODE TO ADJUST EPSON LQ AND FX
EMULATION
ORIENT (Page Orientation)
FONT
SUB CONFIG.
AVAILABLE FONTS AND SYMBOL SETS
Resident Fonts
Character Sets
LQ AND FX EMULATION COMMAND SUMMARY
C-1
C-1
C-2
C-2
C-2
C-3
C-6
C-6
C-6
C-8
APPENDIX D. OPTIONAL FONT CARDS AND
CARTRIDGES
FONT CARDS AND EMULATION MODE CARDS
Font Cards
Emulation Mode Cards
Caring for Cards
Using Font Cards
Selecting a font with your application software
Selecting a font with the Selectype FONT procedure
Using a font card and a font cartridge at the same time
Using the Epson GL Emulation Mode Card
Recovering from a Card Error
FONT CARTRIDGES
Available Font Cartridges
Selecting a font from a cartridge with your application program
Recovering from a cartridge error
D-1
D-1
D-1
D-2
D-2
D-2
D-2
D-3
D-3
D-4
D-4
D-4
D-6
D-6
APPENDIX E. LIST OF FEATURES
APPENDIX F. CONNECTOR PIN CONFIGURATION
APPENDIX G. STATUS SHEET
GLOSSARY
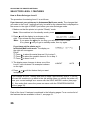
INTRODUCTION
ABOUT THE PRINTER INTERFACE
What this Printer Interface Can Do
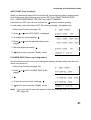
After you have the printer interface kit installed in your fax machine, you will be able to
use the machine as a desktop printer for your personal computer.
To ensure that the printer can be used with a wide range of application programs, emulation modes for three different printer types have been provided. These emulation
modes are for:
❐ HP LaserJet IIIP (3/P/Si mode)
❐ Epson LQ
❐ Epson FX
There is a slot for an optional font cartridge (for a HP compatible font cartridge) and a
slot for an optional font card (for an Epson font card or HP plotter emulation mode
card).
The printer comes with 1 megabyte of memory, and you can add up to an extra 5
megabytes, making a possible total of 6 megabytes.
If you need optional font cards or cartridges, obtain them from your computer store.
The manufacturer of this fax machine does not supply these items, and cannot
guarantee satisfactory operation of the machine with every font card and cartridge
that is available. See Appendix D for more on optional font cards and cartridges.
Sharing the Printer with Two Computers
Your printer has two different interfaces (these will be referred to as channels in this
manual, because the printer’s software uses this term, or its abbreviation "CH"). There
is a Centronics parallel channel and an RS-232C serial channel, and you can connect
one PC to each. The RS-232C channel accepts data from a PC at high speeds up to
19,200 bps. The printer can automatically detect which channel data is coming in on,
and data is printed on a first-in first-out basis.
You can connect the printer to two computers at the same time, using both channels.
This is known as Multi-user mode. There are two basic types of Multi-user mode; these
are described on page 13.
If you wish, you can allocate a different emulation mode to each channel, and different
sets of printer settings. You can also allocate separate parts of the printer’s memory to
each channel. See page 38 for details on how to share your printer between two computers.
1
INTRODUCTION
Working with the Printer and the Fax Machine at the Same Time
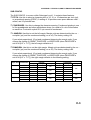
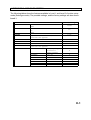
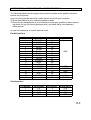
In a few cases, the machine can handle two tasks at the same time. The following tables show how to operate the machine while a job is currently in progress.
1. If you wish to print a file from the computer while the fax machine is busy
Current Task (Fax Machine)
Immediate Transmission
Memory Transmission
Scanning a document and storing it to memory
Receiving a fax message
Printing a fax message from memory
Making a copy
Printing a File from the PC
Not possible; wait until the machine has
finished the current task.
Possible; you can print your file
immediately if you wish.
Not possible; wait until the machine has
finished the current task.
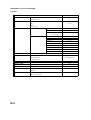
2. If you wish to use the fax machine (or if someone tries to send you a fax message)
while you are printing a file from the computer
Desired Use of the Fax Machine
Immediate Transmission
Memory Transmission
Scanning a document and storing it to memory
Receiving a fax message
Printing a fax message from memory
Making a copy
Whether Possible or Not
Not possible; wait until the machine has finished
printing.
You can store a document in the memory, but
transmission will not begin until at least 10
seconds after the machine has finished printing.
Possible; you can start immediately, even though
the machine is printing a file from the computer.
Not possible; wait until at least 10 seconds after
the machine has finished printing.
Not possible; wait until the machine has finished
printing.
Note: You can tell if the machine is printing a file from the computer by looking at
the
indicator (you can tell by looking at the indicator even if the machine is
in fax standby mode). When it is flashing, the computer is sending data to the
printer. When it is steady, only printing is taking place; the computer is not
sending data.
If the indicator remains steady but nothing is being printed, see Form Feed on
page 14.
While the machine is in printer mode (Function 35), the machine cannot receive fax messages.
2
INTRODUCTION
Operating the Printer
On Line
You can print data from your computer at any time, if the printer is on line (see page 14
for how to switch the printer on line).
Off Line
No data can be received from the computer if the printer is off line. However, any data
in the printer buffer can be printed manually by the Form Feed procedure (see page
14).
Function 35: Printer "Ready"/Set Up Mode (Selectype Mode)
In this mode, you can access a wide range of printer set-up features. Printer setup
mode is called "Selectype" mode. It is described on page 21 and the pages following
that. You can switch between On Line and Off Line if the printer "READY" display is
showing, but not if the printer is in Selectype mode.
To enter Printer Ready/Set Up Mode, use Function 35
Function
3
5
Yes
You can combine these into a keystroke program to enter this mode quickly. For information on how to make a keystroke program, see the Operator’s Manual for your fax
machine.
To leave Printer Ready/Set Up mode:
Return to fax standby mode only from the printer "READY" display (shown above
right). To return to the "Ready" display, press repeatedly.
Press Function to return to fax standby mode.
Also, if you do not touch the machine for 4 minutes while it is in printer mode, the machine will return to fax standby mode.
CONVENTIONS
The following conventions were used when writing this manual.
Keynames: Mainly, these have been placed in a different typeface, and enclosed in a
box. For example: Function means "Press the Function key". For the arrow keys,
(for example) means "Press the key".
Displays: Messages seen in the bottom line of the display panel are shown in a larger
box, normally to the right of the operation that causes the display to appear.
3
INTRODUCTION
ABOUT THIS MANUAL
Operation Panel: This section will acquaint you with the buttons and indicators on the
operation panel that are for use only with the printer. It also outlines how to access the
various printer control functions.
Installation: This section shows you how to connect your computer to the printer and
check that it is working properly. It also tells you how to install the various optional kits
that you can get for your printer, such as extra memory.
Basic Operations: This section shows you how to perform basic operations, such as
resetting the printer and switching it on or off line.
Selecting the Emulation Mode: This section tells you how to select one of the emulation modes.
Adjusting the Printer Settings: This section shows you how to modify the machine’s
settings.
Solving Problems: This section explains any error messages that may appear on the
screen while you are using your fax machine as a printer. It also tells you how to solve
some common problems. However, for mechanical problems such as paper jams, refer
to your fax machine’s Operator’s Manual.
Appendix A. Specifications: This contains a list of the printer’s most important specifications. Also see the Specifications section in your fax machine’s manual.
Appendix B. HP Emulation Mode: This section contains technical information on the
HP LaserJet emulation mode. It also shows you how to fine-tune the emulation mode
to adjust the appearance of your output.
Appendix C. Epson Emulation Modes: This section is similar to Appendix B, except
that it deals with the Epson emulation modes.
Appendix D. Optional Font Cards and Cartridges: This section gives details about
the optional cards and cartridges that you can use with this printer interface kit.
Appendix E. List of Features: This section lists up all the features that can be adjusted with "Selectype" mode, along with their factory settings.
Appendix F. Connector Pin Configuration: This section shows the names of the signals present on the serial and parallel connectors at the back of the machine. Show
this to a technician if you are having problems.
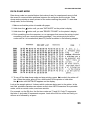
Appendix G: Status Sheet: This gives a sample status sheet printout.
4
OPERATION PANEL
BUTTONS
To operate the printer, you will use the four buttons marked
, , , and . These
keys are only for use with the printer (that is, they do not operate as cursor keys when
inputting telephone numbers). See your fax machine’s Operator’s Manual to see where
these are on your fax machine.
The main uses of these four printer mode buttons are as follows.
Press this to enter printer setup mode from printer "Ready" mode. Set up mode is also
known as Selectype mode. Also, when in printer setup mode, press this repeatedly to
return to printer "Ready" mode.
This button has three main functions:
❐ If the (Line Fail) indicator is flashing, read the error message on the display and
correct the problem (see page 44 for details). Then, press this button to resu me
printing.
❐ If you hold this button down for several seconds, RESET appears on the display and
all printer settings are returned to their previously stored settings. If you continue to
press this button after RESET appears, INITIALIZE will appear on the display, and
the printer settings will return to the power-on default settings. For more on resetting
the machine, see page 15.
❐ If you switch the printer off line then press this button during a multi-copy print run,
any remaining copies will be canceled.
When the printer is off line and the
(Feed) indicator is lit, press this button to print
out the data remaining in the printer’s memory. If you are using more than one channel,
you can print data received by each channel alternately. See Form Feed on page 14.
(As a reminder, note that this arrow key points towards the printout tray.)
Watch the
(on line/off line) indicator, and press this button to switch the printer be tween on line and off line modes. Do this only when the machine is in printer "Ready"
mode. (As a reminder, note that the arrow on the arrow key points the same way as the
arrow in the On Line indicator.)
5
OPERATION PANEL
INDICATORS
To monitor the printer’s status, look at the display panel. The various messages that ap pear on the display panel are explained on page 44. Also, there are three indicators for
use only with the printer. See your fax machine’s operator’s manual to see where these
are on your fax machine. The indicators are as follows.
Line Fail indicator
This indicator flashes when a printing error is detected. An error message appears on
the display (see page 44 for details concerning error messages).
❐
❐
❐
❐
Feed indicator
If this indicator is flashing rapidly: The printer is receiving data from the com puter, or receiving data and printing previously received data at the same time.
If this indicator is lit and the printer is printing: All data has been received and
printout is in progress.
If this indicator is lit and the printer is not printing: Data has been received and
stored in the printer’s buffer, but it has not yet been printed. See Form Feed
(page 14).
If this indicator is flashing slowly: The printer is receiving data through an chan nel other than the currently selected channel, using Autosense mode (see page 13
for more details on channels and Autosense mode).
On Line indicator
This indicator is lit when the printer is on line , indicating that the printer is ready to re ceive data. If the printer is off line, the indicator is out. The indicator flashes while the
printer is switching between on and off line status.
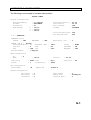
DISPLAY
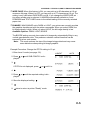
The display on the operation panel shows the printer’s current status. When the ma chine is in printer "READY:" mode , the bottom line of the display should appear some thing like the following.
READY indicates
standby mode.
This indicates the currently active
channel (P: Parallel, S: Serial).
6
This indicates the emulation mode that
is currently selected for this channel.
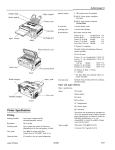
INSTALLATION
INSTALLING THE INTERFACE KIT
Make sure that the machine is unplugged before you have the interface kit installed.
The installation must be carried out by a qualified service technician.
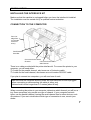
CONNECTION TO THE COMPUTER
Font Cartridge Slot
(on the side
of the machine)
Font/Emulation
Card Slot
Connector for the Serial
Channel
Connector for the Parallel Channel
There is no cable provided with the printer interface kit. To connect the printer to your
computer, you will need either:
❐ A cable for the parallel channel, also known as a Centronics cable.
❐ A cable for the serial channel, also known as a null modem RS-232C cable.
If you plan to connect two computers, you will need one of each.
Make sure that the computer and the printer are both switched off and unplugged
before connecting or disconnecting the cable at either end.
Cables should not be longer than 2.5 metres [about 8 feet].
When connecting the printer to your computer, determine which channel you will be us ing. Some computers only provide one type of channel. If your computer has both
types, use the parallel channel, leaving the serial channel free for other devices, such
as modems. If you are in doubt about which type of connection to use, consult your
dealer.
7
INSTALLATION
The printer is initially set up for the parallel channel. If your computer has a parallel
channel, you should be able to connect it up with a properly shielded, twisted pair ca ble and use it without having to change any of your printer’s settings.
If you have to use a serial channel, you may also need to adjust some of the serial
channel settings, such as Baud rate (see page 36), to match your computer’s settings.
If you plan to connect a computer to each channel, see page 13.
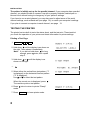
TESTING THE PRINTER
The printer has two built-in tests: the status sheet, and the test print. These tests let
you check the operation of your printer and obtain information on printer settings.
Printing a Test Page
1.
Function
3
5
Yes
2. Hold down
until the display is as shown on
the right. Then release it immediately.
Note: If you did not hold down
for long
enough, press
twice, then repeat
step 2.
3. Hold down
or until the display is as
shown on the right.
4.
5. Select either the vertical lines test pattern ("1"
is displayed) or the horizontal line test pattern
("2" is displayed).
Use or to select the test pattern.
When the correct one is displayed, press
The machine prints a test pattern.
6. Press
mode.
twice to return to printer "Ready"
7. Press Function to leave printer mode.
8
.
INSTALLATION
Printing the Status Sheet and Font Samples
1.
Function
3
5
Yes
2. Press until the screen is as shown on the
right, then release it immediately.
3. Hold down
until STATUS SHEET (or
FONT SAMPLE if you need the font sam ples) appears on the display.
4. Press twice to print the status sheet (or the
font samples). The printer may take a few
seconds to get started on this.
5. Press
mode.
twice to return to printer "Ready"
6. Press Function to leave printer mode.
Note: ❐ The status sheet shows the printer’s current settings. You can use macros
to store various sets of printer settings for different uses of the printer. If you
wish to print the settings stored with each macro, perform the LOAD
MACRO routine first, then follow the above steps.
For full information about macros: See pages 31 to 33 .
❐ If you have already set the printer up in Individual Multi-user mode:
The following display appears at step 2.
Press to select the serial (S) channel, or
to choose the parallel (P)
channel, then go on to step 3.
❐ If you have already set the printer up in Autosense Multi-user mode:
You can only print out the status sheet or font samples for the channel that
was displayed on the screen immediately before you started this procedure.
If you wish to see the settings for the other channel, you will have to select
the other channel using the CH feature (for example, change from AUTO SENSE S to AUTOSENSE P). Then print the status sheet or font samples.
For information on the CH feature, see page 38.
❐ A sample of the status sheet is shown in Appendix G.
9
INSTALLATION
OPTIONAL KITS
Memory Expansion Board
Your machine has 1 megabyte of memory for the printer (this memory is separate from
the memory that is used for facsimile document memory). If you need some more mem ory for your printer, contact your dealer. The printer can have a maximum of 6 mega bytes.
The installation procedure is as follows.
[B]
[A]
[C]
WARNING
Do not remove any screws other than the four screws mentioned in this procedure.
High voltages are present inside the machine. Do not attempt to install the memory
board unless the machine is turned off and the power cord is unplugged.
Also, do not touch any of the contacts on the machine’s circuit boards, because
many of the components can be destroyed by the static electricity on you or your
clothing.
1. If there are any messages stored in your fax machine’s memory, print them (see
"Substitute Reception" in your fax machine’s Operator’s Manual.
2. Turn off the power, and unplug the machine from the wall socket.
3. Remove covers [A] and [B]. See the above Warning.
4. Insert the RAM chips into the sockets on the memory expansion board [C]. See the
instructions provided with the memory board for how to do this.
5. Insert the memory expansion board [C].
10
INSTALLATION
6. Put back covers [A] and [B].
7. Plug in the machine, then turn on the power.
Caution
Do not plug in or switch on until everything is connected up.
Optional Font and Emulation Mode Cards
See Appendix D for details on the types of font and emulation mode cards available,
how to use them, and how to look after them.
To install a card, do the following:
1. Make sure that the machine is in printer "Ready" mode and that it is off line (the
indicator must be off).
❐ The
indicator must be off. If it is flashing, the printer is receiving data. If it is lit
but not flashing, press
to print the data that is still in the buffer.
❐ Never insert a card if the printer is on line, or while you are making printer set tings (using Selectype mode), or while the printer is resetting.
2. Hold the card so that the maker’s logo is pointing up and the arrow is pointing to wards the slot.
❐ Make sure that the card is the correct
way up.
❐ The card is slightly bent. Do not try to
flatten it or bend it further.
❐ Do not touch the small gold contacts
along the card’s edge.
3. Carefully slide the card in to the slot.
❐ Do not force it into the slot.
If REMOVE CARD appears on the
display, you inserted the card when the
printer was on line or when the printer
memory contained some data. Remove
the card and press
. Then go back to
step 1 of the installation procedure.
11
INSTALLATION
To take a card out of the slot, do the following:
1. Make sure that the machine is in printer "Ready" mode and that it is off line (the
indicator must be off).
❐ The
indicator must be off. If it is flashing, the printer is receiving data. If it is lit
but not flashing, press
to print the data that is still in the buffer.
2. Grasp the card at the center and gently pull it straight out of the slot.
Never remove a card if the printer is on line, while making printer settings (using
Selectype mode), or while the printer is resetting. If you remove a card while the
printer is in one of these states, a REINSERT CARD message will appear on the
display. An error will also occur if you remove a card while the
indicator is on,
even if the printer is off line. See the error message descriptions (page 44) for
more details.
Optional Font Cartridges
See Appendix D for details on the types of font cartridges available, how to use them,
and how to look after them.
To install a font cartridge, do the following:
1. Make sure that the machine is in printer "Ready" mode and that it is off line (the
indicator must be off).
❐ The
indicator must be off. If it is flashing, the printer is receiving data. If it is lit
but not flashing, press
to print the data that is still in the buffer.
❐ Never insert a font cartridge if the printer is on line, or while you are making
printer settings (using Selectype mode), or while the printer is resetting.
2. Hold the font cartridge so that the label is facing
your left.
❐ Make sure that the font cartridge is facing the
correct way.
3. Press firmly until the cartridge snaps into place.
❐ Do not use excessive force.
If REMOVE CARD appears on the display, you
inserted the cartridge when the printer was on
line or when the printer memory contained some
data. Remove the card and press
. Then go
back to step 1 of the installation procedure.
12
INSTALLATION
To take a cartridge out of the slot, do the following:
1. Make sure that the machine is in printer "Ready" mode and that it is off line (the
indicator must be off).
❐ The
indicator must be off. If it is flashing, the printer is receiving data. If it is lit
but not flashing, press
to print the data that is still in the buffer.
2. Grasp the cartridge at the edge and slowly pull it straight out of the slot.
Never remove a cartridge if the printer is on line, while making printer settings
(using Selectype mode), or while the printer is resetting. If you remove a cartridge
while the printer is in one of these states, a REINSERT CARD message will
appear on the display. An error will also occur if you remove a cartridge while the
indicator is on, even if the printer is off line. See the error message descriptions
(page 44) for more details.
CONNECTING THE PRINTER TO TWO COMPUTERS
Multi-user Modes
Your printer has two channels. One is serial (RS-232C) and the other is parallel (Cen tronics). You can hook up a separate computer to each channel.
If you connect two computers to your printer, you can set up the printer to monitor the
two channels in one of two different ways.
❐ Autosense Multi-user Mode: In this mode, the printer automatically detects which
channel is receiving data, and allocates all the available printer memory to that chan nel.
❐ Individual Multi-user Mode: The printer allocates a fixed proportion of available
printer memory to each channel.
To select one of these, use the CH feature (see page 38 for how to program this fea ture).
Configuring the Serial and Parallel Channels
Your printer will probably work straight away with the default settings. However, if your
computer is having problems communicating with the printer, you may have to adjust
the I/F CONFIG (Interface Configuration) settings (see page 35 and the pages follow ing that). The settings must match the settings for your computer.
13
BASIC OPERATIONS
TURNING THE PRINTER ON LINE AND OFF LINE
The printer must be on line before it can receive data from the computer. When the
printer is off line, it will not accept data from the computer.
To switch between on line and off line:
1. Make sure that the machine is in printer
READY: mode.
Note: If the machine is in fax standby
mode, press Function 3 5 Yes .
2. Press the
key.
The
indicator is lit when the printer is on line, indicating that the printer is ready to
receive data. If the printer is off line, the indicator is out. The indicator flashes while t he
printer is switching between on and off line status.
FORM FEED
If the indicator is lit and the printer is not printing, data has been received and stored
in the printer’s buffer, but it has not yet been printed.
To print the data:
1. Make sure that the machine is in printer
READY: mode.
Note: If the machine is in fax standby
mode, press Function 3 5 Yes .
2. Switch the printer off line (press
), then press
to print.
If the printer is in Individual Multi-user mode: You can specify which channel to
print from. The display will be as follows if you do a form feed.
❐ To print data from the parallel channel, press
.
❐ To print data from the serial channel, press
.
❐ If you do not wish to print data, press
to exit from this procedure.
See page 13 for details on your printer’s multi-user modes.
14
BASIC OPERATIONS
RESETTING THE PRINTER
You may need to reset the printer sometimes.
1. Make sure that the machine is in printer
READY: mode.
Note: If the machine is in fax standby mode, press
Function
3
5
Yes .
2. Hold the
button down for several seconds. RESET appears on the display and
all printer settings are returned to their previously stored settings.
If you continue to press the
button after RESET appears, INITIALIZE will appear on
the display, and the printer settings will return to the power-up default settings.
Caution: If you reset the machine while it is printing, the current page will be printed,
but other data remaining in the printer’s memory will be discarded.
If the printer is in Individual Multi-user mode: You can specify which channel to re set. The display will be as follows if you reset the machine.
❐ To reset the parallel channel, press
, or to reset the serial channel, press
.
❐ If you do not wish to reset any channel, press
to exit from the reset procedure.
If the printer is in Autosense Multi-user Mode: You can only reset the channel that
was displayed on the screen immediately before you reset the printer.
❐ See page 13 for details on your printer’s multi-user modes.
❐ For more on initializing the printer, see page 54.
SELECTING THE CASSETTE FOR COMPUTER PRINTING
If you have installed an optional paper feed unit (assuming your machine can accept
an extra cassette), you can use the following procedure to select which cassette is
used when you print a file from your computer.
1. Make sure that the machine is in standby mode, ready for fax communication.
2. Function 3
6
Yes
3. Either:
❐ Select the standard cassette: 1 Yes
❐ Select the optional paper feed unit: 2 Yes
The machine returns to standby mode for fax communication.
15
SELECTING THE EMULATION MODE
OVERVIEW
Your printer has the following three emulation modes:
❐ HP LaserJet series IIIP
❐ Epson LQ-2500
❐ Epson FX-800/1000 (FX-86e/286e)
In addition, other emulation modes are available by installing optional Epson cards.
See Appendix D for more information.
The emulation mode that you select affects the following:
❐ The printer that you select from your application software’s printer selection menu.
❐ The available symbol sets and fonts, and the available optional font cards or car tridges.
❐ Some features connected with paper handling, such as the printable area.
See Appendix D for more information about the available cards and cartridges.
HP LASERJET III EMULATION MODE
Your printer interface will be in this mode when it is delivered. When your printer is in
this mode (also known as 3/P/Si mode), select one of the following drivers from your
computer application software’s printer selection menu.
❐ HP LaserJet IIISi
❐ HP LaserJet IIIP
❐ HP LaserJet series III
❐ HP LaserJet IIP
❐ HP LaserJet series II
❐ HP LaserJet Plus
❐ HP LaserJet 500
❐ HP LaserJet
If none of the above printers is listed among your program’s options, select any printer
model that uses the HP Printer Command Language (PCL). For printing documents,
HP LaserJet III mode is recommended.
See Appendix B for the information on the difference between this machine and the II ISi, and for more information about the HP LaserJet III emulation mode.
16
SELECTING THE EMULATION MODE
EPSON LQ AND FX EMULATION MODES
When your printer is in Epson LQ or FX printer mode, select one of the following driv ers from your computer application software’s printer selection menu.
❐ LQ-2500, LQ-1050/850, LQ-1000/800 (expanded ESC/P), LQ-500, LQ-1500 (with
version 2 ROM), LQ printer
❐ FX-1000/800 (286e/86e), FX-85, FX-80
If none of the above printers is listed among your program’s options, choose the first
available of the following: RX, Epson printer, Standard printer, Draft printer. For printing
documents, FX-1000 mode is recommended.
See Appendix C for more information about the Epson LQ and FX emulation modes.
CHANGING THE EMULATION MODE
If you use different printer modes with different application programs, you may have to
switch emulation modes frequently. There are two ways to switch emulation mode:
❐ Using the Selectype Level 2 MODE ASSIGN feature (this must be performed on the
printer’s operation panel using the procedure described below)
❐ Using an emulation control language
- Using the MODE ASSIGN Feature Your printer has two channels, one serial (RS-232C) and one parallel (Centronics). You
can select a different emulation mode for each of the channels.
❐ You can select one of three settings: 3/P/Si (HP emulation mode), LQ, or FX.
❐ If you install the Epson GL Identity card (see page D- 3 for more about this card), the
EPSON GL choice is also available.
To select an emulation mode, do the following.
1.
Function
3
5
Yes
2. Hold down
until Selectype Level 2 ap pears, as shown on the right, then release
the key immediately.
3. Press
until MODE ASSIGN appears.
4.
17
SELECTING THE EMULATION MODE
5. Press or to select the channel to adjust.
In this example, we shall adjust the parallel
channel (CH P should be displayed; to adjust
the setting for the serial channel, CH S
should be displayed; ignore the setting for
CH O).
6.
7. Press or until you see the emulation
mode that you need. Example: Epson LQ
mode.
8.
9. Press three times to return to printer
"Ready" mode.
10. Function
- Using an Emulation Control Language Two emulation control languages are available to change the emulation mode.
❐ Epson Job language (EJL)
❐ Printer Job Language (PJL)
Procedures in these languages are done entirely from the computer; there is no need
to be by the printer. This is useful if the printer is located some distance away from
your computer. However, you need to be an experienced user to make the best use of
these control languages, so some examples are given below.
Epson Job Language (EJL)
EJL allows you to switch your printer into any of the available emulation modes.
To use EJL, make up one batch file and one text file for each emulation mode that you
plan to use.
❐ ejlhp.bat, hp.txt: To switch the printer into HP LaserJet mode
❐ ejlfx.bat, fx.txt: To switch the printer into Epson FX mode
❐ ejllq.bat, lq.txt: To switch the printer into Epson LQ mode
❐ ejlgl.bat, gl.txt: To switch the printer into Epson GL mode (requires the Epson GL
emulation card)
18
SELECTING THE EMULATION MODE
The basic format of each text file is as follows:
<ESC> <SOH>@EJL ENTER LANGUAGE=[mode]
Example: To switch to HP LaserJet III emulation mode.
The text file hp.txt would be:
<ESC> <SOH>@EJL ENTER LANGUAGE=LJ-3
Then, the batch file ejllq.bat would look like this:
REM This batch file changes the printer to HP LaserJet III emulation.
REM
COPY HP.TXT LPT1:
To create these files:
- Creating the Text File Either:
If you have Microsoft Windows, use Windows Write to create the text file.
❐ To create the <ESC> character, type Ctrl-[ (hold down the Ctrl key and press the left
square bracket key).
❐ To create the <SOH> character, type Ctrl-A.
❐ Type the rest of the line:
@EJL ENTER LANGUAGE=[mode]
where [mode] is:
LJ-3
for HP LaserJet III emulation
LQ
for Epson LQ emulation
FX
for Epson FX emulation
GL
for Epson GL Emulation
Also, you can type PJL if you wish to use the Hewlett Packard Printer Job Language.
Or:
If you do not have Microsoft Windows, you have to use a BASIC language interpreter
program and DOS Edit.
❐ Start QBASIC, the BASIC language interpreter that comes with MS-DOS.
Type QBASIC and press Enter.
❐ Type in the following BASIC program:
REM This program creates a text file for switching emulations
input "Name the text file that you want to create"; n$
OPEN n$ FOR OUTPUT AS #1
PRINT #1, CHR$(27); CHR$(1);
PRINT #1, "@EJL ENTER LANGUAGE="
CLOSE
❐ Save the program by selecting "Save As" in the File menu. Specify a file name.
19
SELECTING THE EMULATION MODE
❐ Run the program. To do this, select "Start" in the Run menu. The program prompts
you to name the text file. Then it will create the text file.
❐ Exit QBASIC by selecting "Exit" in the File menu.
❐ Use DOS Edit to add the appropriate mode parameter to the end of the file.
LJ-3
for HP LaserJet III emulation
LQ
for Epson LQ emulation
FX
for Epson FX emulation
GL
for Epson GL Emulation
For example, to switch to Epson LQ emulation, add LQ to the end of the file.
<ESC><SOH>@EJL ENTER LANGUAGE=LQ
❐ Save the file by selecting "Save" in the File menu
- Creating the Batch File Use any DOS or Windows text editor.
- Using a Batch File For example, whenever you wish to use EJL to switch the printer into HP LaserJet III
mode, type ejlhp at the DOS command line, then press Enter.
After this, the display on the printer will appear as follows:
Then, when you print a file from the computer, the printer will switch into HP LaserJet
III mode and print the file.
Note: If you are in Epson GL plotter emulation mode, you cannot use EJL to change
to another emulation mode. You must use the MODE ASSIGN feature of Selec type Level 2.
Printer Job Language
This emulates the HP LaserJet series III printer’s PJL feature. Some information on
PJL commands is given in Appendix B. For full details, see an HP LaserJet III printer
manual.
20
ADJUSTING THE PRINTER SETTINGS
INTRODUCTION
Selectype Mode (Printer Setup Mode - Function 35)
Printer setup mode (also called Selectype mode) is divided into two levels of features.
❐ Level 1 contains commonly-used printing and font selection features.
❐ Level 2 contains printer mode and printer configuration adjustments that you may
not wish to use so often.
Note: In many cases, your application software will override the Selectype settings. If
you are getting unexpected results, check your application software settings.
To view the current settings of your printer, print the status sheet (see page 9).
Note: Any changes that you make to the settings will be erased if you switch the
power off, unless you save the new settings.
❐ To save your Level 1 settings, use the SAVE MACRO feature of the
SYSTEM CONFIG menu (see page 31).
❐ To save your Level 2 settings, use the P-CONFIG SAVE feature (see page
41).
Level 1 Features
One of the following features appears in the display when you enter Level 1. Scroll
through the list with the
and keys until you see the feature that you need.
INPUT: This feature has no effect on the printer’s operation; do not use it.
PAGE SIZE: Use this to specify the size of paper that is being used.
COPIES: Use this to select the number of copies to be printed. This setting is only effective for copies of documents output in printer interface mode.
ORIENT.: Use this to select the printing orientation: portrait (vertical) or landscape (horizontal)
FONT: Use this to select a font from those available in the current emulation mode.
STATUS SHEET: Use this to print a list of the current printer settings.
FONT SAMPLE: Use this to print the fonts that are available in the current emulation
mode.
SUB CONFIG.: This menu allows you to control settings within the current emulation
mode that can be adjusted.
SYSTEM CONFIG.: This menu contains routines for memory allocation, remaining
memory space display, printer offset, and macros to store your Level 1 settings.
S: P: This prompt asks you which channel you wish to adjust. This is only seen if you
have set up both the serial and parallel channels using the Level 2 CH feature, and selected the Individual mode (see page 38).
21
ADJUSTING THE PRINTER SETTINGS
Level 2 Features
One of the following features appears in the display when you enter Level 2. Use the
and keys to scroll through the list until you see the feature that you need to use.
(To return to the printer "Ready" display, press repeatedly.)
TEST PRINT: Use this to print a test pattern.
MODE ASSIGN: Use this to select an emulation mode.
I/F CONFIG.: Use this to change the configuration of the serial and parallel channels.
RX-BUFFER SIZE: Use this to change the size of the printer’s data buffer.
CH: If you are connecting your printer to more than one computer, use the CH feature
to allocate memory to each channel.
CH TIMEOUT: Use this to define the channel timeout. If no data is sent during the
specified time period, the printer switches to the other channel.
AUTO CONT.: If you switch Auto Continue on, the printer will continue printing when
certain types of error are detected.
P-CONFIG. SAVE: Use this to save all the current Level 2 settings. These settings will
take effect every time you switch the machine on.
FACTORY RESET: Use this to reset all Level 1 and 2 settings to the factory settings.
VERSION: Use this to check the version numbers of the printer control software and
fonts.
PAGE COUNTER: This counter only gives the total number of pages made by the
printer. For a count of the pages made by your machine, including faxes and computer
printouts, use the counter feature described in your fax machine’s Operator’s Manual.
STANDBY: Do not use this feature.
See Appendix E for a more detailed list of these features and their possible settings.
22
ADJUSTING THE PRINTER SETTINGS
Using Selectype Mode
The Display
When you enter Selectype mode, menus and options appear on the display. The display shows feature names on the left side and optional settings for each feature on the
right side.
The display also uses the following icons.
If seen to the left of an option, this indicates that you can press
either or to view other options or features.
If seen to the left of an option, this indicates the current
setting of the feature. You can press either or to view other
options or features.
This icon indicates that you can press to enter a submenu,
select an option, set an option, or execute an action.
Buttons
- Entering Selectype Mode Use this to enter Selectype mode from printer "Ready" mode.
To enter Level 1, press the button until "SELECTYPE LEVEL 1"
appears on the display, then release it immediately.
To enter Level 2, hold the button down longer, until
"SELECTYPE LEVEL 2" appears on the display.
- Within Selectype Mode Use the arrow buttons to move through menus and to select, display, set, or execute
Selectype options.
Use this to enter a submenu, set an option, or select or execute an action.
Use this at any time to return through the menu levels to the main menu or to get out of
Selectype mode.
Use these buttons to scroll through the available choices. Either press the button once
to view the options one at a time, or hold the button down to scroll quickly through the
options.
23
ADJUSTING THE PRINTER SETTINGS
Sample Selectype Procedure
The following sample procedure will help you to become familiar with the purpose of
the various icons on the display. We shall practice with the INPUT feature in Level 1.
1. Enter the required Selectype mode from the printer "Ready" mode.
In our example, press
LEVEL1" is displayed.
until "SELECTYPE
"SELECTYPE LEVEL1" only remains briefly on
the display. Shortly after, one of the features from
the Level 1 menu will be displayed. In this case,
the INPUT feature is displayed.
2. Display the required feature from the main menu.
There is an icon to the left of the feature. This means that you can press
scroll through the Level 1 main menu.
or
to
The
icon at the right side of the display indicates that you can start to work on the
INPUT feature if you press . (The INPUT feature has no effect on your machine, so
you can use it for practice.)
In the above example, the current setting (AUTO)
is also displayed. However, some features have
extensive submenus. In this case, only the feature name may be displayed. For example, see
the display on the right.
3. Enter the displayed feature.
Press
The
the
to begin work on the feature.
icon indicates that AUTO is the current setting of this feature. You can use
or button to display other possible settings.
The message to the right of the
icon shows what will happen if you press .
SET means that you will store the currently displayed setting. EXE or PRINT may be
seen for some features.
24
ADJUSTING THE PRINTER SETTINGS
4. Display the required setting for this feature.
Press or to scroll through the possible settings until you see the one that you want. Hold
down or if you wish to scroll quickly through
the possible settings.
The icon to the left of "STD" indicates that STD is a possible setting, but it is not the
current setting. An
icon would indicate that this is the current setting.
Note: If you want to return to the main menu at any time without changing a setting,
press until you get back to the main menu.
5. Store the displayed setting.
When you see the setting that you want,
press .
The new setting is stored, and you are returned to the main menu for Level 1. The new
setting is displayed.
If you wish, you can scroll through the main menu with the or key to change another setting. If you have finished changing settings, go on to step 6.
Note: You cannot move directly to a setting that is in a different Selectype level. For
example, you cannot directly access a Level 2 feature while you are in Level 1.
You must return to printer "Ready" mode, then enter Selectype Level 2.
6. Go back to printer "Ready" mode.
Press as many times as necessary until you
see the following.
Then press
mode.
once more to go to printer "Ready"
7. Return the machine to standby mode for fax communication.
To return the fax machine to standby mode, press
Function .
Also, if you do not touch the machine for 4 minutes, the machine returns to standby
mode automatically.
Note: If you press Function while still in the middle of a procedure, your setting will
not be stored (unless you pressed (SET) first). However, when you enter
printer setup mode again, the display will take you immediately to where you
were just before you left it. Also you may have to reset the machine on/off line.
25
ADJUSTING THE PRINTER SETTINGS
SELECTYPE LEVEL 1 FEATURES
How to Enter Selectype Level 1
The procedure for entering Level 1 is as follows.
If you have set your printer up in Autosense Multi-user mode: The changes that
you make to the Level 1 settings will only be valid for the channel that is displayed on
the screen to the right of READY just before you enter Selectype mode.
1. Make sure that the printer is in printer "Ready" mode.
Note: If the machine is in fax standby mode, press Function
3
5
Yes .
2. Press until the display is as shown on the
right. Then release the key immediately.
Note: If you press the key for too long, you will enter Level 2 mode.
If so, press until you get to standby mode, then try again.
If you have set the printer up in
Individual Multi-user mode: The display on
the right will now appear.
Either:
❐ Press to select the serial channel. Go to step 3.
❐ Press to select the parallel channel. Go to step 3.
❐ Press to leave Level 1.
3. The display soon changes to show one of the
Level 1 menu features. An example is shown
on the right.
4. Press or until the feature that you want
is displayed.
If you change a Level 1 setting and want to keep it permanently (that is, if you do
not want the machine to go back to the old setting when you switch the power off),
save your current settings as a macro with the SAVE MACRO routine (see page
31), then make that macro the power-on macro with the POWERON MACRO
routine (page 33).
Each of the Level 1 features is explained in the following pages. For a concise list of
the features that are available in level 1, see page 21.
26
ADJUSTING THE PRINTER SETTINGS
INPUT
This feature is not used.
PAGE SIZE
Use this to select the paper size that you wish to print on. If your machine has more
than one paper cassette, make sure that the cassette that you selected with Function
36 (see page 15) is loaded with this size of paper.
Available Options: See your fax machine’s Operator’s Manual for the paper sizes you
can use. However, do not use A5 paper.
1. Enter Level 1 mode (see page 26).
2. Press
or
until PAGE SIZE is displayed.
3. To change the current setting:
4. Press or
played.
until the required setting is dis -
Note: If you see " - - - - " on the right hand of the screen instead of ">SET", the
printer cannot use the displayed paper size. The
key will be ignored if
you press it.
5. Store the displayed setting:
6.
twice to return to printer "Ready" mode.
COPIES
You can print up to 999 copies of your output. During printing, if you had previously se lected a number greater than one, the display will show how many copies have been
completed so far during the print run. For example, if you set the COPIES feature to 10
and five copies have been printed so far, the display will show "5/10".
Available Options: 1 to 999
1. Enter Level 1 mode (see page 26).
27
ADJUSTING THE PRINTER SETTINGS
2. Press
or
until COPIES is displayed.
3. To change the current setting:
4. Press or
played.
until the required setting is dis -
5. Store the displayed setting:
6.
twice to return to printer "Ready" mode.
ORIENT.
This allows you to select either landscape or portrait mode. The settings available dif fers depending on the emulation mode. See Appendixes B and C for details.
FONT
This allows you to select a font for printing. The fonts available are different for each
emulation mode. See Appendixes B and C for details.
STATUS SHEET
This feature lets you print a sheet of the current settings.
The procedure is given on page 9. Also, see the sample in Appendix G.
Note: If you wish to print a status sheet for each of your macros, do the following for
each of your macros.
❐ Load the macro (see page 32 for the LOAD MACRO feature).
❐ Print the status sheet using the STATUS SHEET procedure.
FONT SAMPLE
This feature allows you to print all the fonts that are available for the current emulation
mode.
The procedure is given on page 9.
SUB CONFIG.
This is a menu of features within Level 1. This menu allows you to fine-tune the way
that the current emulation mode works. The settings available in the SUB CONFIG.
menu differ with each emulation mode; see Appendixes B and C for details.
28
ADJUSTING THE PRINTER SETTINGS
SYSTEM CONFIG.
This is another menu of features within Level 1. The features are as follows.
❐ Memory-related features: FULL PRINT, MEMORY LEFT
❐ Printer offset adjustments: T-OFFSET, L-OFFSET
❐ Macros: LOAD MACRO, SAVE MACRO, DELETE MACRO, POWERON MACRO
To enter System Config. mode, do the following.
1. Enter Level 1 mode (see page 26).
2. Press or
played.
until SYSTEM CONFIG is dis -
- FULL PRINT This setting specifies how much of your printer’s memory is set aside for page composi tion.
The default setting of 0 is enough for most uses of the printer. However, if you are print ing complex pages, you may need to increase the setting. If you ever see the SET
FULL PRINT error message on the display, you will have to increase the setting.
For example, if you set a value of 5, you are allocating 5 x 20 KB = 100 KB.
The amount of memory that you set aside with this feature will not be available for any
other purpose. So it is best to leave the setting at 0 until you see a SET FULL PRINT
message. Then increase the setting in small increments until the error does not appear.
After increasing the setting, you may see INSUFF. MEMORY or PAGE BUFFER FULL
next time you try to print. In this case, you must either install an optional printer mem ory kit or try to make do with a lower setting for FULL PRINT.
1. Enter SYSTEM CONFIG mode (see above).
2.
, then
played.
or
until FULL PRINT is dis -
3.
4. Press or
played.
until the required setting is dis -
5. Store the displayed setting:
6.
29
ADJUSTING THE PRINTER SETTINGS
7.
twice to return to printer standby mode.
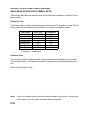
The following table shows the maximum setting that you will need for each paper size.
Your machine may not be able to use all these paper sizes; check the specifications
section in your fax machine’s operator’s manual.
Paper Size
A4
Letter
Legal
Setting
51
47
62
- MEMORY LEFT Use this feature to display the amount of memory available . This helps you to check
whether a newly-installed memory option is working properly, or to see how much mem ory is available for fonts or complex graphics.
1. Enter SYSTEM CONFIG mode (see page 29).
2.
, then or until MEMORY LEFT is dis played. In this case, there is 219 K.
3. After checking the display press
times.
three
- T-OFFSET and L-OFFSET These allow you to make fine adjustments in the position of the printed image on the
page.
❐ T-OFFSET allows you to raise or lower the printing position by up to about 5 mm
[0.2 inch]. T-OFFSET is the distance relative to the top of the page.
❐ L-OFFSET allows you to move the printing position to the left (negative values) or to
the right (positive values) by up to about 5 mm [0.2 inch]. L-OFFSET is the distance
relative to the left edge of the page.
Available Settings: -64 to +63 dots. Each dot is about 0.0846 mm [1/300 inch]. For ex ample, a setting of "1" for T-OFFSET will move the print area down by 1/300 inch.
The following example procedure shows how to adjust the L-OFFSET feature.
The T-OFFSET feature is similar in operation.
1. Enter SYSTEM CONFIG mode (see page 29).
30
ADJUSTING THE PRINTER SETTINGS
2.
, then
or
until T-OFFSET is displayed.
3.
4. Press or
played.
until the required setting is dis -
5. Store the displayed setting:
6.
7.
twice to return to "READY:" mode.
- SAVE MACRO Macros are a convenient way to easily call up a given configuration. A macro allows
you to save more than one setting to satisfy the requirements of various applications.
Using this feature, you can save the current Level 1 settings as a macro. Then you will
be able to load up those particular settings later, whenever you need them, using the
LOAD MACRO procedure (see page 32).
Available Options: 1 to 4
Caution
You can save up to 4 macros. Each macro can be for either the serial channel or
for the parallel channel, but not for both channels.
Before starting this procedure, make sure that you have made all the Level 1
settings that you wish to store in this macro.
Storing a macro takes up memory space. If you store multiple macros, you may
have to upgrade your printer memory.
1. Enter SYSTEM CONFIG mode (see page 29).
2.
, then
played.
or
until SAVE MACRO is dis -
3.
31
ADJUSTING THE PRINTER SETTINGS
4. Press or until the required number is dis played.
Example: Macro number 2.
5. Store the current settings as the displayed
macro number:
(EXE: Execute)
6.
7.
twice to return to printer "Ready" mode.
Caution:
Do not switch off the printer while it is saving a macro. If you do, you
may see START UP ERROR next time you turn the printer on.
- LOAD MACRO Use this feature to load one of the macros that you have already stored with the SAVE
MACRO feature.
Available Options: 0 to 4, If you select 0, all Level 1 settings return to their factory set tings.
1. Enter SYSTEM CONFIG mode (see page 29).
2.
, then
played.
or
until LOAD MACRO is dis -
3.
4. Press or until the required macro num ber is displayed.
5. Load the macro:
(EXE: Execute)
6.
7.
32
twice to return to printer "Ready" mode.
ADJUSTING THE PRINTER SETTINGS
- POWERON MACRO Use this option to specify which macro contains the Level 1 settings you wish to use im mediately after you switch the power on.
Available Options: 0 to 4, If you select 0, the factory settings will be used.
1. Enter SYSTEM CONFIG mode (see page 29).
2.
, then or
displayed.
until POWERON MACRO is
3.
4. Press or until the required macro num ber is displayed.
5. Store the displayed macro number:
6.
7.
twice to return to printer "Ready" mode.
- DELETE MACRO Use this feature if you wish to delete one of your macros.
Available Options: 1 to 4
1. Enter SYSTEM CONFIG mode (see page 29).
2.
, then or
displayed.
until DELETE MACRO is
3.
4. Press or until the required macro num ber is displayed.
5. Delete the displayed macro:
6.
7.
twice to return to printer "Ready" mode.
33
ADJUSTING THE PRINTER SETTINGS
SELECTYPE LEVEL 2 FEATURES
How to Enter Selectype Level 2
Unlike Level 1, the procedures for Level 2 are the same even if you have set up both of
your printer’s channels.
1. Make sure that the printer is in printer "Ready" mode.
Note: If the machine is in fax standby mode, press Function 3
5
Yes .
2. Press and hold down
until the display is as
shown on the right. Then release the key im mediately.
Note: If you let go the
key before you reached Level 2 mode, press
get to printer "Ready" mode, then try again.
until you
3. The display soon changes to show one of the
Level 2 menu features. An example is shown
on the right.
4. Press
or
until the feature that you want is displayed.
If you change a Level 2 setting and want to keep it permanently (that is, if you do
not want the machine to go back to the old setting when you switch the power off),
do the P-CONFIG SAVE routine on page 41.
Each of the Level 2 features is explained below. For a concise list of the features that
are available in level 2, see page 22.
TEST PRINT
Use this feature to print a test pattern.
Available Options: 1 (vertical lines), 2 (horizontal lines)
The procedure is given in the "Installation" section (see page 8).
MODE ASSIGN
Use this feature to select the emulation mode that you wish to use. If you are using
both printer channels, you can select a different emulation mode for each channel.
The procedure is given in the "Selecting an Emulation Mode" section (see page 16).
34
ADJUSTING THE PRINTER SETTINGS
I/F CONFIG. (Interface Configuration)
This feature allows you to configure your printer’s channels to match the signals output
by your computer(s).
- Parallel Channel For the parallel channel, there are three settings. Normally, you do not have to change
any of these unless you have special requirements.
❐ SLCTIN: If SLCTIN is OFF, the printer is continuously selected and ignores device
control codes DC1 and DC3. In almost all cases, leave SLCTIN set to OFF. When
SLCTIN is ON, the SLCTIN signal goes HIGH at power-up and control codes DC1
and DC3 are valid.
Available Options: ON, OFF
❐ AUTOFEED: If AUTOFEED is OFF, the printer ignores the AUTOFEED signal on pin
14 and does not send an automatic line feed (LF) command with each carriage re turn (CR). If AUTOFEED is ON, the printer adds a line feed to each carriage return
that it receives. If your text lines overprint each other, set AUTOFEED to ON.
Available Options: ON, OFF
❐ BUSY DELAY: Use this to set the delay period from the ACKNLG signal to the
BUSY signal.
Available Options: -5, 0, +5 (microseconds), MIN. The MIN option sets the
ACKNLG signal to HIGH.
Factory Settings: SLCTIN: OFF, AUTOFEED:OFF, BUSY DELAY: 0
Example procedure: To switch AUTOFEED on.
1. Enter Level 2 mode (see page 34).
2. Press
or
until I/F CONFIG. is displayed.
3.
4. Press or
played.
until CH P CONFIG. is dis -
5.
6. Press
or
until AUTOFEED is displayed.
7. To change the current setting:
35
ADJUSTING THE PRINTER SETTINGS
8. Press or
played.
until the required setting is dis -
9. Store the displayed setting:
10.
four times to return to printer "Ready"
mode.
- Serial Channel There are nine settings for the serial channel. These settings must match the settings
that your computer’s serial channel is using. Check your computer’s manual for this in formation.
❐ WORD LENGTH: This specifies how many bits there are between the start and stop
bits.
Available Options: 8-bit or 7-bit.
❐ BAUDRATE: This allows you to set the data transfer rate for the serial channel.
Available Options: 300, 600, 1200, 2400, 4800, 9600, 19200
❐ PARITY: Parity is a basic form of error detection.
Available Options: ODD, EVEN, NONE. If you select NONE, there is no parity
check.
❐ STOP BIT: Use this to select the number of stop bits that are sent to the printer with
each character to signal the end of a character.
Available Options: 1 or 2
❐ DTR: Use this to turn the printer’s DTR (Data Terminal Ready) communications pro tocol on or off. You can use DTR protocol in combination with the XON/XOFF option
setting.
❐ XON/XOFF: Use this to turn the printer’s XON/XOFF communications protocol on or
off. You can use DTR protocol in combination with the DTR option setting .
❐ ENQ/ACK: Not used. Keep OFF.
❐ DSR: When DSR (Data Set Ready) is OFF, the DSR signal is permanently set to
HIGH, allowing the printer to send data to the computer. For most communication
purposes, this option should be kept OFF. When DSR is ON, data is sent to the com puter only when the DSR signal is HIGH .
❐ CTS: When CTS (Clear To Send) is OFF, the CTS signal is permanently set to
HIGH. For most communication purposes, this option should be kept OFF. When
CTS is ON, data is sent to the computer only when the CTS signal is HIGH .
Factory Settings
WORD LENGTH: 8-bit
PARITY: NONE
DTR: ON
ENQ/ACK: OFF
CTS: OFF
36
BAUDRATE: 9600
STOP BIT: 2
XON/XOFF: ON
DSR: OFF
ADJUSTING THE PRINTER SETTINGS
Example Procedure: To change the Baud rate to 4800.
1. Enter Level 2 mode (see page 34).
2. Press
or
until I/F CONFIG. is displayed.
3.
4. Press or
played.
until CH S CONFIG. is dis -
5.
6. Press
or
until BAUDRATE is displayed.
7. To change the current setting:
8. Press or
played.
until the required setting is dis -
9. Store the displayed setting:
10.
four times to return to printer "Ready"
mode.
RX-BUFFER SIZE (Receive Buffer Size)
This feature allows you to change the size of the printer’s input buffer. A larger buffer al lows you to quickly transfer data from the computer’s memory to the printer’s memory.
The printer then prints the data from its own memory, and the computer’s memory is
free for other tasks.
The settings that are available depend on how much printer memory you have installed
in your printer. Memory used for fax communication (SAF memory, ECM memory) is
not included. If you have no additional memory for your printer, the factory setting is 5
KB.
If you set the buffer size too high for the amount of memory that you have installed,
you may get an error message telling you to add memory.
If your document is larger than the buffer, the computer must wait for the printer to buff er, format, and print the page.
1. Enter Level 2 mode (see page 34).
37
ADJUSTING THE PRINTER SETTINGS
2. Press or
played.
until RX-BUFFER SIZE is dis -
3.
Note: CH P indicates that the setting on the screen is for the parallel channel. If
you wish to adjust the serial channel, now press
or until you see
CH S. Ignore CH O.
4.
5. Press or
played.
until the required setting is dis -
6. Store the displayed setting:
7. Either:
❐ Press to cancel the new setting.
Go to step 4, or press
three times to re turn to printer standby mode.
❐ Press to store the new setting.
The printer resets itself and returns to
printer "Ready" mode.
CH (Channel)
If you are only using one computer with the printer, you can ignore this section. If you
are using two computers, read this section carefully before deciding what settings to
use.
The CH feature gives you the choice of two settings to specify how the printer’s mem ory is allocated to each channel. The CH setting has no effect on fax memory.
❐ AUTOSENSE: The printer automatically detects which channel (parallel or serial) is
receiving data, and allocates all the available printer memory to that channel.
❐ INDIVIDUAL: You allocate a separate portion of the available memory for each
channel.
AUTOSENSE is less complicated and requires less total memory. However, there is a
small chance that files sent from two different computers at exactly the same time will
interfere with each other. The INDIVIDUAL mode eliminates this possibility.
There are two ways to set up Autosense mode: AUTOSENSE P and AUTOSENSE S.
38
ADJUSTING THE PRINTER SETTINGS
For example, if you set up the machine in AUTOSENSE P mode, the printer stays on
the P (parallel) channel. If data comes in on the S (serial) channel, the printer will
switch to the S channel immediately, but only if the time stored in CH TIMEOUT has
elapsed since the last data came in on the P channel. If the time hasn’t yet elapsed, it
will wait until it has elapsed before switching over. ( CH TIMEOUT, see page 40.)
1. Enter Level 2 mode (see page 34).
2. Press
or
until CH is displayed.
3. To change the current setting:
4. Press or
played.
until the required setting is dis -
5. Store the displayed setting:
❐ If you selected AUTOSENSE:
Select either AUTOSENSE P or AUTO SENSE S (ignore AUTOSENSE O).
Press or until the correct setting is dis played.
Press
Then either:
❐ Press to store the new settings.
The machine resets itself and returns to printer standby mode.
❐ Press to cancel your changes.
Then go back to step 3 or press
twice to return to printer "Ready" mode.
❐ If you selected INDIVIDUAL:
You must now assign memory to each channel. Each channel that you are using needs at least 0.5
MB of memory. You must use 1.5 MB if the channel is using the GL emulation mode; this is
available as an optional card.
Please do not adjust the O setting.
The value on the left of the screen shows you how much printer memory you have available in
megabytes (or MB). The number to the right of each channel is the proportion of memory allocated
to each channel. For example, if you specify S:1 P:1 O:0, both S and P channels will have half the
memory each. If you specify S:2 P:1 O:0, the serial channel will have two thirds of the memory, and
the P channel one third.
Assign a value from 0 to 9 for each channel. Use the arrow buttons to choose the values.
39
ADJUSTING THE PRINTER SETTINGS
Allocate the required memory proportion to
the S channel. The value can only be from 0
to 9. Press
or until the setting is correct.
Then press .
Do the same for the P channel.
Ignore the O channel. Just press
.
Then either:
❐ Press to cancel the new setting.
Then go back to step 3 or press
twice to
return to printer "Ready" mode.
❐ Press to store the new setting.
The machine resets itself and returns to
printer "Ready" mode.
CH TIMEOUT (Channel Timeout)
This allows you to set the time for a channel timeout. If the printer is on line and re ceives no new data for the number of seconds specified, and if there is data in the
other channel, the printer will automatically switch to the other channel. The factory set ting is 60 seconds.
Available Options: 10 to 600 seconds (in steps of 10).
1. Enter Level 2 mode (see page 34).
2. Press
or
until CH TIMEOUT is displayed.
3. To change the current setting:
4. Press or
played.
until the required setting is dis -
5. Store the displayed setting:
6.
40
twice to return to printer "Ready" mode.
ADJUSTING THE PRINTER SETTINGS
AUTO CONT (Auto Continue)
When you switch this feature ON, the printer will continue printing after a certain period
of time when one of the following error occurs: SET FULL PRINT, PAGE BUFFER
FULL, PAPER SIZE ERROR, TRAY SET xxx, INSUFF MEMORY
If this feature is OFF, you will have to press the
button to continue printing.
In most cases, leave this feature OFF. The warning on page 44 explains why.
1. Enter Level 2 mode (see page 34).
2. Press
or
until AUTO CONT. is displayed.
3. To change the current setting:
4. Press or
played.
until the required setting is dis -
5. Store the displayed setting:
6.
twice to return to printer "Ready" mode.
P-CONFIG SAVE (Power-up Configuration)
Use this feature to save your Level 2 settings so that they will take effect each time you
switch your printer on.
1. Enter Level 2 mode (see page 34).
2. Press or
played.
until P-CONFIG SAVE is dis -
3.
4. To save the current Level 2 settings:
5.
twice to return to printer "Ready" mode.
Note: If you ever need to return the printer to the factory settings, see FACTORY RE SET (page 42).
41
ADJUSTING THE PRINTER SETTINGS
FACTORY RESET
Use this feature to reset all Level 1 and Level 2 settings to their factory settings.
Note: ❐ If you wish to reset the Level 1 settings, but not the Level 2 settings:
Use the LOAD MACRO routine to load macro 0 (see page 32).
❐ If you wish to reset the Level 2 settings, but not the Level 1 settings:
Store the current Level 1 settings as a macro (see SAVE MACRO, page 31).
Then do the FACTORY RESET procedure as stated below. Then reload the
macro that you just stored containing your Level 1 settings (see LOAD
MACRO, page 32).
1. Enter Level 2 mode (see page 34).
2. Press or
played.
until FACTORY RESET is dis -
3.
4. Reset the machine:
Caution: Do not turn off the printer until the READY message appears on the
display. If you turn the printer off too soon, you may see "START UP ERROR" the
next time you turn on the printer. See page 47 for how to clear the error.
VERSION
Use this feature if you wish to display the version number of the printer’s control soft ware and fonts.
1. Enter Level 2 mode (see page 34).
2. Press
3.
or
until VERSION is displayed.
. The printer control software (C-ROM) ver sion number is displayed.
4. Press or
displayed.
. The font version number is
5.
6.
42
twice to return to printer "Ready" mode.
ADJUSTING THE PRINTER SETTINGS
PAGE COUNTER
Use this feature to display the following page counters:
❐ PAGE COUNTER: How many pages your printer has printed since it was installed.
❐ PCU COUNTER: How many pages printed so far with the current master unit.
These counters do not include printed fax messages and reports. The counters only
show how many pages have been output from the computer.
1. Enter Level 2 mode (see page 34).
2. Press
or
until you see PAGE COUNTER.
3. To display the PCU counter:
Note: If you wish to reset the PCU counter to clear the CHANGE PCU error mes sage (see page 44), open the printer cover then press
and at the
same time. The counter resets after you execute step 4.
4.
5.
twice to return to printer "Ready" mode.
STANDBY
Please do not adjust this feature.
43
SOLVING PROBLEMS
STATUS AND ERROR MESSAGES
While the printer is being used, messages on the display panel indicate the status of
the machine and alert the user to any errors that may occur. This section gives an al phabetical list of these messages, and explains how to clear any associated problems.
Note
If you see the
indicator flashing, first correct the problem, then press the
key
to clear the error. (However, if the AUTO CONT. option is set to ON (see page 41),
some errors clear automatically, even though the problem remains. Therefore, in
most cases, it is best to leave AUTO CONT. off to avoid the possibility of
damaging your printer.)
The error messages are described below.
ADD MEMORY FOR CH-x
There is not enough memory for channel x. Either:
❐ Decrease the RX-BUFFER SIZE setting (see page 37).
❐ Change the CH setting to AUTOSENSE (see page 38).
❐ Adjust the memory distribution in the INDIVIDUAL setting of the CH function (see
page 38).
❐ Add printer memory (see page 10).
CHANGE PCU
Reset the PCU counter (see page 43). Do not change the master unit.
CHAR CREATING
The printer is creating characters. Please wait.
COPY END x/y
Multi-copy printing was canceled. ’x’ represents the current page number, and ’y’
shows the number of copies currently set in the COPIES setting (see page 27).
COVER OPEN PCU xxxxxx
The printer cover is open, or the toner cartridge or master unit is not installed. Close
the cover or install the missing component. See the fax machine’s Operator’s Manual
for how to install a toner cartridge.
’xxxxxx’ shows the current PCU counter value (see page 43). You can reset this
counter by pressing the
or key while this message is displayed.
DATA: {x} {mode}
The printer has received data but is not yet printing or is off line. To resume printing,
press if the printer is off line, or press
to print the data. ’x’ shows the current chan nel, and ’mode’ shows the current printer mode.
44
SOLVING PROBLEMS
FEED JAM
Paper was not fed from the cassette, or jammed on the way into the printer. See your
fax machine’s Operator’s Manual for information on how to clear paper jams.
FONT CREATING
The printer is creating a font. Please wait.
GRAPHIC DRAWING
The printer is composing a graphic. Please wait.
ILLEGAL CARD #x
The card or cartridge in slot x cannot be read. Take the printer off line then press
. If
the error message remains, make sure the printer is off line, then remove the card or
cartridge. The value of ’x’ will be either A (for a card) or C (for a cartridge). See page 7
for the location of the slots.
INITIALIZE
The printer is now resetting itself.
INSUFF. MEMORY
The printer does not have enough memory for the current job. Press
. If the message remains, press
, or reset the machine (see page 15).
You can also clear this error by switching the printer off, waiting a few seconds, then
switching back on. However, you may have to simplify the page you are trying to print,
or add more memory to the printer (see page 10 for how to add memory).
PAGE BUFFER FULL
The printer’s buffer filled up, and an incomplete page was fed out as a result.
Press to clear the error. You may need to add more memory to the printer (see page
10 for how to add memory).
PAPER FEEDING
The machine is now feeding paper, after you pressed
. Please wait.
PAPER JAM
Paper is not being fed into the printer, or paper is jammed inside the machine. See
your fax machine’s Operator’s Manual for information on how to clear paper jams.
PAPER OUT
There is no paper in the cassettes. Add paper. See your fax machine’s Operator’s Man ual for information on how to add paper.
PAPER OUT {paper source} {paper size}
There is no paper in the paper source from which the printer expects to feed paper.
Load paper of the indicated size into the cassette.
45
SOLVING PROBLEMS
PAPER SIZE ERROR
The PAGE SIZE setting does not match the paper in the selected cassette. Press
to
clear the error. Then either load the correct size of paper in the cassette, or change the
PAGE SIZE setting (see page 27 or use your application software).
PRINTING
The printer has received data and is printing. Please wait.
PRINT STOP x/y
The printer is pausing during a multi-copy printout. Please wait; printing should soon re sume automatically. ’x’ represents the current page number, and ’y’ shows the number
of copies currently set in the COPIES setting (see page 27).
READY: {x} {mode}
The printer is ready to print. ’x’ shows the current printer channel and ’mode’ shows the
current printer mode. This is the printer "Ready" mode.
REINSERT CARD
You may have removed a card while the
indicator was still lit or while the printer
was on line. To correct the error, make sure the printer is off line. Then reinsert the card
or cartridge and press
.
REMOVE CARD
You may have inserted a card/cartridge when the
indicator was on or while the
printer was on line. To correct this error, take the printer off line, then remove the card
or cartridge, then press
. Before you reinsert the card or cartridge, make sure that all
the data in the buffer has been printed and that the printer is off line. If the
indicator
is on, press to print out the remaining data.
RESET: {x} {mode}
The printer has been reset to the settings stored in the macro number that is currently
specified with the LOAD MACRO setting (see page 32). ’x’ shows the current printer
channel and ’mode’ shows the current printer mode.
SAVE MEMORY OVERFLOW
This message may appear while you are trying to save a macro with the SAVE
MACRO routine (see page 31). However, the printer does not have enough mem ory to
store the macro. Delete any unused macros using the DELETE MACRO routine (see
page 33), then repeat the SAVE MACRO routine.
SERVICE REQ. xxxxx
A controller or printer engine error has been detected. ’xxxxx’ is the error code. Write
down the error code then switch off the printer. Turn the printer back on after a few sec onds. If the error message still appears, turn off the printer and unplug it, then call your
service representative.
46
SOLVING PROBLEMS
SET FULL PRINT
This message may appear when you are trying to print a page that contains graphics.
Pressing may clear the problem and allow you to continue printing. However, if the
message appears often, you should increase the FULL PRINT setting (see page 29).
STARTUP ERROR
If this message appears when you turn on the printer, the power may have been
switched off while the printer was performing a save operation. To clear the error,
press to return the printer to its factory default settings. WAIT appears while the re set is in progress.
TONER LOW
The toner has almost run out. When this message first appears, you can only print 25
more pages from the computer before you have to replace the toner cartridge. How ever, the machine can print up to 100 more pages of incoming fax messages.
TONER OUT
The toner cartridge must be replaced. See your fax machine’s Operator’s Manual for in formation on how to add fresh toner.
TRAY SET {paper source} {paper size}
The PAGE SIZE setting (see page 27) does not match the paper in the specified pap er
source. Either change the PAGE SIZE setting, or load the correct paper size. Press
to print the page when you have corrected the problem.
WAIT
The printer is being reset after a startup error. Please wait.
47
SOLVING PROBLEMS
PRINTING PROBLEMS
The printer does not print, or stops printing
The
(on-line/off-line) indicator is on, but nothing is printed
❐ Check that both ends of the cable from the computer to the printer are plugged in se curely.
❐ Check that you are using the correct type of cable to meet the specifications of your
computer and your printer.
❐ You may not have selected the correct I/F CONFIG settings (see page 35). See your
computer manual for the correct settings for your computer.
❐ The software may not be installed for your printer correctly. Use the program’s setup
or install procedure to check the printer settings on your computer’s display. Also,
make sure that your printer’s emulation mode is set up correctly (see page 16).
❐ If the Night Timer feature on the fax machine is switched on, nothing can be printed.
To release the Night Timer, press the Function key twice. Then you can print. Note
that the Night Timer is not reinstated after the end of printing.
The
(on-line/off-line) indicator is off
❐ The printer is off line. Press
once to make the printer come on line. The
tor should light up.
indica-
PAPER OUT or TONER OUT is displayed
❐ Replace the paper or toner. See your fax machine’s Operator’s Manual for the cor rect procedure.
The printout is not what you expected
The font you selected with software commands cannot be printed
❐ The correct orientation (portrait or landscape) may not have been selected. Make
sure that the orientation matches the selected font.
❐ The font that you selected with your software package may not be available. Check
that you have installed the correct font card or cartridge.
Characters not belonging to the symbol set are being printed
❐ The expected symbol may not be available in the printer. Be sure that you have in stalled the correct font card or cartridge.
❐ The correct symbol set may not have been selected. Specify the desired symbol set
(containing international characters and symbols) with your software, or use a Selec type procedure (see SYMSET on page B- 7, and COUNTRY and CGTABLE on page
C-4). The symbol sets that are available depend o n the emulation mode that you
have selected.
48
SOLVING PROBLEMS
All the text has been printed on the same line, or the text is overprinting itself on
the same line
❐ Line feed commands are not being sent at the end of each line of text. If you are us ing the parallel channel, you may be able to correct the problem by switching AUT OFEED on (see page 35). Some software packages will allow sending line feed
commands in the setup.
Text is printed with an extra blank line even after you set AUTO LF to OFF
❐ Your computer may be sending the extra line feed command. Ask your service repre sentative to disable the AUTOFEED signal on your cable.
Some or all of the output is garbled or printed as asterisks
❐ The cable may not be plugged in completely. Check both ends.
❐ The I/F CONFIG settings may not be set up correctly to match your computer. Your
computer and your printer must use the same settings if you are using the serial
channel. Check your computer manual, and adjust the I/F CONFIG settings (see
page 35).
❐ Use the data dump mode (see page 53) to check the data that is being sent from
the computer.
The position of the printout is not what you expected
The printed page differs from the actual length of the paper
❐ Your software may be overriding the printer’s Selectype settings. Check the page
length setting in the application software setup.
❐ The Selectype form length setting may not be correct. See FORM on page B- 7 and
TEXT on page C- 4. The procedure depends on the emulation mod e that you are us ing.
The left or right margin setting does not match the actual paper width
❐ The margin settings of your application software may not be correct. Check the soft ware’s settings.
❐ Use Selectype to change the left and right margin settings. This can only be done if
you are using an Epson emulation mode. In HP LaserJet mode, you have to send
the appropriate commands from your computer. There is some more information on
this in Appendix B, but you may need a Hewlett-Packard reference manual for this.
Even after changing the page length or margin positions, the printed position is
not correct
❐ Try adjusting the T-OFFSET and L-OFFSET settings (see page 30).
49
SOLVING PROBLEMS
The printer prints a page and then stops
The display reads PAPER SIZE ERROR and the
indicator blinks
❐ You have selected the wrong paper size with your application software.
❐ You may be trying to use a paper size that your printer cannot handle. Check your
fax machine’s specifications to see what paper sizes it can handle.
❐ The P-SIZE setting may not match your paper size. Either:
If the
indicator is out, press
to clear the error. Then change the P-SIZE setting
(see page 27) if necessary.
If the
indicator is on, check the current P-SIZE setting (see page 27) and put
some paper of the same size in the cassette. If the P-SIZE setting is incorrect,
press to reset the printer, then change the P-SIZE setting.
Caution: ❐ When you reset the printer, any remaining data that was sent from the
computer will be lost.
❐ If you continue to print using paper that is smaller than the paper size set
with your software, toner may accumulate inside the machine and dam age the master unit. Make sure that your software and P-SIZE settings
match the paper size in the cassette. If AUTO CONT is on, a paper size
error is detected but cleared automatically and printing continues. There fore, to avoid damage to your printer, keep AUTO CONT set to OFF (see
page 41).
PROBLEMS WITH GRAPHICS
Graphic images do not print
After changing the emulation mode, you cannot print graphics
❐ You may not have the correct printer driver installed. Set up your software package
to match your printer’s current emulation mode.
You cannot print graphics using the serial channel
❐ The WORD LENGTH setting may not be correct (see page 36).When printing graph ics, this setting should be at 8.
When printing a mix of text and graphics, the page does not print or is only partially printed. The display may also show SET FULL PRINT
❐ Change the FULL PRINT setting (see page 29).
❐ Your printer may not have enough memory. Simplify the page or install additional
memory (see page 10). To clear the error, press
.
50
SOLVING PROBLEMS
An INSUFF MEMORY message appears and graphics cannot be printed
❐ Change the FULL PRINT setting (see page 29) or the RX-BUFFER setting (see
page 37).
❐ Your printer may not have enough memory. Simplify the page or install additional
memory (see page 10). To clear the error, press
.
❐ If you are set up in CH INDIVIDUAL mode, check that the memory share is set up
so that the channel used for printing complex pages has a large enough share of the
memory. See page 38 for how to share the memory between channels in
INDIVIDUAL mode.
PROBLEMS WITH SELECTYPE MODE
Selectype does not function as expected
Settings made with Selectype are ignored
❐ Your computer software may be changing the printer’s settings or initializing the
printer. You may have to change the initialization sequence sent by the software.
See your software manual for more information. Anyway, you should be able to
make any required printer setting by configuring the software package correctly.
❐ You may have made a combination of settings using Selectype mode that your
printer cannot act upon. Normally, the printer checks for such incompatible settings,
but some combinations may elude the checking procedure. Try a different combina tion of settings.
❐ You may not have saved your settings before turning off the printer. For Level 1 set tings, use the SAVE MACRO and POWERON MACRO routines (see pages 31 and
33). For Level 2 settings, use the P-CONFIG SAVE routine (see page 41).
❐ You may have saved settings to the same macro number in more than one channel.
Never save settings to the same macro number for more than one channel. If you
used macro 1 for the serial channel, do not store a macro 1 for the parallel channel;
the settings in one channel may affect the settings in another.
The desired Selectype settings are not displayed
❐ You may be trying to select a setting that is not available in the current emulation
mode. The available settings are not the same for each emulation mode. Also, some
settings are not displayed if you have not installed certain items of optional equip ment, such as font cartridges.
❐ You may have entered the wrong Selectype level. See the lists on pages 21 and 22
to find out what level your setting is in.
51
SOLVING PROBLEMS
After turning on the printer, START UP ERROR is displayed.
After pressing to recover from the error, your previously selected settings
have been changed
❐ This message may appear if you turned off the printer while it was printing, or while
it was executing a FACTORY RESET, P-CONFIG SAVE, or SAVE MACRO routine.
Print a status sheet to see the current settings (see page 9). Adjust any settings that
are incorrect.
PROBLEMS WITH OPTIONAL CARDS AND CARTRIDGES
When font cards or cartridges are used, the printer does not operate as expected
The desired font cannot be selected
❐ Check that the card/cartridge is installed correctly.
❐ The font that you selected may not be available for the current page orientation (por trait or landscape). See Appendix D for more information.
❐ The FONT feature (see page B- 5 for HP fonts or page C- 2 for Epson fonts) may not
be set correctly. See Appendix D for information on how to use the FONT feature
with optional cards and cartridges.
Fonts cannot be selected from the card or cartridge, and the message CARD ERROR appears
❐ The small gold connectors on the edge of the card/cartridge may be dirty. Wipe
them with a clean tissue.
❐ The cartridge may be incompatible with this printer. See Appendix D for a list of com patible cartridges.
52
SOLVING PROBLEMS
DATA DUMP MODE
Data dump mode is a special feature that makes it easy for experienced users to find
the cause of communication problems between the computer and the printer. Data
dump mode provides an exact printout of the codes reaching the printer. To start data
dump mode, do the following.
1. Make sure that the printer is loaded with paper.
2. Hold down the
button until you see "INITIALIZE" on the printer’s display
3. Hold down the
button until you see "READY P:DUMP" on the printer’s display.
4. Print something from the computer, or run a program that causes the printer to print
something (such as a word processing package). Your printer prints out all the
codes sent to it in hexadecimal (base 16) format as shown in the following sample.
5. To turn off the data dump mode and stop printing, press
to switch the printer off
line. When the printer goes off line, either switch off the printer or hold down
the button until INITIALIZE appears on the display.
Look at the sample printout. It shows which codes are being sent to the printer. In the
text field, printable characters are shown as their true ASCII characters. Non-printable
codes, such as control codes, are shown as dots.
For example, on the fifth line, the first two codes are 73 and 20. Code 73 represents
the letter s, and code 20 represents a space. Look at the fifth line of the text field; you
will see an s followed by a space.
53
SOLVING PROBLEMS
To interpret the first line of codes on the sample printout on the previous page, see the
following table.
Hex codes
1B 52 00
1B 43 45
1B 6B 00
1B 70 00
Command
ESC R 0
ESC C 69
ESC k 0
ESC p 0
Function
Select the USA character set
Set the page length
Select the typeface
Turn proportional mode on/off
RESETTING THE PRINTER
You may need to reset the printer sometimes.
There are four types of printer reset.
Type 1: Return all the printer’s settings to the default power-on settings
Either:
❐ Switch the power off, wait for at least 5 seconds, then switch on again.
❐ Press until the display shows INITIALIZE.
Type 2: Erase all data received from the computer and return the Selectype Level 1
settings to the saved settings
Press until RESET appears on the display. All printer settings are returned to their
previously stored settings.
Note: If you reset the machine while it is printing, the current page will be printed, but
other data remaining in the printer’s memory will be discarded.
This type of printer reset is the one described on page 15.
Type 3: Return the Selectype Level 1 settings to their saved settings
Perform the LOAD MACRO routine (see page 32).
Type 4: Return the Selectype Level 1 and 2 settings to original factory settings; this dis regards any settings that you have made earlier. The procedure is as follows.
1. Do a FACTORY RESET (see page 42).
2. Adjust any Level 2 settings that need to be different from the factory settings.
3. Load the macro that contains the required Level 1 settings.
54
APPENDIX A. SPECIFICATIONS
Power consumption: 45 W in standby mode, 200 W while printing
Resolution: 300 x 300 dots per inch
Printing speed: 10 pages per minute, after up to 20 seconds for the first page.
Paper size: A4, Letter, and Legal
Printable area: Refer to pages B- 1 and C-1.
Memory capacity: 1 megabyte, expandable to up to 6 megabytes total memory. This
is for the printer only. Fax and printer memory are completely separate.
Channels: One serial (RS-232C), one parallel (Centronics)
Emulation modes: HP LaserJet III, Epson LQ, Epson FX.
For other specifications, refer to the Operator’s Manual for your fax machine.
A-1
APPENDIX B. HP EMULATION MODE
This section informs you about using your printer’s HP emulation mode. It describes
the unique features of your printer’s HP emulation as well as the differences between
your printer’s HP emulation and printing with an actual HP LaserJet printer.
HP EMULATION MODEVS HP LASERJET III
Your printer differs slightly from a HP LaserJet III because the two printers use different
technologies. The differences in printing are explained below.
Your Printer
Input paper supply
Paper size
Resident fonts
Maximum no. of fonts per page
Page buffer mode
HP LaserJet Series III
Refer to the specifications for
the base fax machine.
200 sheets
Letter, Legal, A4, Executive,
Monarch 7-3/4
Commercial 10, DL, C5
Bitmap: 14
Bitmap: 10
Scalable: 13
Scalable: 8
Depends on the amount of memory
Built-in
Not available
Printable Area
Portrait
The size of the printable area for the HP LaserJet se ries III and this printer is the same. The maximum
number of characters per line is also the same. How ever, the position of the printout on the page may not
be exactly the same as for output from a HP Laser Jet series III.
If you wish to match your printing to the output pro duced on a HP LaserJet series III printer, use the TOFFSET and L-OFFSET controls (see page 30) to
make fine adjustments to the printing start position.
However, the offset controls can move the data out side the printable area, so some data may be miss ing.
Paper
feed
The printable areas for various paper sizes are
shown in the following table.
Paper Size
A4
Letter
Legal
l
50
Units: Dots at 300 dpi
B-1
x
2380
2450
2450
r
t
50
50
y
3407
3200
4100
b
50
APPENDIX B. HP EMULATION MODE
Character Clipping
If a character is partially outside the printer area, the HP LaserJet mode clips it and the
part outside the printer area is not printed.
Paper Handling
When using HP emulation mode, the paper size is not determined by the paper cas sette as it is with a HP LaserJet series III printer. Use the PAGE SIZE feature (see
page 27) to select the paper size that you need.
Downloaded Fonts
When the machine is in the 3/P/Si emulation mode, you can download fonts to the ma chine in the same manner as you would download to a Hewlett-Packard LaserJet
printer.
Resident Fonts
The printer offers a variety of fonts in HP emulation mode. The following table lists
these fonts.
When using your application software to select a font, use the font names in the right
hand column of the table.
Fonts
Courier: Standard, bold, italic
Line printer
Epson Roman T, standard, bold, italic,
bold italic
Epson sans serif U standard, italic, bold,
bold italic, medium condensed*, bold
condensed*, medium condensed italic*,
bold condensed italic*
ITC Zapf Dingbats*
Font name in HP emulation mode
Courier
Line printer
CG Times
Univers
ITC Zapf Dingbats
Note: The five fonts marked with an asterisk (*) are only available with a LaserJet II ISi driver or by using a printer command.
B-2
APPENDIX B. HP EMULATION MODE
If your program does not have a driver for the HP LaserJet IIISi but can send printer
commands, send the commands below to select the HP LaserJet IIISi fonts.
Esc (#
Esc (s#P
Esc (s#B
Esc (s#S
Esc (s#T
#
1
0
4
52
#
1
0
5
52
#
1
3
4
52
#
1
3
5
52
#
1
0
0
45
Epson sans serif U medium condensed
Epson sans serif U medium condensed italic
Epson sans serif U bold condensed
Epson sans serif U bold condensed
italic
ITC Zapf Dingbats
For the value of # in the Esc commands, see the symbol sets starting on page B-9.
Symbol Sets
Your printer can access a variety of symbol sets. Many of these symbols differ only in
the international characters specific to each language. This appendix provides charac ter tables for a representative sample of the symbol sets available in HP emulation
mode. These tables, starting on page B-9, show both the characters and their hexa decimal codes.
The following table shows the available character sets, and whether they are bitmap or
scalable fonts.
’✔’ means Yes, ’ ✖’ means No
Symbol Set
Roman--8
Norway 1
Roman Extension
French
HP German
Italian
JIS ASCII
ECM 94-1
Swedish2
ANSI ASCII
Norweg2
UK
German
HP Spanish
Legal
French 2
Chinese
B-3
Bitmap
Available Fonts
Scalable
✔
✔
✔
✔
✖
✔
✖
✖
✔
✔
✖
✔
✔
✖
✔
✔
✖
✔
✔
✖
✔
✔
✖
✔
✔
✖
✔
✔
✖
✔
✔
✖
✔
✔
✖
✔
✔
✖
✔
✔
✖
✔
✔
✖
✔
✔
✖
✔
✔
✖
Scalable (ITC Zapf
Dingbats)
✖
APPENDIX B. HP EMULATION MODE
Symbol Set
Spanish
IRV
Swedish
Portugese
PC Multi
IBM Portugese
IBM Spanish
IBM-US
IBM-DN
PsMath
Windows
PsText
VeInternational
VeUS
MsPublishing
VeMath
DeskTop
Math-8
PiFont
VeZapfDingbats
PsZapfDingbats
Zd100
Zd200
Zd300
Bitmap
Available Fonts
Scalable
✔
✔
✖
✔
✔
✖
✔
✔
✖
✔
✔
✖
✔
✔
✖
✔
✔
✖
✔
✔
✖
✔
✔
✖
✔
✔
✖
✖
✔
✖
✖
✔
✖
✖
✔
✖
✖
✔
✖
✖
✔
✖
✖
✔
✖
✖
✔
✖
✖
✔
✖
✖
✔
✖
✖
✔
✖
✖
✖
✔
✖
✖
✔
✖
✖
✔
✖
✖
✔
✖
✖
✔
Scalable (ITC Zapf
Dingbats)
OPERATING AS A LASERJET IIISi
If your application software’s printer selection menu has the HP LaserJet IIISi, select
this if you want to take advantage of all of your printer’s features.
In addition to the differences between your printer and the LaserJet III as described on
page B-1, there are a few extra differences between y our printer and the LaserJet IIISi.
On your printer, the JobOffset and PaperDestination commands are ignored, and the
Duplex command is treated as a page eject command. Also, your printer cannot use
the network interface boards.
B-4
APPENDIX B. HP EMULATION MODE
USING SELECTYPE MODE TO ADJUST THE HP EMULATION MODE
ORIENT (Page Orientation)
This feature allows you to select the direction in which characters are printed on the
page.
Available Options: PORT (portrait; vertical), LAND ( landscape; horizontal), R-PORT
(opposite direction of portrait), R-LAND (opposite direction of landscape)
1. Enter Level 1 mode (see page 26).
2. Press
or
until ORIENT. is displayed.
3. To change the current setting:
4. Press or
played.
until the required setting is dis -
5. Store the displayed setting:
6.
twice to return to printer "Ready" mode.
FONT
Use this feature to select the source of your font, and the font itself.
1. Enter Level 1 mode (see page 26).
2. Press
or
until FONT is displayed.
3.
4. If you have installed an optional font car tridge, press
or to select the required
font source.
❐ RD is for the resident fonts. If you have in stalled an optional font card or cartridge,
you will also have the choice of A (for the
fonts on the font card), C (for the fonts on
the cartridge), or DL (for downloaded
fonts) . See Appendix D for more on the
use of optional font kits.
B-5
APPENDIX B. HP EMULATION MODE
5.
6. Press or until the required font number
is displayed. Example: Font number 1.
Note: Font types are displayed only as numbers in this procedure. To see the font
types that correspond to each font number, print a font sample sheet (use the
FONT SAMPLE procedure on page 9).
7. Store the displayed setting:
If you have just selected a scalable font, you must
perform an additional step.
For proportional fonts: The display is as
shown on the right.
❐ Press or to select the point size that
you need, then press
.
Available settings: 4.00 to 999.75 in steps
of 0.25
For fixed pitch fonts: The display is as
shown on the right.
❐ Press or to select the spacing in char acters per inch, then press
.
Available settings: 0.44 to 99.99 in steps of
0.01
8.
until the machine returns to printer
"Ready" mode.
You can only select fonts that match the current orientation setting. If you change the
SYMSET or ORIENT settings, the available font numbers may change.
To save the selected font as the default font, use the SAVE MACRO routine (see page
31).
B-6
APPENDIX B. HP EMULATION MODE
SUB CONFIG.
SUB CONFIG. is a menu within SelecType Level 1. It contains two features.
❐ FORM: Use this to set the number of lines for the selected page size and orienta tion. The setting that you choose affects the line spacing on printouts. This setting is
affected by the PAGE SIZE, ORIENT, and FONT settings.
Available Options: 0 to 128.
If you select 0, the line spacing will be 1/6 inch [about 4.2 mm].
If *** appears on the display, you selected a number that is out of the possible range
for the paper that you are using.
❐ SYMSET: Use this feature to select one of the 41 resident HP symbol sets. See
page B-9 and subsequent pages for tables of these symb ols.
Example SUB CONFIG Procedure: Change the FORM setting to 128 lines.
1. Enter Level 1 mode (see page 26).
2. Press or
played.
until SUB CONFIG. is dis -
3.
If FORM is not displayed, press
or
until it is.
4.
5. Press or
played.
until the required setting is dis -
6. Store the displayed setting:
7.
8.
B-7
twice to return to printer "Ready" mode.
APPENDIX B. HP EMULATION MODE
AVAILABLE FONTS AND SYMBOL SETS
This section describes the fonts and symbol sets available in HP emulation mode.
There are a variety of resident bitmap and scalable fonts. To explain the difference be tween these two types of font, the following table shows the attributes that can be
changed for bitmap and scalable fonts.
’✔’ means Yes, ’ ✖’ means No
Attribute
Bitmap
Scalable
✔
✔
Orientation
✔
✔
Symbol Set
✖
✔
Pitch
✖
✔
Point Size
✔
✖
Typestyle
✖
✖
Weight
Resident Bitmap Fonts
The following table lists the attributes of the resident bitmap fonts available with HP
emulation mode.
Font Name
Courier
Courier bold
Courier italic
Courier
Courier bold
Courier italic
Line Printer
Spacing
Height
10 cpi
12 point
Typeface
Courier
12 cpi
10 point
16.66 cpi
8.5 point
Line Printer
Style
U
U
I
U
U
I
U
Weight
Medium
Bold
Medium
Medium
Bold
Medium
Medium
❐ All fonts are available in Portrait and Landscape modes.
❐ 26 symbol sets are available for all fonts. See the table on page B-4 for details.
❐ In the Style column: U = Upright, I = Italic
B-8
APPENDIX B. HP EMULATION MODE
Resident Scalable Fonts
The following table lists the attributes of the resident scalable fonts available with HP
emulation mode.
Font Name
Epson Roman T
Epson Roman T Bold
Epson Roman T Italic
Epson Roman T Bold
italic
Epson sans serif U
Epson sans serif U bold
Epson sans serif U italic
Epson sans serif U bold
italic
Epson sans serif U
medium condensed
Epson sans serif U bold
condensed
Epson sans serif U
medium condensed
italic
Epson sans serif U bold
condensed italic
ITC Zapf Dingbats
Symbol Set
Height (pt)
Typeface
Epson Roman T
36 sets
0.25 - 999.75
Epson sans serif U
5 sets
ITC Zapf Dingbats
Style
U
U
I
Weight
Medium
Bold
Medium
I
Bold
U
U
I
Medium
Bold
Medium
I
Bold
CU
Medium
CU
Bold
CI
Medium
CI
Bold
U
Medium
❐ All orientations (portrait, landscape, reverse portrait, and reverse landscape) are
available for each font.
❐ The spacing for all fonts is proportional.
❐ In the Style column: U = Upright, I = Italic, CU = Condensed Upright, CI = Con densed Italic
To see a sample of the fonts, do the FONT SAMPLE routine (see page 9).
Note: This printer can print fonts generated by Bitstream FaceLift and Bitstream
Fontware Installation Kits using Bitstream Typeface Packages for the PC. Re fer to your FaceLift or Fontware User Guide for instructions on using Bitstream
typefaces with HP LaserJet compatible printers.
Symbol Sets
Your printer can access a variety of symbol sets. Many of these symbol sets differ only
in the international characters specific to each language.
B-9
APPENDIX B. HP EMULATION MODE
The following tables show the symbol sets that are available when your printer is in HP
emulation mode. The ID number in brackets after the symbol set’s name shows what
number to insert in the ESC code to select that particular symbol set.
Roman-8 (8U)
ECMA-94 Latin-1 (0N)
B-10
APPENDIX B. HP EMULATION MODE
IBM-US (10U)
IBM-DN (11U)
B-11
APPENDIX B. HP EMULATION MODE
PcMultilingual (12U)
Legal (1U)
B-12
APPENDIX B. HP EMULATION MODE
ISO ANSI ASCII (0U)
Ventura Math (6M)
B-13
APPENDIX B. HP EMULATION MODE
Ventura International (13J)
Ventura US (14J)
B-14
APPENDIX B. HP EMULATION MODE
PS Math (5M)
PS Text (10J)
B-15
APPENDIX B. HP EMULATION MODE
Math-8 (8M)
Pi Font (15U)
B-16
APPENDIX B. HP EMULATION MODE
Microsoft Publishing (6J)
Windows (9U)
B-17
APPENDIX B. HP EMULATION MODE
Desktop (7J)
Ve Zapf Dingbats (9L)
B-18
APPENDIX B. HP EMULATION MODE
Ps Zapf Dingbats (10L)
Zd 100 (11L)
B-19
APPENDIX B. HP EMULATION MODE
Zd 200 (12L)
Zd 300 (13L)
B-20
APPENDIX B. HP EMULATION MODE
HP EMULATION COMMAND SUMMARY
This section lists the printer commands supported by HP emulation mode. For more in formation on printer commands, see the Hewlett- Packard LaserJet III Printer Technical
Reference Manual.
To use these commands, you have to make batch files and data files. Normally, only ex perienced users attempt to use these codes. However, you can get a rough idea about
how to make batch and data files by looking at page 18 and the pages following that.
Also, you will probably have to consult Hewlett Packard manuals and other software
development materials to get the most out of these commands.
All commands closely emulate the HP LaserJet series III except for the following:
ESC &l#A
This can be used to select the following three paper sizes:
A4
Letter
Legal
This command overrides the PAGE SIZE setting (see page 27). Other paper sizes can not be specified with this command.
ESC &l#H
You cannot use the ESC #H command to specify manual paper feeding. The values for
# produce the effects listed in the following table.
#
0
1
2
3
4
This printer
Eject current page
Feed from standard paper cassette
Ignore
HP LaserJet series III
Eject current page
Feed from cassette tray
Feed from manual feed slot
Ignore
Ignore
ESC &l#P sets the page length and paper size. The paper sizes available with this
command are the same as those available with ESC &l#A.
B-21
APPENDIX B. HP EMULATION MODE
Printer commands arranged by topic
The HP printer commands supported in HP LaserJet Series III emulation are listed be low.
Control codes
BS
LF
FF
CR
SO
SI
ESC
HT
SP
Backspace
Line feed
Form feed
Carriage return
Shift out
Shift in
Escape
Horizontal tab
Space
Orientation
ESC &1#O
Orientation
Font selection
Primary
Secondary
Symbol set
ESC(0A
ESC(0B
ESC(0C
ESC(0D
ESC(1D
ESC(0E
ESC(0F
ESC(1F
ESC(0G
ESC(1G
ESC(8G
ESC(0H
ESC(8H
ESC(0I
ESC(6J
ESC(7J
ESC(8J
ESC(10J
ESC(13J
ESC(14J
ESC(0K
ESC(1K
ESC)0A
ESC)0B
ESC)0C
ESC)0D
ESC)1D
ESC)0E
ESC)0F
ESC)1F
ESC)0G
ESC)1G
ESC)8G
ESC)0H
ESC)8H
ESC)0I
ESC)6J
ESC)7J
ESC)8J
ESC10J
ESC13J
ESC14J
ESC)OK
ESC)1K
HP Math 7
HP Line Draw-7
HP Large Characters
ISO 60: Norwegian v1
ISO 61: Norwegian v2
HP Roman Expansion
ISO 4: United Kingdom
ISO 25: French
HP German
ISO 21: German
HP Greek8
Hebrew-7
Hebrew-8
ISO 15: Italian
Microsoft Publishing
Desk Top
Document
PS Text
Ventura International
Ventura US
ISO 41: JIS ASCII
ISO 13: Katakana
B-22
APPENDIX B. HP EMULATION MODE
ESC(2K
ESC(8K
ESC(9K
ESC(0L
ESC(1L
ESC(2L
ESC(8L
ESC(9L
ESC(10L
ESC(11L
ESC(12L
ESC(13L
ESC(0M
ESC(1M
ESC(5M
ESC(6M
ESC(8M
ESC(0N
ESC(2N
ESC(5N
ESC(10N
ESC(0O
ESC(1O
ESC(2O
ESC(0P
ESC(1P
ESC(0R
ESC(1R
ESC(3R
ESC(0S
ESC(1S
ESC(3S
ESC(4S
ESC(5S
ESC(6S
ESC(7S
ESC(8S
ESC(16S
ESC(17S
ESC(18S
ESC(0T
ESC(8T
ESC(0U
ESC(1U
ESC(2U
B-23
ESC)2K
ESC)8K
ESC)9K
ESC)0L
ESC)1L
ESC)2L
ESC)8L
ESC)9L
ESC)10
ESC)11L
ESC)12L
ESC)13L
ESC)0M
ESC)1M
ESC)5
ESC)6M
ESC)8M
ESC)0N
ESC)2N
ESC)5N
ESC)10N
ESC)0O
ESC)1O
ESC)2O
ESC)0P
ESC)1P
ESC)0R
ESC)1R
ESC)3R
ESC)0S
ESC)1S
ESC)3S
ESC)4S
ESC)5S
ESC)6S
ESC)7S
ESC)8S
ESC)16S
ESC)17S
ESC)18S
ESC)0T
ESC)8T
ESC)0U
ESC)1U
ESC)2U
ISO 57: Chinese
Kana-8
Korean-8
Line Draw-7
HP Block Characters
Tax Line Draw
Line Draw-8
Ventura ITC Zapf Dingbats
L PS ITC Zapf Dingbats
ITC Zapf Dingbats Series 100
ITC Zapf Dingbats Series 200
ITC Zapf Dingbats Series 300
Math-7
Tech-7
M PS Math
Ventura Math
Math-8
ECMA-94 Latin 1 (ISO 8859/1)
ECMA-94 Latin 2 (ISO 8859/2)
ECMA-128 Latin 1 (ISO 8859/9)
ECMA-113/88 Latin/Cyrillic (ISO 8859/5.2)
OCR A
OCR B
OCR M
APL (Typewriter Paired)
APL (Bit Paired)
Cyrillic ASCII (ECMA-113/96, ISO 8859/5)
Cyrillic
PC Cyrillic
ISO 11: Swedish for names
HP Spanish
ISO 17: Spanish
ISO 16: Portuguese
ISO 84: Portuguese
ISO 85: Spanish
HP European Spanish
HP Latin Spanish
HP-GL Download
HP-GL Drafting
HP-GL Special Symbols
Thai-8
Turkish-8
ISO 6: ASCII
Legal
ISO 2: International Reference Version
APPENDIX B. HP EMULATION MODE
ESC(5U
ESC(7U
ESC(8U
ESC(9U
ESC(10U
ESC(11U
ESC(12U
ESC(17U
ESC(15U
ESC(8V
ESC(0Y
ESC(1Y
ESC(2Y
ESC(4Y
ESC(5Y
ESC(6Y
ESC(7Y
ESC(8Y
ESC(15Y
ESC(s#P
ESC(s#H
ESC(s#V
ESC(s#S
ESC(s#B
ESC(s#T
ESC &k#S
ESC)5U
ESC)7U
ESC)8U
ESC)9U
ESC)10U
ESC)11U
ESC)12U
ESC)17U
ESC)15U
ESC)8V
ESC)0Y
ESC)1Y
ESC)2Y
ESC)4Y
ESC)5Y
ESC)6Y
ESC)7Y
ESC)8Y
ESC)15Y
ESC)s#P
ESC)s#H
ESC)s#V
ESC)s#S
ESC)s#B
ESC)s#T
HPL Language Set
OEM-1
Roman-8
Windows
PC-8
PC-8 D/N (Danish/Norwegian)
PC-850
PC-852
Pi Font
Arabic-8
3 of 9 Barcode
Industrial 2 of 5 Barcode
Matrix 2 of 5 Barcode
Interleaved 2 of 5 Barcode
CODABAR Barcode
MSI/Plessey Barcode
Code 11 Barcode
UPC/EAN Barcode
USPS Zip
Spacing
Pitch (cpi)
Point size
Style
Weight
Typeface
Font pitch
Page length, page size, text length
ESC &l#P
ESC &l#A
ESC &l#F
Page length
Page size
Text length
Margins
ESC &l#E
ESC &l#L
ESC &a#M
ESC 9
Top margin
Set left margin
Set right margin
Clear side margins
Offset
ESC &l#U
ESC &l#Z
Left offset registration
Top offset registration
B-24
APPENDIX B. HP EMULATION MODE
Vertical line spacing
ESC &l#C
ESC &l#D
Set vertical motion index
Set lines per inch
Half-line feed
ESC =
Half line feed
Specialized printer control
ESC E
ESC &l#X
ESC %#X
Printer reset
Select number of copies
Exit LaserJet mode
Miscellaneous
ESC &k#H
ESC &k#G
ESC &s#C
ESC &l#H
Horizontal motion index
Line termination
End of line wrap
Paper input control
Cursor positioning
ESC &a#C
ESC &a#R
ESC &a#H
ESC &a#V
ESC *p#X
ESC *p#Y
Horizontal (columns)
Vertical (lines)
Horizontal (decipoints)
Vertical (decipoints)
Horizontal (dots)
Vertical (dots)
Underline
ESC &d#D
ESC &d@
Enable auto-underlining
Disable auto-underlining
Display functions, transparent print data
ESC Y
ESC Z
Enable display functions
Disable display functions mode
Perforation skip mode
ESC &l#L
B-25
Perforation skip mode
APPENDIX B. HP EMULATION MODE
Font management
ESC *c#D
ESC *c#E
ESC *c#F
ESC *c#R
ESC *c#S
ESC (f#W[data]
ESC (s#W[data]
ESC )s#W[data]
ESC (#X
ESC )#X
ESC (3@
ESC )3@
Specify font ID
Specify character code
Font and character control
Specify symbol set ID
Symbol set control
Define symbol set
Download character
Create font (font descriptor)
Designate downloaded font (primary)
Designate downloaded font (secondary)
Font default (primary)
Font default (secondary)
Macros
ESC &f#Y
ESC &f#X
Macro ID
Macro control
Push/Pop position
ESC &F#S
Push/Pop position
Raster graphics
ESC *t#R
ESC *r#F
ESC *r#A
ESC *b#Y
ESC *b#M
ESC *b#W[data]
ESC *r#T
ESC *r#S
ESC *rB
ESC *rC
Raster graphics resolution
Raster graphics presentation
Start raster graphics
Raster Y offset
Set raster compression mode
Transfer raster graphics
Raster graphics height
Raster graphics width
End raster graphics version B
End raster graphics version C
Advanced graphics
ESC *v#T
ESC *v#N
ESC *v#O
ESC *c#A
ESC *c#B
ESC *c#H
ESC *c#V
ESC *c#P
ESC *c#G
Select pattern
Select source transparency mode
Select pattern transparency mode
Horizontal rectangle size (dots)
Vertical rectangle size (decipoints)
Horizontal rectangle size (decipoints)
Vertical rectangle size (decipoints)
Print graphics
Specify graphic pattern
B-26
APPENDIX B. HP EMULATION MODE
Vector graphics
ESC %#B
ESC *c#K
ESC *c#L
ESC *c#Q
ESC *c#T
ESC *c#W[data]
ESC *c#X
ESC *c#Y
ESC *p#R
Enter GL/2 mode
Plot horizontal size
Plot vertical size
User-defined pattern control
Set picture frame anchor point
Define pattern
Picture frame horizontal size
Picture frame vertical size
Set pattern reference point
GL/2 mode
Configuration and status group
IP
IR
SC
IW
RO
IN
DF
Input P1 and P2
Input relative P1 and P2
Scale
Input window
Rotate coordinate system
Initialize
Default values
Line and fill attributes group
LA
UL
PW
FT
RF
SM
Line attributes
User defined line type
Pen width
Fill type
Raster fill definition
Symbol mode
LT
SP
WU
SV
AC
TR
Line type
Select pen
Pen width unit selection
Screened vectors
Anchor corner
Transparency mode
PU
PR
AR
RT
PE
Pen up
Plot relative
Arc relative
Relative arc three point
Polyline encoded
ER
RR
WG
Edge rectangle relative
Fill rectangle relative
Fill wedge
Vector group
PD
PA
AA
AT
CI
Pen down
Plot absolute
Arc absolute
Absolute arc three point
Circle
Polygon group
EA
RA
EW
B-27
Edge rectangle absolute
Fill rectangle absolute
Edge wedge
APPENDIX C. EPSON LQ AND FX EMULATION MODES
Your printer is able to emulate a selection of Epson LQ and FX printers. This means
that you can use your printer with software that supports Epson LQ and FX printers.
OPERATING AS AN LQ OR FX PRINTER
Your printer’s Epson emulation modes provide options not available with most LQ or
FX printers, including control over most printer features and output quality using Selec type mode.
Portrait
Printable Area
The size of the printable area in Epson emulation
mode is shown here. The printable areas for vari ous paper sizes are also shown.
Paper
feed
Paper Size
A4
Letter
Legal
l
47
x
2386
2456
2456
r
t
47
47
y
3414
3206
4106
b
47
Units: Dots at 300 dpi
C-1
APPENDIX C. EPSON LQ AND FX EMULATION MODES
USING SELECTYPE TO ADJUST EPSON LQ AND FX EMULATION
ORIENT (Page Orientation)
This feature allows you to select the direction in which characters are printed on the
page.
Available Options: PORT (portrait; vertical), LAND ( landscape; horizontal)
1. Enter Level 1 mode (see page 26).
2. Press
or
until ORIENT. is displayed.
3. To change the current setting:
4. Press or
played.
until the required setting is dis -
5. Store the displayed setting:
6.
twice to return to printer "Ready" mode.
FONT
Use this feature to select the font.
Available Options: Courier, Prestige, DL (downloaded)
1. Enter Level 1 mode (see page 26).
2. Press
or
until FONT is displayed.
3. To change the current setting:
4. Press or
played.
until the required setting is dis -
5. Store the displayed setting:
6.
twice to return to printer "Ready" mode.
After selecting the font, you can adjust the character spacing and font size with the
PITCH and CONDENSED settings in the SUB CONFIG menu. When the machine is in
an Epson emulation mode, you can download fonts to the machine in the same man ner as you would download to an Epson printer.
C-2
APPENDIX C. EPSON LQ AND FX EMULATION MODES
SUB CONFIG.
The SUB CONFIG. is a menu within Selectype Level 1. It contains these features.
❐ PITCH: Use this to select a character pitch of 10, 12, or 15 characters per inch (cpi),
or proportional spacing (PROP). A setting of 10 provides more space between char acters, and 15 provides less.
❐ CONDENSED: Use this to change the character spacing. Condensed printing is use ful for spreadsheets and other applications where you need to fit a lot of information
on each line. Fonts with a pitch of 15 cpi cannot be condensed.
❐ L-MARGIN: Use this to set the left margin. Margin units are determined by the cur rent pitch (cpi) and the condensed setting (on or off). The factory setting is 0.
If you select proportional, 10 cpi and condensed determine the margin units. If you
change the setting of ORIENT, PAGE SIZE, or WIDE PAGE (when PAGE SIZE is
set to A4 [8.3" x 11.7"]), the left margin defaults to 0.
❐ R-MARGIN: Use this to set the right margin. Margin units are determined by the cur rent pitch (cpi) and the condensed setting (on or off). The factory setting is 80.
If you select proportional, 10 cpi and condensed determine the margin units. If you
change the setting of ORIENT, PAGE SIZE, or WIDE PAGE (when PAGE SIZE is
set to A4 [8.3" x 11.7"]), the right margin defaults to the following setting.
Paper Size Condensed
A4
A4-80 col
Letter
Legal
OFF
ON
OFF
ON
OFF
ON
OFF
ON
10 cpi
77
133
80
137
80
137
80
137
Portrait
12 cpi
93
155
96
160
96
160
96
160
15 cpi
116
120
120
120
10 cpi
111
191
111
191
105
180
135
231
Landscape
12 cpi
134
223
134
223
126
210
162
270
15 cpi
167
157
202
C-3
APPENDIX C. EPSON LQ AND FX EMULATION MODES
❐ FORM TOP: Use this to specify the distance from the top of the sheet to the base line of the first printable line. The factory setting is 0.5 inch [12.7 mm].
Available Options: 0.5 to 1.5 inches [12.7 to 38.1 mm] in increments of 0.05 inch
[0.127 mm].
❐ TEXT: Use this to set the page length. The unit of measurement for this setting is
1/6 inch [4.2 mm]. The factory setting is 66 (6 lines per inch, 2.4 lines per cm).
If you change the ORIENT, PAGE SIZE, or FORM TOP settings, the form length set ting automatically returns to the default setting for the paper size.
❐ SKIPBOTTOM: If you switch this feature ON, the printer inserts the number of line
spaces specified by the ESC N (skip-over-perforation) command between the last
line printed on the page and the first printable line on the next page. The total num ber of lines skipped equals the FORM TOP setting plus the amount of skip-over-per foration set with ESC N. Since most application programs insert their own top and
bottom margins, use this feature only if your program does not provide them.
❐ CGTABLE: Use the character generator table option to select the graphics charac ter table, the italics table, or the download table. The graphics table (PcUSA) con tains graphics characters for printing lines, corners, and shaded areas; international
characters; Greek characters; and mathematical symbols. Selecting the italics table
defines the upper half of the character table as italic characters. The download table
(DLoad) is not available when you are in FX emulation mode.
Available Options: PcUSA, PcMulti, PcPort, PcCanF, PcNord, DLoad, ITALIC
❐ COUNTRY: Use this to select one of the 13 international symbol sets. See page
C-6 for samples of the characters and symbols in each set.
Available Options: USA, France, Germany, UK, Denmark, Sweden, Italy, Spain1,
Japan, Norway, Denmk2, Spain2, LatinA
❐ J-REPRINT: Use this to reprint after a paper jam. When it is set to ON and a page
jams in the printer, the page is reprinted after you clear the jam. If it is set to OFF,
jammed pages are not reprinted automatically, but complex pages may print faster.
❐ AUTO CR: Use this automatic carriage return feature to perform a carriage-return
line-feed (CR-LF) whenever the print position exceeds the right margin. If AUTO CR
is OFF, the printer does not print characters beyond the right margin and it does not
perform a linewrap until it receives a CR. Most application programs take care of
this function, so there is normally no need to change this setting.
❐ ZERO CHAR: This option determines whether the printer prints a zero with a diago nal slash or a normal unslashed zero. This feature is useful when distinguishing be tween an upper case letter O and a zero when printing programming lists.
C-4
APPENDIX C. EPSON LQ AND FX EMULATION MODES
❐ WIDE PAGE: When this feature is ON, you can print up to 80 characters at 10 cpi
across an A4 page. When it is OFF, you can print up to 77 characters at 10 cpi. The
setting is only valid when PAGE SIZE is at A4. If you change the WIDE PAGE set ting when another size is selected, L-MARGIN automatically defaults to 0 and
R-MARGIN and TEXT LINES return to the default setting for the currently selected
paper size.
❐ B-IMAGE: With B-IMAGE set to DARK or LIGHT, your printer can correctly emulate
the graphics densities set with the printer commands. When you select DARK, the
bit image density is high. When you select LIGHT, the bit image density is low.
Available Options: DARK, LIGHT, BCODE
The BCODE setting converts bar codes to bit images by automatically filling in any
vertical gaps between dots. This produces unbroken vertical lines that can be
scanned by a bar code reader.
Note: This mode reduces the size of the image being printed and may cause
some distortion when printing bit image graphics.
Example Procedure: Change the PITCH setting to 12 cpi.
1. Enter Level 1 mode (see page 26).
2. Press or
played.
until SUB CONFIG. is dis -
3.
If PITCH is not displayed, press
or
until it is.
4.
5. Press or
played.
until the required setting is dis -
6. Store the displayed setting:
7.
8.
twice to return to printer "Ready" mode.
C-5
APPENDIX C. EPSON LQ AND FX EMULATION MODES
AVAILABLE FONTS AND SYMBOL SETS
This section describes the resident fonts and symbol sets available in LQ and FX emu lation modes.
Resident Fonts
The printer offers a variety of resident fonts in the LQ and FX emulation modes. The fol lowing table lists the resident fonts available in LQ and FX emulation modes.
Font Name
Courier
Courier bold
Courier
Courier bold
Line printer
Prestige
Prestige
Pitch (cpi)
10
10
12
12
16.66
12
20
Orientation
P/L
P/L
P/L
P/L
P/L
P
P
P: Portrait, L: Landscape
Character Sets
This section provides character tables for the character sets available in the LQ and
FX emulation modes. The tables show both the characters and their hexadecimal val ues.
Epson Italic Character Table
Note: You do not need to select the italic character table to print italics. You can print
italics when one of the other character tables is selected.
C-6
APPENDIX C. EPSON LQ AND FX EMULATION MODES
Pc USA
Epson International Character Sets
C-7
APPENDIX C. EPSON LQ AND FX EMULATION MODES
LQ AND FX EMULATION COMMAND SUMMARY
This section lists the control codes and ESC codes supported in the LQ and FX emula tion modes. Some LQ and FX printer codes are not available, either because the func tions are not required (such as draft printing) or are not possible because of the
different technologies used in these printers.
To use the commands explained in this section, you have to make batch files and data
files. Normally, only experienced users attempt to use these codes. However, you can
get a rough idea about how to make batch and data files by looking at page 18 and the
pages following that. Also, you will probably have to consult Epson manuals and other
software development materials to get the most out of these commands.
The following commands are either not available or are ignored in LQ or FX emulation
mode:
ESC <
Unidirectional mode (one line)
ESC 8
Disable paper end detector
ESC 9
Enable paper end detector
ESC U
Select print direction
ESC s
Set/cancel half-speed printing
ESC r
Select color printing
ESC i
Incremental view
The following commands are available in FX mode but not in LQ mode:
ESC 1
7/72-inch line feed
ESC ^
Select 9-pin graphics mode
ESC I
Select character code table
The printer commands listed below function in a slightly different way when used in LQ
or FX emulation mode. Also, many of the commands that control the print position use
approximations because of the difference in print density between the LQ and FX print ers.
ESC G/ESC E
These commands produce identical bolding effects on your printer. On an actual LQ se ries printer, these two commands create slightly different effects and can be combined
to produce darker characters.
SI/ESC SI
These commands print 10 cpi characters in a 16.66 cpi font, and 12 cpi characters in a
20 cpi font. On an actual LQ/FX series printer, these commands condense the font.
ESC x
This command is normally used to select between draft and LQ quality with an LQ or
FX printer. However, this command has no effect on your printer’s print quality since all
characters are printed at 300 dpi (dots per inch).
C-8
APPENDIX C. EPSON LQ AND FX EMULATION MODES
ESC w
This command produces double-height characters but differs between LQ and FX emu lation modes, as follows:
❐ LQ mode - If you send the ESC w command when the print position is set at the first
line of the logical page, LQ printers print only the bottom half of the characters. Your
printer prints the entire character.
❐ FX mode - When combining ESC w and ESC W to produce double-width, doubleheight characters, FX printers do not increase the stroke weight for vertical lines.
Your printer in FX emulation does increase the vertical line width. Also, when this
command is set with the print position set at the first line of the page, FX printers
change the baseline position in order to print the entire character. For your printer,
the baseline is not changed.
ESC &, ESC K, ESC L, ESC Y, ESC Z, ESC *, and ESC ^
This printer uses an image processing technique that emulates, as closely as possible,
the image densities available on FX and LQ printers. Because of this process, the
graphics commands listed above do not produce exactly the same output on the
printer that they would on an FX or LQ printer.
ESC C, ESC C0 (zero)
When you send the ESC C or ESC C0 command to change the page length on the LQ
or FX printers, you can print more than one page on the same sheet of paper. Because
your printer processes data page-by-page, each page must be printed on a separate
sheet of paper, so exact LQ or FX emulation cannot be provided. Problems will occur
when the page length set with the ESC C or ESC C0 command differs from the actual
page length.
DEL
The printer handles the DEL command as a BS command. Print position return is the
same as for an FX or LQ printer, although your printer does not clear previous charac ters.
CAN
FX and LQ printers clear the data in their print buffer with this command; your printer
prints the data.
ESC EM
Your printer supports 1, 2, and R for n.
C-9
APPENDIX C. EPSON LQ AND FX EMULATION MODES
Printer commands arranged by topic
The following section lists and describes all FX and LQ commands by topic.
Printer operation
ESC @
DC 1
DC 3
ESC EM
BEL
Initialize printer
Select printer
Deselect printer
Control paper loading/ejecting
Beeper
Data control
CR
CAN
DEL
ESC =
ESC >
ESC #
Carriage return
Cancel line
Delete character
Set MSB to 0
Set MSB to 1
Cancel MSB control
Vertical motion
FF
ESC C
ESC C0
ESC EM
ESC N
ESC O
LF
ESC 0
ESC 1
ESC 2
ESC 3
ESC A
ESC J
ESC j
VT
ESC B
ESC b
ESC /
C-10
Form feed
Set page length in lines
Set page length in inches
Control cut-sheet feeder
Set skip-over-perforation
Cancel skip-over-perforation
Line feed
Select 1/8-inch line spacing
Select 7/72-inch line spacing (FX only)
Select 1/6-inch line spacing
Select n/180-inch line spacing (LQ), Select n/216-inch line spacing (FX)
Select n/60-inch line spacing (LQ), Select n/72-inch line spacing (FX)
Perform n/180-inch line spacing (LQ), Perform n/216-inch line spacing (FX)
Perform n/180-inch reverse feed (LQ only)
Tab vertically
Set vertical tabs
Set vertical tabs in channels
Select vertical tab channel
APPENDIX C. EPSON LQ AND FX EMULATION MODES
Horizontal motion
Margins
ESC l
ESC Q
HT
ESC D
Set left margin
Set right margin
Tab horizontally
Set horizontal tabs
Print position
CR
BS
ESC \
ESC $
Carriage return
Backspace
Set relative position
Set absolute print position
Overall printing style
ESC x
ESC k
ESC !
Select LQ or draft
Select typeface family
Master select
Print size and character width
ESC g
ESC P
ESC M
ESC p
SI
ESC SI
DC 2
SO
ESC SO
ESC W
DC 4
ESC w
Select 15 cpi
Select 10 cpi
Select 12 cpi
Turn proportional mode on/off
Select condensed mode
Select condensed mode
Cancel condensed mode
Select double-width mode (one line)
Select double-width mode (one line)
Turn double-width mode on/off
Cancel double-width mode (one line)
Turn double-height printing on/off
Printer enhancement
ESC E
ESC F
ESC G
ESC H
ESC S
ESC T
ESC -
Select emphasized mode
Cancel emphasized mode
Select double-strike mode
Cancel double-strike mode
Select superscript/subscript mode
Cancel superscript/subscript mode
Turn underline mode on/off
C-11
APPENDIX C. EPSON LQ AND FX EMULATION MODES
Word processing
ESC a
ESC SP
Select justification
Set intercharacter space
Character tables
ESC t
ESC 4
ESC 5
ESC R
ESC I
Select character table
Select italic mode
Cancel italic mode
Select an international character set
Printable code area expansion (FX mode only)
User-defined characters
ESC &
ESC :
ESC 6
ESC 7
Define user-defined characters
Copy ROM to RAM
Printable code area expansion
Enable upper control codes
Graphics
ESC K
ESC L
ESC Y
ESC Z
ESC *
ESC ?
ESC ^
C-12
Select single-density graphics mode
Select double-density graphics mode
Select high-speed double-density graphics mode
Select quadruple-density graphics mode
Select graphics mode
Reassign graphics mode
Select 9-pin graphics mode (FX mode only)
APPENDIX D. OPTIONAL FONT CARDS AND CARTRIDGES
FONT CARDS AND EMULATION MODE CARDS
The printer interface has one slot for an optional card; this can be either a font card or
an emulation mode card.
Font Cards
You can use the following font cards with your printer.
Description
Bit map font card
HP bit map font card
OCR/BAR-CODE font card
22 scalable fonts card
Notes
Usable in Epson emulation mode
Usable in HP emulation mode
Usable in HP emulation mode
Usable in Epson emulation mode
You will be able to use any of those cards with your printer. The documentation sup plied with each font card will explain which fonts and symbol sets the font card pro vides.
Note: ❐ Some of the fonts on the cards may be duplicated by the resident fonts in
the printer. See Appendix B and C for lists of the resident fonts.
❐ Each font card can only be used with a certain emulation mode. The font
card manual will tell you which emulation mode you need to use. To change
emulation mode, use the MODE ASSIGN routine on page 17.
Emulation Mode Cards
This printer can use the Epson GL Identity card. The Epson GL card adds the Epson
GL mode to your list of possible emulation modes. Epson GL mode emulates the
HP7475A/7440A plotter.
D-1
APPENDIX D. OPTIONAL FONT CARDS AND CARTRIDGES
Caring for Cards
Observe the following precautions.
❐ Do not drop, crush, or bend cards. The card’s natural curvature does not affect its
operation, so do not try to straighten a card by bending it.
❐ Avoid touching the small gold contacts on the card’s edge.
❐ If the card gets dirty, clean the connectors by wiping the edge with a clean tissue.
Do not use water, alcohol, or other solvents.
❐ Keep the cards in their cases and anti-static bags when you are not using them.
❐ Do not store cards in direct sunlight or near a source of heat. Font cards can with stand temperatures ranging from -30 to 65 °C (-20 to 150 °F), and can tolerate up to
90% humidity.
❐ Be careful when you insert and remove a card. You can damage it by attempting to
insert it the wrong way or by using too much force. Follow the procedures on page
11 when inserting or removing a card.
Using Font Cards
- Selecting a font with your application software When the printer is in 3/P/Si (HP LaserJet) mode, you can use your application soft ware to select the fonts you wish to use. First, be sure to select HP LaserJet IIIP or a
similar printer from the program’s installation or printer selection menu. For a list of the
printer types that you can specify with your software, see pages 16 and 17. After you
set up your application software, you can specify the fonts you need to use from within
the program.
If your program does not provide commands that allow you to select the font you need,
you can use the FONT feature (see pages B- 5 and C-2) or you can use printer com mand sequences (see pages B- 21 and C-8).
- Selecting a font with the Selectype FONT procedure Using Selectype, you can only select one font for the entire document , whereas appli cation packages often allow you to select more than one font within the same docu ment.
Only those fonts designed for the currently selected orientation (portrait or landscape)
will appear on the display.
You can use the SAVE MACRO routine to store the font setting if you wish to have a
font from a font card as the default font.
D-2
APPENDIX D. OPTIONAL FONT CARDS AND CARTRIDGES
When the printer is in 3/P/Si mode:
❐ The FONT procedure displays the currently selected font source (RD [resident], A
[card slot], C [cartridge slot], or DL [downloaded]). To select the font card slot, select
font source A. Then select the required font number.
❐ The font that you want may not be available if it does not contain the currently se lected symbol set. For best results, select the appropriate symbol set with the SYM SET routine (see page B- 7), then choose the font.
When the printer is in LQ or FX mode:
❐ You do not need to specify the font source. The fonts on the card that are available
will appear on the display along with the resident fonts.
- Using a font card and a font cartridge at the same time This will give you a wider range of fonts in 3/P/Si mode. The printer adjusts the font
numbers in the cartridge by adding them to the total number of fonts on the card in the
card slot. Then you can select from the full range of fonts as if you had a single font
card, with the fonts numbered from 0 up to the total number of fonts contained on both
the card and the cartridge.
For example, if the fonts on the font card are numbered from 0 to 4 and the fonts in the
font cartridge are also numbered from 0 to 4, the fonts on the card will be numbered
from 0 to 4, and the numbers of fonts on the cartridge will start from 5. All these fonts
will appear on the A source in the FONT procedure. The FONT procedure for 3/P/Si
mode is on page B- 5.
Using the Epson GL Emulation Mode Card
The Epson GL card adds the Epson GL mode to your list of possible emulation modes.
Epson GL mode emulates the HP7475A/7440A plotter.
Observe the following guidelines when using the optional Epson GL card:
❐ You must allocate at least 1.5 megabytes (MB) of RAM for the channel that will use
Epson GL mode. This means that you will have to add at least 0.5 MB of RAM to
your printer before you can use GL mode.
❐ If you are using GL mode on the serial (S) channel with the CH feature set to AUTO SENSE: a) The power-on default channel becomes the serial channel,
b) The serial channel cannot receive any data while another channel is receiving
data, c) You can only select the serial channel when the
indicator is off.
D-3
APPENDIX D. OPTIONAL FONT CARDS AND CARTRIDGES
Recovering from a Card Error
When the display shows one of the following error messages, a card error has oc curred: REINSERT CARD, ILLEGAL CARD #x, REMOVE CARD, CARDMEMORY
OVERFLOW, INSUFF.MEMORY
This type of error occurs if you insert or remove a font card when the printer is on line
or when the printer’s memory contains data. You cannot use the font card or print any thing until you correct the error. See the Error Message section starting on page 44 for
how to deal with these errors.
FONT CARTRIDGES
The printer interface has one slot for an optional cartridge.
Available Font Cartridges
While the printer is in 3/P/Si (HP LaserJet) emulation mode, a wide range of font car tridges can be used to supplement the printer’s resident fonts. The manual for each
cartridge contains samples of the fonts and symbol sets provided.
Each cartridge contains several fonts. Some of the fonts on these cartridges may be
duplicates of resident fonts in the printer.
You can use the font cartridges shown in the table on the following page.
D-4
APPENDIX D. OPTIONAL FONT CARDS AND CARTRIDGES
Maker
Hewlett
Packard
Cartridge Number
92286A
92286B
92286C
92286D
92286E
92286F
92286G
92286H
92286J
92286K
92286L
92286M
92286N
92286P
92286Q
92286R
92286T
92286U
92286V
92286W
92286X
92286Y
92286Z
92290S1
92290S2
92286PC
C2055A
C2053A
C2053A
C2053A
C2053A
C2053A
C2053A
C2053A
C2053A
Anacom General Corporation
Computer Peripherals, Inc.
Cartridge
Courier 1
Tms Proportional 1
International 1
Prestige Elite
Letter Gothic
Tms Proportional 2
Legal Elite
Legal Courier
Math Elite
Math TmsRmn
Courier P&L
Prestige Elite P&L
Letter Gothic P&L
TmsRmn P&L
Memo1
Presentations 1
Tax 1
Forms Portrait
Forms Landscape
Bar Code 3-of-9/OCR-A
EAN/UPC/OCR-B
PC Courier 1
Microsoft 1A
Courier Document 1
TmsRmn/Helv Report 1
ProCollection
#C01 Great Start
#C01 WordPerfect
#C02 Microsoft
#C03 Polished Worksheets
#C04 Persuasive Presentations
#Co5 Forms Etc
#C06 Bar Codes & More
#C07 TextEquations
#C08 Global Text
Alfajet MX-1-"MAXI-ONE"
Alfajet PC-"MAXI-RPO"
JetFont SuperSet
JetFont 12/30
JetFont 4-in-1
JetFont SuperSet International
D-5
APPENDIX D. OPTIONAL FONT CARDS AND CARTRIDGES
Maker
Everex Systems, Inc.
Cartridge Number
IQ Engineering
Pacific Data Products, Inc.
UDP Data Products, Inc.
Intercon Associates, Inc.
Cartridge
HardFont B Cartridge
HardFont F Cartridge
HardFont T Cartridge
HardFont Z Cartridge
HardFont LGL Cartridge
HardFont SST Cartridge SST
HardFont BST Cartridge
HardFont All-in-1 Cartridge
HardFont A-TO-Z Cartridge
Super Cartridge 1
Super Cartridge 2
Super Cartridge 2L
Super Cartridge LC
Super Cartridge 2WP
25 in One! Original Version
25 in One! 172
Headlines in a Cartridge
DP1-TmsRmn
DP2-Helv
65-in-One!
PHont+
ProllP
To install or remove a font cartridge, see page 12.
Selecting a font from a cartridge with your application program
When the printer is in HP emulation mode, you can use your application software to se lect fonts from the cartridge. First, be sure that you have selected HP LaserJet III or a
similar printer from the program’s installation or printer selection menu. For a list of the
printer types that you can specify with your software, see page 16. After you set up
your application software, you can specify the fonts you need to use from within the
program.
If your program does not provide commands that allow you to select the font you need,
you can use the FONT feature (see pages B- 5 and C-2) or you can use printer com mand sequences (see pages B- 21 and C-8).
Recovering from a cartridge error
When the display shows one of the following error messages, a cartridge error has oc curred: REINSERT CARD, ILLEGAL CARD #x, REMOVE CARD
See the Error Message section starting on page 44 for how to deal with these errors.
D-6
APPENDIX E. LIST OF FEATURES
The following tables show the features available in Level 1 and Level 2 of printer setup
mode (Selectype mode). The possible settings, and the factory settings are also shown.
Level 1
Feature
INPUT
PAGE SIZE
COPIES
ORIENT
FONT
STATUS SHEET
FONT SAMPLE
SUB CONFIG
SYSTEM CONFIG
Factory Setting
AUTO
STD
A4
LT
HLT
1 to 999
Depends on the emulation mode; see the tables
at the end of the Appendix.
Depends on the emulation mode; see the tables
at the end of the Appendix.
FULL PRINT
0 to 62, depending on
the amount of
memory installed
T-OFFSET
-64 to +63
L-OFFSET
-64 to +63
MEMORY LEFT
LOAD MACRO
0 to 4
SAVE MACRO
1 to 4
DELETE MACRO
1 to 4
POWER ON MACRO 0 to 4
AUTO
LT
1 copy
0
0
0
0
1
1
0
E-1
APPENDIX E. LIST OF FEATURES
Level 2
Feature
TEST PRINT
MODE ASSIGN
I/F CONFIG
RX-BUFFER SIZE
CH
CH TIMEOUT
AUTO CONT.
P-CONFIG. SAVE
FACTORY RESET
VERSION
PAGE COUNTER
E-2
Factory Setting
PATTERN 1
PATTERN 2
3/P/Si
LQ
FX
(Epson GL)
PARALLEL
SLCTIN (Off/On)
AUTOFEED (Off/On)
BUSY DELAY
(0, ±5, MIN)
SERIAL
WORD LENGTH
BAUD RATE
PARITY
STOP BIT
DTR
XON/XOFF
ENQ/ACK
DSR
CTS
Depends on your printer memory capacity.
AUTOSENSE P
AUTOSENSE S
INDIVIDUAL
1
3/P/Si
Off
Off
0
8
9600
None
2
On
On
Off
Off
Off
5K
AUTOSENSE P
60
Off
C-ROM
FONT
PAGE COUNTER
PCU COUNTER
APPENDIX E. LIST OF FEATURES
3/P/Si Emulation Mode
Feature
ORIENT
FONT
SUB CONFIG
PORT, LAND, R-PORT, R-LAND
RD (Resident), A (Card), C (Cartridge), DL
(Downloaded)
FORM
0 to 128
SYMSET
Roman-8
IBM US
IBM DN
ECM94-1
IRV
French
UK
Chinese
ANSI AS
Norweg1
Swedish
Norweg2
Swedis2
French2
JIS ASC
IBM Por
Italian
IBM Spa
Portugu
HP Germ
Spanish
HP Span
German
Roman E
Legal
PcMulti
VeInter
PsText
Ve US
Windows
MsPubli
VeMath
DeskTop
Math-8
PiFont
VeZapfD
PsZapfD
Zd100
Zd200
Zd300
PsMath
Factory Setting
PORT
RD; 0
64
Roman-8
E-3
APPENDIX E. LIST OF FEATURES
Epson LQ or FX Emulation Mode
Feature
ORIENT
FONT
SUB CONFIG
Factory Setting
PORT
LAND
Courier
Prestige
(OCR-B)
(OCR-A)
DL (Downloaded)
PITCH
CONDENSED
L-MARGIN
R-MARGIN
FORM TOP
TEXT
SKIP BOTTOM
CGTABLE
COUNTRY
J-REPRINT
AUTO CR
ZERO CHAR
WIDE PAGE
B-IMAGE
E-4
PORT
Courier
10
12
15
PROP
On/Off
From 0 upwards
From 1 upwards
0.5 to 1.5
From 1 upwards
On/Off
Italic
PcUSA
PcMult
PcPort
PcCanF
PcNord
DLoad
USA
France
German
UK
Denmark
Sweden
Italy
Spain1
Japan
Norway
Demk2
Spain2
LatinA
On/Off
On/Off
Slashed/Unslashed
On/Off
DARK
LIGHT
BCODE
10 cpi
Off
0
80
0.5
66
Off
PcUSA
USA
Off
On
Unslashed
On
DARK
APPENDIX F. CONNECTOR PIN CONFIGURATION
The following tables show the signal names that are present at the parallel and serial
sockets on your printer.
If you are having trouble selecting a cable that will work with your computer:
❐ Show these tables to your computer hardware dealer.
❐ Check the pin assignments of your computer’s printer port (parallel or serial, depend ing which one you are having problems with), and show that to your hardware
dealer as well.
In most circumstances, a normal cable will work.
Parallel Interface
Pin Number
1
2
3
4
5
6
7
8
9
10
11
12
13
14
15
16
17
18
Signal Name
STROBE
DATA1
DATA2
DATA3
DATA4
DATA5
DATA6
DATA7
DATA8
ACKNLG
BUSY
PE
SLCTOUT
AUTOFEED
-GND
CHASSIS GND
--
Pin Number
19
20
21
22
23
24
25
26
27
28
29
30
31
32
33
34
35
36
Signal Name
Signal Name
FG
TXD
RXD
RTS
Pin Number
5
6
7
20
Signal Name
CTS
DSR
SG
DTR
GND
INIT
ERROR
GND
-+5V
SLCTIN
Serial Interface
Pin Number
1
2
3
4
F-1
APPENDIX F. CONNECTOR PIN CONFIGURATION
The following page contains diagrams of the serial interface cable pin assignments for
two types of computer.
Pin assignments for typical ATs and compatibles
Computer
9-pin F
Printer
25-pin M
1
4
2
2
3
3
4
5
6
5
7
6
20
8
8
7
Pin assignments for typical PC/XTs and
compatibles, and PS/2 machines
Printer
25-pin M
Computer
25-pin F
1
1
2
3
3
2
5
20
6
7
7
20
5
6
F-2
APPENDIX G. STATUS SHEET
The following is an example of a status sheet printout.
STATUS SHEET
Printer Configuration
Installed Memory
CH Mode
CH Time Out
Mode Assign
:
:
:
P :
S :
O :
1.0 Mbytes
AUTOSENSE
60
3/P/Si
3/P/Si
3/P/Si
Controller Version
Font Version
Auto Continue
Standby
:
:
:
:
26.22
06.03
OFF
DISABLE
Total Printed Count: 328
PCU Printed Count
: 295
I/F : PARALLEL
PARALLEL (CH P)
SLCTIN
: OFF
AUTOFEED
SERIAL (CH S) : RS232C
Word Length(bit) : 8
Stop Bit
: 2
DSR
: OFF
Receive Buffer
:
BUSY Delay ( µs)
: OFF
Baudrate (bps) : 9600
DTR
: ON
CTS
: OFF
: 0
Parity
XON/XOFF
ENQ/ACK
: NONE
: ON
: OFF
5 Kbytes
Mode Configuration
CH
Mode
: P
: 3/P/Si
Input Tray
Copies
Version
: AUTO Font
: 1
Orientation
: RD-0
: PORT
:
:
: 22.45
Page Size : A4
Sub Configuration
Form Length
64
Symbol Set
Roman-8
System Configuration
Top Offset
Full Print
Load Macro
: 0
: 0
: 0
Left Offset
Memory Left
Power On Macro
: 0
: 805Kbytes
: 0
G-1